Hey Everyone,
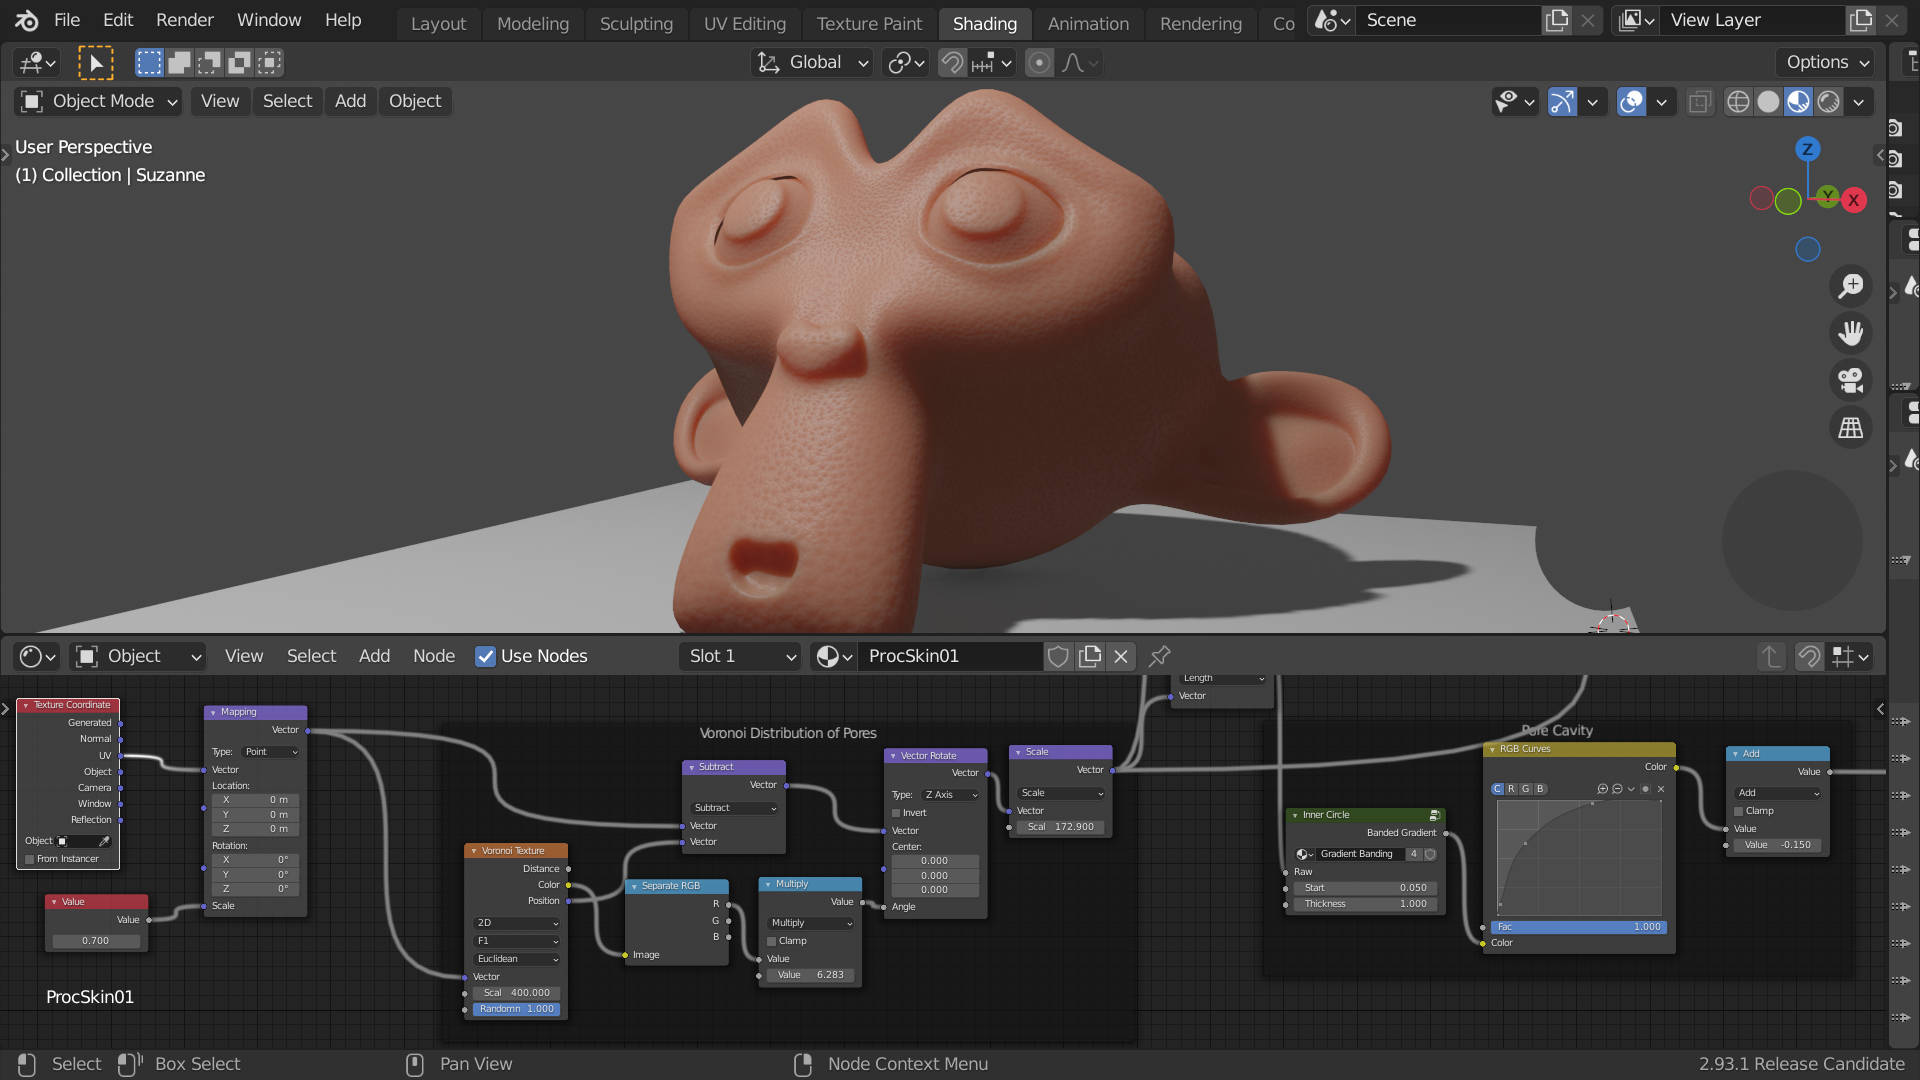
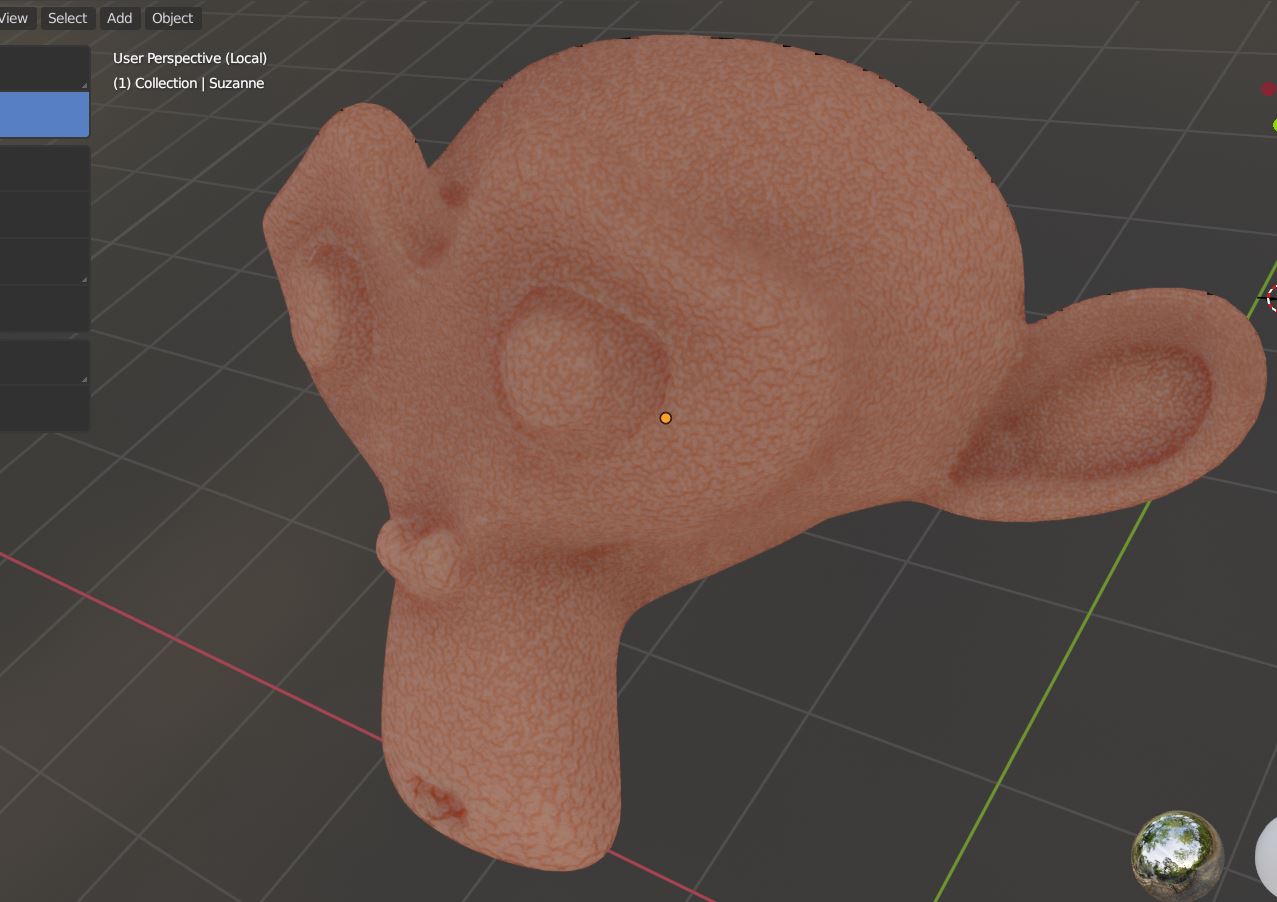
Spent a couple of nights playing with making a procedural skin pore texture in Eevee, this is what I’ve been able to come up with so far…
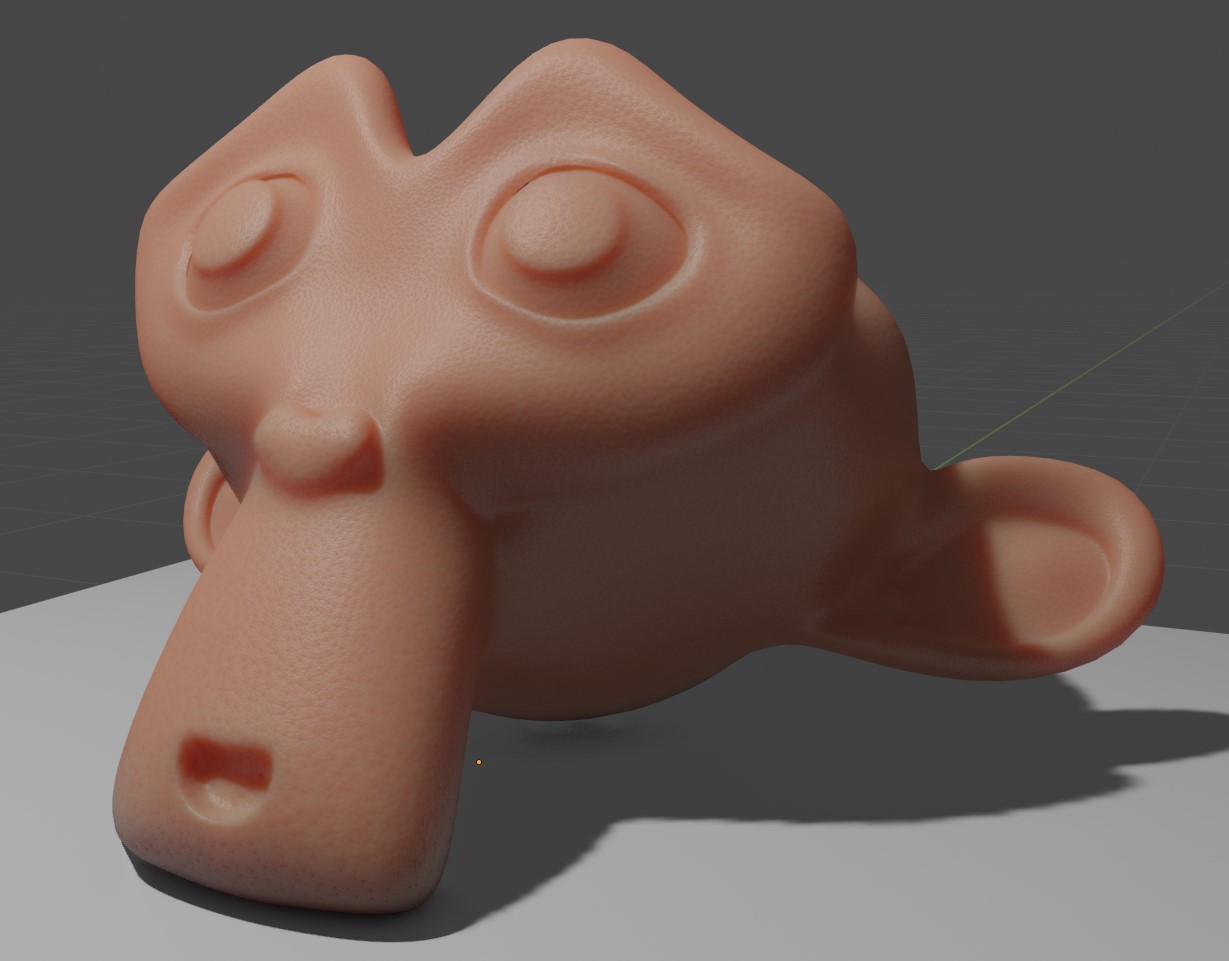

Devil is in the details, so you’ll need to watch it in HD to see them.
Hey Everyone,
Spent a couple of nights playing with making a procedural skin pore texture in Eevee, this is what I’ve been able to come up with so far…
Devil is in the details, so you’ll need to watch it in HD to see them.
awesome close-ups are working really well !
I know little about procedurals, it always makes me complicated, but it looks very real
With a little surface scattering effect it will look great but I think you already know that.
Thanks everyone!
Next step is to try it on a human character…
Someone on youtube asked if I could make the blend for this available.
I was planning to put this into a big make a person from scratch udemy course, but I’ve changed direction this year and have been putting all of my energy into developing my game so…
Why not? 
ProcSkin01.blend (1015.1 KB)
looking good
pores are very small
only thing i found is near edges see images here
thanks for sharing
happy bl
strange
i use only the standard EEVEE renderer
did not do any changes to shadow
will recheck your file to see if there is any differences !
thanks
happy bl
i compared the 2 EEVEE set up and looks identical
but i have a very old video card so possible
it is making these differences
have to wait to get a new PC and will retest it later on
thanks
happy bl
Thanks for downloading! Can’t wait to try…
Skin is SOOOO important.
UPDATE: If viewport is surface - OK. But switch to material or render??? Blender CRASH!!
Oh well still looks great in your screen shots.
Thank you very much for sharing I am always interested in node setups!
It looks great on my system (no crashes or strange shadows).
You have named everything nicely which makes it easy to tweak ![]()
Great stuff!
there is a frame named pore cavity and you can tweak the values to get different results.
which values do you change ?
thanks
happy bl
Thickness (the inner circle node group), and the add node value.
Edit
The start value in the inner circle group also has an influence.
Also I found the frame “Veroni distribution of pores frame” also has a scale factor at the end - I am still playing around with it all!
i tried a few parameters and did not see much effect yet !
let me know if you find one
thanks
happy bl
Thanks for sharing…
strange a bit
if you set vononoi scale around 150 it looks bigger
other values look smaller not certain why there is sort of a band
happy bl
and changing the bump strength to 0.5 also seem to work now
happy bl
i added a displacement nodes to the output node
using the bump node input
and it allows to get much bigger bumps LOL
happy bl
Yea, its a question of tweaking around to see what you get, here is what I did tweaking around with all those values. I also added a mapping node at the beginning for general scale.
Looks a bit like a nose texture with those big pores! (at least my nose)
Happy Blending!