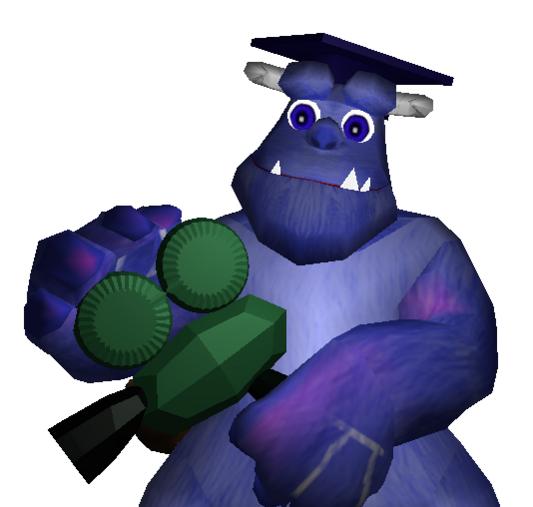
I call it freeView, because it tries to provide a free view on the camera target.
You think we already have that? … and it is called camera actuator?
Then you haven’t seen the[INDENT]FreeView(video)
[/INDENT]in action.
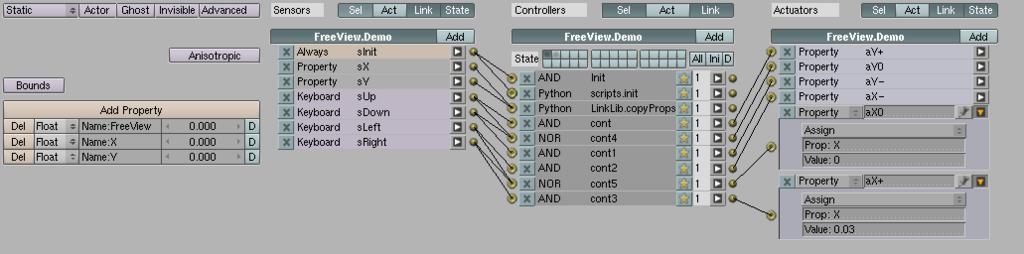
Add logic to change X and Y at the FreeView pivot. Ensure the properties are copied to the freeView object with LinkLib.copyProps.
Run the game with <p>. Watch the camera avoiding obstacles and getting frre view on the target.
The demo file contains some more complex controlls to allow additional mouse control. It also shows how to use the EventManager. But this is not required.
Hint:
The movement might be a little bit hard sometimes. Parent the camera with slow parent to make smooth transitions.
Wow, that looks great.
Have you thought of using a ray to check if something is blocking your view to the object?
The camera could then shift up or down to bring the object back in to view.
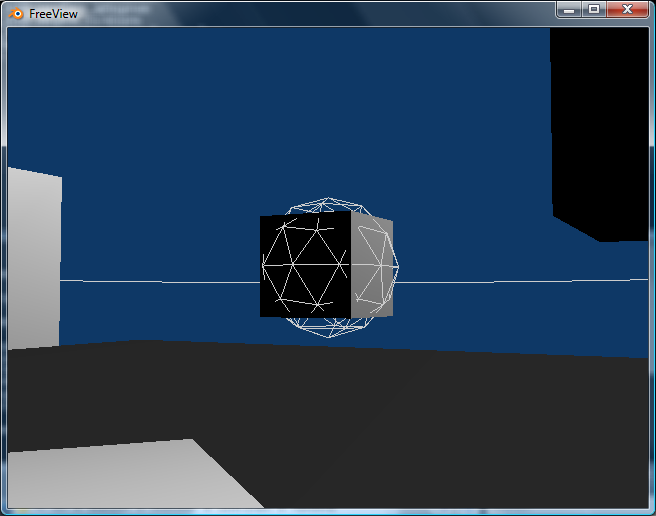
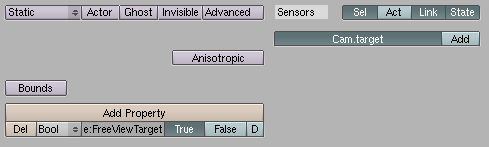
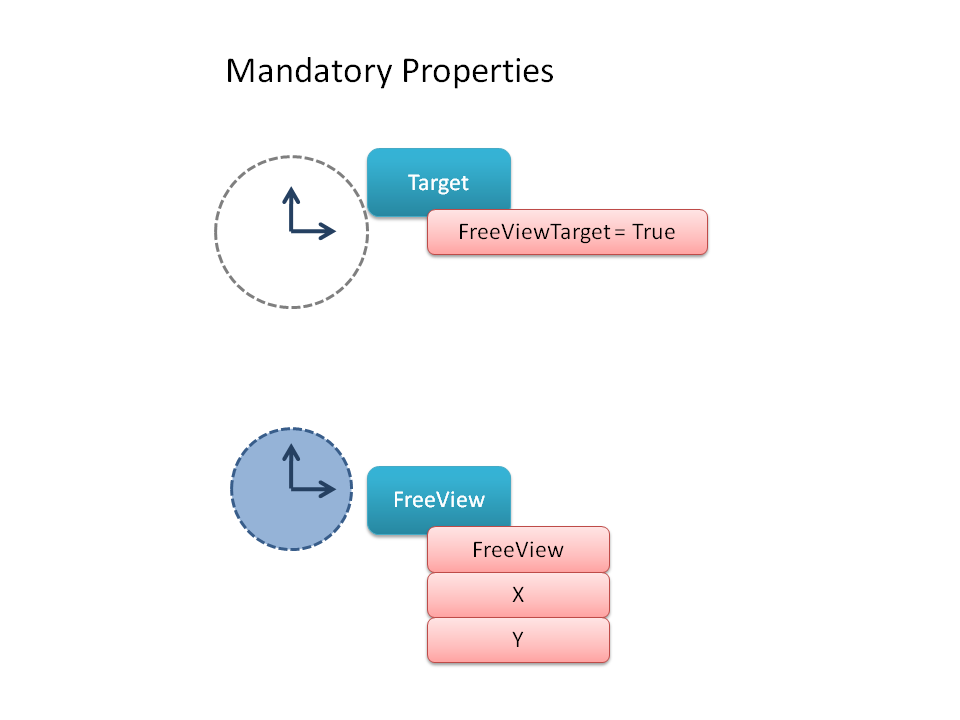
One object need to be defined as target. This is simply done by adding the property FreeViewTarget. The type does not matter but the value should not be None, “”, False, 0, or 0.0. Make sure there is only one object with that property.
The FreeView object needs to be marked as FreeViewer by addinf property “FreeView”. Type and value do not matter.
To navigate the FreeViewer set the properties X and Y. I recommend the type float.
There are vrious optional paramters that can influence how the FreeViewer works. I tried to make a diagram to show what the different parameters mean. I think the default values are reasonable for the most situations. Have an eye on “minCheck” this depends on the size of the target. If you have a big target adjust this value.
Another important parameter is “gravity”. If you do not have default gravity (9.80) in your scene, set this parameter accordingly. Otherwise you will not have much fun with the FreeViewer.
Please refer to FreeViewer.py for more details.
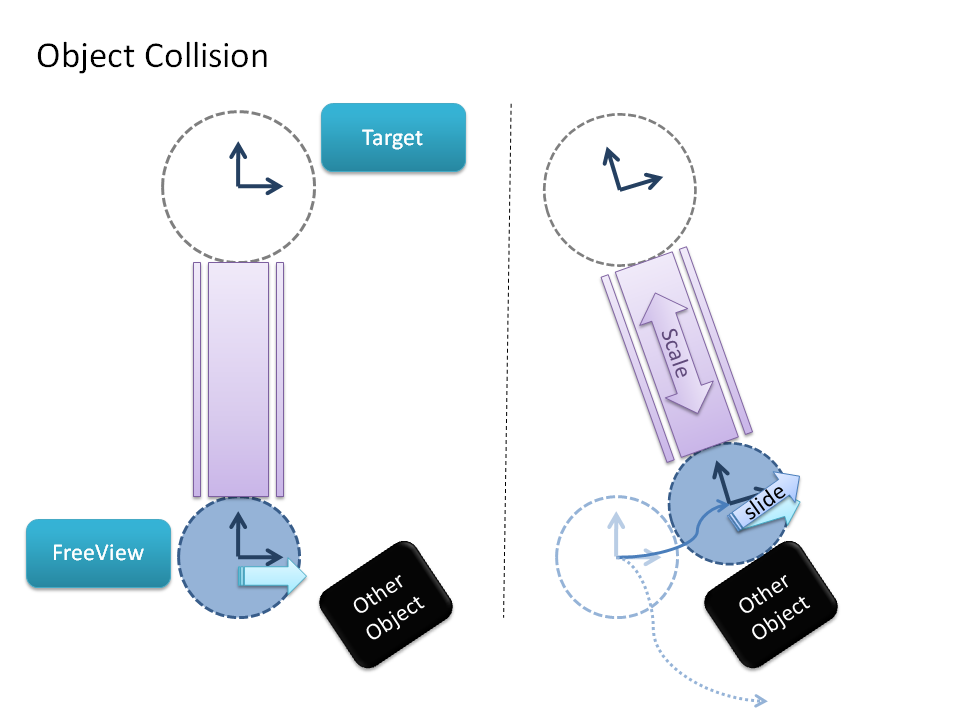
The FeeView object acts as levitating physical object. That means it avoids to fly throuh other non-ghost objects. The consequence is that when colliding with other objects the FreeView object might stop, slide along the object or change the distance to the target.
The FreeView object might slide in fron or behind the obstacle.
When the obstacle does not disturb anymore the FreeViewer tries to go back to the configured distance.
Keep in mind there might be situations where the FreeView object is not be able to follow the target.
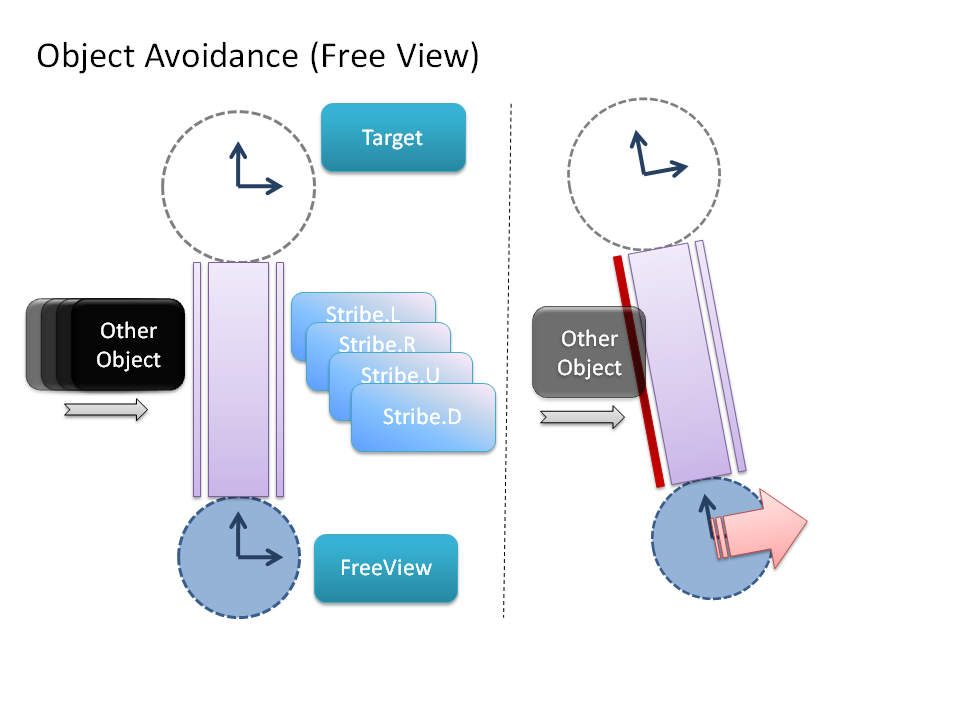
Object Avoidance
The FreeView object has 4 sensors attached (stribe.X). Each sensor detects if another object is between the FreeViewer and the target. They do not check the direct line of sight to the target but the space around that line. If one of them detects a collision the FreeView object moves into the opposite direction until there is no collision or the other site gets an collision too.
The input from the user overrides this behaviour.
While it is a good concept, my only beef with this example is the decision to use a bunch of logic bricks to set and check properties.
When I have used the BGE I would always try to avoid all use of property sensors and actuators in major (larger) logic systems and instead set and check them through Python. I’m fine with them in minor (smaller) logic systems (for objects that don’t have complex logic for example) to avoid having to search through too many script files but I imagine the camera being a major logic system in this case.
I know you like logic bricks, but I’d use python to set and check properties since you already have python scripts you can do that in (and doing that in python is fairly easy which anyone who’s not a newcomer would know)
The bunch of properties makes the logic very flexible. They trigger the controllers regardless if you fill the properties by script controller or any actuator. So you have the option to calculate the properties from keyboard, or mouse or whatever without the need to access the internal logic of the system.
Properties are a very good way to configure a system. There is no reason to hide parameters in a script or a module. It would force the user to edit a file that they might not understand. I wouldn’t even have a look into a working file if I can configure it by properties.
The advantage is you still can write a script to set all the parameters. You can even mix it with logic bricks :).
I mentioned to look at the .py files because it contains a short documentation right at the beginning of the file. I do not expect anyone to edit the file. Just set the properties at the object.
I will produce a documentation site as soon as I can.
Just now I’m preparing a system that makes you link in a group and you get a full working FreeViewObject including mouse and keyboard controlls. This is similar to Raderium’s mouselookscript just with freeView and free configurable keyboard/mouse mapping.
One object, no logic bricks to get confused, but all options available by properties.
I already tested this with a file that wasn’t prepared to do so. And it works like a charm right from the beginning. There are some minor bugs to solve and it can be published. Then docs, then Video tut… ok that will take same time …
Usually when I need such configuration I would usually do it via the properties panel that is available for the object, then I can affect certain logic aspects per-object by changing the properties and without adding logic bricks.
One of the more well known uses of configuration using this method is the famous UVscroll script, where the properties panel is used to set aspects such as scrolling speed.
Hi Ace Dragon,
I think we talking about the same thing. This is exactly what it is doing. You can set up the configuration by the logic panels properties.
If you are talking about the X,Y properties - they are not static. The logic panel can just provide an initial value.
I avoid the use of keyboard or mouse sensors here, because that means the whole logic is restricted to exactly this sensors making it very inflexible. I prefer to modularize the functionality:
one module for freeView
one module for user input
but still free to combine them into one object or to use another method for freeView or user input.

 right from the beginning. There are some minor bugs to solve and it can be published. Then docs, then Video tut… ok that will take same time …