Hi I am David Norman I have finally plucked up the courage to post a project here. Unfortunately I started wrong as there has been no real Final “plan”. It was going to be an exercise of another car when it occurred to me that a reading wagon would be much more interesting. It is a vehicle and a home, and also inspires childhood dreams of travel and adventure. I have ended up falling in love with the whole concept.
I am now fairly happy with the model, although I do want to “clutter” a bit and make the curtains hang nicer and fabric softer. I am now spending hours rendering and tweaking the textures.
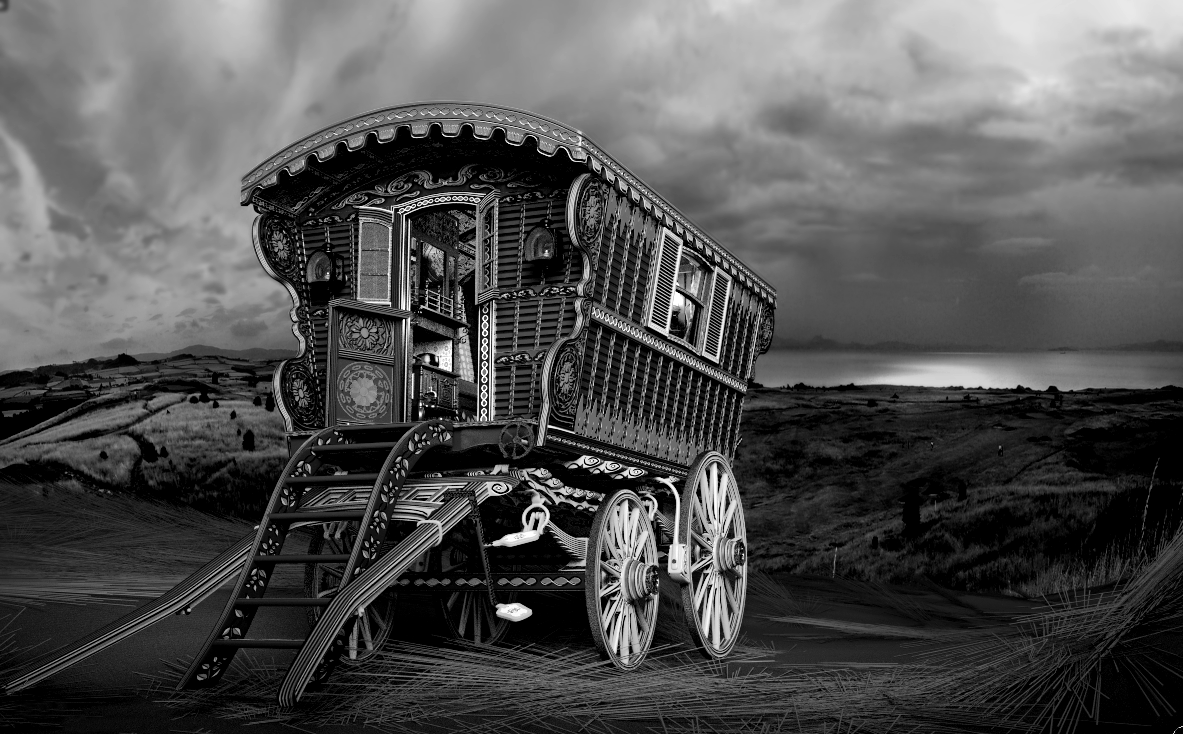
Suggestions are very welcome (feedback is the reason for posting). I have not decided on the setting or lighting as I imagine so many different options, the wagon for me has come to life and needs to travel - the horse will be my next project!
Here it is.
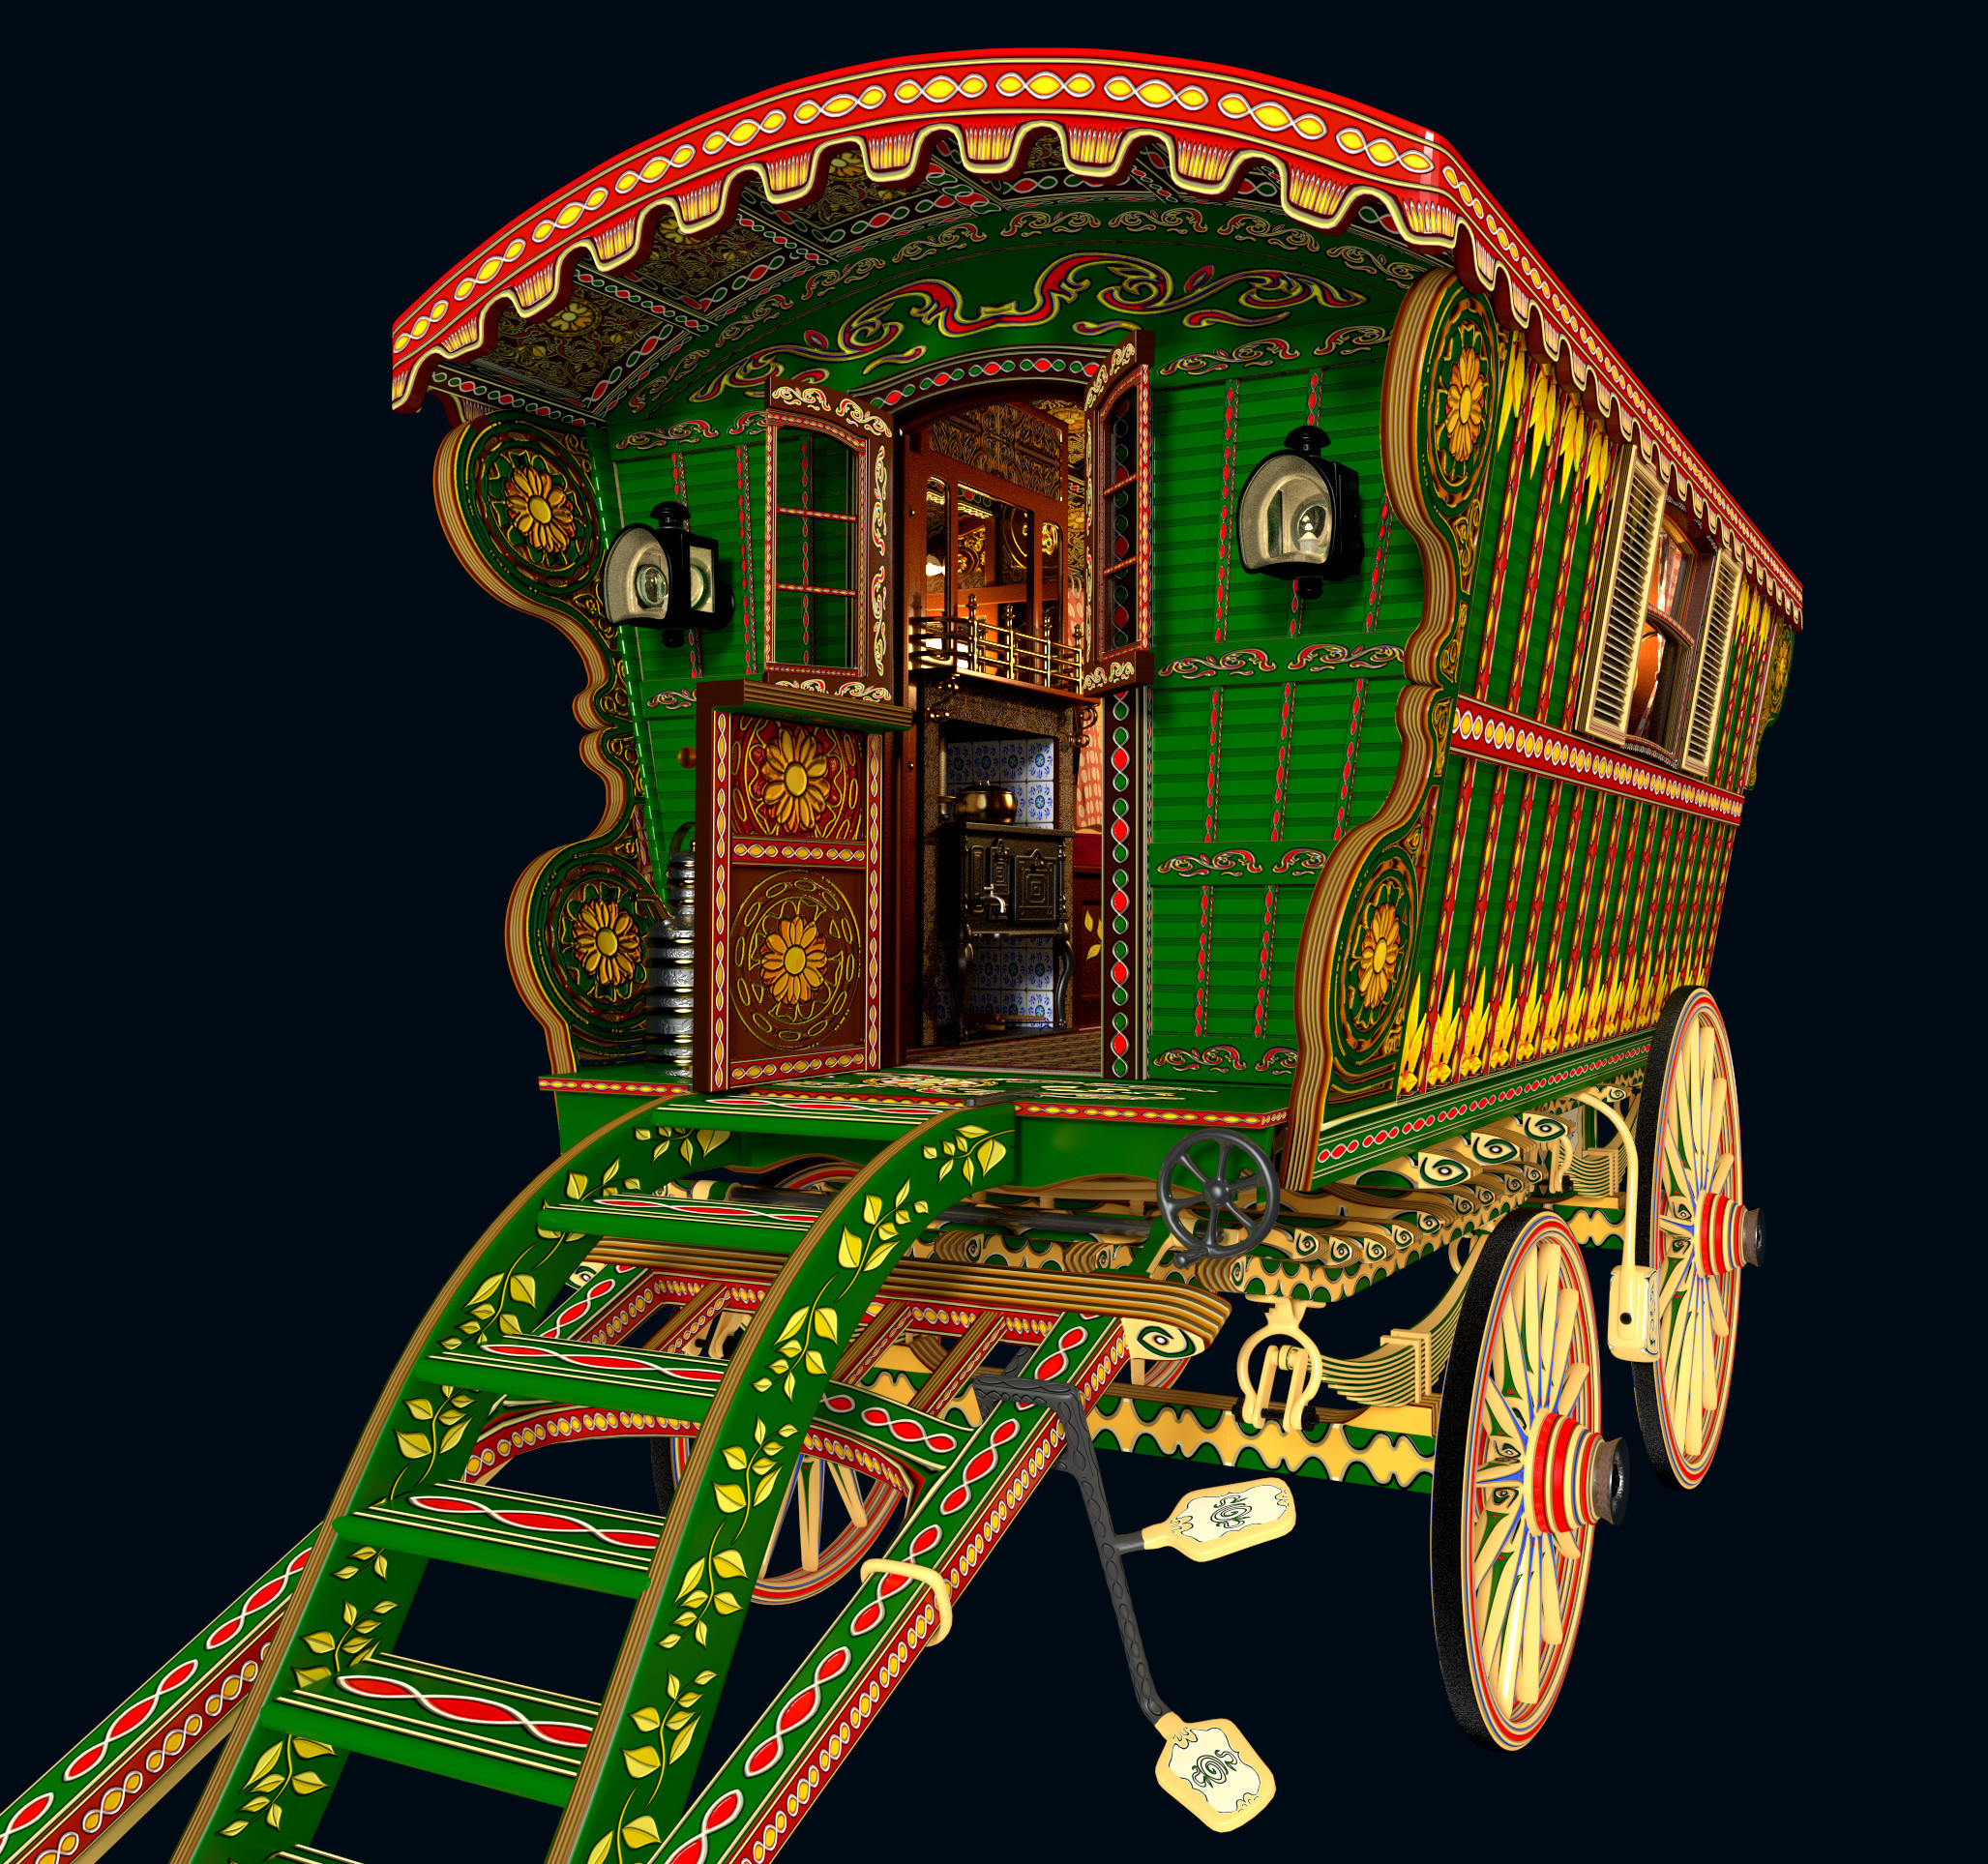
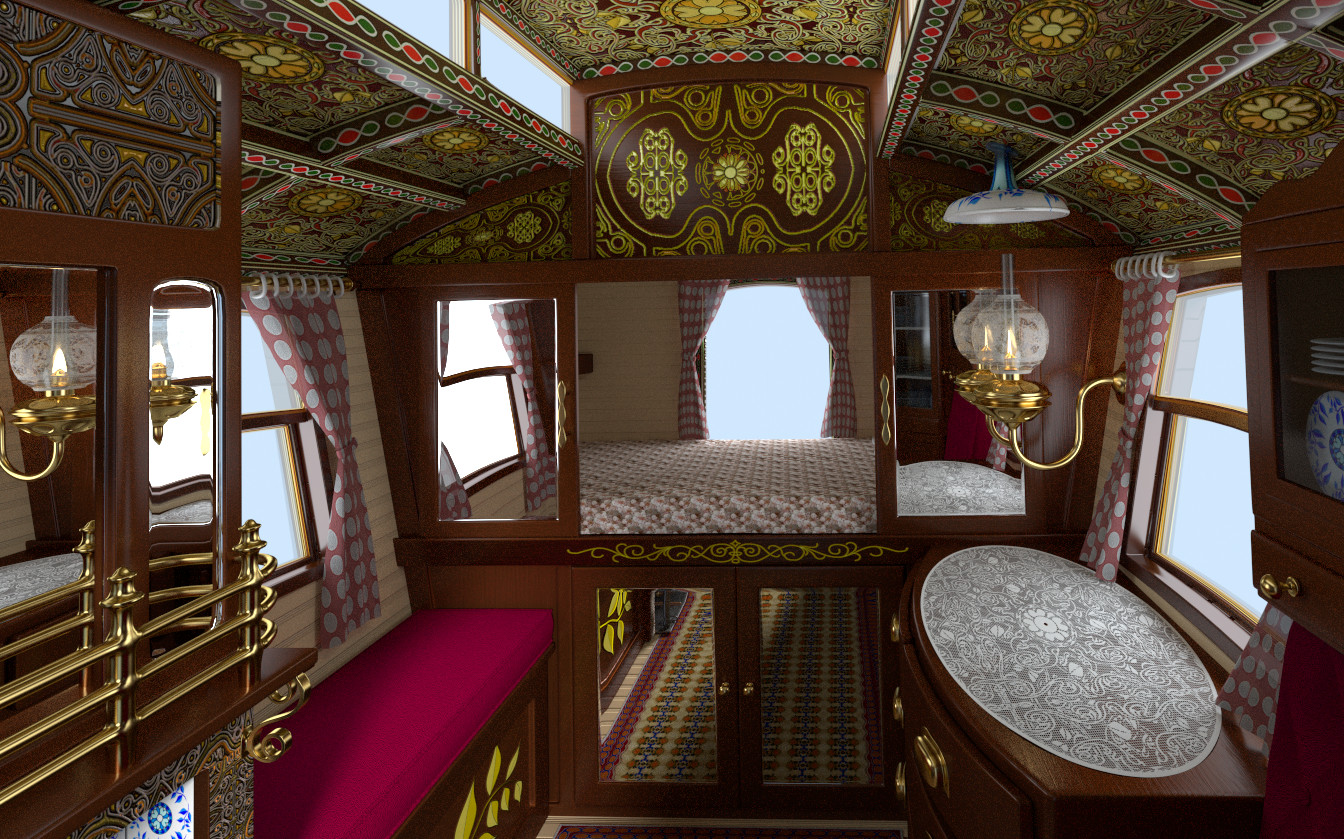
wow, that’s nice. do you have a render of the interior? looks like there’s a lot going on in there.
I have been trying to upload one here goes again…

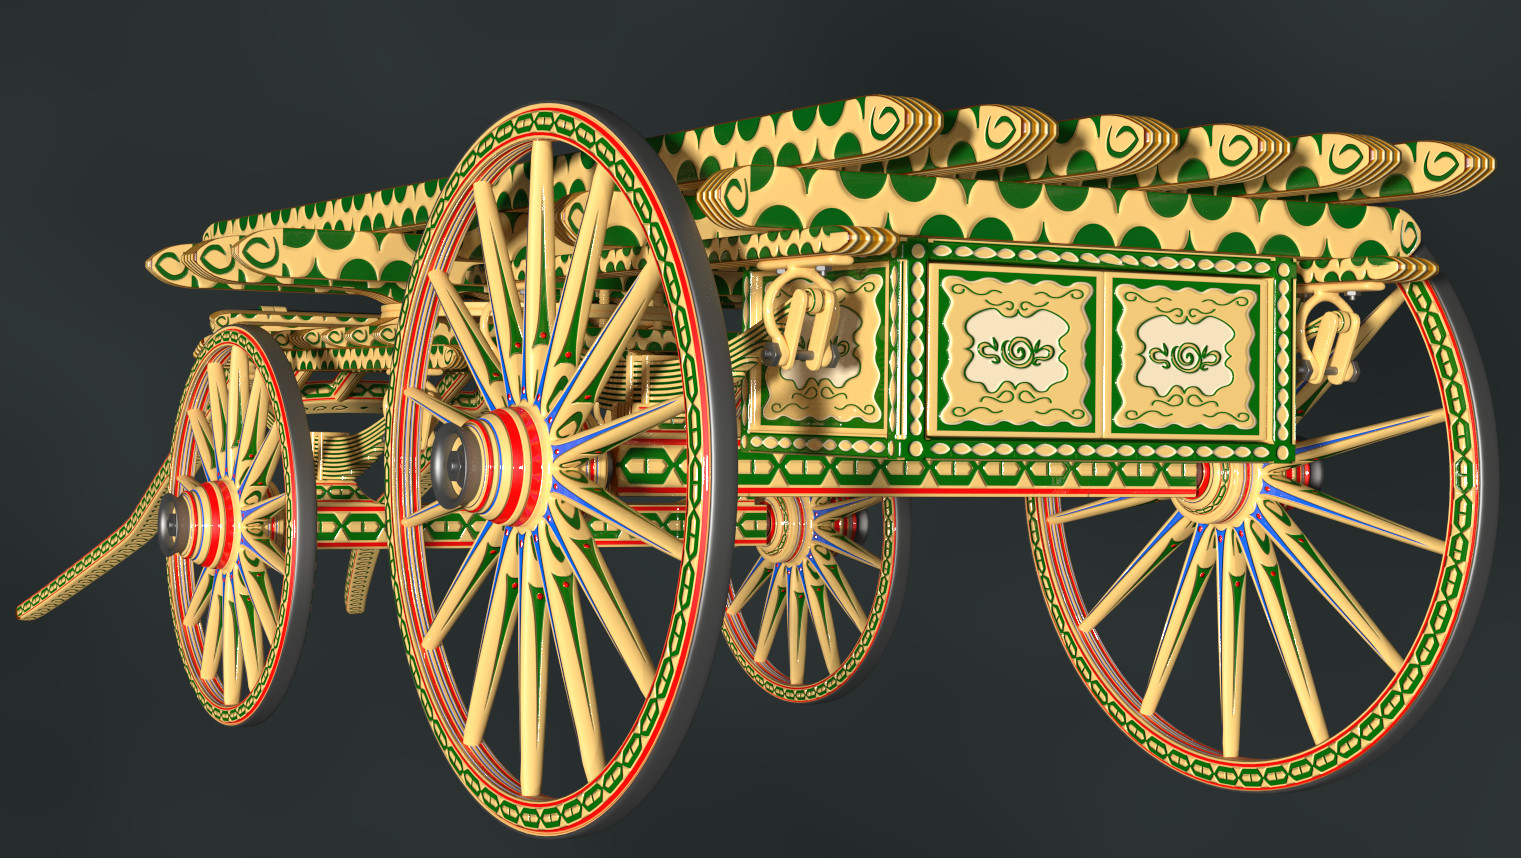
Here are some renders of early stages, I have been texturing along the process.

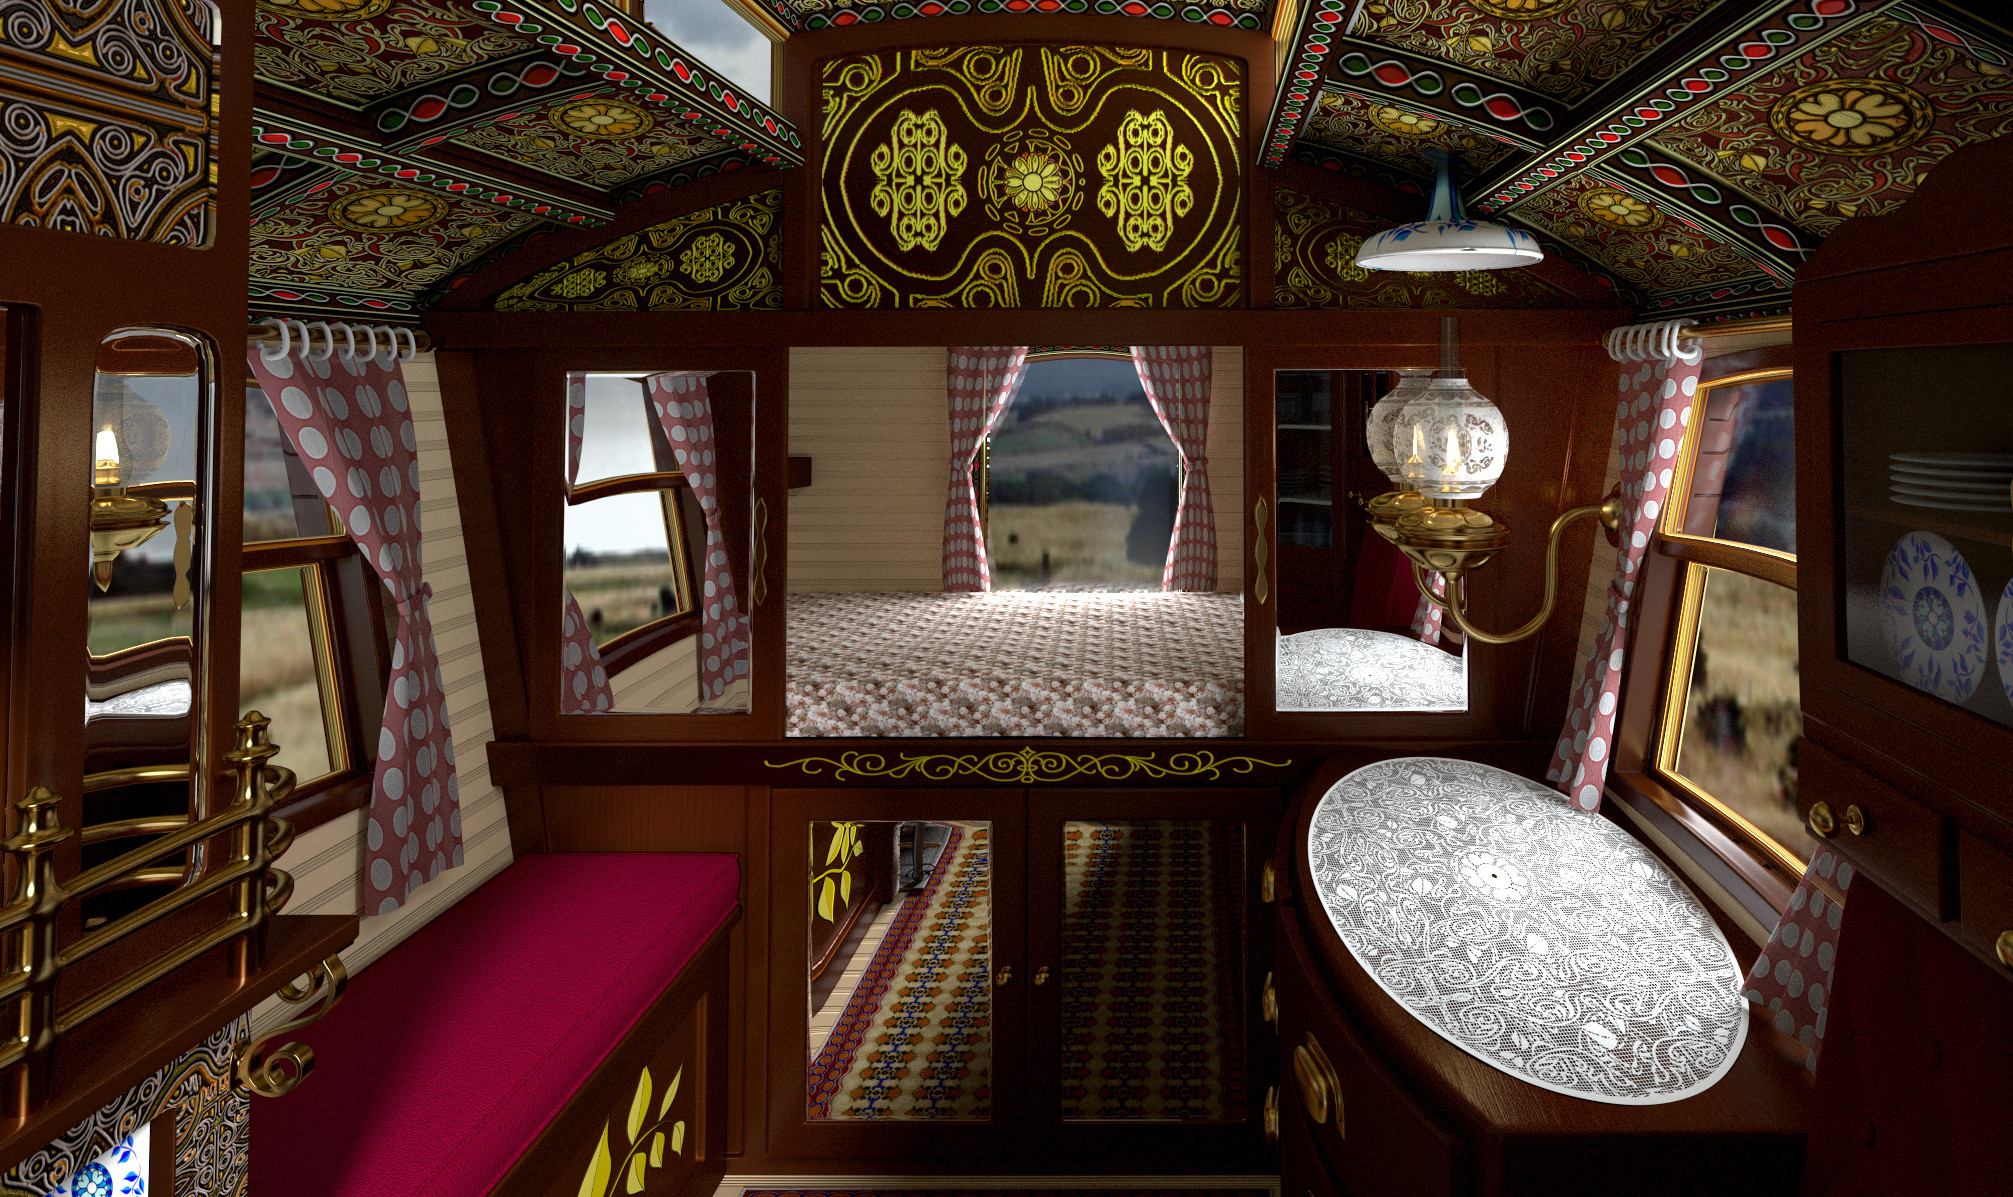
Throughout the day of browsing art this piece has stood out in my mind. I need more though. Can we see other angles, the interior, some wires, etc? Looking forward to seeing this develop more. Thanks for sharing and inspiring!
Thank you for your interest, I have now managed to upload some more renders, i have had a bit of trouble uploading.

Sorry I have repeated some renders and am trying to get rid of the duplicates
Oh my God!!!
This is awesome!
You have to do moar like this!
This is great/ My advise is to always have dissimilar and textured surfaces
Very inspirational. The detail is amazing. I had planned to do an old train passenger car in the near future with lots of detail. This work you have here inspires me. Very nicely done.
Thanks for the comments. Ripp your right about the surfaces, in the origional wagons all the patterns are carved into the wood, I tried to get away with bump maping them but the result is still flatish. I’ll work on that aspect.
The rest is great. As for b/w image - it is perfect
Here is a link to a screen cast walk around (only a rough reference)
http://www.flickr.com/photos/d_norman/10966563463/

Amazing work!
Definitely a refreshing break from car renders - they can tend to make you glaze over a bit but this pulls you in trying to make out all the details, I love it. For me the only things that broke the realism on the first render were the strands on the ground, as they look perfectly straight and stand out a bit. Can’t fault the model though, great job!
I left my computer renering for a couple of days and it came out with this RENDERED version of the walkaound!

[video]http://www.flickr.com/photos/d_norman/10995446286/[/video]
I only went to 300 cycles, it took about 40 hours.
I hope it gives an idea of what I like about this project - the fact that you can walk into it.
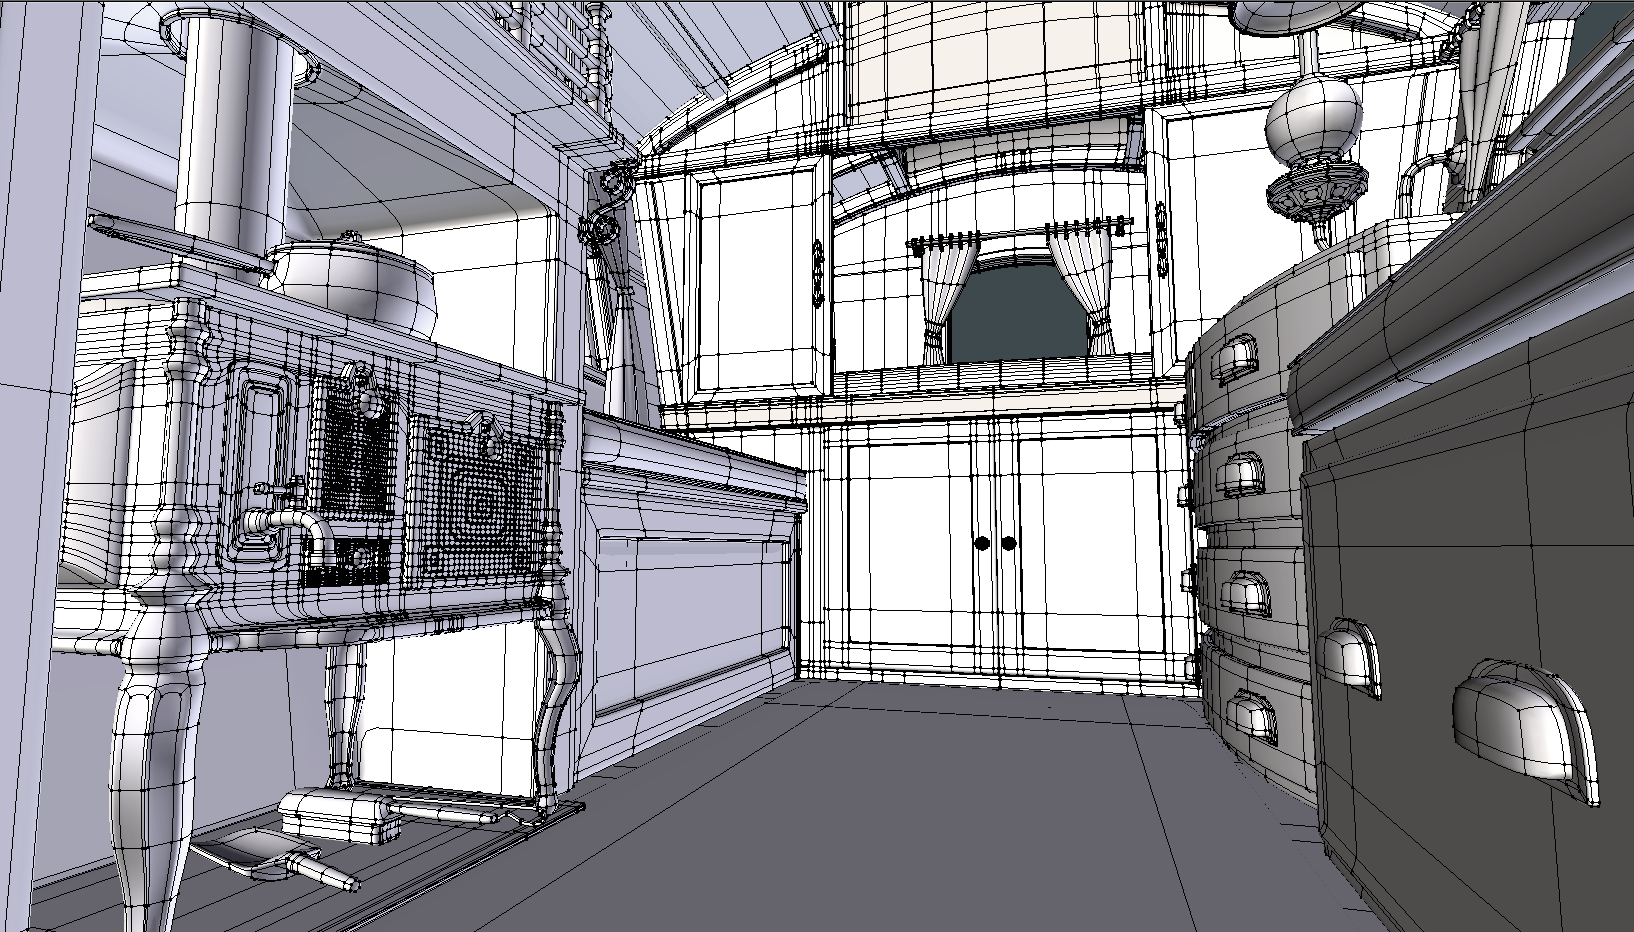
Watching it develope has made me decide to go back to work modeling, there are many dodgy areas (behind the front door, the bedroom) that I need to work on and add detail. I should also decorate the furniture.
I will post the progress.
I have put some invisible light planes in the windows, unfortunately I’ve had to turn off camerra and glossy rays if not the planes reflect in the windows and render white in the morred reflections. Here are the two renders (one with glossy rays and one without).
This method has certainly given a daytime feel and has made the lamp look great, although the lamp has little lighting infuence on the sceen - some GLOSSY rays!.
With glossy rays (I had the background image turned off)
And without glossy rays:(
This is outstanding - I’ve fallen in love with the concept, too! The level of detail is inspiring. I can tell you’ve put a lot of thought and work into this. I especially love the stove because I’m looking to model something similar for a project of mine.
It’s refreshing to see something that’s so different from the usual render concepts (cars, Crate & Barrel showroom interiors, guns and spaceships, etc). Keep up the great work.
Thanks for the positive comments they help me to carry on.
I have mainly been correcting mistakes this week.
I will post a good view of the kitchen stove once I get the “fireplace” right.
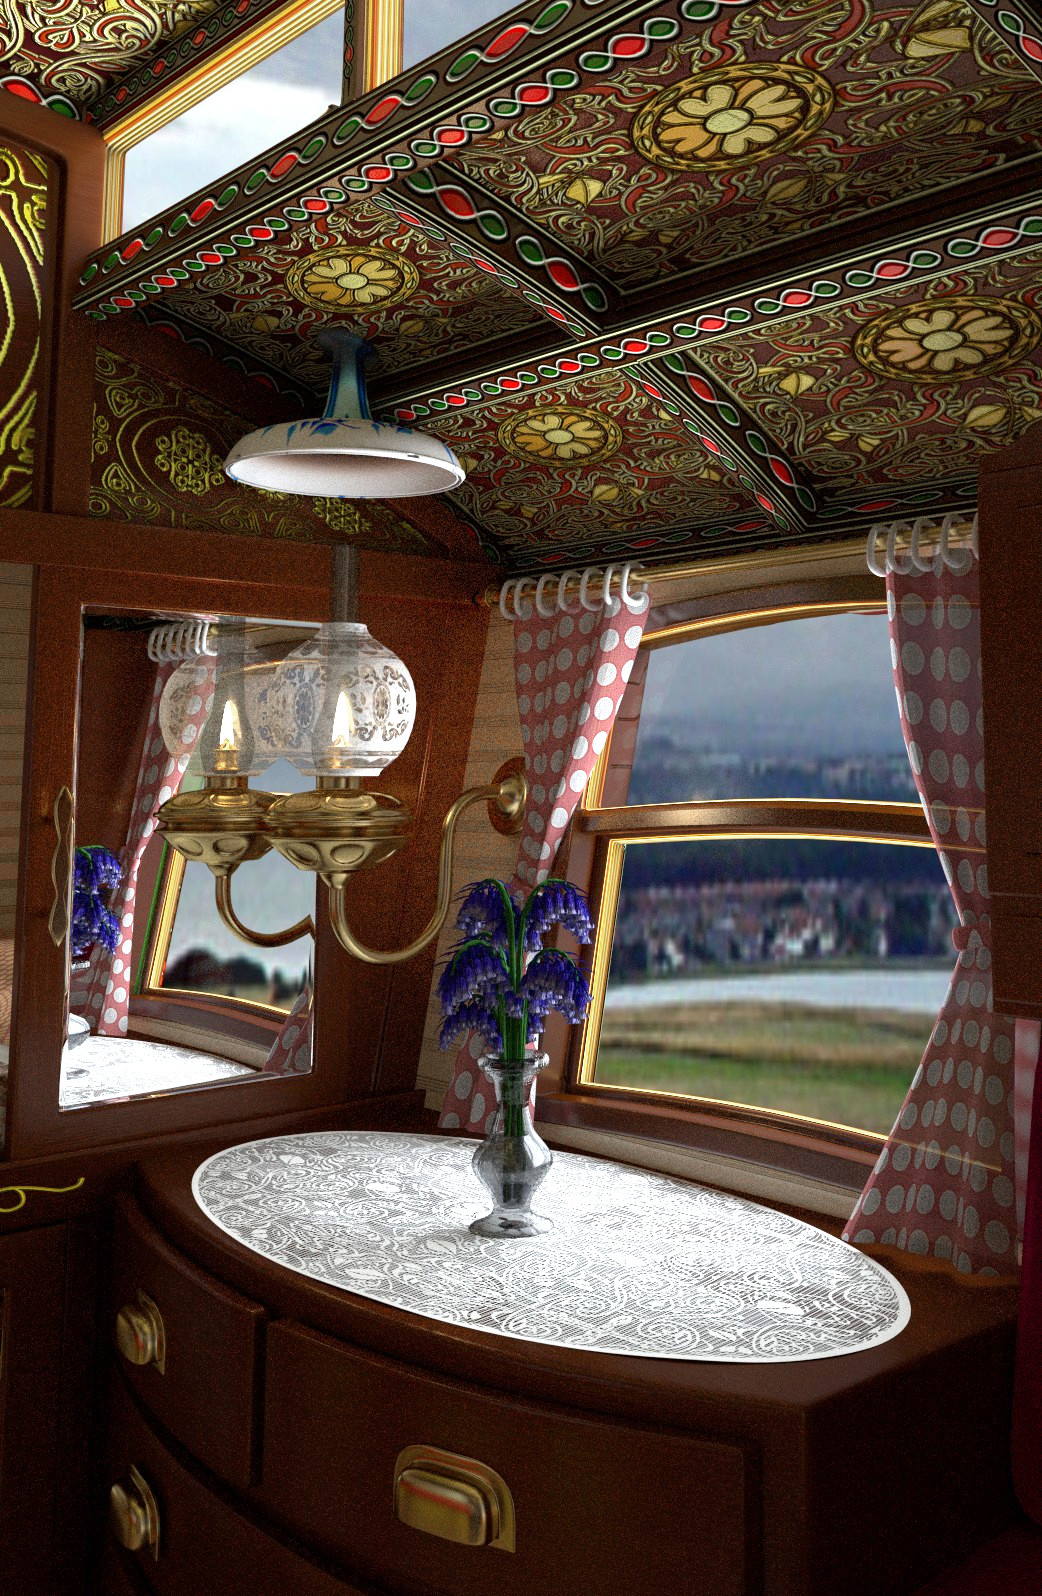
I’ve put a bunch of bluebells on the table:
Wonderful work, DNorman! It’s very inspiring to see the amount of detail you’ve put into this project.
I’m sure there must be a way, that wouldn’t be too complicated, to combine the two different types of renders in post #17. I would suggest looking into using layers and object masking to combine the two. This means you could have your nice, glossy reflections, but still see the exterior clearly without it turning white. I haven’t used masks myself, but I’m sure some other people here could give you more detailed advice if you get stuck.