Hi guys,
I like to do outdoor scenes with a nice sky. Fortunately, I have a large collection of photos that can be used as background. But wouldn’t it be nice to have more control and freedom like by using Vue to create realistic cloudscapes?
I started some experiments with volumetric clouds and would like to show some intermediate results.
The first place to stop is the cloud generator addon, of course. The generator can produce very complex clouds but I had problems to do a large field of clouds with sufficient control. Therefore, I modified the approach.
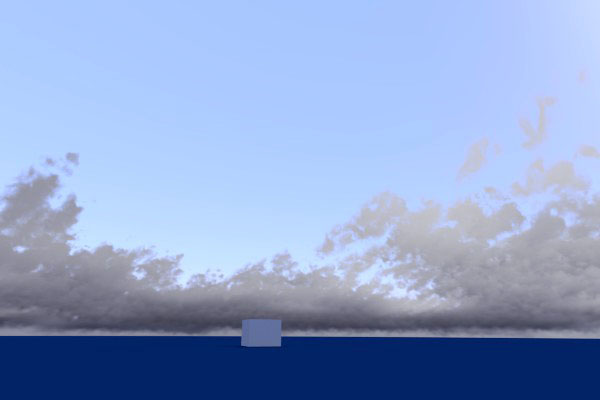
Clouds need a bounding box for the volume and an emitting object that forms the cloud. I have used something like a pizza box with a flat section of a polysphere inside. The sphere segment to simulate the sky should be rather flat.
The second step is to use weight paint to define the cloud layer.
A particle system that is emitted by the painted parts of “pizza” will influence cloud density.
From a camera perspective the particle system looks like this:
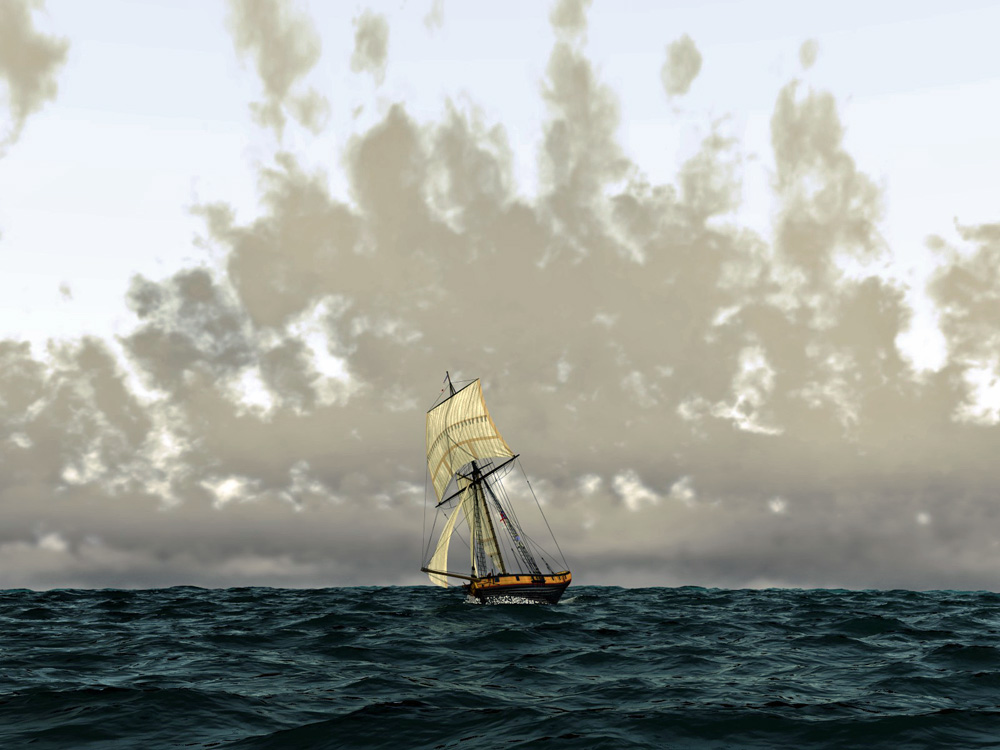
The next step to a nice cloudscape is rendering a panoramic picture that can be used as environment map. The results looks like that using the same Blender setup as before but a panoramic camera with 360 degree lens.
There is a lot of room for improvement and experiments. Different light situations like sunset; changes in the cloud material; using several cloud layers …
This is a very cool idea and it looks like your on the right track. Only thing I would point out is that the clouds seem to touch the horizon and in reality there should be a point just above the horizon which the clouds stop and the haze of the atmosphere blend the clouds and sky with the horizon. Check out some reference photos. I think all you need to do is raise your pizza box a bit and maybe put a blend on the sky texture to make the horizon a bit creamier than the bluish sky.
This is really neat stuff. Reminds of some things done back when I messed around with Bryce 4 a lot. (But the volumetric stuff likely had to be re-invented a few times to take advantage of all the advances in 3D rendering since 1999. Definitely worth the wait if it’s 100X faster with much more realistic lighting and at a price that can’t be argued with.)
If the volumetrics can be set up to work on the world level while taking advantage of coordinate and vector channels with ramp gradients, that could probably make some nice fog and haze too.
Looks really nice. Remember that Clouds sit on layers of dense warm air, so they tend to have flat bottoms, not puffy ones. I’m not sure how you would resolve that issue with this technique? You need a controlled clip at the bottom…
I have a I7-2600 CPU with 8GB RAM, not the newest one but not bad either. Rendering the 6000x2000 environment map takes about 2 hours. Half of the map is below horizon therefore rendering fast. That means a 100x100 pixel tile would render in 10-12 seconds. Of course, render time depends on many factors…
Here is a cloudscape with moonlight. I used the same setup as before but with a darker sky and a circle shape for the moon to render an environment map with BI. The map was then used in the ocean test scene, this time rendered with cycles.
There are a number of parameters that have to be adjusted to get a convincing cloud picture:
Lighting : beside sun position; sun energy (in lamp attributes); reflection, density, asymmetry (in cloud material)
Turbulence: turbulence type, size, strength, falloff, radius (in cloud density texture)
Both cloudscapes use the same weight paint map and the same particle system.
The thick cloud layer (top) uses 30000 particles, blender noise, density 0.3.
The thin cloud layer (bottom) uses 5000 particles, Voronoi F3 noise, density 0.1.
I have rendered the clouds in Blender Internal as 360 degree environment map using the panoramic camera type:
image size 6000 x 2000, camera focal length 4.9 mm. Camera has to be directed towards horizon. Saved as 16-bit PNG. There is some overlap in the resulting image that can be cropped with an editor capable to handle 16 bit pixel depth, e.g. Photoshop. Cycles does not (yet?) provide volumetric materials.
The environment map image is used in the sea scene with the Cycles renderer: World Output/Background/Environment Texture. It can be rotated or adjusted with a vector mapping node. There are of course some advanced set-ups for HDRI images available. http://reynantem.blogspot.nl/2013/07/proper-hdr-lighting-remix.html
HDRI lighting gives a very good basis for outdoor scene lighting that needs little tweaking.
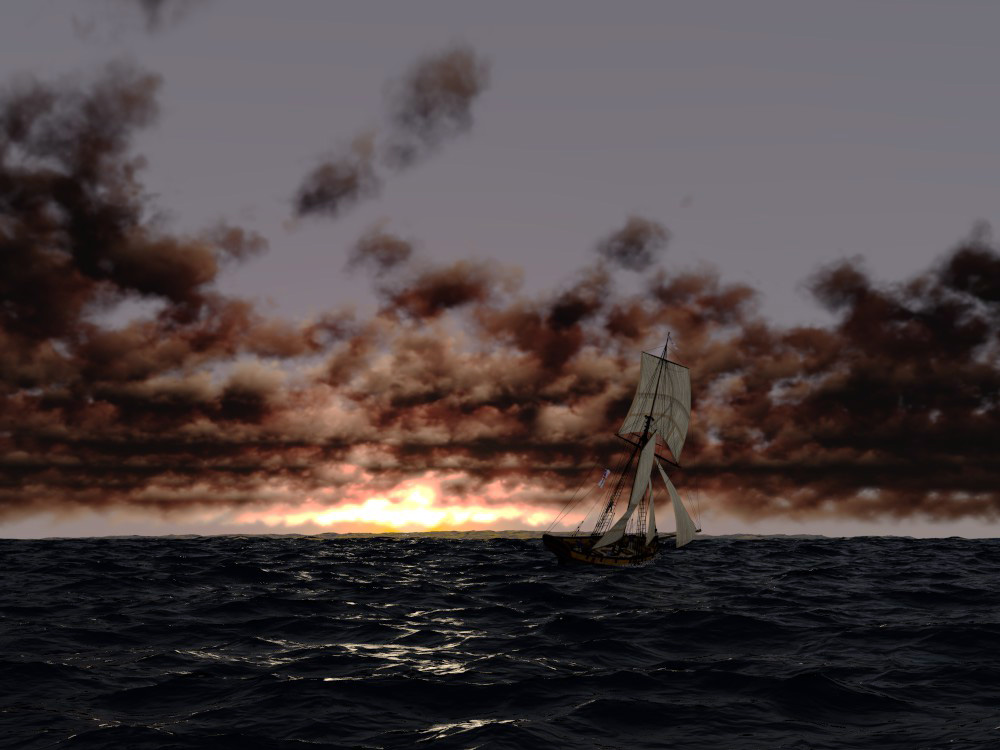
I have experimented with extending the princip to several cloud layers. First result is a sunset scene.
It has three cloud layers each with different particle systems and material parameters.
Back layer at the horizon gets last light from sun and is glowing (forward scatter asymmetry).
Front layer is already in earth shadow and therefore very dark.
Thin top layer gets some rest light.
The variation in lighting depends on reflection strength and color, cloud density, and scattering asymmetry.