realistic skin??? and head modeling

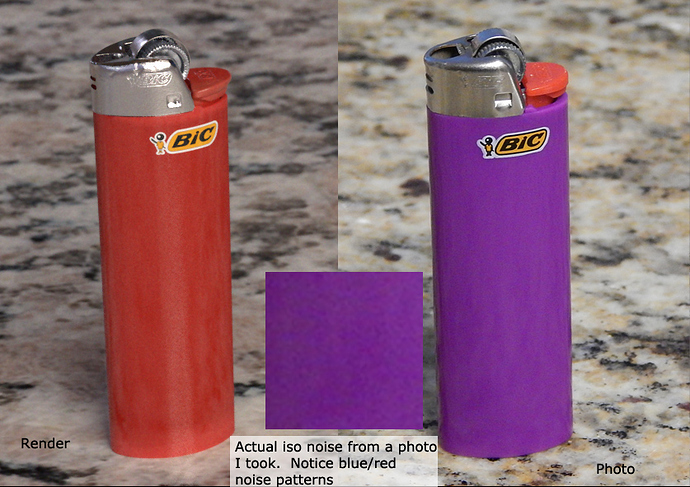
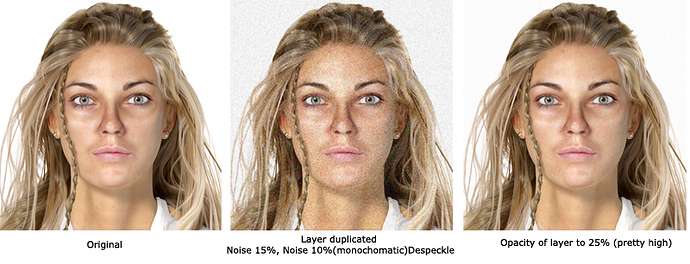
iso noise is electronic noise, kind of like static on the radio, that affects the camera’s sensor and causes multi-hued, and often blue/red/purple noise patterns in a photo. I sometimes fake it in photoshop using add noise then despeckle and/or reduce noise. A couple months a did a “spot the fake” render of a bic lighter. If I hadn’t added fake iso noise it would have been a dead giveaway.

A note: iso noise is considered shoddy camerawork. It is the sign of a cheap camera and a unskilled photographer (read: me) Like a lot of tricks to push things photoreal (dof, aberration, vignettes,glare) it can be considered cheap and oversued, and is best done with a soft touch.

The new braid looking much better, but I wouldn’t have any holes showing through.


Hi Photox

Thanks for the explanation.

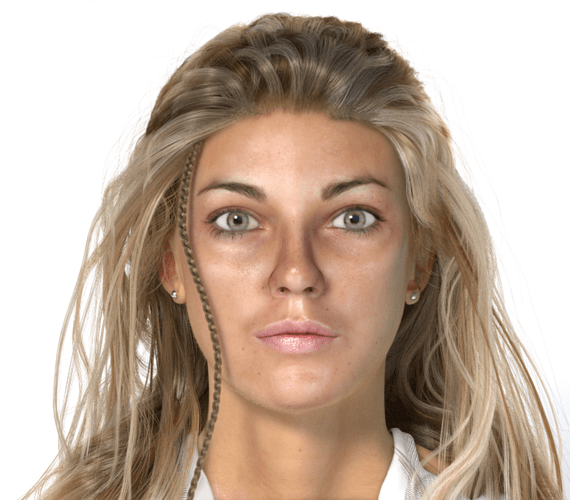
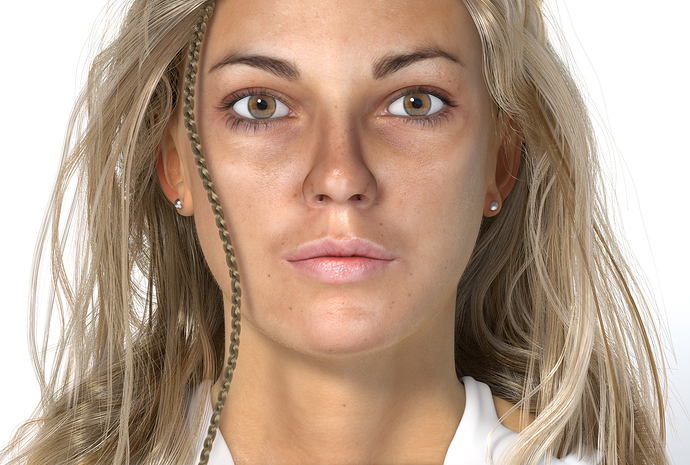
Attached is render that cooked most of the day, just really for a decent test for me.

I think the hair may need more curve subdivisions, I have it set on 8 at the moment, but there are some places that look wonky.

Applied gaussian blur 0.5% and 1% noise, also added a light vignette. Eyes a skew already so going to bed now.


Shaun

Hi All

Got some hairs in from the temple area down as well as adding some wild hairs around the head. Did a system at the hairline, but really been struggling with it, so will have to try again with it tomorrow. Also worked a bit on the facial hair.

Eyes slightly bigger.

Viewport render 750 samples.


Shaun

Congrats. Wow again!! First off, I like the biker chic swept back bangs better than parted hair on you model. Her Hair frames the face and head well. beautiful. Really nice variation of hair and coloring.
Honestly, at this point I would freeze the work.

Seriously. It’s tremendous. And the amount of work required to get another .01% of improvement or difference at this point isn’t worth the extensive labor. I recommend Starting something"new".

With The amount of experience you’ve gained with this work, you’d tear through a new project in days. And You’ll learn far more trying something new than chasing bits of perfection. A new Project will rejuvenate and issues you’ve encountered you’ll solve more readily creating a new work. Don’t know why but you will.

Then later, after you pick up more skill sculpting new stuff, then come back to your girl.
she’s tremendous as is. Great art is known for its imoerfections

I had to look really hard at this one. I think you are really close to real skin. I think the nose looks kinda hard as in ceramic. The eyes look kinda glassy hard too. Maybe little softer maybe. I really like it. She is pretty too. Keep up the good work, Rodshakkervids

As to the braid would you mind if I take a crack at it?

Not at all, go for it.

HI All

@FXR. thanks very much appreciate all the input and encouragement I have had from you. Its nice to hear that something that you have tried hard on has worked out nicely.

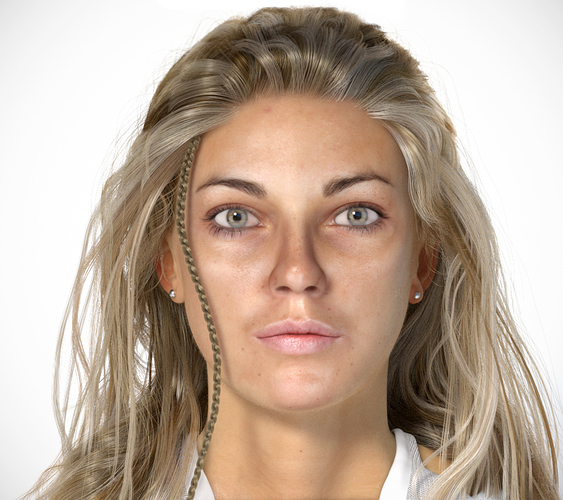
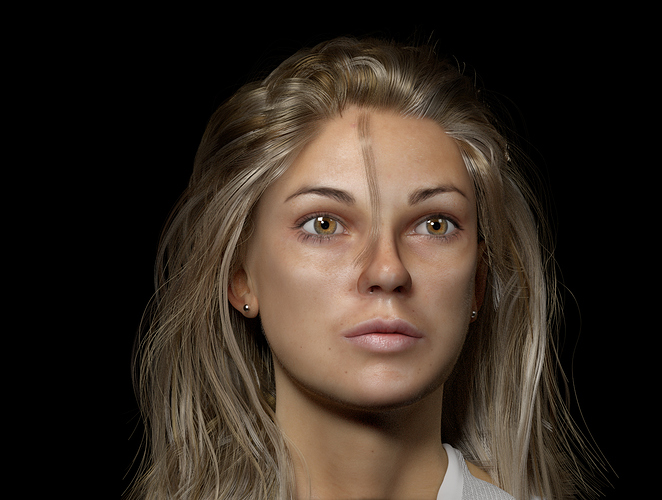
I also think that it is time to move on to another project, so I agree with FXR, I have tried to incorporate all suggestions made to the best of my ability and attached is where this is at. If there are no major points being made I think I will start the final render.

This one is low samples at 1920 x 1080 with a little touch up work in PS, based on the time this one took the final render will take about 40 hours.


Shaun

This is so far ahead of anything I’ve done amazing is all I can say.

Yeah she’s rather fetching looking

Hi All

@rodshakkervids, thanks for looking in here, yes the eyes have been the downfall here for awhile now, Photox has also been talking about them, so…I decided to knuckle down and I have remodelled them and made a new eye texture from high res 3d.sk pics. Still undecided about the colour though.

@Ghost, thanks for visiting me here, really appreciate it. A man with your knowledge will always have input.

@FXR, She just broke up with here boyfriend and is available for a date. :evilgrin:

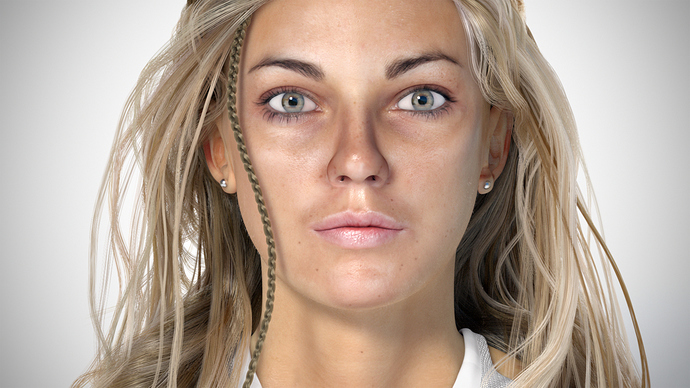
See what you guys think, I feel I am getting really close now??? This is a raw render, no PS done except cropping.


Shaun

The nostrils seem a bit off, and the eyes definitely need some grunge (like blood vessels and such), and the hair seems overly stiff (like if she’s put a ton of mousse on her hair), but otherwise it is a stunning portrait.

The skin is very nice imo (no need to go overboard with pores), it’s just that the pose and lighting isn’t very flattering, so perhaps a believable context would make the head more realistic.

Hi, Shaun, she looks so beautiful and lovely and the darker eye texture looks nice on her.

Something from the two cent category would be to work on the reflections which show up in the eyes. There is this horizontal edge in the white reflections at the lower half of the eyes. It looks like it is coming from a white ground plane. Maybe you could shorten the ground plane so that it does not show up in the eyes. Or you could extend it towards the viewer. Or you could make it invisible for glossy shaders, which is a trick from the CG bag of tricks. - If it is really coming from a ground plane.

But this is something really, really small.

I’d call it a wrap! End scene. The work on the eyes did pay off!

Well…

I seemingly lied, but it is not my fault, the people posting on the FP Forum said that some things were not right, so…that got me started up again. :evilgrin:

Got some great feedback from my good friend minoribus which I will attempt to apply to the model. For now I have just tried some different lighting setups. Among other things the eyes have always been the weak part of this work and for quite a while now I have been working on different eyes to get them as realistic as possible.

What I have found is this and I stand open to correction. You cannot get the eyes looking right using cycles with normal lamps, I have spent countless hours using different setups, adding and subtracting lights until I decided to add some planes with emission and all of a sudden (well let’s say a light switched on) :D. Eyes are far from perfect at the moment, but I think there is a big improvement.

@ brinca, sorry I seemed to have missed your post, I apologize. I am busy working on the eyes at the moment and they do need some blood vessels. I am also busy working on the lighting setup which I also think is making the hair look a bit softer.


Shaun

If you really want to improve this project you need to get back down to the foundations of realism: shaders can only take you so far. A good underlying model is essential. This is what I’ve been doing and seen a great deal of improvement in my own project. Make sure you have plenty of references of one specific person. Don’t stray too far into the realms of improvisation and freehand sculpting. Apply fundamental anatomical principles and continually check and recheck them with your reference. Focus on small details but never out of the context of the overall shape. Don’t be afraid to make big changes in the shape, don’t stay committed to one version out of fear of messing it up. That’s why you save all your versions!

When attempting realism in CG, the model always comes first, as you can see by this pyramid.

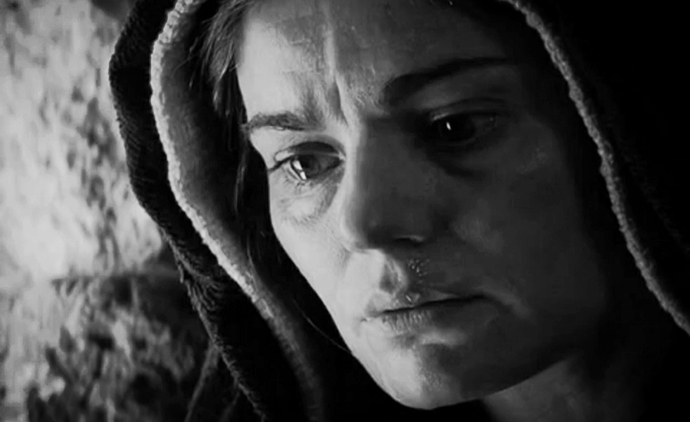
Zekes right. You’ve got the drive and the artistic eye, you have attention to detail and work ethic. Take the next step. Start on a new project to Learn anatomy of bone structure and musculature. And what shapes expression and captures emotion. It will pay HUGE dividends. You’ll answer a lots questions you have now about stuff. I attached a pic of Mary, for emphasis about expression.

Plus your girl already a babe, with great eyes as is.

Attachments


Also her hair is great. That would make an interesting post on how her hair evolved and tips.

Hi Fred

Thanks I will give it a go, but I am no tutorialist ( if there is such a word :smiley: ) mainly because I do not know a lot about this software and I feel my way around a lot.

There are a huge amount of tutorials available for hair, but I could not find any that teach you how to do good hair, with the exception of Kent Tremell’s which I hear is brilliant but have not seen except for the 1st one which is the teaser to the series.

There is also not a huge amount of info on what settings to use and even what a lot of the settings you find in the particle editor are used for. Most of the stuff you do find is outdated, so for me it was a lot of trial and error.

One hint that Kent gave in his teaser vid that helped me tremendously was the fact that I saw that he used different particle systems for various parts of the head, maybe I am just thick, but at the time I had never thought of that and I was trying to do the whole head with one system. IMHO it cannot be done that way.

Splitting up the head into various regions gives you a huge amount of control. You are able to to have a braid on one section, wavy hair on another and even some curls on another. Once you have various systems on the head your possibilities are then endless. The great thing about this also is the fact that when you are working on one system you are not disturbing another system and with hair this is invaluable.

For anyone trying out hair for the 1st time or even someone experienced with hair I would suggest that you start with a really simple scene, maybe a sphere with a hundred hairs and a hundred children, leaving the thickness at 1 in the cycles hair settings. This way you can work in real time ( have a window open with your model and another window open that you are doing a viewport render in ) and even if you do not have the greatest system you will be able to see the changes that you make. Working this way you can fiddle with every setting in the particle system and see what it all does and make notes as you go along.

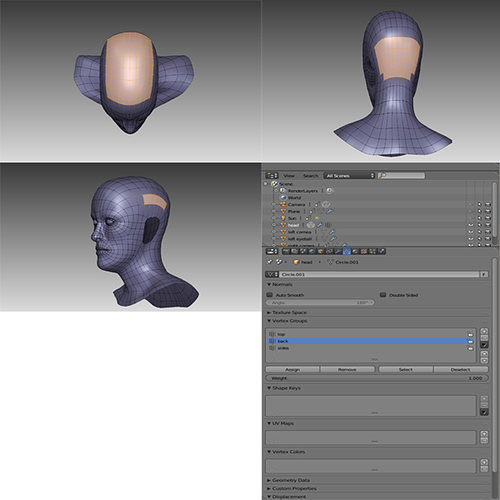
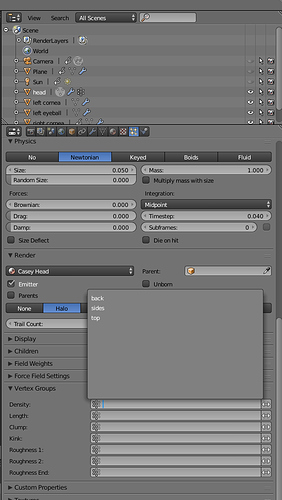
I would suggest that when you get started on your model making the hair that you split your head into 3 regions, the top, the sides and the back. Make a vertex group for each of these regions and name them. Set up your three particle systems and give them the same name, this so you always know what is what. You can obviously have as many systems as you need or want.


This way each particle system is allocated to a vertex group. When you enable the specific vertex group in the particle editor the hair will only grow out of that specific region. Each vertex group will also automatically have a weight painted section assigned to it, so you can tweak it further in weight paint. This is especially valuable when it comes to the hairline and the hair near the ears at the side of the head as you can subtract and add there very easily using weight paint. You assign the groups in the particle settings under the vertex group tag and each particle system would have its corresponding vertex group assigned to it.


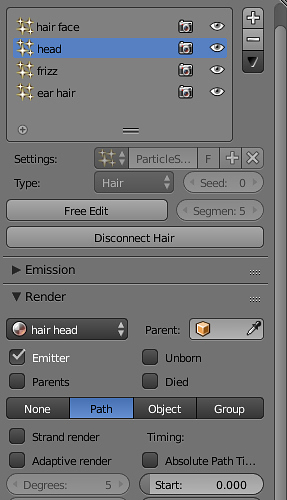
Next you will go the particle system that you are starting with and change the emitter toggle to hair, if you have already assigned your vertex group you will see that the hair is now only growing out of that section. If you click on the advanced block under the emission/hair toggle another tab will open, the hair is already set to grow from faces and I would leave it this way, you can also leave all the other settings as default as they are all correct for what you will be doing.

Under the emitter tab you will see the default of 1000, this is the number of hairs that is currently on your model for that particular particle system, the more hairs you can have here the better you eventual control of the system, I had this set to five thousand, but be warned the greater this number the better you computer needs to be. The next number you will see is 4000, this is the length of the hair as default, you can change it here or later in the particle edit system with the length tool. Remember when you go to particle edit this section greys out and you can no longer use it to adjust number of hairs and length of hairs.

The next tab is called Render and you will see a toggle for material, you can add your hair material that you have made there now or at a later stage, all other settings can remain the same.

The next tab is Display and all these setting can remain the same, the steps is default at 2 and the higher you bump this up the better your hair displays in the viewport in order for you to see what your final render will look like.

The next tab is Children and this is where most of your tinkering will take place. IMHO the correct setting for hair is simple and not interpolated as this seems to give you the most control, the interpolated hairs can get out of whack especially when you start to use the kink system. The display tab shows you the amount of hairs in the viewport and the render tab is the amount of hairs that you will actually be rendering. You will need to adjust the number of children hairs to suit your needs. Each of the hairs that you set in the emitter tab will be the parent hairs and each parent will have as many child hairs as you set in the children tab. For me to explain the various setting that follow in the children tab will take a novel and this is where the notes that you have taken when you were messing around with your furball that I suggested you make will become invaluable to you. The next setting in the Children tab is kink and this is where a lot of the magic in Blender hair can happen, the names nothing, curl, radial etc do exactly what they say and once again messing around on your furball will let you know exactly what all these do and how the settings for them behave. The braid setting will only work properly if you use a single parent hair per braid.

The next tab is Cycles hair rendering, if this tab is not checked, check it and underneath it you will find the primitive settings.

The average head of hair has about 110 000 hairs on it, this would be for brunettes, blondes have about 140 000 and reds about 90 000. I like to try and keep the hairs on the model about the same as in real life.

  1. Curve segments, best results, but you can go on holiday while you are rendering 100 000 hairs.
  2. Line segments, I used this on my model and I think it is adequate. Render times are about 10% of curve segments.
  3. Triangles are for hair that is not to close up and really fast, so also use this setting when playing with your furball.

Shape you would keep to thick.

Check the cull back faces if you are only doing a front render and not a turntable.

Keep the pixel settings as default.

The final tab is Cycles hair settings.

  1. Shape, you will see what this does as you are playing with your furball, I find that -0.7-8 works nice for hair.
  2. Root is how thick the root of your hair. I find the 0.5 is a good setting, but you will have to mess around by yourself to find out what suits your model the best.
  3. Tip. I like to keep the tip very close to the size of the root and hence use 0.45 most of the time. This is contrary, but I do not use the close tip checkbox as I find that the hair tapers off to nothing and this does not look realistic at all in many models that I have seen, but this is subjective and you would need to see what suits you.

Will continue in next post as I can only add the three pics.

Shaun
Continued from previous post.

Attached are the settings for the main hairs on the head, I also added a system for the wild hairs on my model. In order to do this I just duplicated the vertex group for the main head and I added another particle system with a lot less hairs to it and really messed around with the roughness settings in the Children section to get them ( well for lack of a better word, not behave properly :smiley: )

Hopefully this helps someone who looks in here, but let me say this, making hair takes a long time and there is a lot of tweaking and pushing and pulling around to get it to look half decent, so please be patient.


Shaun