Hi there! I’m still quite newbie to the community and i had been trying to post render a week… it became rander a month with addition that i mostly do Andrew’s tutorials. I’ll try to do original stuff so it might still be render a month but with growing quality (i believe)
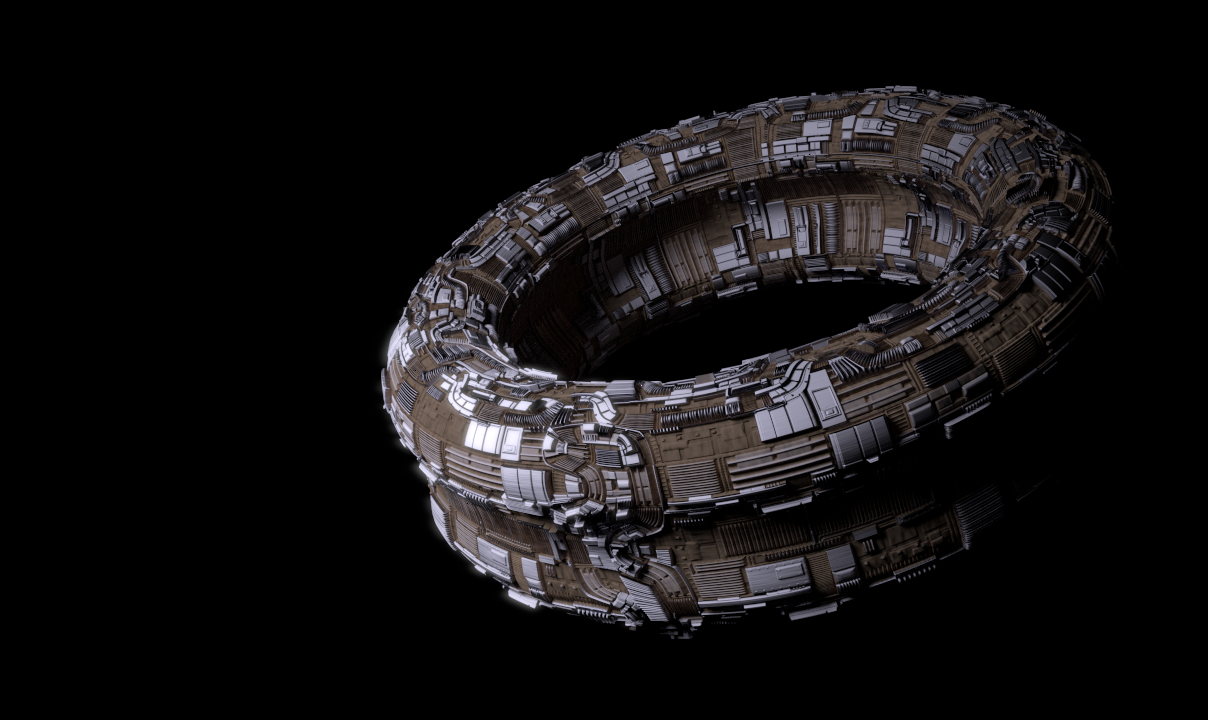
Very good result, RhinoFlip! It is always interesting to see the details that is created with this technique. I also like the choice of material colors. If I have any critique, it is that the background doesn’t feel up to the same level as the subject. But then again, I know it can be difficult to find just the right starry background for your shot. Great job!
The backround really sucks. It was friday and i wanted to have it done, so i used this one. I should rather use blender internal render engine generator of stars to finish the job. Thank you very much James to leave a message and feel free to come around later!
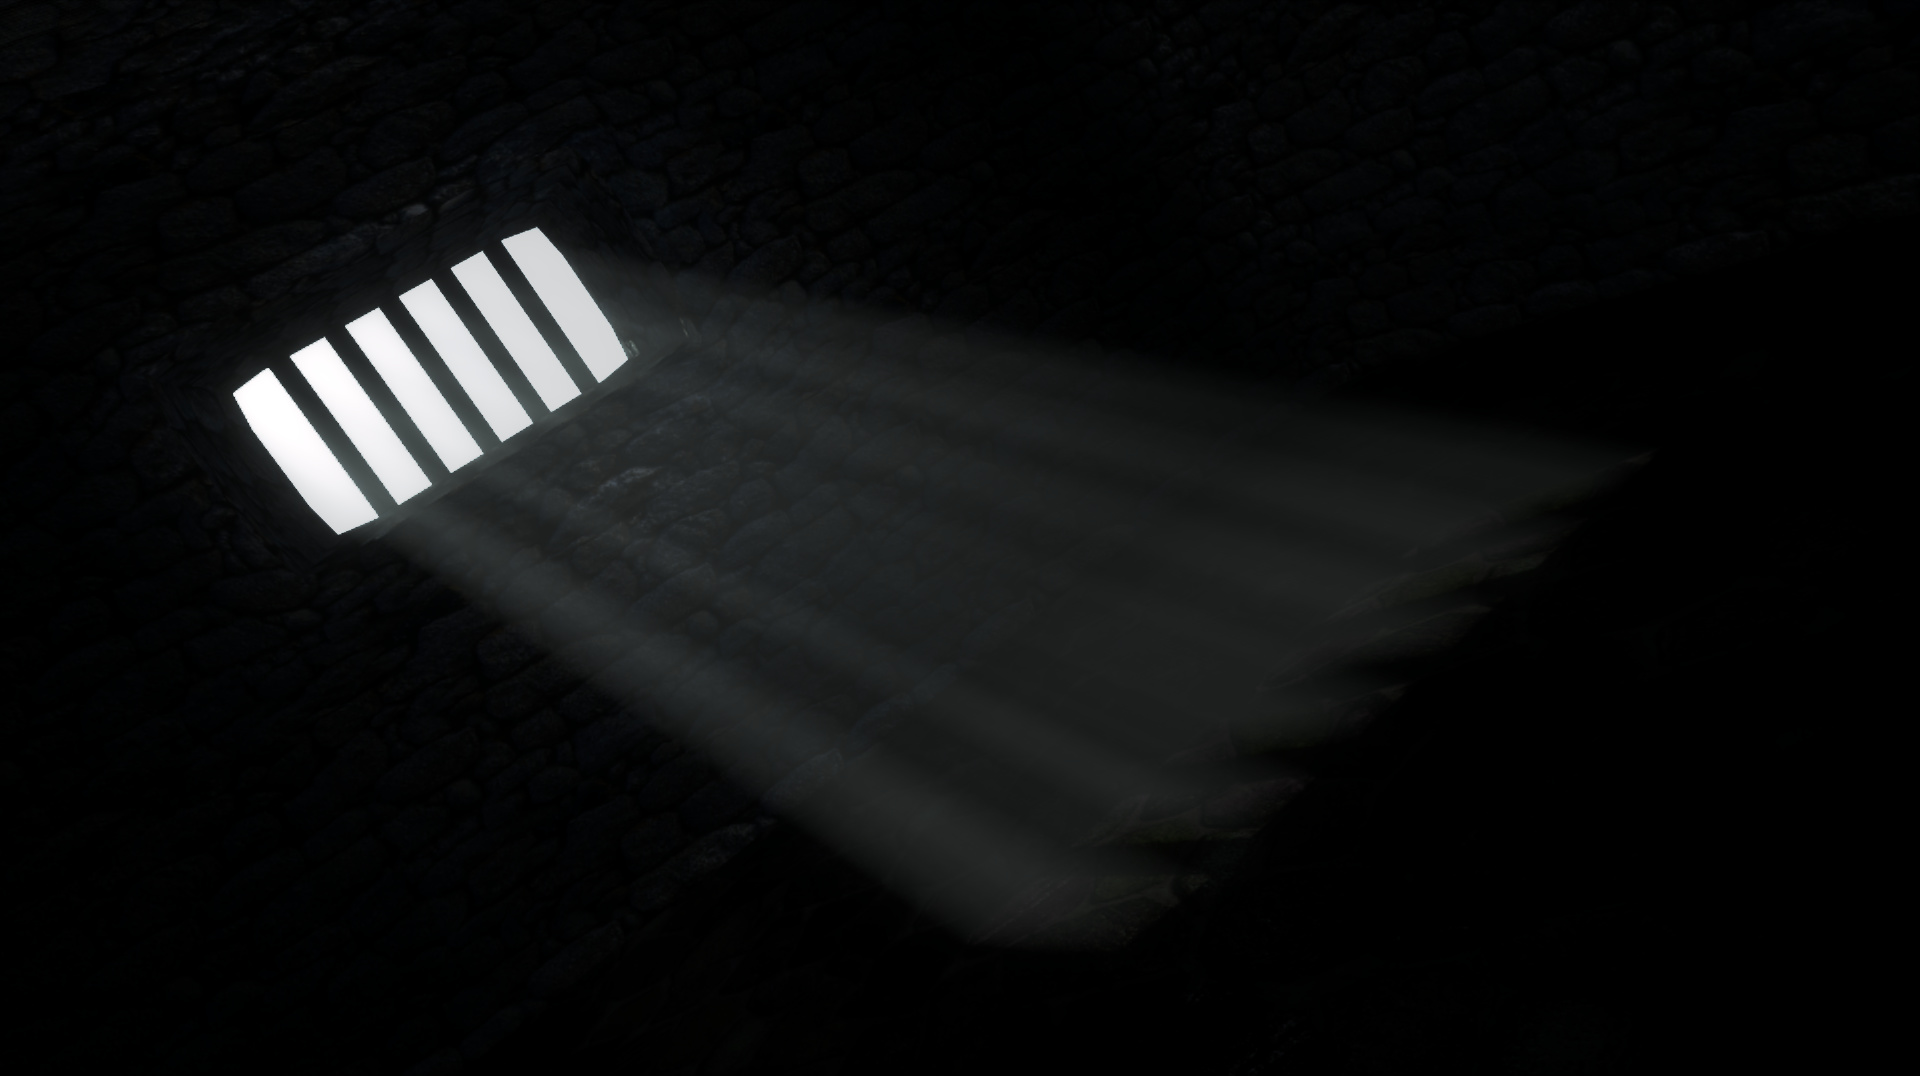
I made stars in Blender iternal, added streaks to shinest stars and some metallic structure to glossy shader part of render and added minor displacement for diffuse ocre rest of ship. I think it looks li’l better now…
I like how you used inset-loops. Nice one. The second render is much better, regarding background.
Did you also use the AO included map? I mean, the cycles baked ones. What a difference from the BI baked ones!
I think there’s recent discussion on your thread about baking maps with cycles. I should try bake one. This is only made of one of your first maps and that i think is made with BI. By the way i’ve seen your dynotopo posts and they are very impressive!
I think at michalis thread i’m talking about in my first post! They also have been talking there about ‘maybe’ start a database of UV displacement maps. So you better search there.
Thank you, it is very kind of you to share that! The updated render looks even better, RhinoFlip!It was hard for me to put my finger on it, but now I can see that the original star background drew too much attention away from the structure, and made the composition feel a bit cramped. Now with fewer stars, the image has space to breathe, and our eyes don’t dart around so much. The stars themselves are also much better looking. Great job!
This background is a matter of discussion.
Difficult to find an appropriate, a convincing space background.
A simple black is always an easy solution, an empty silent vacuum.
Fact is, Michalis and James, that i really like the browny vintage atmosphere which is on most of Michalis’s posts at the displacement thread, but it too high road to go to get perfection in composition node since i’m starting to understand cycles materials now. I really adore the look of cloudy environment and all that stuff. An empty silent vacuum is exactly what the space is made of. So it’s called space, isn’ it? I didn’t wanted it to be sad so some stars may make it hapier. To make it more interesting I added streaks to stars but my brother called those a ‘little kitch’. Still it’s a matter of discussion. I’ll try to delete the background and if it’ll be worth of post, I will do so. But i have to focus on my next render too. Keep on blending! (And thanks for all the posts)
I filled my picture with emptiness but i will never be satisfied. Just to fulfill my promise :D. I hope somebody aout there is waiting for my next render. I didn’t get echo that I’m late
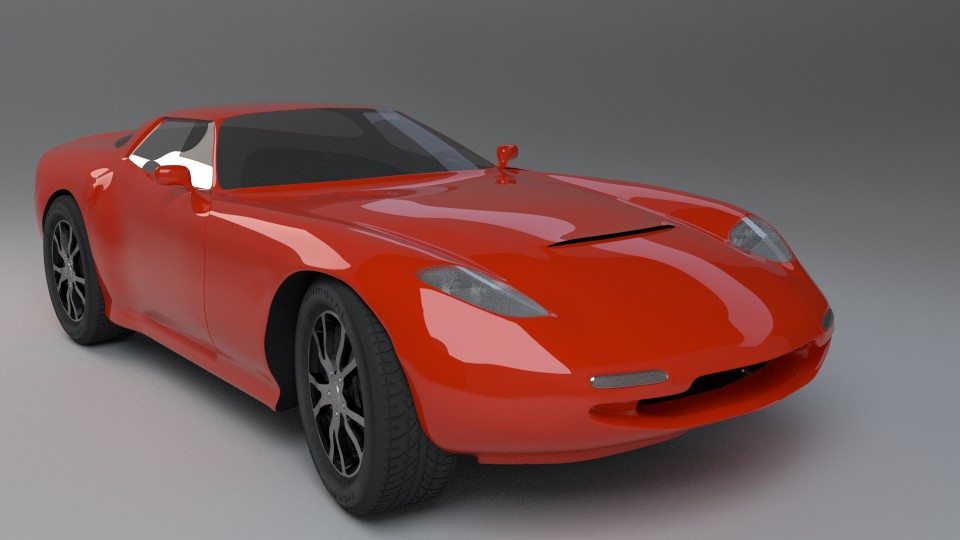
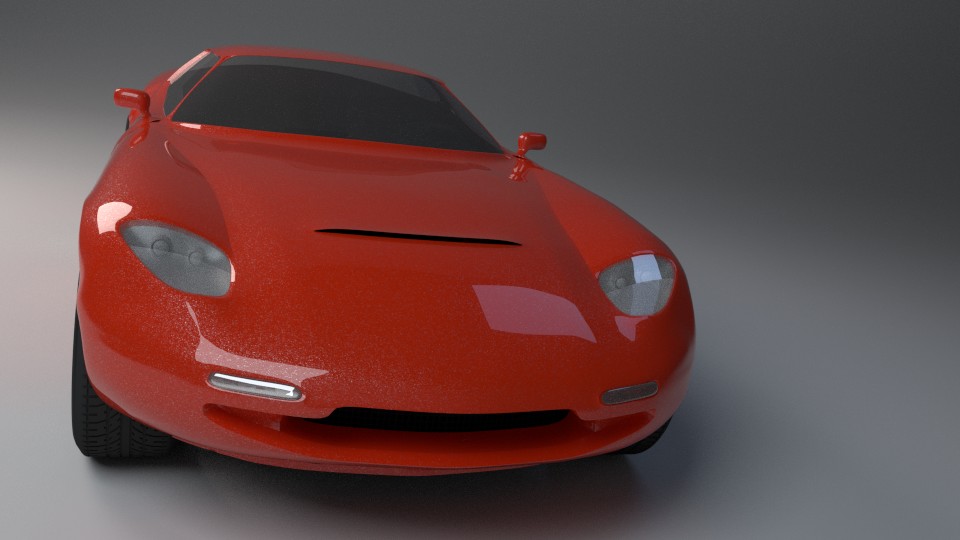
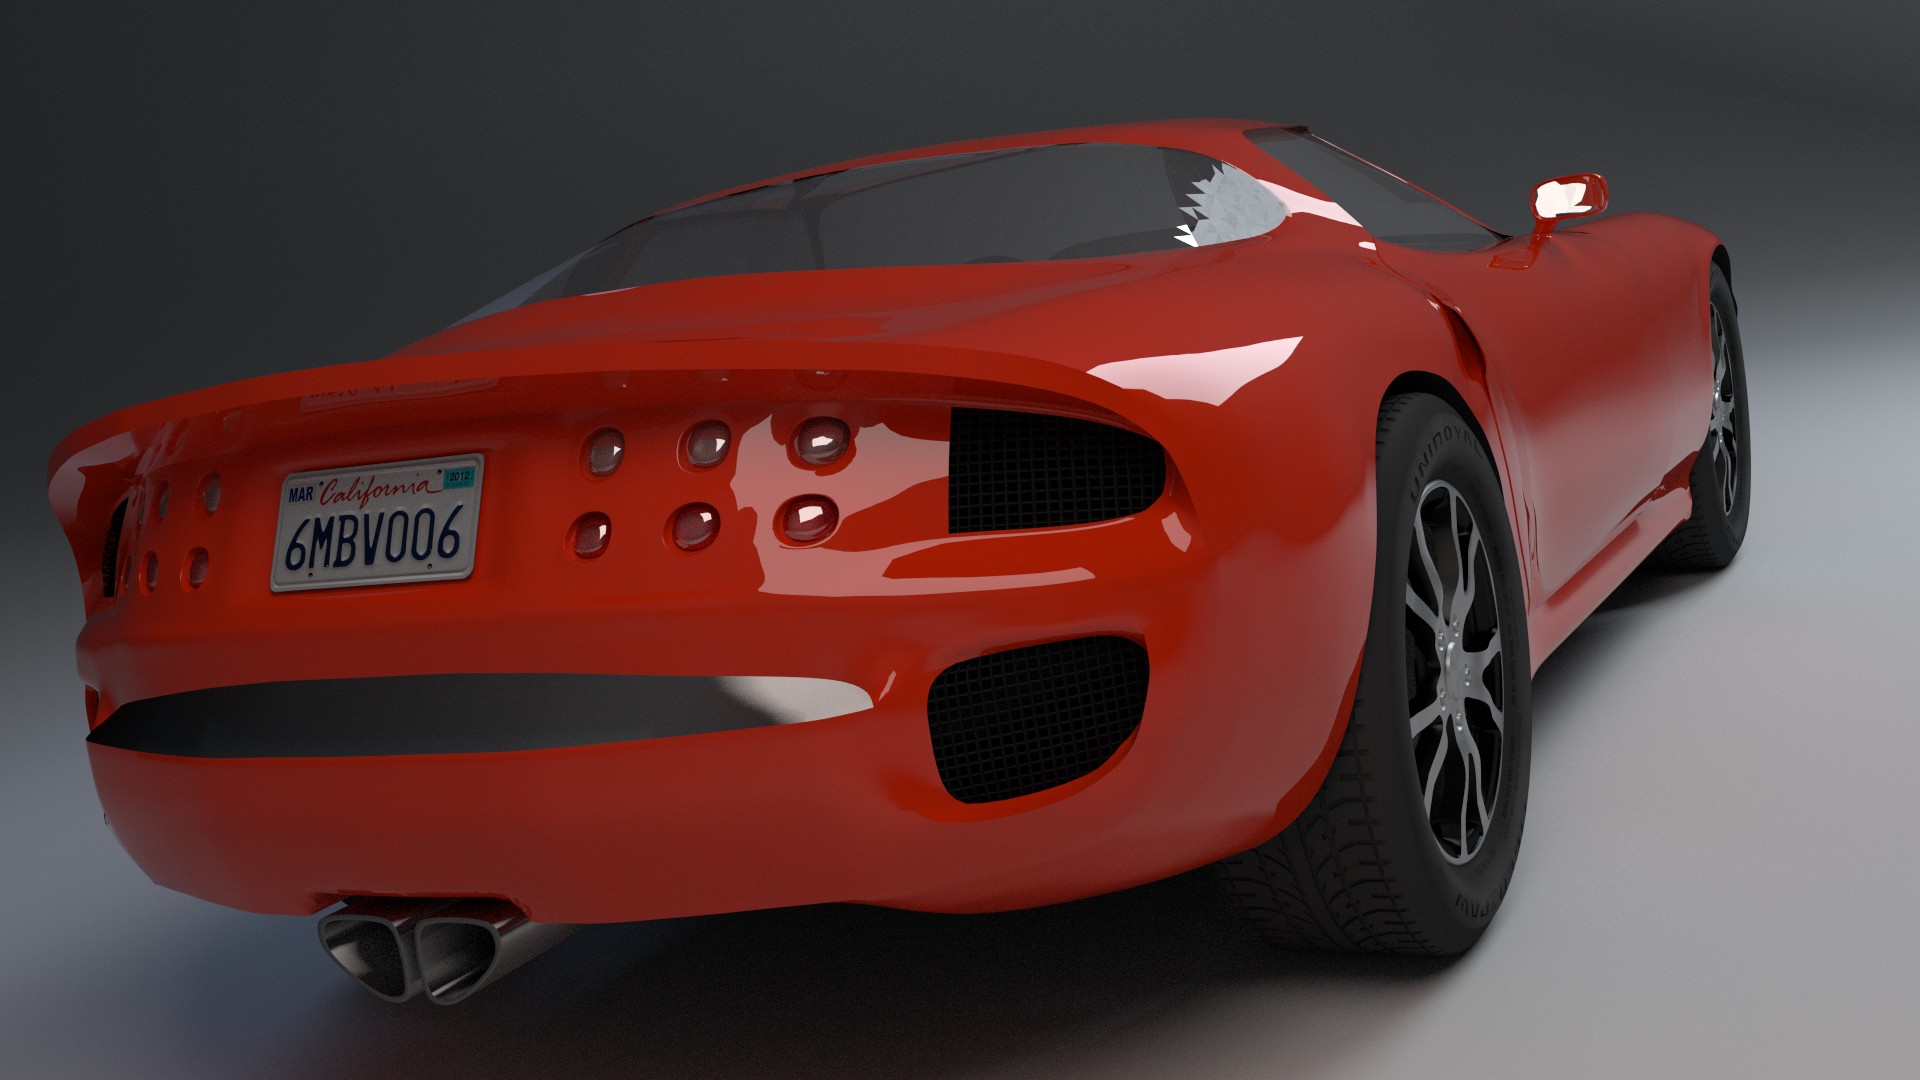
So this is my very first car. I hope you don’t mind it’s not perfect. Critiques and recomandations are permitted :D. I dont’t know if it’s offical or not, but it’s Corvette concept from 1997 and i was hoping that non-existing car will make it easier for me. Instead of it I ended up in lack of references
Improved CarPaint, no more metallic sparkling shh. Watch exhaust, better, isn’t it? There’s some weired something on the window, can anybody help me with it?
That is amazing work, somehow I missed the tutorial that @michalis gave. Looking at this thread and his, makes me want to stop the project I am working on now (Server Room), and do a space scene, or at least a Sci-Fi corridor or something.
I’ve been too thinking about joining Blender Guru’s tutorial on space corridor and michalis UV sculpting. I may try at future, but you should try first His work especially that thread is amazing. My ship is just a try but he’s the master.
HDRI lighting was first what came on my mind. I did some renders, but I decided to use my own lights So not in this case. I think you’re right with the topology. It is so obvious, shame on me. Thank you very much!
The window was strange job. I recalculated normals, removed triangle (I was doing the window half a year back when i didn’t know about flow and topology) and only thing that helped to get rid of the bad reflection was making more sudivision surface count for render.
I tried Ambient occlusion and turned it down to 0.1 Can anybody explain me what is AO good for?

 They also have been talking there about ‘maybe’ start a database of UV displacement maps. So you better search there.


 His work especially that thread is amazing. My ship is just a try but he’s the master.