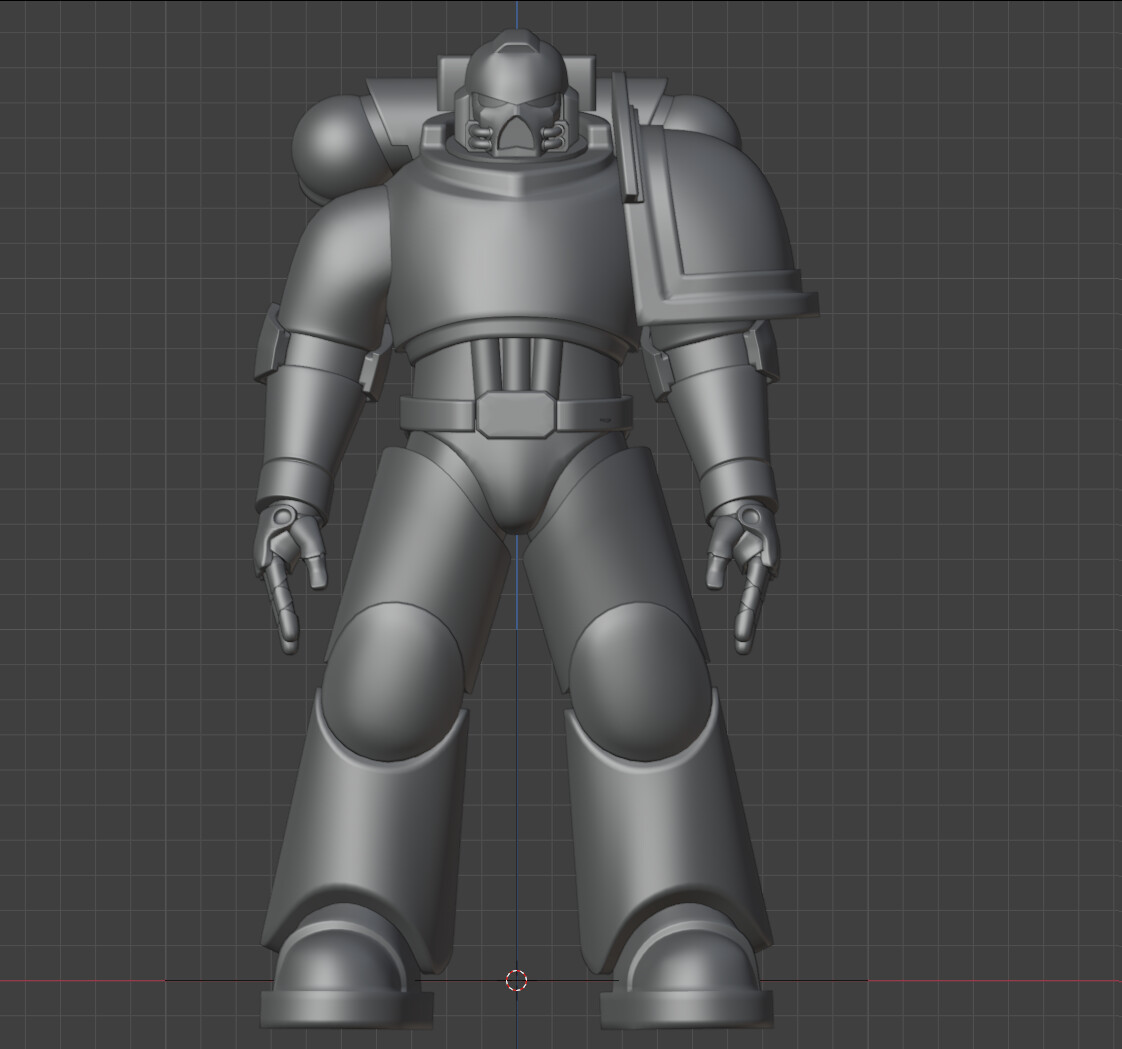
I thought I would make a thread for this personal project. I wanted to make a “realistic” space marine (40K). Obviously many have done this before, but I wanted to put my own spin on it.
By realistic, I mean trying to work from a base model and have the armour fit and be functional. It seems that usually, people model the armour from a scan of the models or just eyeballing proportions. in game models, they usually “cheat” and have the shoulders be somewhat impossible:
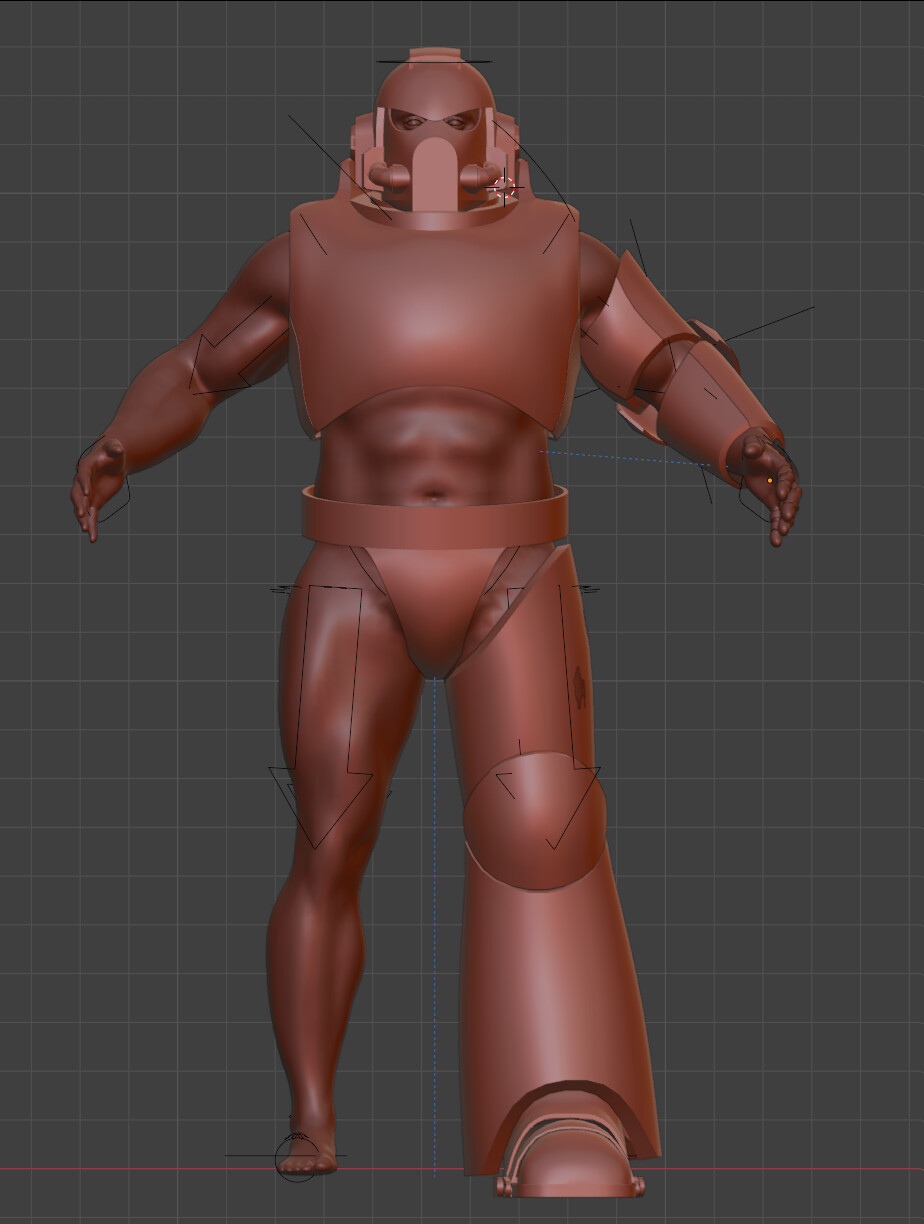
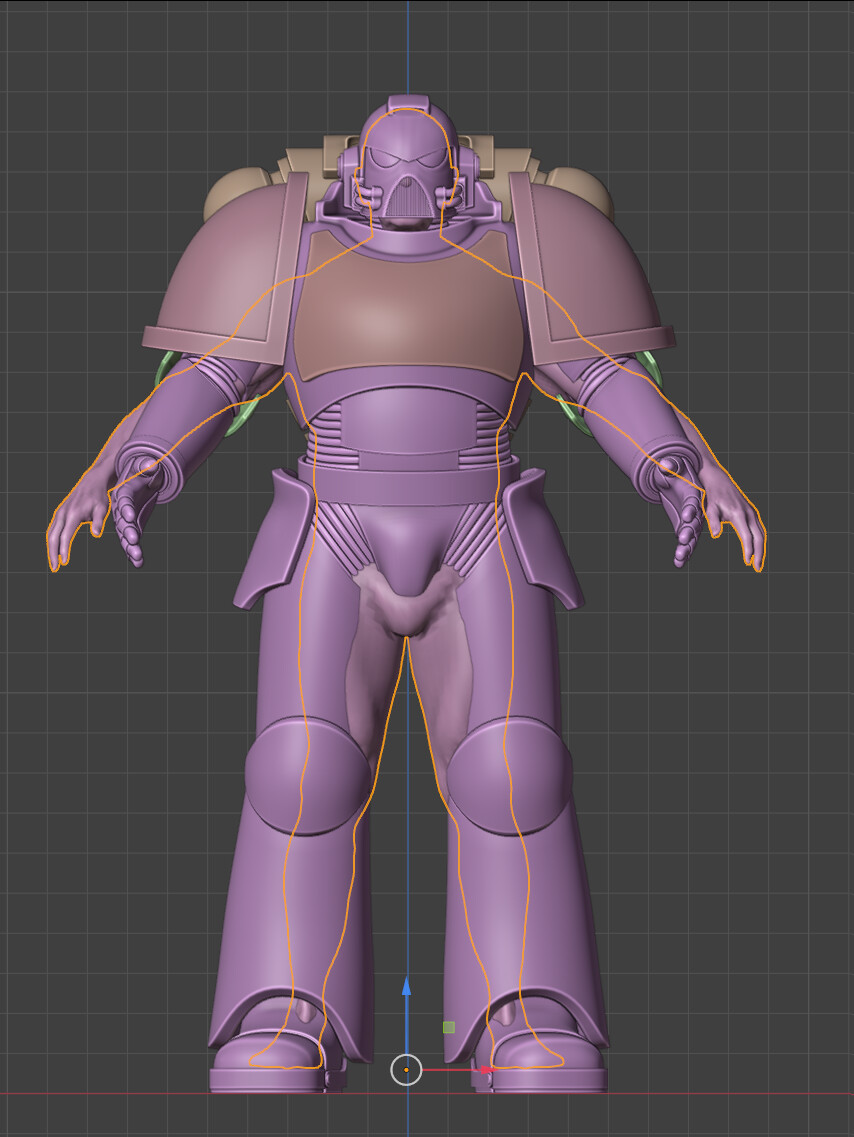
I’m not a huge fan of pinhead marines, so after a bit of looking I decided to start from a power lifter / strongman type base mesh (I didn’t make this, it’s a scan of a real person). I very roughly increased the size of some muscles and then widened the hips a little, and scaled it to around 7ft tall. This will not be part of the final mesh so it’s just a guide for proportions and to see how armour might pinch or intersect.
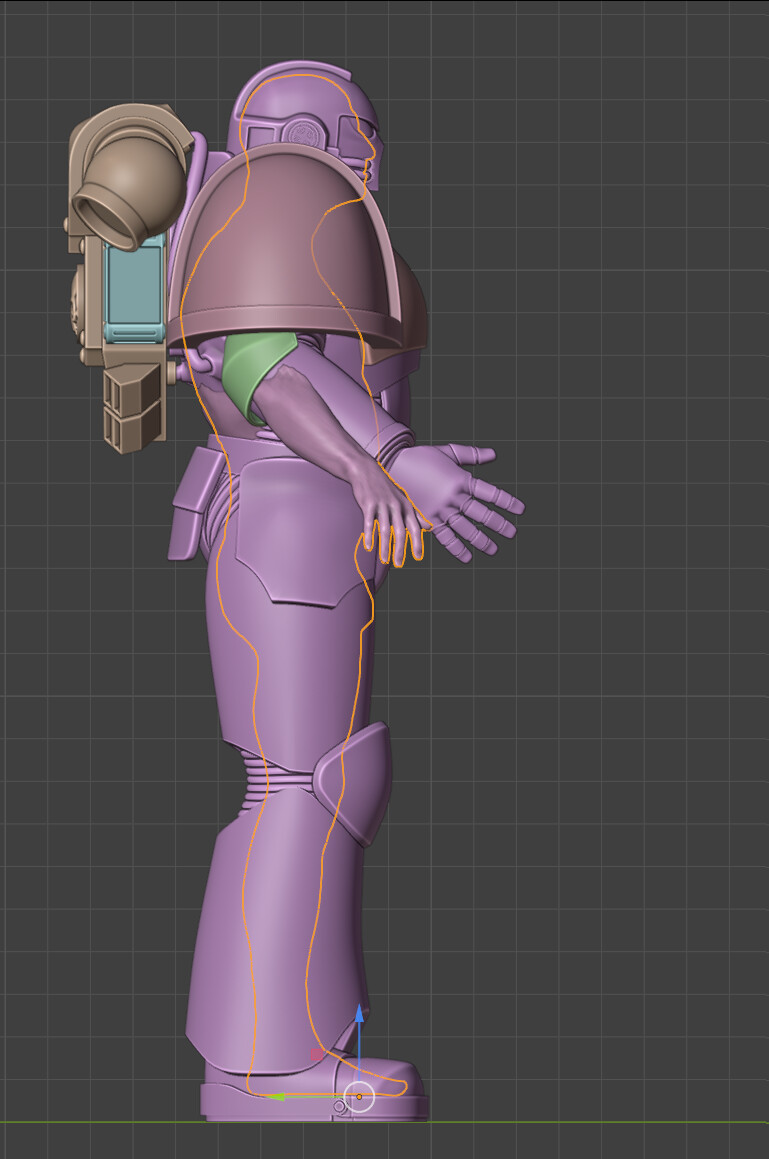
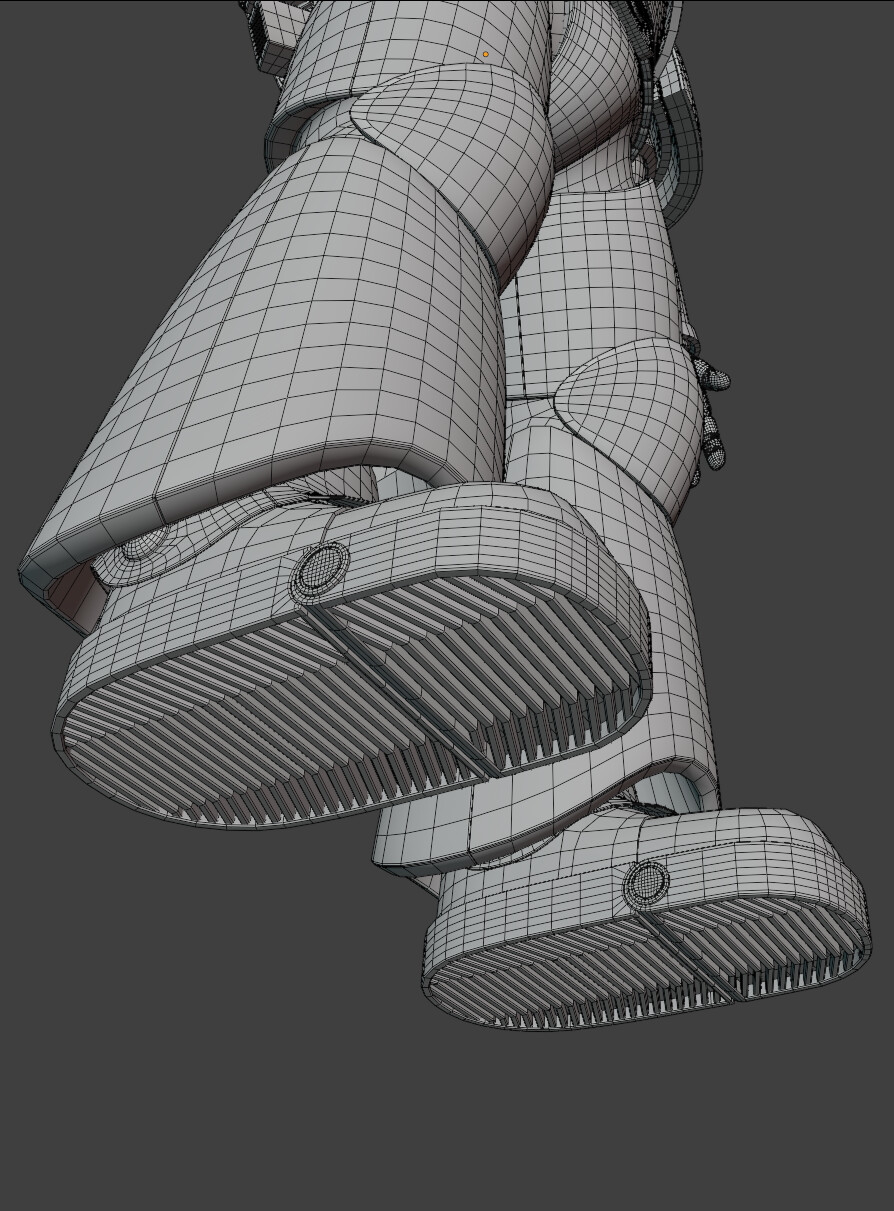
I had to edit the arm pieces so that the elbow could bend without intersection, and shorted the upper arm parts so that the marine could drop his arms by his sides (this is still basically impossible unless you dramatically widen the shoulders). The feet needed a design change so they could actually flex. In the original design it doesn’t seem possible.
There also needs to be some expansion areas for biceps and laterals. In the lore the armour is apparently in single parts “to make it easier to produce” but this doesn’t make much sense in 3D with movement. I’d like my marines to be able to drop their arms, put them out in front, lift them, etc. I’ll try to keep the armour as slab like as possible and in a few parts as possible, but it seems some flex is just a biological necessity.
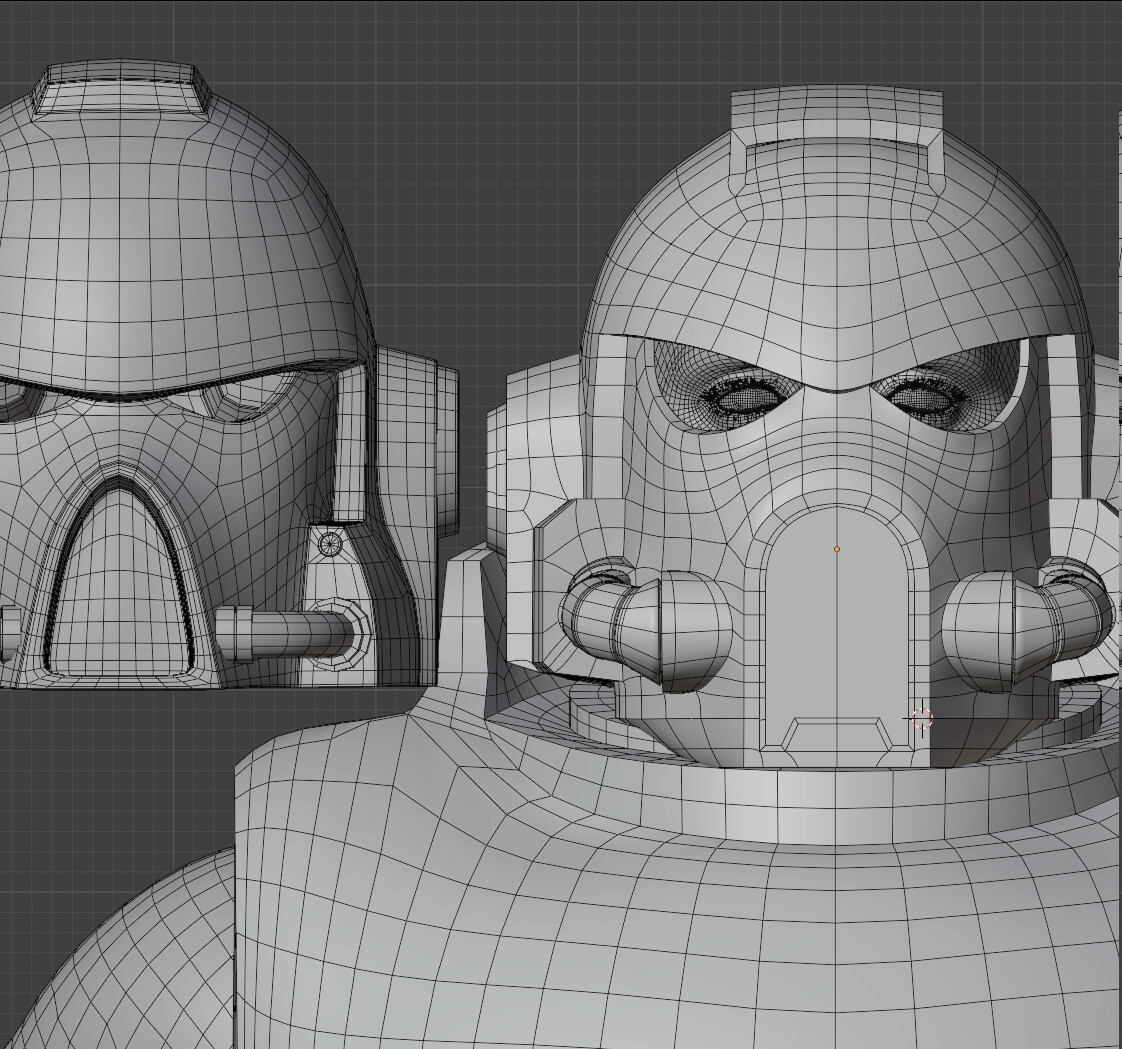
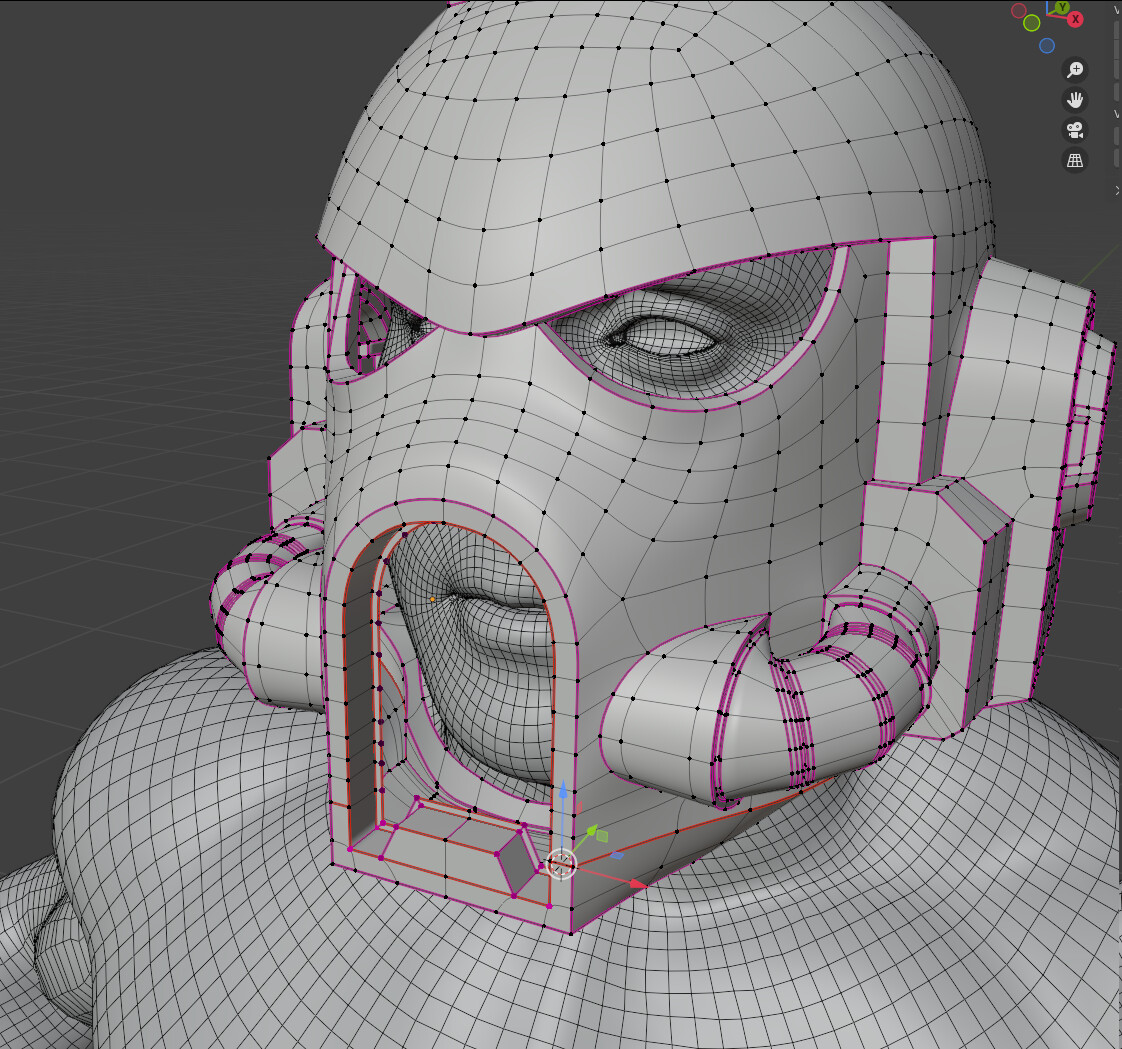
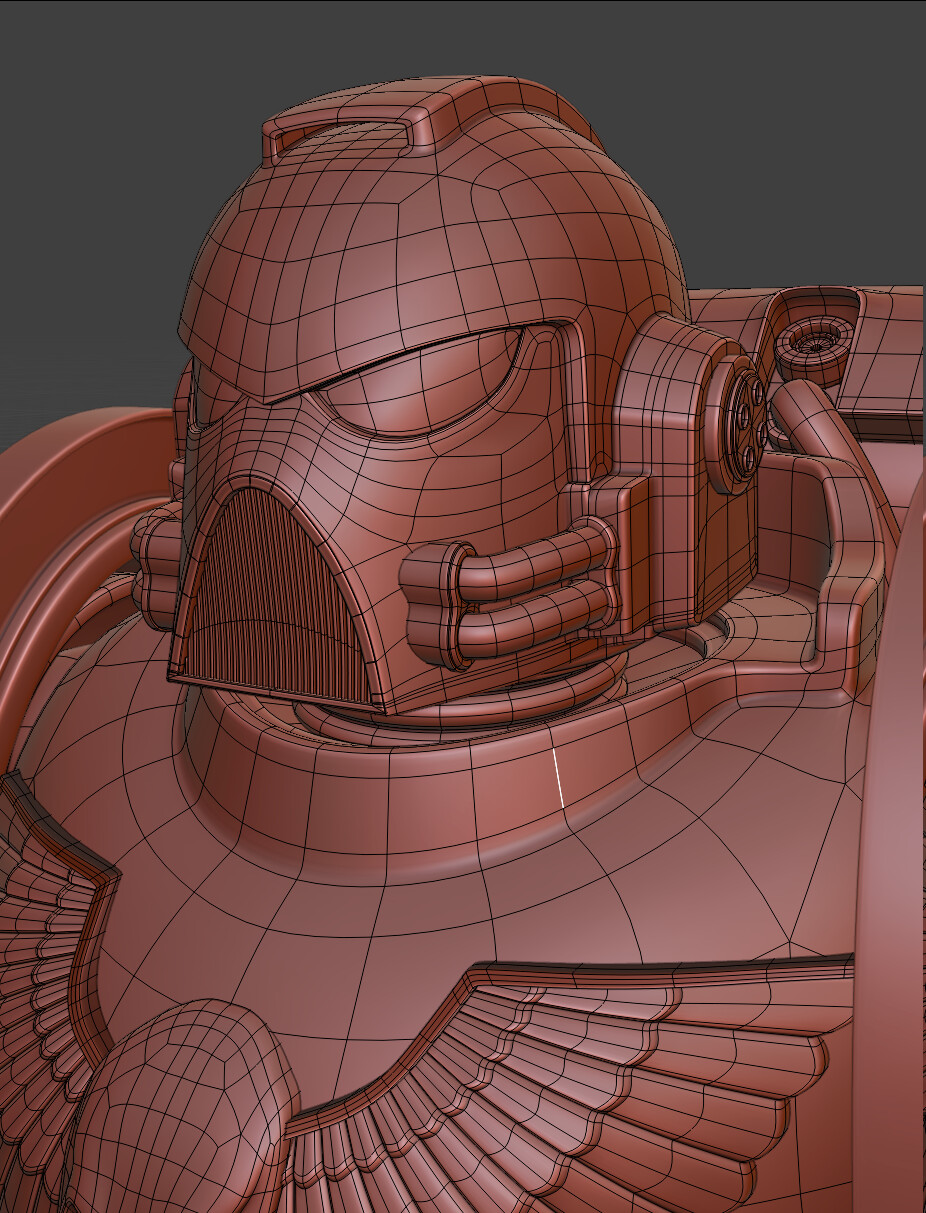
The original proportions of the helmet also needed changed - the bottom of the helmet sat too high and would not fit over the jaw. In the final rig the neck will also need lengthened to avoid intersecting the chest/neck ring. In general it seems marine heads are very small in artwork, which to me is odd. I decided to keep mine more in proportion for now. I’m going to change the mouth opening to be more like the classic models - mine currently doesn’t quite look disgusted enough.
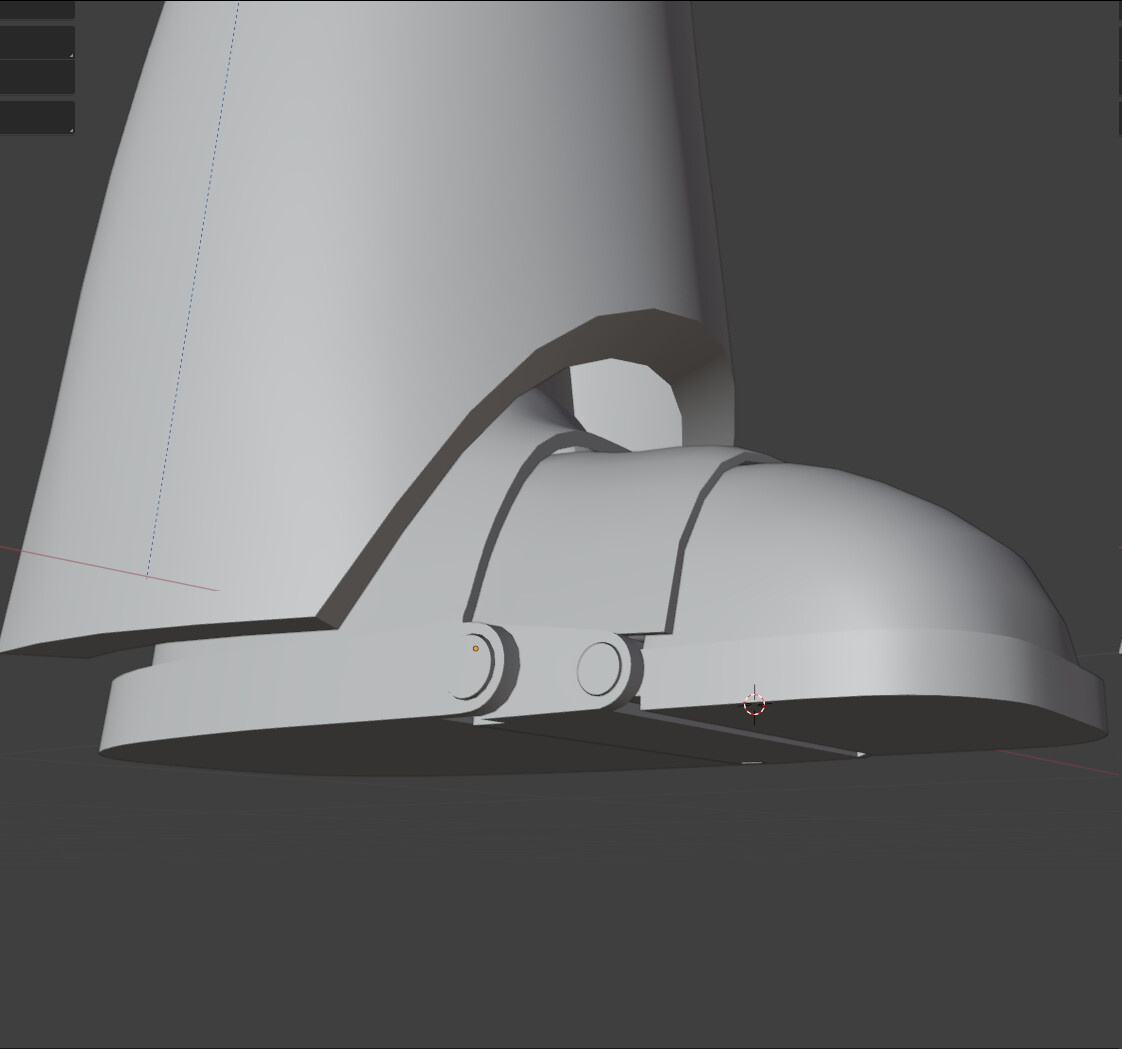
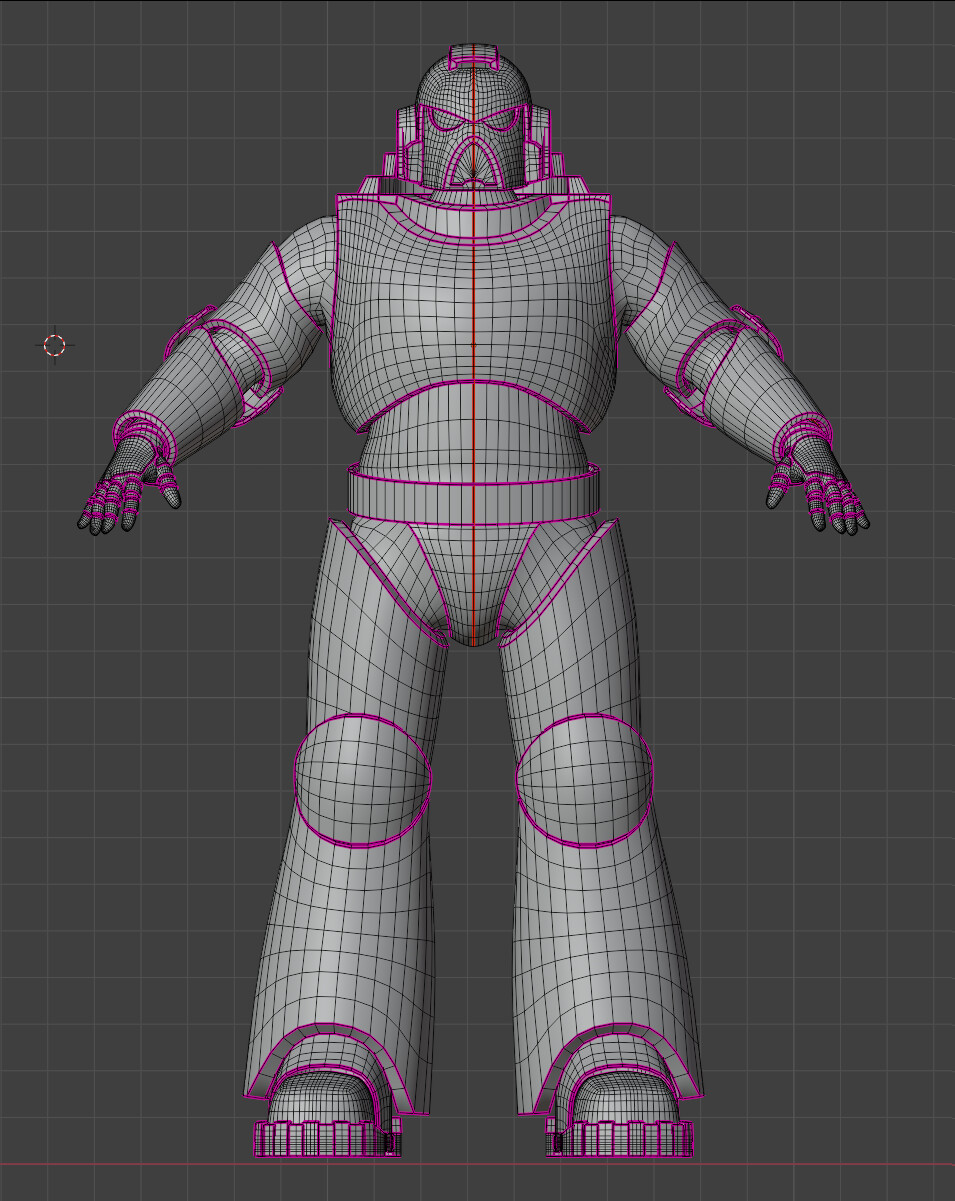
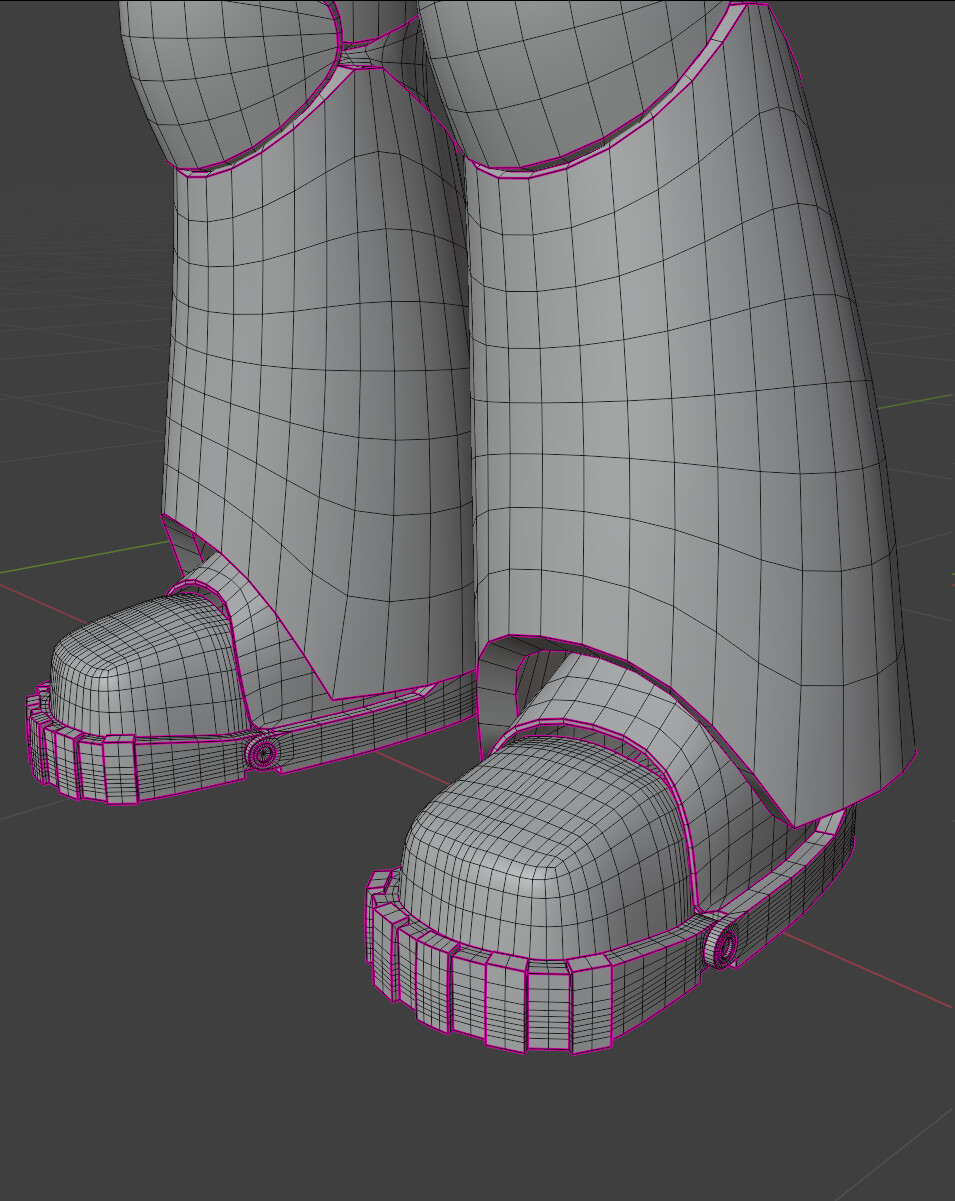
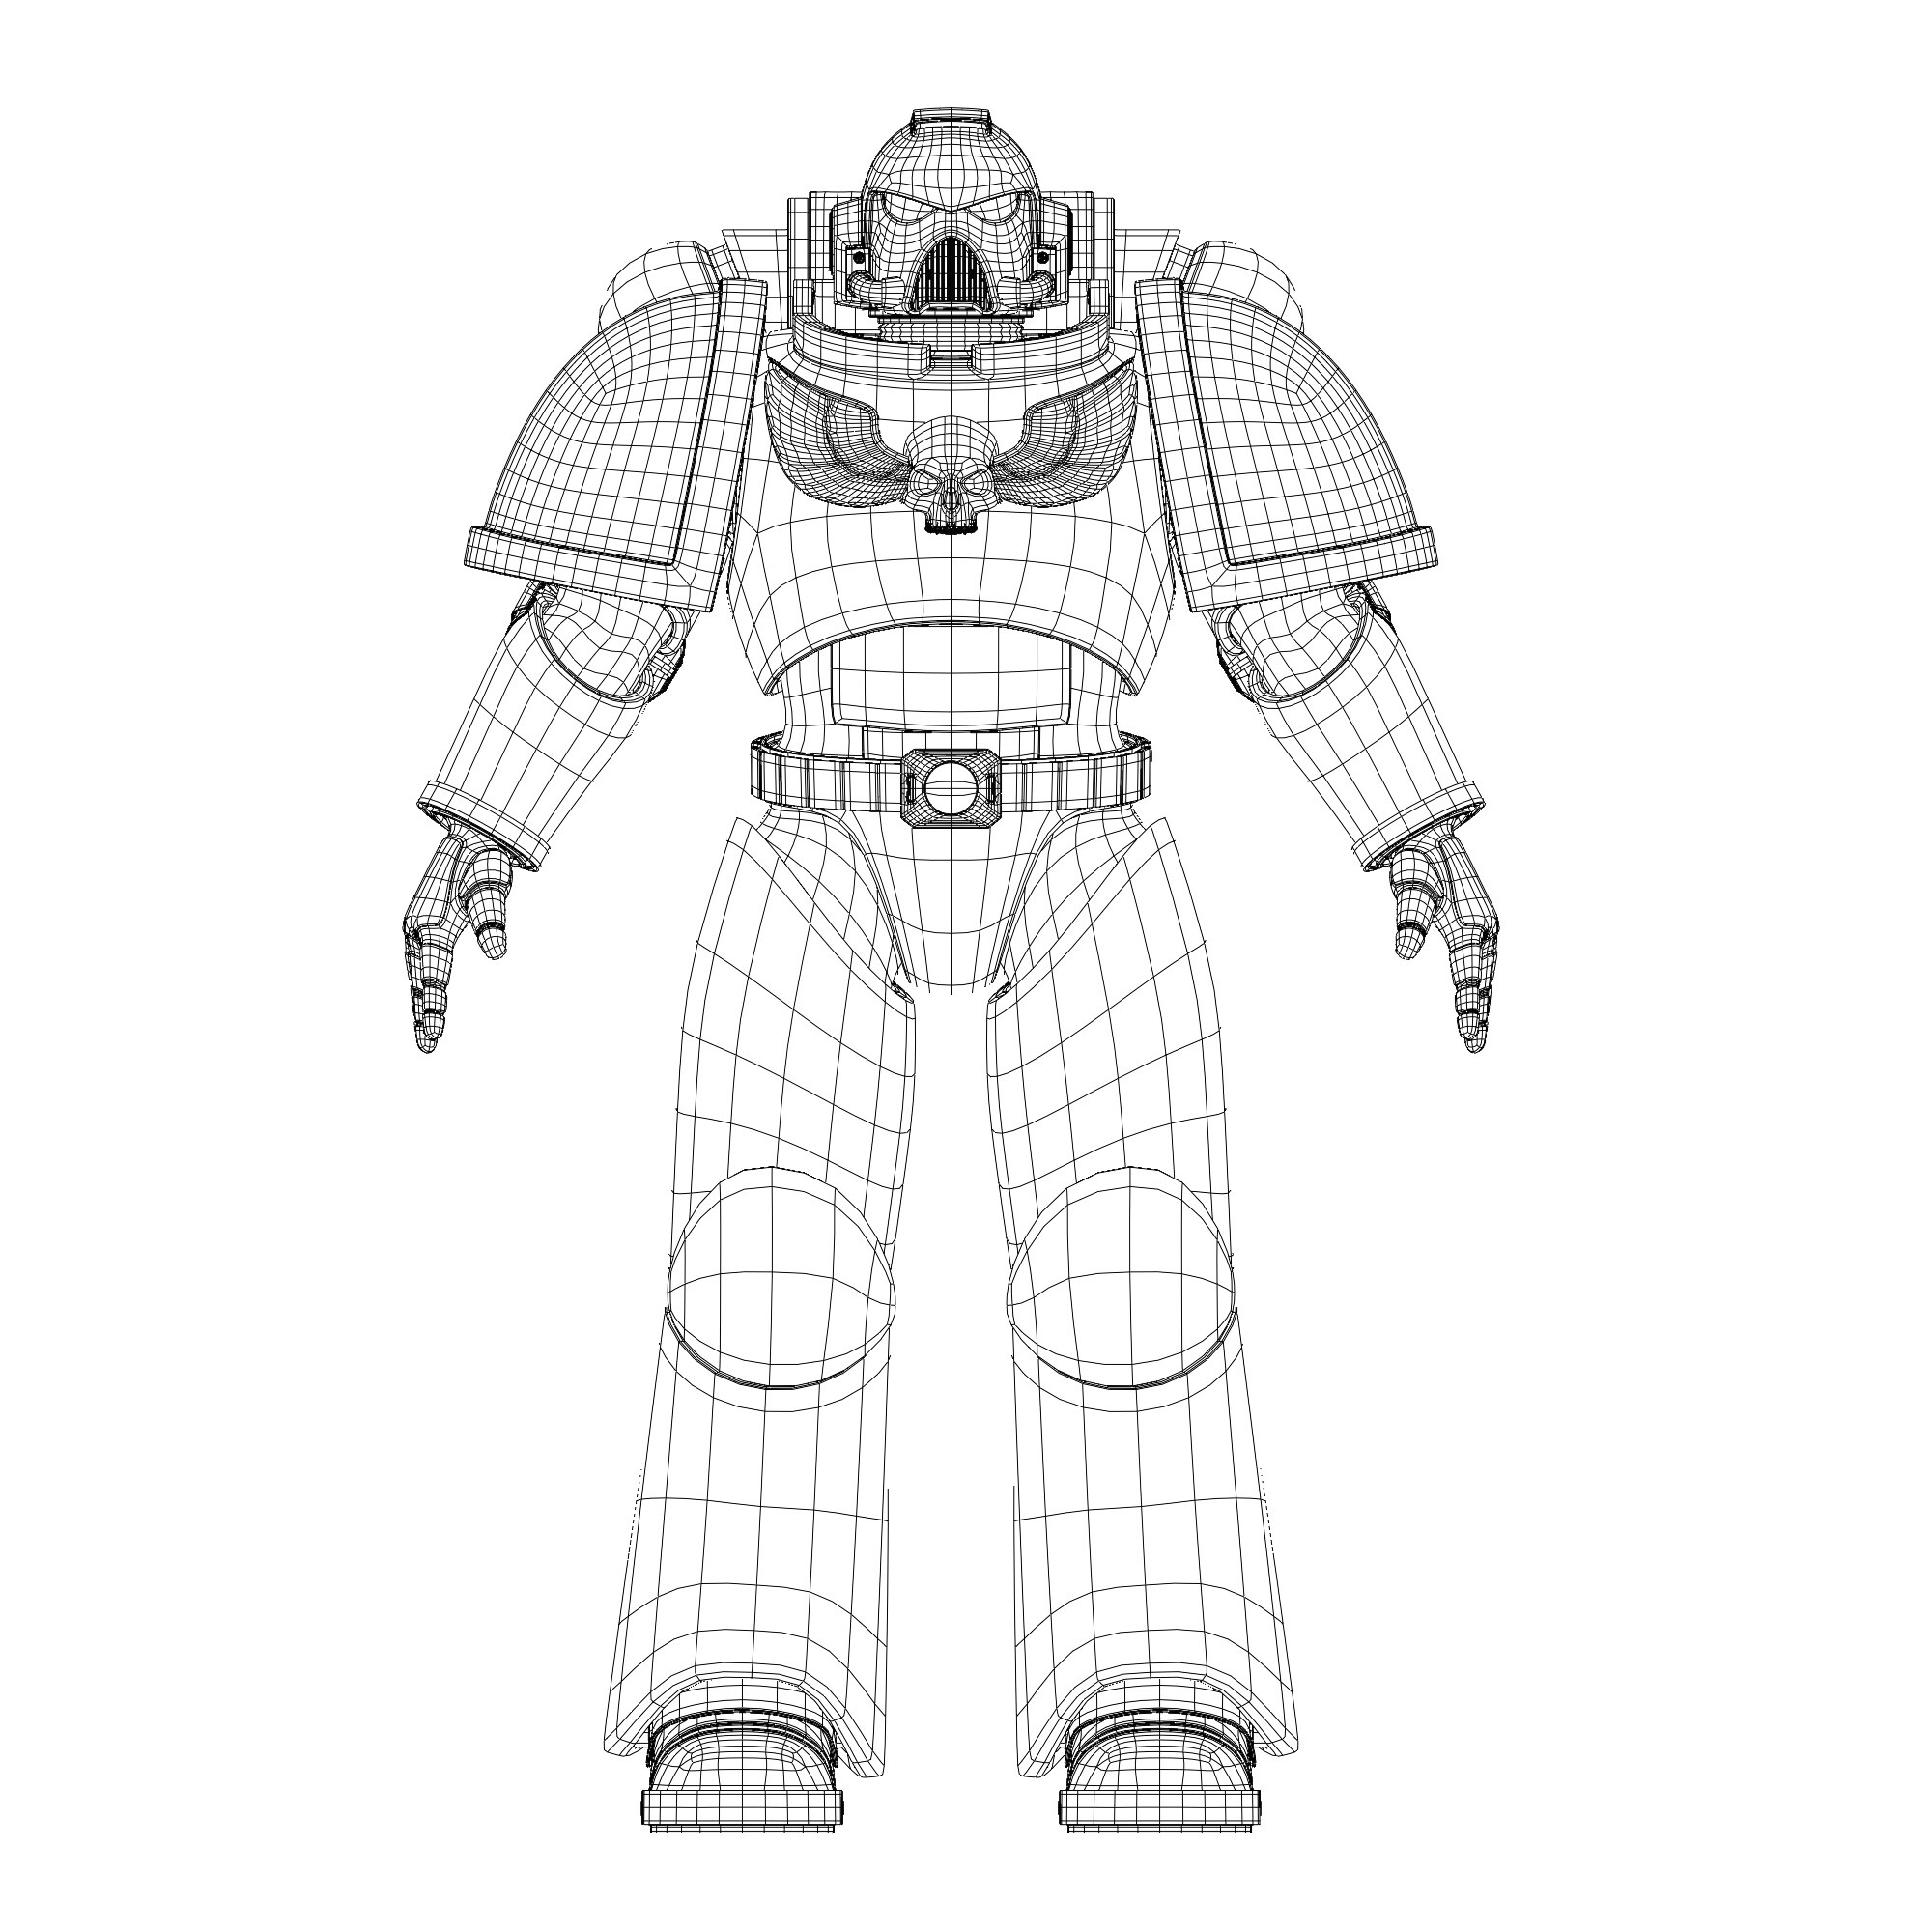
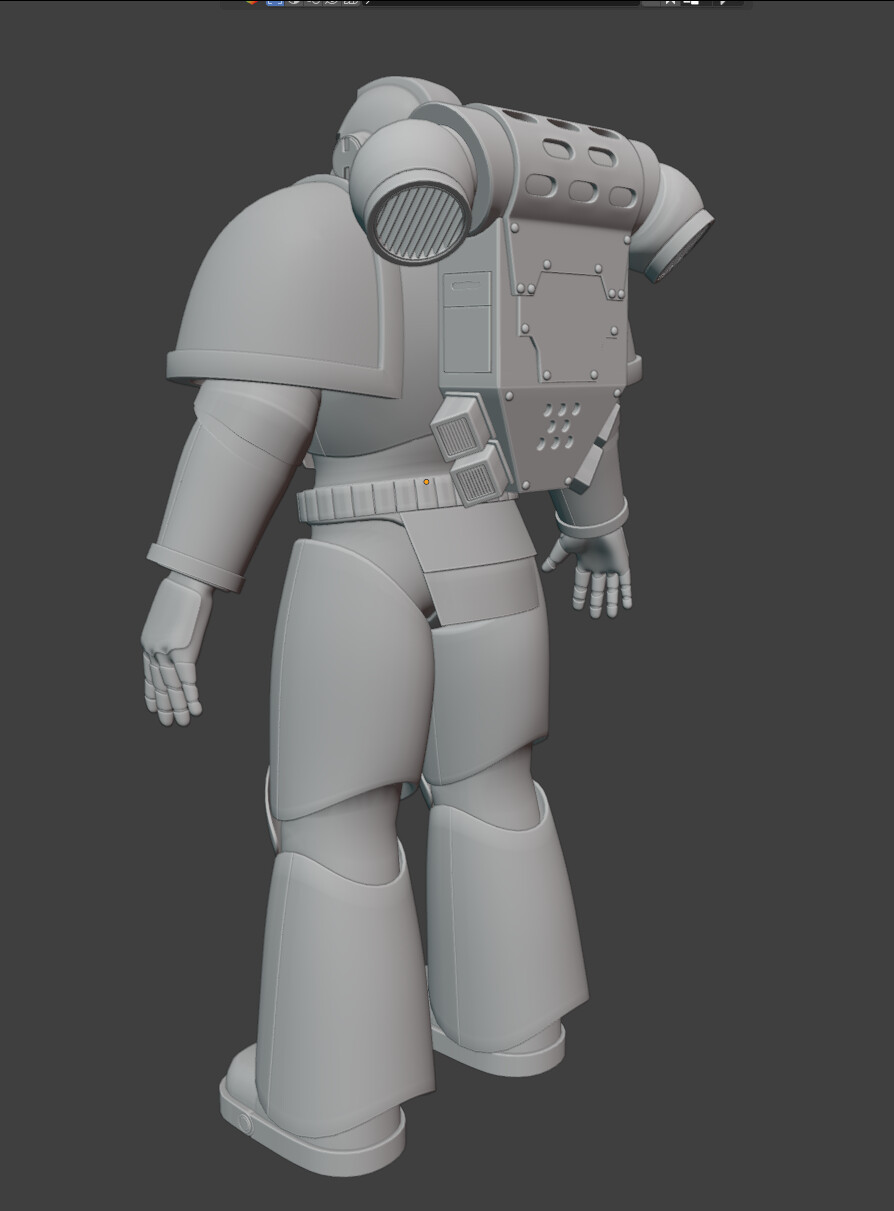
I redid the helmet - I just retop’ed an STL scan, altering things as required. I also remade the feet, and made the hands. I did have to make some alterations to the positions of the armour - the hips and shoulders are wider apart, there is no real way to make them work properly otherwise. It’s not so crazy however, he has an overall sort of V-shape that is not too exaggerated.
The feet also work, whilst being more like the original design.
It’s currently almost entirely quads (tris on flats on helmet, soles of feet), manifold*, and sitting about 25k verts (and I could reduce this, certainly some areas are over-dense). Next is to make the powerpack and figure out the shoulder pads.
*there is a gap between the toe and foot, but all the joints and armour plates are attached.
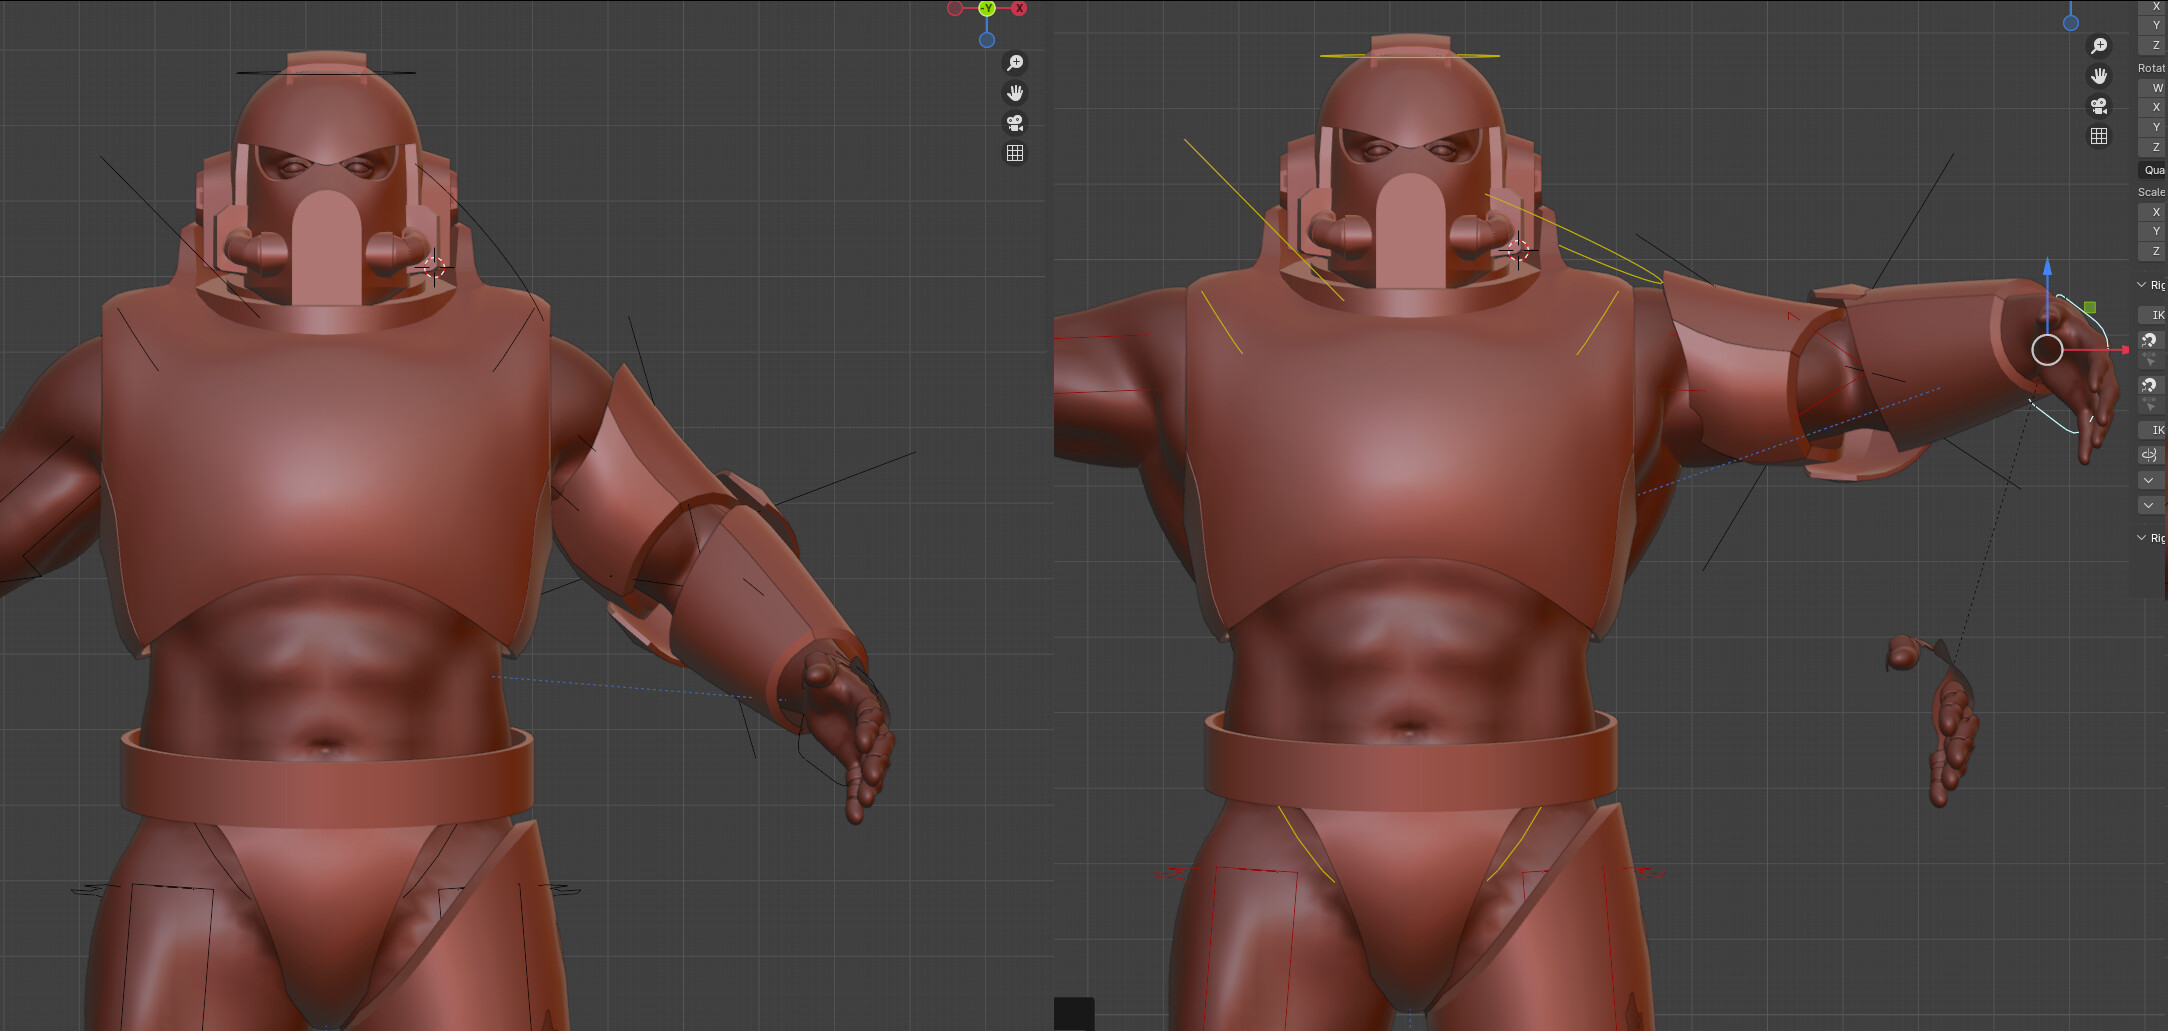
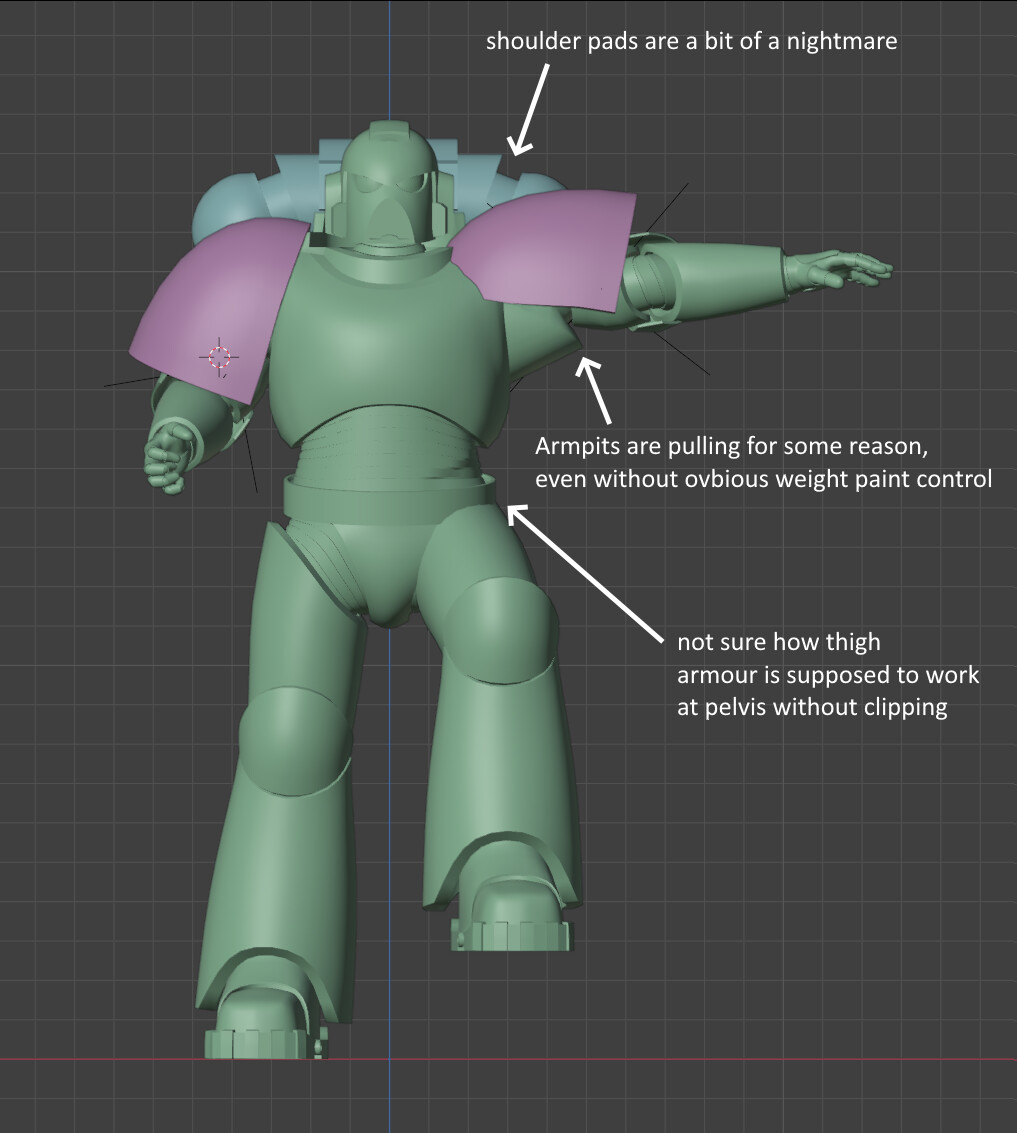
Been slow going, I am still fighting with rigging as I am not that knowledgeable about using rigify etc. I think this image highlights the main issues I have at the moment:
I’m having a bit of a hassle with the weight painting, I am not always sure which bones are actually involved in an IK chain when using rigify (I will paint all the DEF bones that seem to be involved, only for some faces to be left behind when I start moving the arm etc.).
I also tried to use this method for the shoulder pads, but I can’t quite figure this out. I think I need to have the pauldron bone parented to something else, given the ‘clavicles’ don’t move (armour). Once I have everything rigged I can position the backpack and make some final edits to the form, then sculpt details for the normal map using multires.
you might try using an “Action Constraint” - just do a simple animation of the pauldron moving out of the way, save it as an action, then drive that action with the constraint. It’s a really handy way to make complex rigs without having to solve complex problems - just do it by hand once and save the result.
I’ll look into action constraints, it’s not something I have used before.
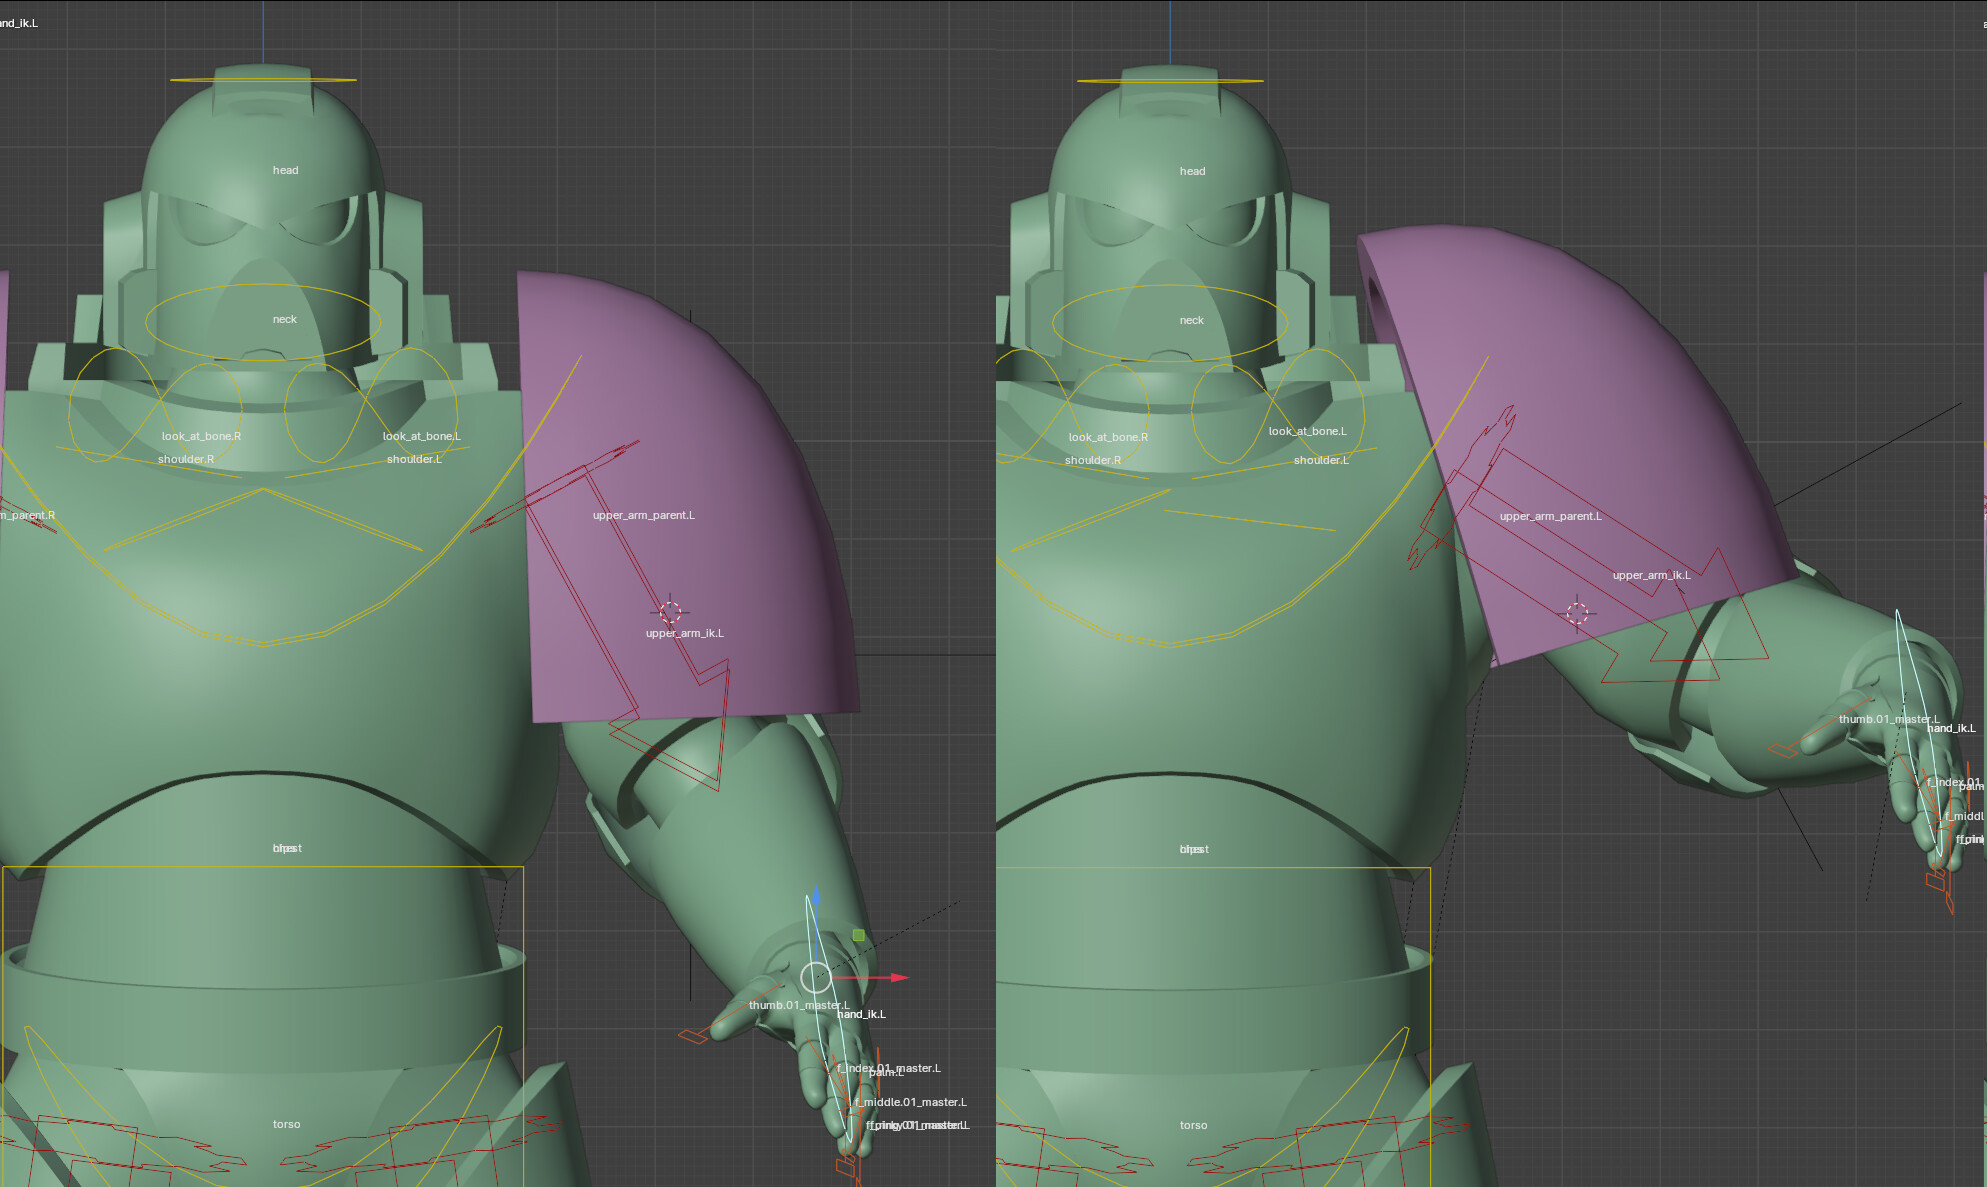
I did manage to finally figure out the ‘look at’ method:
Place an empty on the upper arm bone. Use an object constraint to parent the empty to the bone.
Rename or create bones called ‘look_at_bone.L’ and ‘look_at_bone.R’ (I used the existing breast bones). For each, add a bone constraint - track to, and set the target as the empty.
Add an object constraint > ‘child of’ to the shoulder pad, and set the parent to the corresponding ‘look_at_bone’.
It doesn’t work perfectly, but it gets close for less extreme movements. Moving the upper arm empty is a fairly simple way to adjust the position as well.
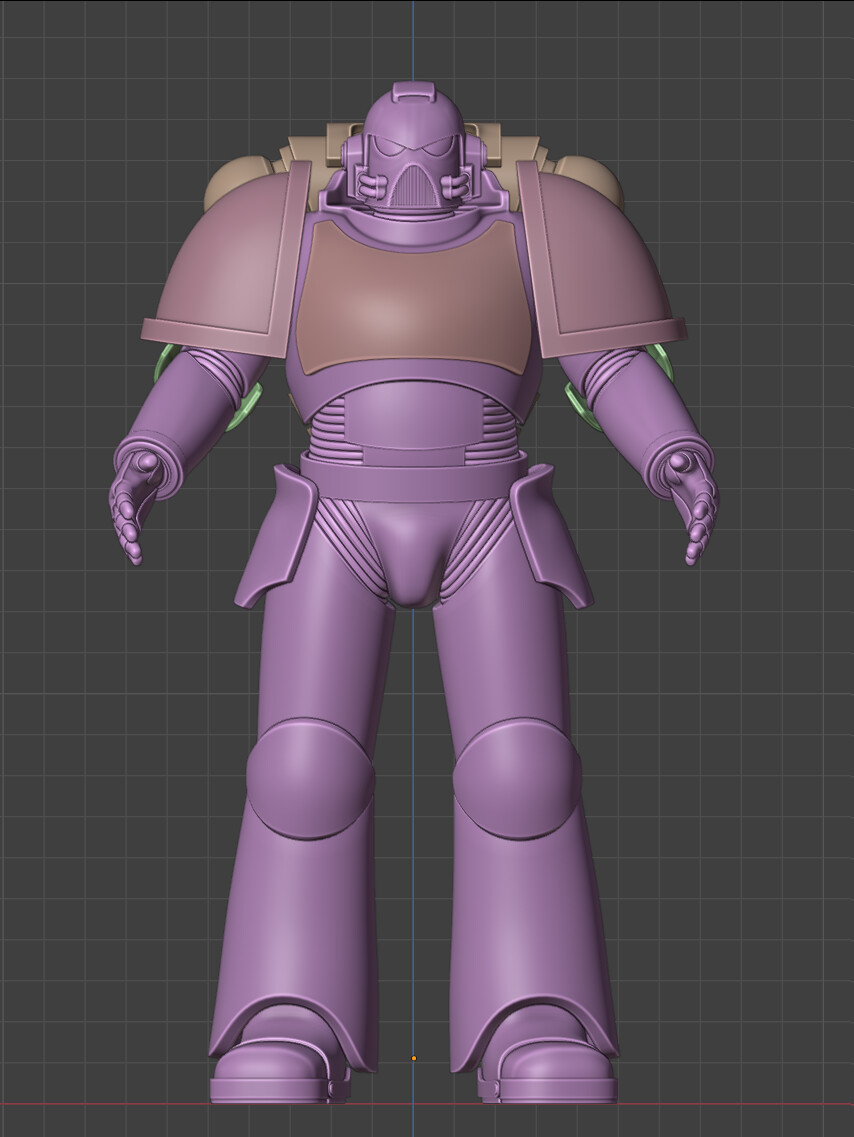
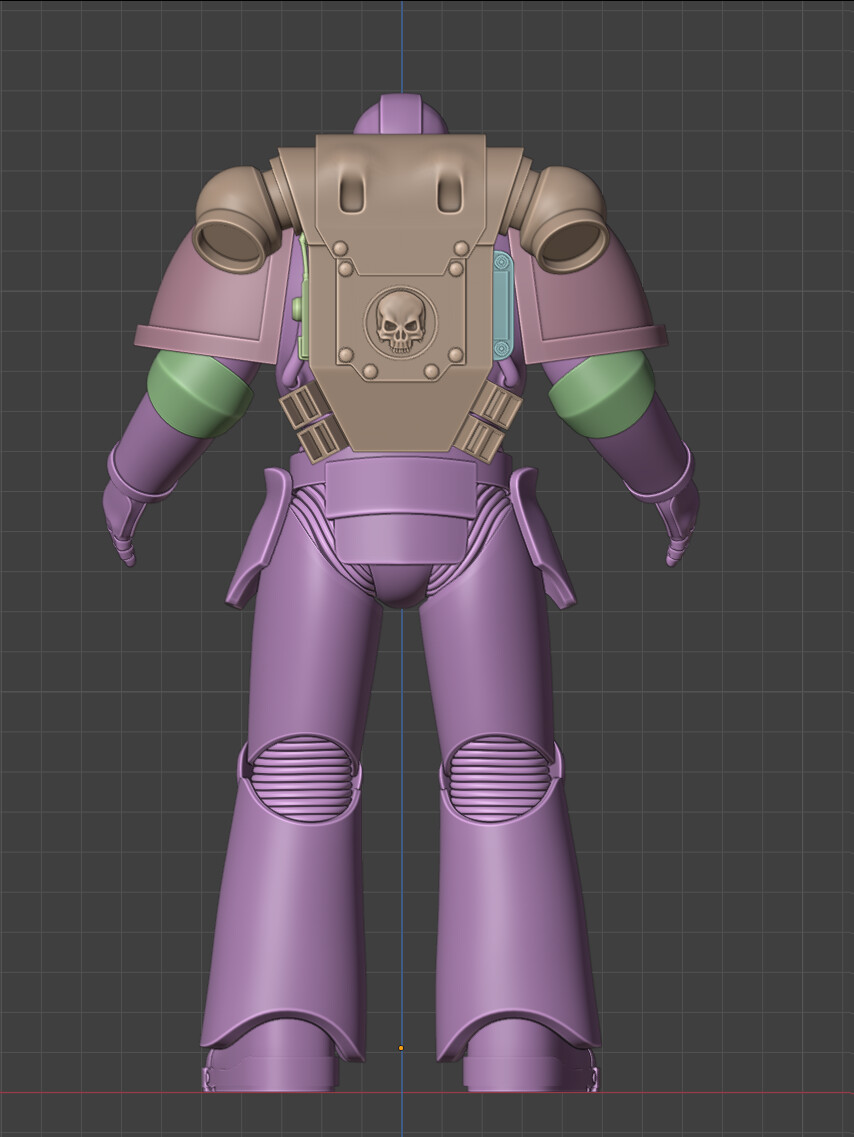
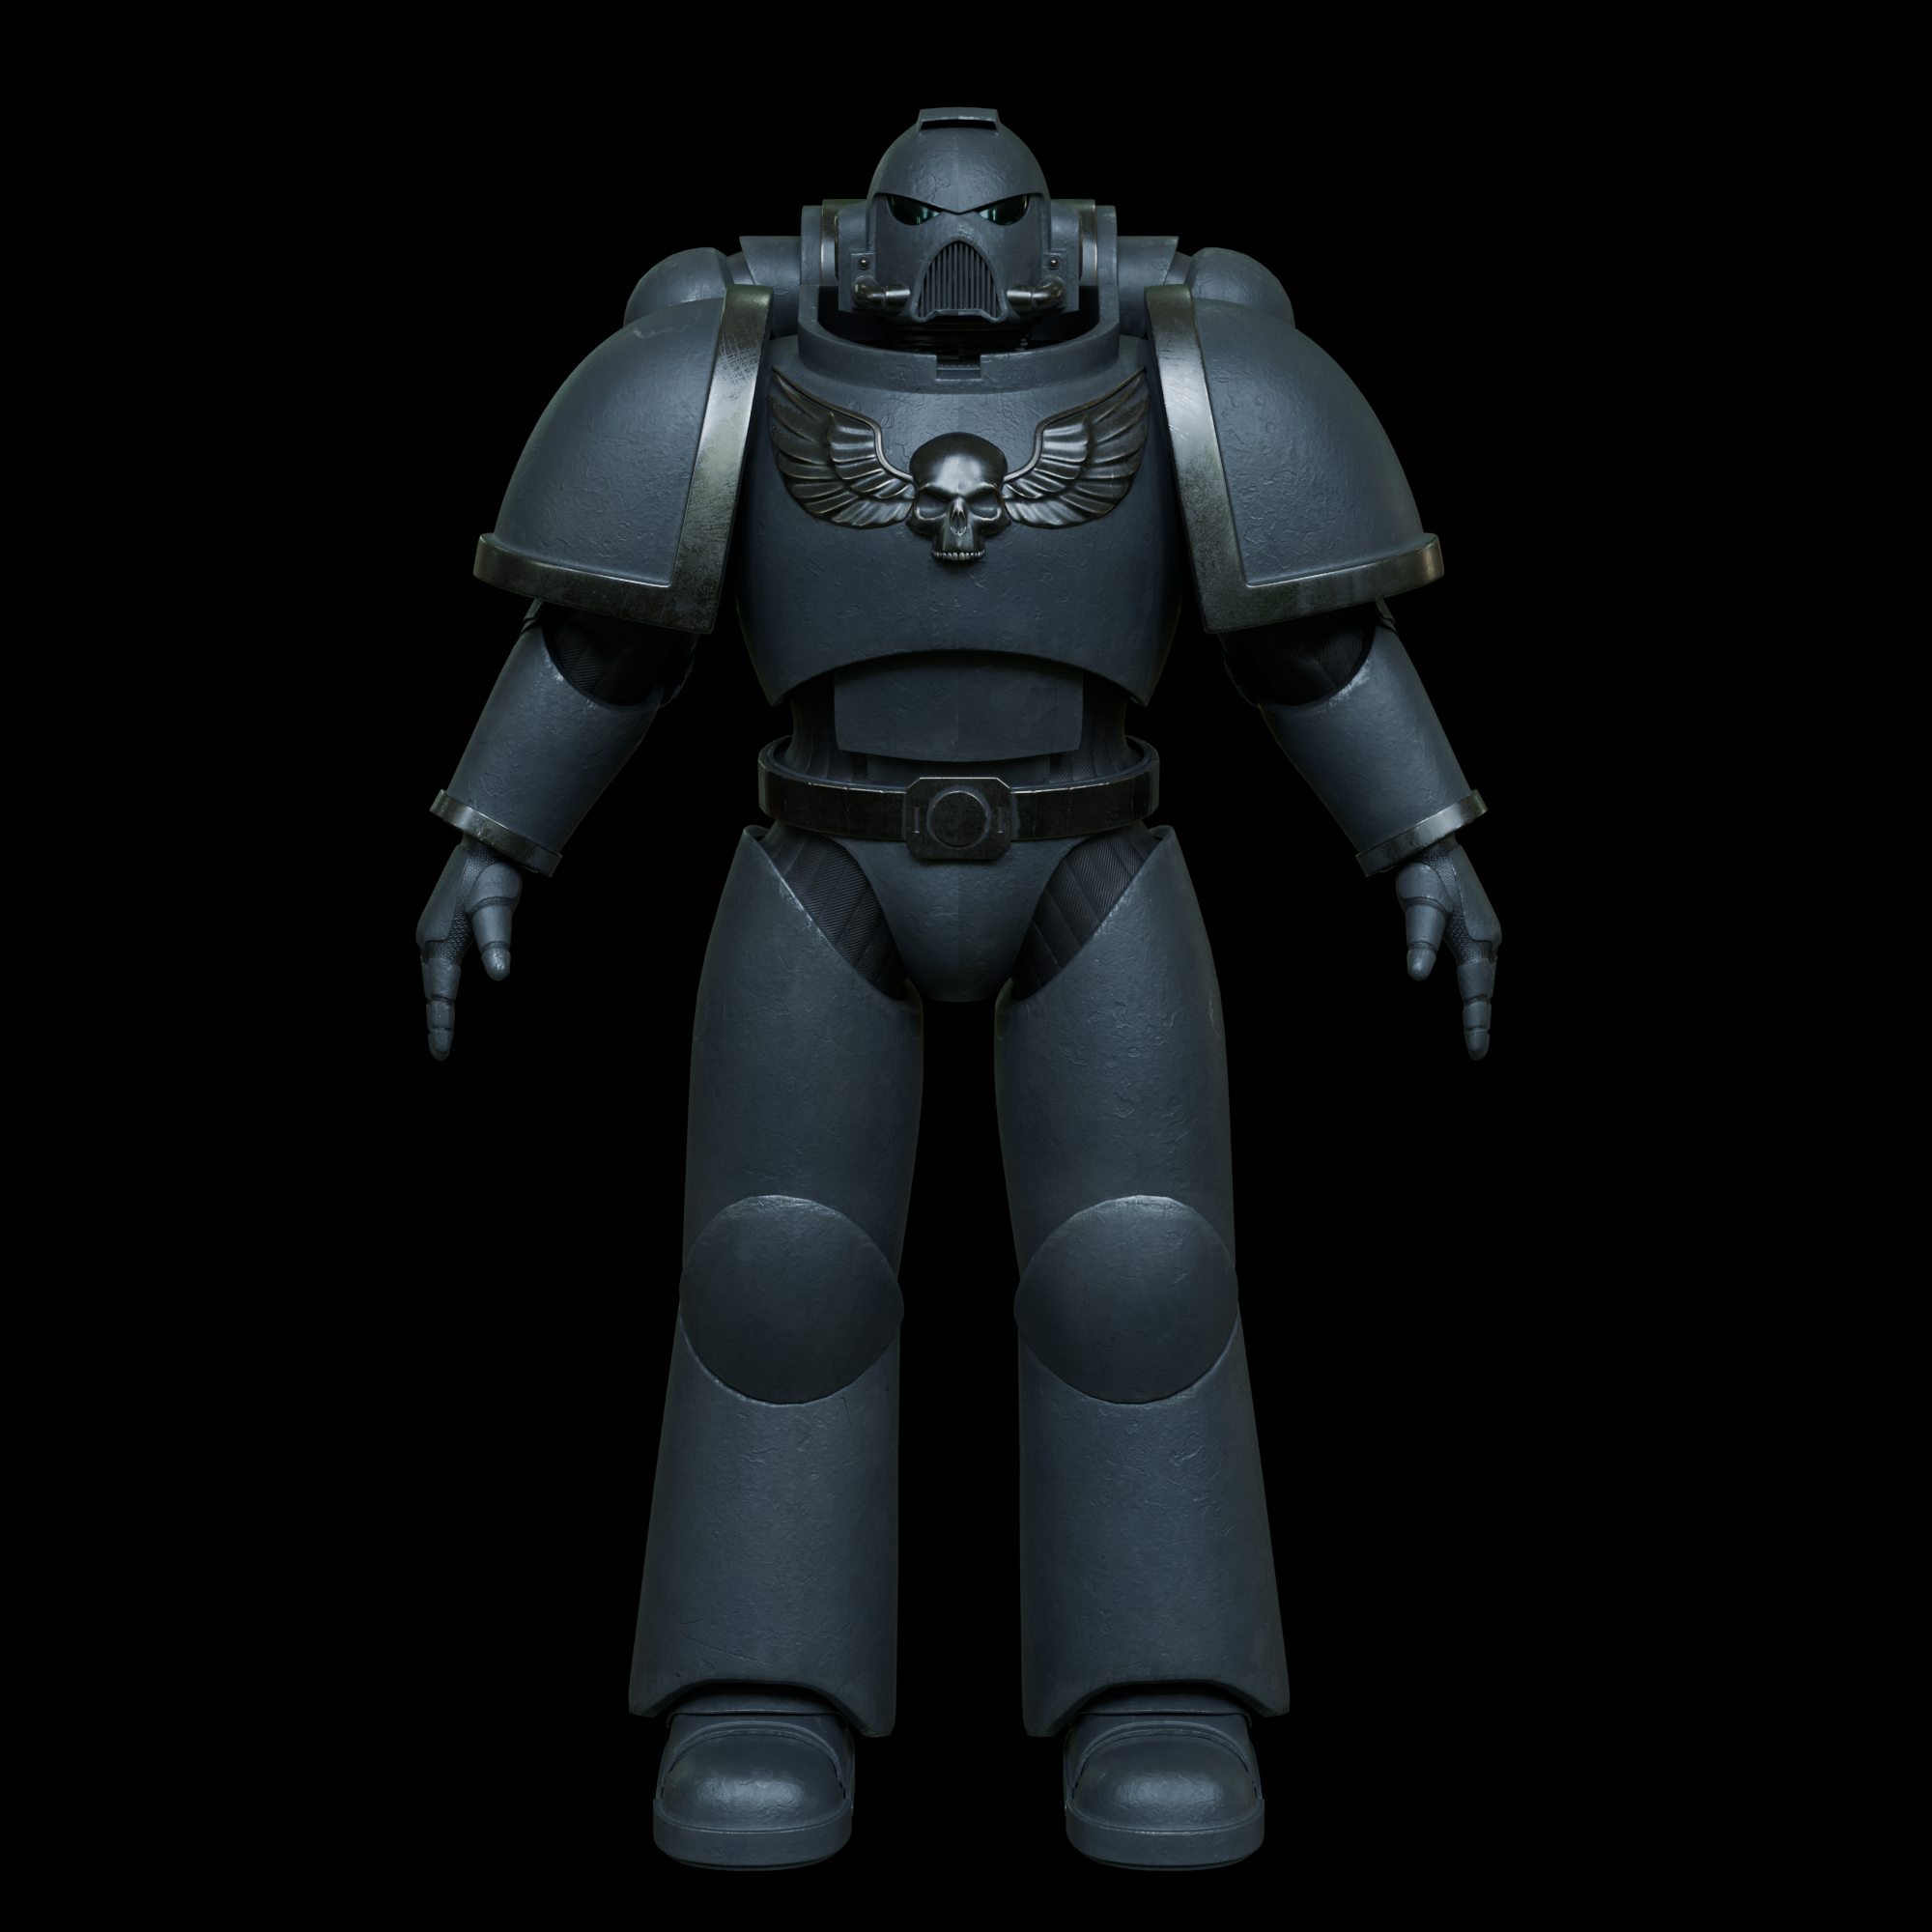
After a bit of a hiatus (I moved house, etc.) I decided to rework this.
I focused just on making the topology better (with aim of it being subD) and making the proportions a bit chunkier.
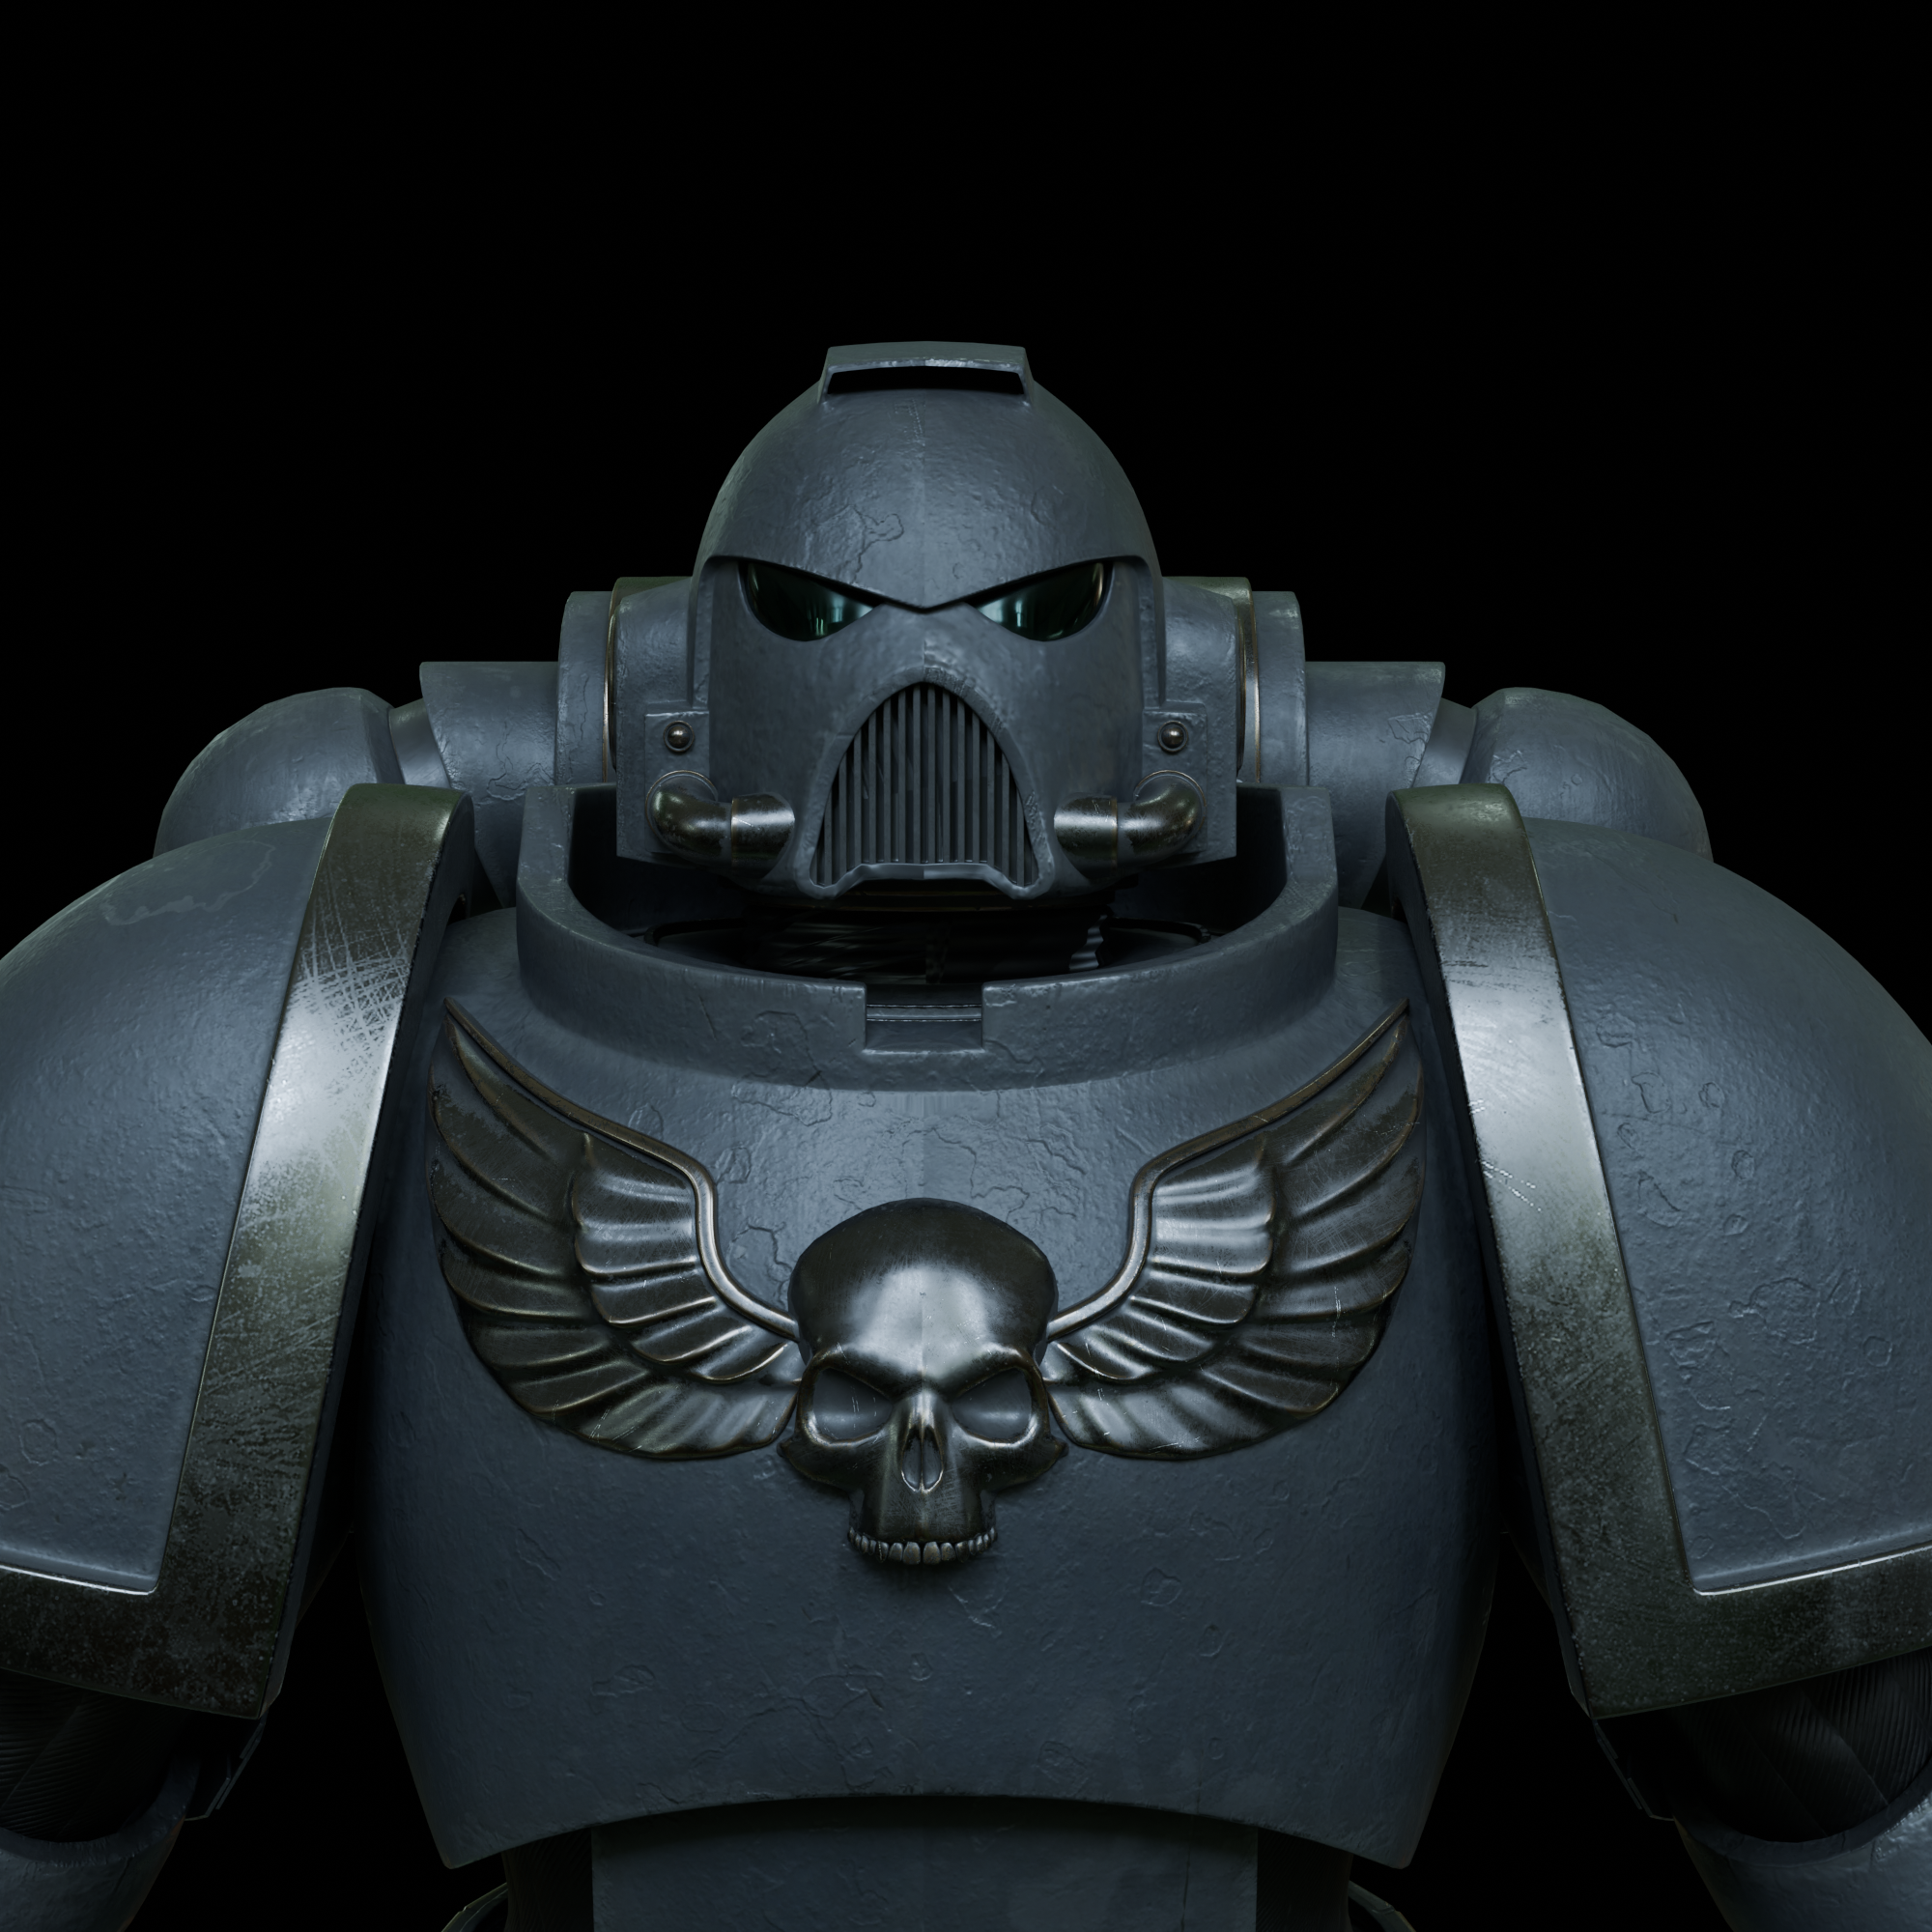
The armour itself is a mix of different aspects - mostly Mark VII / VIII but with some Primaris aspects. I really don’t like the new GW designs, especially the helmet - the look of disgust in the older helmet design is IMO, what really sold space marines.
It’s now UV unwrapped, and I spent a lot of time today trying to figure out how to rig this. The shoulders remain a problem, as are the elbows. I think the toecaps would benefit from a simple parent to bone arrangement as separate objects, so that I can control the angle of rotation more easily (they keep popping out of the socket otherwise). I just want it rigged so I can make any final tweaks to the shape of armor at the joints, then I can finally start sculpting the high poly version, and texturing.
Been busy, but still worked on this project a little.
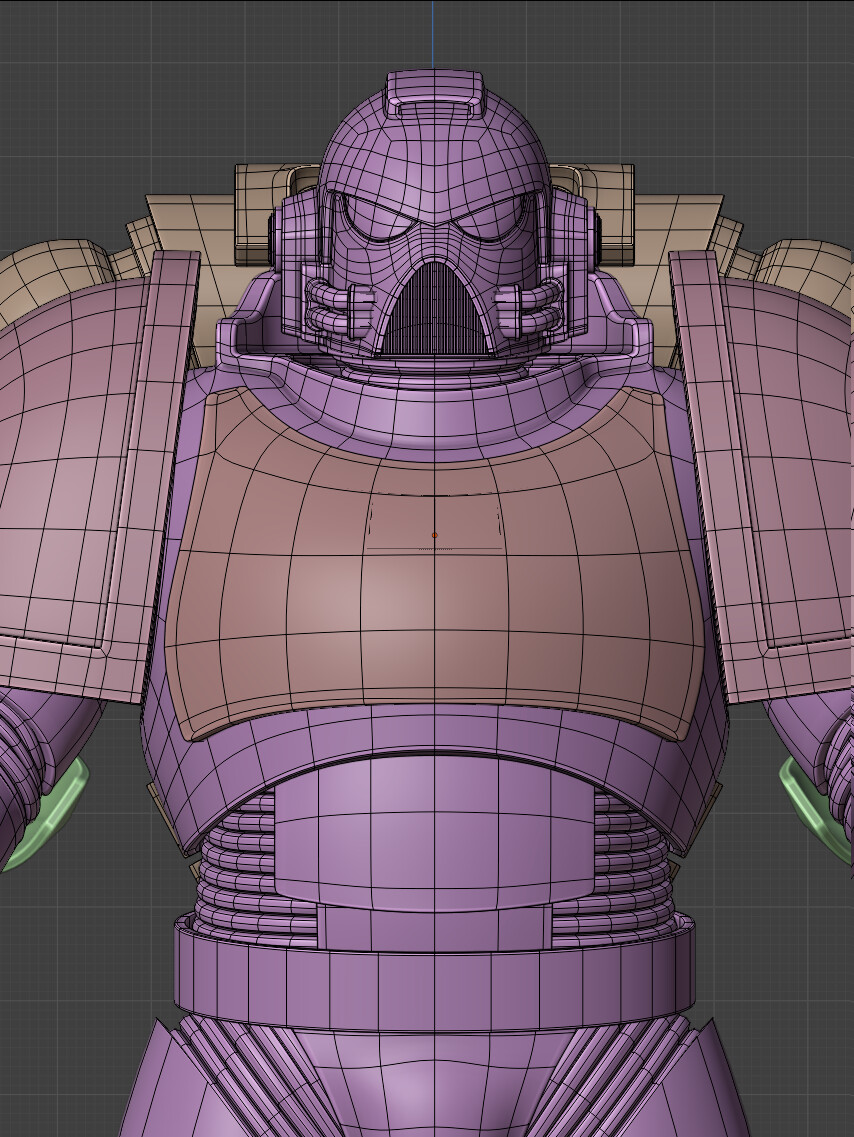
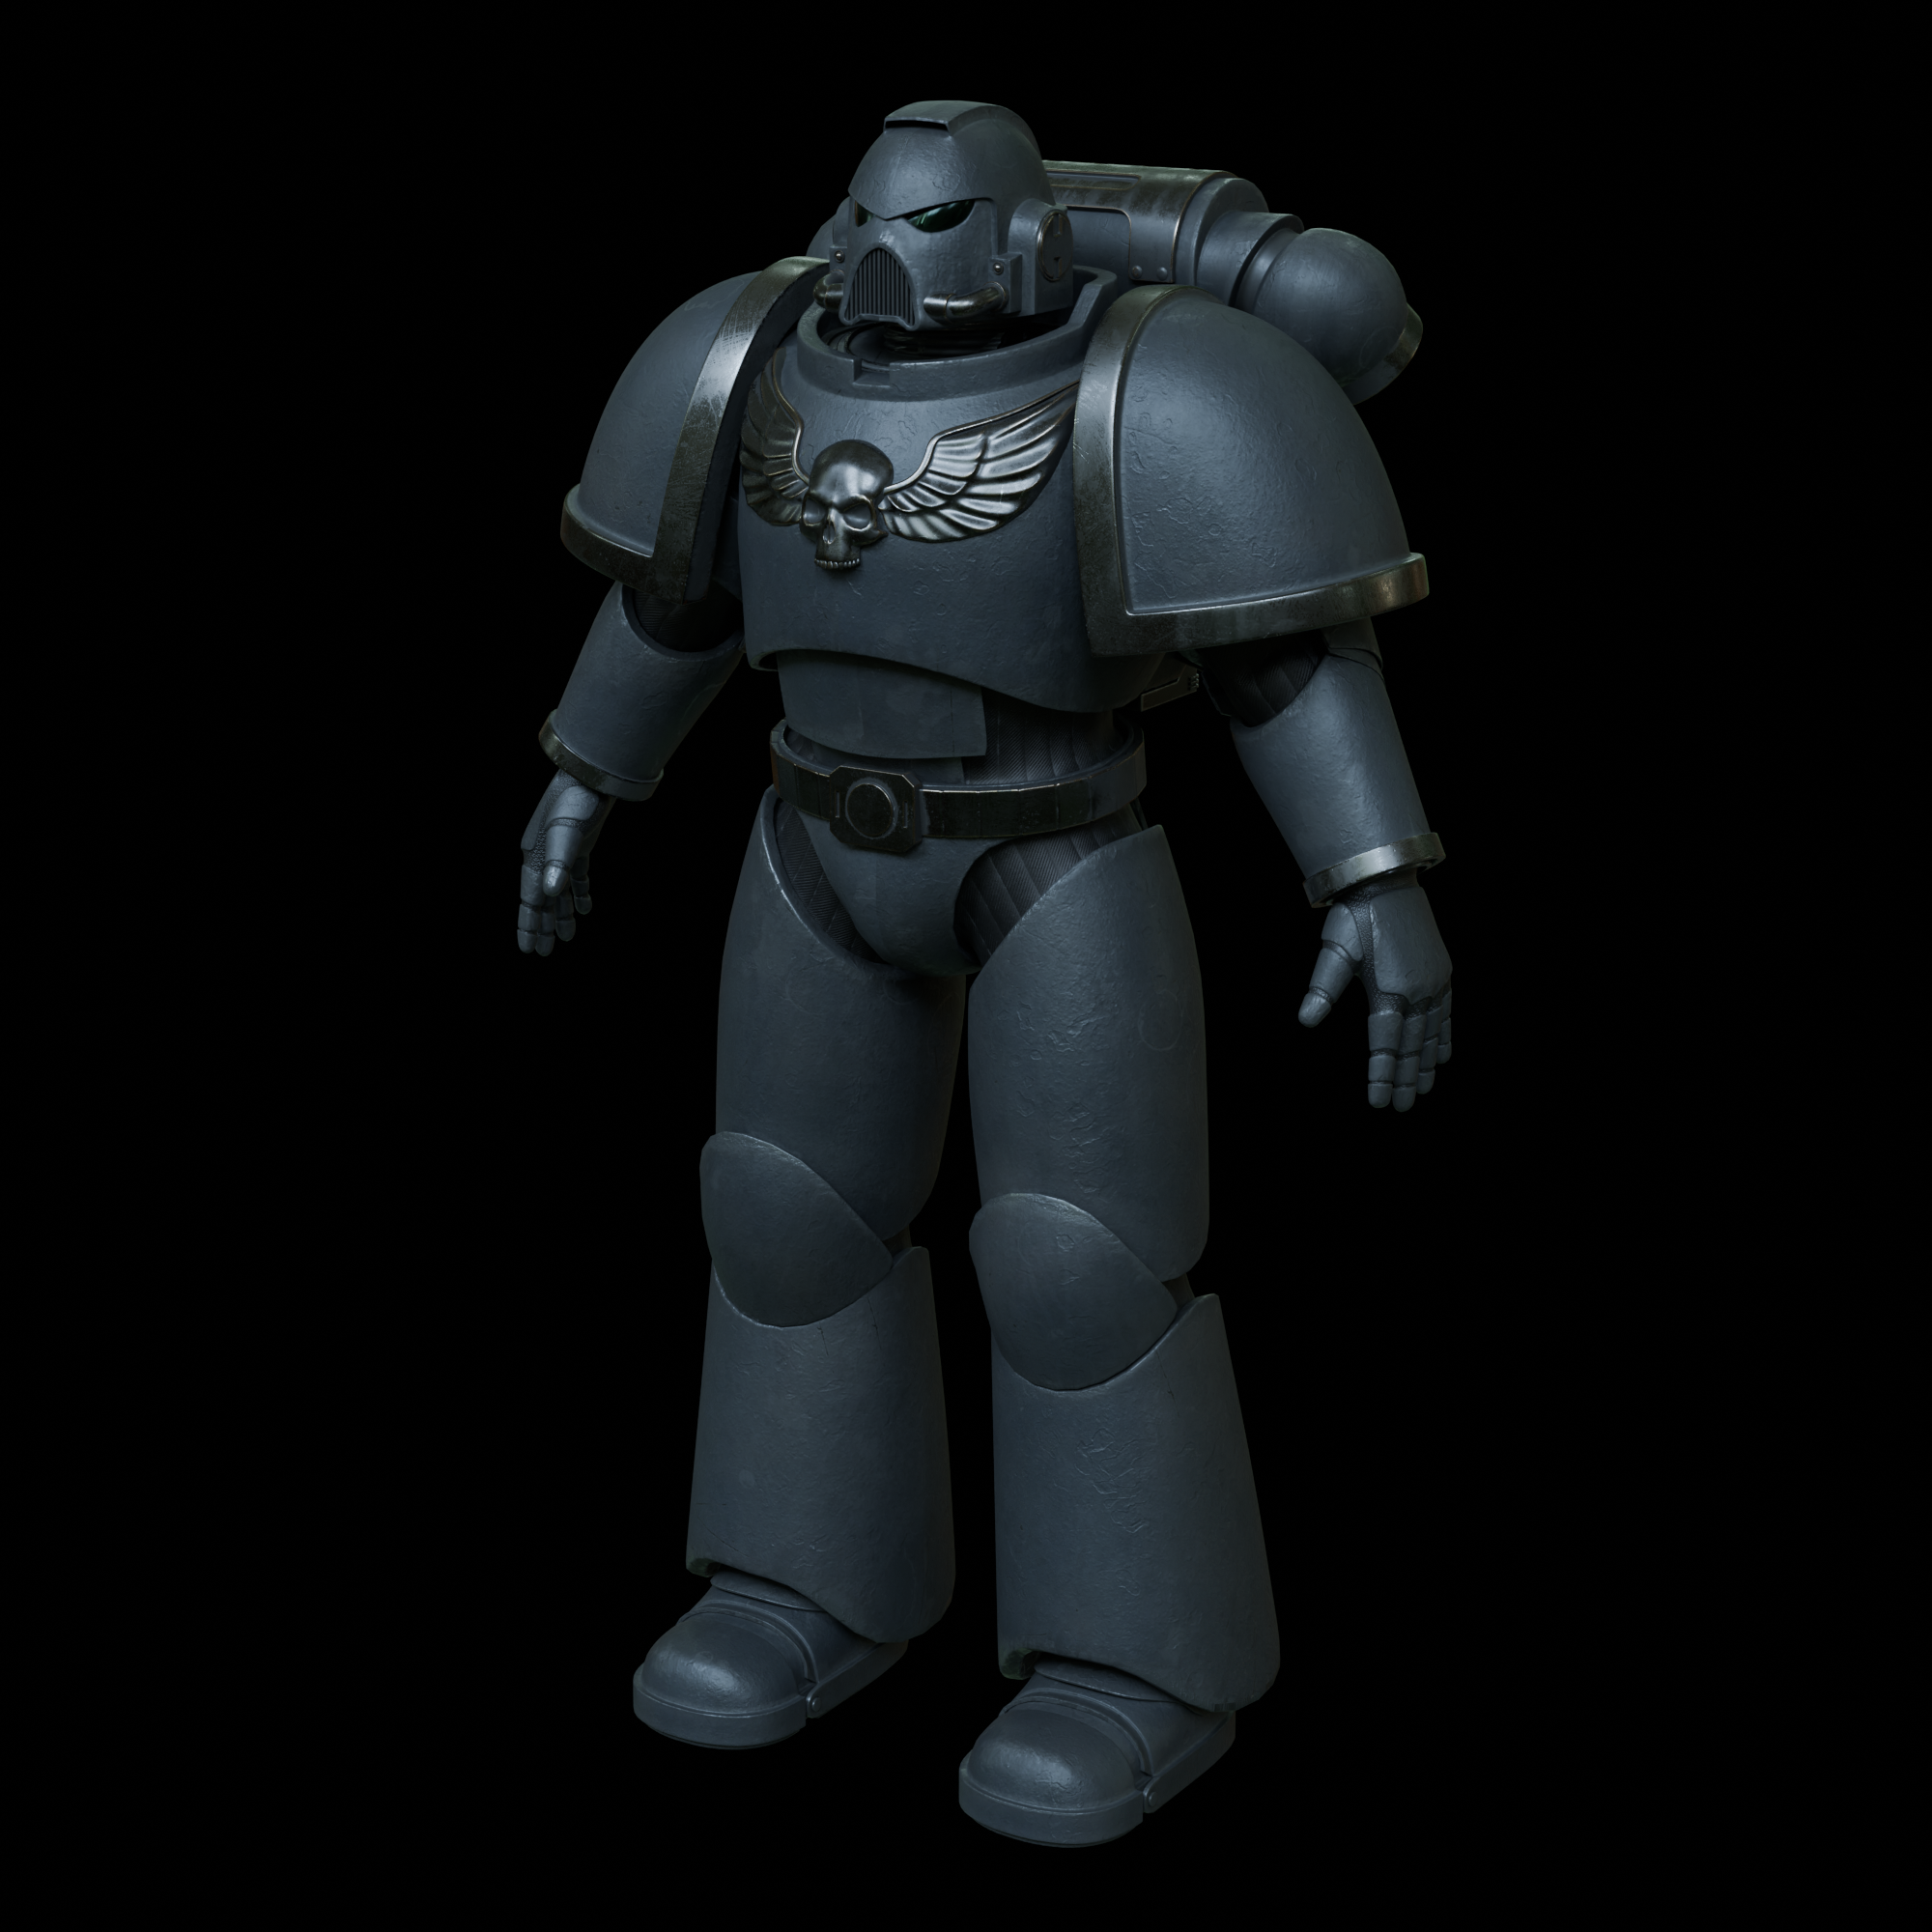
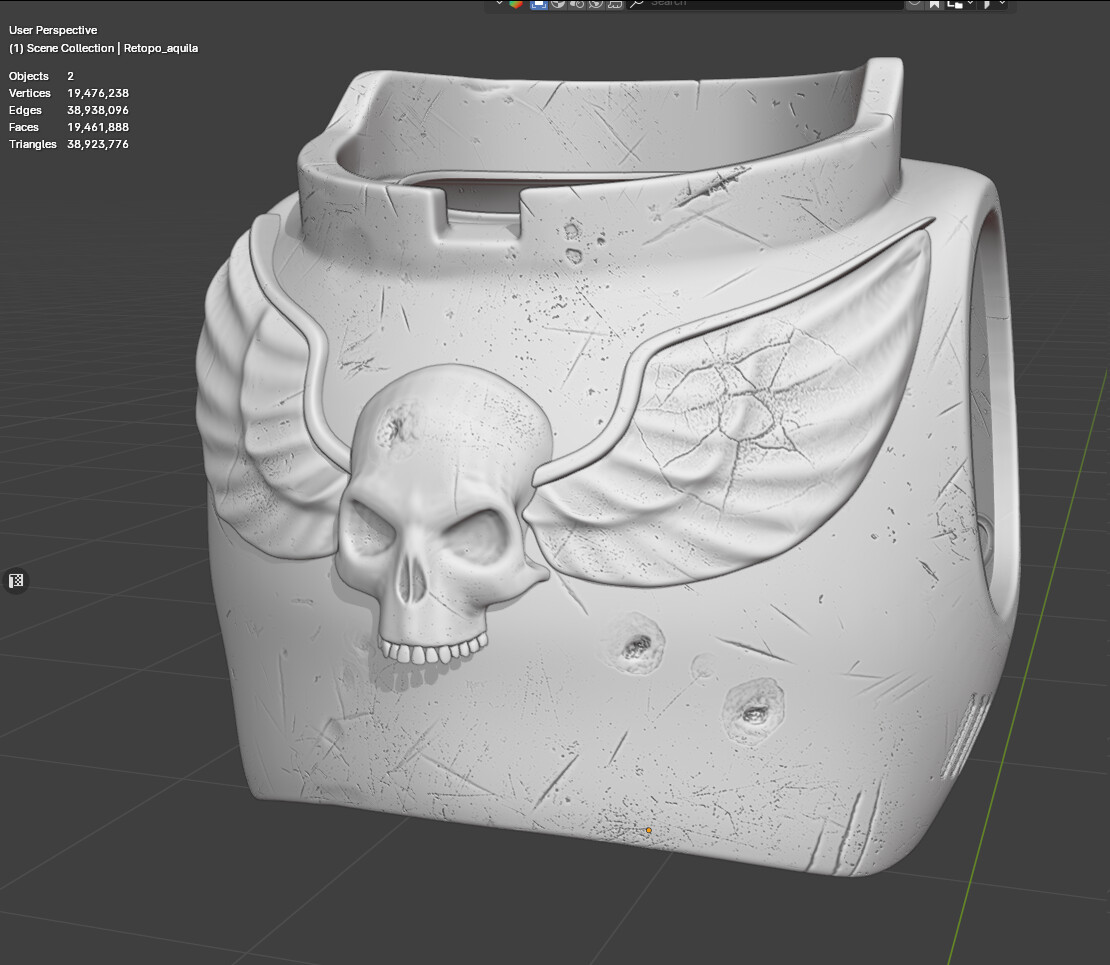
I redid much of the topology, focusing on a subD workflow (in the earlier mesh, I ended up using a mix of both subD and low poly, and it was a mess). I also fixed some proportions, as well as going back to the more traditional design overall. The chest aquila was quite difficult to get right, I spent a few attempts until I got something I am reasonably happy with.
I tried to make the model from as few parts as possible overall, which is not an efficient way to model but it is a fun puzzle. It’s 52K verts without subdivision, and 189K as in the images.
Here is the current status with some placeholder textures, and no sculpting yet:
More work on texturing and the armature. I’ve been dipping into the Dikko tutorials on rigging, just trying to wrap my head around the control bones etc. The rig is at a “mid” stage, it mostly works OK, but I am going to add control bones and I want to have a way to swap between IK/FK for fine posing. Ultimately the idea is to model different marks of armour and either use this armature for them or use them as masks on this model to generate different marines.
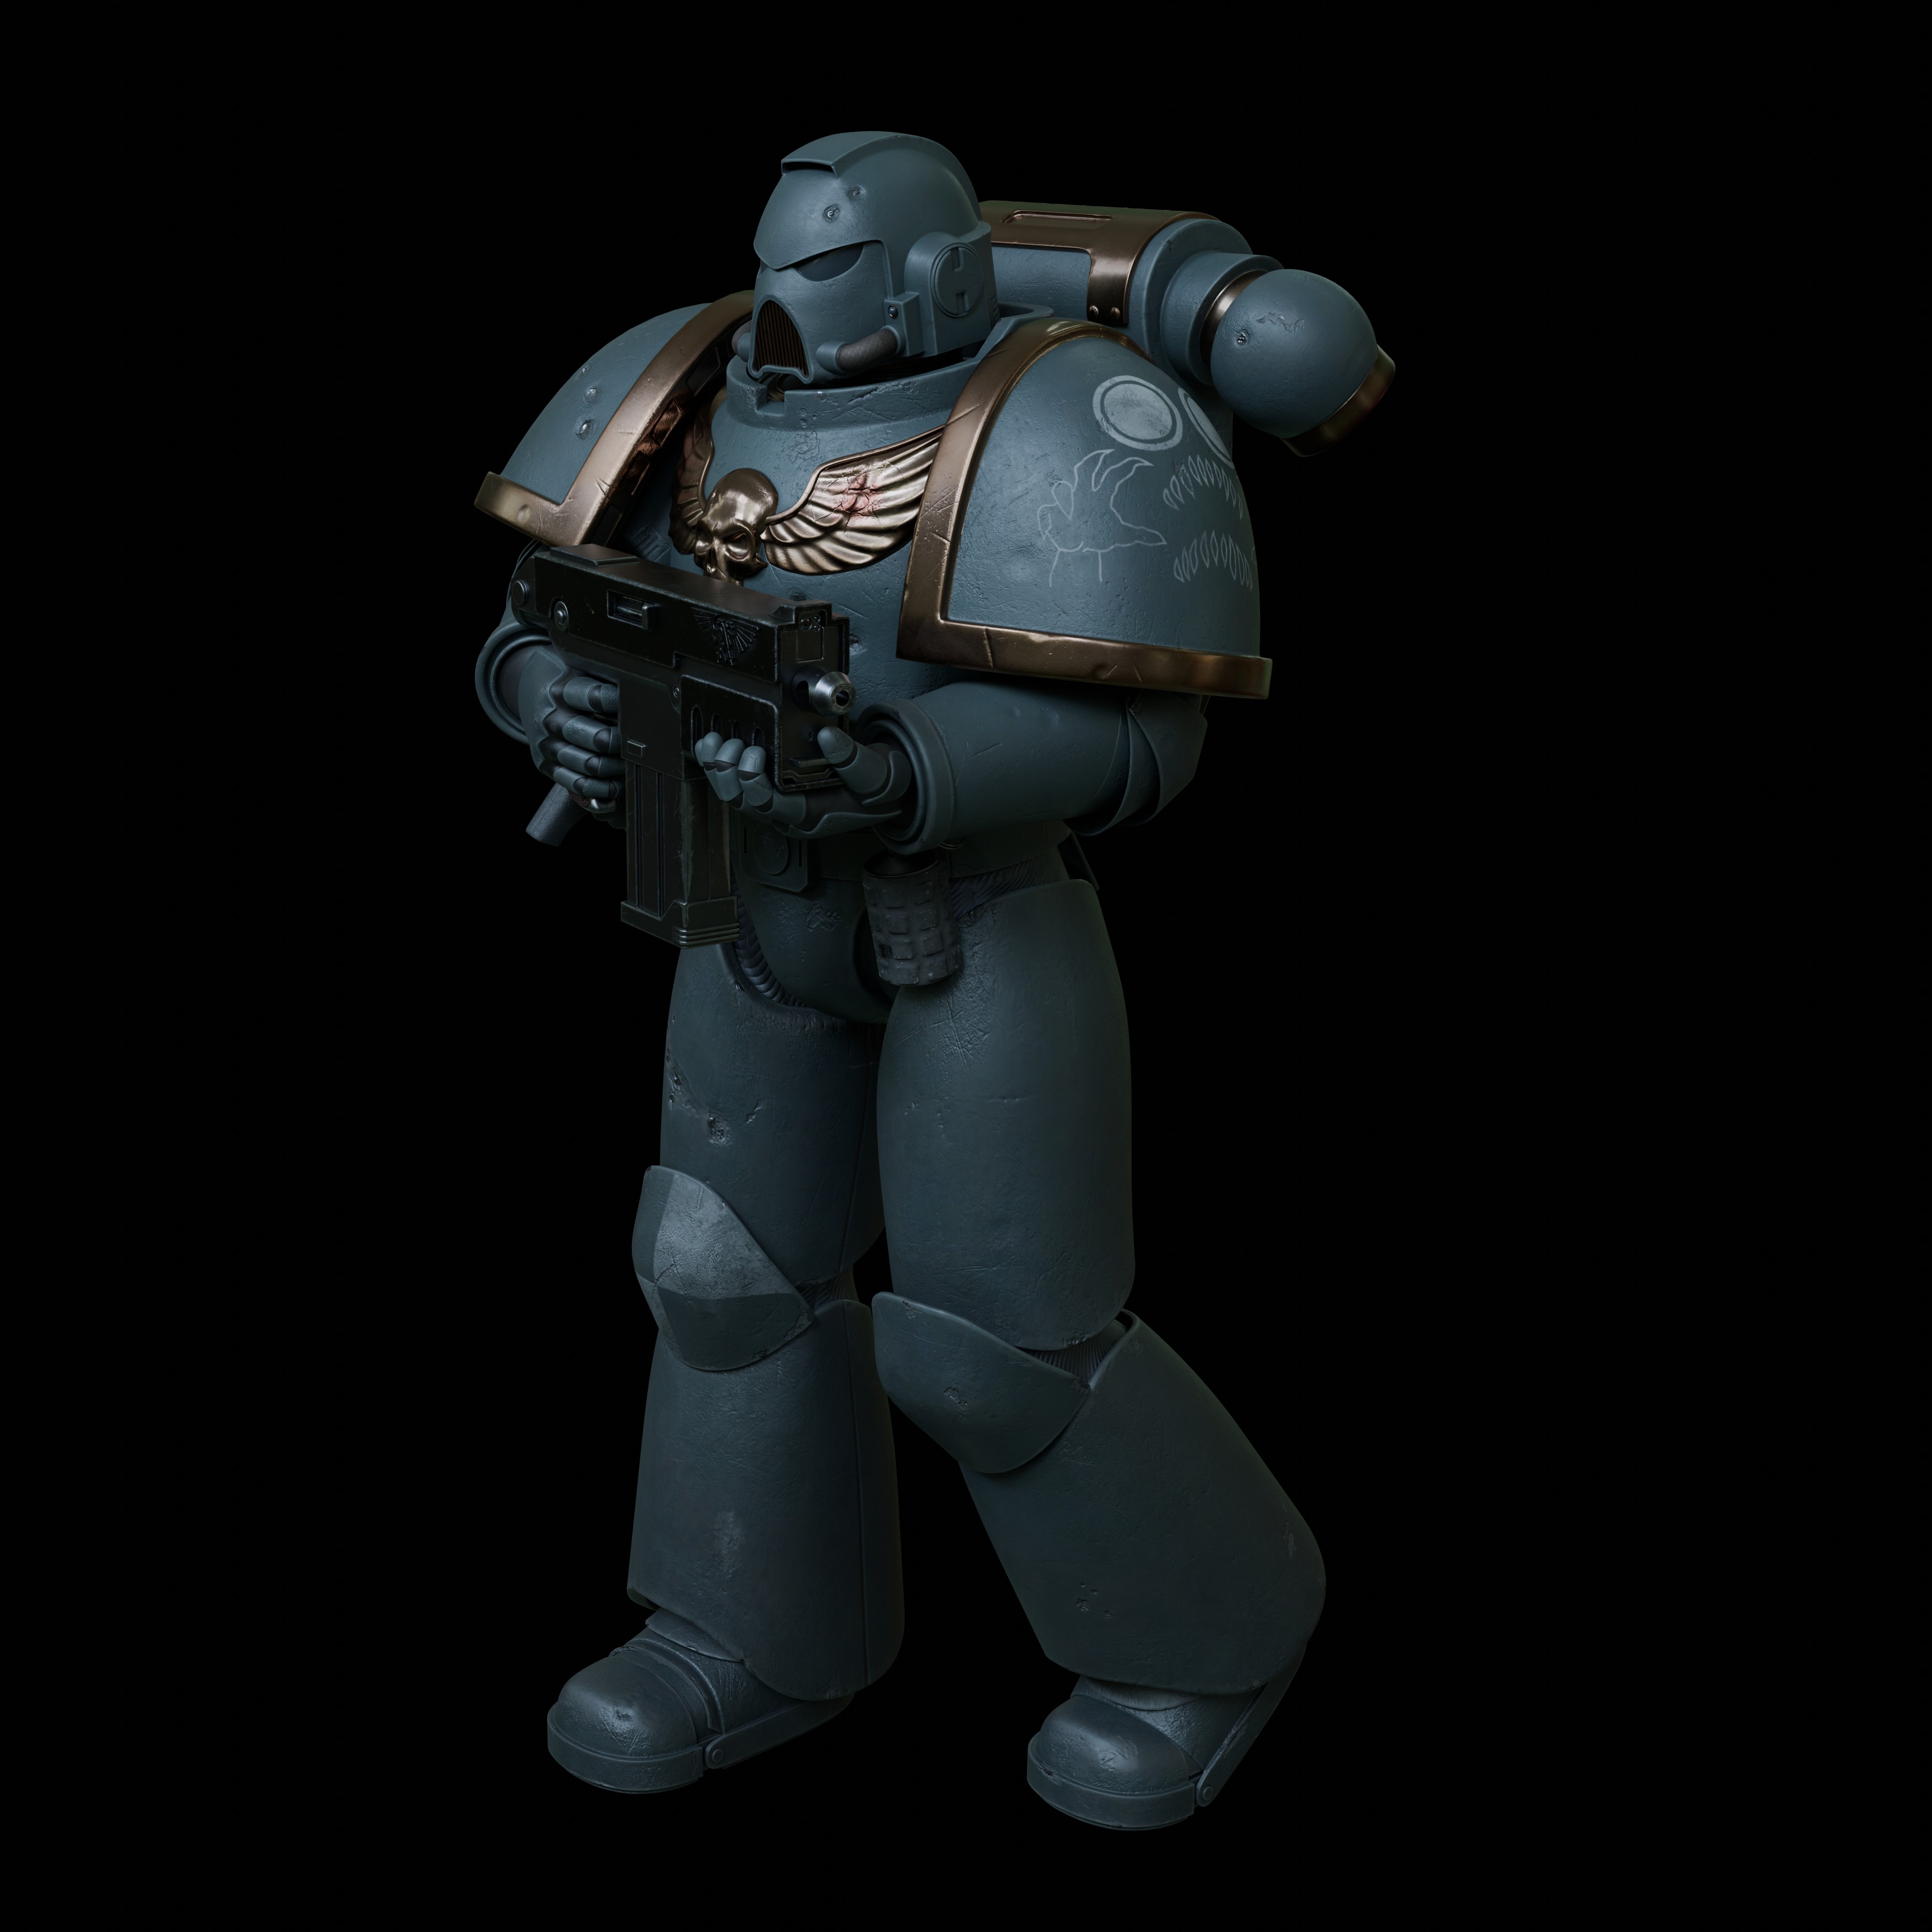
I also thought about the chapter lore and character, and made the chapter logo. I am still finalising the name, but I think something like Abyss Striders. It’ll combine a subtle deep sea theme with the idea they are a fleet based chapter and so are in the galactic void. I also like the idea that as a fleet based chapter they don’t have easy access to new wargear/repairs, so their gear will be a mix of utilitarian stuff that might be damaged or extremely old. I might tweak the armour colour scheme - I want it to be pragmatic and not flashy, but I think it might look better in renders if it were more a metallic substance rather than the painted cast steel type material I have now. This is mostly driven by the fact that I really like the chest emblem material.
More progress. The model is now rigged thanks to @magpie and this is making detailing and tweaks much easier.
I decided to work on producing improved textures. To make these I first duplicated the mesh and separated the armor pieces. Then I re-meshed all of them and used multiresolution to sculpt on high-res versions.
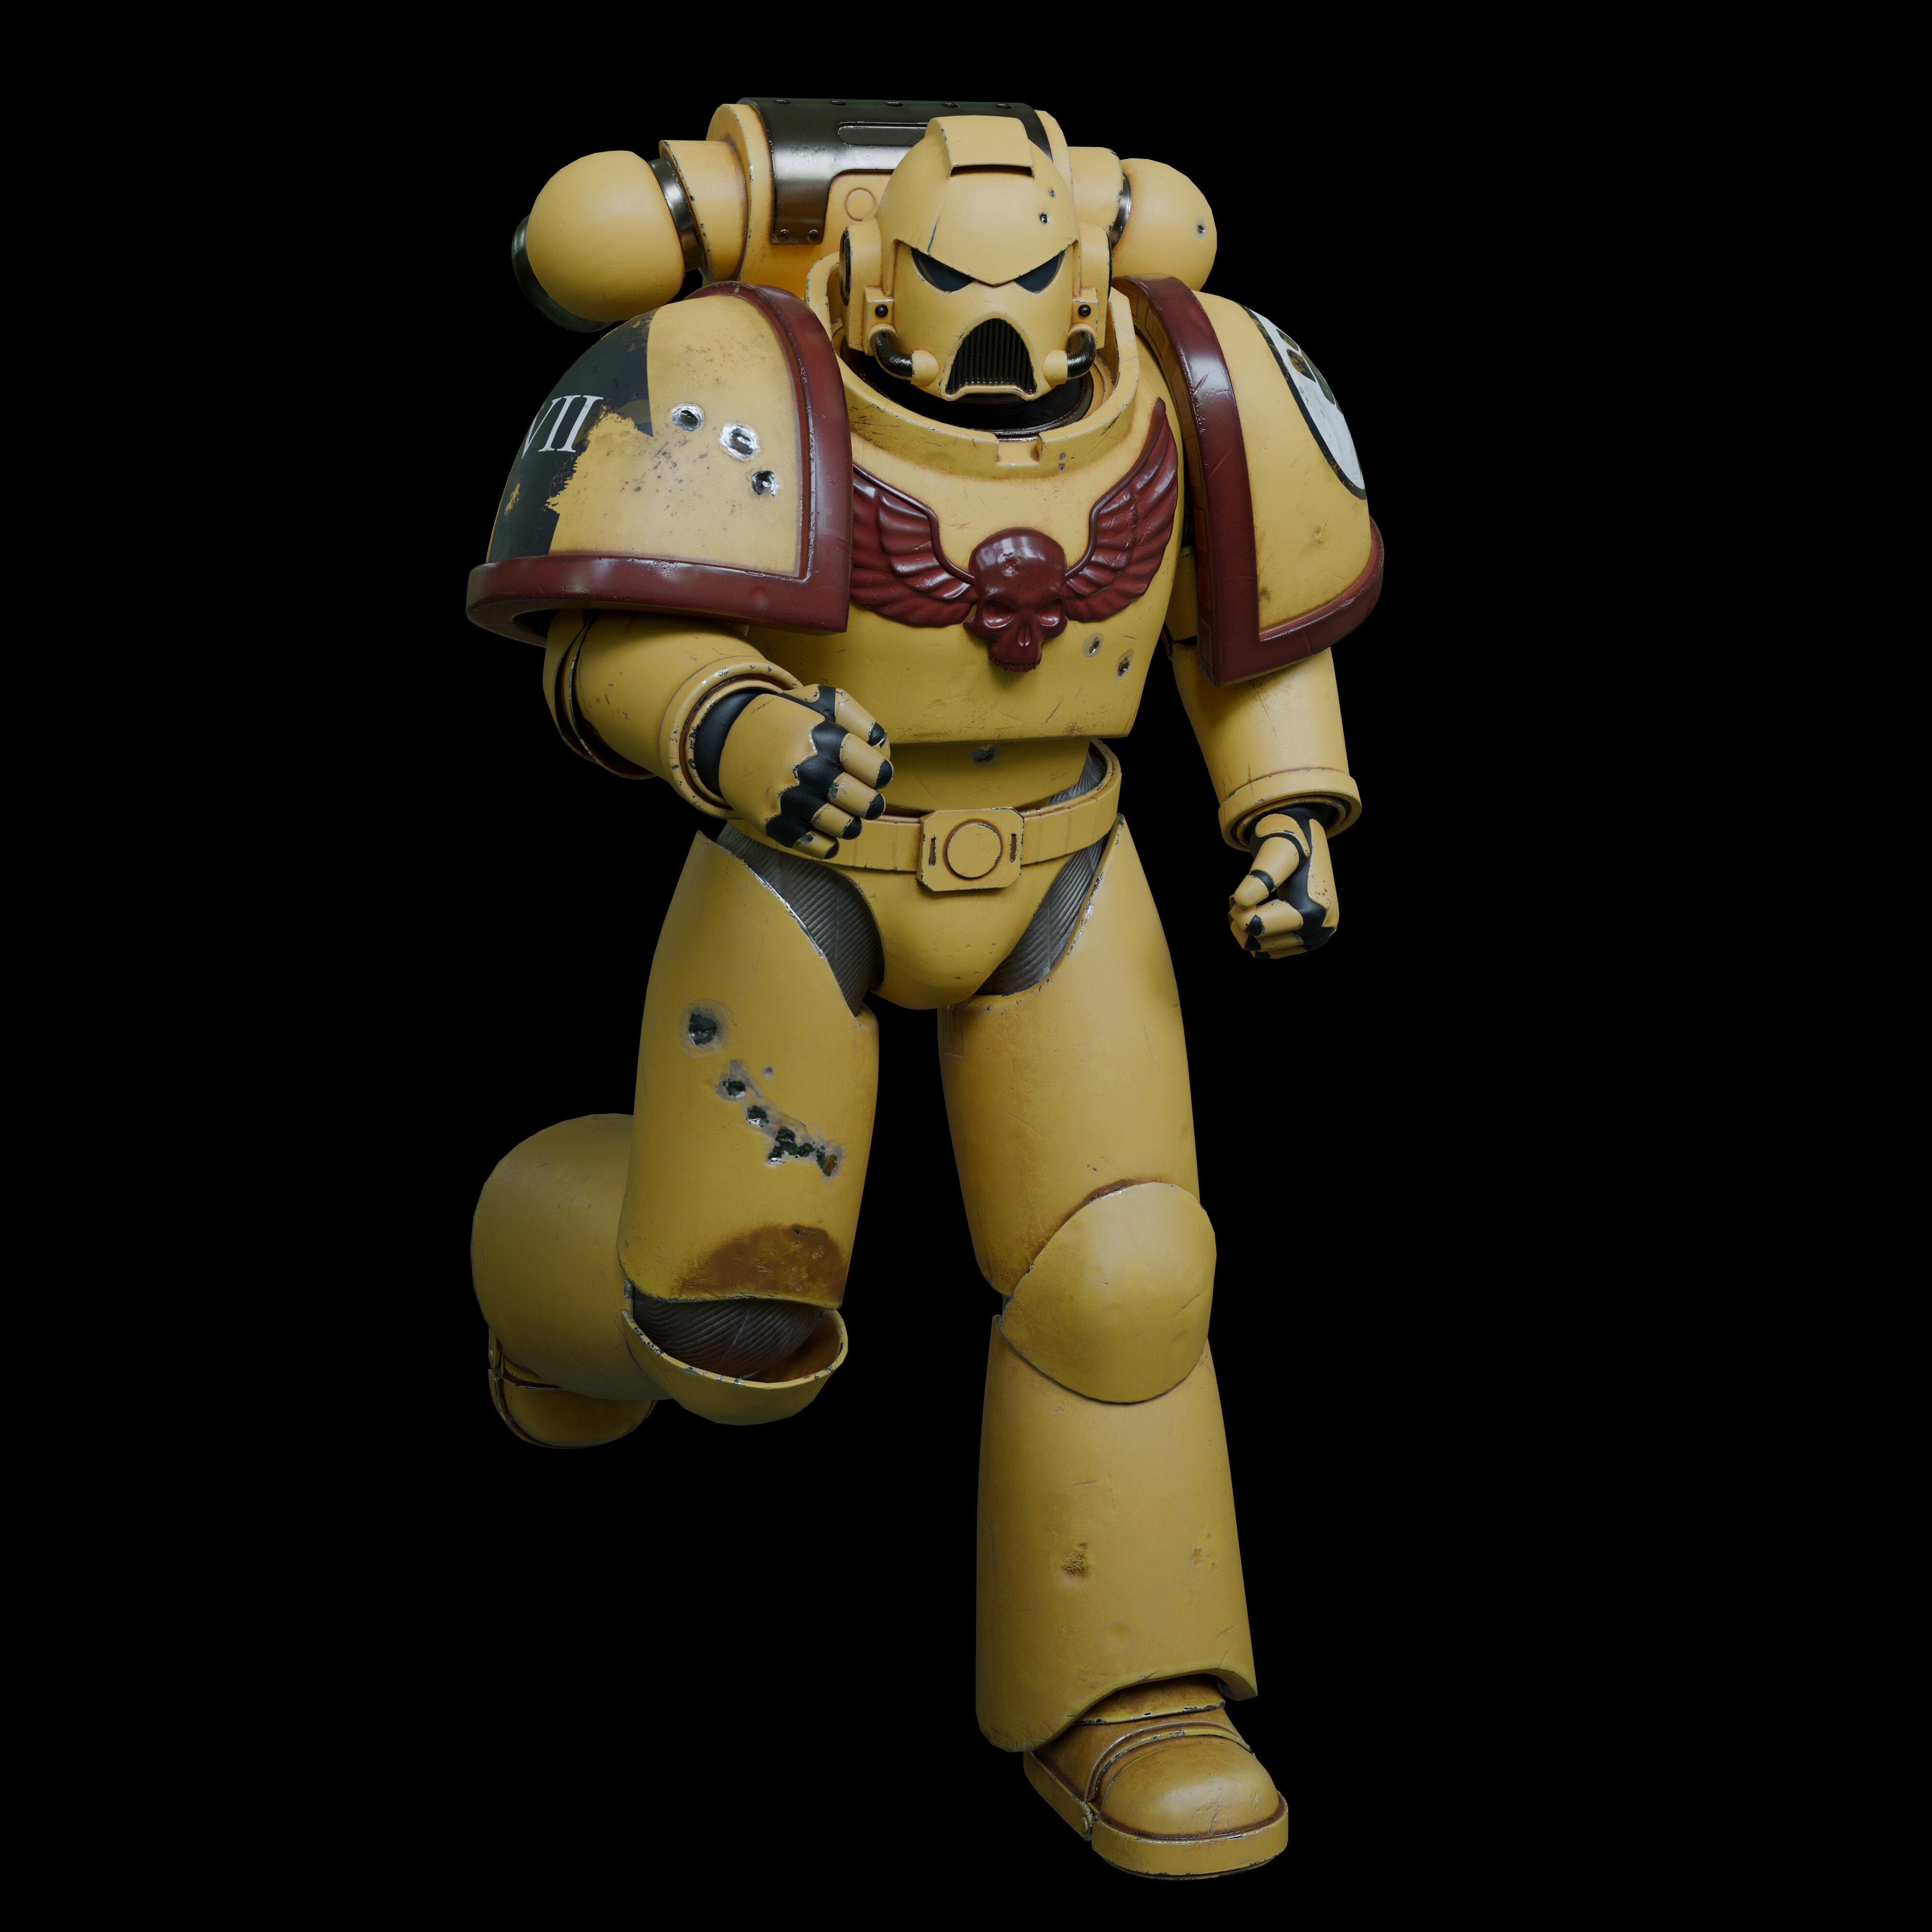
From these I baked the textures in Substance painter (one tile at a time), and created a set of materials to emulate Imperial Fists. I chose these guys because they are bright and easy to work on, so I could see what was happening with the texture more easily.
Here is a quick render with the new paint (HDRI, subD level 1, 175K quads):
It needs some tweaks (e.g. the dirt behind the kneepads is something I missed until it was posed). I think I have achieved a good “large toy” look - but it’s not quite “realism” yet for a fully grown marine.
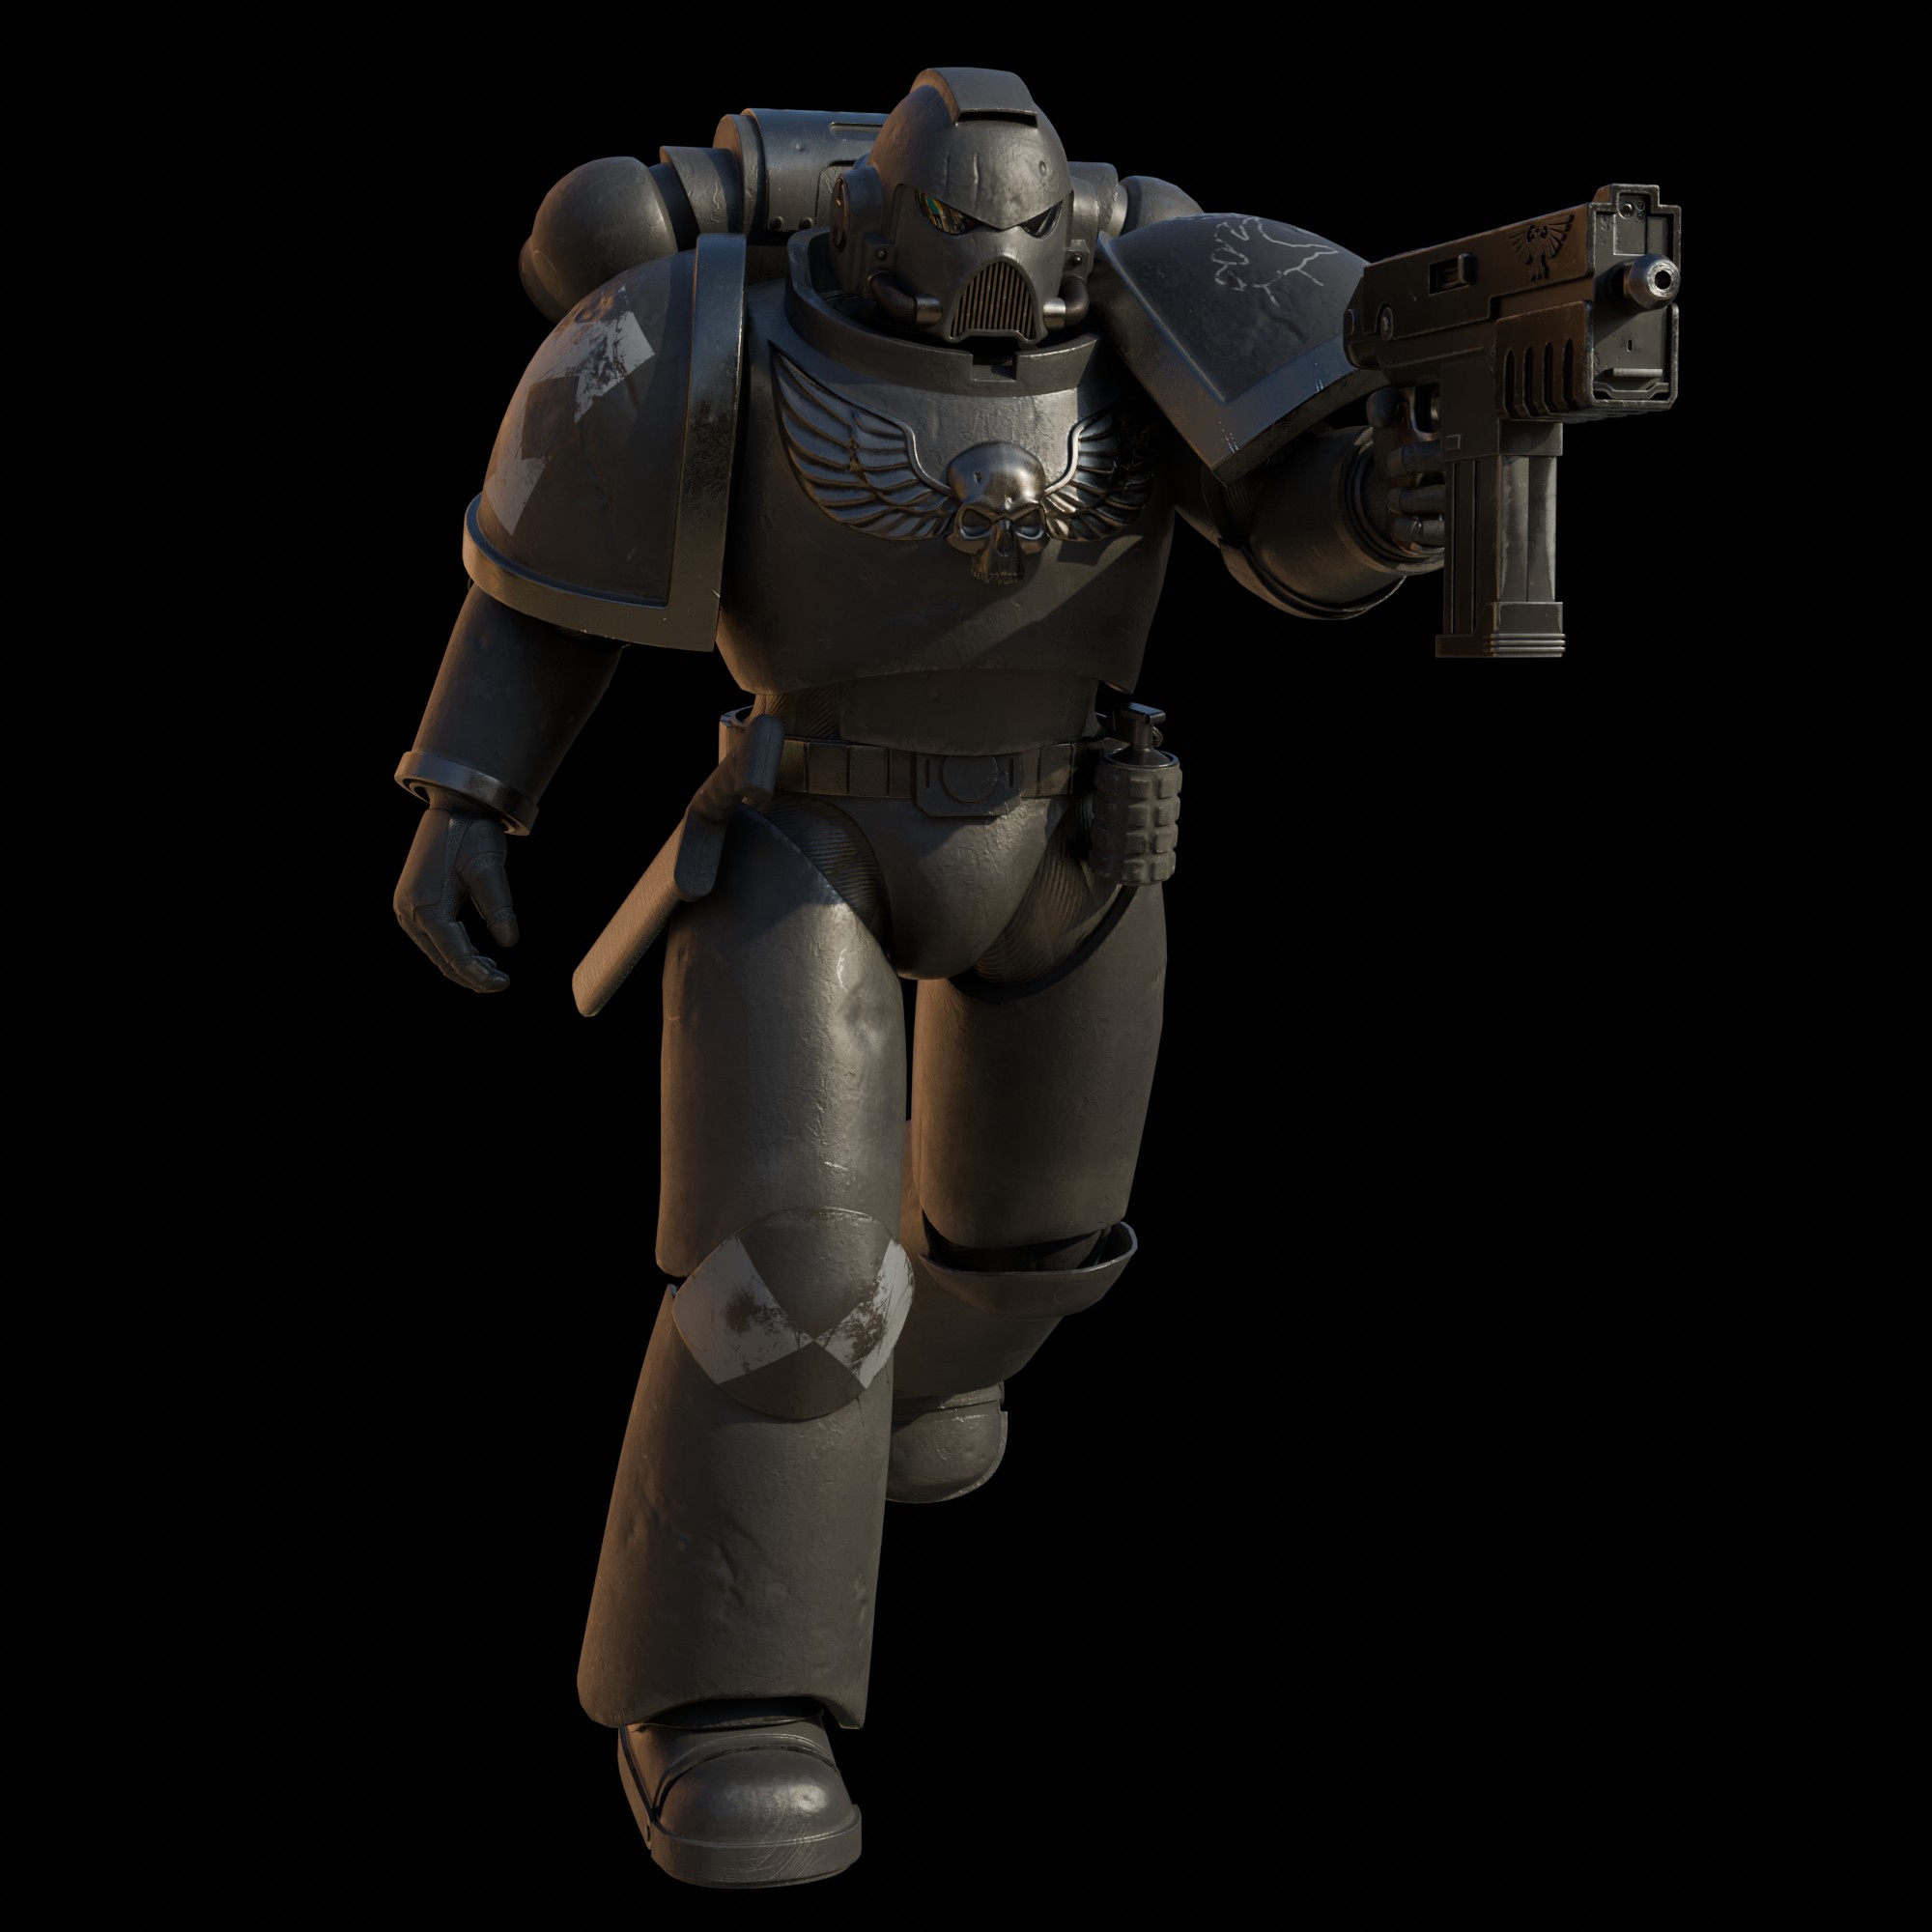
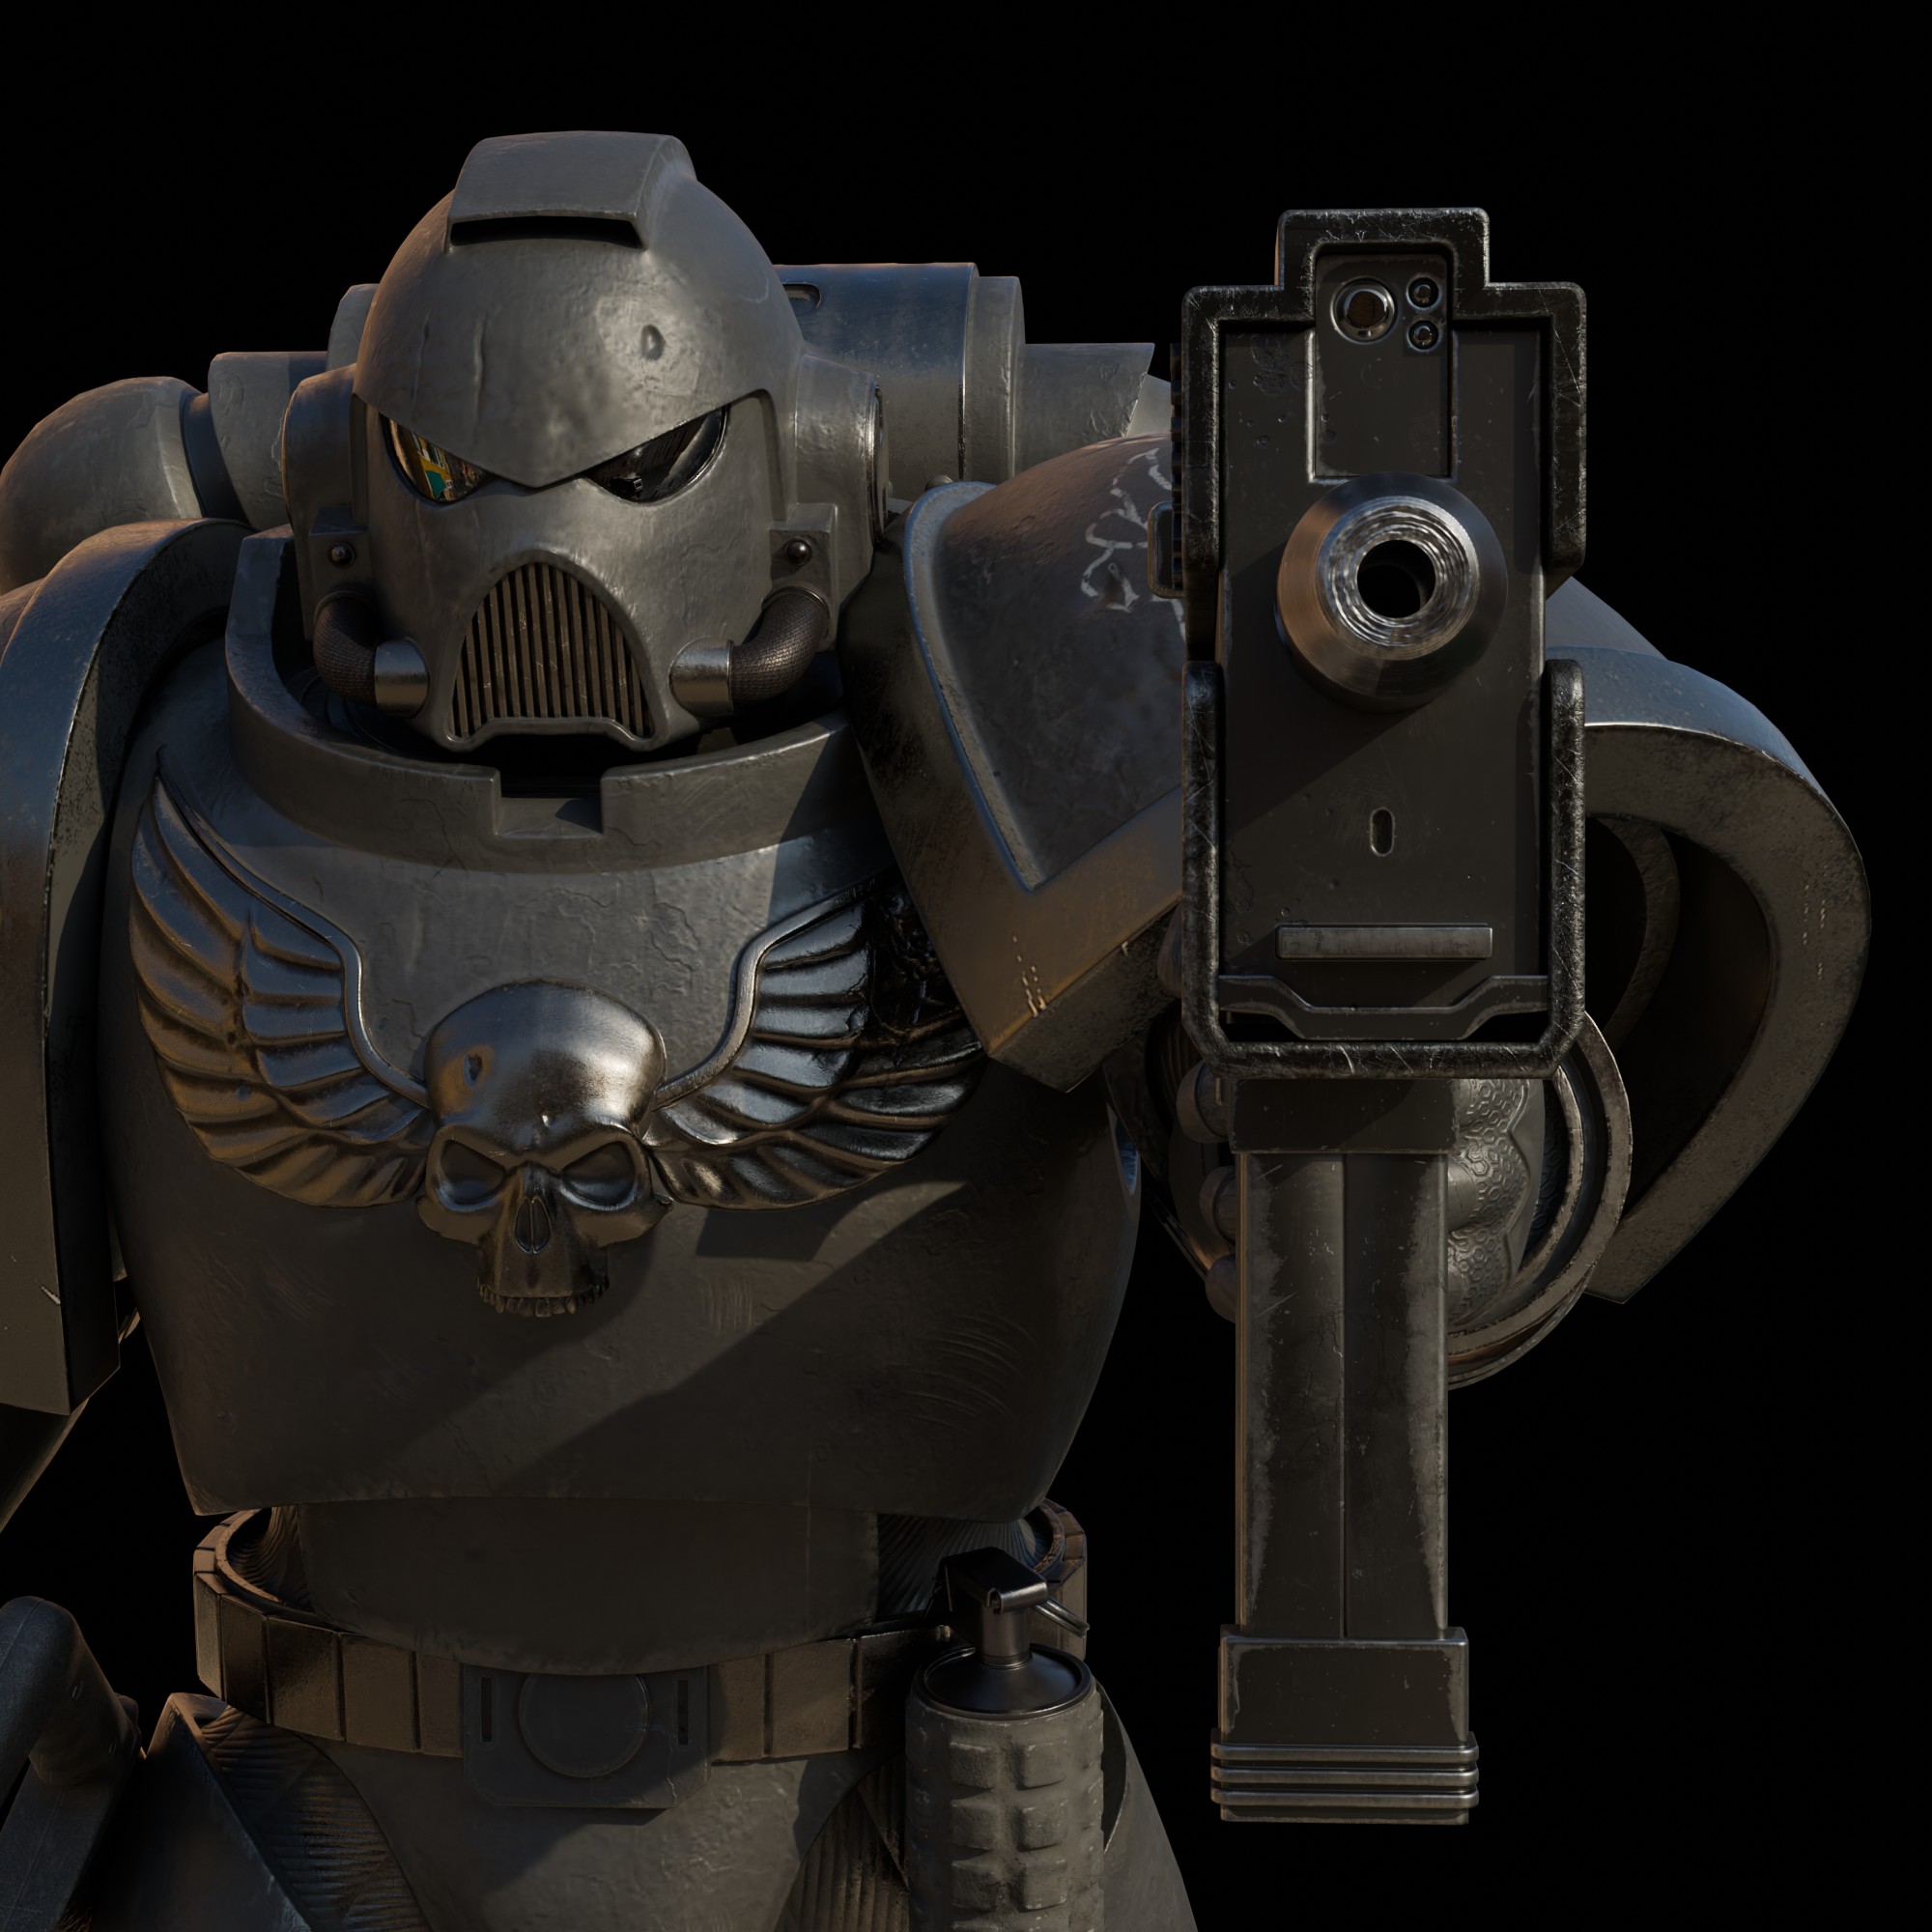
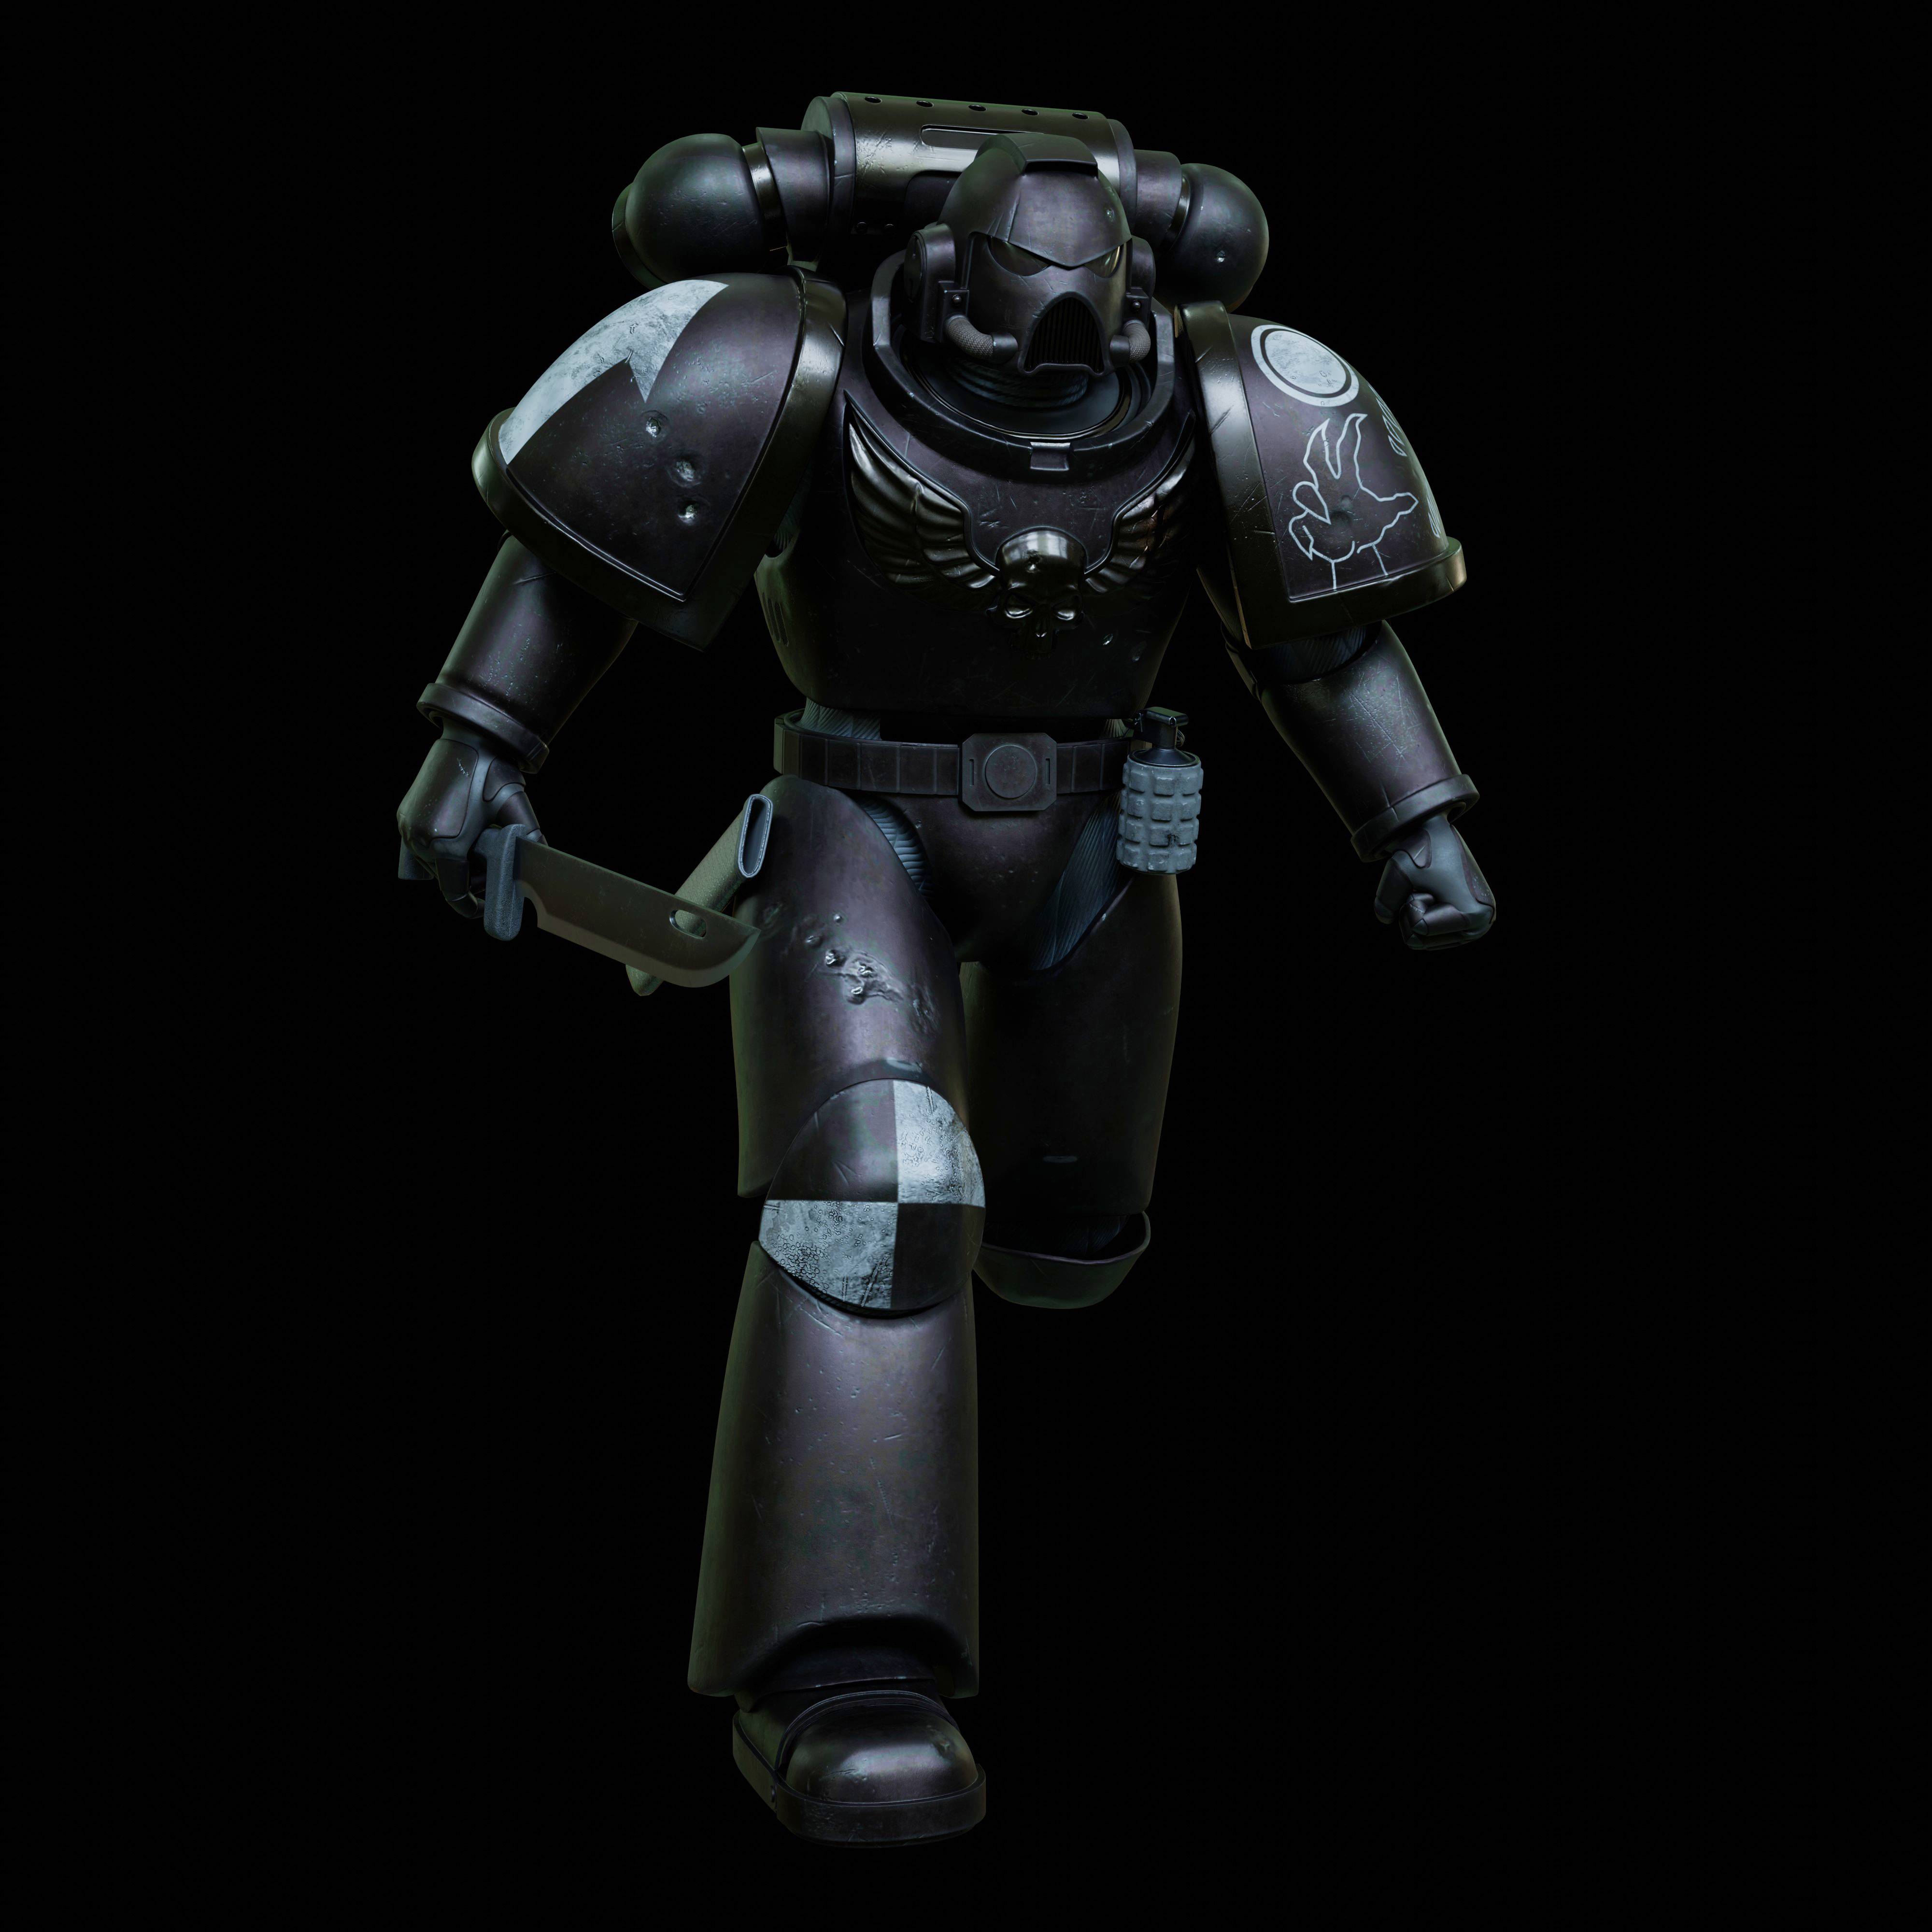
I did some more experimenting with textures. Here I tried to create a painted metal style finish, with lots of hand-painted scratches and wear and tear. Unfortunately I think it ended up looking more like old plastic (e.g. fishing buoys/fish trays) in the render so I am not entirely happy with it, despite the work.
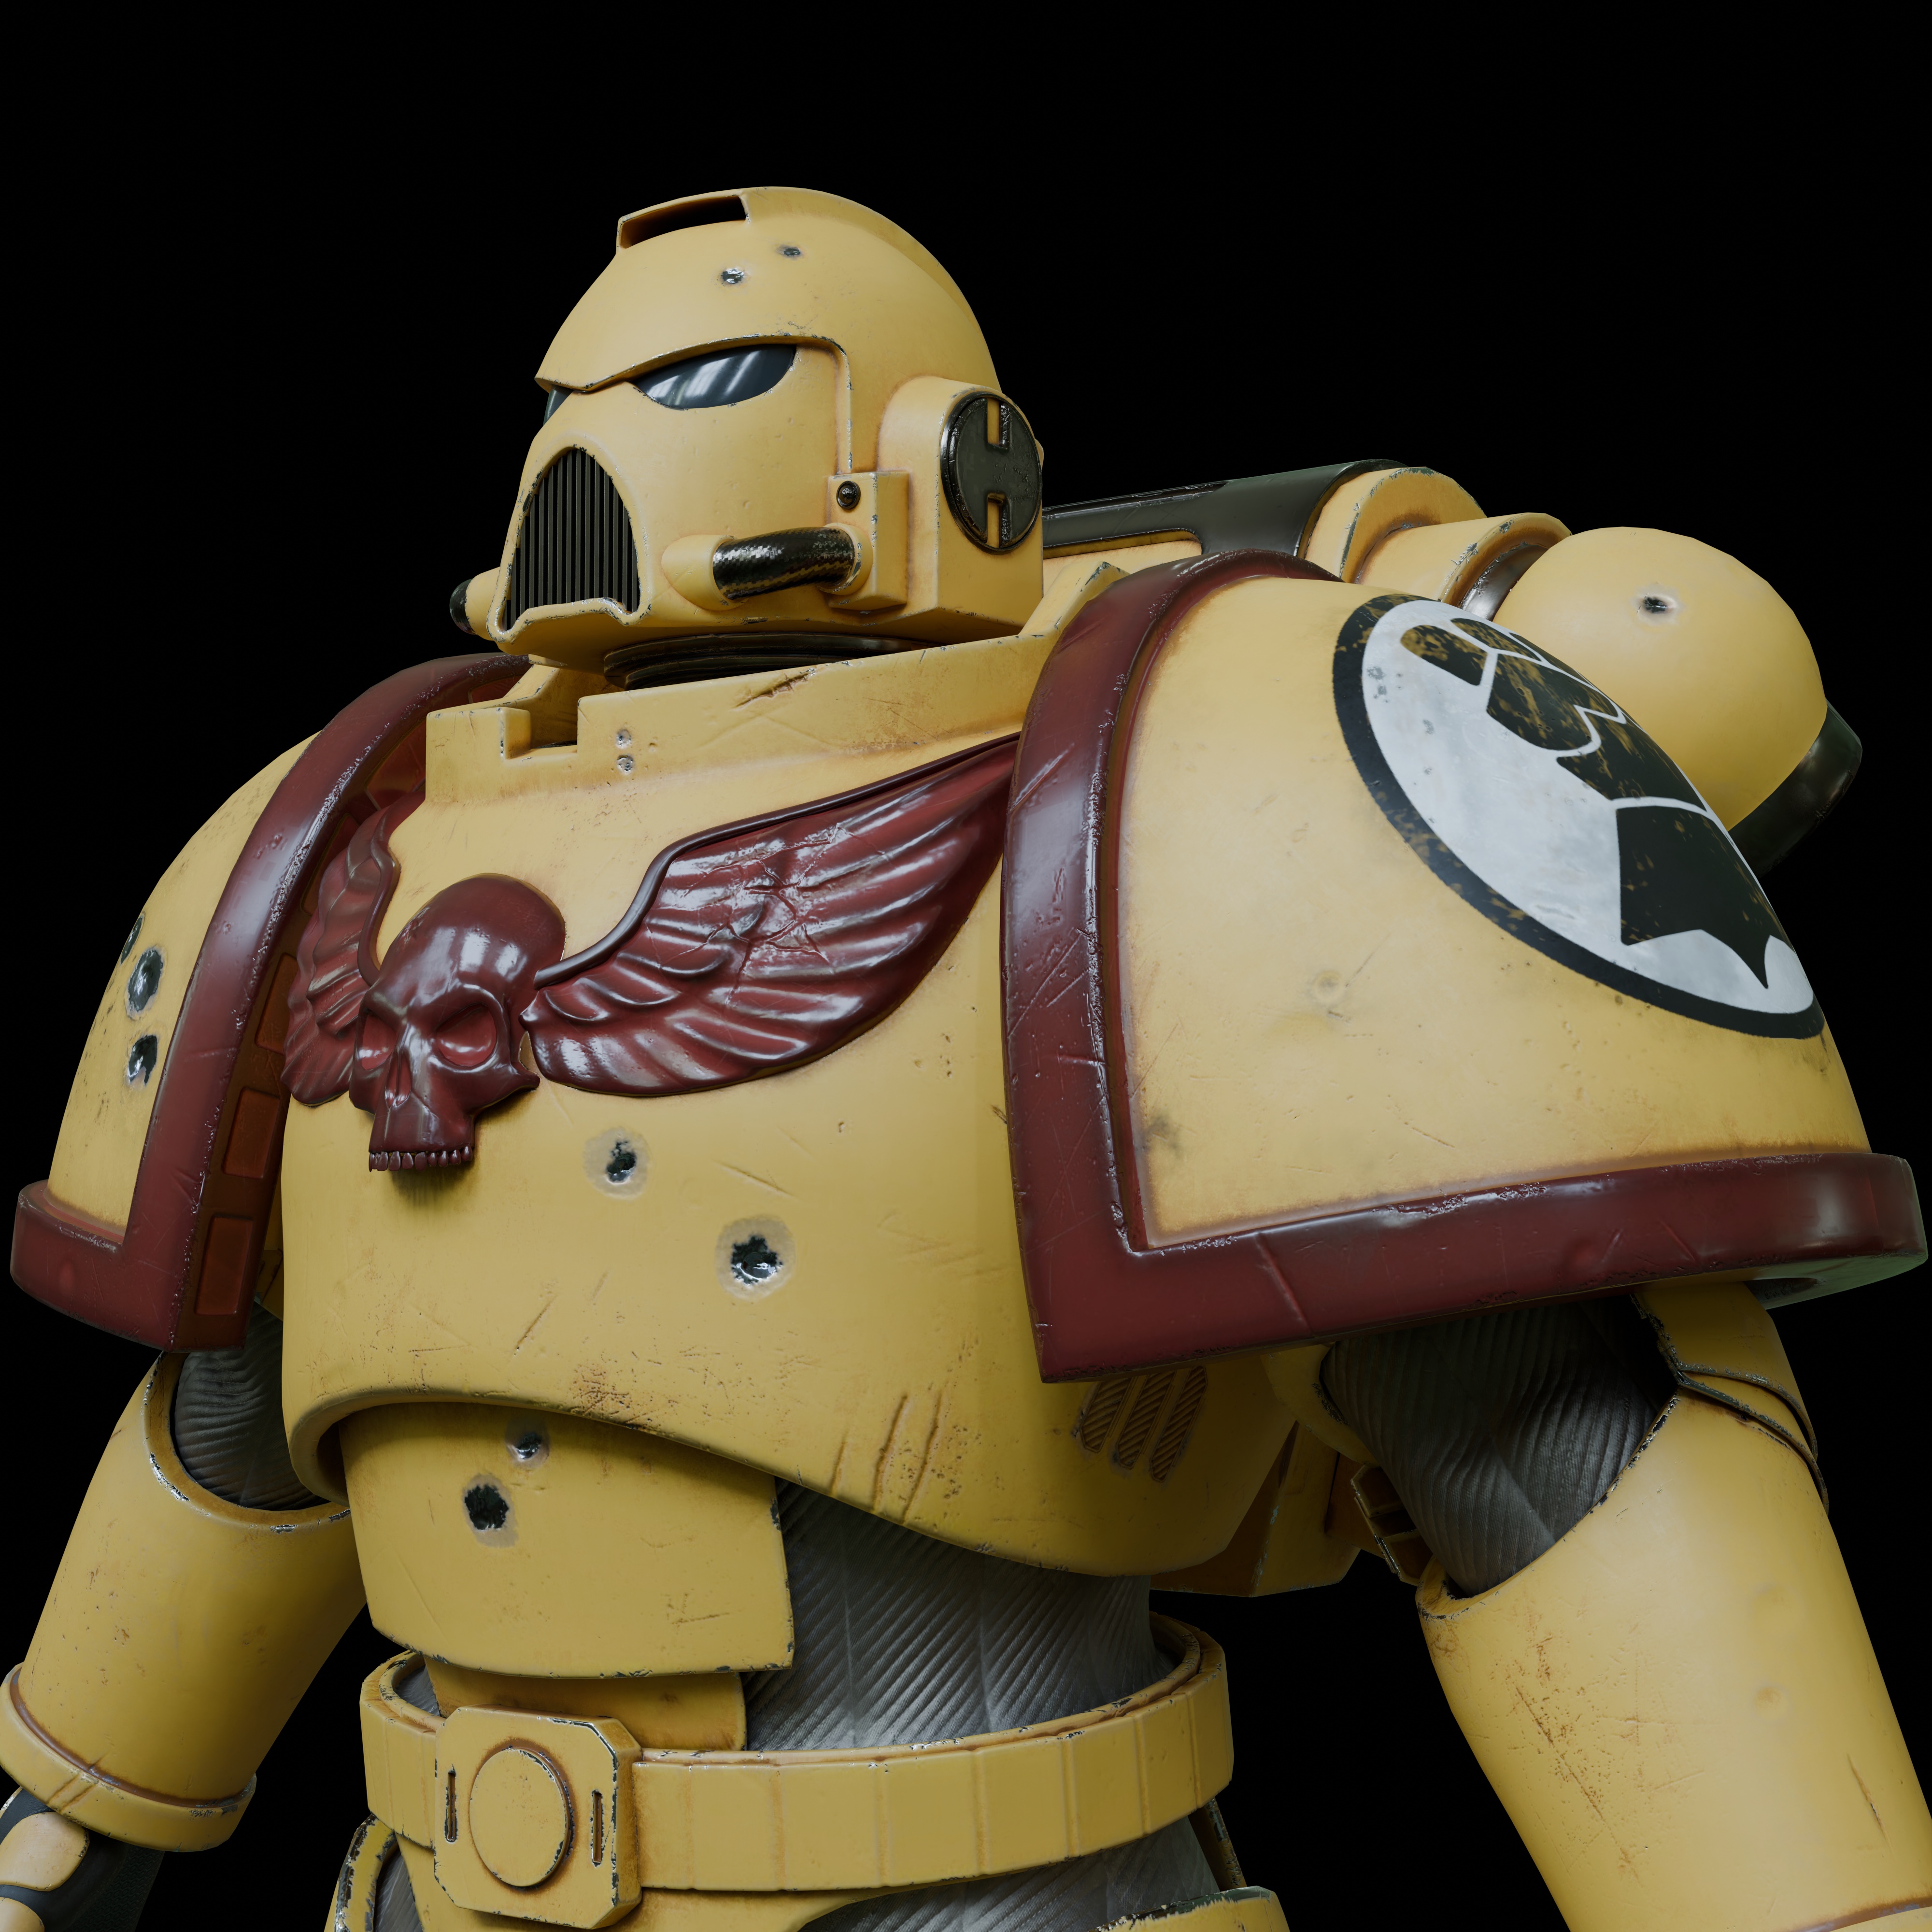
I am much happier however with the material for my custom chapter, the Abyss Striders. Here I went for a thin coated metal look. Some subtle pattern details to add, but overall colour decided I think.
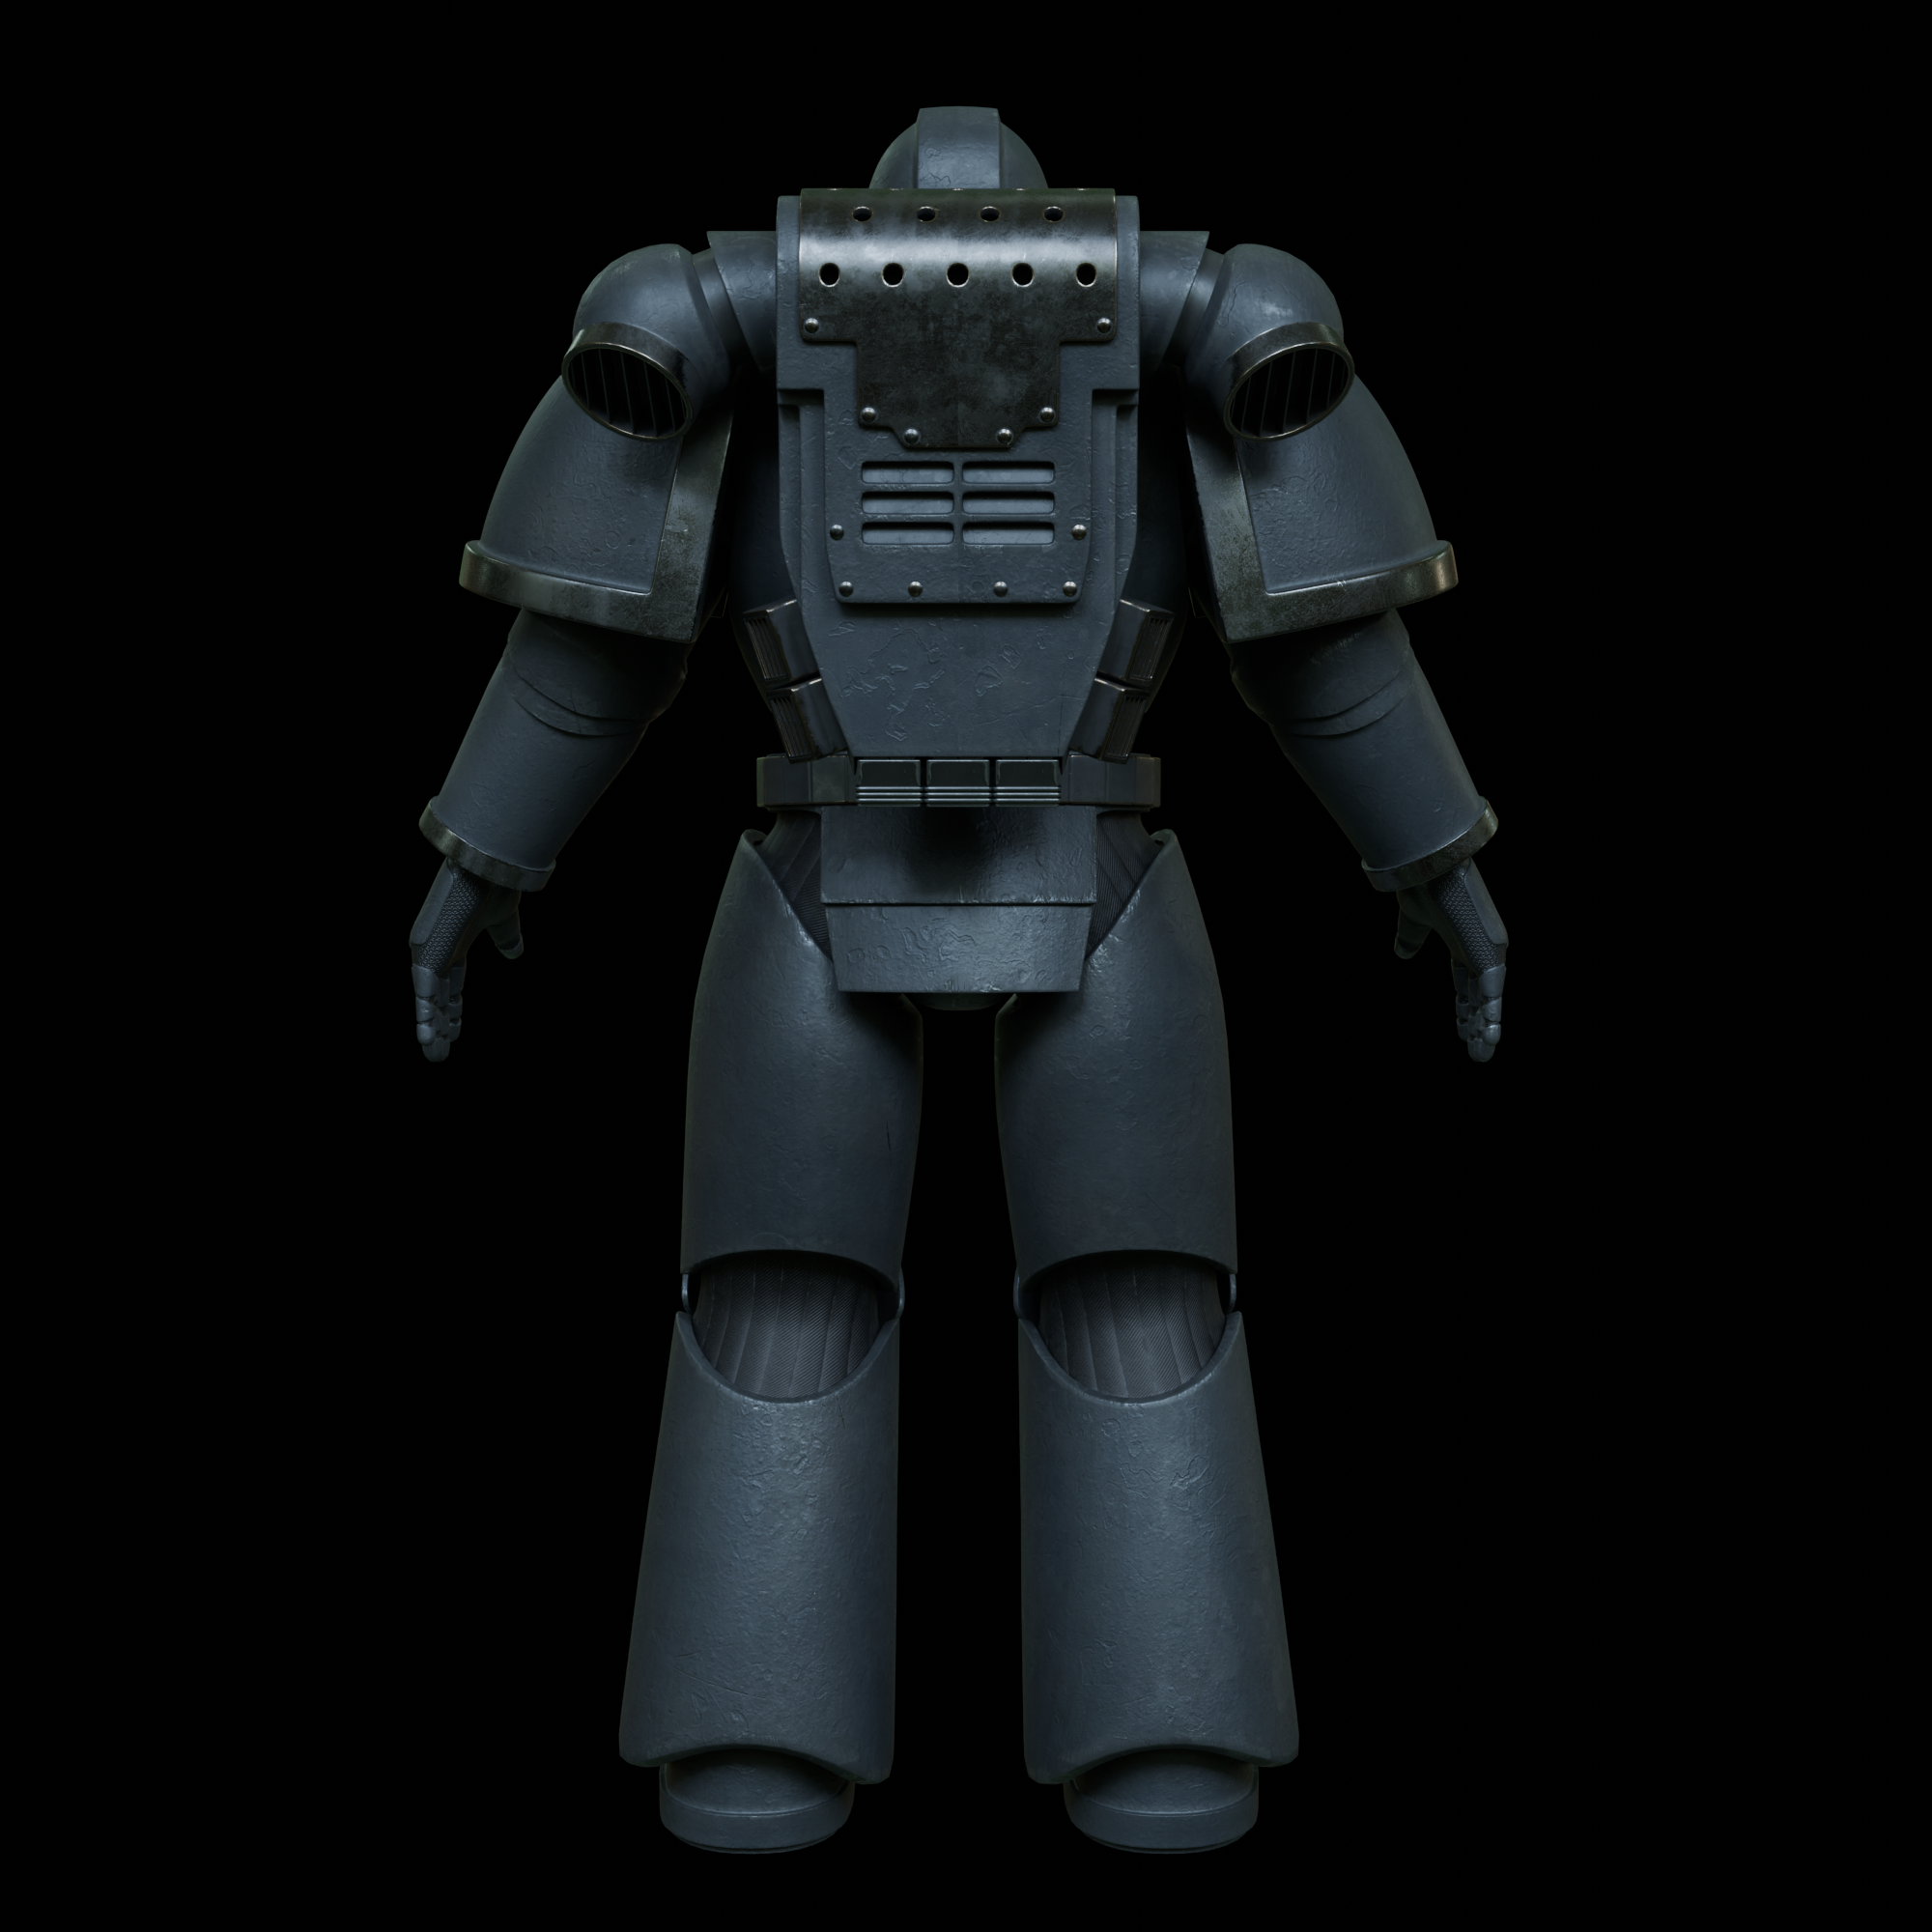
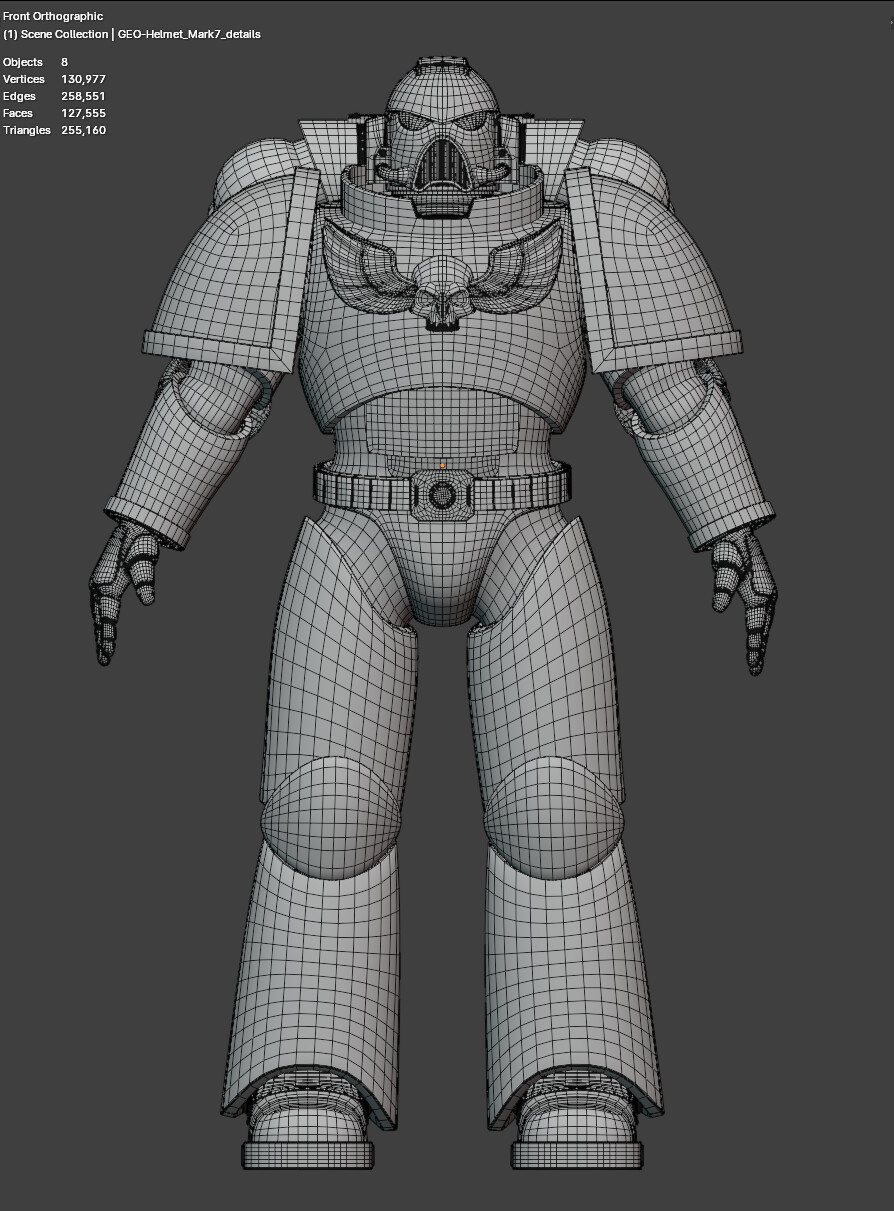
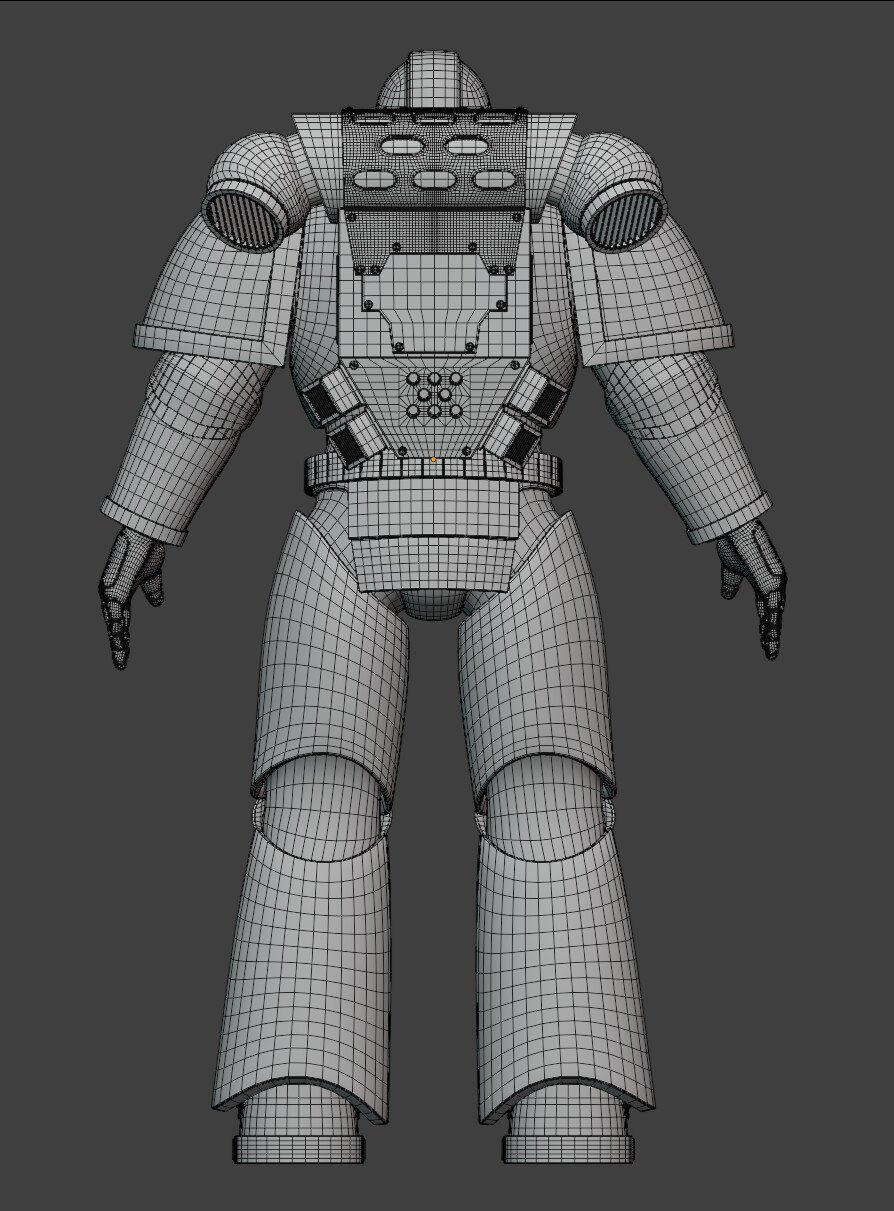
I reworked the design of some parts of the mesh, and also redid the topology for sculpting - it is much more even now, and I added some additional details to hide seams (so the UV unwrapping is also much better). The chest Aquila needs redone, but otherwise the majority is done. I did play around with making the helmet more “human sized” (it’s far to stout for it to fit a real head and needs elongated) but it looked bizarre, so I have left things as they were.
The mesh now looks pretty good “as is” and no longer needs any subdivision (although for a render, level 1 does make it look a bit better). It also still works with the original armature,which was important. The polycount is now lower as well (in the original renders, with subD level 1 it was around 200K verts).
A couple of sections were difficult to keep consistent with the rest of the mesh (hands, helmet, the grid and vents on the backpack, etc.) so these are separate meshes (still sculptable, but you would use less subdivisions).
Focus now will be on final UV unwrapping and finalising any details. Then the texturing should be relatively quick, just a matter of re-masking the existing materials for the new UV maps.
I have mark 5 and mark armour variants in a draft state, but they should be easier to make now that I have the majority of the mesh in a suitable condition.
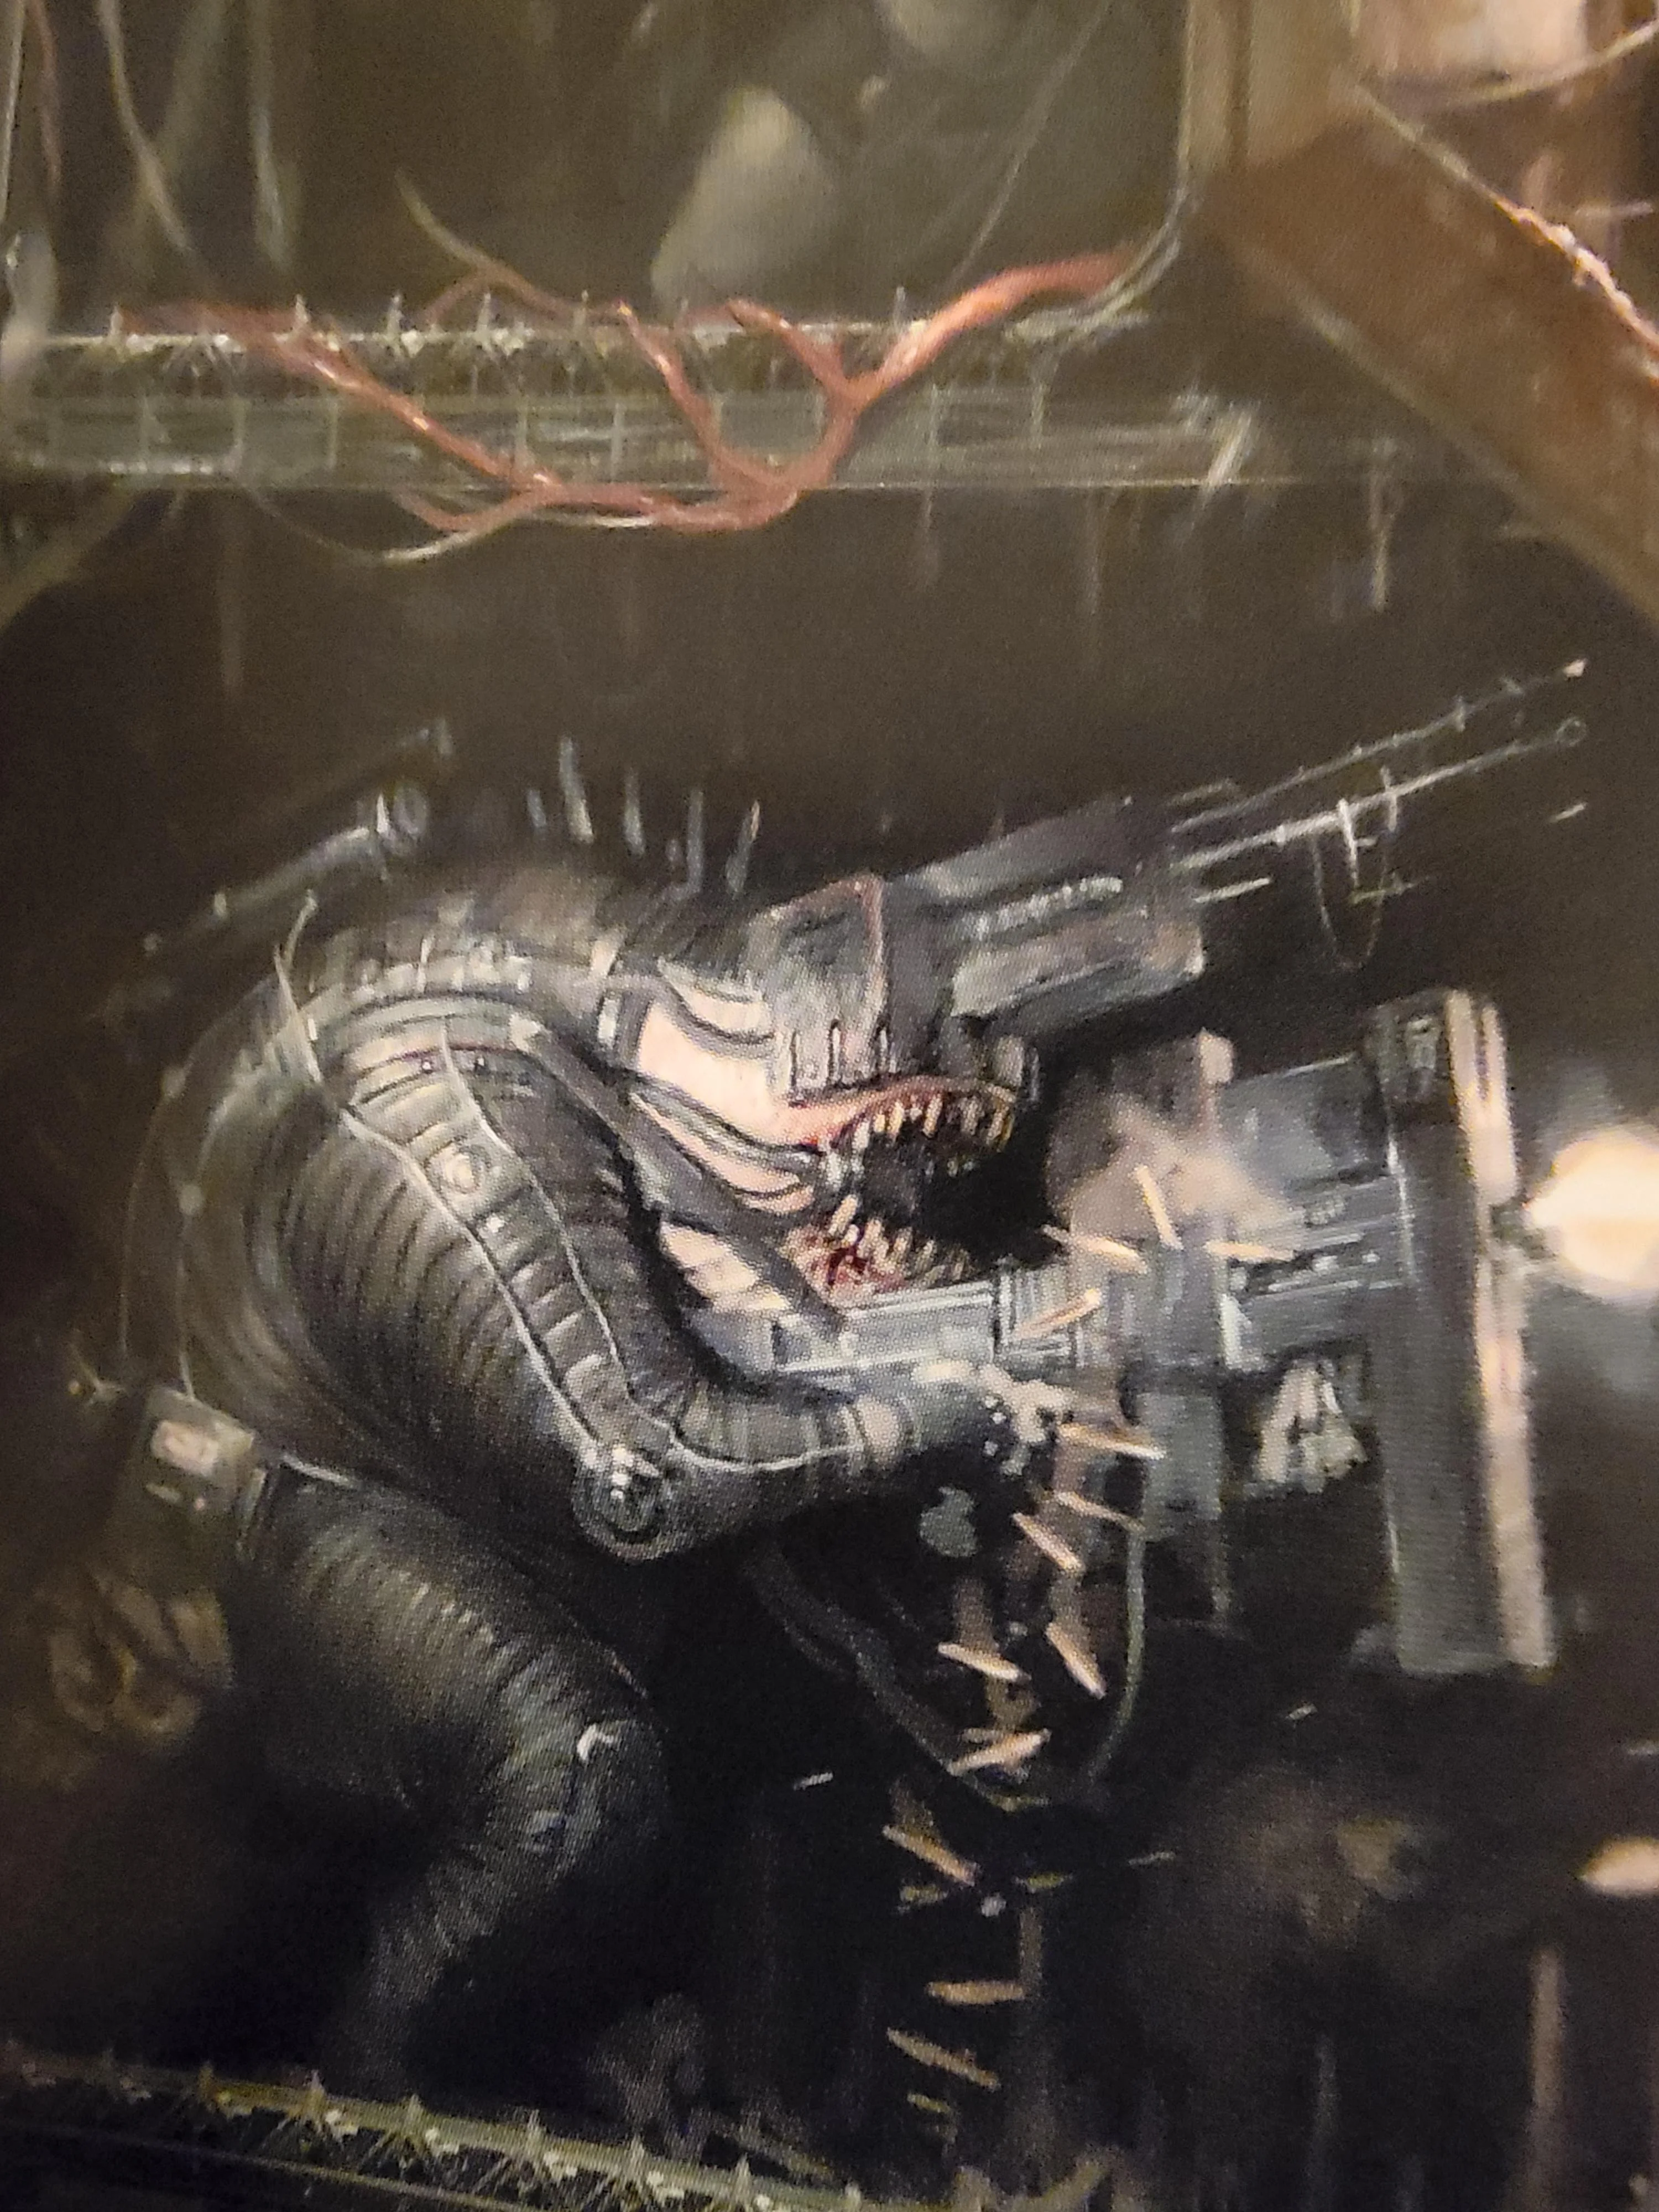
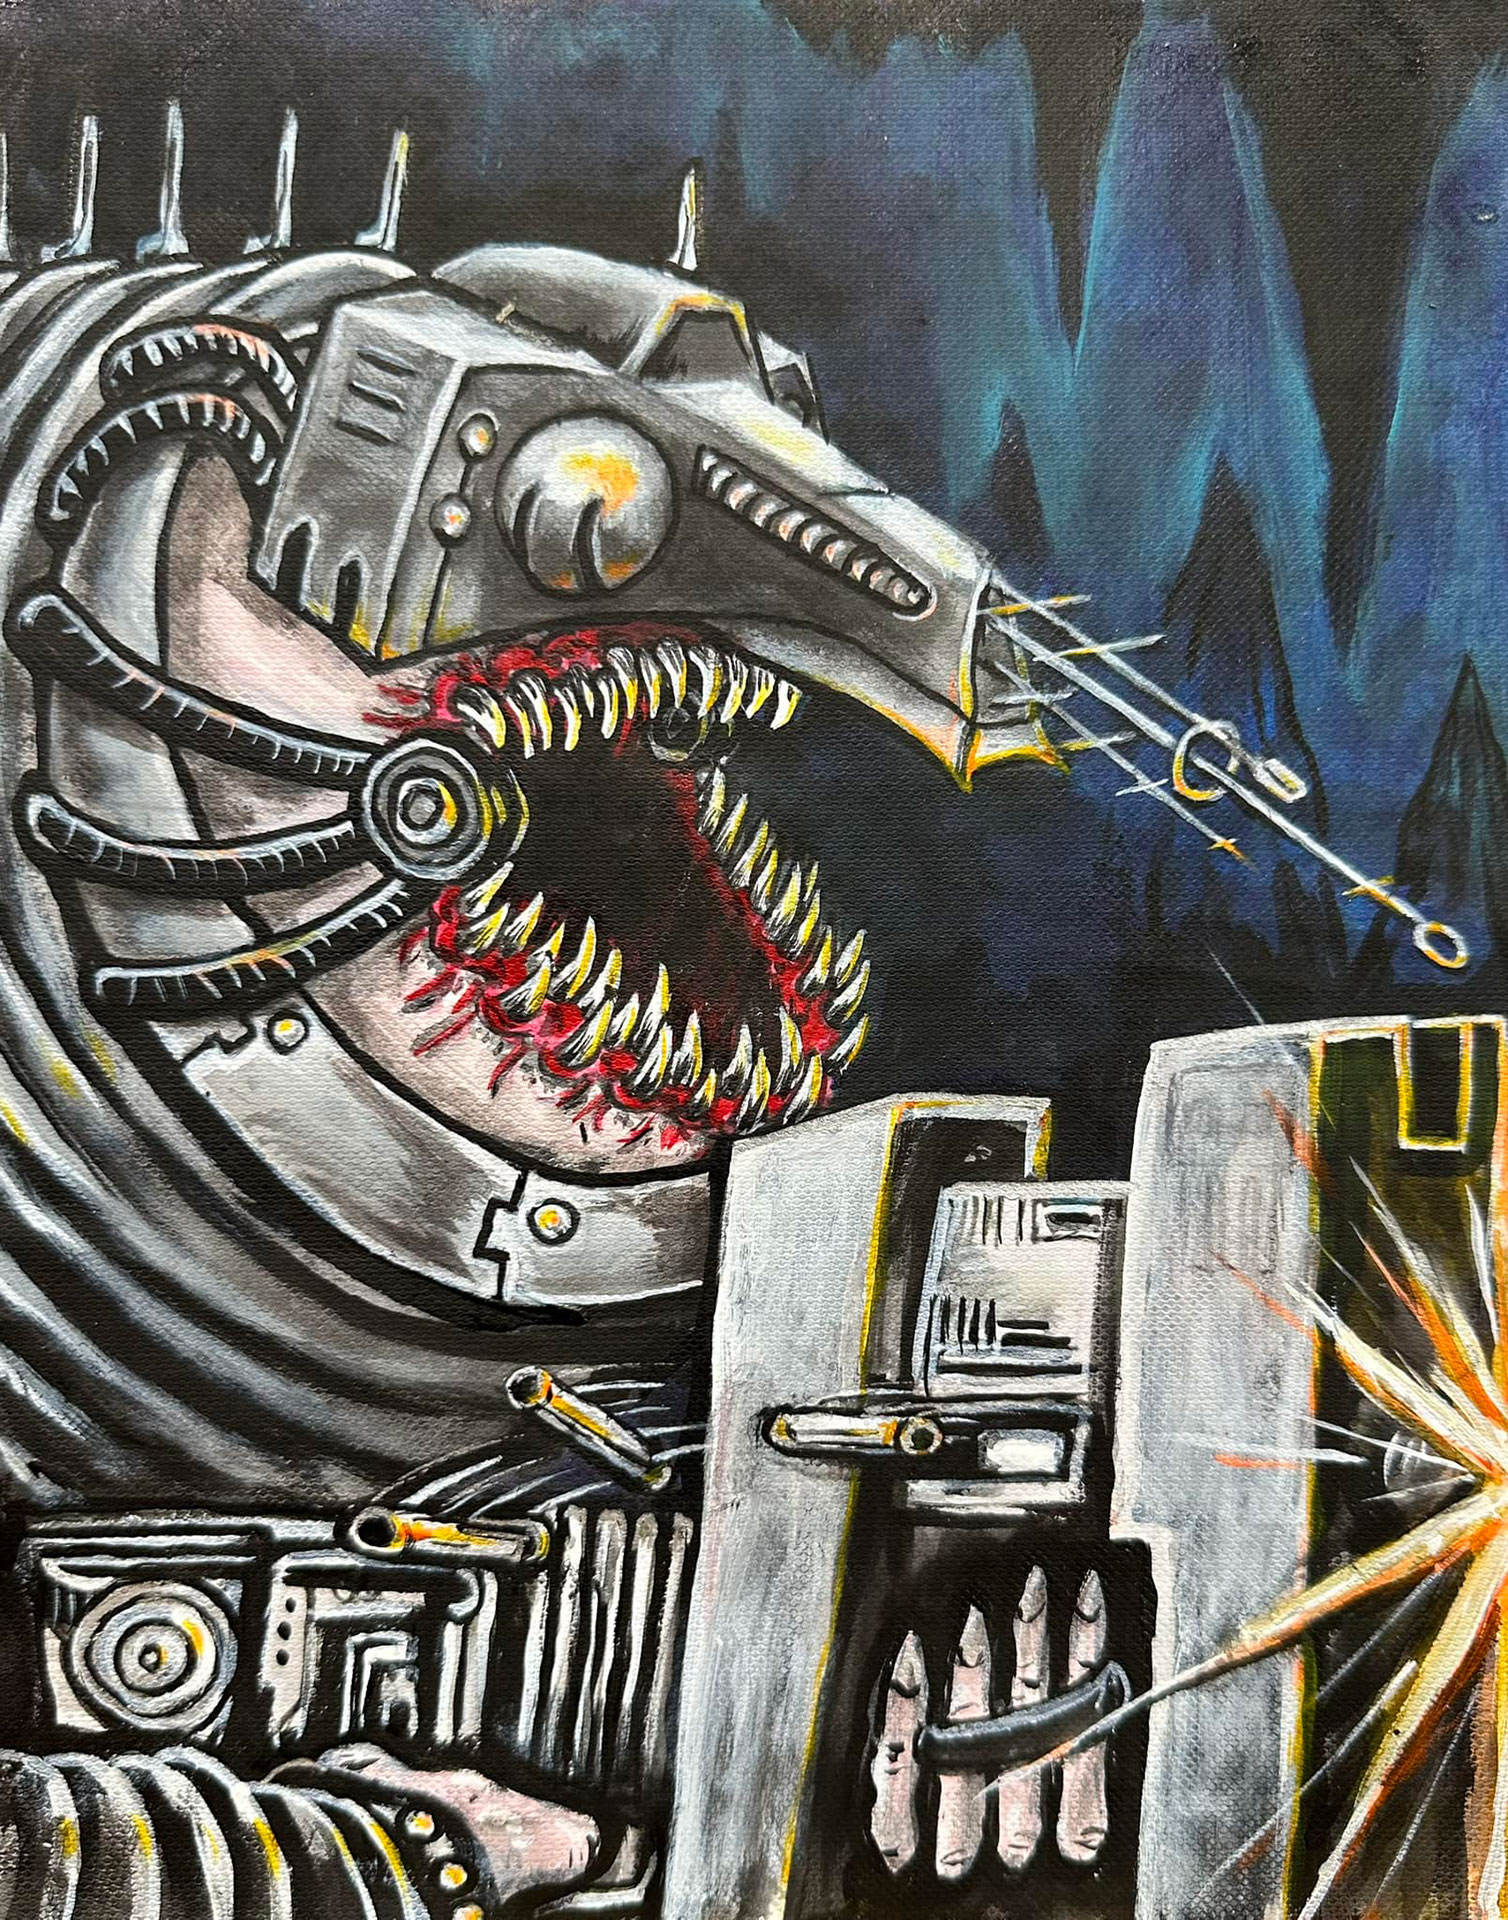
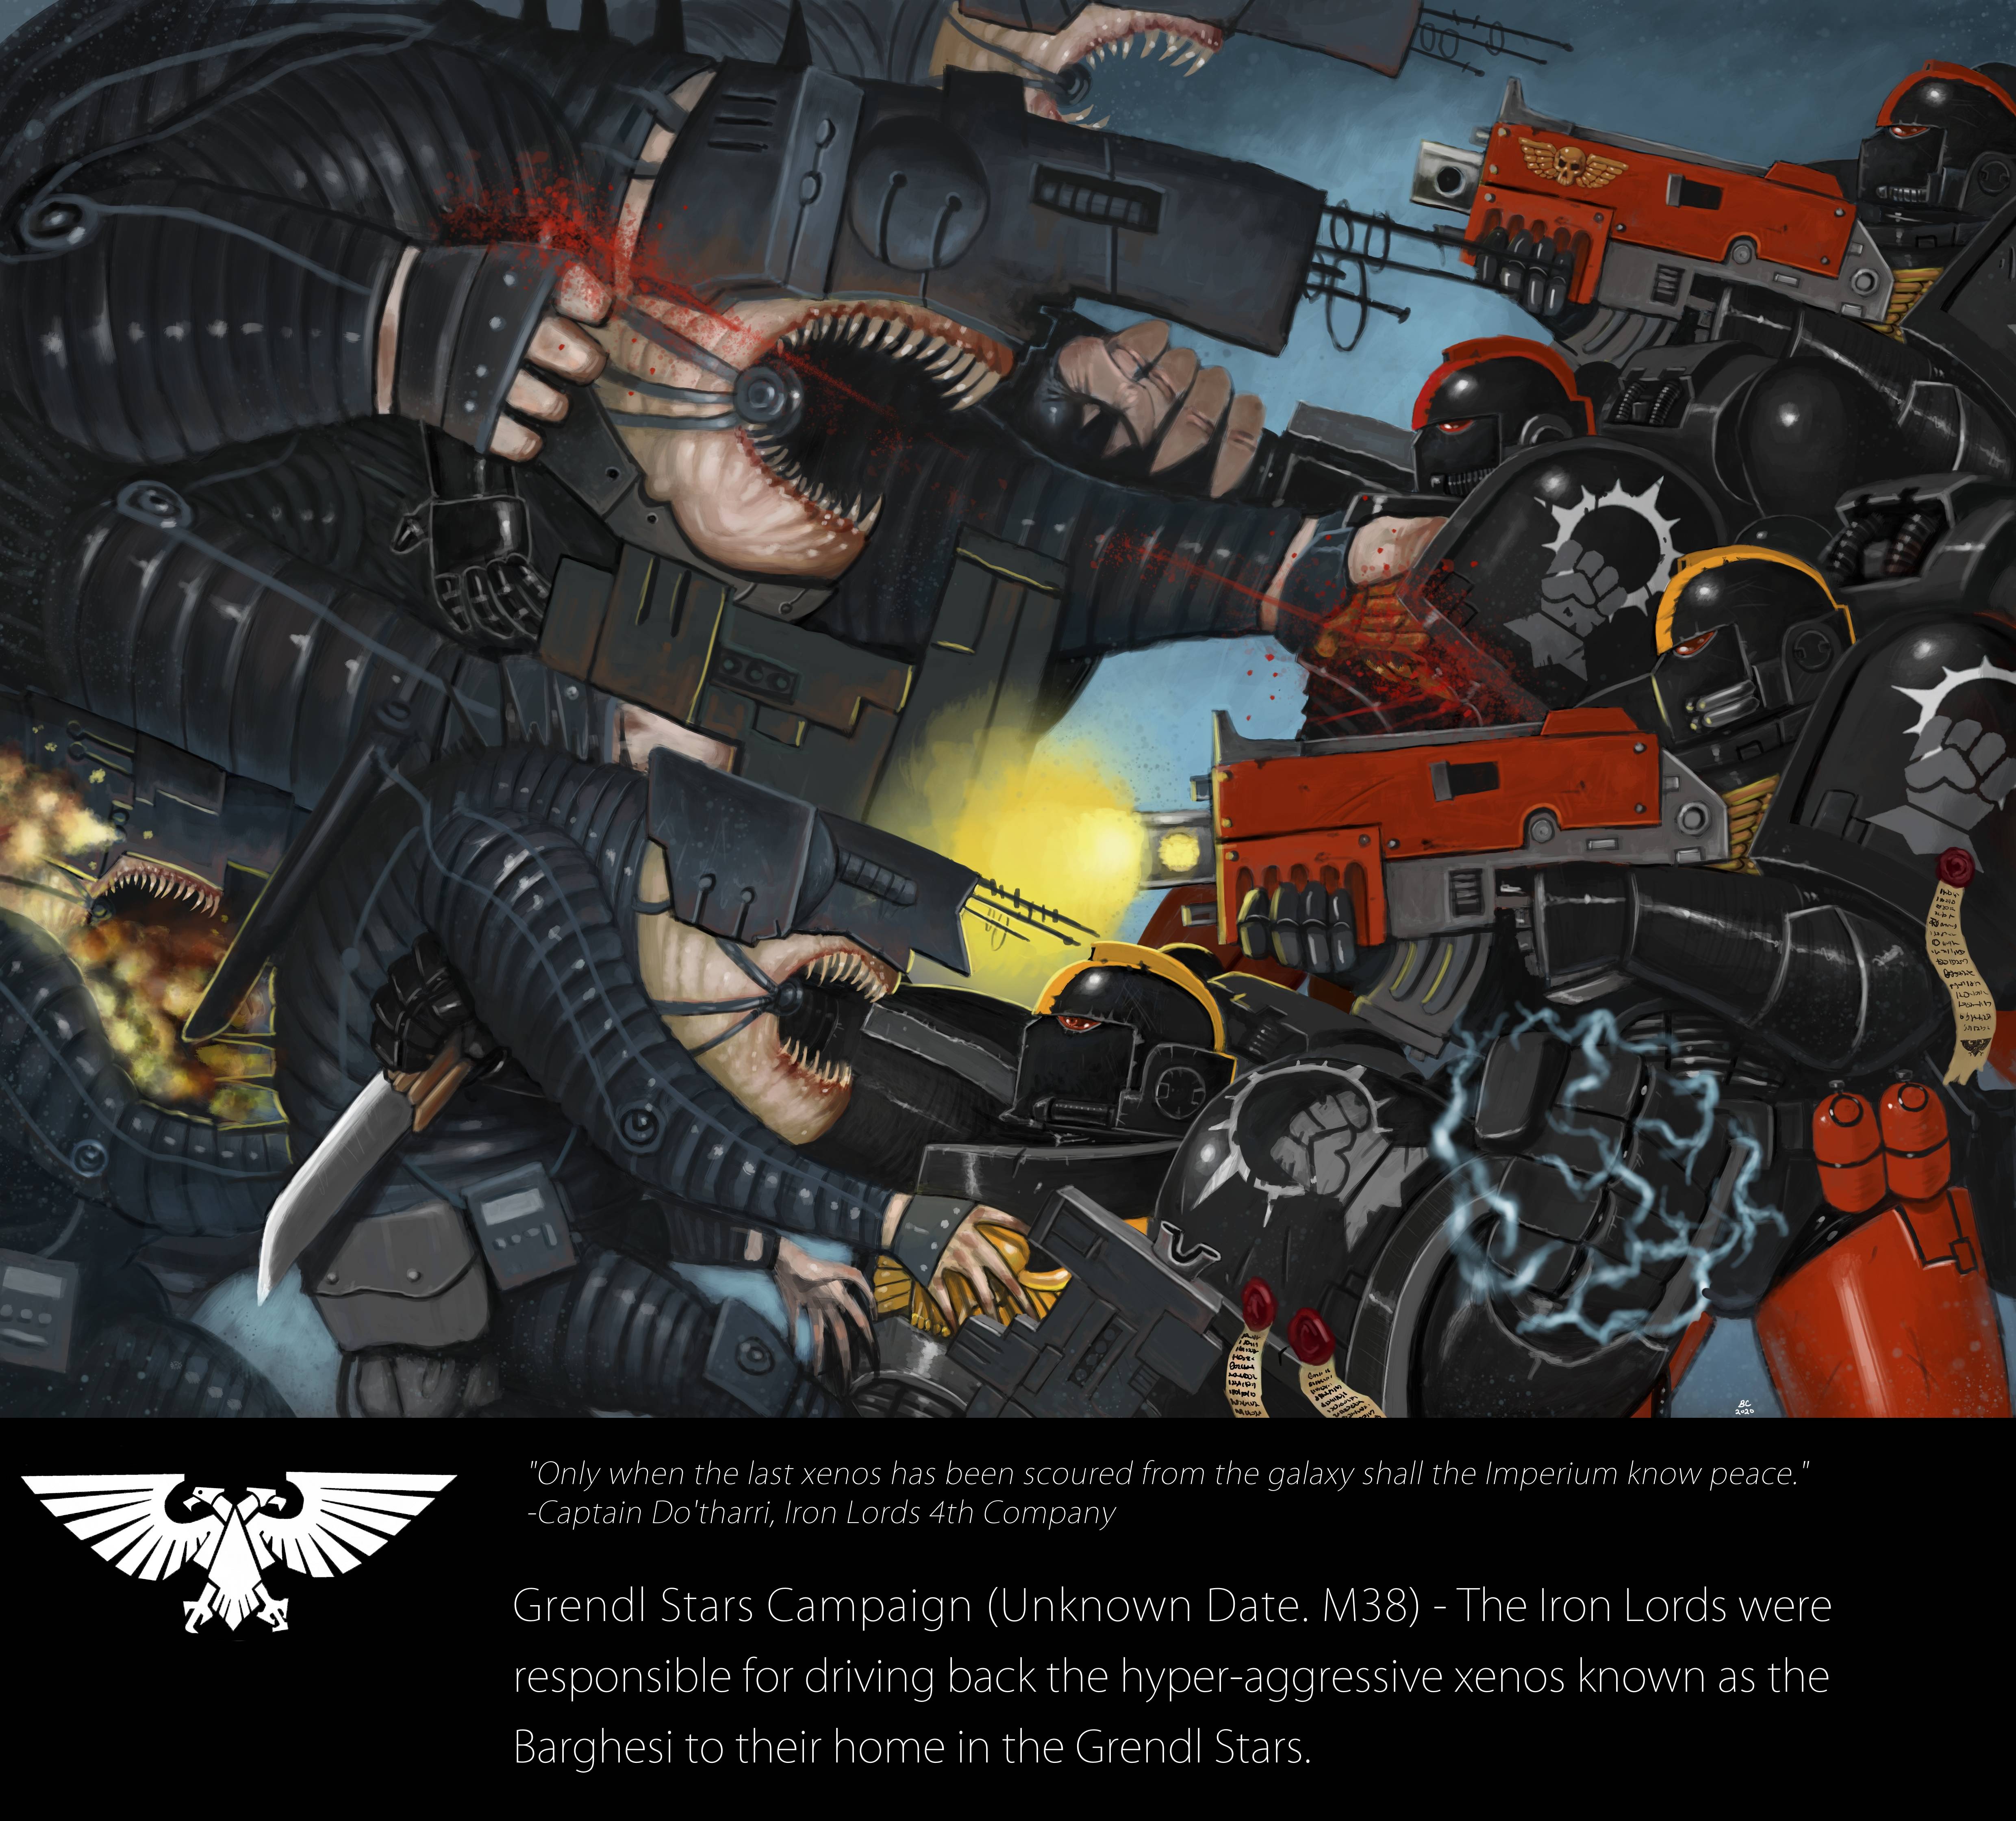
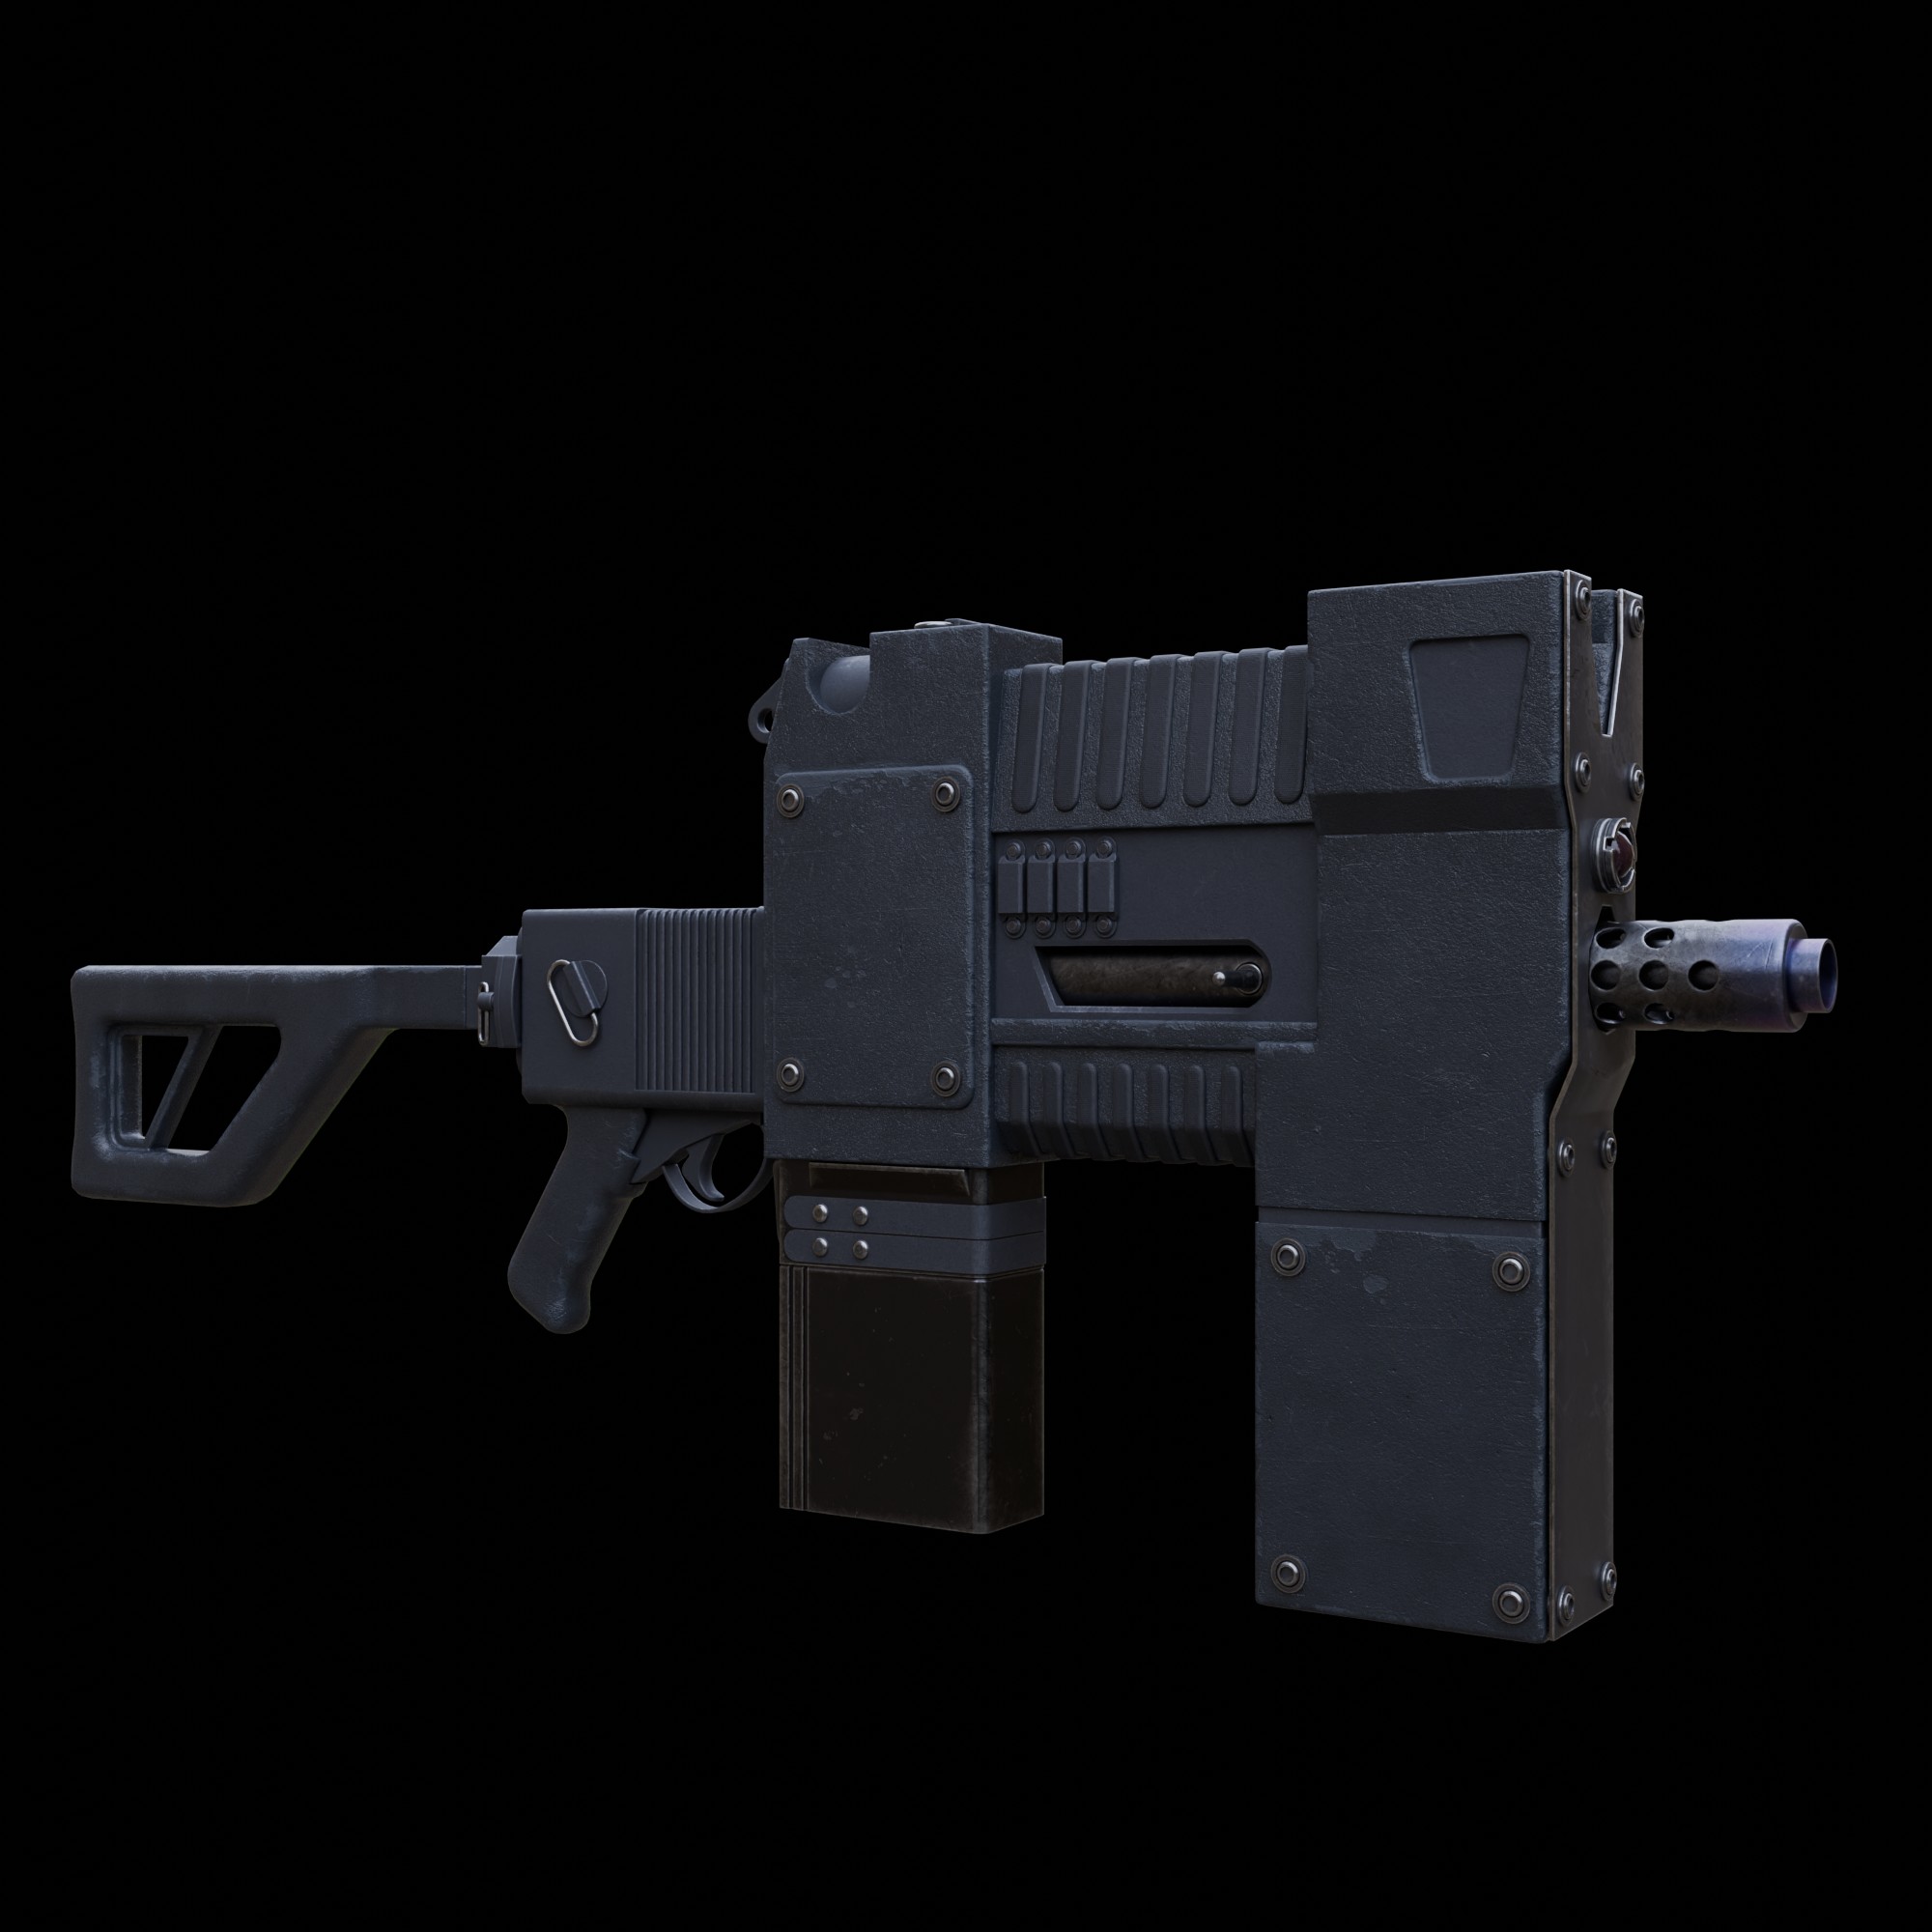
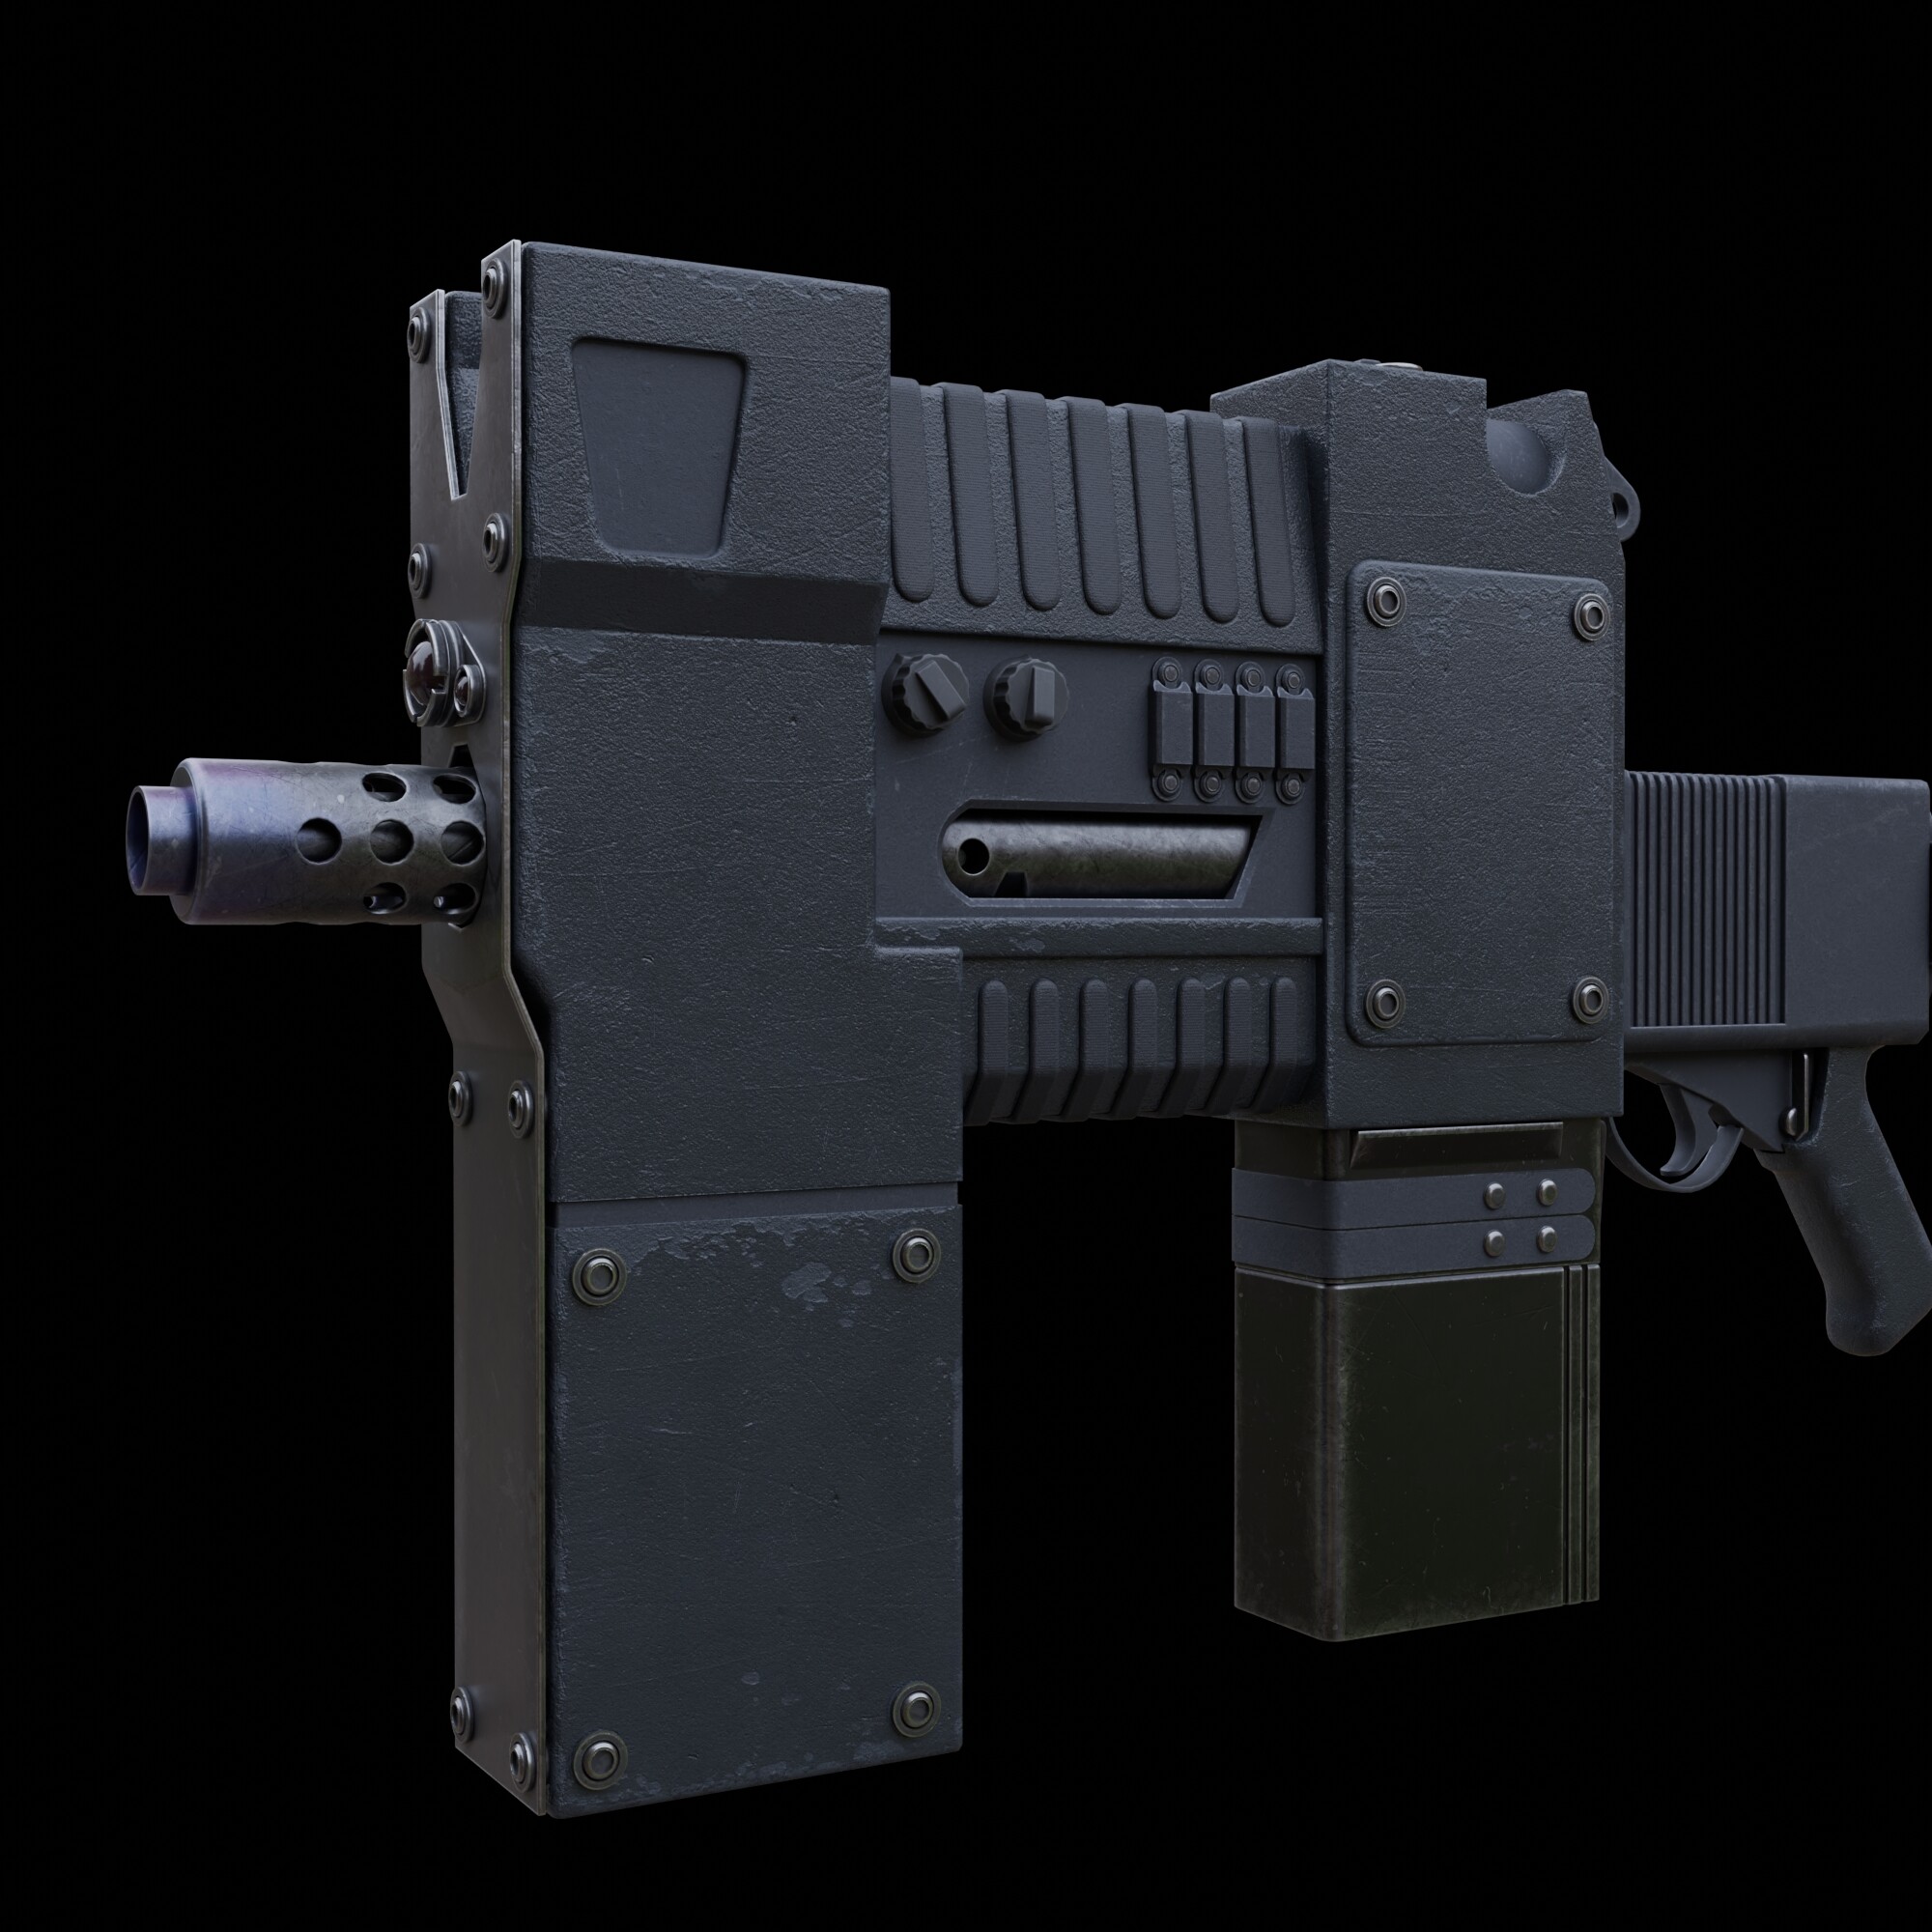
I made a relatively quick model for rigging (using the top artwork for most inspiration) but need to make proper textures yet. I’ll add the cables and such when it is rigged and positioned. To speed things up I used a few models from the Substance asset library (e.g. some of the hardsurface gubbins) but otherwise made everything from scratch. I might remodel the feet to something more interesting.
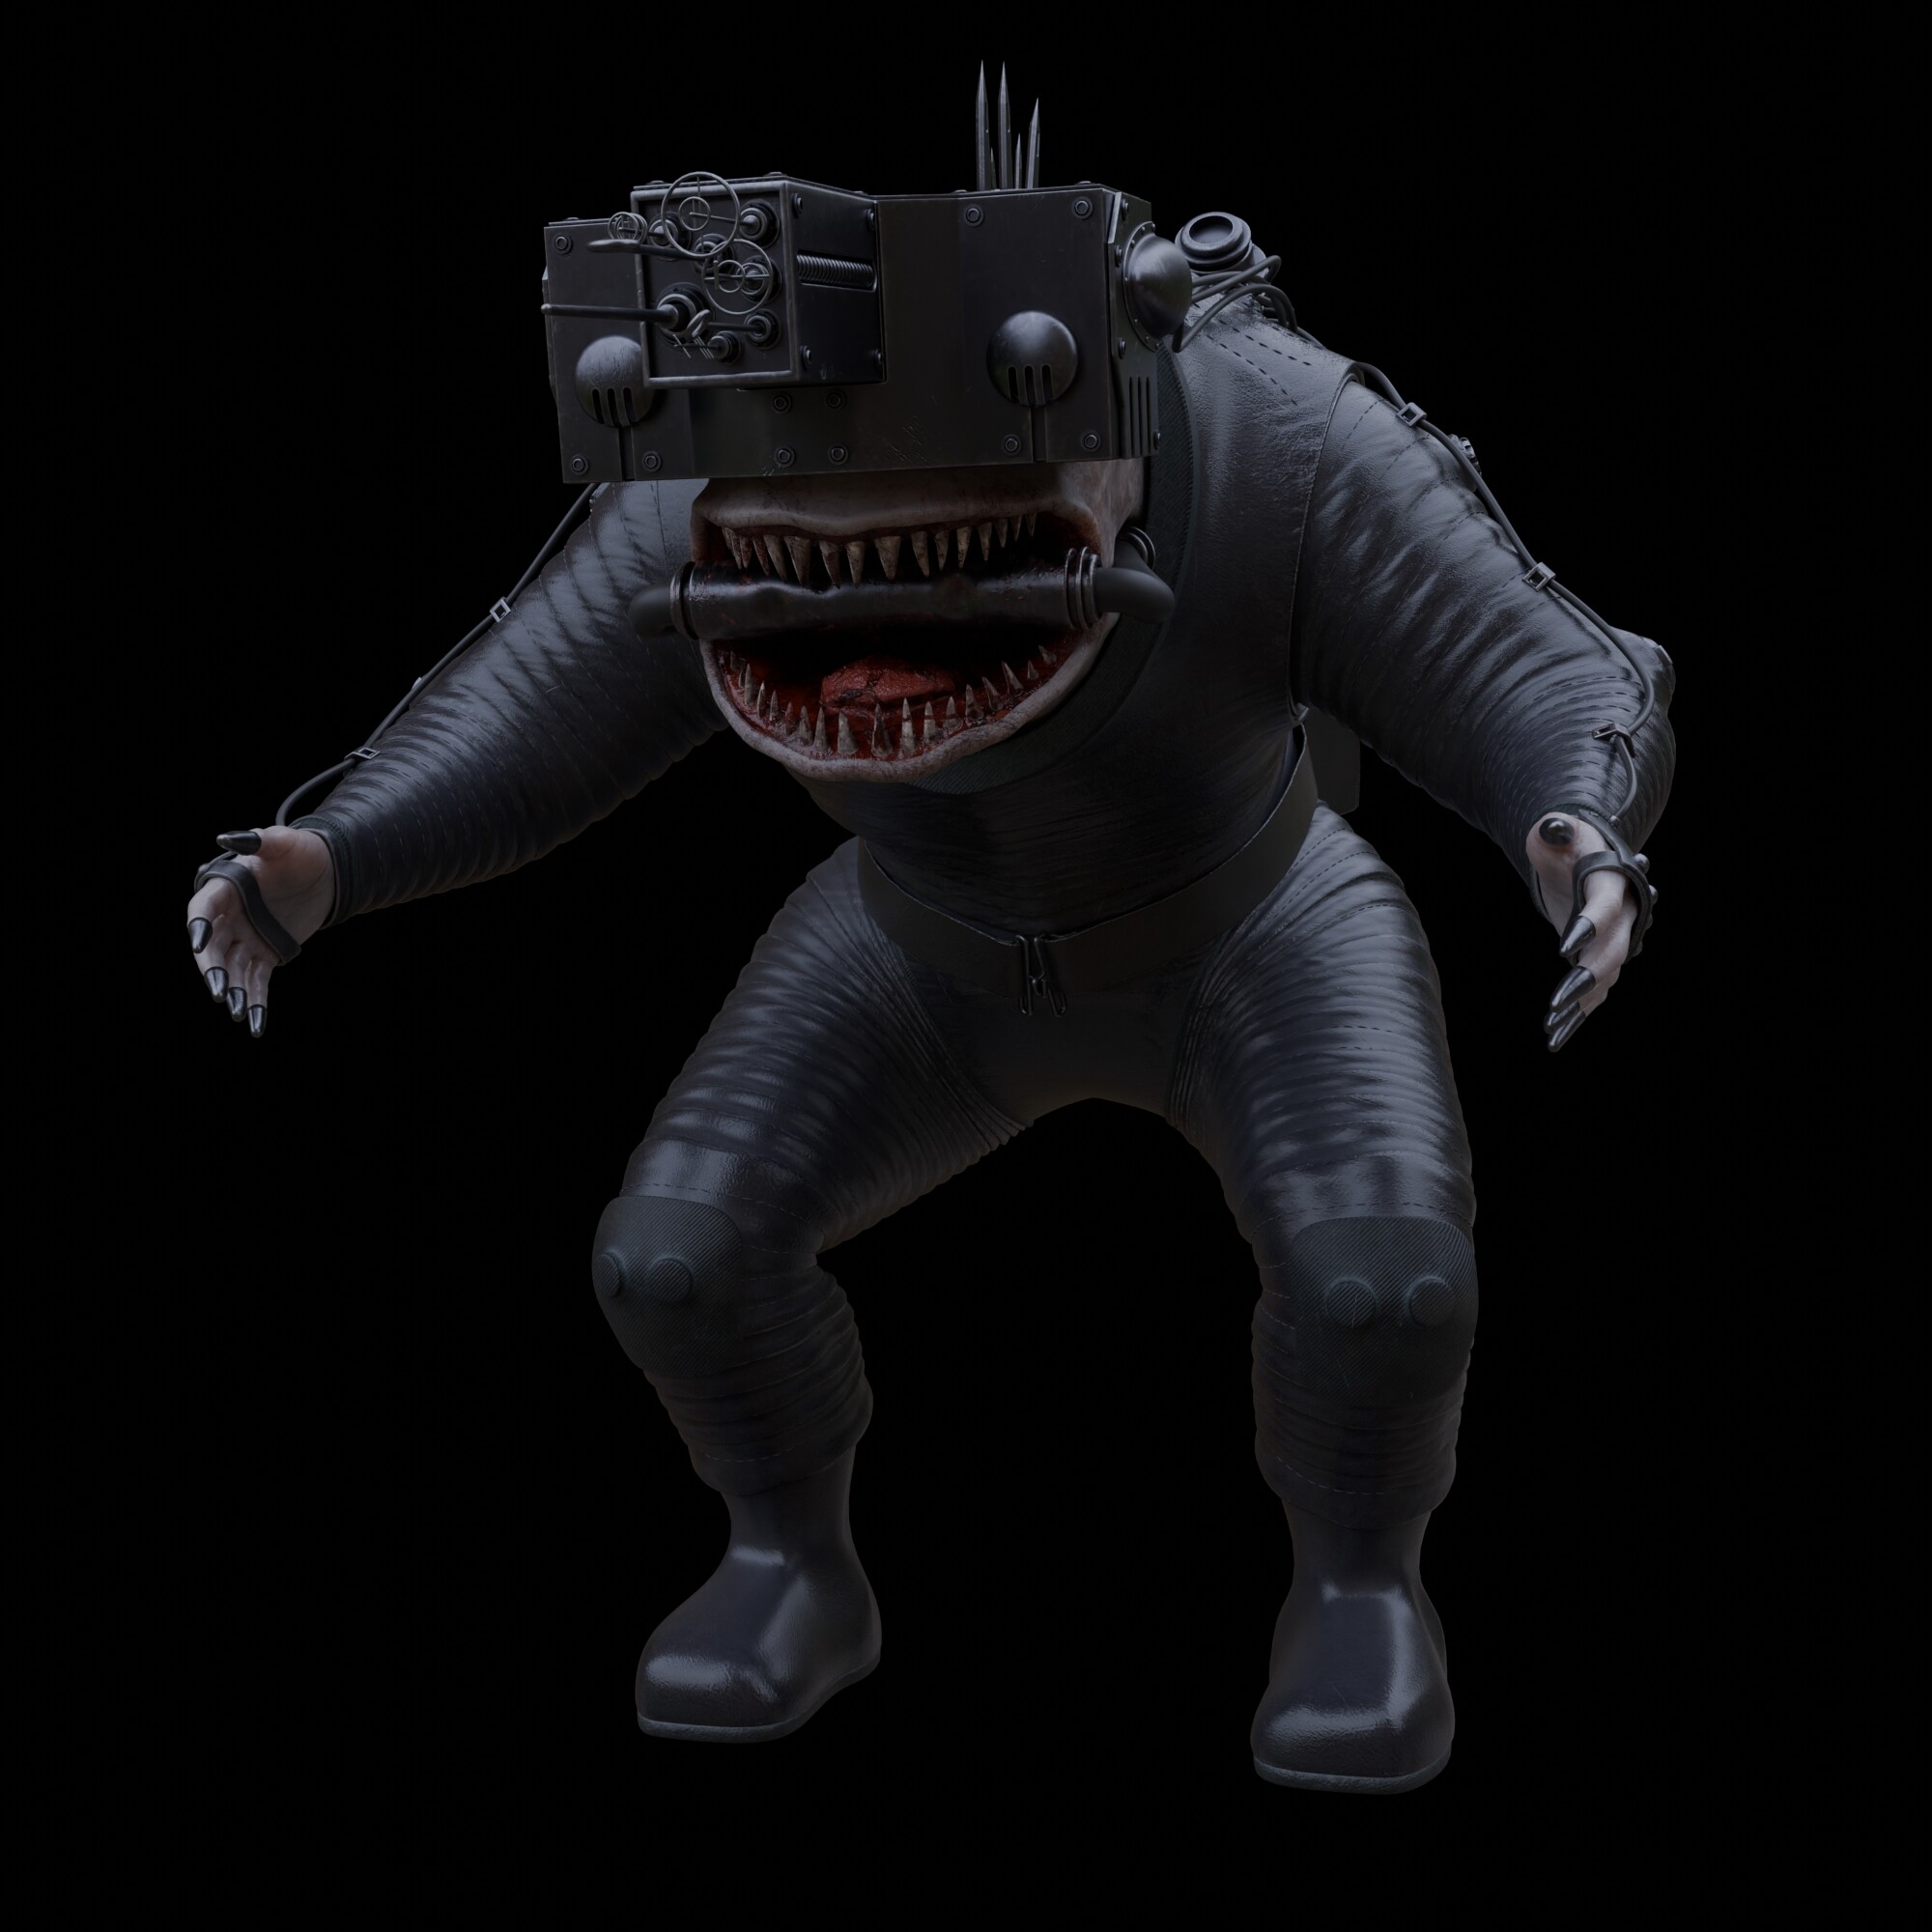
Texturing done (well, some tweaks will happen in all likelihood). Next will be to make a simple FK rig for this, and rig the cables (I’ll use hooks).
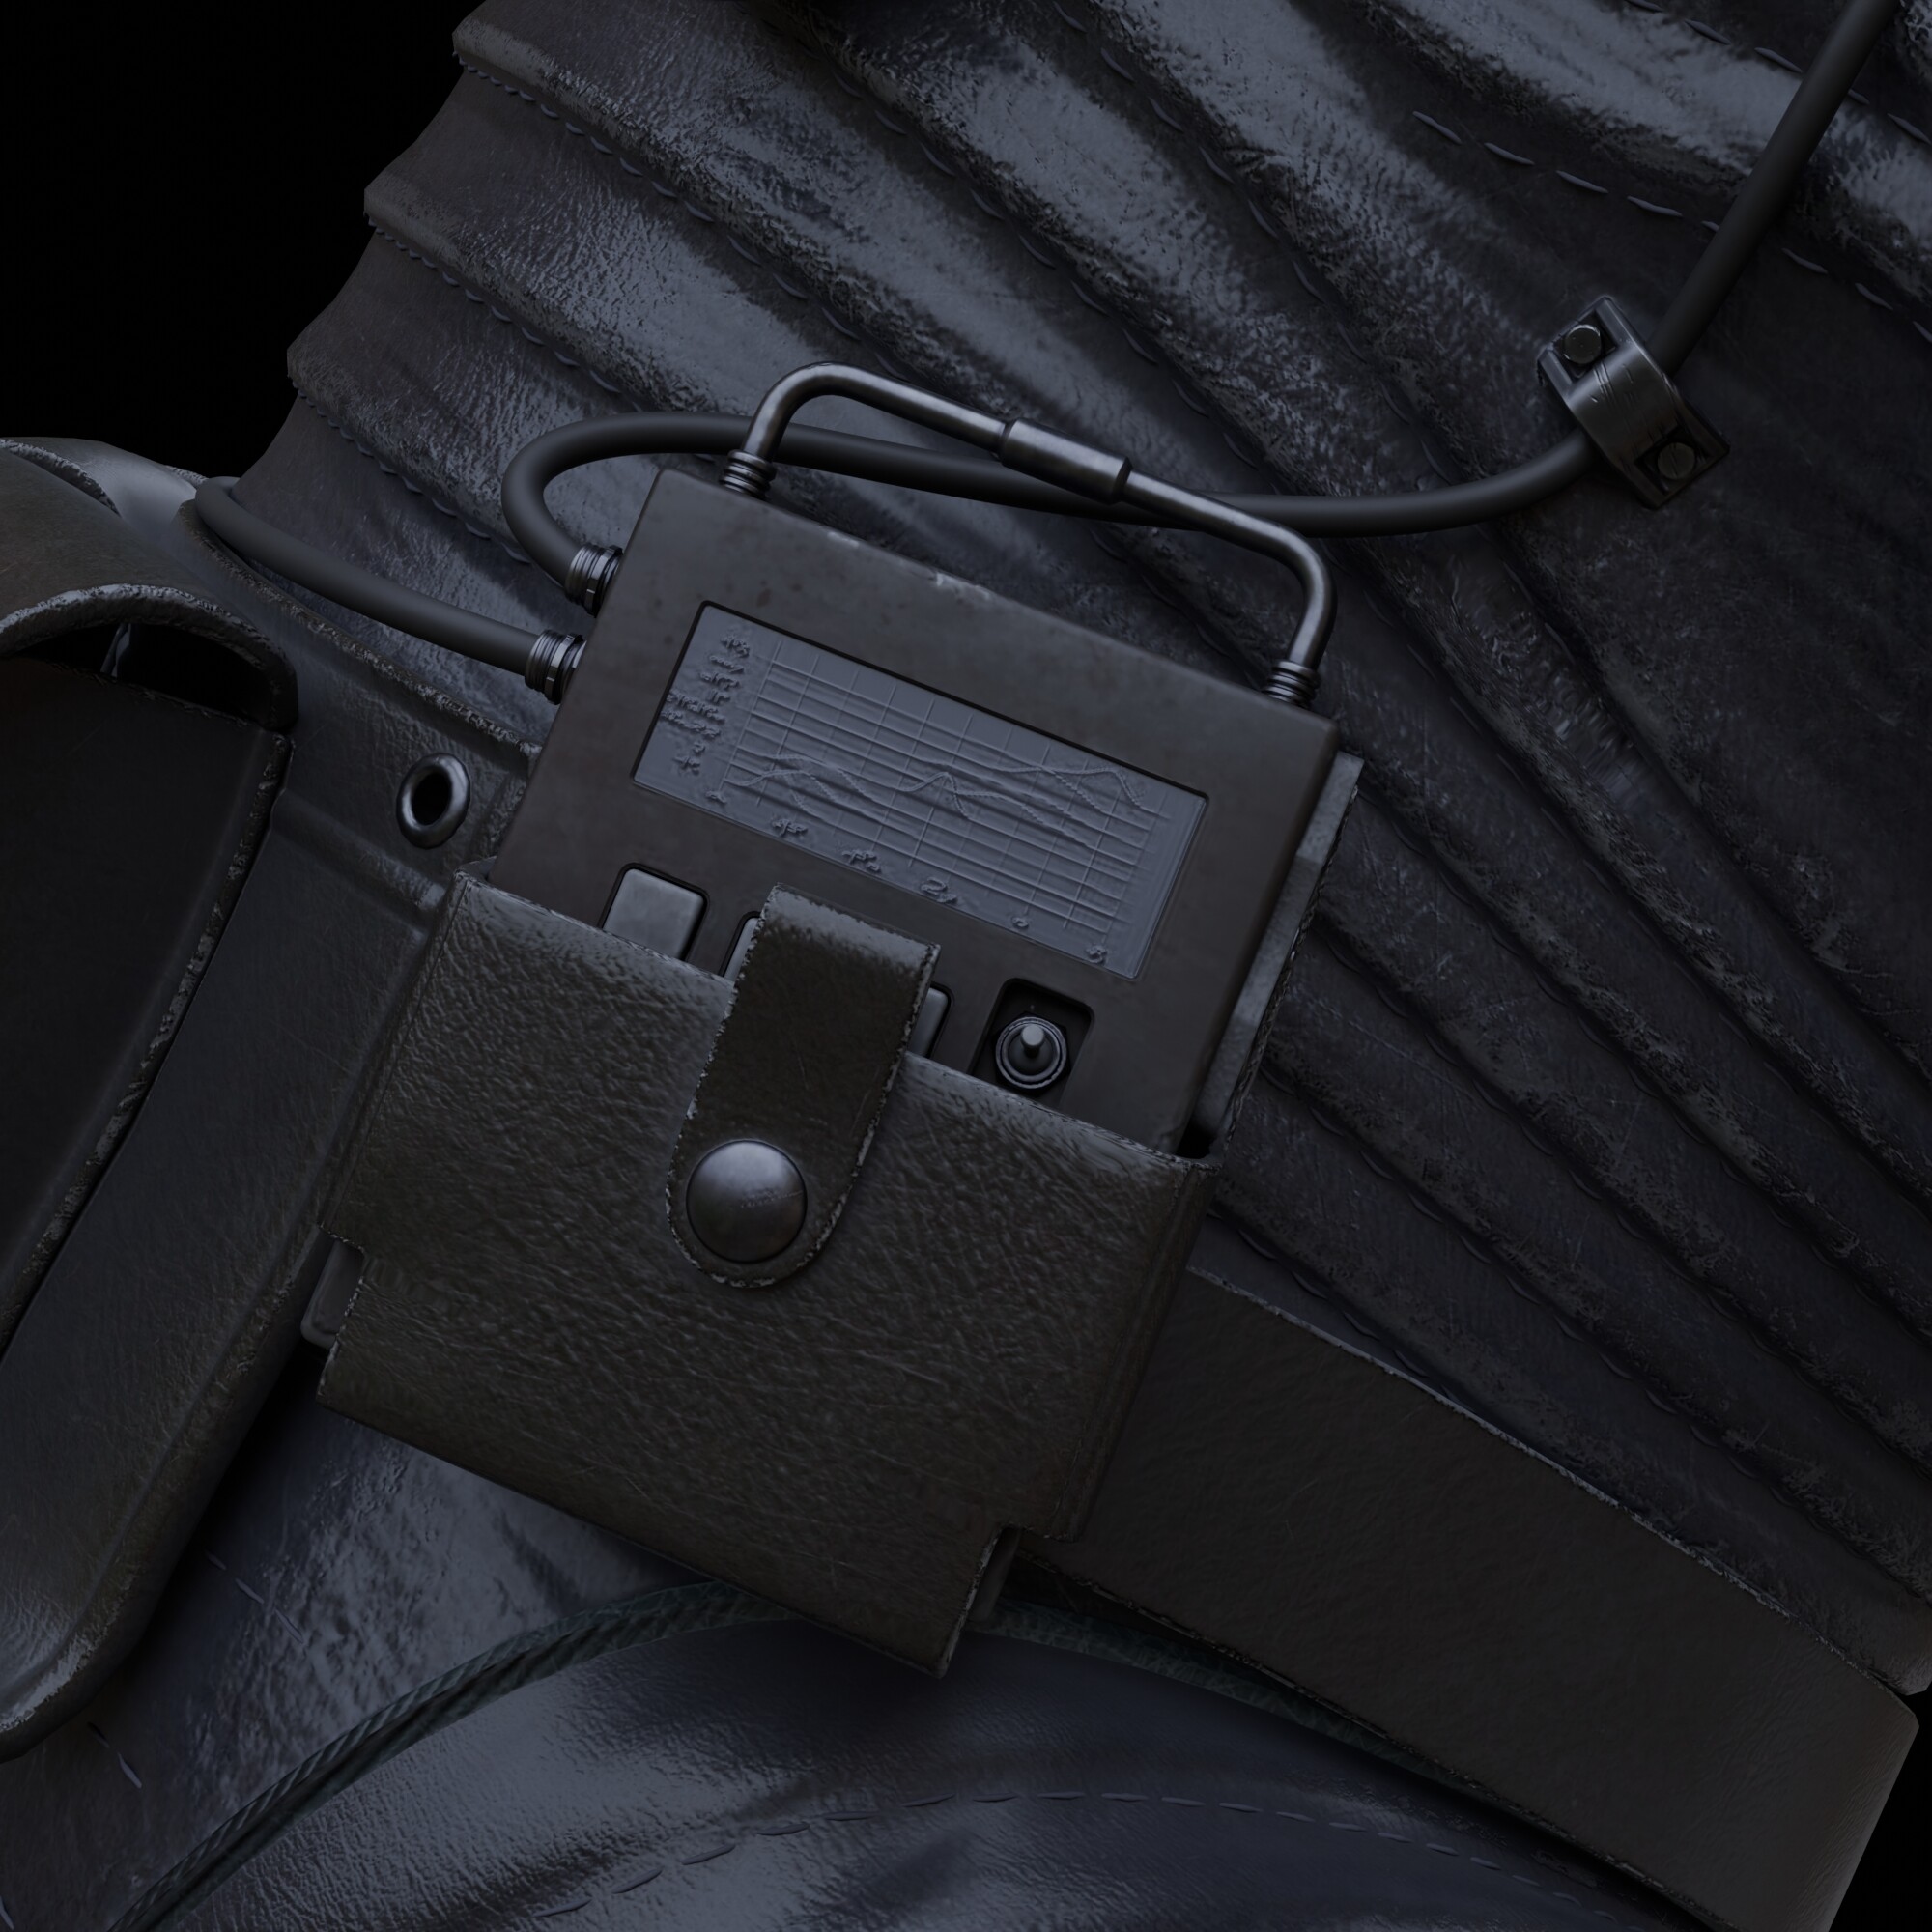
I’m not sure if the stitching will make it into the final images - it’s a lot of extra geometry for a subtle effect (and might not be visible in the scene).
It’s a very subtle thing, but I figured since they don’t seem to have eyes, the display on the little unit thing uses touch instead of visuals (like a braille display). I could increase the size of the UV island to sharpen this up, but again I suspect it won’t be visible in scene.
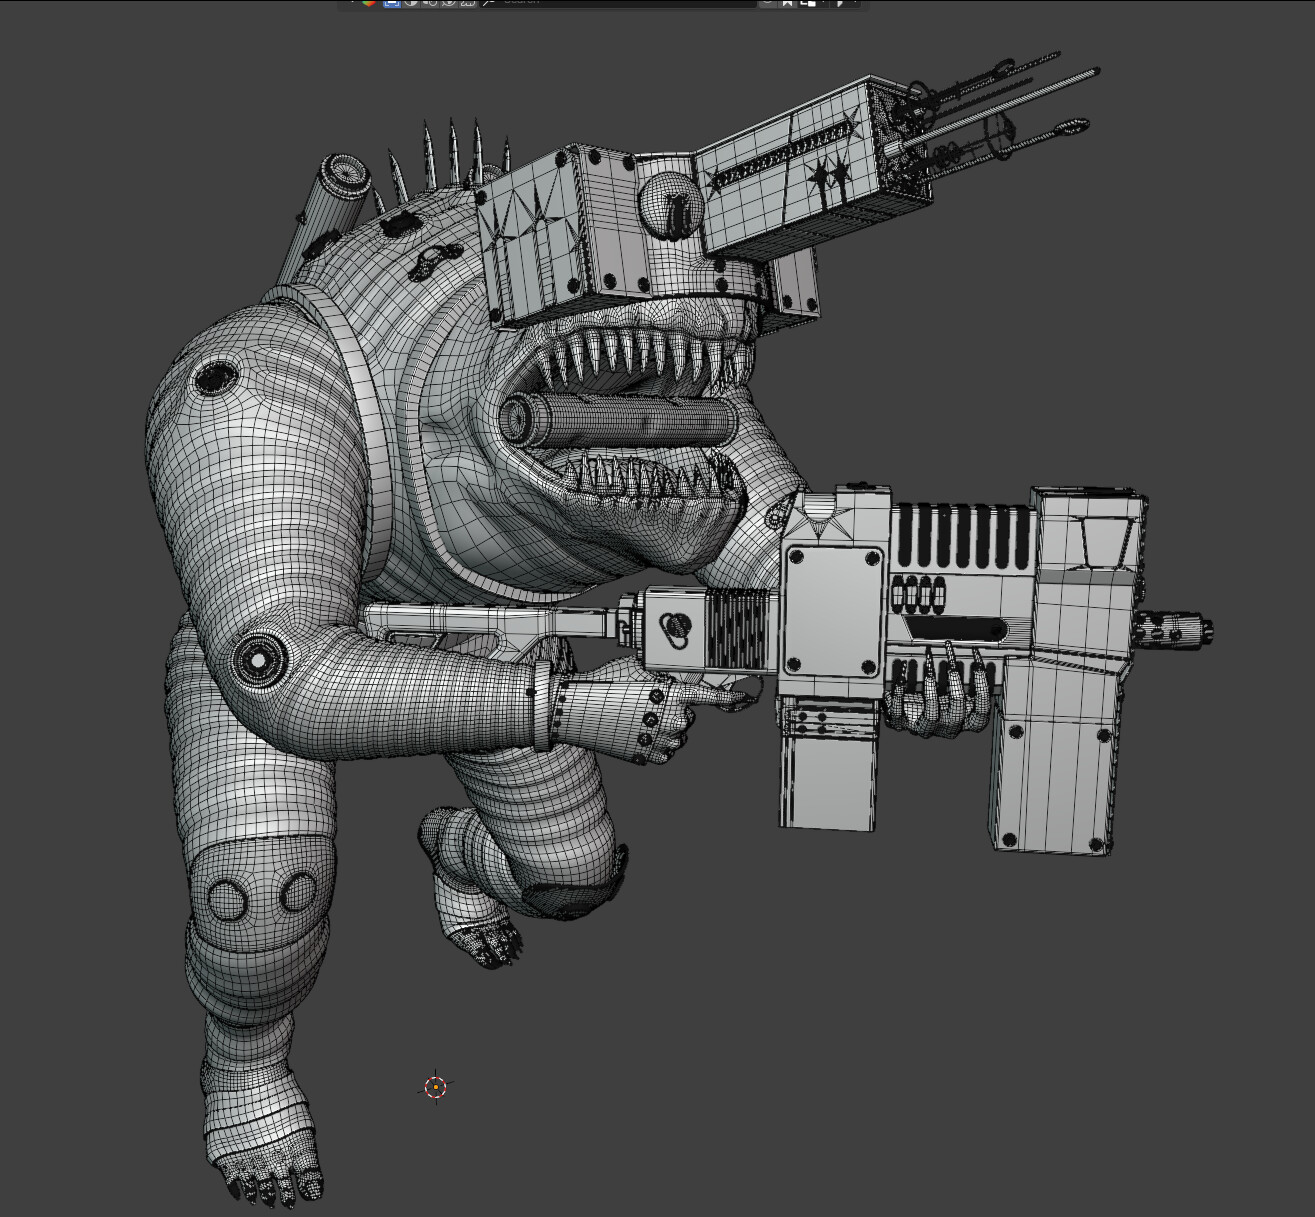
I like the design of these guys - I like the"atompunk space astronaut hammerhead shark" look.
The more I looked into the artwork the more I also wondered about these creatures - given it is 40K, it would not surprise me if these were slave-warriors that were doped up to their eyeballs in combat stims (from the little packs and tubing), and kept in a state of agony to further their aggression (the mouth bit looks unpleasant at the very least, even if it is to provide breathing gases or something). They might even have been humans at one point in the Dark Age of Technology, and now barely resemble us.
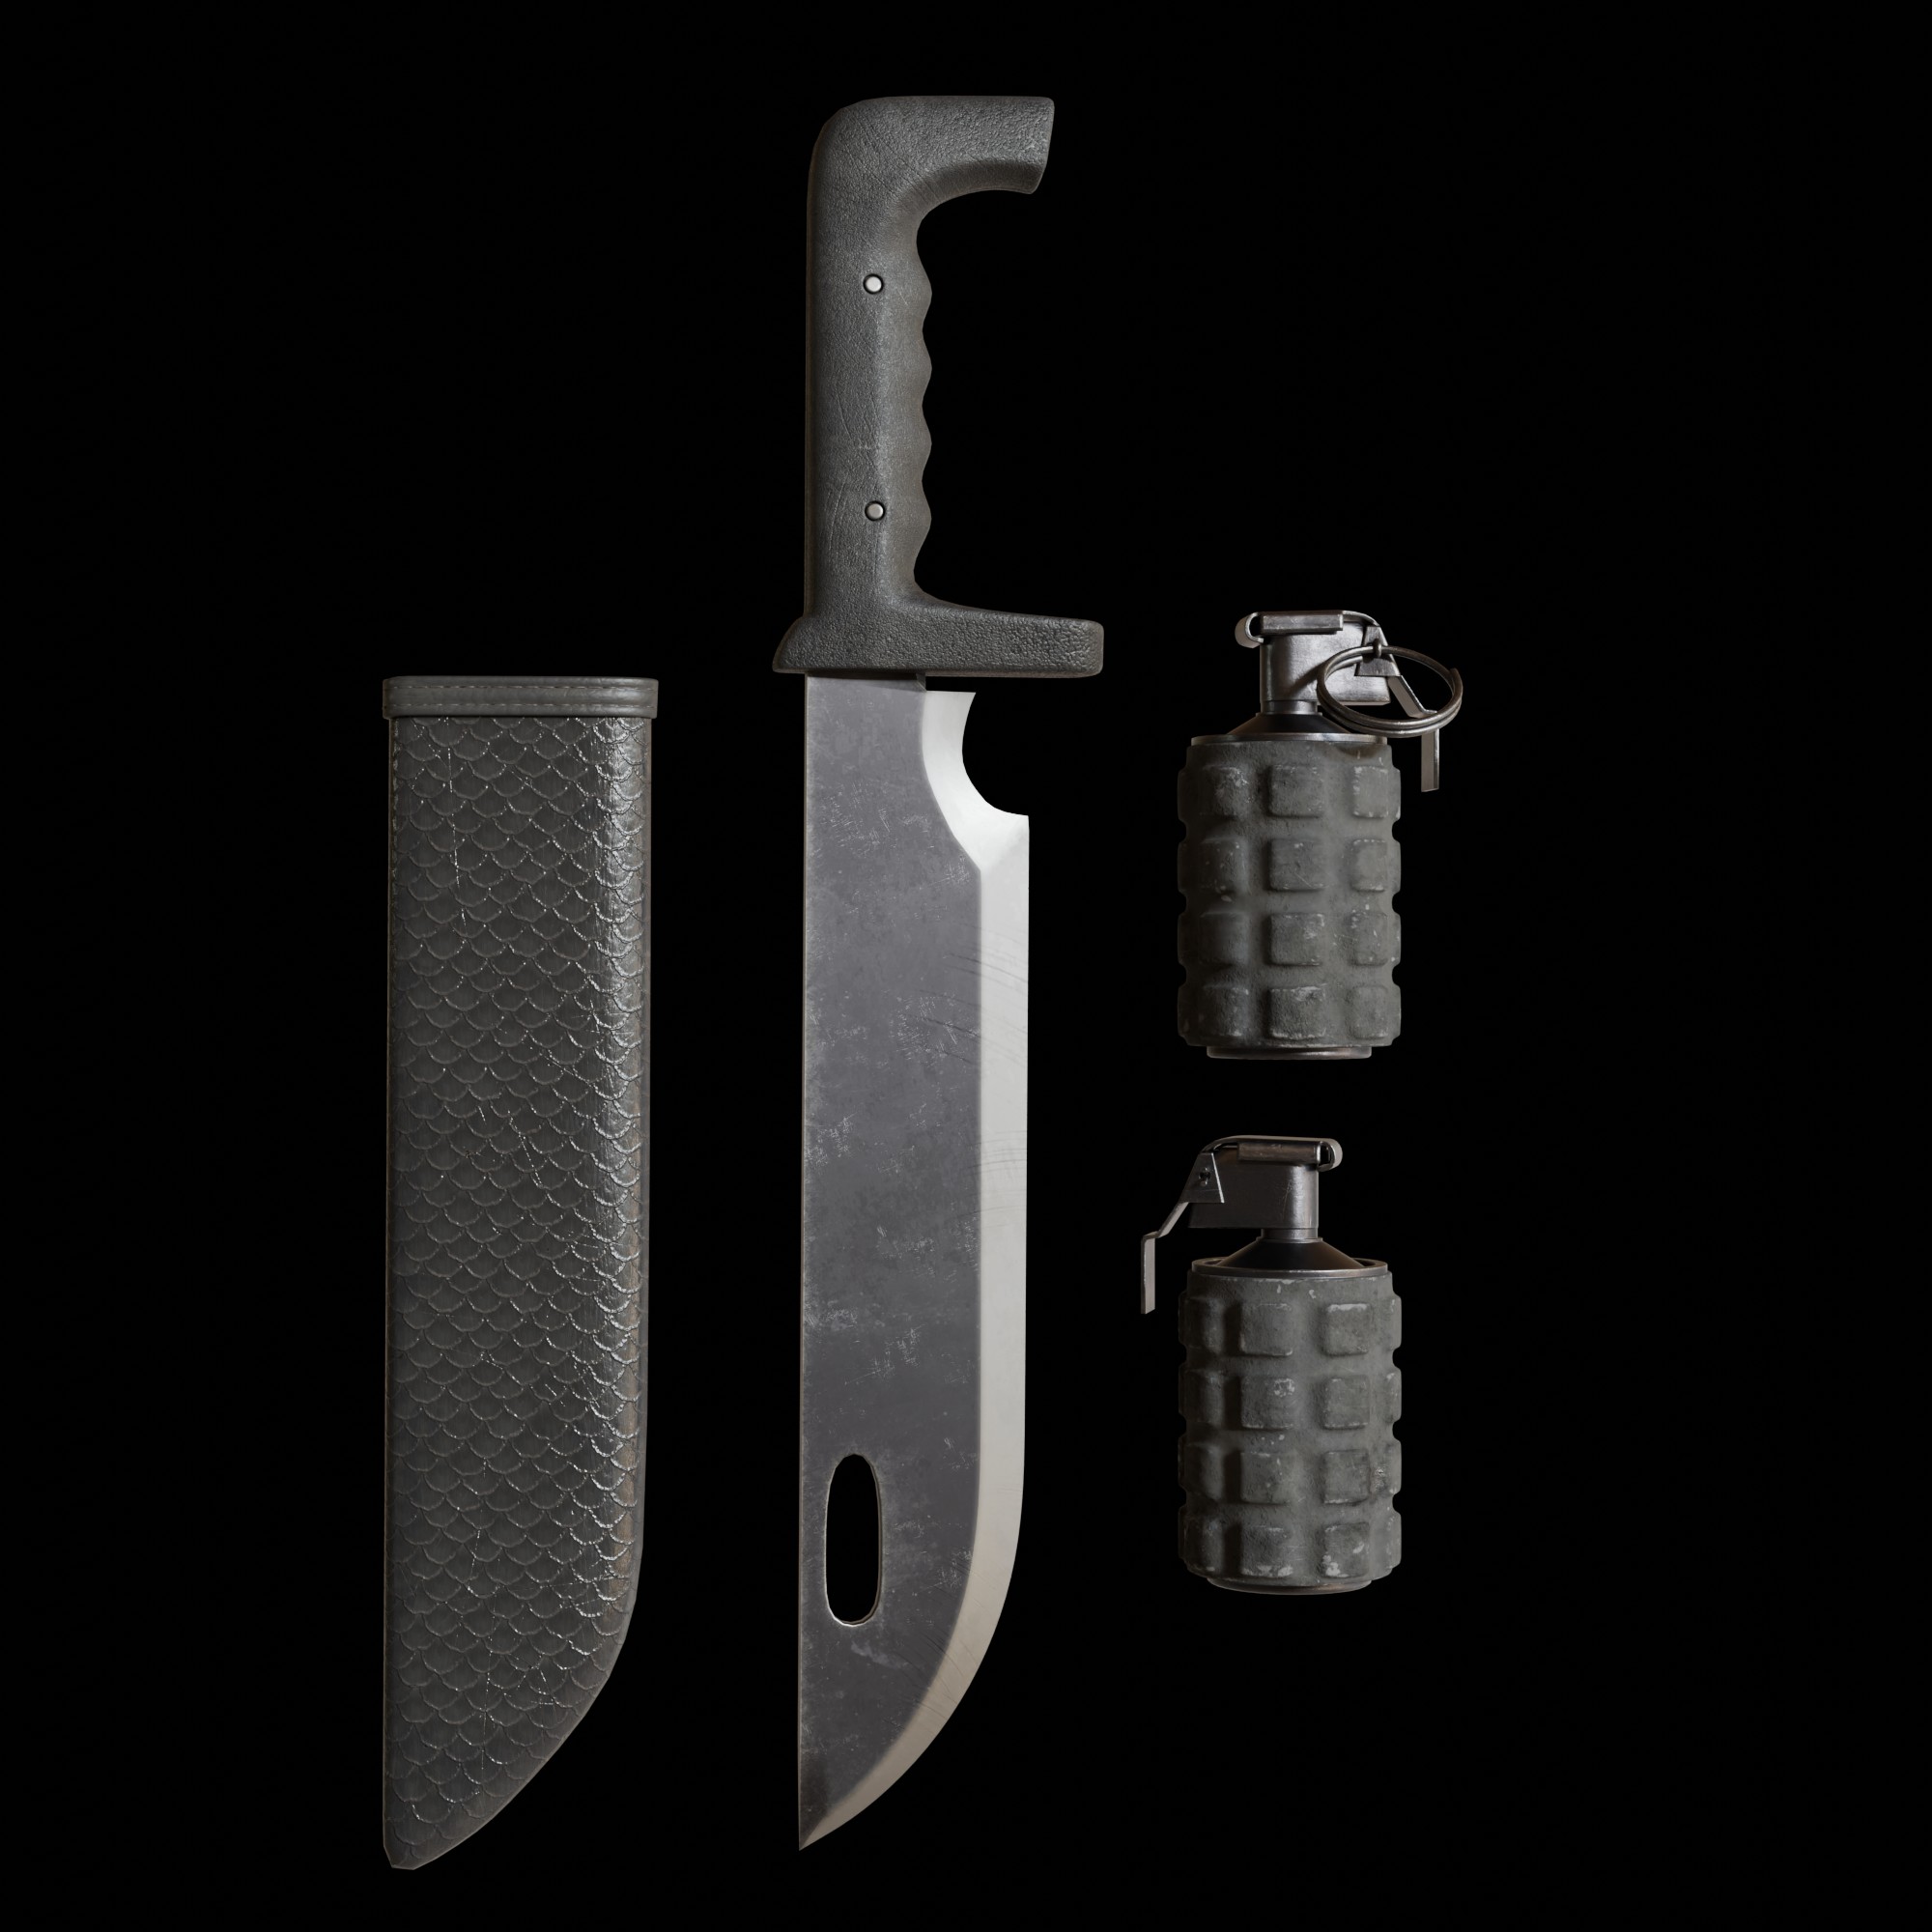
I used a few adobe assets here just to speed things up, particularly for the handle and stock (for some reason I just find modelling these so boring). I went for a similar blue-ish colour scheme, reasonably simple. The plastic casing is a little too similar to the parkerised metal, so I might tweak this to contrast more once I see everything in the scene.
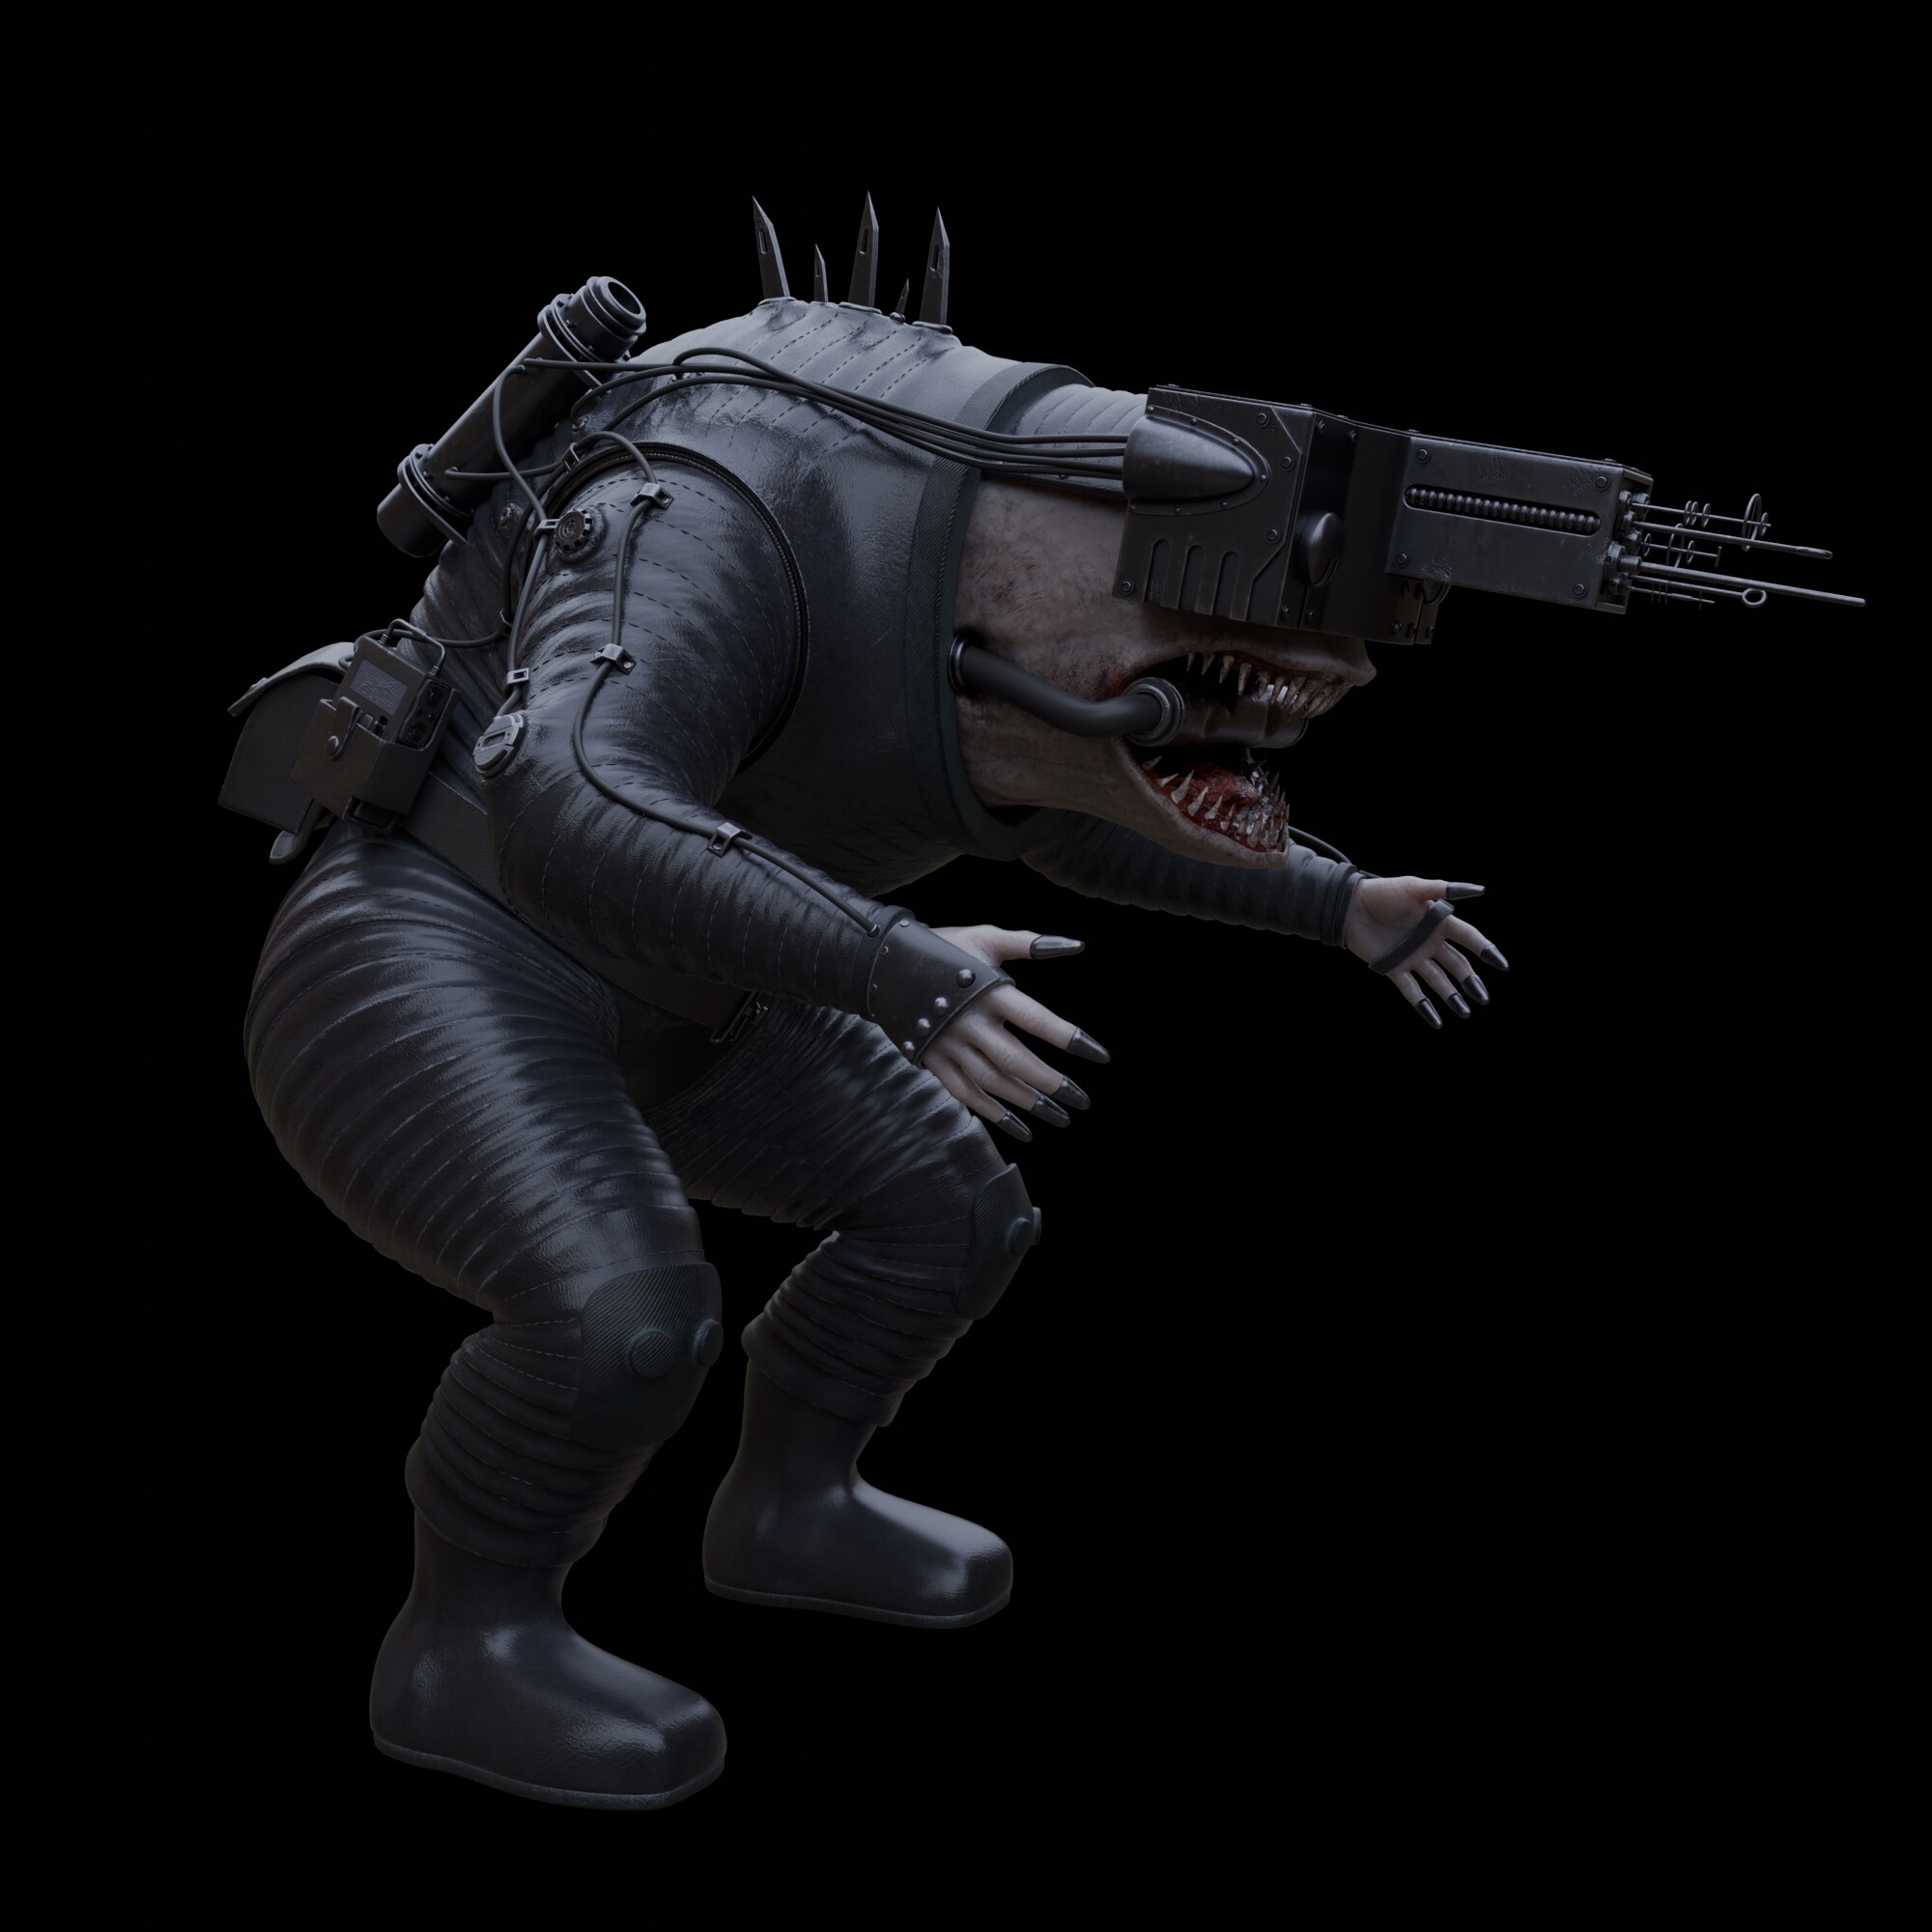
So, there was a bit of a setback. When I tried the original model I encountered all sorts of issues - weight paints not updating, bones behaving weirdly, etc. Then I also couldn’t quite get the sort of poses I wanted - the proportions were too thick in places, etc. I just couldn’t fix the weird bugs so I decided to just remodel it all and fix everything that was annoying me (including remaking my own hard surface assets, as I started to find the adobe ones annoying).
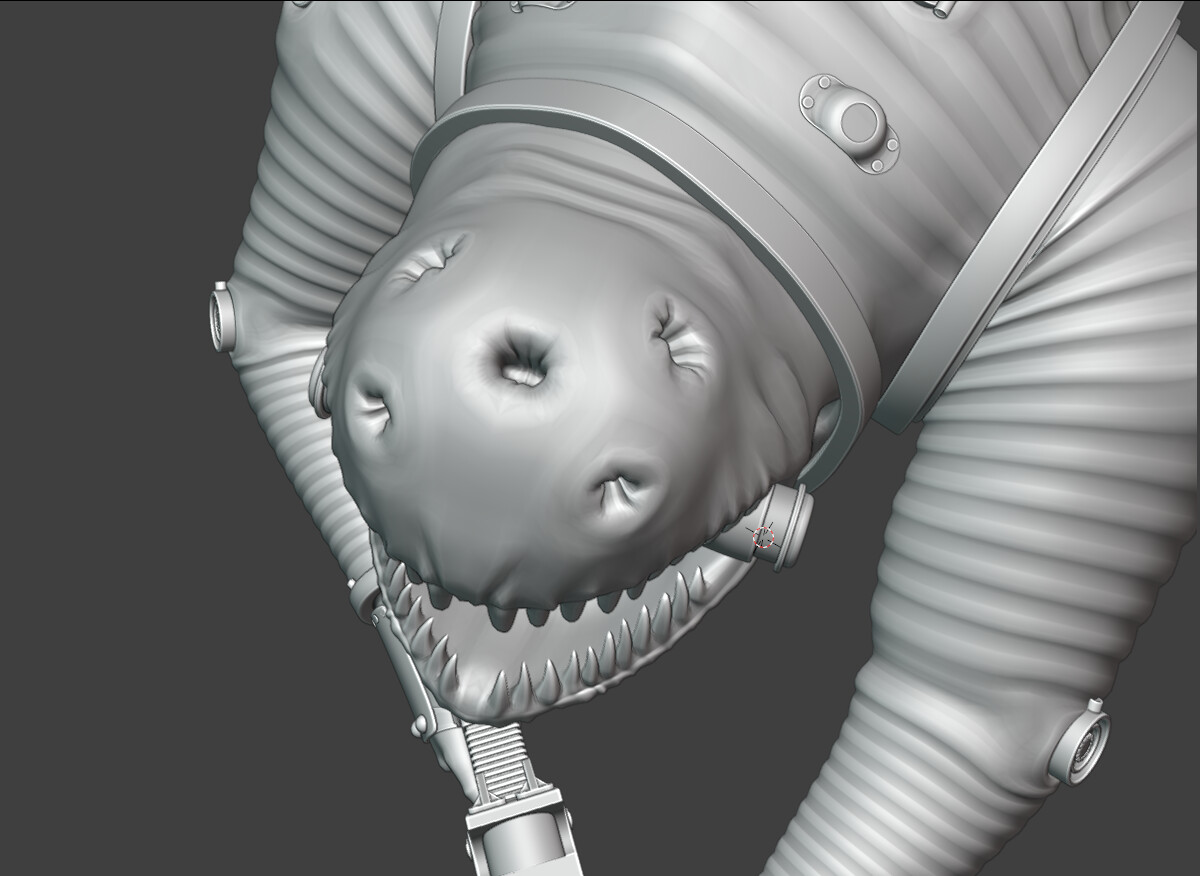
I also decided to redo the face and add in an idea I had for how these organisms look without a helmet (and how it stays on), and to make the feet more interesting. I also used a little more reference to the other Barghesi images for some of the decorations.
This is the current model, now with a basic FK rig:
It’s a little high poly, but as it’s for stills (as supporting characters…) I’m not going to worry too much about making it super lightweight.
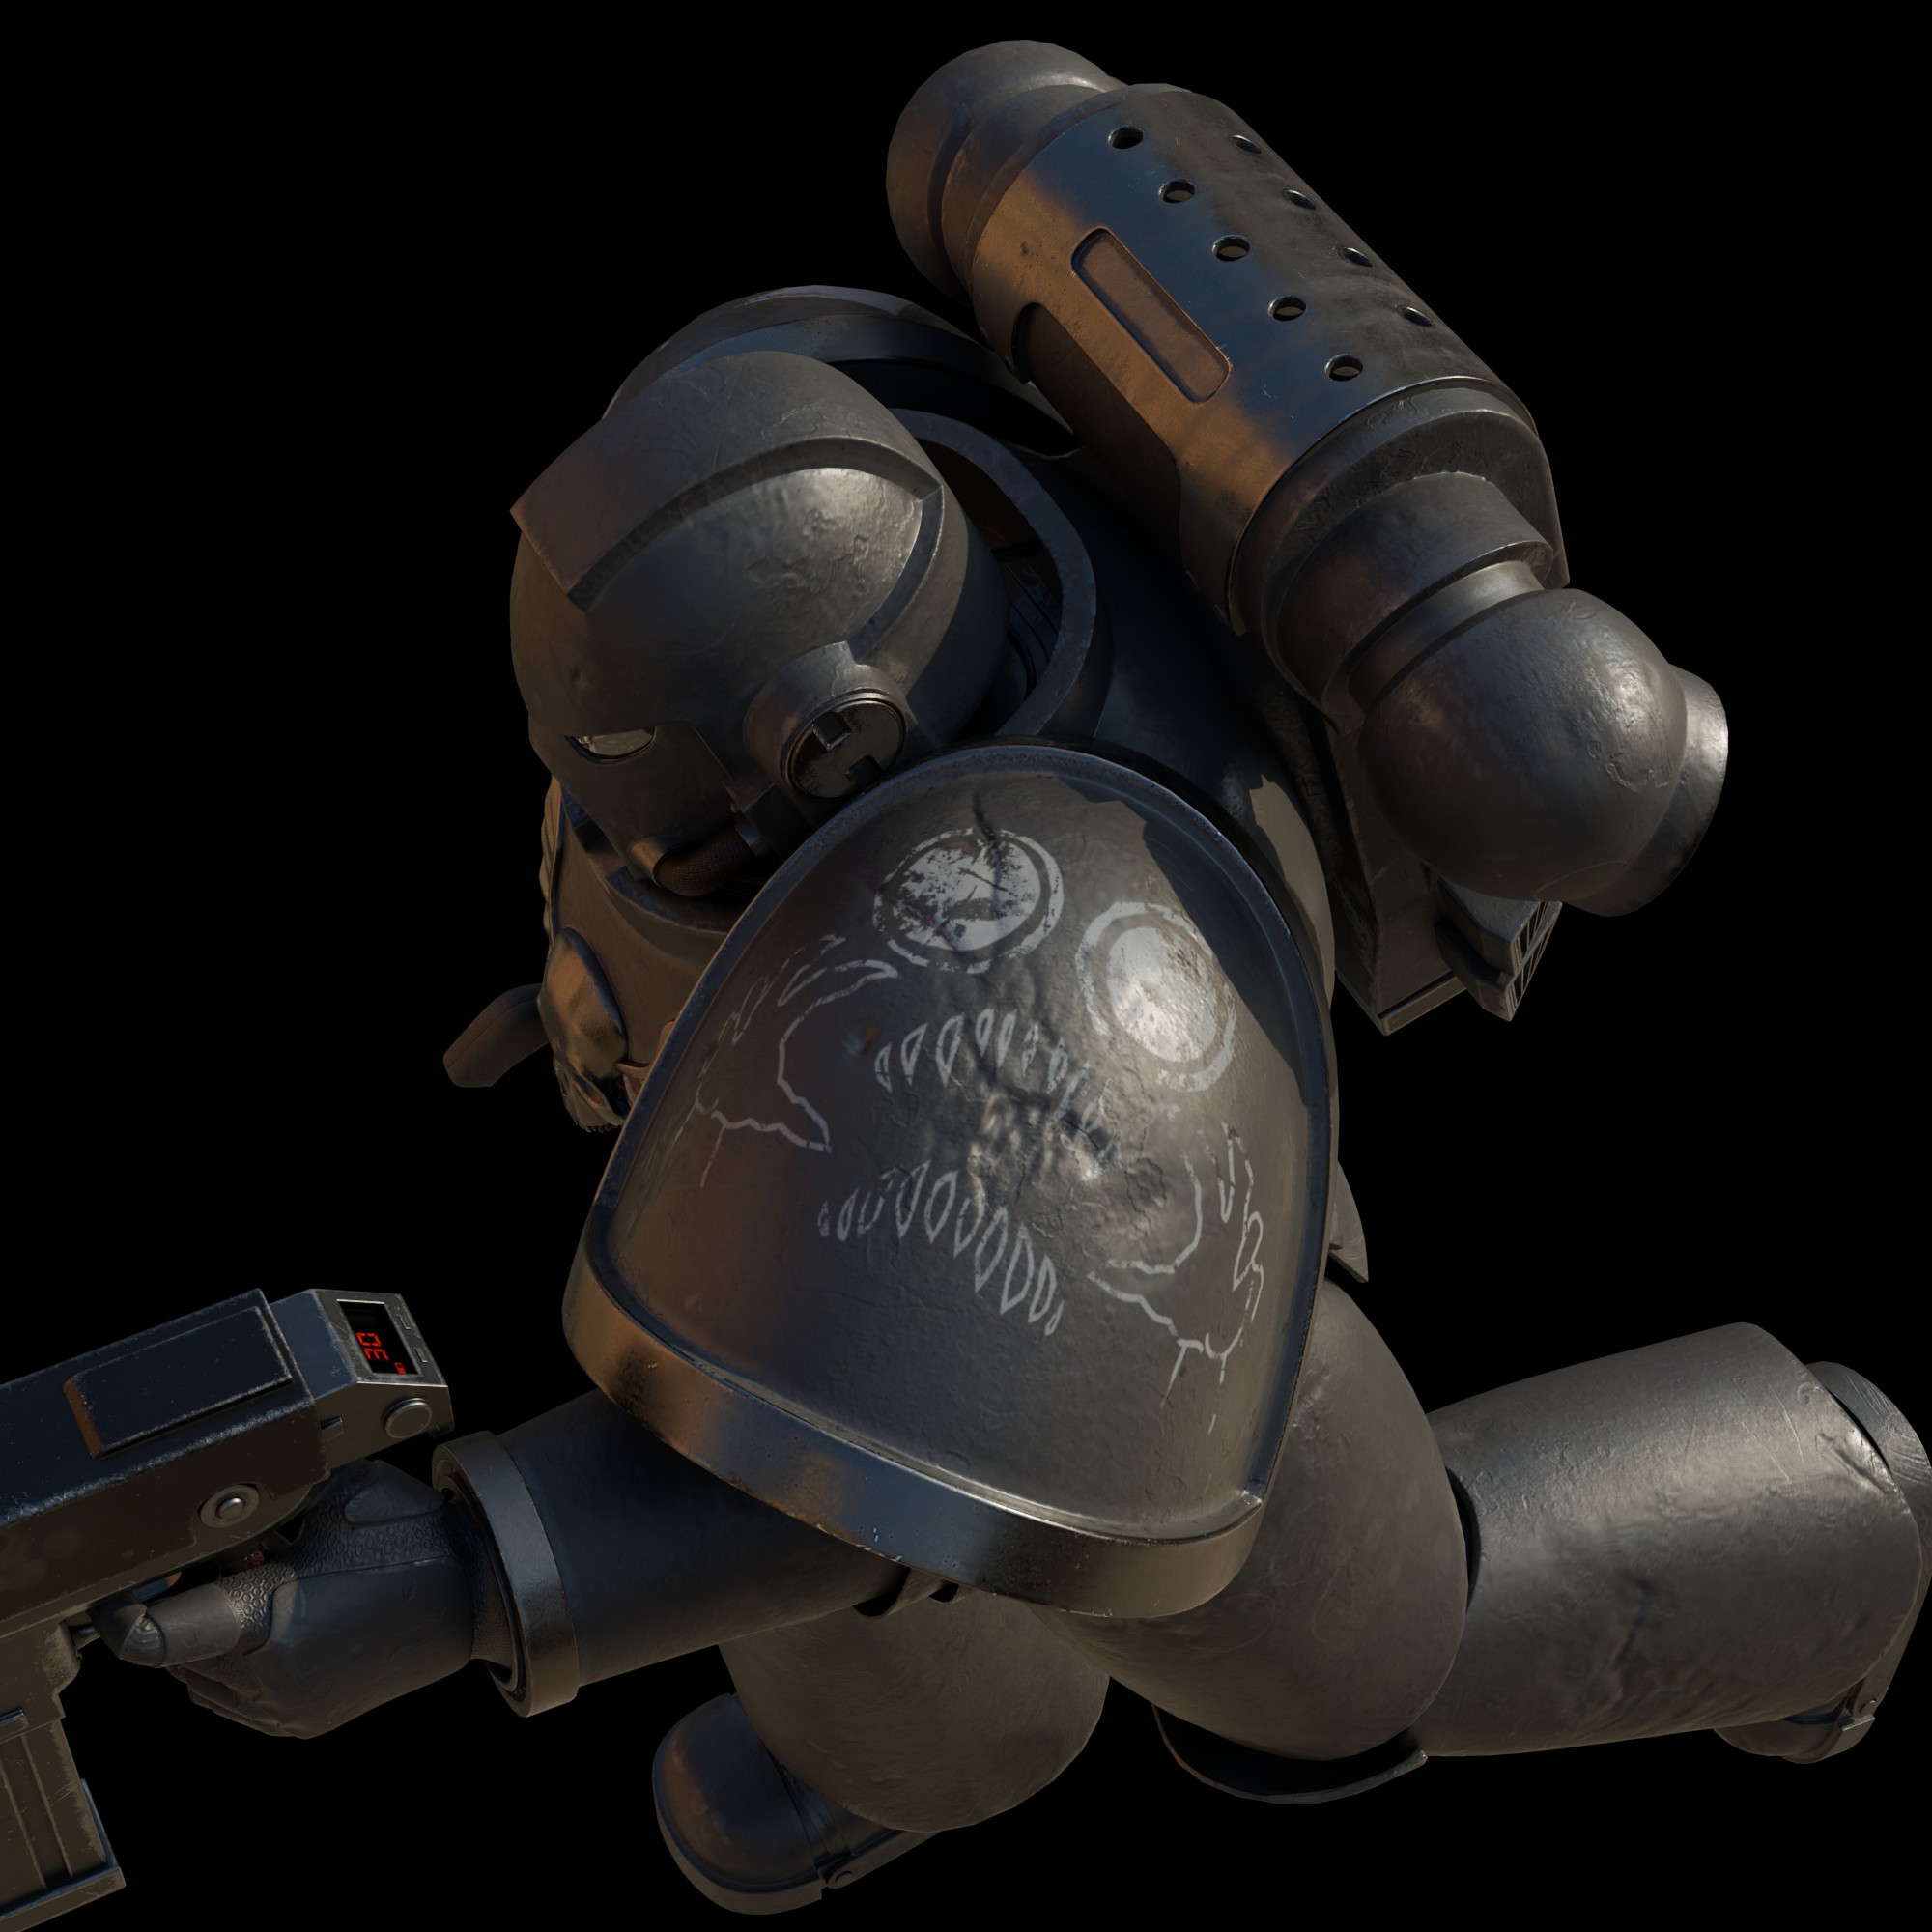
This is about the best I can replicate the original pose and still have it make some sense without insane clipping. The shoulders need some work I think, they are pretty bulging at the moment with the angle required. It might a bone to control the “volume” of the shoulder, and bring it in a little.
I am not sure what is going on with the original gun in the artwork, to me it honestly looks like it bends.
Anyway, the hands are also much improved and articulate quite well. I am much happier with the new head, which is also lower poly than the original. Speaking of which, my idea is that these creatures have “sphincter” openings in their heads which the helmet has “sensor prongs” which insert into:
Super awesome rendition of those xenos and marines. Btw you wrote that you watched Dikko’s tutorials for rigging, what tutorials did you watch to learn texturing?
I didn’t watch a lot of tutorials really - mostly I looked at smart materials downloaded from the substance assets and community assets pages and looked at how they did things (and how they arranged layers). I watched bits of some streams by the weapons artist Dan Kenton, where he shows off a lot of good tricks. The only other specific tutorials I remember watching were on how to overpaint seams, and a couple on how to use anchor points for normal/height damages.
I think learning to use stencils and also seeing examples of how to use layer styles (overlay, multiply, etc.) really helped too.