Sorry, I skipped a couple of steps as I thought you already had the bones visible, etc.
You pretty much never need to expand the rig in the outlining, that’s just painful. You need to get your head around the rig Layers, where all the various components are kept.
So with the generated rig selected, click the Object Data Properties (its a little running man icon) and you will see a lot of layers, with a lot of dots and many in blue.
By default all the deform bones are on a layer that isn’t visible, so you have to turn it on.
So hold down SHIFT and Left Click on the little layer box that the red arrow points at.
Then go into Edit mode (you may have to toggle viewport X-Ray mode) and you will see all the bones that are actually used to deform the mesh.
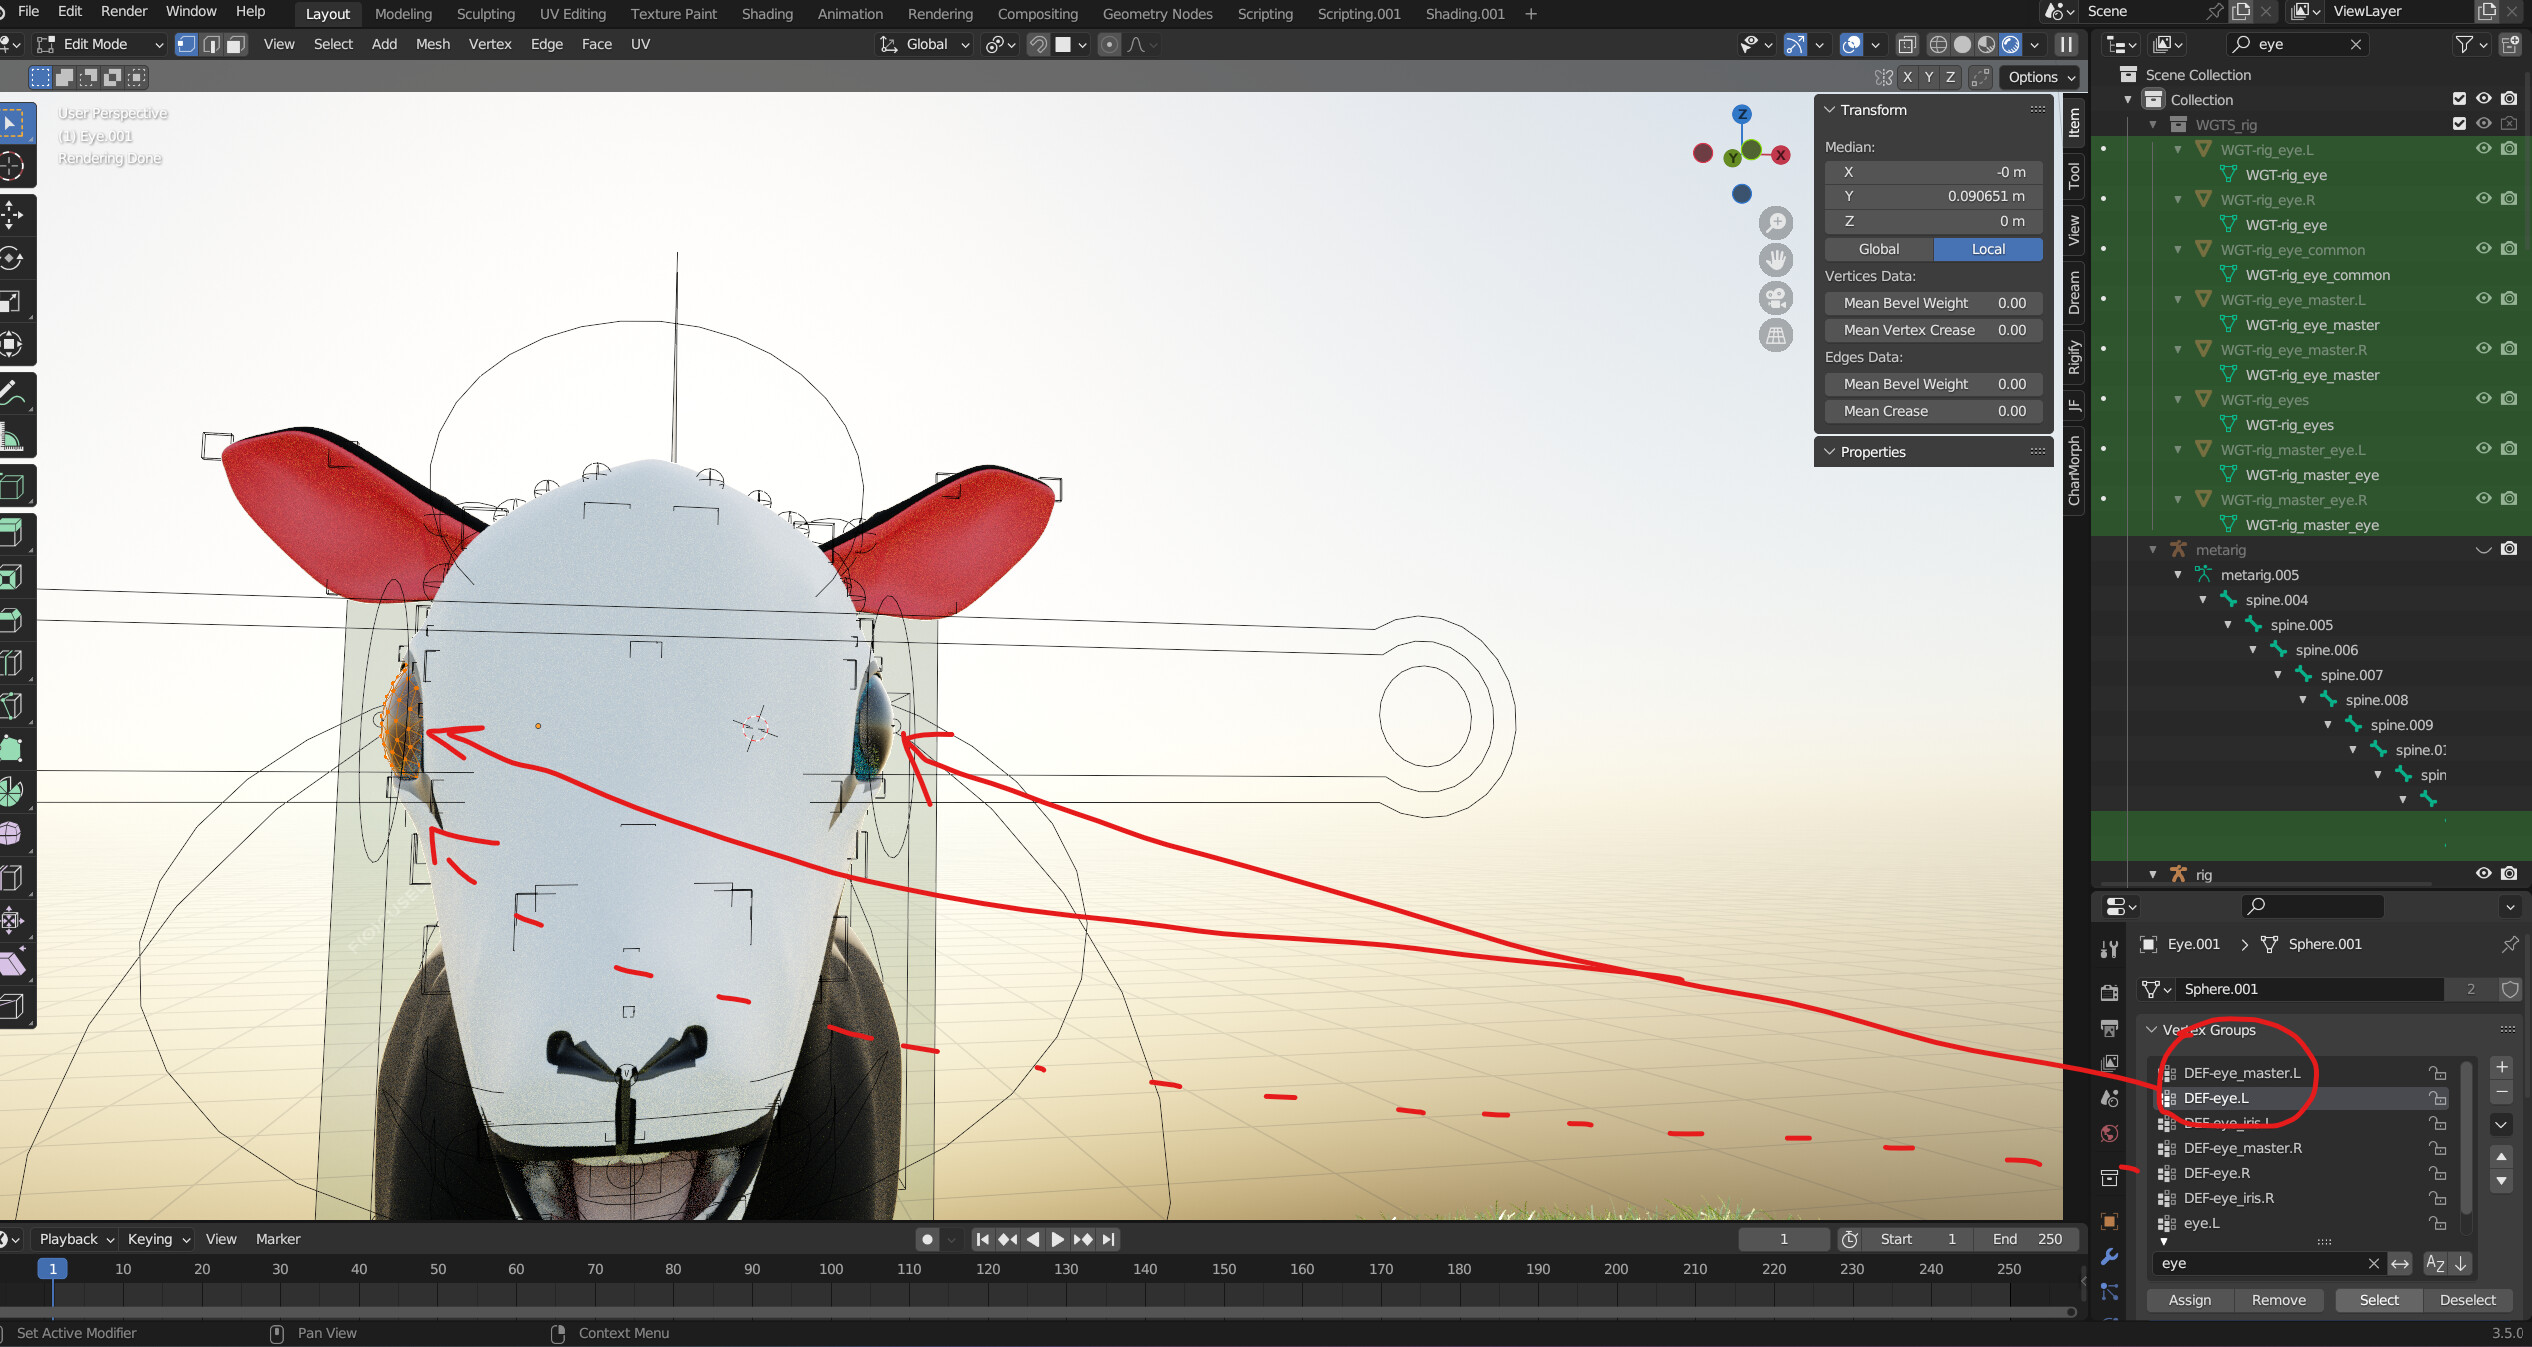
Again, in that above screen shot, I have the DEF-eye.L bone selected (you may have to click a couple of times, as its actually inside another bone.
With that picked, exit edit mode and parent using bone.
If you then look at the Object Properties | Relations, it should look a lot like this:

Just like my eye object, it has no vertex groups, all movement is based off the whole bone, I mean its the eye, any vertex group would just be the whole eye weight painted to the same bone, so why bother, just directly use the bone.
My modifier stack also doesn’t have the armature listed, it isn’t need. It’s all done via direct bone parenting.
EDIT *********** NOTE ****************
Do the stuff below first. The eye object needs to be ‘correct’ before any parenting.
As for the eye jumping out into space, etc. There’s a few things you need to check/adjust. First make sure that scale has been applied CTRL-A.
Second, where is the origin point of the eye object? If it isn’t at the center of the eye, then things may get a little strange. Also, you need to make sure your bone placement (as part of the metarig) is correct.
If you look at this image:
you can see that the eye object origin (the very small orange dot in the middle of the move gizmo), along with the head of the eye bones are all at the center of the eye object.
If you want to see or understand more how it all works, with the deform bones layer visible, hide all your mesh objects (leaving just the rig) and go into pose mode and move the eye control around a see what the rig does. Even select just one of the eye circle controls and move a single eye around. You can actually even scale that circle control and observe what that does.
If need be, just start a new blender file, add Rigify and generate the rig. Then add a sphere, place it where the eye bone is and then play around with parenting, etc so you can understand how the rigging all works, what’s on the various layers, etc.