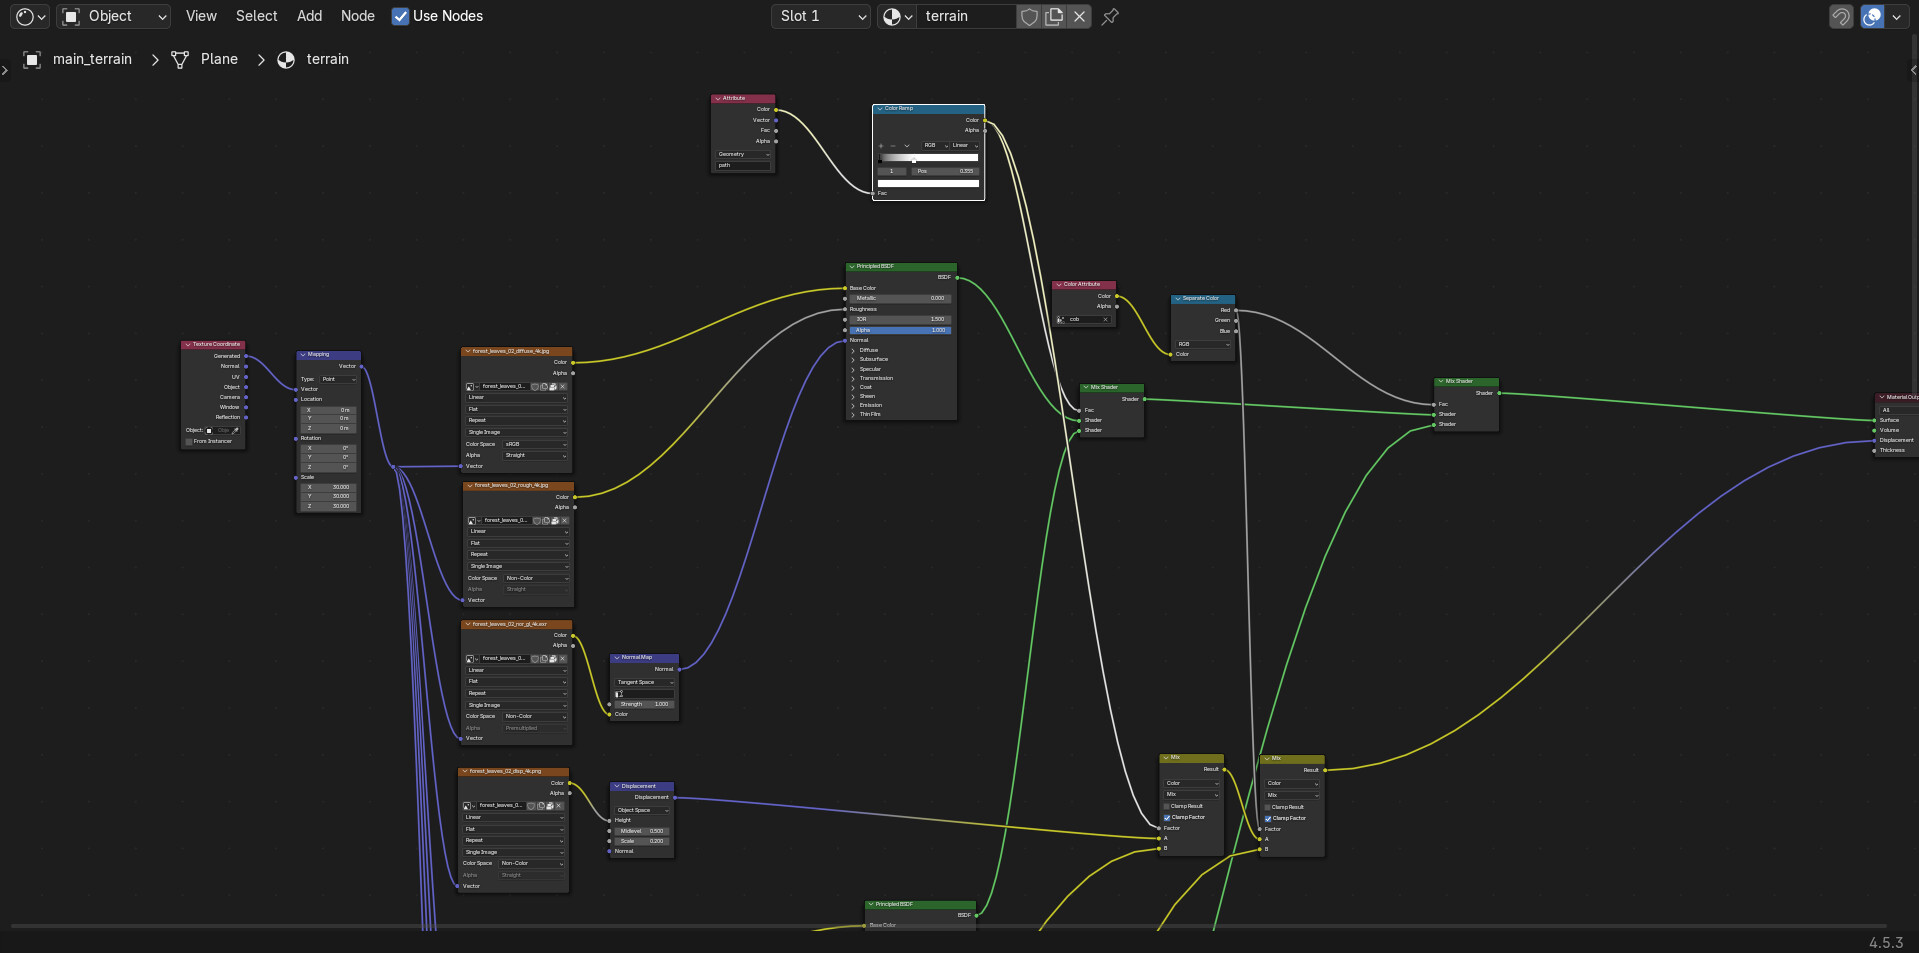
I have changed the materials on the terrain to a different image texture to make it look better in this environment, I am also now using a mud material around the water, this is being controlled by a colour ramp node.
The sky is currently the default Hosek / Wilke sky texture.
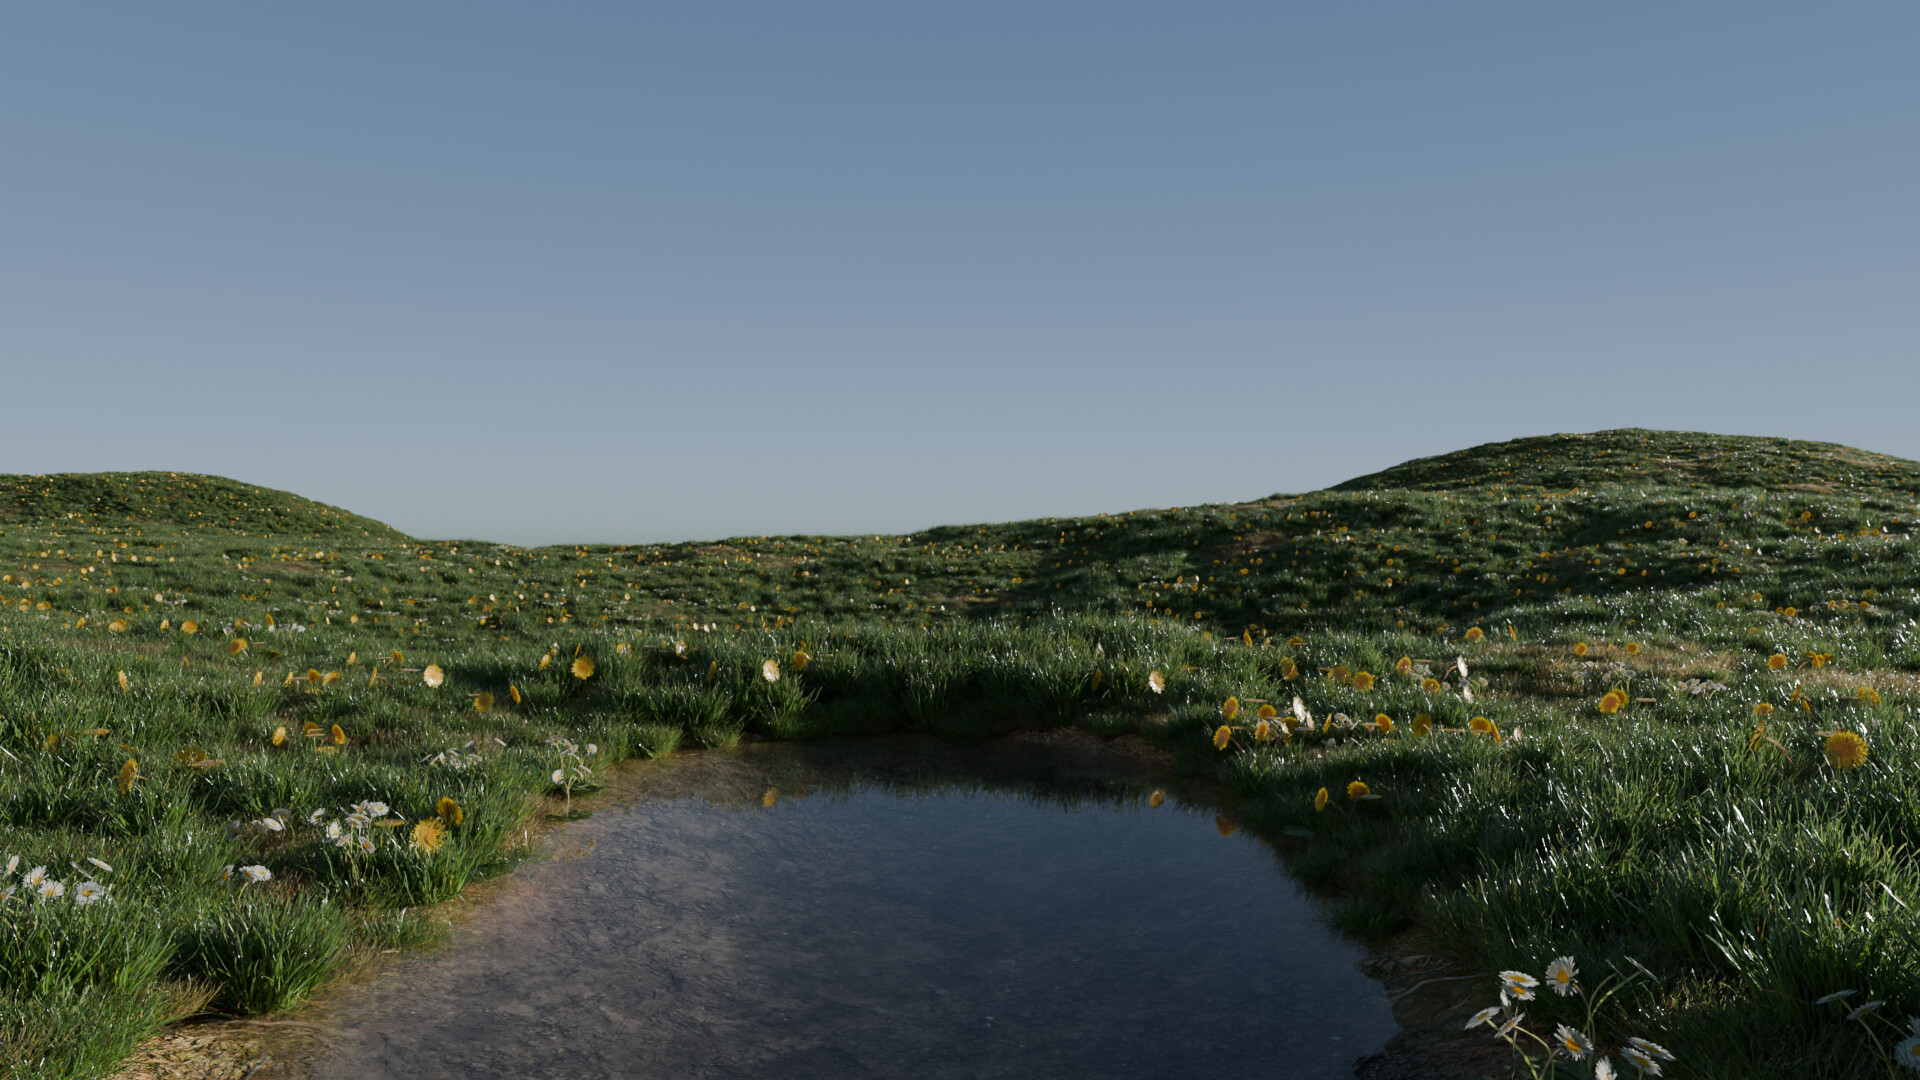
Here is a render of the scene so far, I am currently trying to work out why the grass is spawning under the water, which shouldn’t be happening due to the path generation.
Hello there everyone,
I have made some more progress on this scene.
I have updated the lighting settings so you can better see the scene, although this still needs some tweaking.
I have also changed the values for the grass configuration to better match the scene.
Here is the latest render:
Hello everyone,
I have been working more on this scene recently.
I have now appended the fog to the scene to create the mist in the background, I have modified the settings so the density is now only 0.002 compared to 0.003, the fog works using the volume scatter node plugged into the volume in the material output.
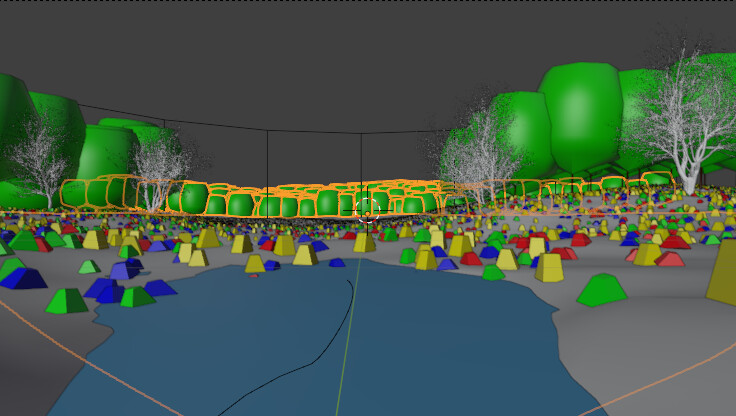
I have also added a distance plane, and configured the trees and grass to spawn on this. The trees only spawn where there is a vertex paint, this means they only spawn at the back. I used proportional editing to add a sense of depth to the trees, making some of them lower and some of them higher.
I also added some trees to the main terrain, 4 of these are individually modelled trees using Mtree. The other groups of trees are the same, using geometry nodes to instance them.
Hello there,
I highly reccomend you buy a Blender course. I had the same problem as you when I was following free YouTube videos. A paid Udemy course helps to walk you through every step of a complicated process, and then the next time you want to do something similar, you can adapt what you have already learnt.
I am currently following a Blender course from Udemy, this project is one of the sections from it, I would highly recommend it, Udemy is normally having a sale where it is down to £14.99. Here is the link if you are interested (https://www.udemy.com/course/blender-environments)
There are lots of free stuff on YouTube and Udemy. I really like the Polygon Runway YouTube channel, I have followed lots of his tutorials. There is also Ryan King Art, he also makes good tutorials.
What skills do you specifically want to learn, then I can make some more suggestions.
i really just wat to learn how to make much better textures and after the textures i would like to make better models but thank you and i will go check out those channels👍
A lot of the good courses are paid for, but there are some good options for free. It can be hard to find something that has all the information you need in one place, this is generally what you get with a paid tutorial. So it might be a bit harder to learn for free.
For modelling I would suggest Polygon Runway and Ryan King Art, CBaileyFilm also has some good tutorials.
For texturing Blender Guru has a good course that is available for free on YouTube (https://www.youtube.com/watch?v=uHCJoNEWjXo). Ryan King Art also has got some tutorials on procedural texturing, I have linked some of them below:
I would also suggest having a look at free courses on Udemy, here are some that look good (I have never tried these so I don’t know how good they are):
Hello there,
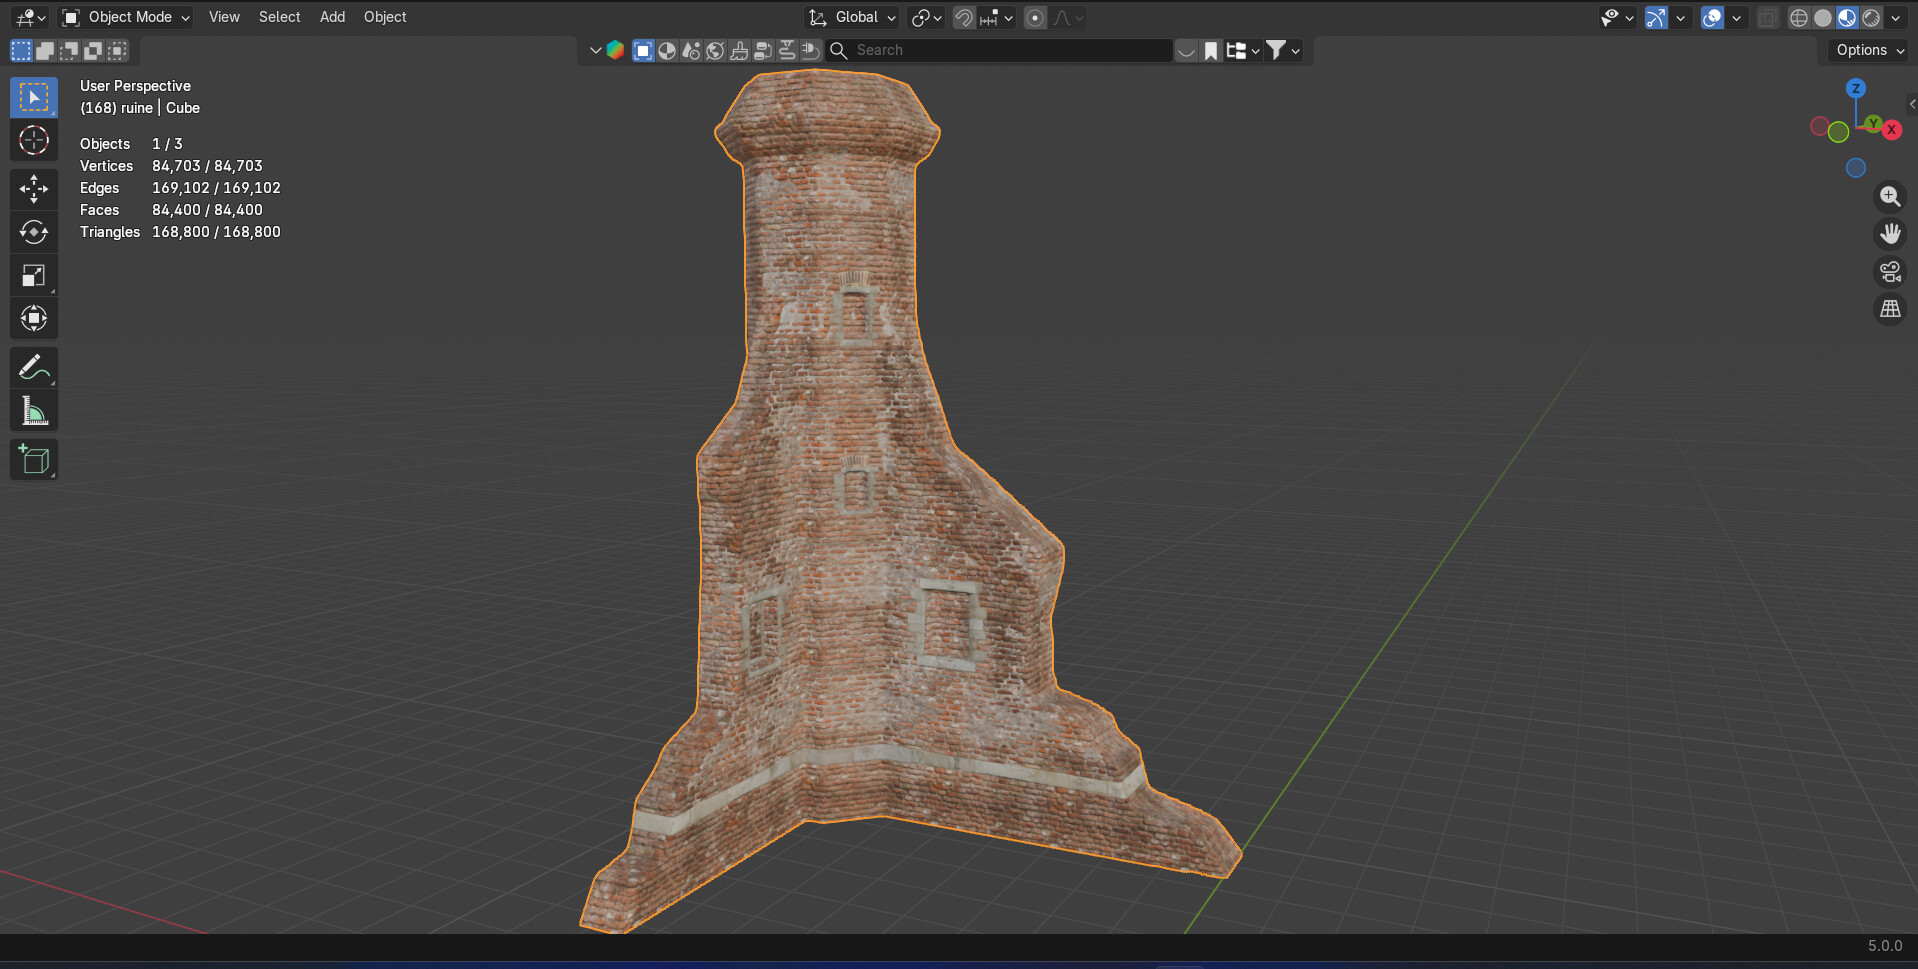
I have stared working on the ruine material for the scene, this is the material that will be used on the ruined building.
I am currently working on the material on a sphere to get the material setup right before I start on the ruine. It is made up of two image textures at the moment, a brick and a plaster texture. These are going into a mix shader controlled using a vertex paint, and the displacement map of the brick texture. This helps to make the plaster mix with the brick. I have separated the nodes for this into a separate node tree (see the last image below).
Hello there,
I have been working more on the ruine material, I have changed some of the displacement settings and also added a new sandstone layer.
The sandstone layer uses image textures, I have used a separate UV map for the sandstone (image below.) The areas where I want the sandstone are I have placed the UV’s in the black area.
I have created a new nodetree for the sandstone, this is relatively simple (image below). I have also added some new mix shaders to the existing nodetree’s to make the sandstone mix better.
Hello everyone,
I have recently been working on the next part of this scene. Now I have finished creating the ruine material I have started creating the ruine mesh. I have imported the reference image into the scene, and used a cube set to 20m high to scale the reference image accordingly.
I have used a cube mesh that I have extruded, scaled and moved to start creating the bash mesh for the ruine.
Hello again,
I have been working more on the ruine structure. I have added a circle with 8 vertices to use as the centre of the structure, I extruded the top and scaled it serval times to get the desired effect.
I have added a remesh modifier to fix the geometry and better merge the two objects. I have also added a Boolean modifier and a new object to act as the cutter for the windows.
Hello there,
I have been making some more progress on the scene, I have been applying the ruine material to the ruine object.
I have done a vertex paint for both the plaster and the dirt (images below), I have also made some adjustments to the colour ramp to adjust the placemen of the plaster.
I have aligned the UV map for the windows and the sandstone layer, currently these aren’t perfect and they still need a bit of work. I found the best way of doing the sandstone bricks was to select a row of vertices and then project from view, repeating this process for every side, otherwise the material would be stretched on some sides.
Hello there,
I have been bust lately but I have been working on the scene in my spare time.
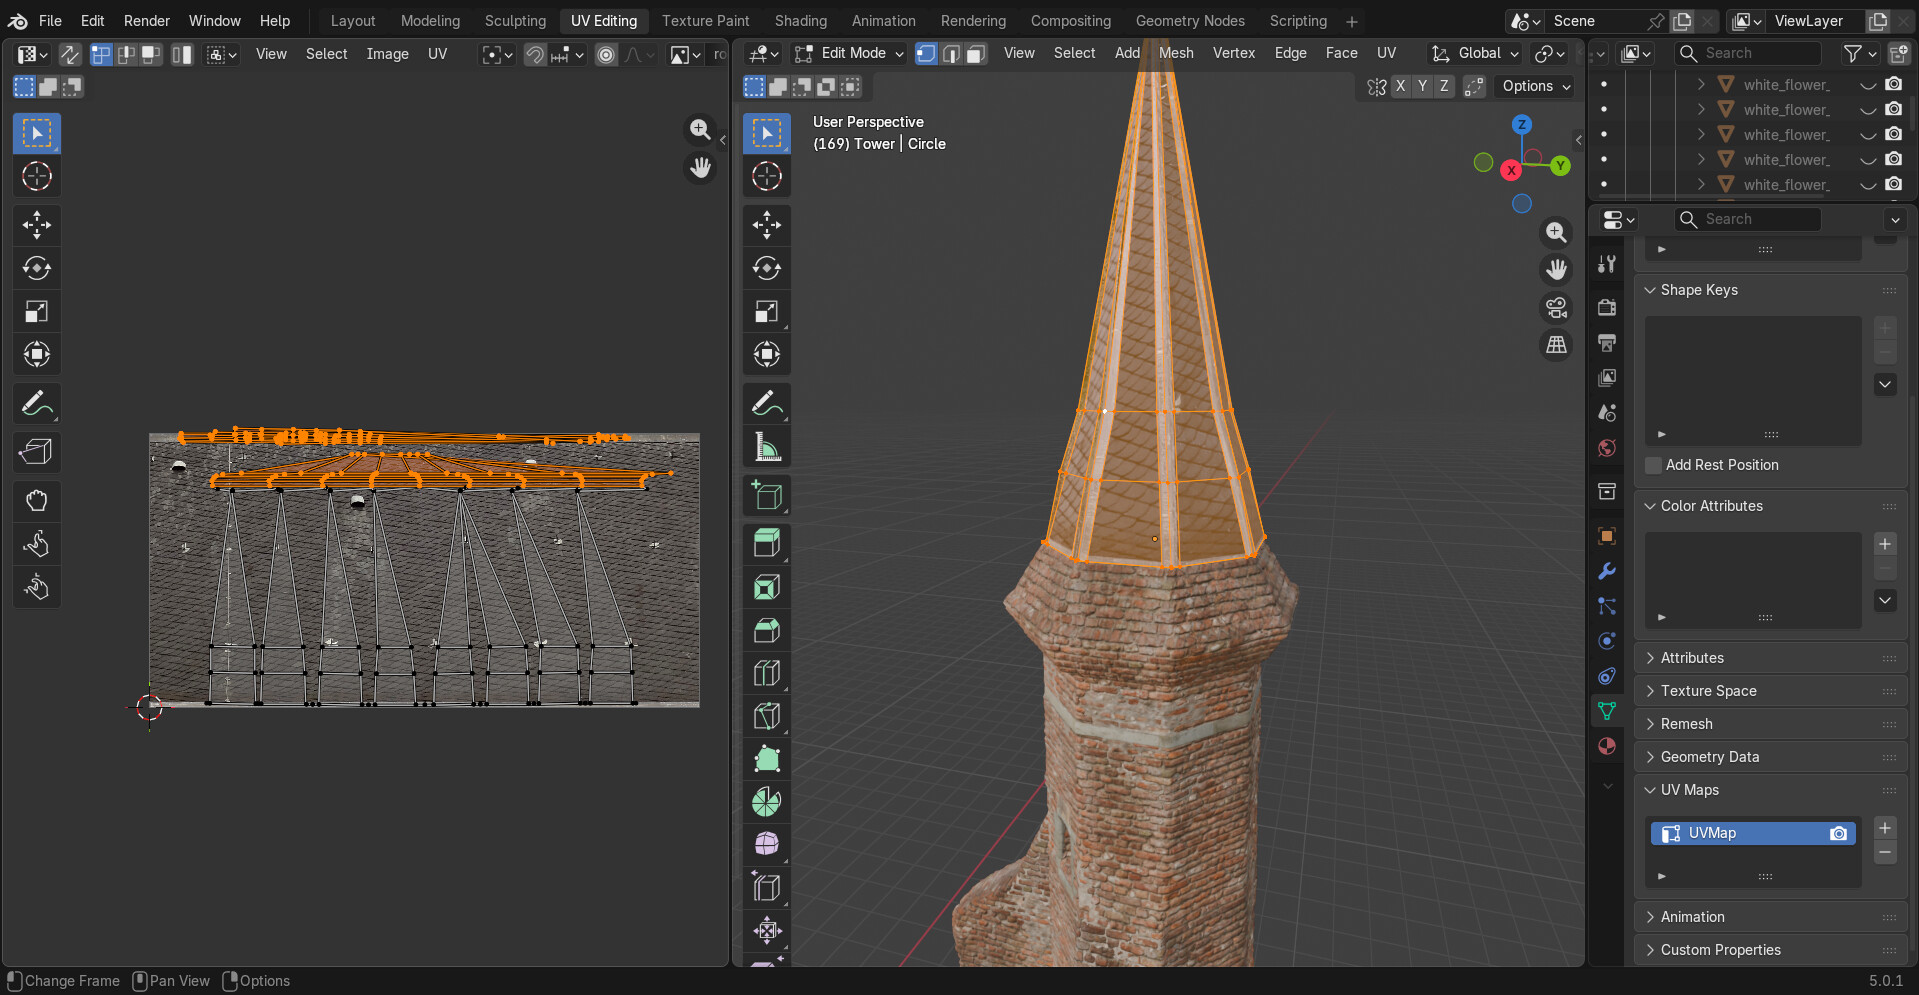
I have modelled the tower roof, I did this by using a circle and extruding it to fit the reference image. I then positioned and scaled the base of the tower to better fit the shape of the existing ruine.
For the material I used the provided image textures (nodetree below), I used the UV editing to align the shiny areas correctly.
Another quick update, I have just added the large sandstone material below the roof to better blend the materials. I used the dirt vertex paint to make the bricks directly below it look more weathered and old, I also modified the material nodetree to make the dirt darker.
Hello there,
I have been making some more progress on this scene, I have started sculpting the bricks for the ruine. These will be placed individually to increase the realism, there won’t be as many of them as the bricks done via materials, but it should help.
I started out by creating cubes using the ruine as a scale, I then used the remesh function to create the necessary topology, and applied a shade smooth.
I then mainly used the smooth and draw brush, but I also used blob, pull, and clay strips. I sculpted three bricks and then duplicated each of them, slightly editing the sculpting to make them different.
For the material I used the same image textures as the ruine, and used a mapping node to adjust it.
Hello there and a happy new year to everyone reading this,
I have been making more progress on the bricks. I have created a geometry nodes tree to instance them on the sides.
I started out with a simple instance on points and distribute points on face setup, using the bricks collection. I then added two rotate rotation nodes and a random value node, to randomise the rotations. I used a separate XYZ and a multiply node to let the vertex paint control where it was instanced.
I then duplicated this nodetree multiple times, once to rotate the bricks differently, and again for the bricks on the other side.