I like it Darin.
Thou we’re coming to the old way of painting UVmaps.
What I learned after starting this thread is a clever way to use the UVeditor. And how to add interesting loops.
BTW, you baked a specmap. How? I get only blank baked images. LOL Missing something, obviously.
Michalis -
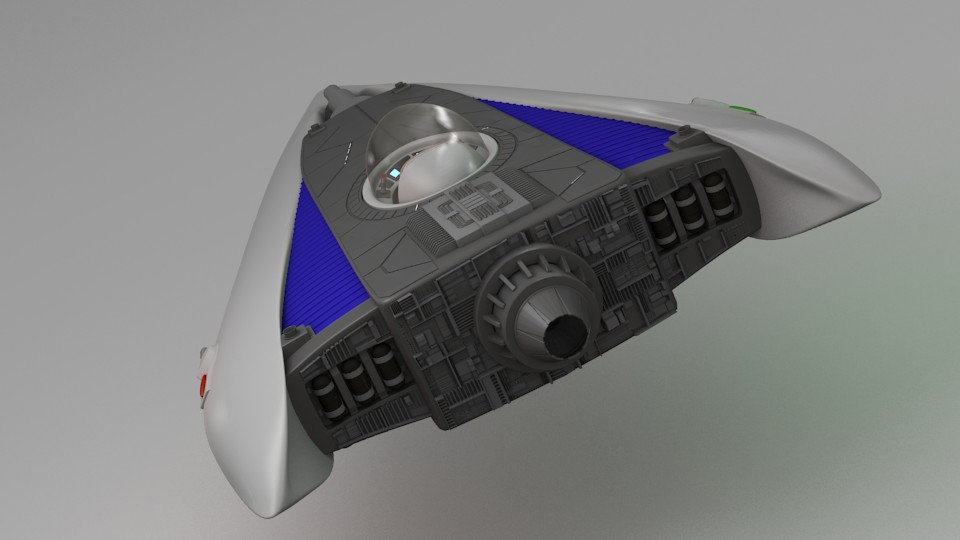
I am totally on board with the UVmap technique you taught me. I did use it on this last render. I just left the packed island a little larger as compared to my first render where there were many more island on that sphere. My goal was to see how nice I could make the object look without using a displacement mod. I know this thread is about the UVmaps, and I can’t tell you how happy I was when I found it. It took me to a new level in my Blending abilities. Next time I will come up with something a little more extreme.
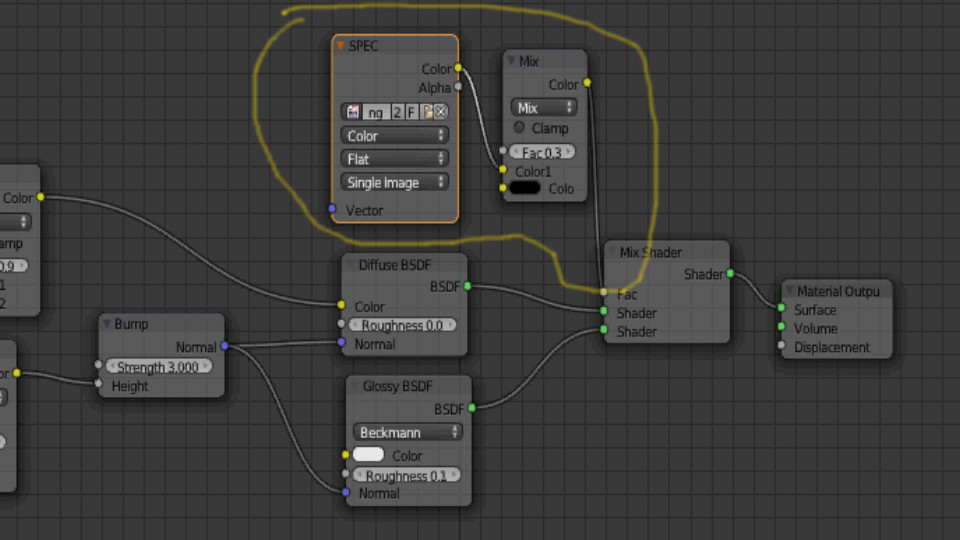
As far as the specmap goes - I took your exr file put it in blender saved it as a png or jpeg then used Crazybumb to generate the AO and SPEC maps. Here is where I used it. um - I hope I don’t offend like I already did with ng material - you are probably much smarter than I am at this. And I hope I used it in the right place – It seems to work for me.
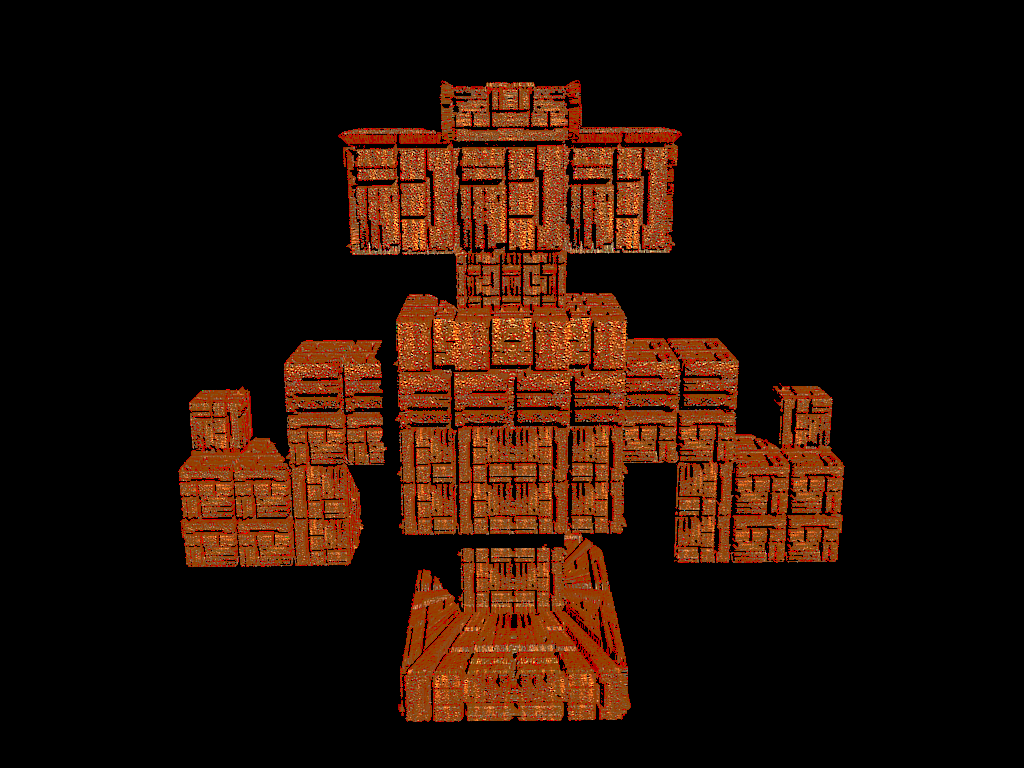
I wanted to thank you for this tutorial and the references - I hadn’t gotten past Page ONE! before trying it out. The number of faces are making my computer work very hard. I believe that this technique is an excellent way to form models. I ran a Displace on top of an Applied Displace to create my first attempt (7.8 million faces - most not in the camera’s view). Additionally, my .exr files appear mostly WHITE even at 5 Blender units [when Baking the Displace] - perhaps I’m doing something wrong? Thank you again and I’ll continue through the pages in the post.
Attached is my first effort - it’s a little embarrassing, but thank you again.
Attachments
I wanted to thank you for this tutorial and the references - I hadn’t gotten past Page ONE! before trying it out. The number of faces are making my computer work very hard. I ran a Displace on top of an Applied Displace to create my first attempt (7.8 million faces - most not in the camera’s view). Additionally, my .exr files appear mostly WHITE even at 5 Blender units [when Baking the Displace] - perhaps I’m doing something wrong? Thank you again and I’ll continue through the pages in the post.
Attached is my first effort - it’s a little simple, but thank you again.
Thanks. hehe crazybumps then. A nice app, I used a trial for some months.
Here the news, cycles is not able to bake maps so far, it will take long time before Brecht will do it. It seems difficult.
However, we can always bake a nice AO map using cycles. LOL
Parallel camera to the the relief-panel, turn off all lights, use GI grey only. Render.
But, you have to align this map to the original displ map after. (Pshop or gimp).
Excellent results this way, much superior to the BI AO baked maps.
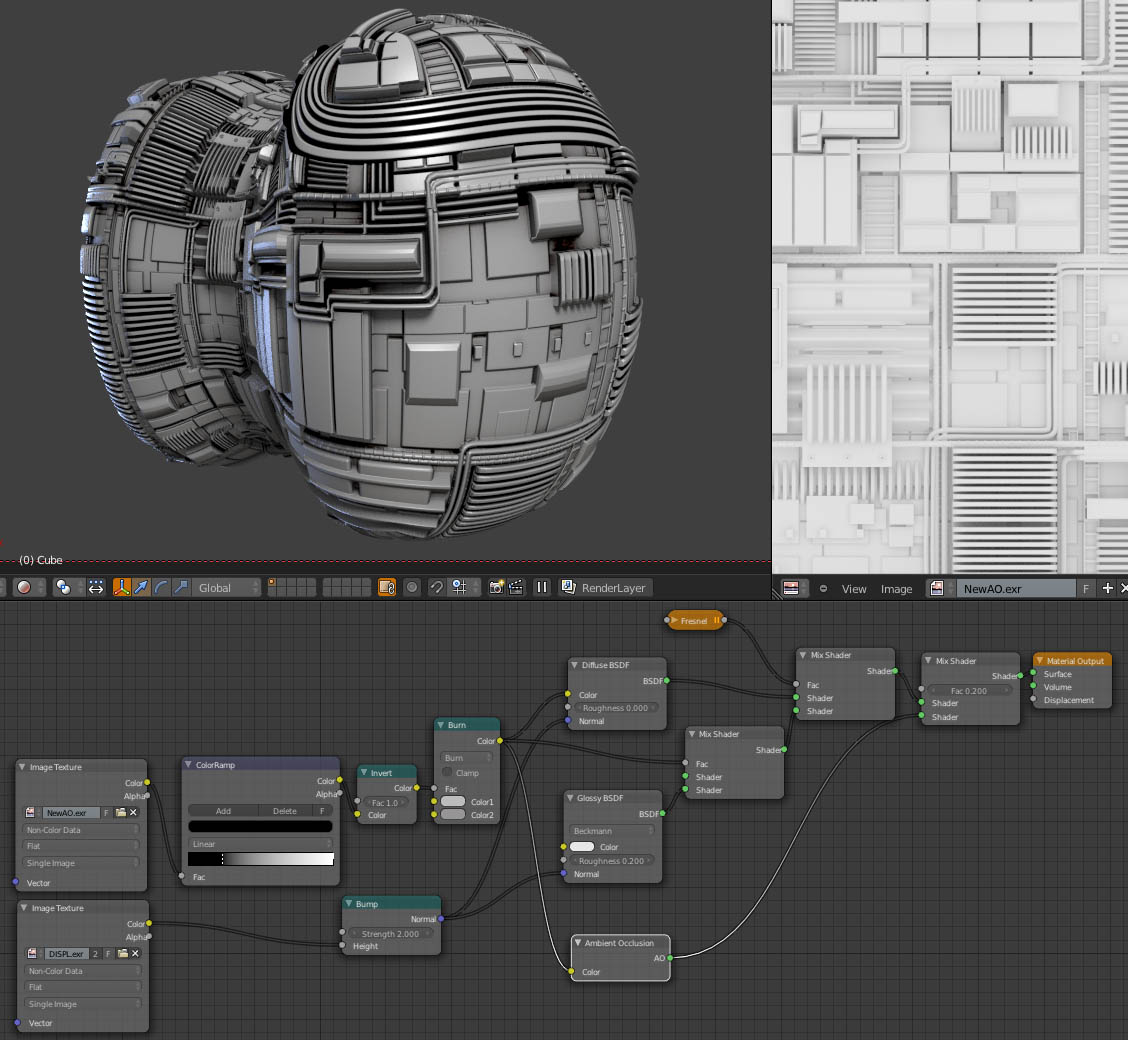
Regarding your posted nodes setup.
It’s OK, there isn’t one right place in cycles for AO, do what you like. We have a beautiful real time viewport preview.
However, try to plug it into roughness of the diffuse bsdf too.
Or, this way: GlossyBSDF->mixShader (plug AO into factor), then connect this group to the Mixshader, mixing the diffuse as always. Or, use it to control roughness of glossy, etc etc .
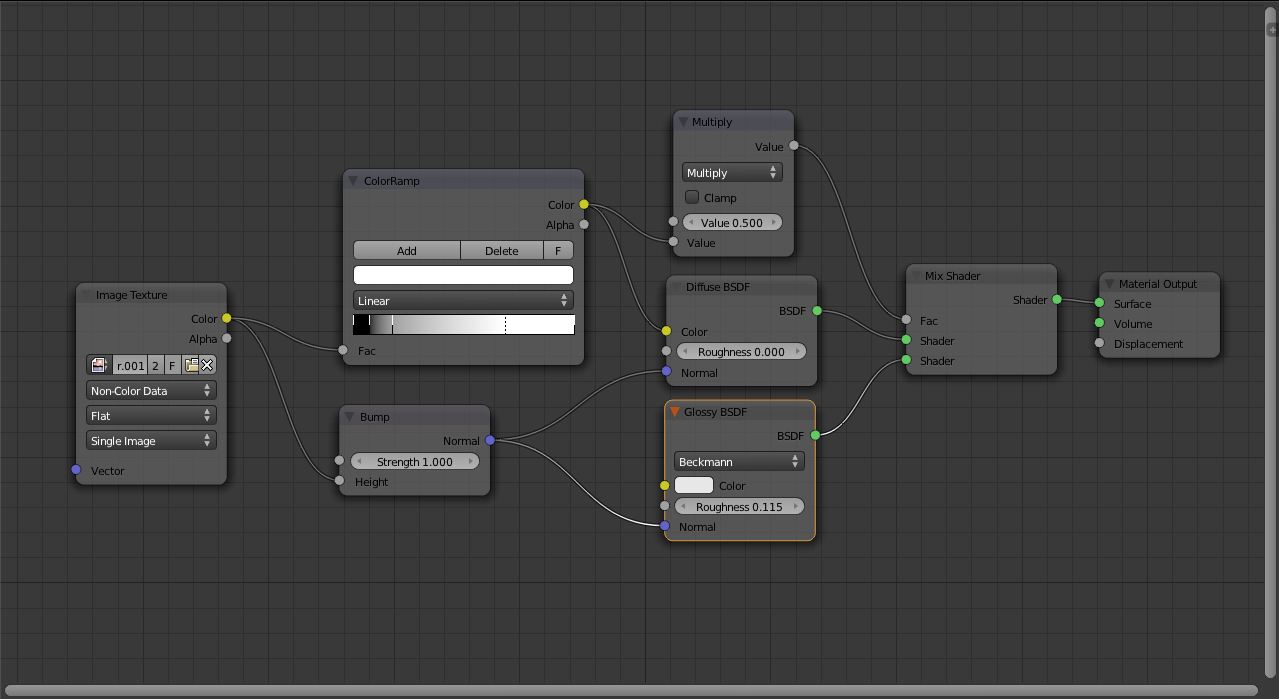
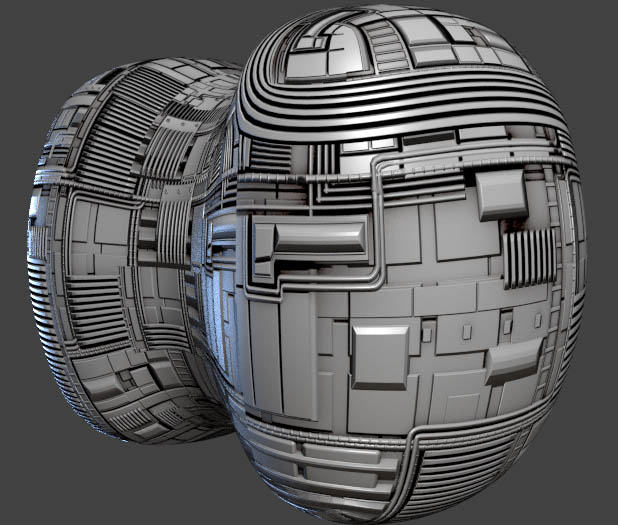
I wasn’t sure if to post this or not but here’s my test on it.
At first I tried actually adding a disp modifier but my computer is so crappy it would take an eternity to even start the render. So I removed the modifier and just used the nodes.
Here’s the simple node setup:
And here’s the overall everything else lol:
@HelloHiHolla
Very interesting.
Additionally, my .exr files appear mostly WHITE even at 5 Blender units [when Baking the Displace] - perhaps I’m doing something wrong?
The blender units I mentioned was rather wrong. They may be useful for AO baking map.
You’re trying to bake on a rather small plane and panel. Select both, enlarge them and (important) never forget to apply scale (ctrl+A). The larger it is the more contrasted. Don’t over do it because you may face some difficulties on fine tuning the amount of displacement.
If the map you mentioned appears completely white or something, first of all, check the orientation of the normal of the plane/face.
@CGSiino
Very nice. So you use only bumps. In this case, you need to bake AO map and use this to control coloramp or such. Never the exr-displ as it tends to colorize the surface, this is for bump normals only. The addition of the AOmap will give you the fake displacement.
Here’s another. I had lot of fun playing with a excellent new addon. (mesh_face_random_material_assigner). It helps to randomly select groups. Then, I applied inset tool (I) and started UVs.
I also added an AO map.

1 Like
Same base, first attempt on organic maps. Again, displ and AO map (exr 32 bit)
~90k faces.

Michalis,please can I see HI-Res renders of those last 2 sculpts,I really like them! will make good wallpaper for my desktop!
Thanks ng
Now it’s the right time to comment my silly statement on Prometheus thread. LOL
I added a link, click on the pictures for higher res.
LOL 
thanks.
Have you ever used Xnormal for creating maps? it looks useful.
Xnormal is great. I’m a macuser.
Nevermind, blender is just fine.
Just for the records, these two are the first renders that demonstrate Cycles Baking. LOL
(yes, it’s possible when using the panels technique.
Excellent AO map.
When cycles will be able to bake on UV maps, we’ll see how xnormal is great.
Wow -
Getting really good at the tech/organic (Matrix) very cool…
Great thread, lots of cool stuff here!
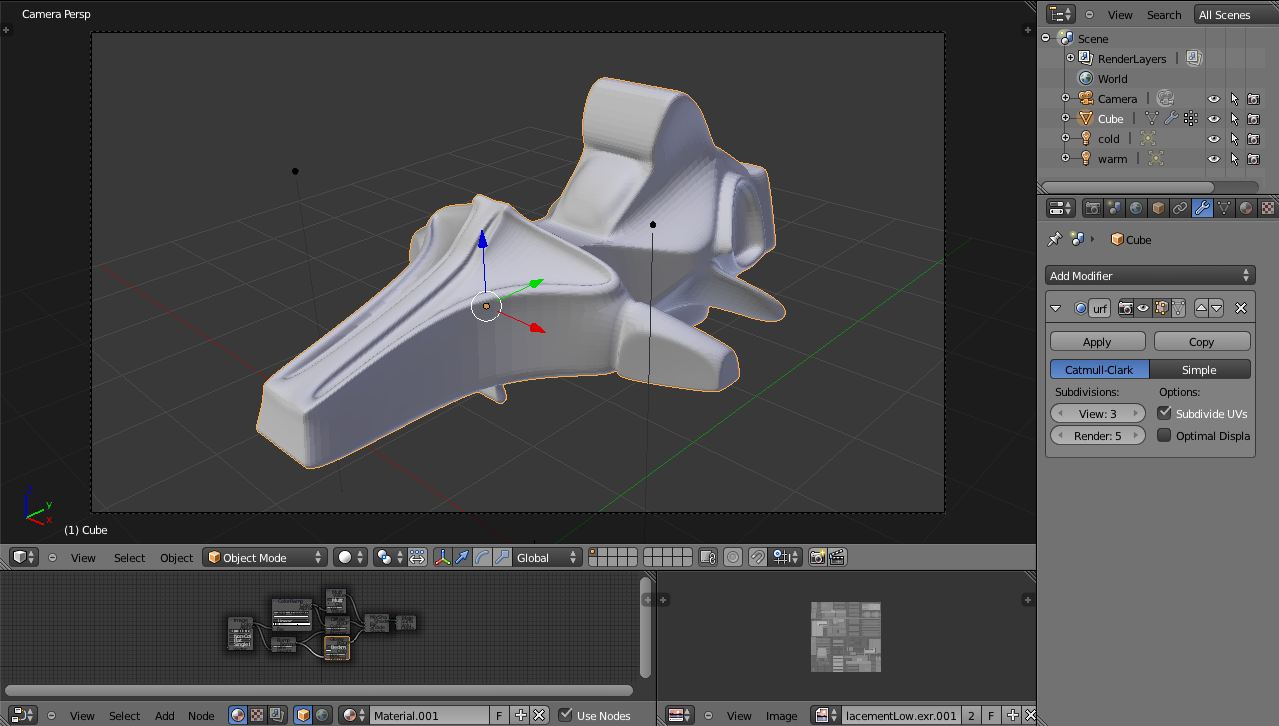
I used the basic technique on part of my spaceship model for the BG contest:
(the flat areas in the back)
I think it looks pretty good, and it saved me a lot of time modeling all those details…
Another attempt. On organic forms.
Click for HD

This way of sculpting is really awesome. I just can’t stop. By the way, are there any more cool displacement maps around ?
Big thanks for sharing :yes:
Day 2 for me. I’m just getting my head around assigning different textures to a Material to control color, spec, emit and displace.
Comment 104 is a great way to construct greebles by the way! I’m totally addicted to this method also! I did up half a torus and then “interrupted” the seams and added new faces (insert). After clearing seams and marking new ones, I was happy to see it worked - you can change your mind later and re-map. Attached is just a proof of concept, not a piece of art! 
Michalis, the lighting in your renders is sooooo pretty! I hope your tutorial gets published in a magazine! I got my .exr to show some values, thanks!
Attachments
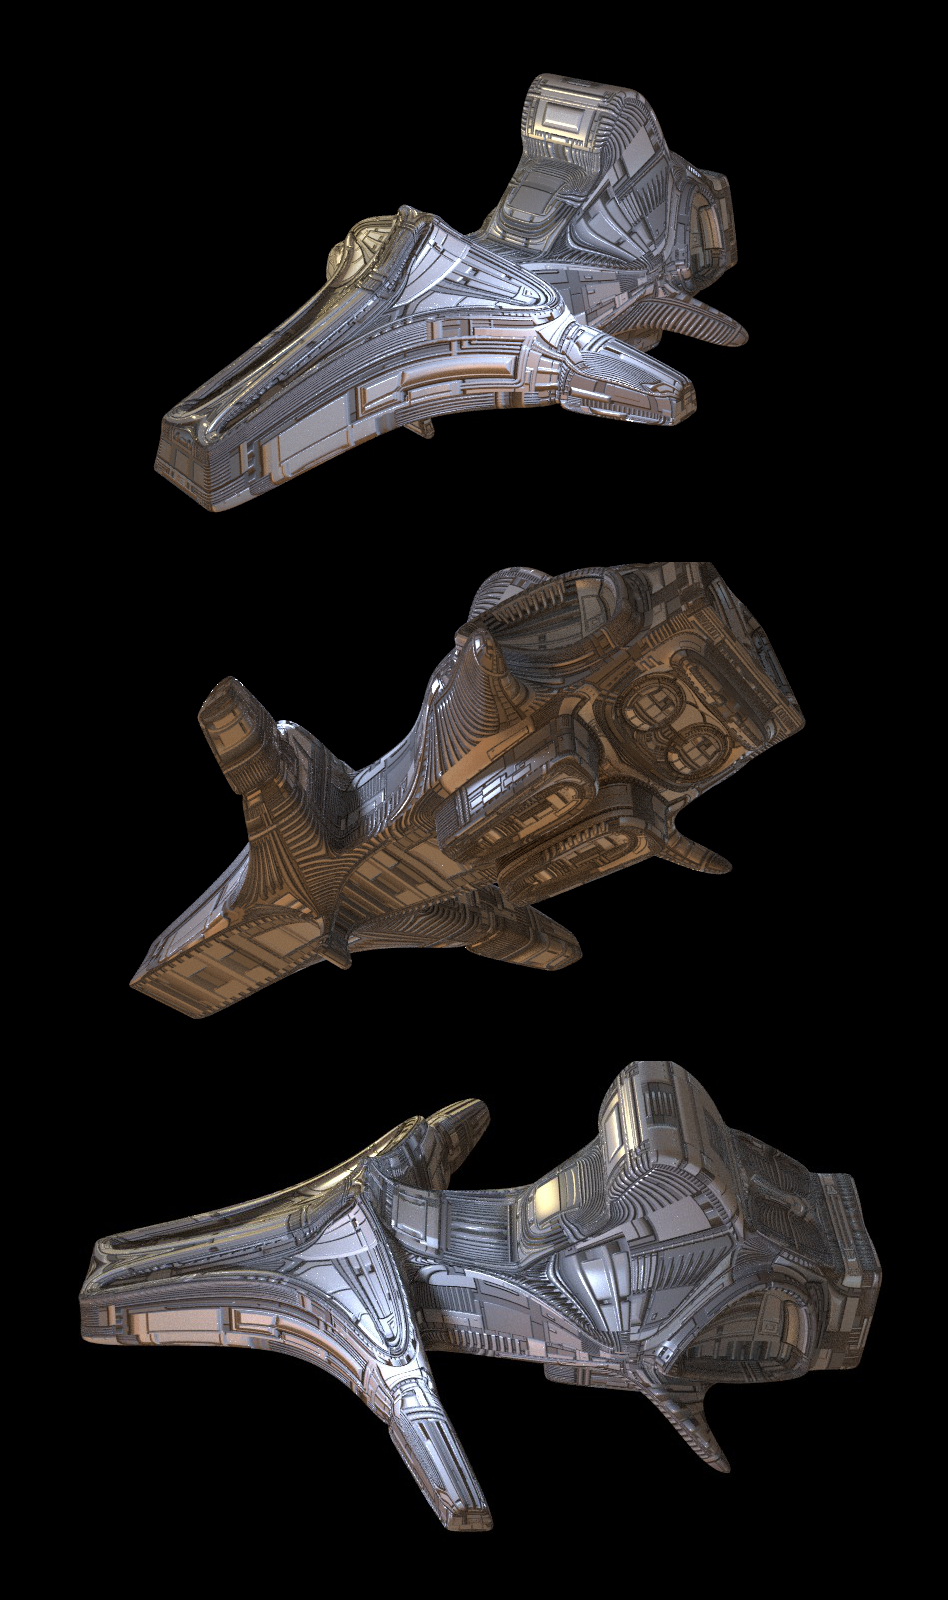
Texturing in Blender has always been a challenge. I’ve learned more in this single thread than in any book I have! Just to be clear, you’re requesting that we sculpt simple geometry by displace… So, since the thread’s inspirations are bio-mechanical (HRGiger-ish) that different islands and UV Packs should be placed on different ‘greeble’ shapes in ONE image?
As I’m looking, we’re mostly using one greeble shape in non-repeating pieces to each island - it’s all flowing rectangles. To introduce a new sculpted shape, our Images should contain several greeble shapes to pick from; is that how you’re making diverse organic shapes? That’s the goal I think…
Attached are the three images I’ve been working with, scaled down. First one’s terrible, but it works. They’ve never appeared in one image, but now I’m starting to see the light!
Attachments

@HelloHiHola
You got the message right. Nice one. You have some interesting panel there. Bake, and use, an AO map too.
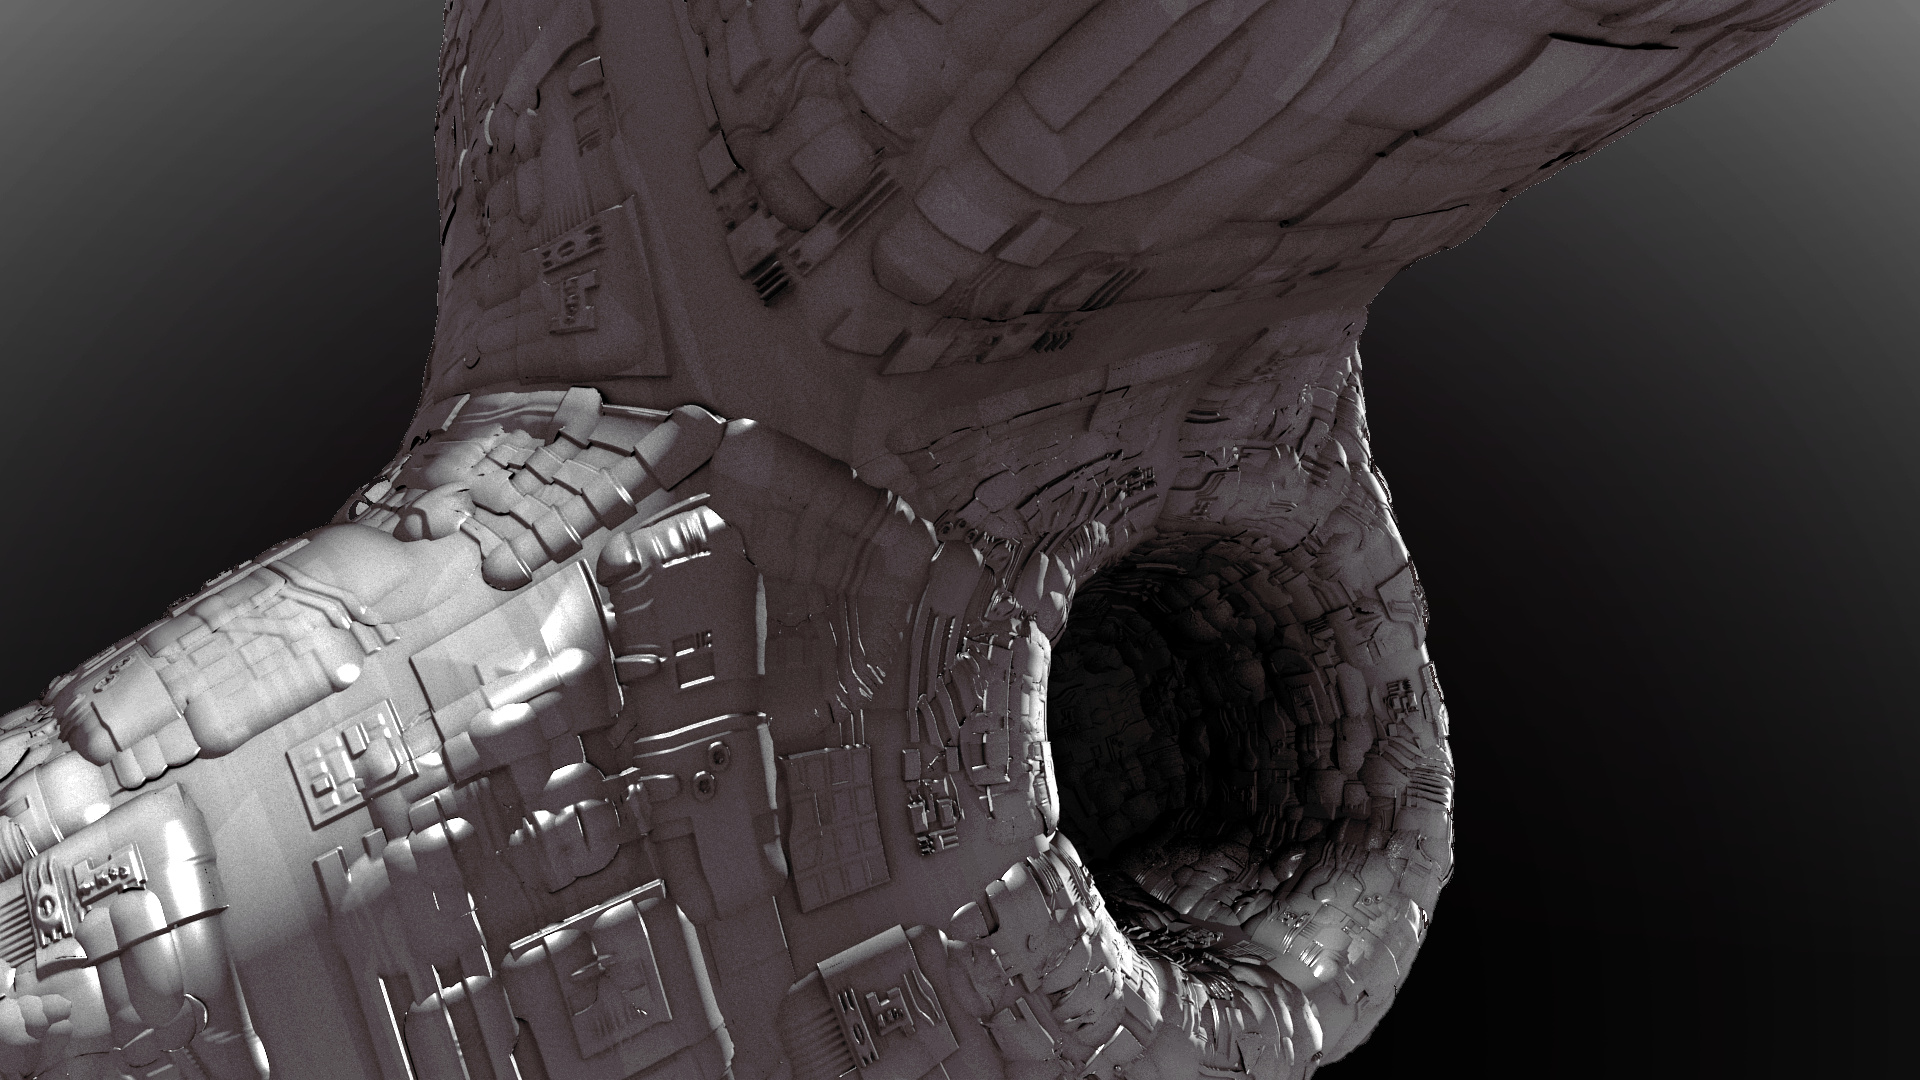
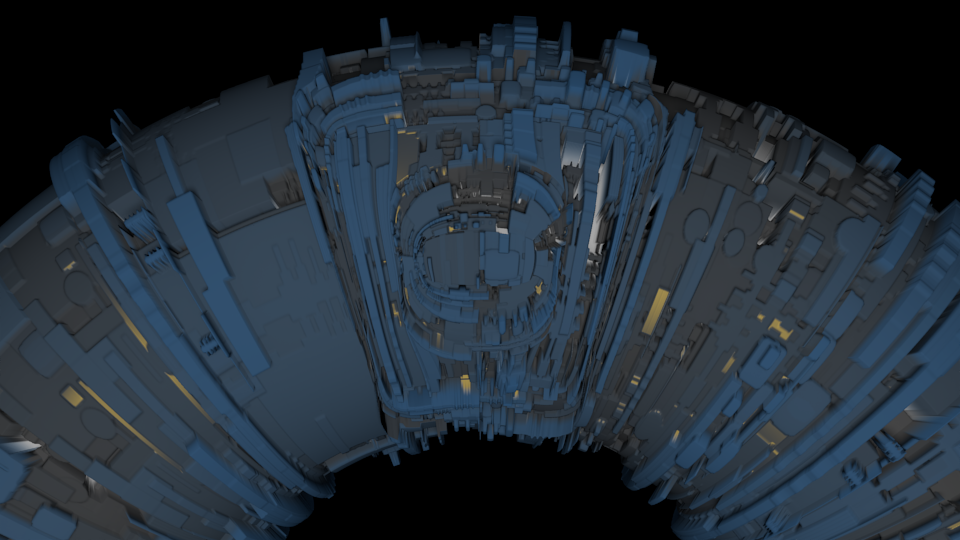
It’s essential, especially for low poly assets where only bumps will be used. Here an example. Displaced ~500K
Here at ~8k, displace modifier is off. (it looks great at 2K from a distance but curves start looking ugly)
You can bake the AO map (BI, to active as usual) but this isn’t of good quality.
As this is a simple panel case, I used parallel view and rendered the AO in Cycles. A premier of cycles in baking LOL.
I spent a few more minutes to trim it as layer in Ps, on top of the Displacement exr. (make the layer as multiply to preview)
Watch how displ and AO exr can be used in cycles nodes. In many other possible ways I guess.
1 Like
@HelloHiHola: Thanks about comment 104 