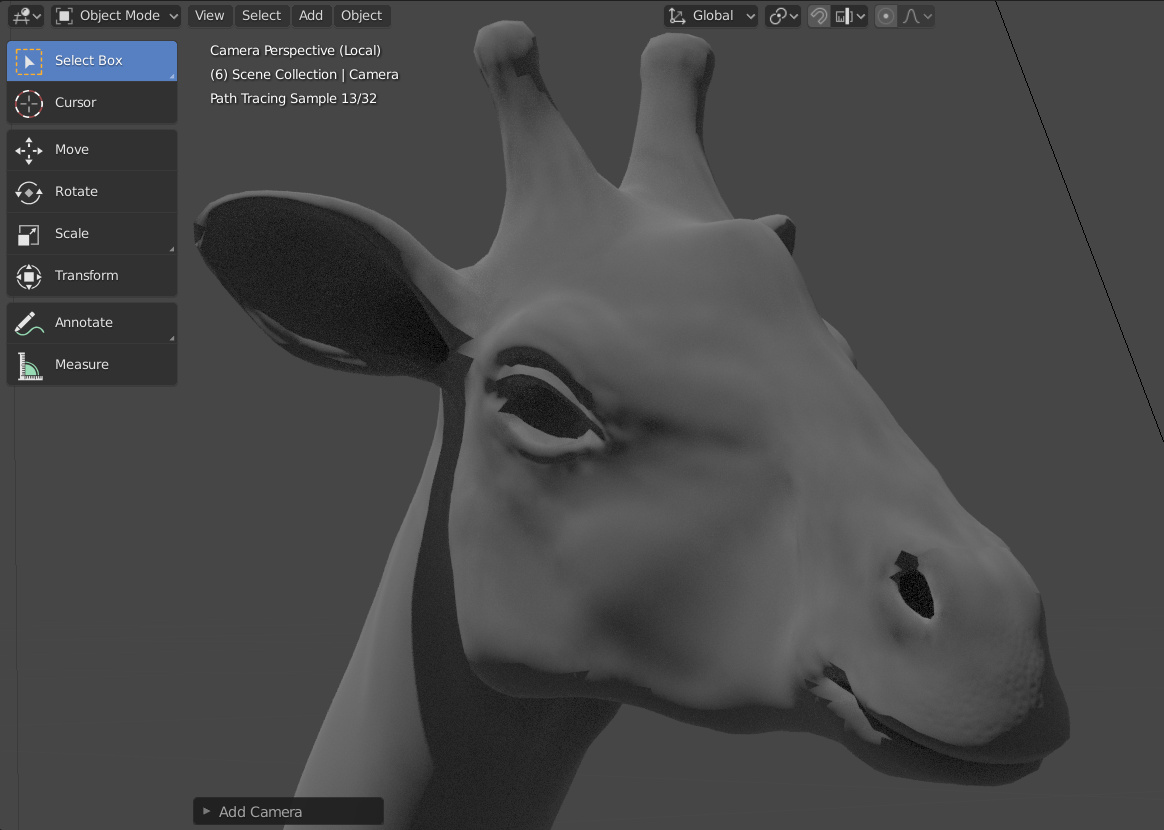
Hello blender people. And again I need your help. I have those strange jagged shadows allover my mesh in rendered view and can’t figure out how to solve this issue. That’s how it looks
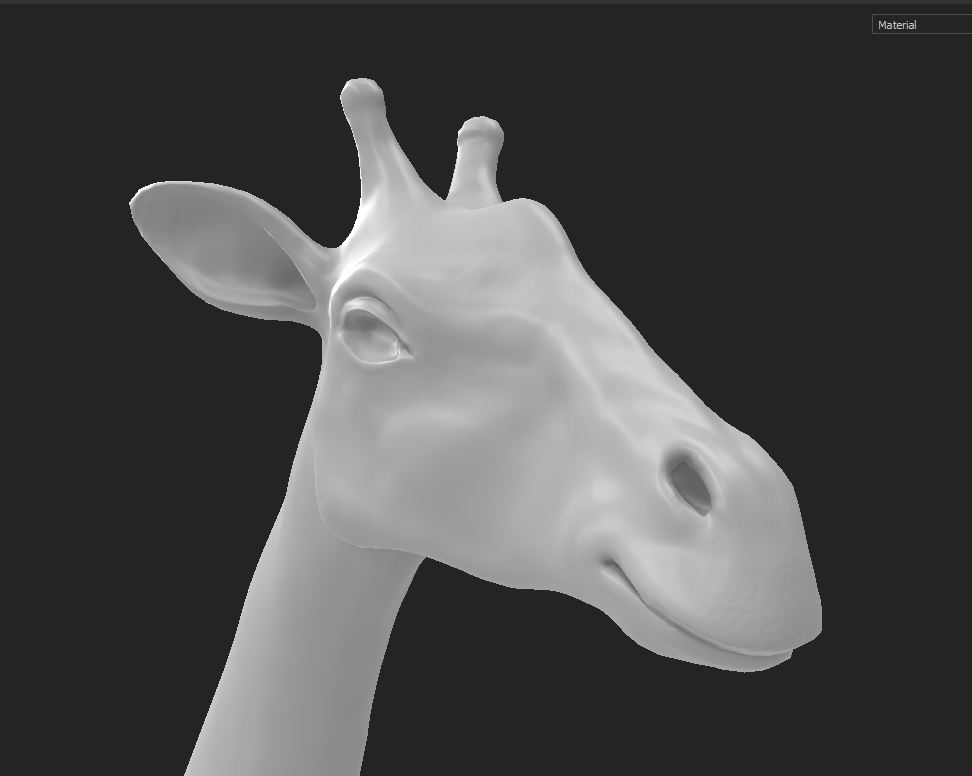
I created the model inside Zbrush, and then baked maps inside Substance Painter. And there everything looked just fine, here is the screenshot from SP.
All transformations are applied, normals recalculated, no loose parts or double vertices. I tried to change auto smooth shading settings, tried to subdivide mesh - but the result is still awful. Any ideas how to tackle that problem?
Can you try to disable any normal/bump maps in the material? I suspect some issue with these. Or do you have split/custom normals enabled? If yes, remove these also.
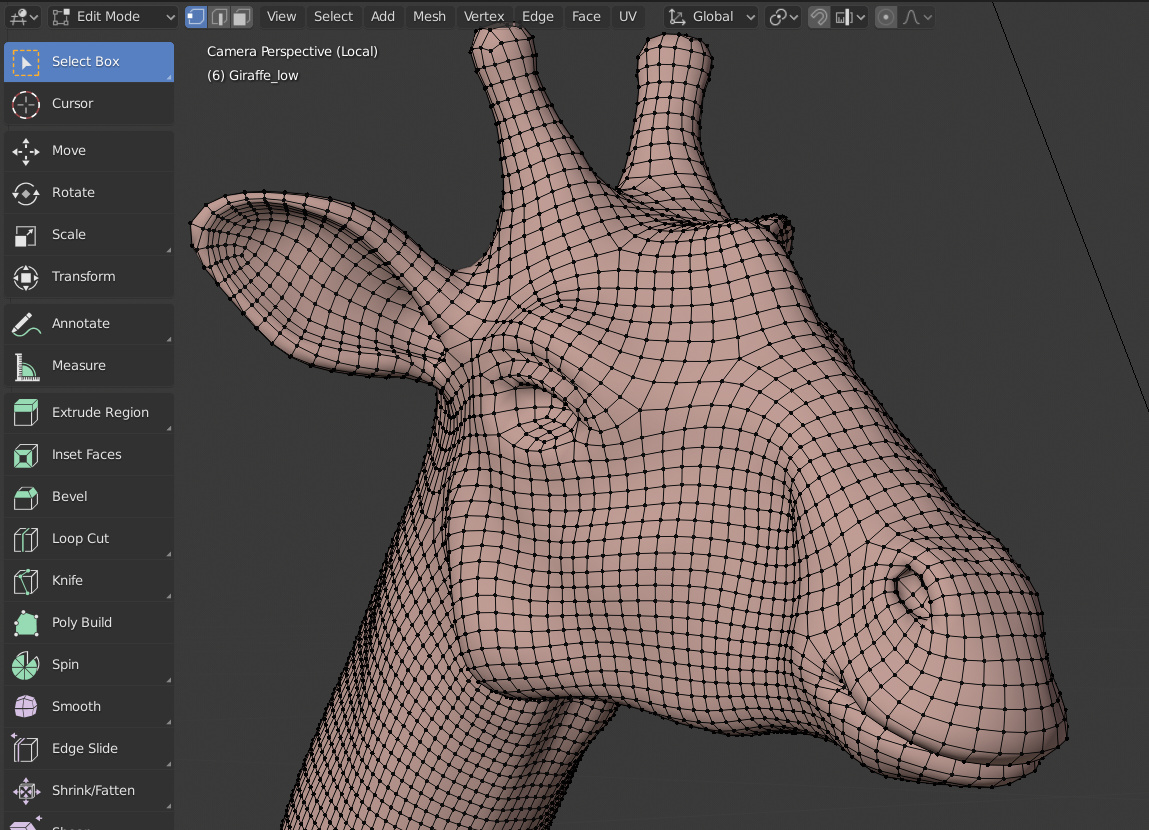
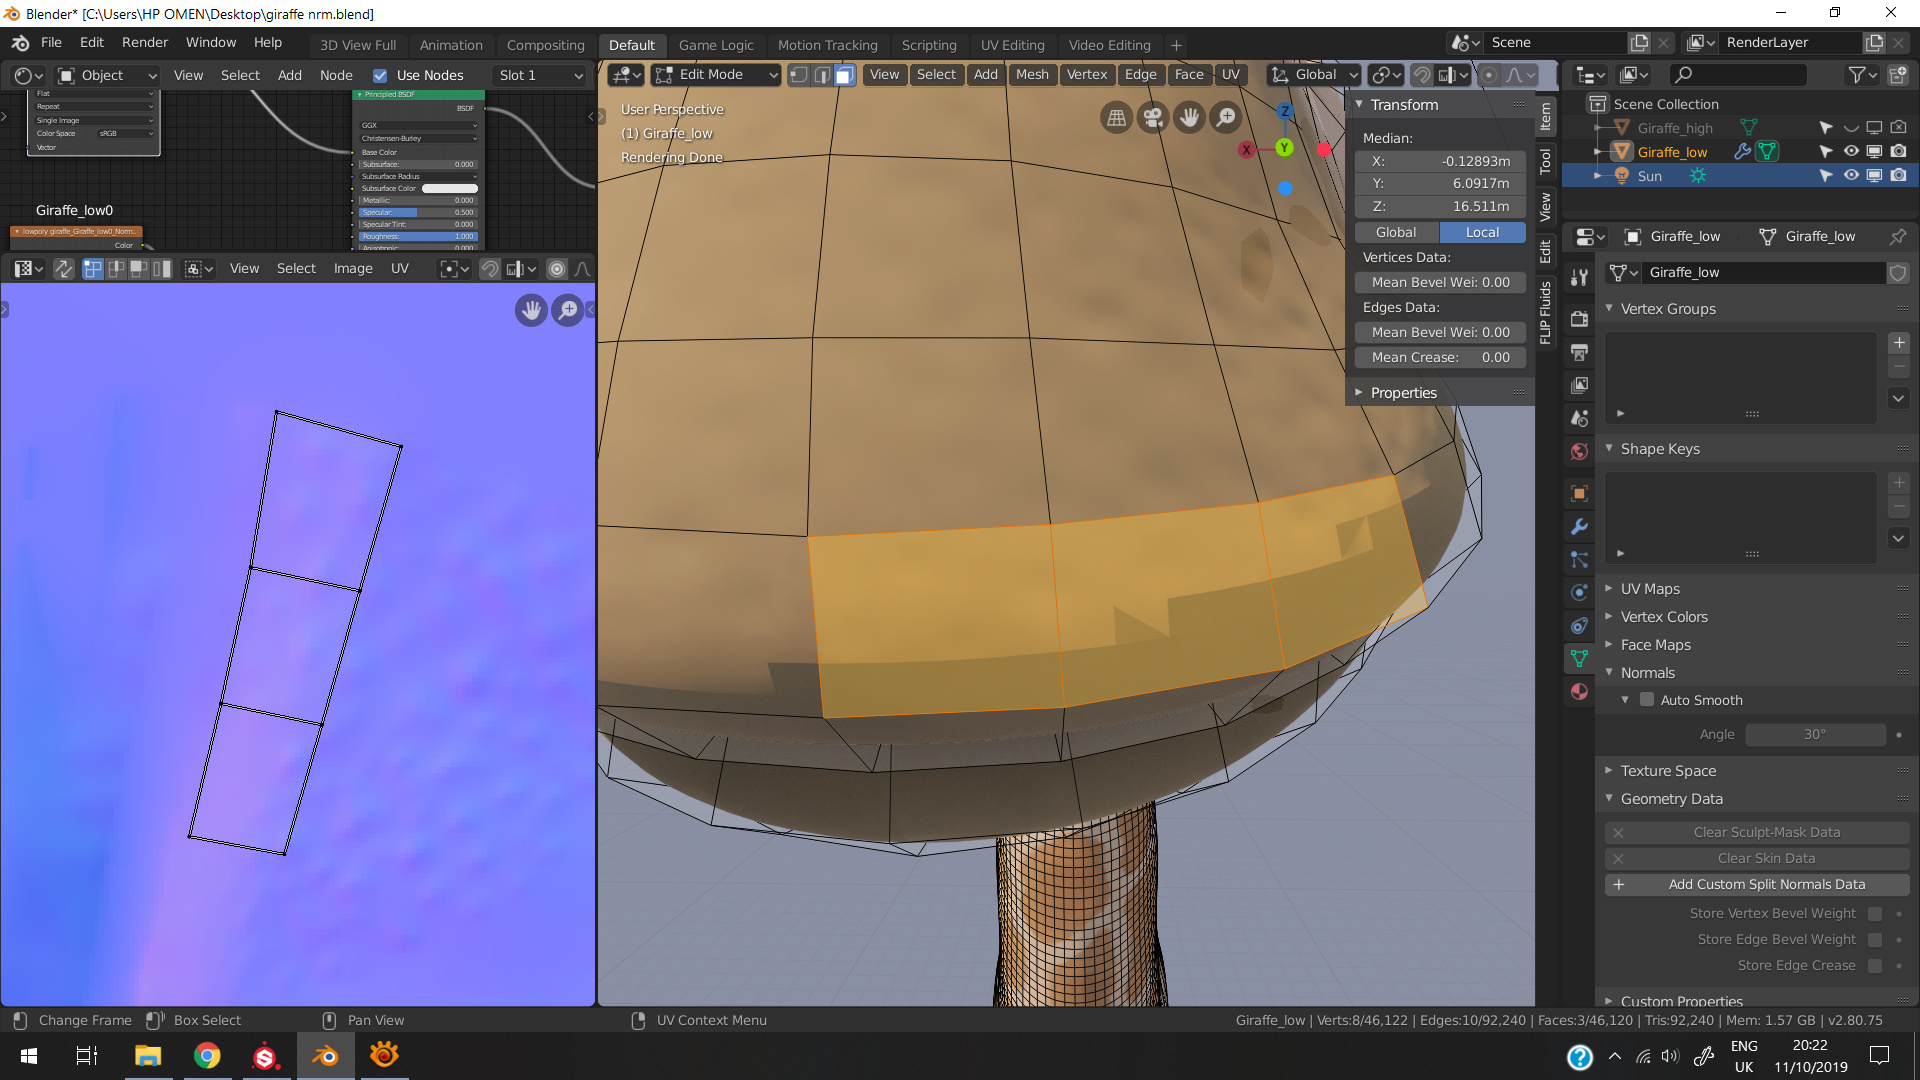
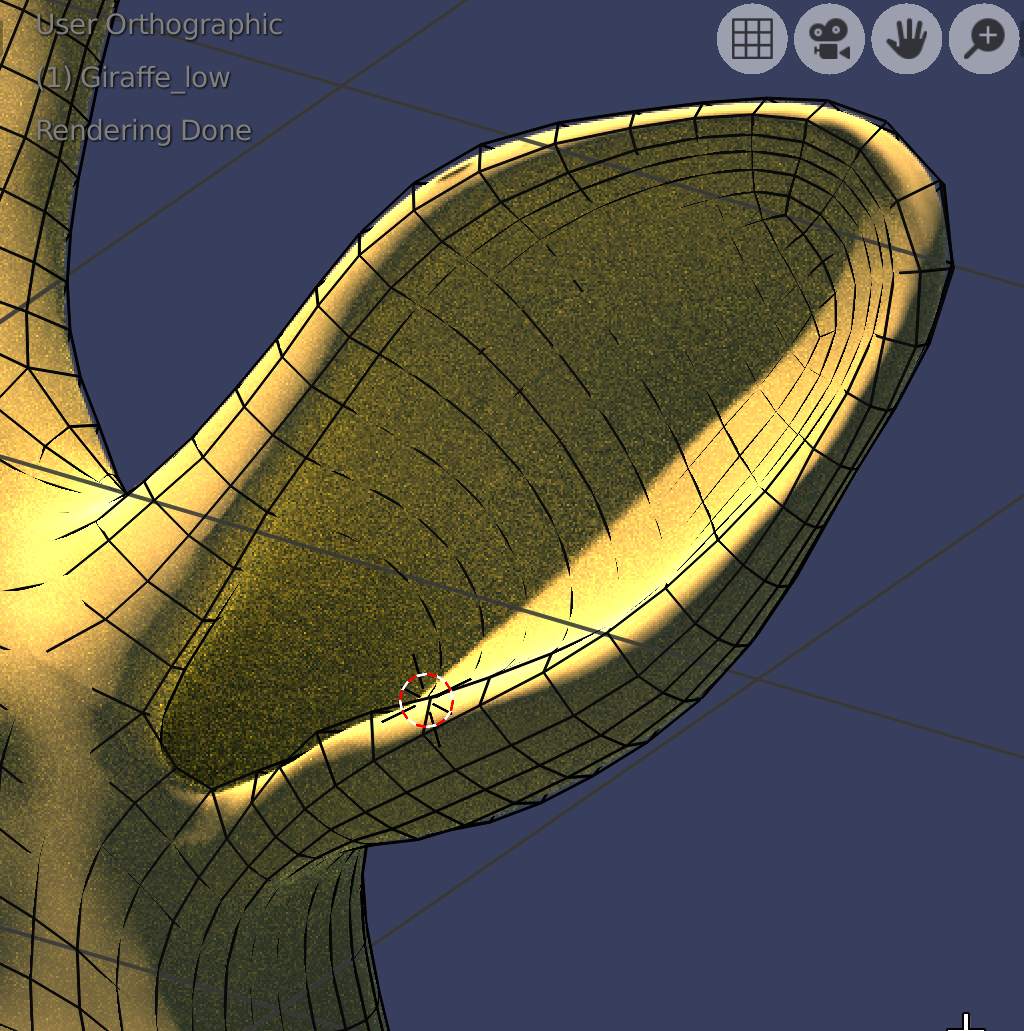
I disabled all maps - the shader is simple diffuse BSDF. I do not know much about enabling or disabling split/custom normals. Can you tell me how can I do that? Here how my normals looks like (the selected polygon is one of the problematic ones).
And one more thing - after some intense googling on the subject I tried to use average normals function, but Blender just quits after I try to use any of three options (custom area/face area/corner angle). If I try to use that function on other meshes - all good, but this one I need just crashes the program. Here is my mesh, maybe this will be more useful - http://s000.tinyupload.com/?file_id=82123623132742296922
(it is an fbx file 2.8mb). Please help.
The split normals can be enabled disabled under Object Data->Geometry Data->Add/Clear Custom Split Normals Data.
Could you maybe show a render with a 2x subdivided mesh? It appears to me, that the artifacts appear mostly at highly nonplanar quads. That latest image looks like Auto Smooth is enabled, right? Can you disable it, and set the complete mesh to smooth shading?
Checked you mesh (awesome modeling by the way), and it seems really just to be the combination of smooth shading and nonplanar faces. Subdiv 2x and everything looks fine to me:
You need to zoom in on the problematic polys and, try to figure out what’s wrong with them - - maybe there’s some wonky geometry, my stuff usually looks that way when there’s problem, with the ’ face ’ normal directions - -
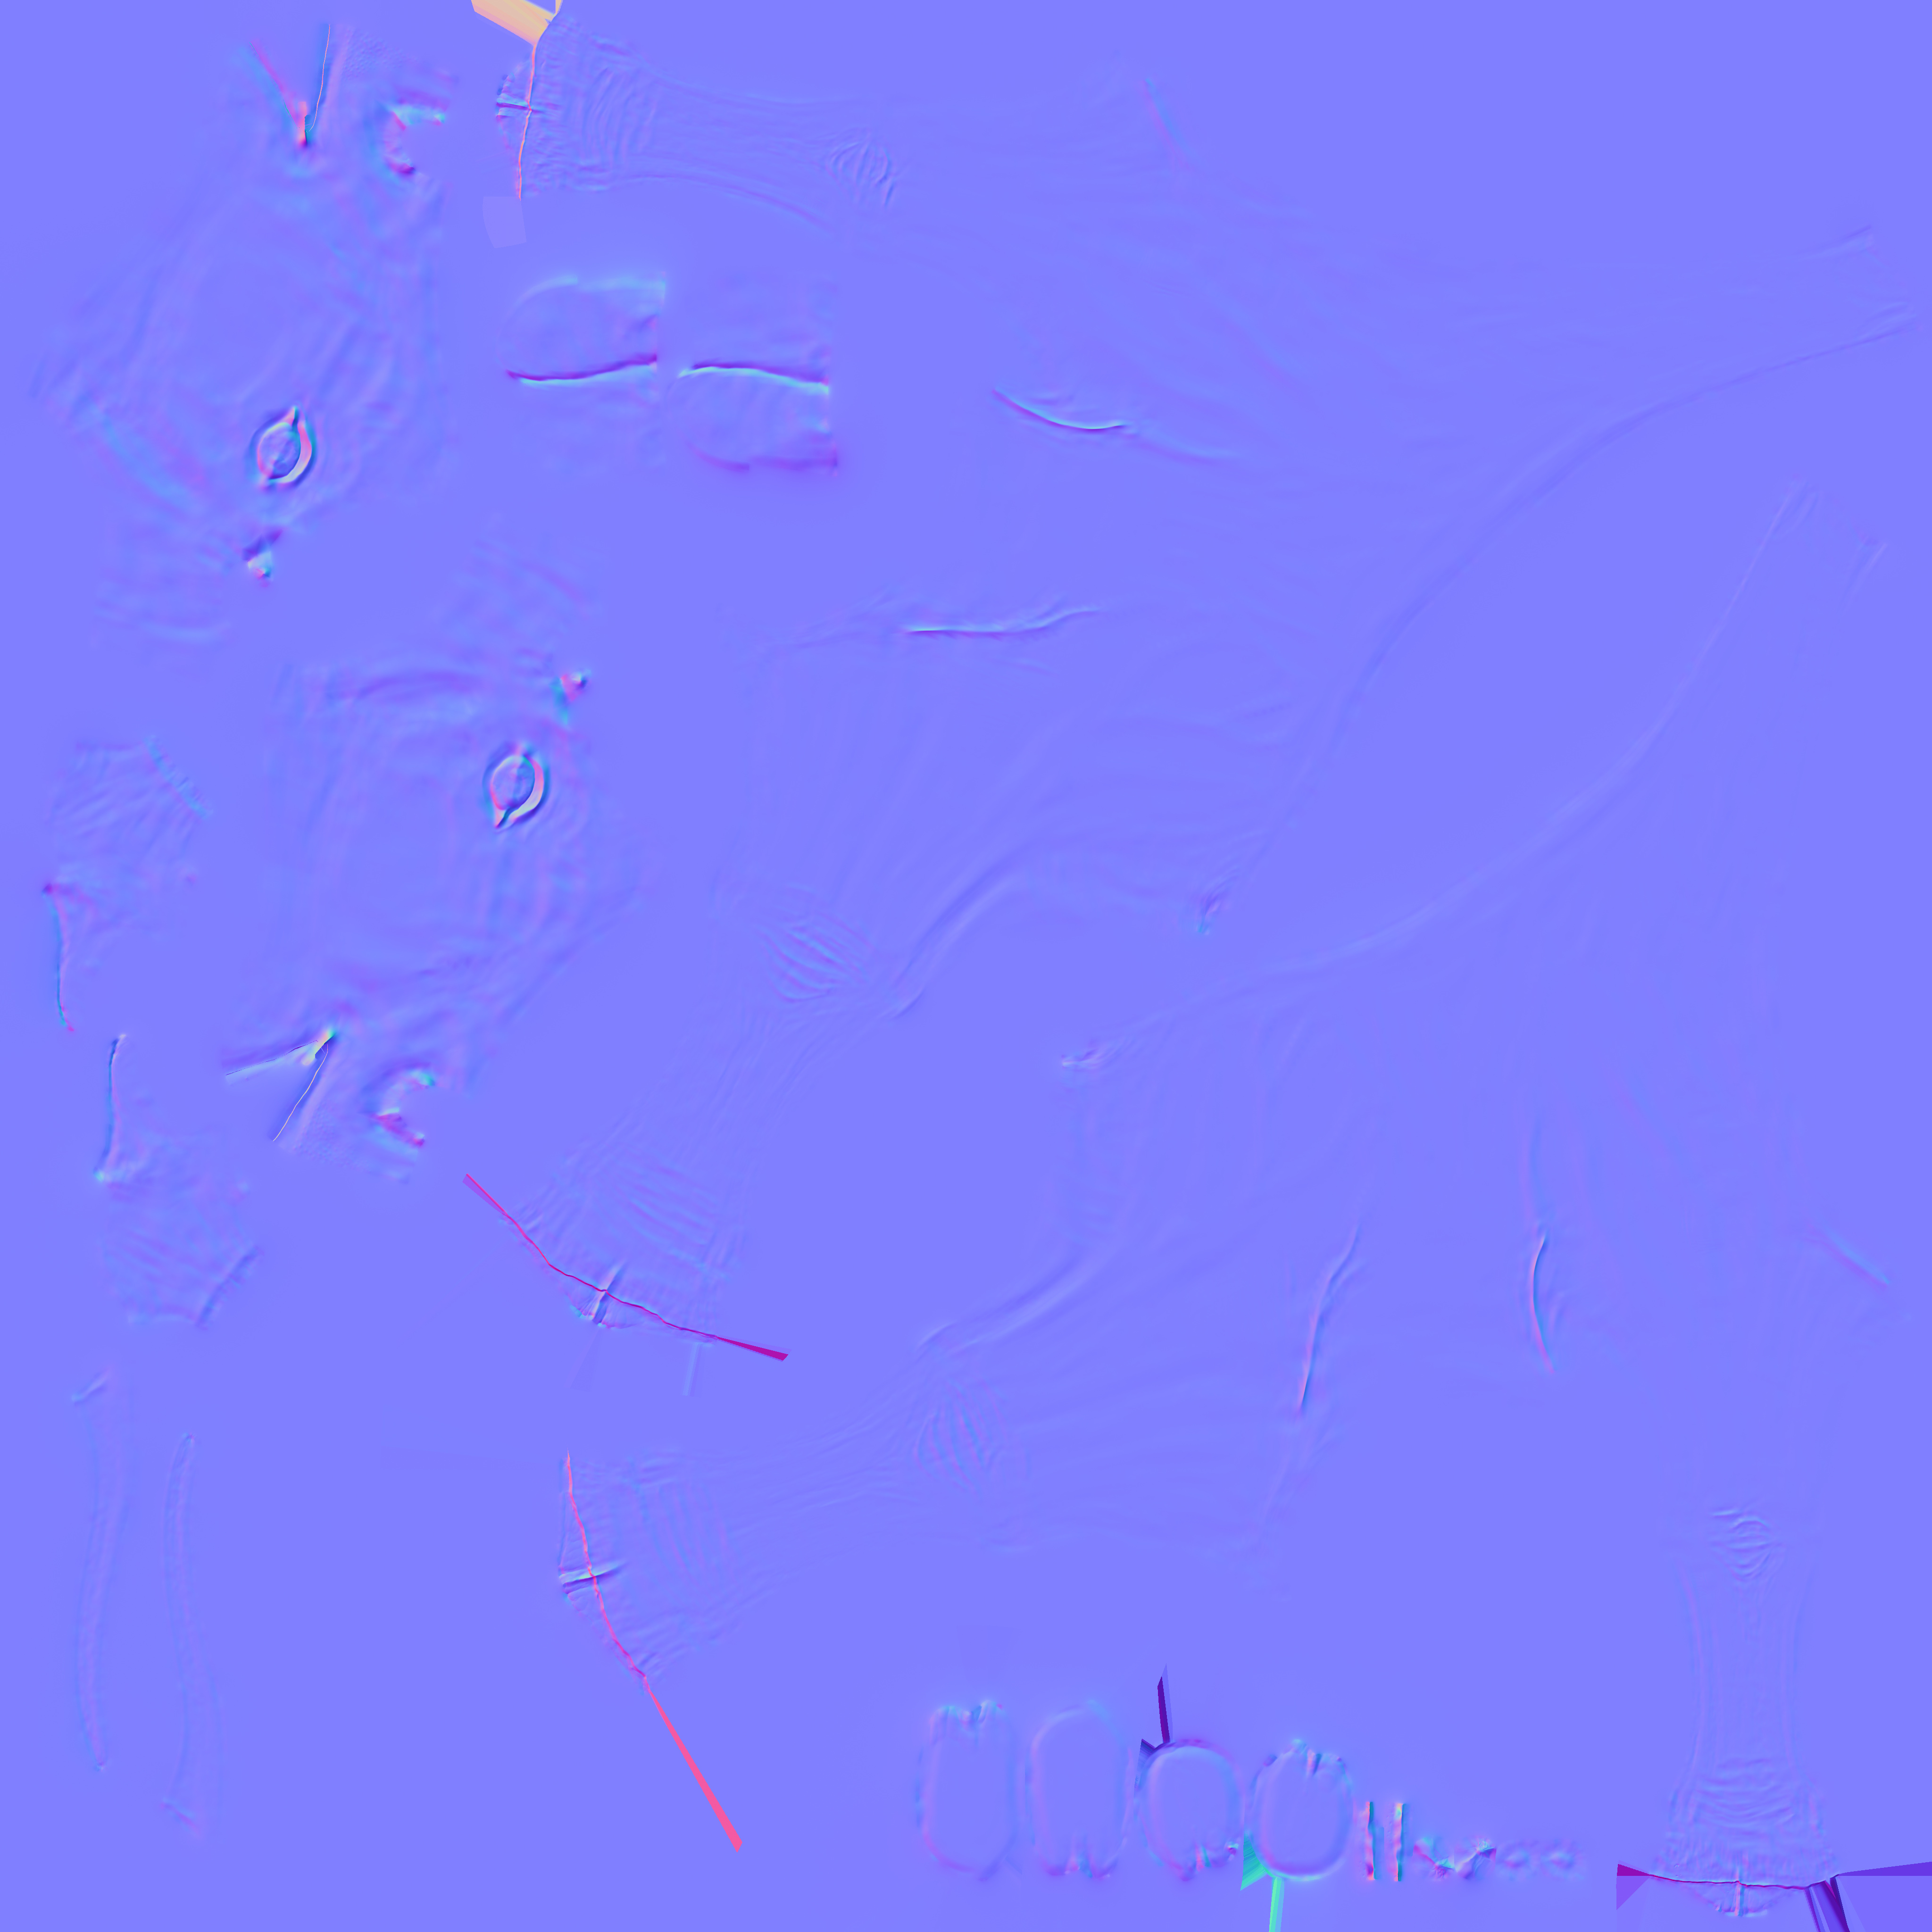
Thank you for the compliment regarding my modelling, I really appreciate it : ) I checked your blend file - it looks good, and I managed to repeat the process with similar result. But if I apply my normal map baked in Substance Painter - the problem returns. Here is my normal map. Maybe you know how to fix it? I really need the details from normal, not from geometry, so I would be grateful for any thoughts.
I tried that, even deleted problematic polys and created new ones - no difference. But omgold figured out how to solve it (partially, because normal map brings the problem back).
Hmm, either the UVs are not correctly imported from the fbx, or your normal map is broken. This is just the normal image mapped via the UVs from the fbx:
The faces adjacent to the discontinuity are on different UV islands, but that isn’t a real explanation, of course.
What the reason for the broken normal map is, I can only guess, as I’m not familiar with Zbrush and Substance Painter. Might also have something to do with the nonplanar quads.
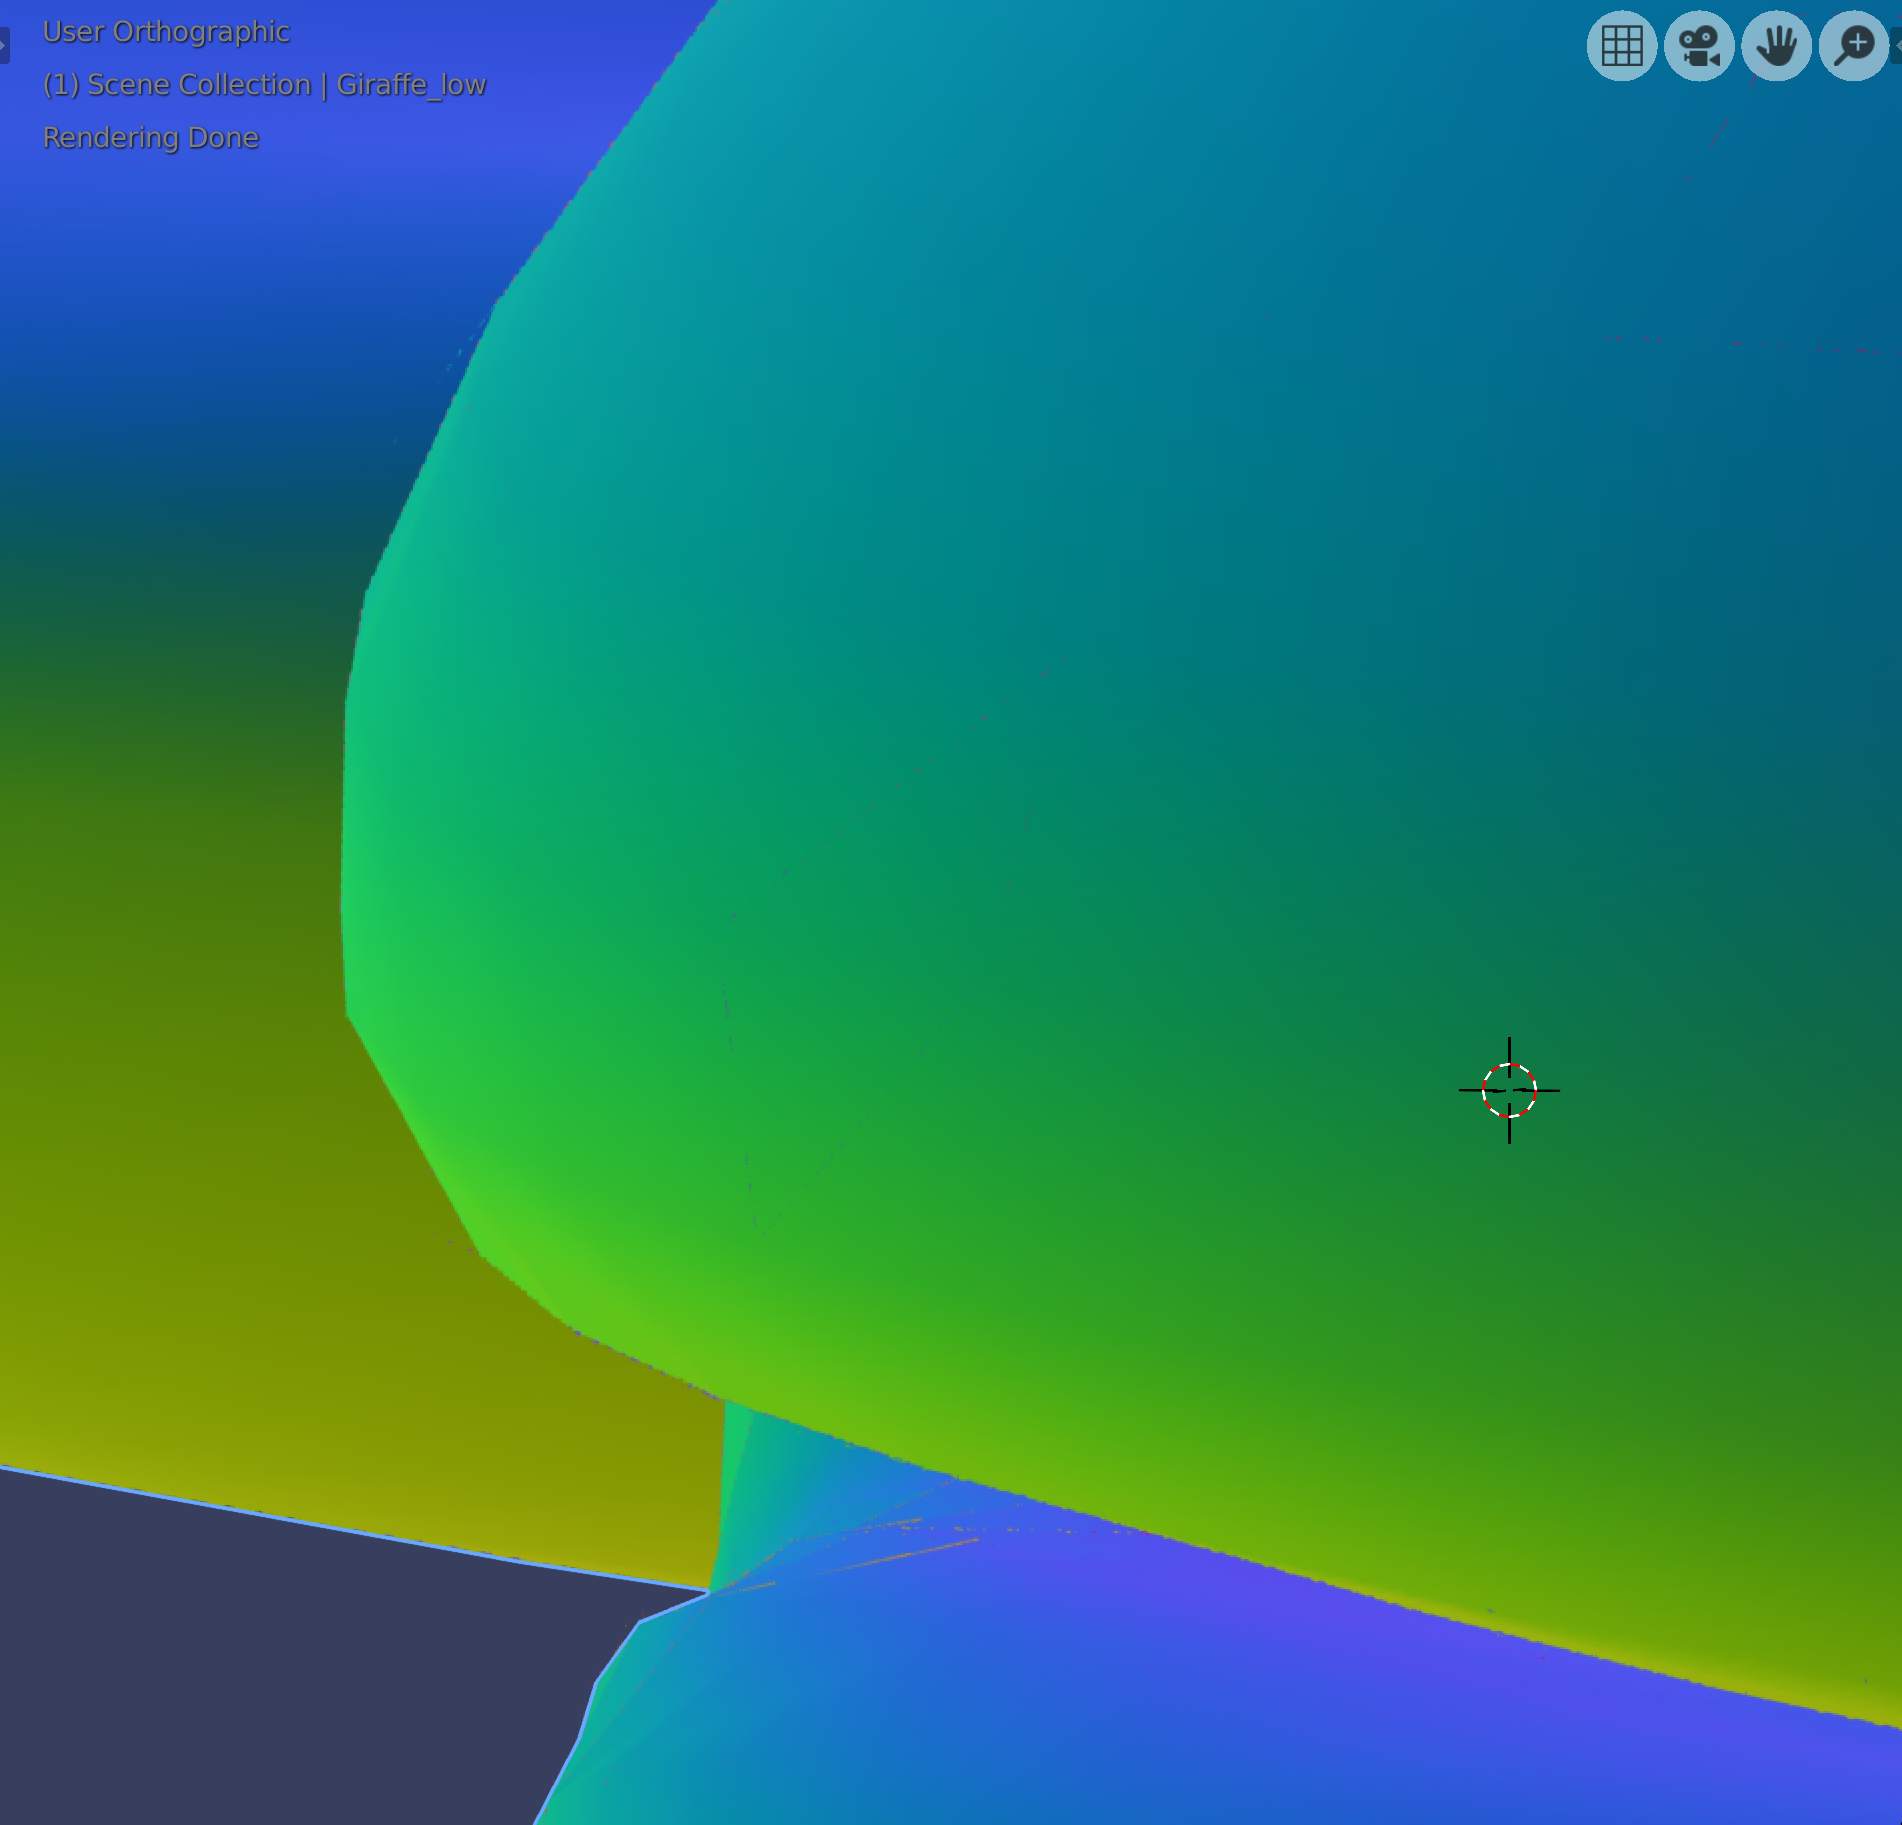
Ok, I still need help on that issue. I checked my bugged normal map (actually I tried to create it inside Blender and then in Substance Painter again with different settings) - it looks good now. Here you can see that shadow problems occurs where normal map is perfectly ok.
And it doesn’t matter what normal map I use - created in Blender or SP, and with what settings - the result is more or less the same - jagged shadows. I spent all day trying to fix it, but all worthless. I attach my blend file hoping that some advanced Blender user can help me to solve this as I ran out of ideas : (
Well, increasing this parameter makes sun “bigger” and shadows softer. In my case the jagged shadows are not so prominent from ~60 degrees. Thus, this is not a solution - only a way to mask that glitch. By the way I did some research and find out that this problem is a well known cycles issue when rendering low poly with normal maps and it is called “terminator artifact”. So far I didn’t manage to find a solution for this and even not sure there is one.
If it is indeed terminator artifacts, the are very difficult to fix. The usual approaches are actually to make the light soffter, or better (if face count is not an issue) to subdivide finer.
But I have doubts that it really is that effect in your case. The blocking would appear aligned
with the subdivided faces, while in the render above it looks coarser. To check it, I would need the new normal map also.
Thanks. Okay, I have to say the whole issue is confusing to me. It seems there are two different issues with the normals, both of which are responsible for only part of the artifacts. It is not the terminator effect, though.
The first is that there are still mismatches in normals across UV islands (the one I pointed out previously is still there). I suspect it is a mismatch in tangent spaces.
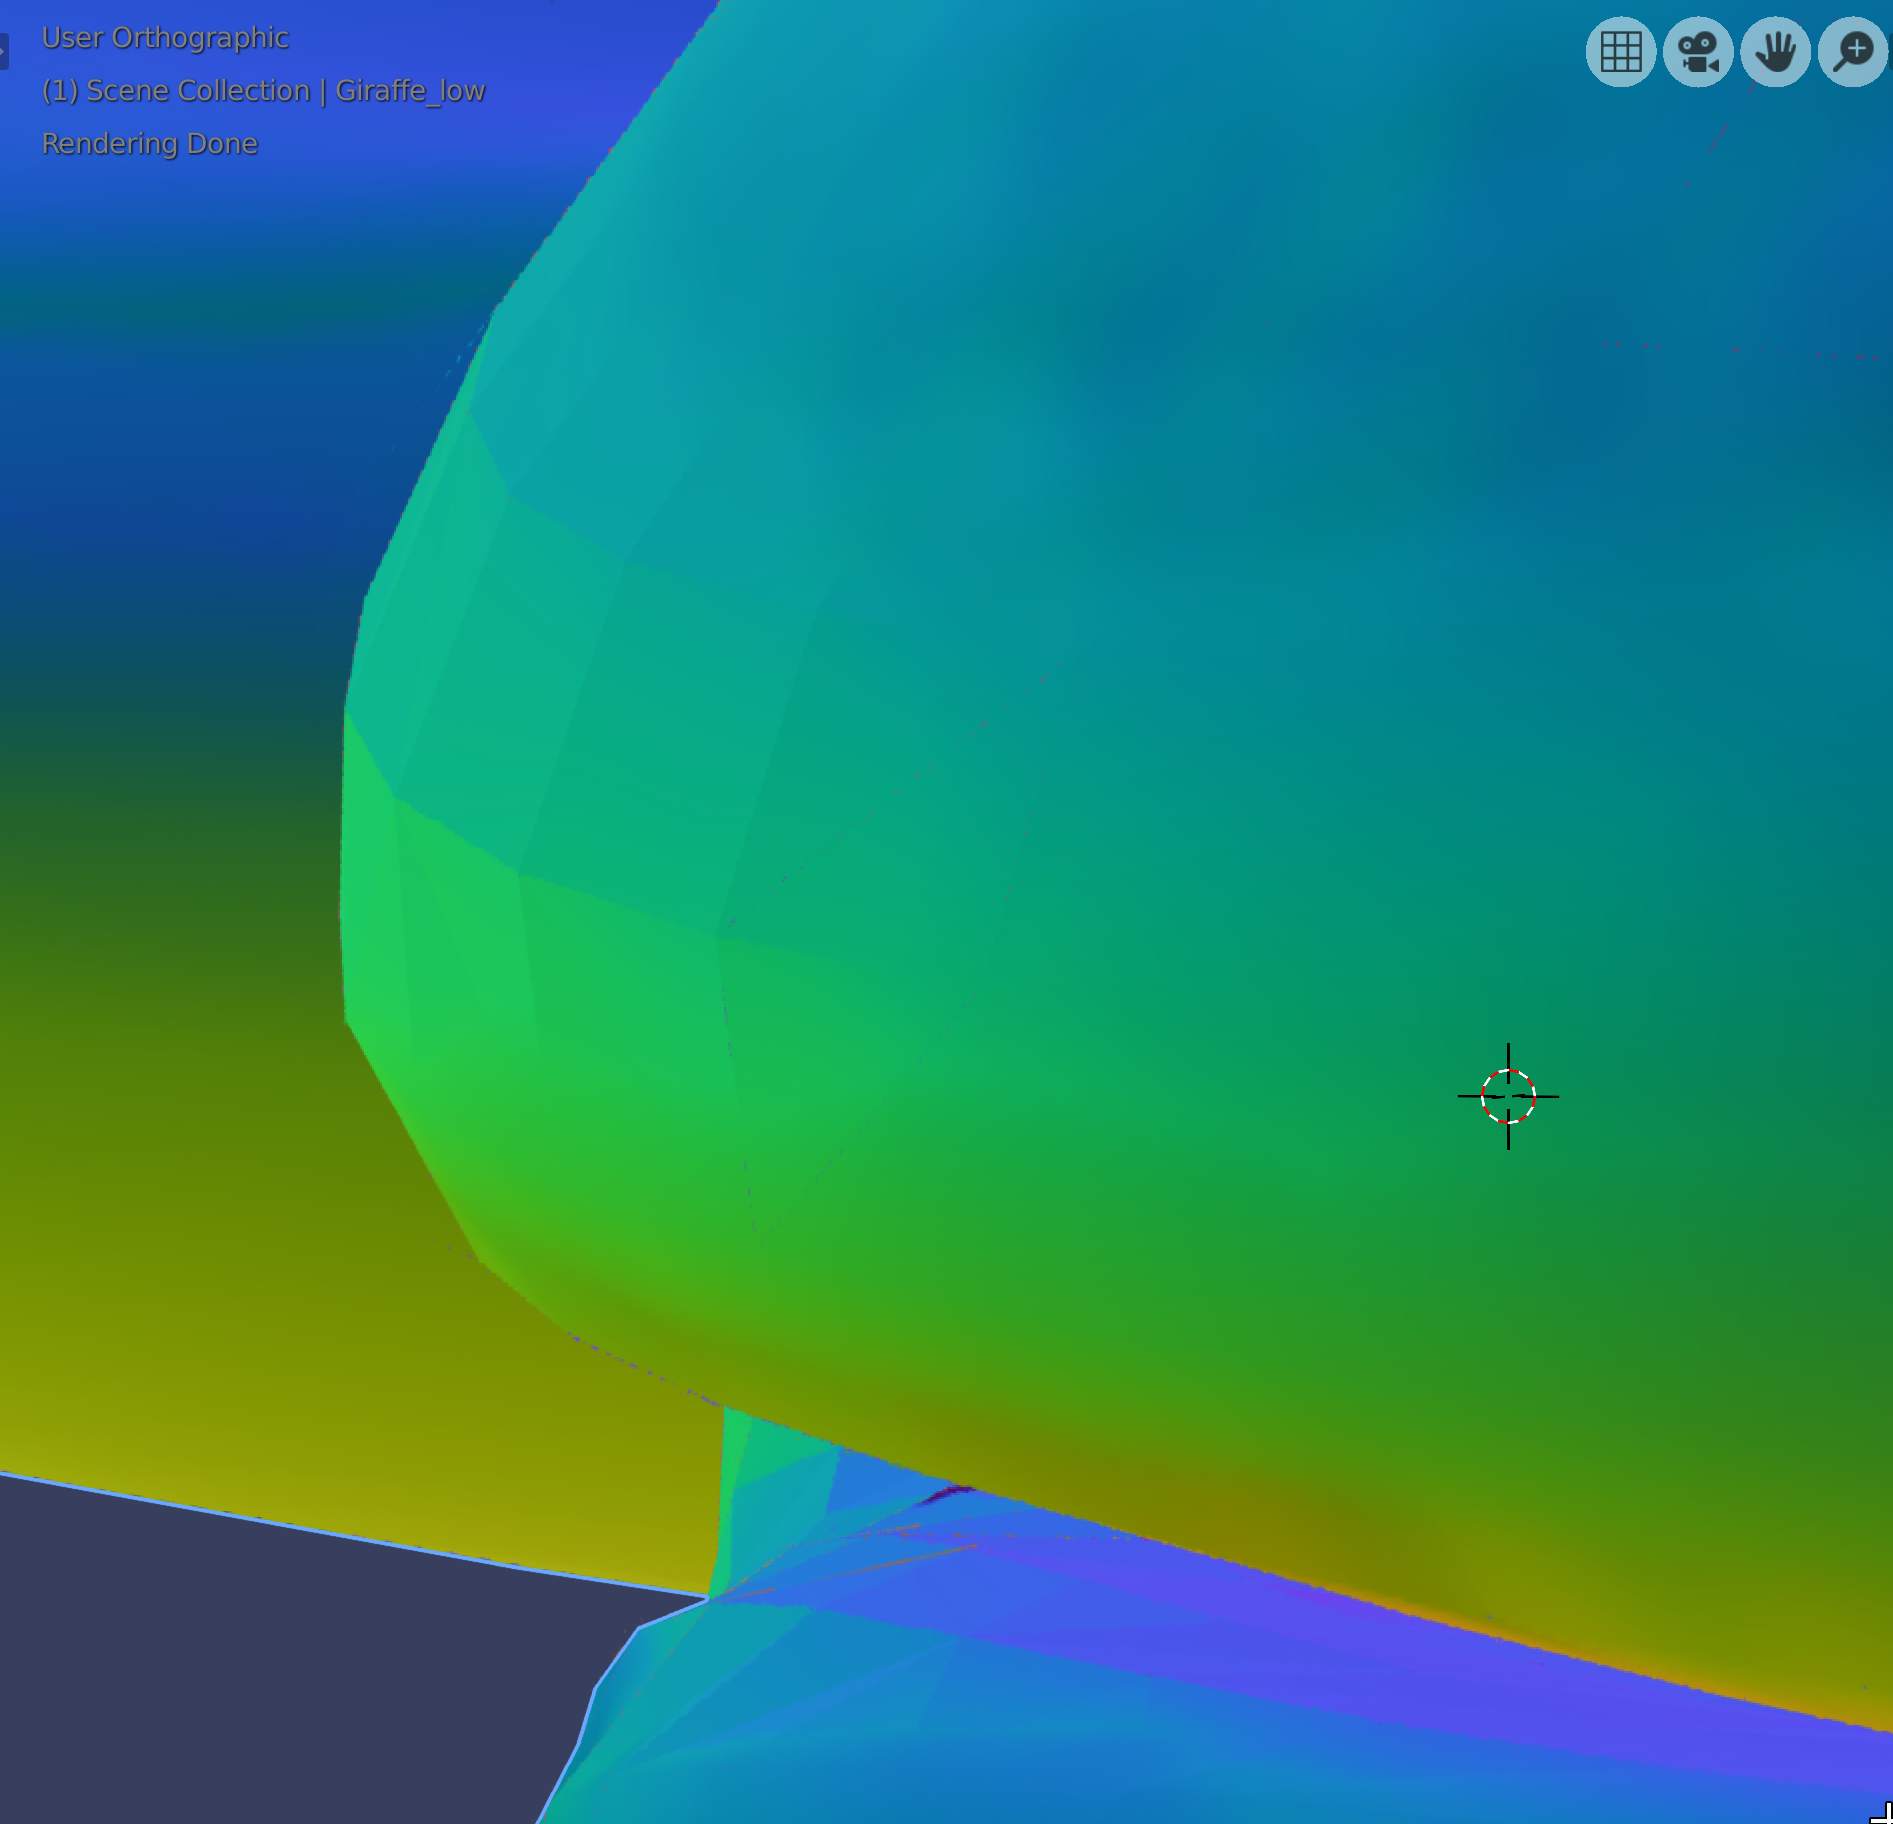
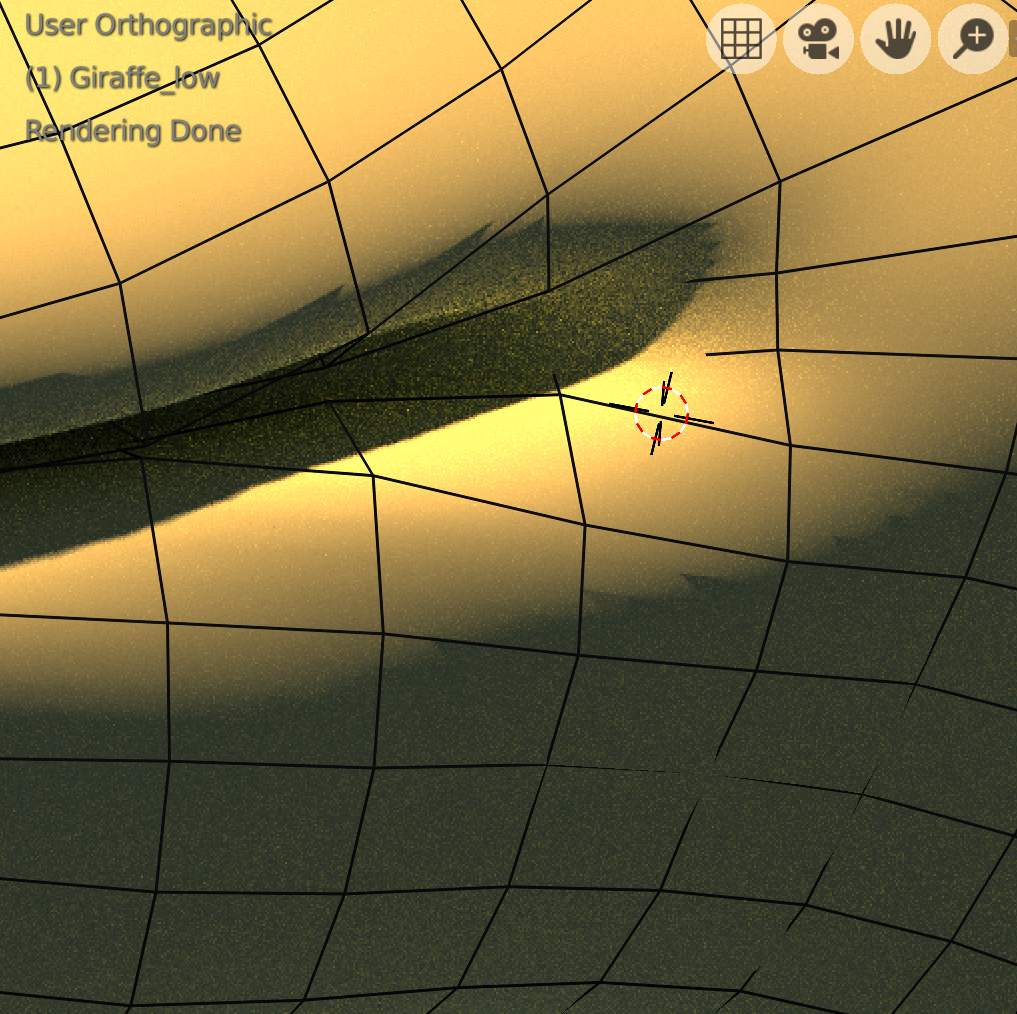
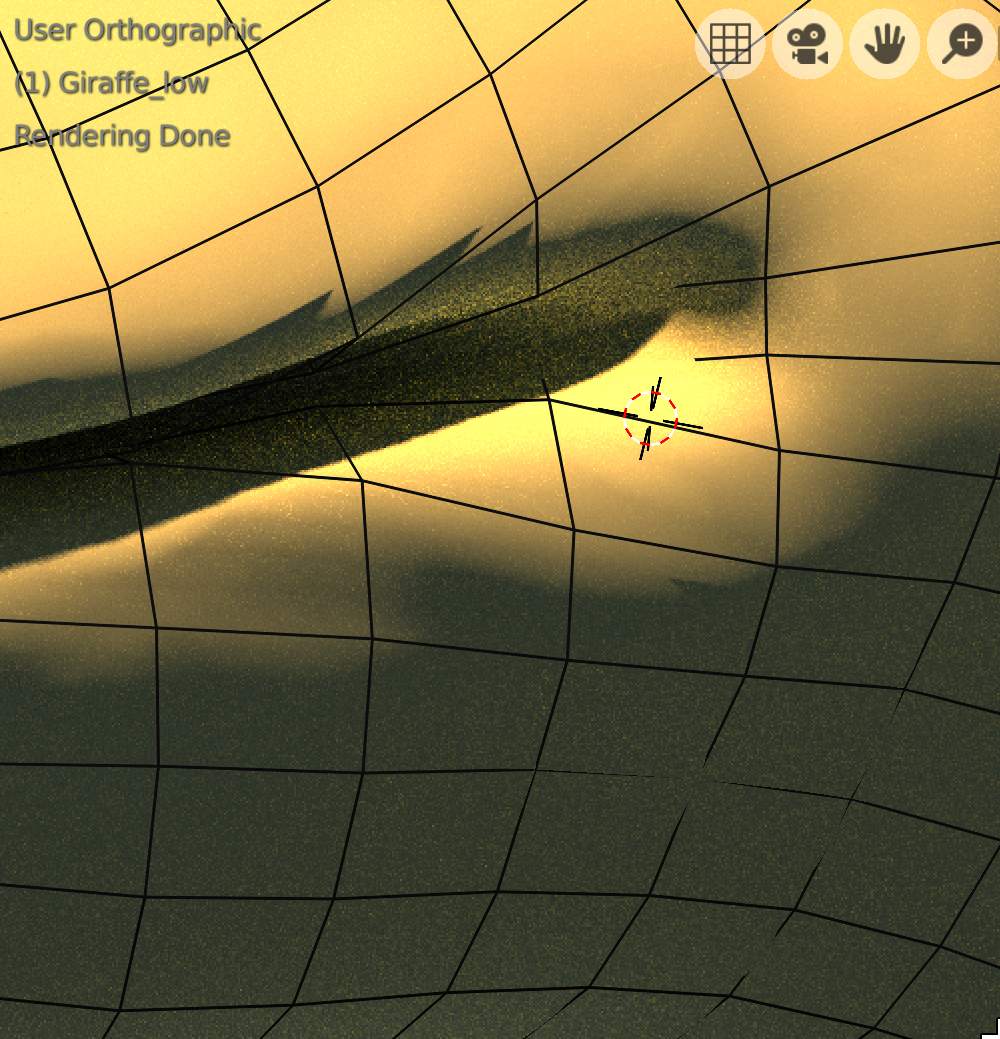
The other, more weird one is that, even in regios of the normal map being smooth and without UV seams, the resulting normals are discontinuous:
That is something I also would like an explanation for: smooth input normals + smooth normal map = blocky normals. Ehm, what? Wonder if maybe the tangents will not be smoothed by blender. Have to do more analysis on that.
What may help quite a bit, is to not including large-scale displacements in the normal map. I notice that, e.g. the normal map tries to sharpen the curves along the snout and on the ears. I would guess that the marked area in your last render, would look much better then.
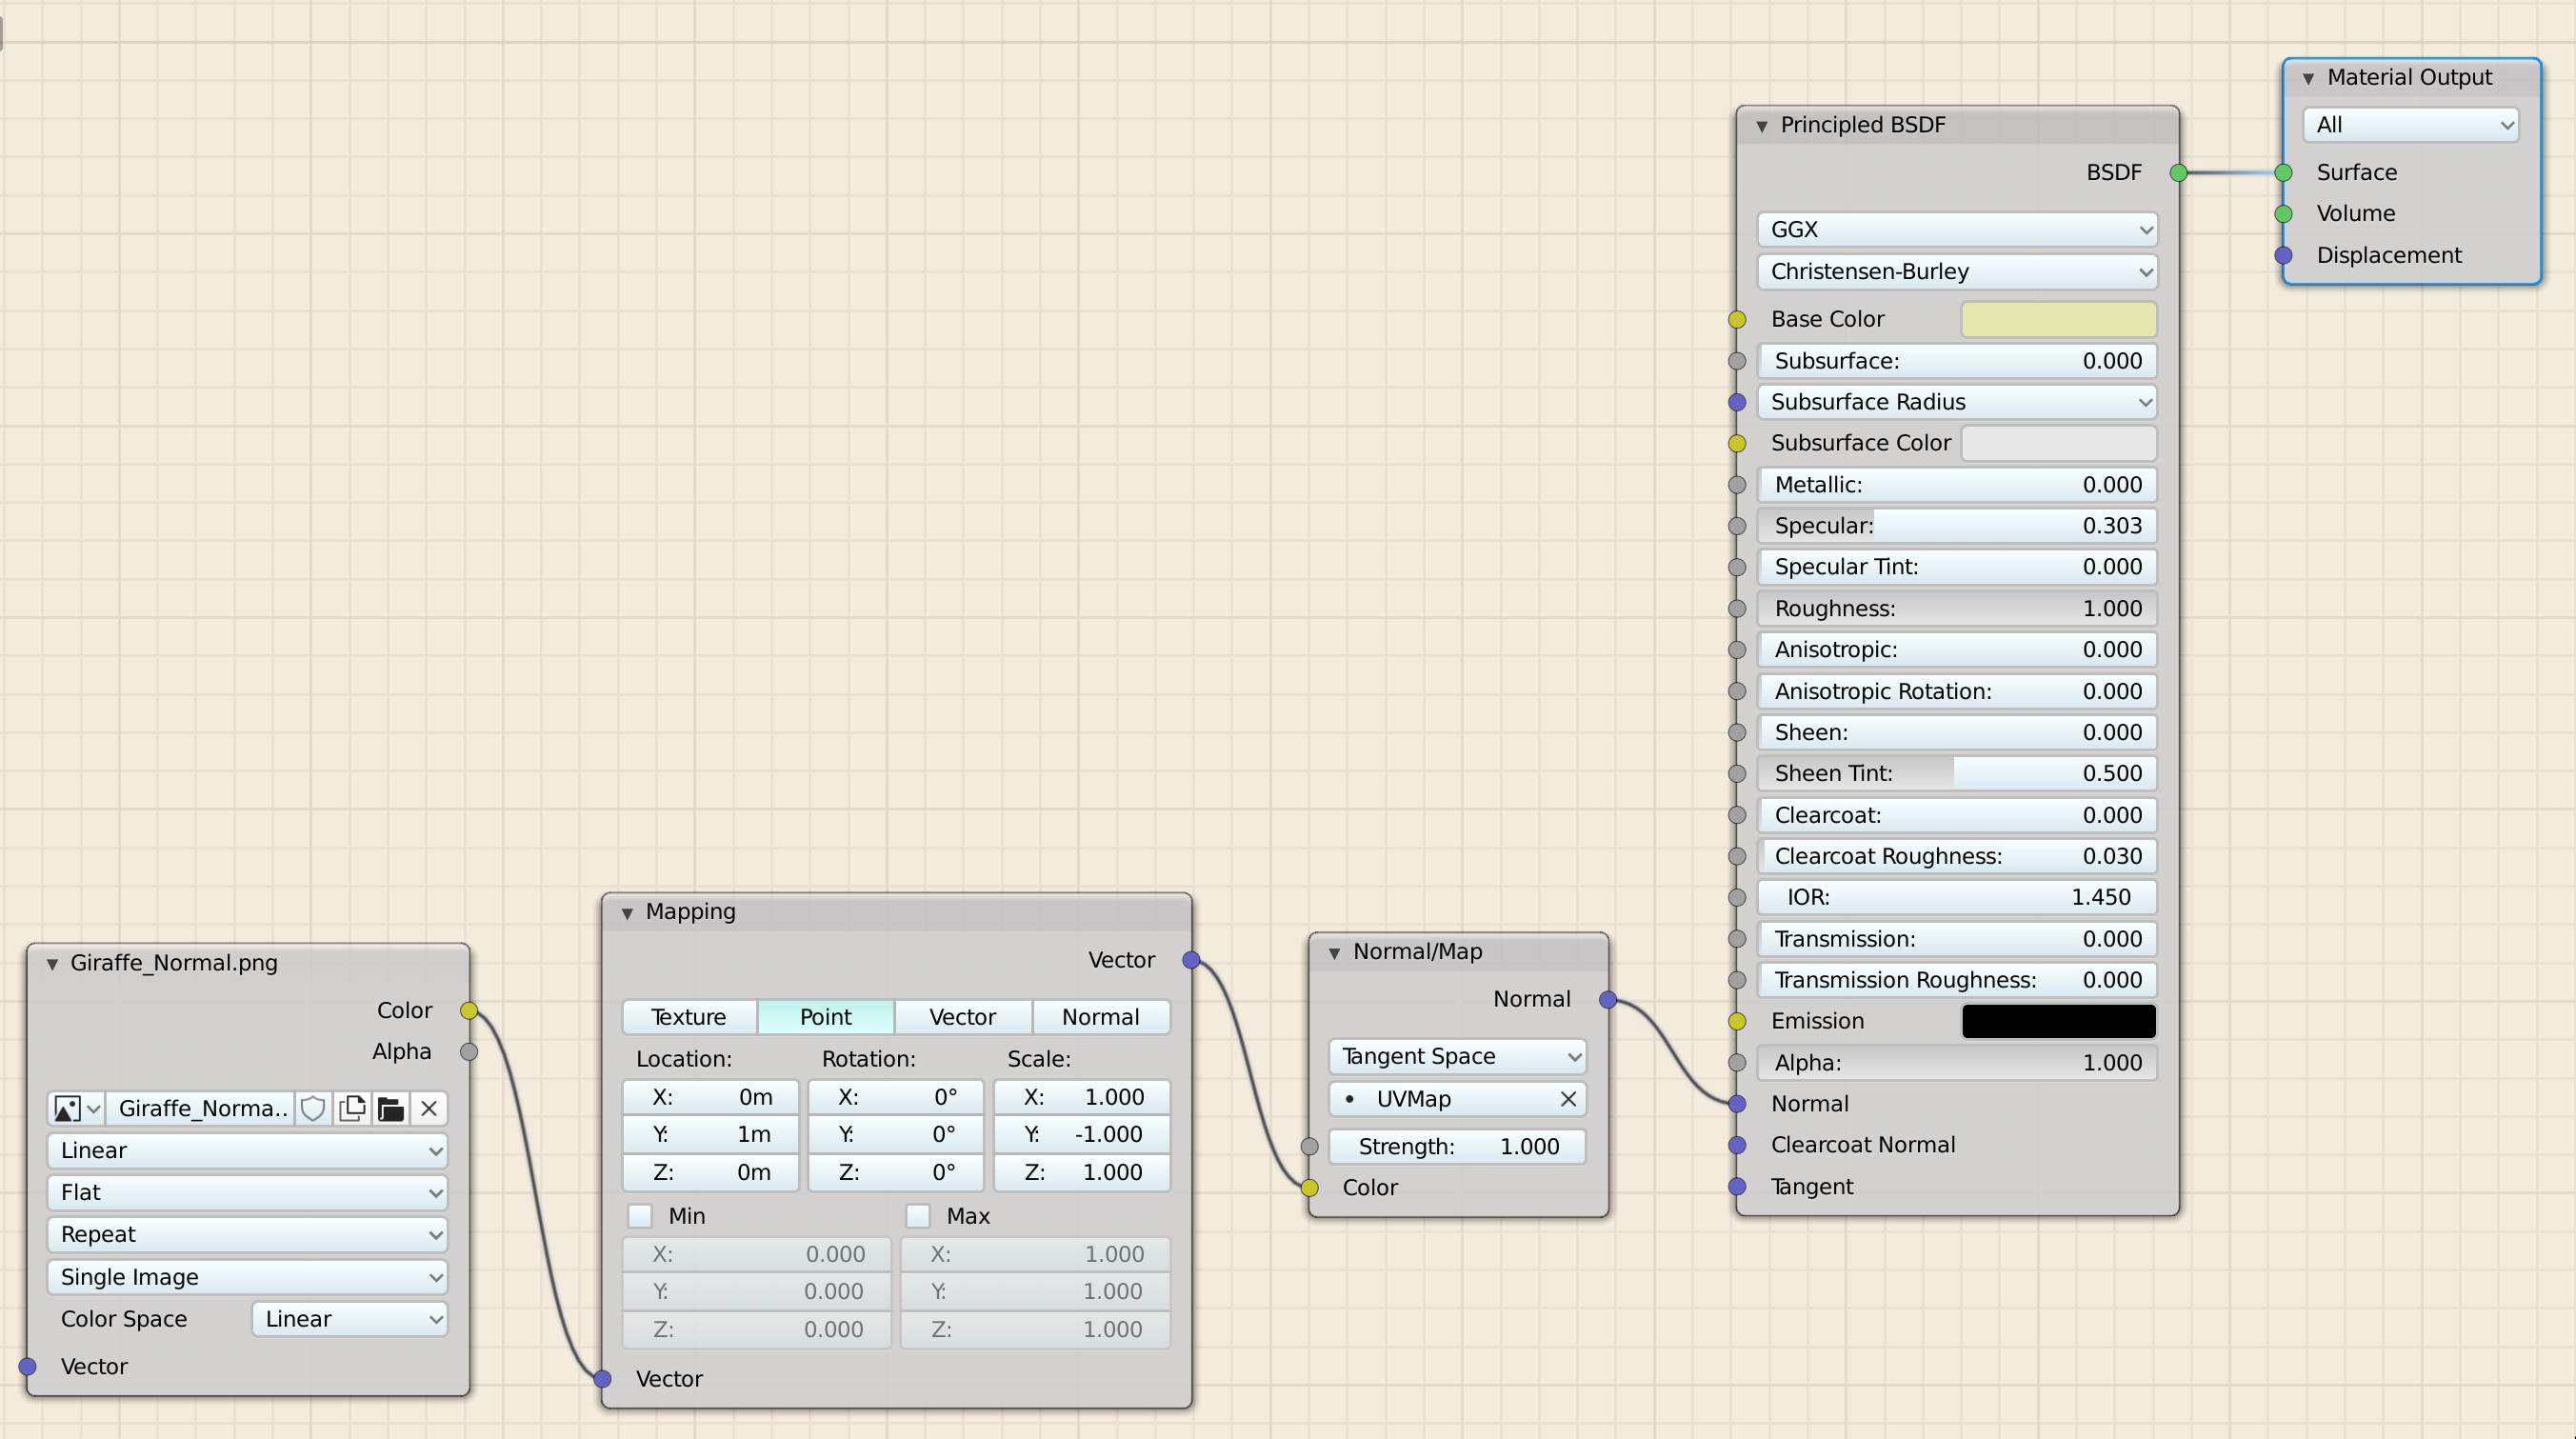
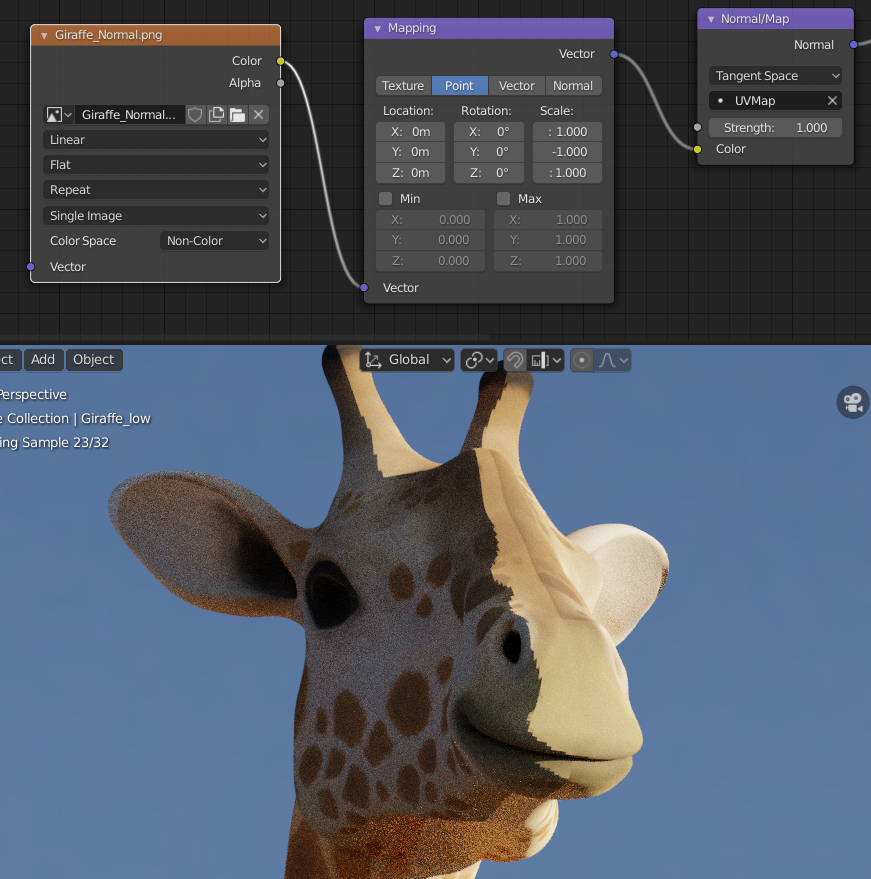
Okay, I think I finally figured the matter out. What is wrong with the normal map, is that the y-coordinate (cotangent) is inverted. But this can be fixed with a vector map node:
For these to get rid of (beside the methods already mentioned), it could help to align the mesh better with the curvature, in such strongly curved regions. Don’t know whether Zbrush didn*t do that, but locally refine the mesh in these places would be desirable.
Can you please explain how to do that - “What may help quite a bit, is to not including large-scale displacements in the normal map”? Just edit normal map in Photoshop erasing problematic parts( I tried that, not very successful) or somehow else?