Hey folks. I just wanted to share something I put together over the weekend.
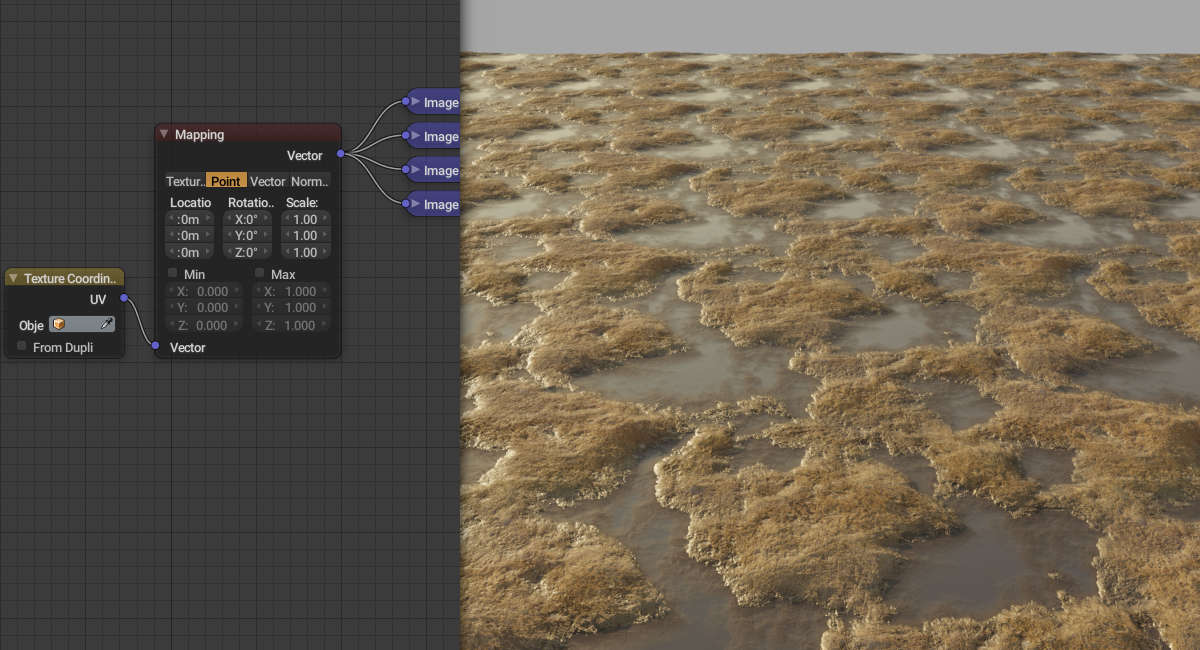
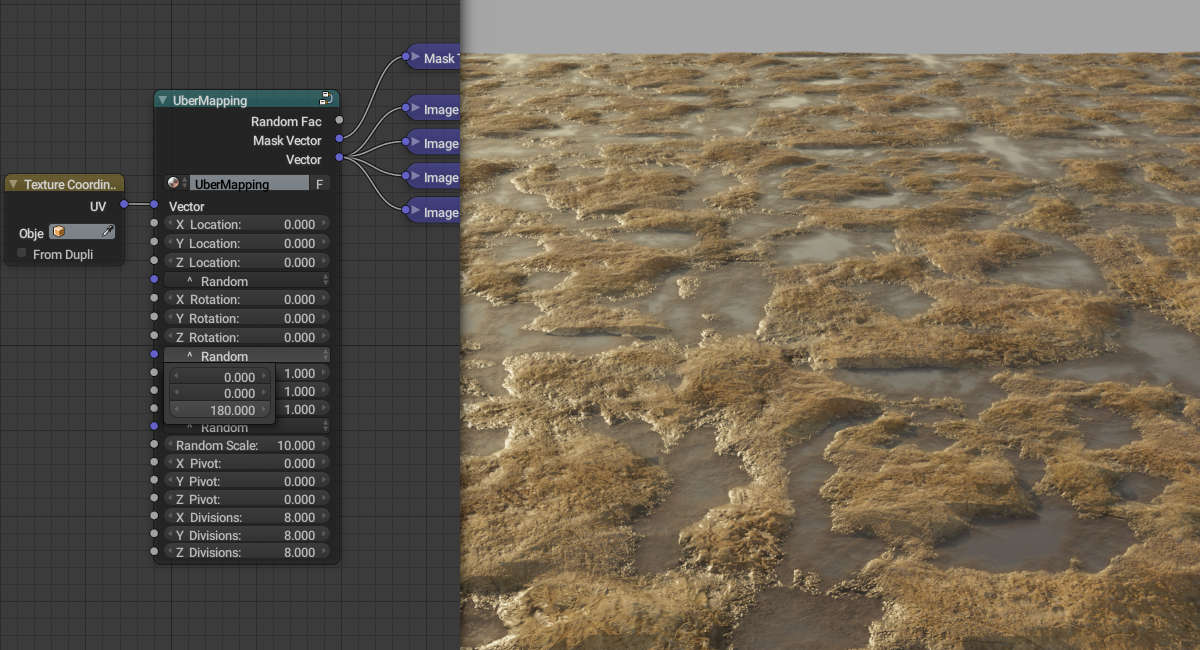
It started out as a mapping node with exposed inputs, but I ended up adding some extras for fun. Who knows, maybe someone will find a use for it. In the future, I’d like to add some additional types of mapping, as well as the min/max clipping functionality.
I’ve updated the .blend above with a proper procedural mask to replace the texture stand-in.
I planned to build it into UberMapping, but I’m not so sure I should now. Masking is outside the scope of mapping. Besides, it can be used for other thing, like bump mapping:
Props to @yashar for his box mapping trick, which I’ve incorporated into the SquareCircle nodegroup. It doesn’t have blending, but I think that’s better than tripling 40+ nodes for a triplanar setup. (Maybe… I haven’t actually run any performance tests… I’ll put that on my todo.)
Thank Cody that will become very handy! After my first step last night with the Blender material workflow i become a bit frustrated so i decide to go directly with the nodes editor like you suggest me last night but hooking the mapping node give me no result just like in the texture tab!
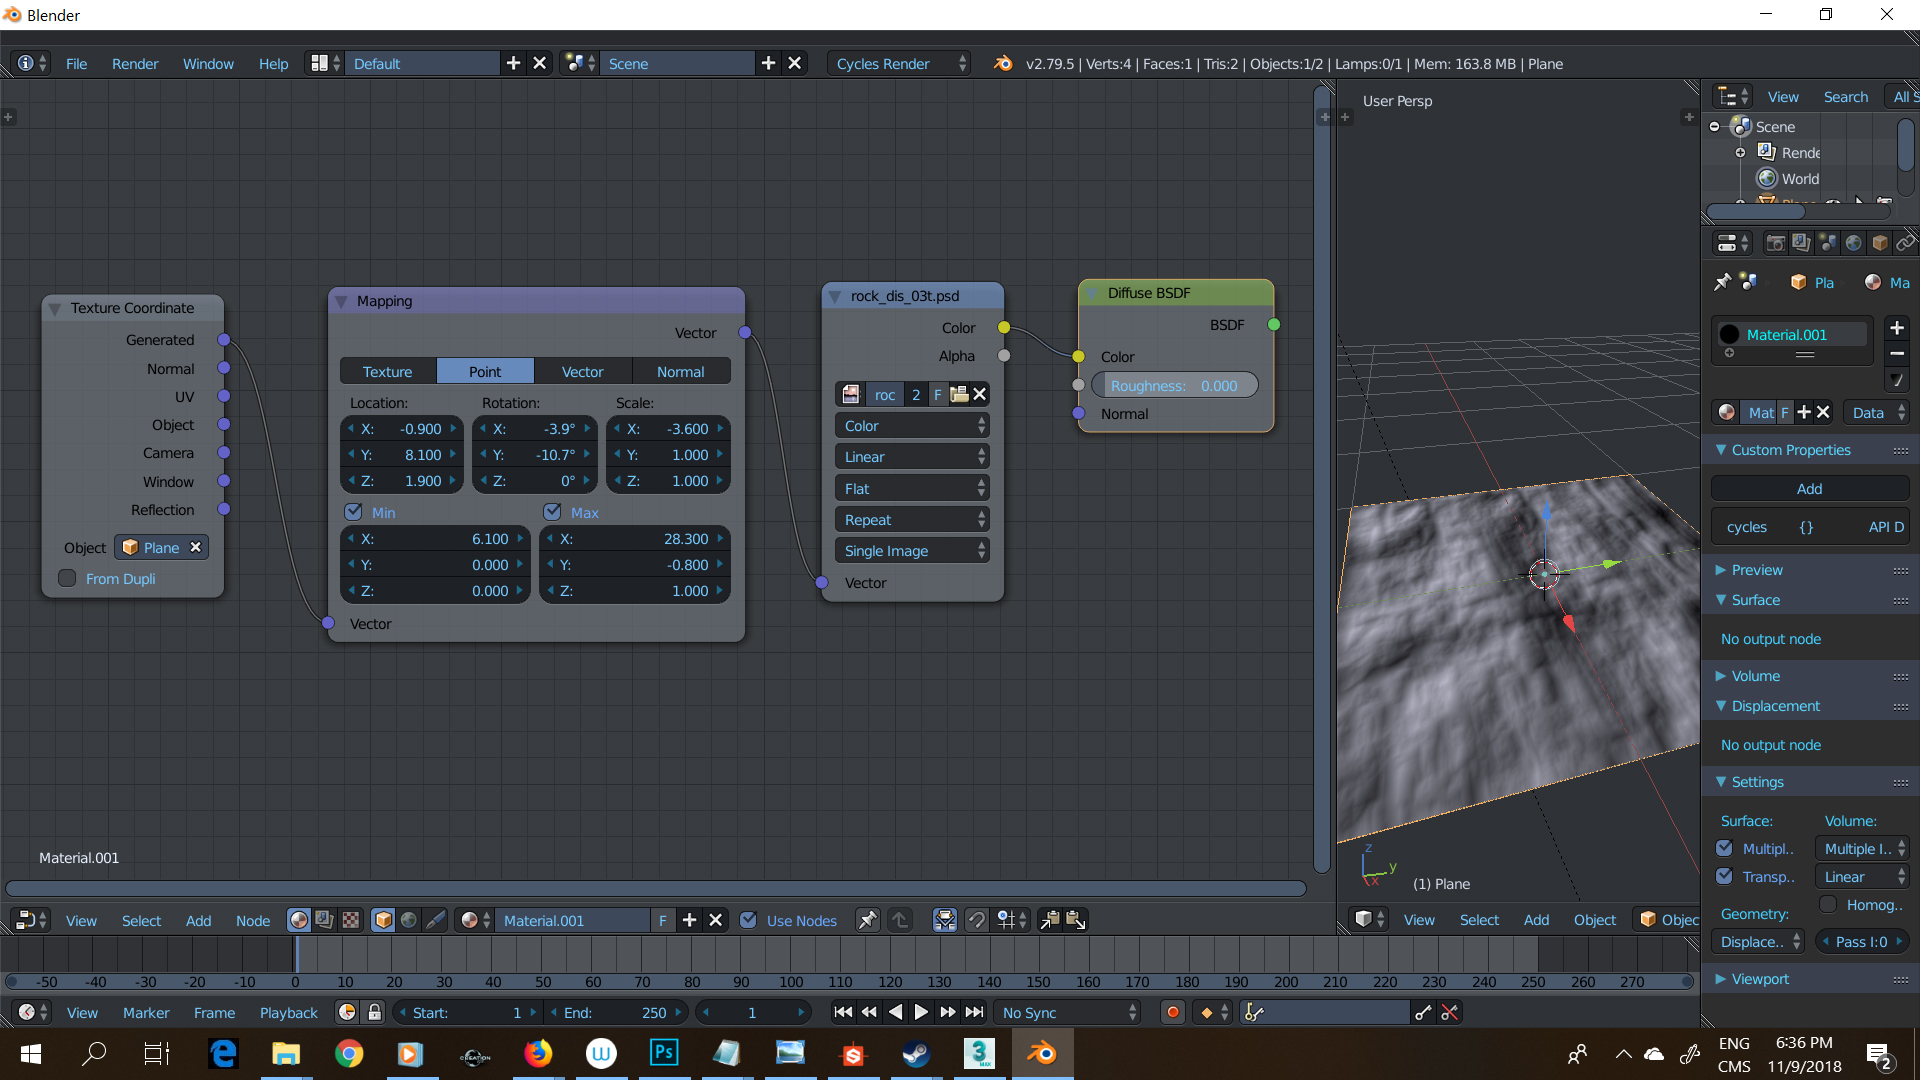
I am completely at lost and here a picture of my editor ;
EDIT; Never mind Cody i found why, it was because i need to first assign the material since cycle doesn’t seem to work the same way blender internal does and i had to turn on the rendered display node.
Hey polynut, well I was about to respond, but it looks like you edited your post while I was typing.
One thing I’d note is the rotation on the X and Y axis you have in the image. Maybe that’s what you’re going for, but that’ll cause the texture to have some weird warping on the Z axis plane.
You could, yes. The node group will work with any type of coordinate system, including custom ones as it’s just dealing with transforms.
You don’t need a custom setup for single texture triplanar mapping, by the way. On the Image Texture node, you just change the mapping to box and increase the blending.
yeah a friend gave me the file and I made it have grass on the Z+ facing side,
then he found the box image blending trick
however having 3 separate mapping systems means your random system can do a better job no? (top / sides/ front could all have different patterning slightly?)
Ahh I see, you mean building the triplanar functionality into the node?
I thought about it and I still might. However, the reason I decided against it is because triplanar mapping is more akin to the Texture Coordinates node. So you’d decide if you want to use generated, object, UV, or triplanar mapped coordinates, then plug that into UberMapping for your transforms.
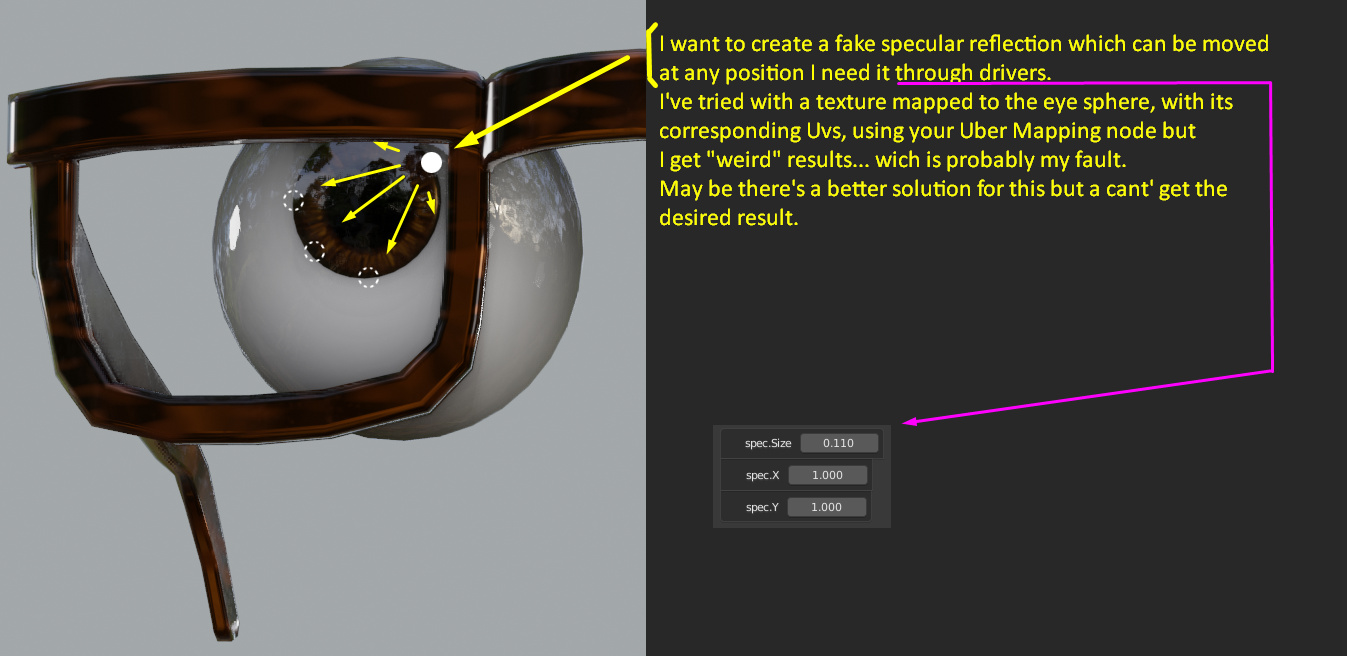
Hi cgCody , I’m having some problems with your node or maybe there is something a don’t understand.
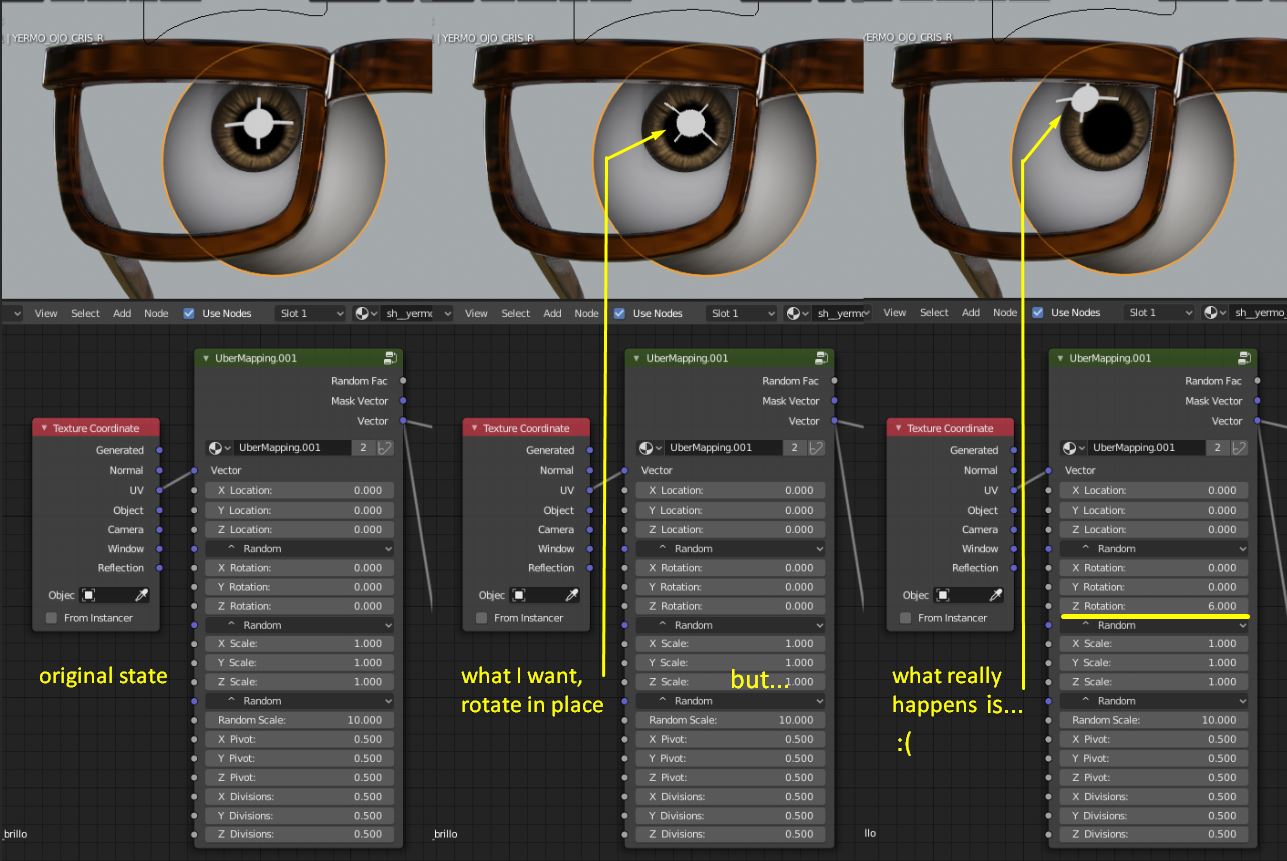
I’m just tying to rotate or scale the white texture in my eye model and it “moves” away instead of “stay”, actually it does scales or rotates but it “moves” at the same time.
In your video is clearlly how the Blender logo rotates or scales.
May be it’s the UV but I tested with Generated coordinates but does the same behavior.
What am I doing wrong?
Thanks!
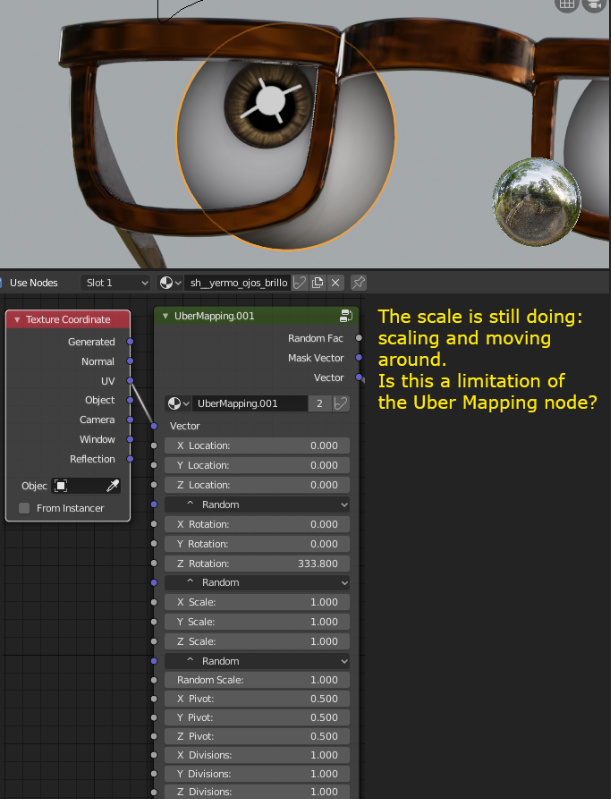
Thanks cgCody!, now the eyes are rotating as I expected, but the scale is still doing: scaling and moving around.
Is this a limitation of the Uber Mapping node?.
Hmm. Elaborate on what you mean by “moving around”?
And let me ask you this: What goal are you trying to achieve with the UberMapping node? I ask because allthough the node is good for prototyping complex mapping setups, there might be a more efficient way to do what you want. I might be able to help you find a lighter setup.