I have been trying to create this type of silicone tubing for about 3 days. I have seen the following two post but neither got the results i am looking for
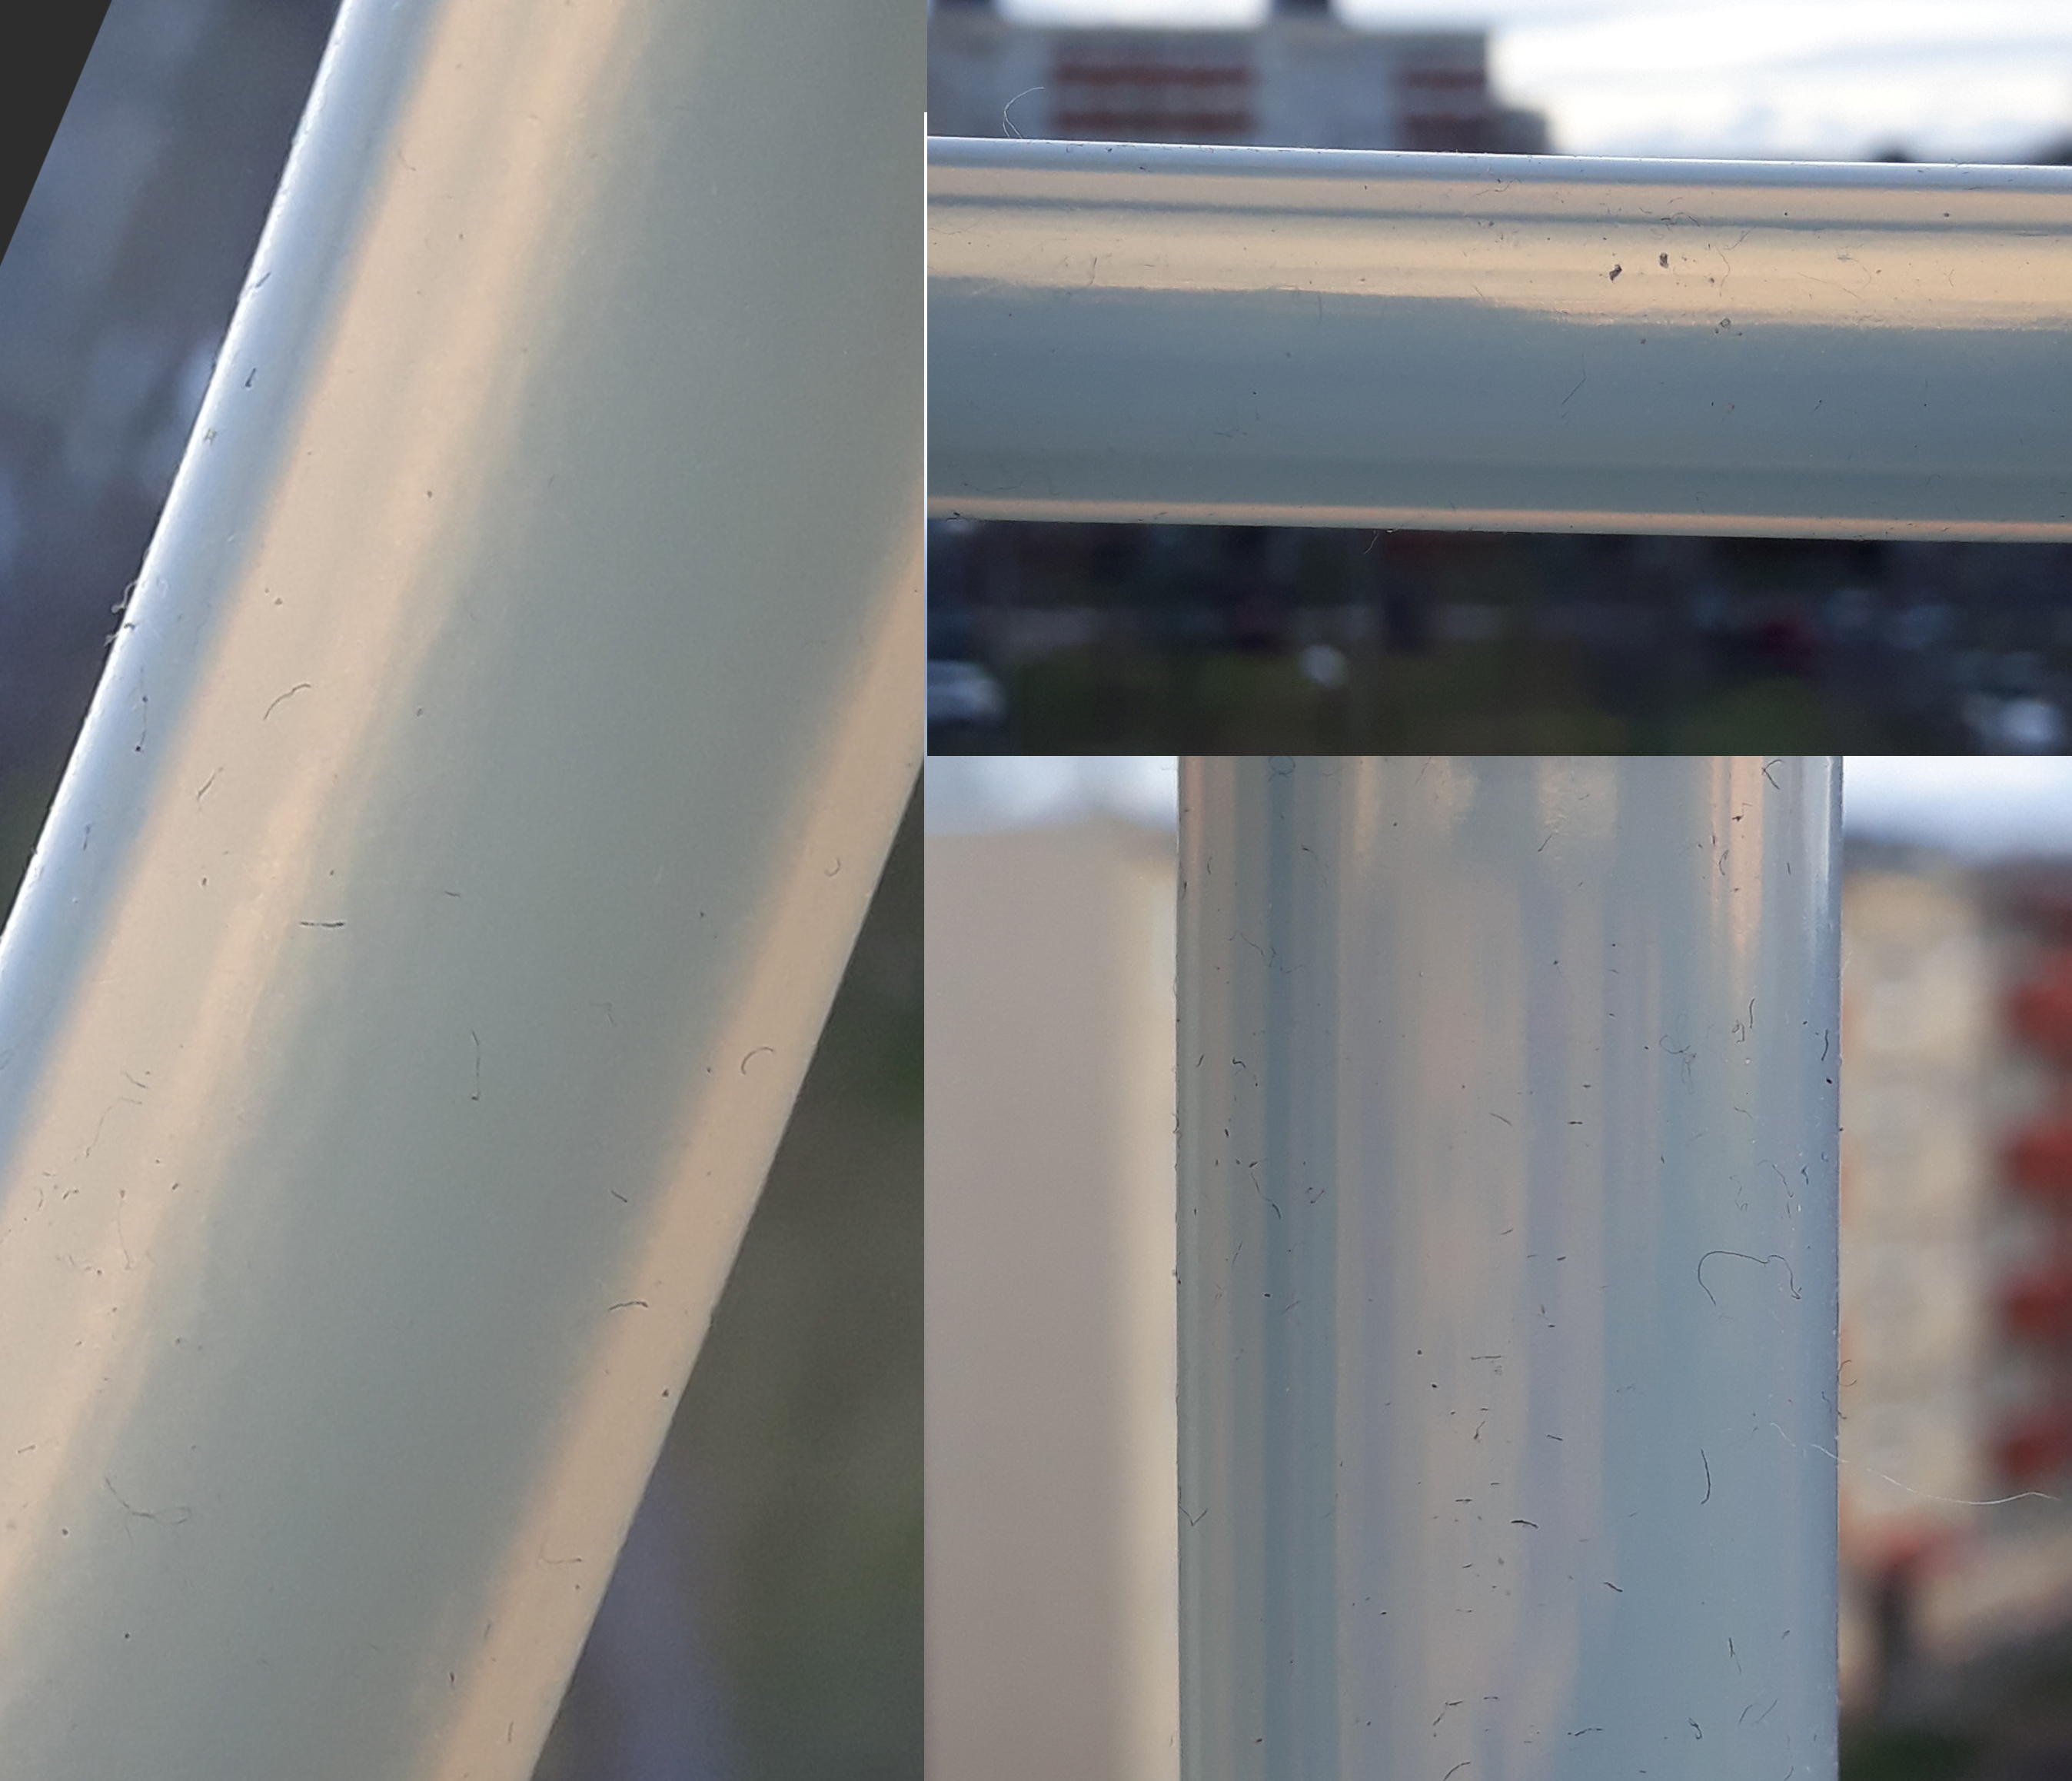
This is the exact type of silicone I need.
The Refractive index n = 3.9766
The silicone is cloudy translucent but still clear enough that you can see though it.
It is clear silicone but has a yellow tint to it when exposed to bright light
The tubing has thick walls around 5-10mm sometime thicker.
When you see an IOR like this that is way up there among diamond (2.4’ish) and above, which has nothing to do with gemstones, that should be a clear indication that we’re dealing with complex IORs. Blender at this point doesn’t support complex IORs (mostly used for metals to cause color variations with angle), so ignore such IORs and stick with what seems sensible. I looked it up and found it to be about 1.4.
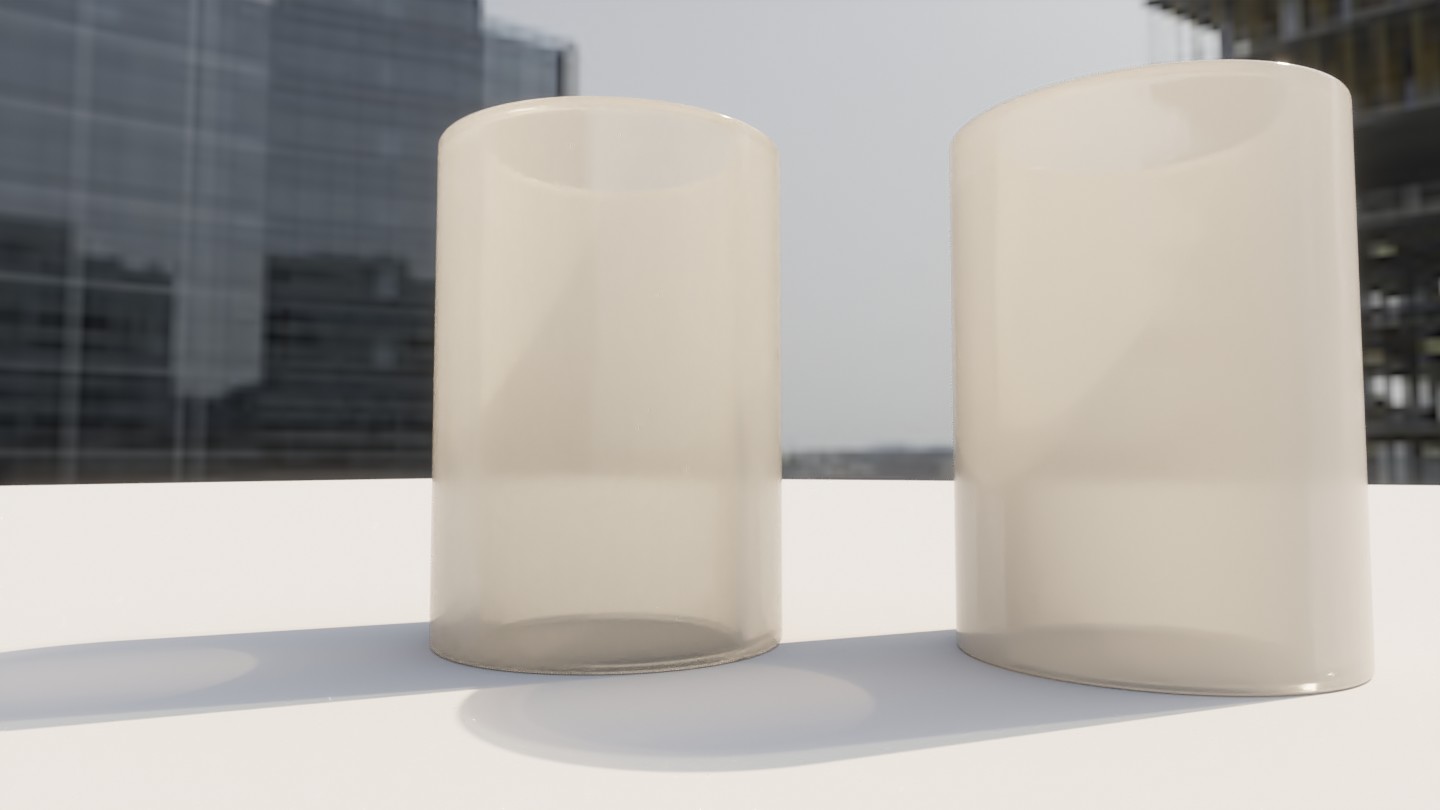
Try the attached and see if it gets you in some direction. SiliconeTubing1.blend (2.0 MB)
The one on the left uses backfacing ray length (the old absorption trick) to set the amount of translucency. The one on the right uses view angle modulation. Both fake the handling of shadows, and this method can never look good with walled tubes. If you don’t want to rely on this, enable caustics and go way up in samples. I didn’t bother with scratches or “hair”.
I don’t know if this is the “correct” way of doing it, but these things are what I hate the most trying to do. So every time someone asks I start over, trying to improve what I did the last time You need a few transmissive, glossy, and volume samples.
You did a great job with the material. I guess I went down the rabbit hole with my material evolution. I also started with standard values and eyeballing it but as frustration grew I tried to apply real-world values.
The angle-based material is the one I found to work better with plug and play into other scenes.
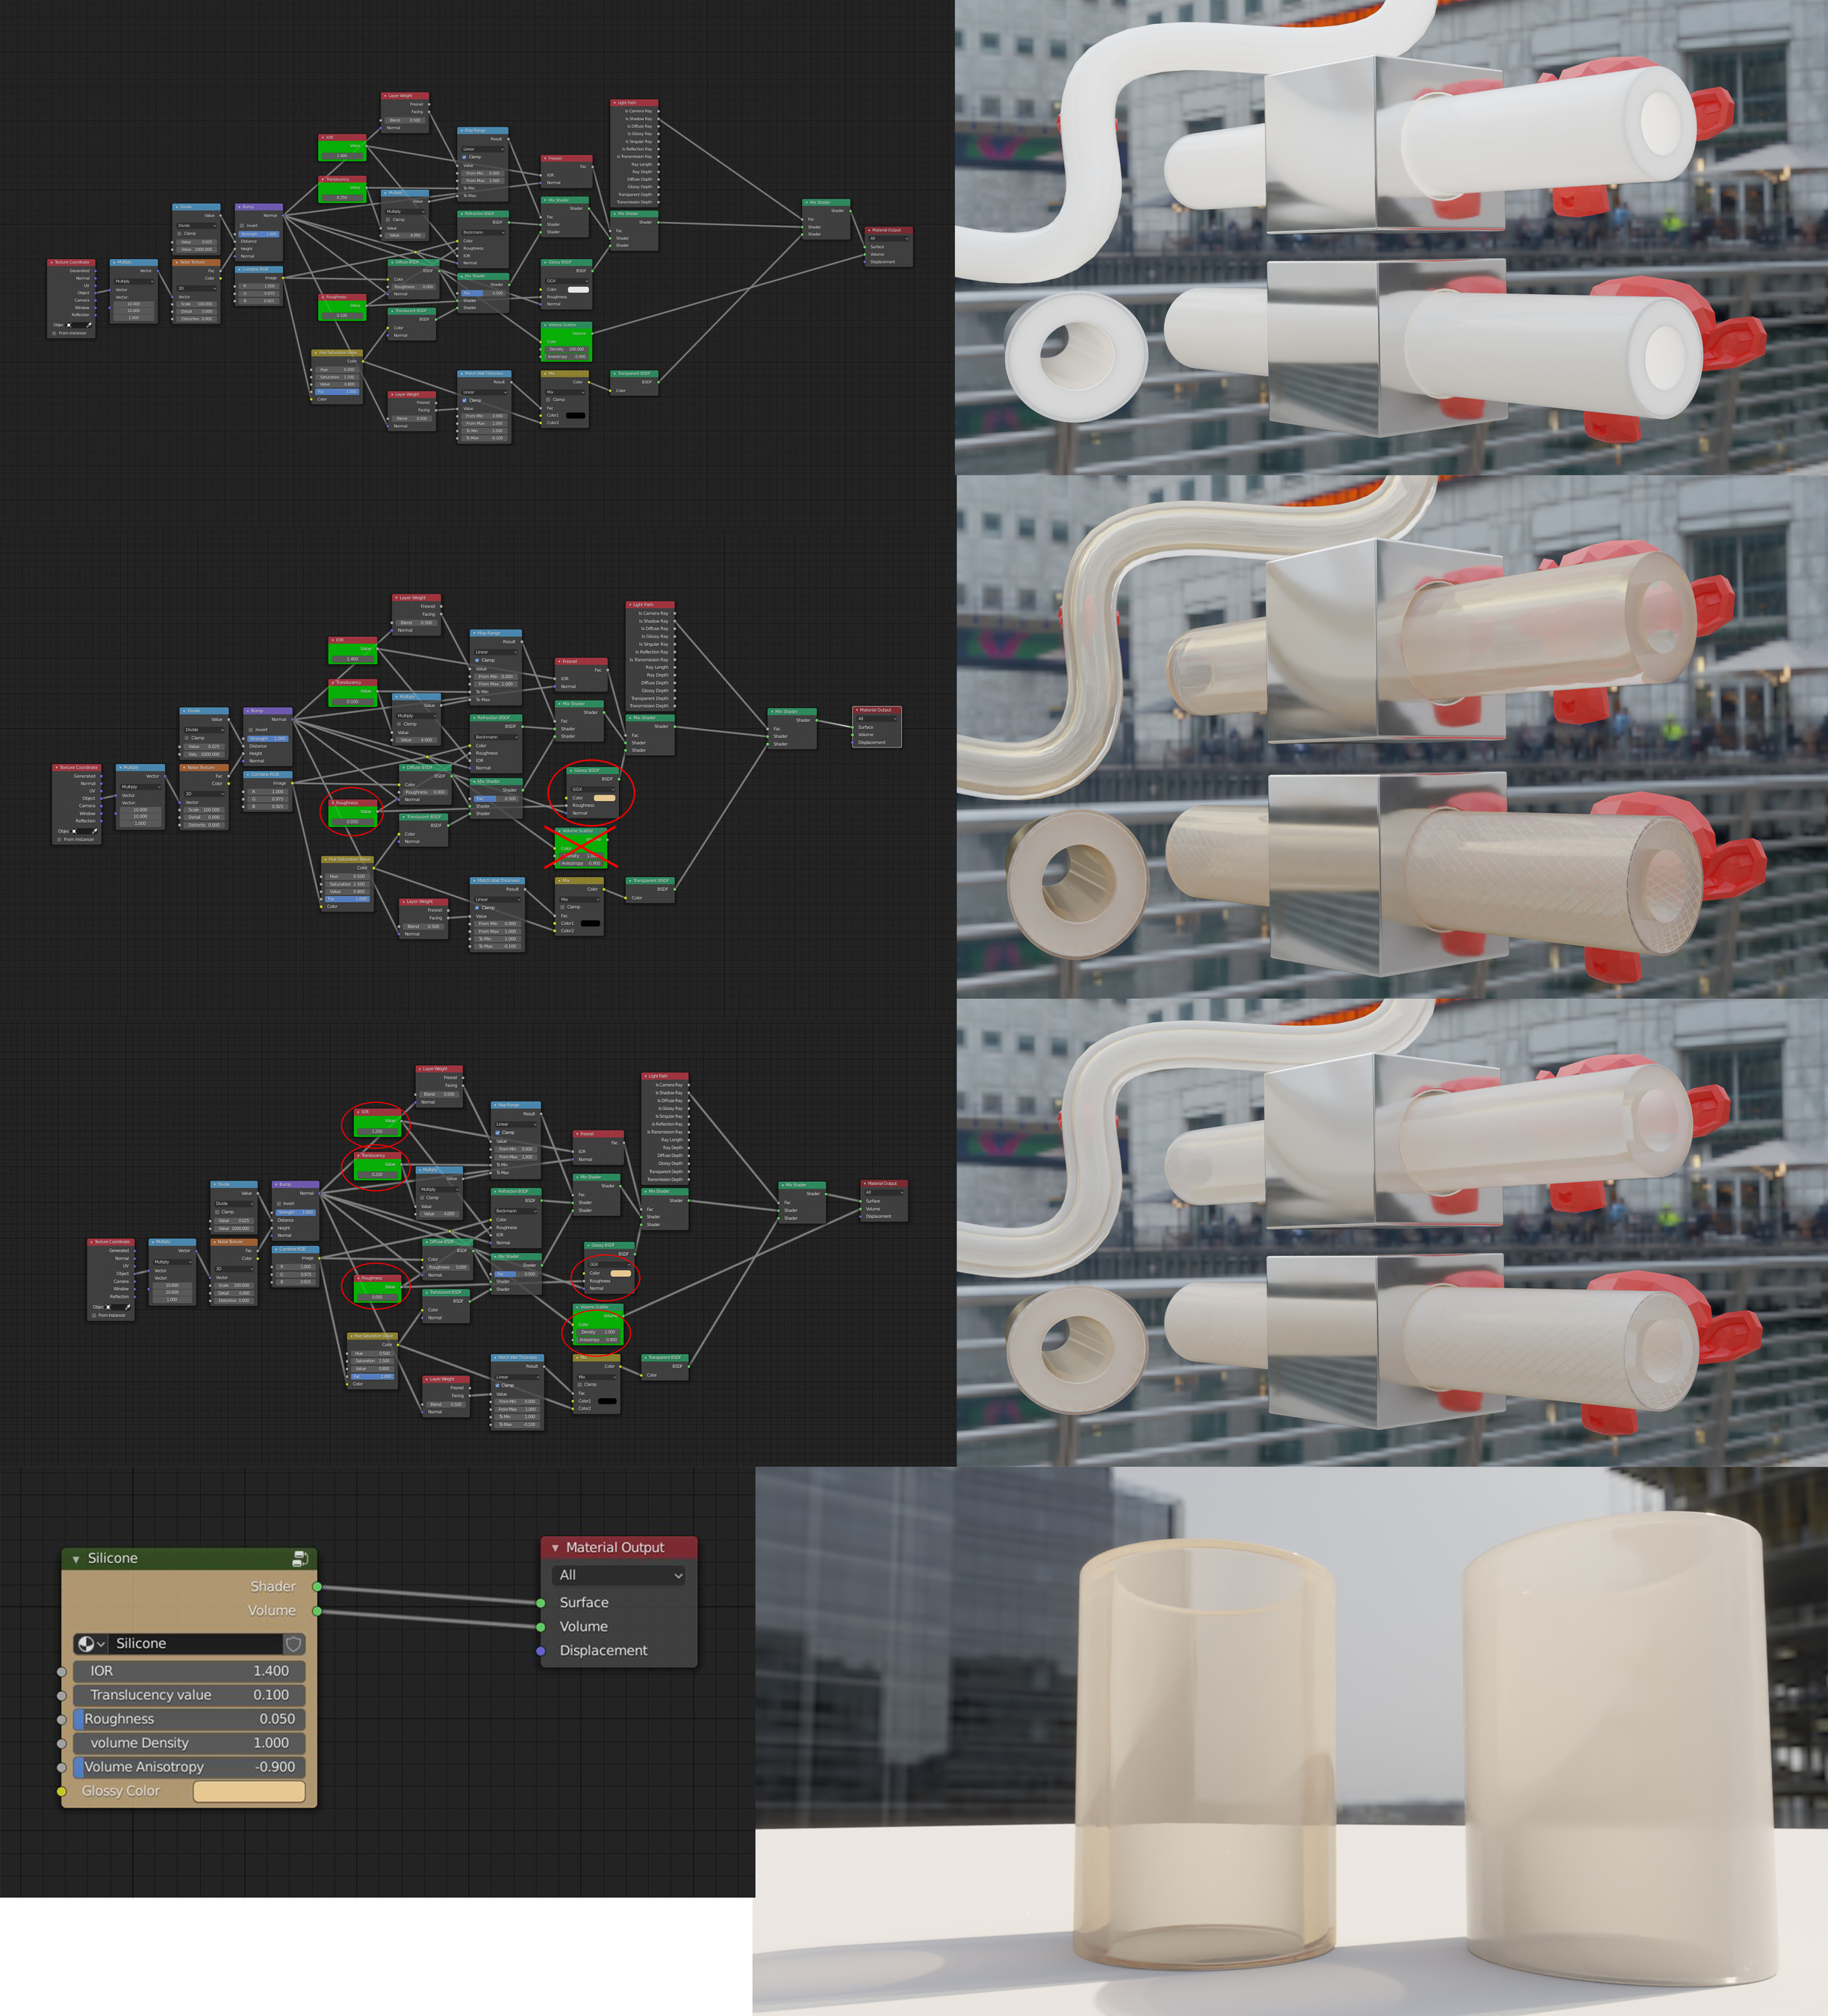
Since I need to use the silicone in a variety of different conditions, thickness and lighting I realized my hopes for a simple drop and render method was a bit too wishful. However, I found the 4 main values in your material that could easily be adjusted for a variety of silicone types.
The top one is the material you created when imported to a whole new scene that had very different lighting from your original scene.
Then the other two are variations. I circled the nodes that got changed.
I then created a node group for the values that should be changed according to each scene. I found that adding an orange hue to the glossy node gave me that nice color distortion I was looking for in the silicone.
The last image has my variant on the left and yours on the right in the original scene you sent me. In this scene your original material looks still better so as mentioned before with the node group I created this material is a life saver. Thank you.
I usually put all coloring in the absorption part and leave glossy white, especially at grazing angles. You may be right though. Since you found that complex IOR part, it may indicate a colorization of the glossy - similar to how complex IOR causes color on metals.
Yeah, np. Do with it what you want. It’s a very simple and straightforward setup, so consider it public domain.
Angle vs distance - again, I don’t really know myself, I don’t have a silicone tube to examine. But to examine and match real world, put it under backlight only and put a solid cylinder close to it to cast a shadow onto the tube. The translucency is only diffuse lighting (and shadowing) for backfacing. See which one works the best under those conditions, and adjust the mix factors. If it even matters at all