i would like to see some asymmetry coming in for the goblin - different shaped ears, perhaps a dropped eye, broken nose… otherwise its really cool - i can just image in a face like that getting up close to a victim, the breath would be horrendous…
I totally agree, asymmetry is always the last step for me, first i have to retopo the head as it is in a neutral pose, then i’ll add all the tweeks to bring him to life.
wait, before you retopo, could you post the messy wireframe? that might be rather interesting
There you go, as you can see it’s not too messy due to the quick retopo i did first, what needs to be sorted out are the ears, clean up the eyes and add a cavity for the nose
Attachments
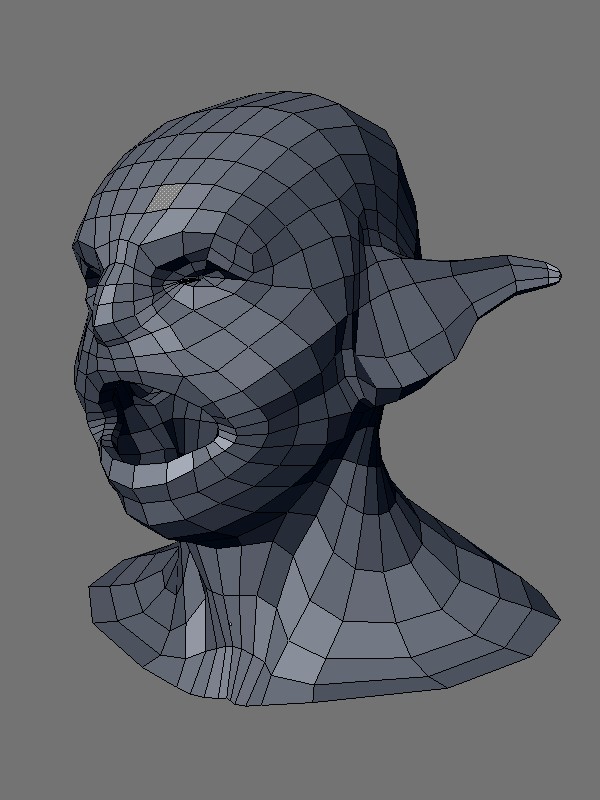
heh, i was expecting an nearly unusuable mess… but i spose your paying attention as you sculpt to not pull the mesh to badly… that initial retopo sounds like a very good idea
Re-topology is under way. I’m mainly concentrating on a flow that will give me the best chance of adding higher frequency detail.
Attachments
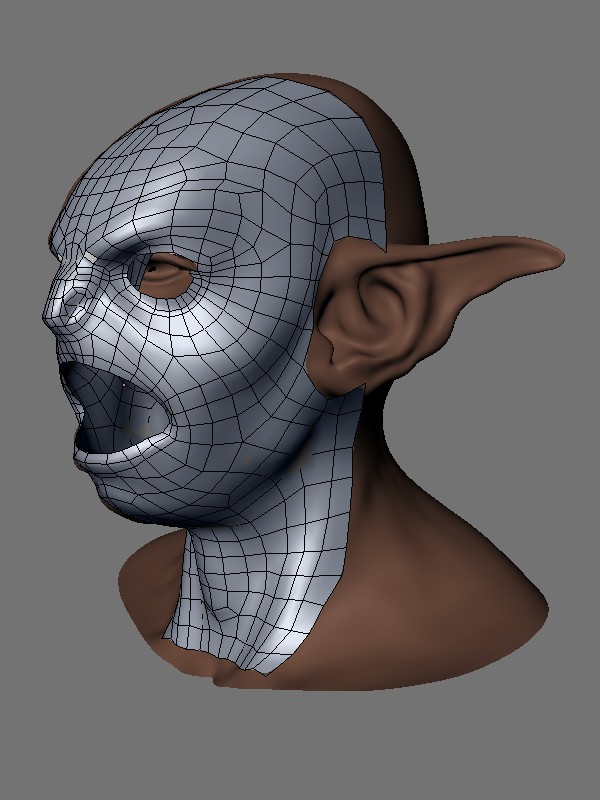
cool ear… is there a problem with the edge loop at the temple? shouldn’t if flow from mouth to temple around to front top of face in a smooth line? and theres a 5 edge vertex in the cheek that i think might be possible to made into a better loop…
it really looks like a horror mask with those eye cut outs and the high res behind! freaky and rather cool
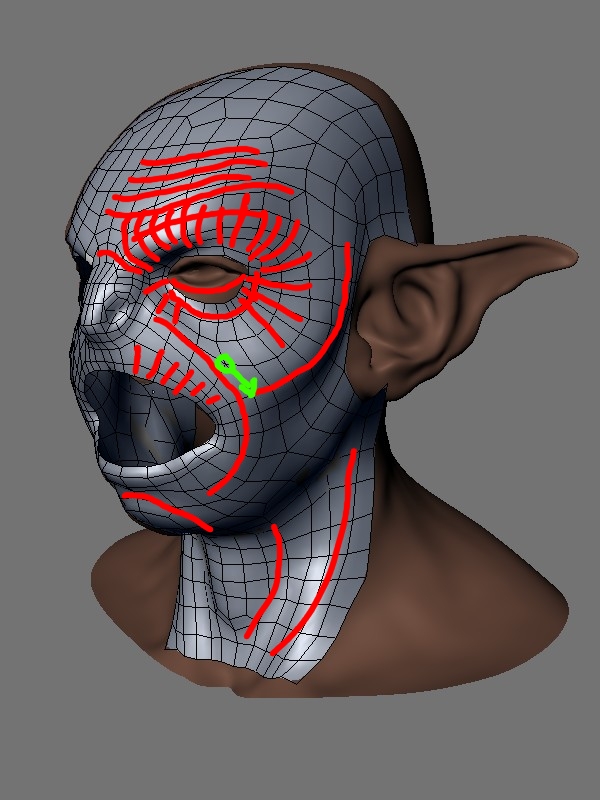
dvandamme I’m mainly ordering loops with sculpting in mind, here’s a quick sketch to show where i want to add wrinkles. Also remember it’s not human anatomy and bone structure, the cheek bone will carry on around the side of the head and will make a definite ridge that hasn’t been sculpted yet, thanks for input.
Attachments
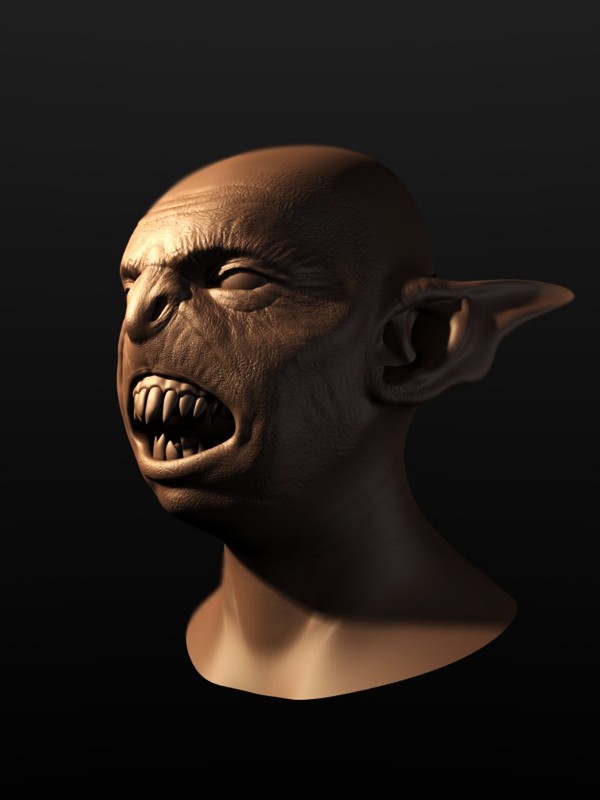
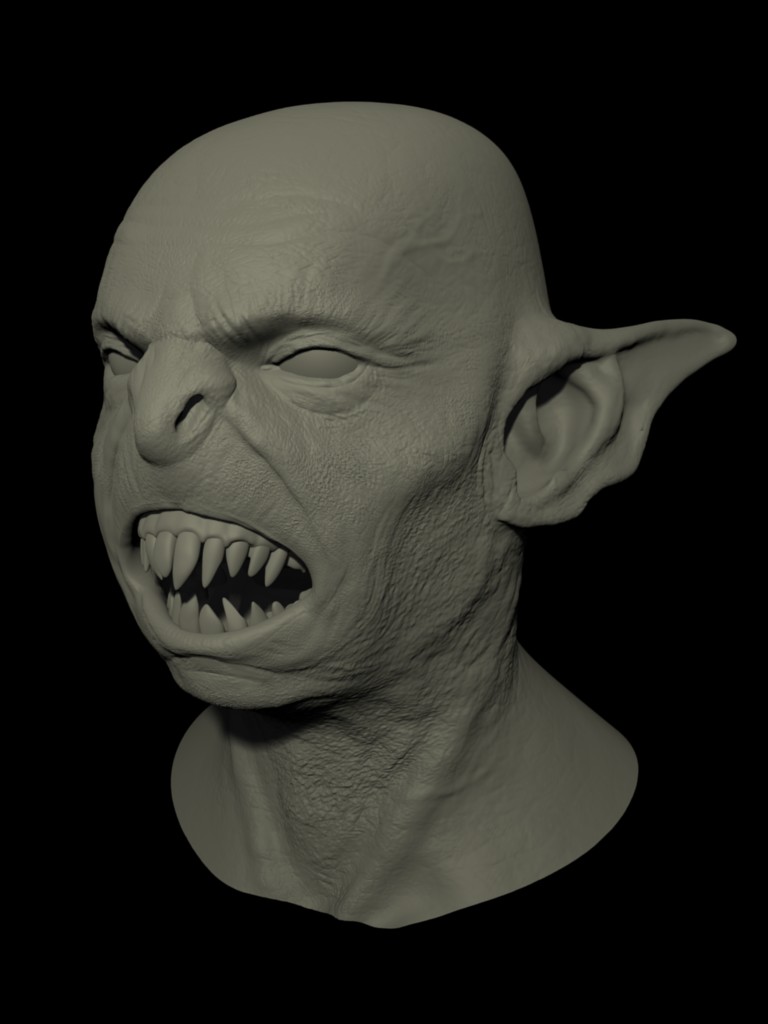
Started to sculpt the skin, with the re-topology i’m able to get quite high frequency detail without any performance loss at 1.5 million polys.
Attachments
HOLY SH*T
that’s…incredible
Awesome work. Thanks for linking to that video. I am going to check it out now.
thats looking awesome! is that all mesh? no normal mapping or anything? i guess your using some sort of textured brush?
1.5mill polys wowie…
Jeepster Glad you like him. I’m really enjoying the process, skin detailing is something i haven’t done before, it’s a real challenge to keep it looking natural and not overdoing it.
Monster Maker’s old man’s thread over at zbrush central is a great benchmark to aspire to, here’s the link
http://www.zbrushcentral.com/zbc/showthread.php?t=23879&highlight=monster+maker
linuxpimp2 That video is one of the best i know, you’ll learn loads about basic anatomy and what to look for when you’re sculpting a head.
dvandamme It’s all geometry atm, it surprised me too that i could get higher frequency detail in blender. When i’m done i’ll bake the normal and displacement maps. The normal map i might experiment with sharpening in the gimp to crisp things up even more, we’ll see, yet more unexplored territory for me.
I’m using a combination of alpha brushes that i googled off the net last night, there’s loads out there so no need to re-invent the wheel, along with the standard draw, pinch inflate and smooth brushes, adjusting the curves to get the results i want.
If anyone knows of a good cavity shadeing tecnique that will pick up the really fine detail, that would be awesome, i’m thinking of using the displacement map overlayed in the colour channel that might work, thanks for dropping by.
cool work handlebar, I should check out that video you linked to.
p.s I see you linked to one of my hollywood artistic heros, to those who don’t know ‘monster maker’ is the alias of Rick Baker
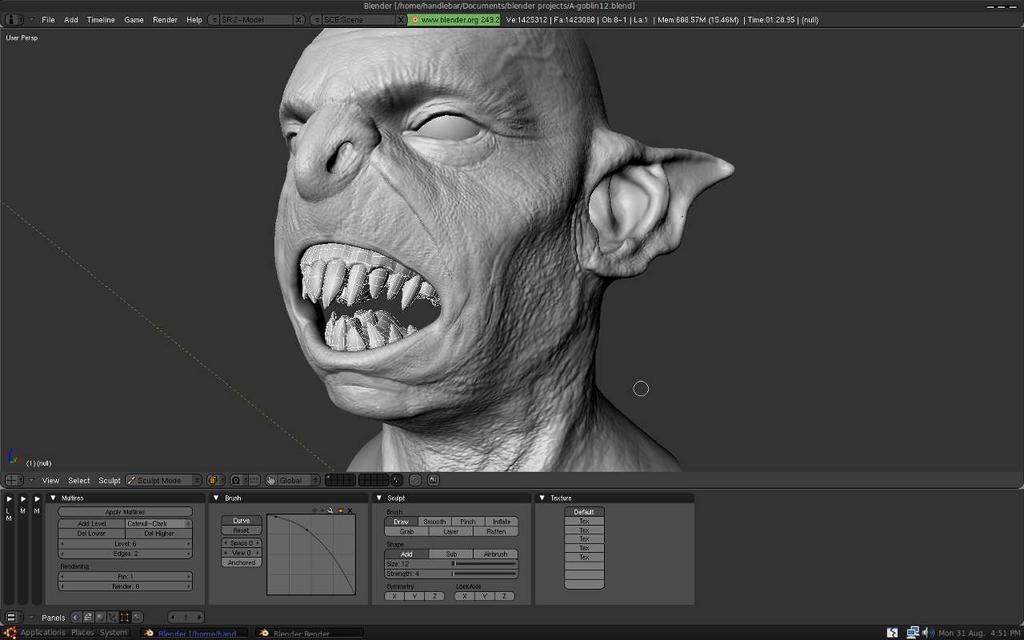
tyrant monkey Thanks, yeh Rick Baker is one of my all time heroes, here’s a little capture of my working environment, it’s set up the same way as Pablo used in his fantastic Venom dvd, it’s what got me inspired to tinker with a bit of blender sculpting. Having all the panels visible really speeds things up when your learning this stuff.
I’m nearly done now, just a bit of cleanup work to do and i’ll move on to another project. This started out as a quick experiment type of thread and turned into a monster, literally. That’s what i like about cg, one idea leads to another, learn a bit and move on.
Attachments
same goes for every aspect of everyday life. Not just cg.
I like how your head turned out. You’re not gonna slap a material on and try some beautyrender?
Thanks FreakyDude, i’m not really planning on doing any material work for this, it was just a project to get familiar with blender’s sculpting and re-topo tools and an ork like thingy seemed an obvious choice at the time. I want to move onto some sort of more realistic type caricatures, which is where my interest really lies.
that looks awesome handlebar… that weak chin is particulary good for conveying the characters viciousness that bulging forehead vein shows some serious anger issues… … the kind that would just switch sides constantly depending on where the money and pain was coming from and going to… really good work
dude that’s killing awesome , i never knew we could do such cool things with blender O.O
Awesome!
ENDI, man i like your tutorial! It goes straight to the point of the design process. Having good proportions in the beginning is crucial to ANY kind of design process! Nice