I want to play along with Nodevember, so here is a thread for doing just that.
Link to the prompts thread: Nodevember prompts
All of my submissions are CC0, feel free to use them for whatever.
I want to play along with Nodevember, so here is a thread for doing just that.
Link to the prompts thread: Nodevember prompts
All of my submissions are CC0, feel free to use them for whatever.
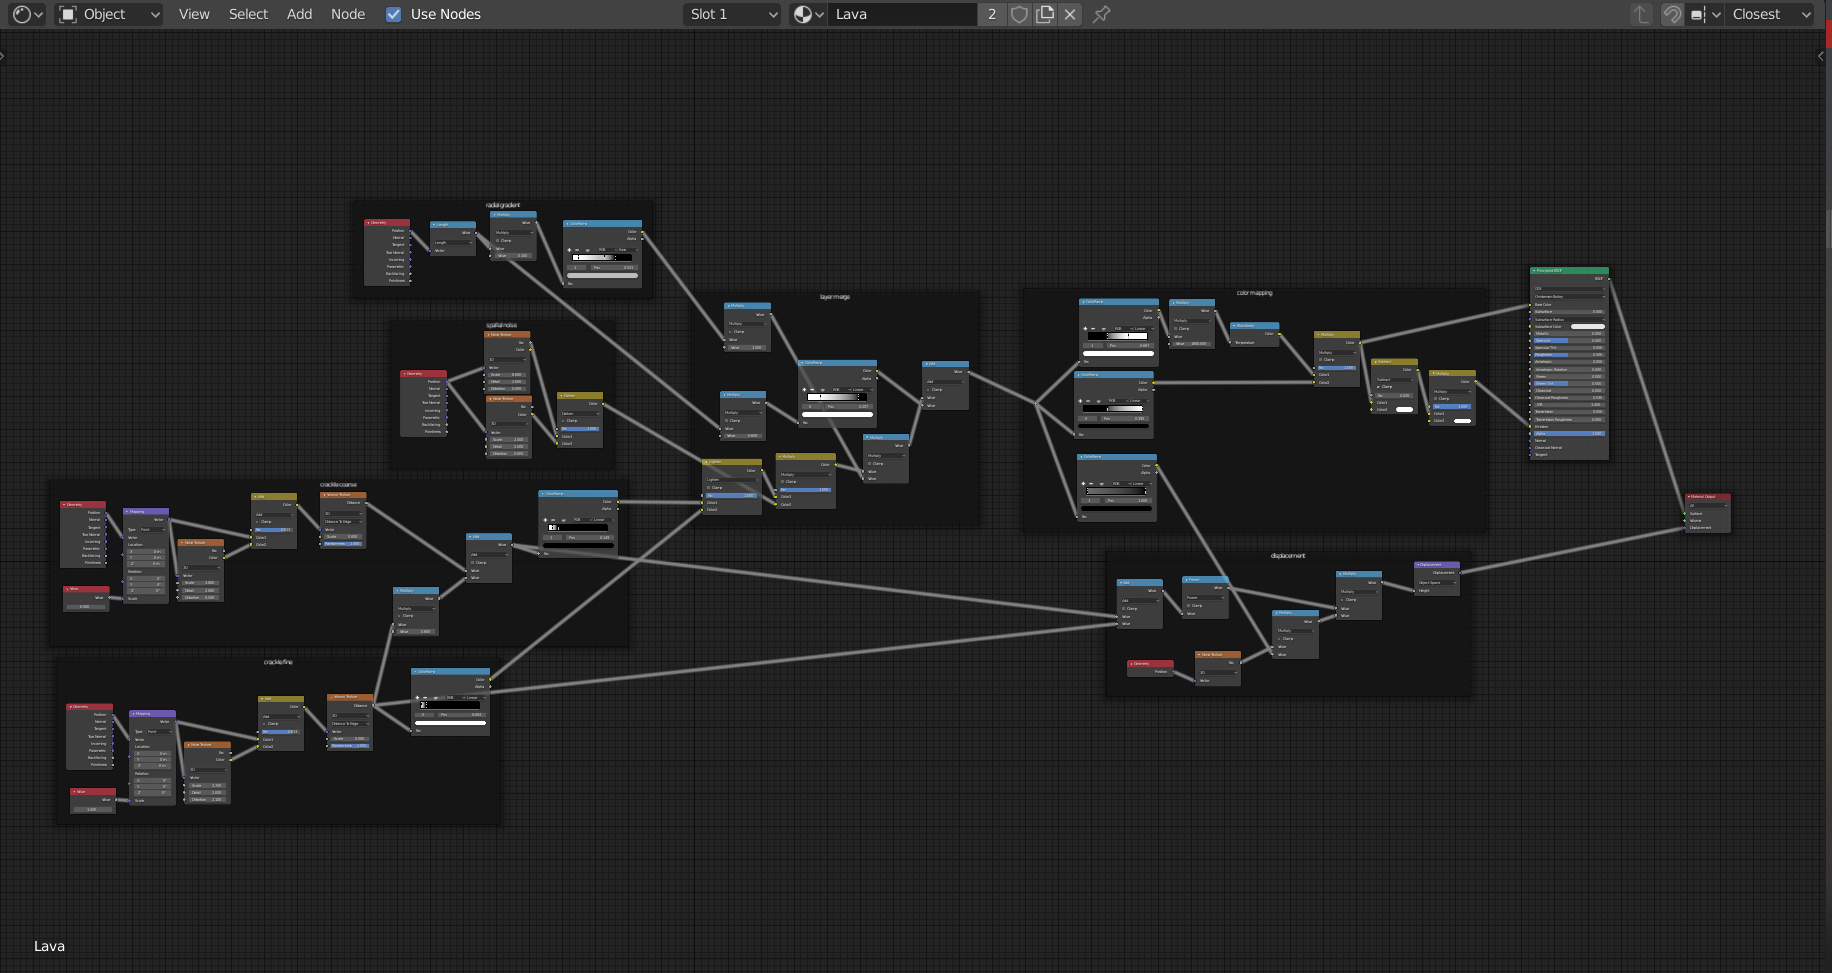
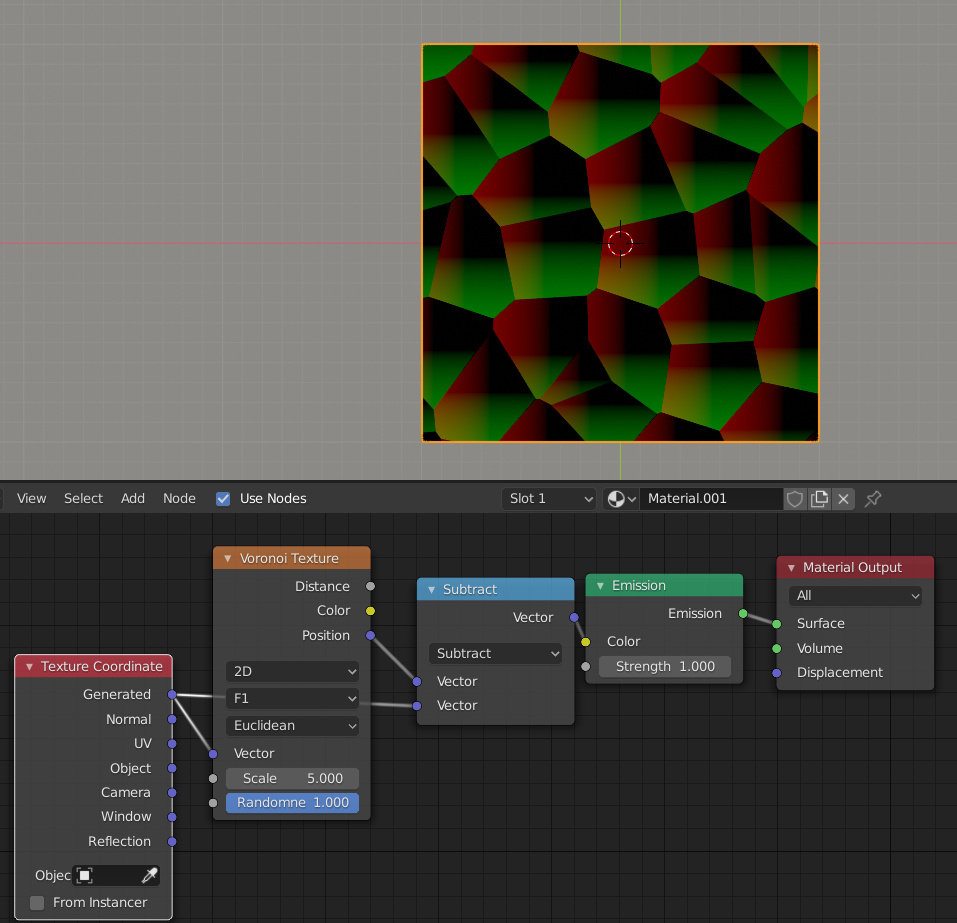
Day 1 - Lava:
Inspiration image:

This was a fun one, used a little voronoi, then several noise textures to deform the coordinates, vary intensity, and add some bump to the non-molten parts. The last big key was the blackbody node and the associated math to get the color ramp up to the expected temperature values.
Lots and lots of color ramps and math nodes to mix everything together. It’s not optimized at all, and I’m sure I could accomplish 99% of this result with half as many nodes. But overall, I’m pretty pleased.
Geometry is one sphere and one plane, there is one point light above, behind, and to the right of the camera pov. Cycles render, 64 samples, built-in denoiser.
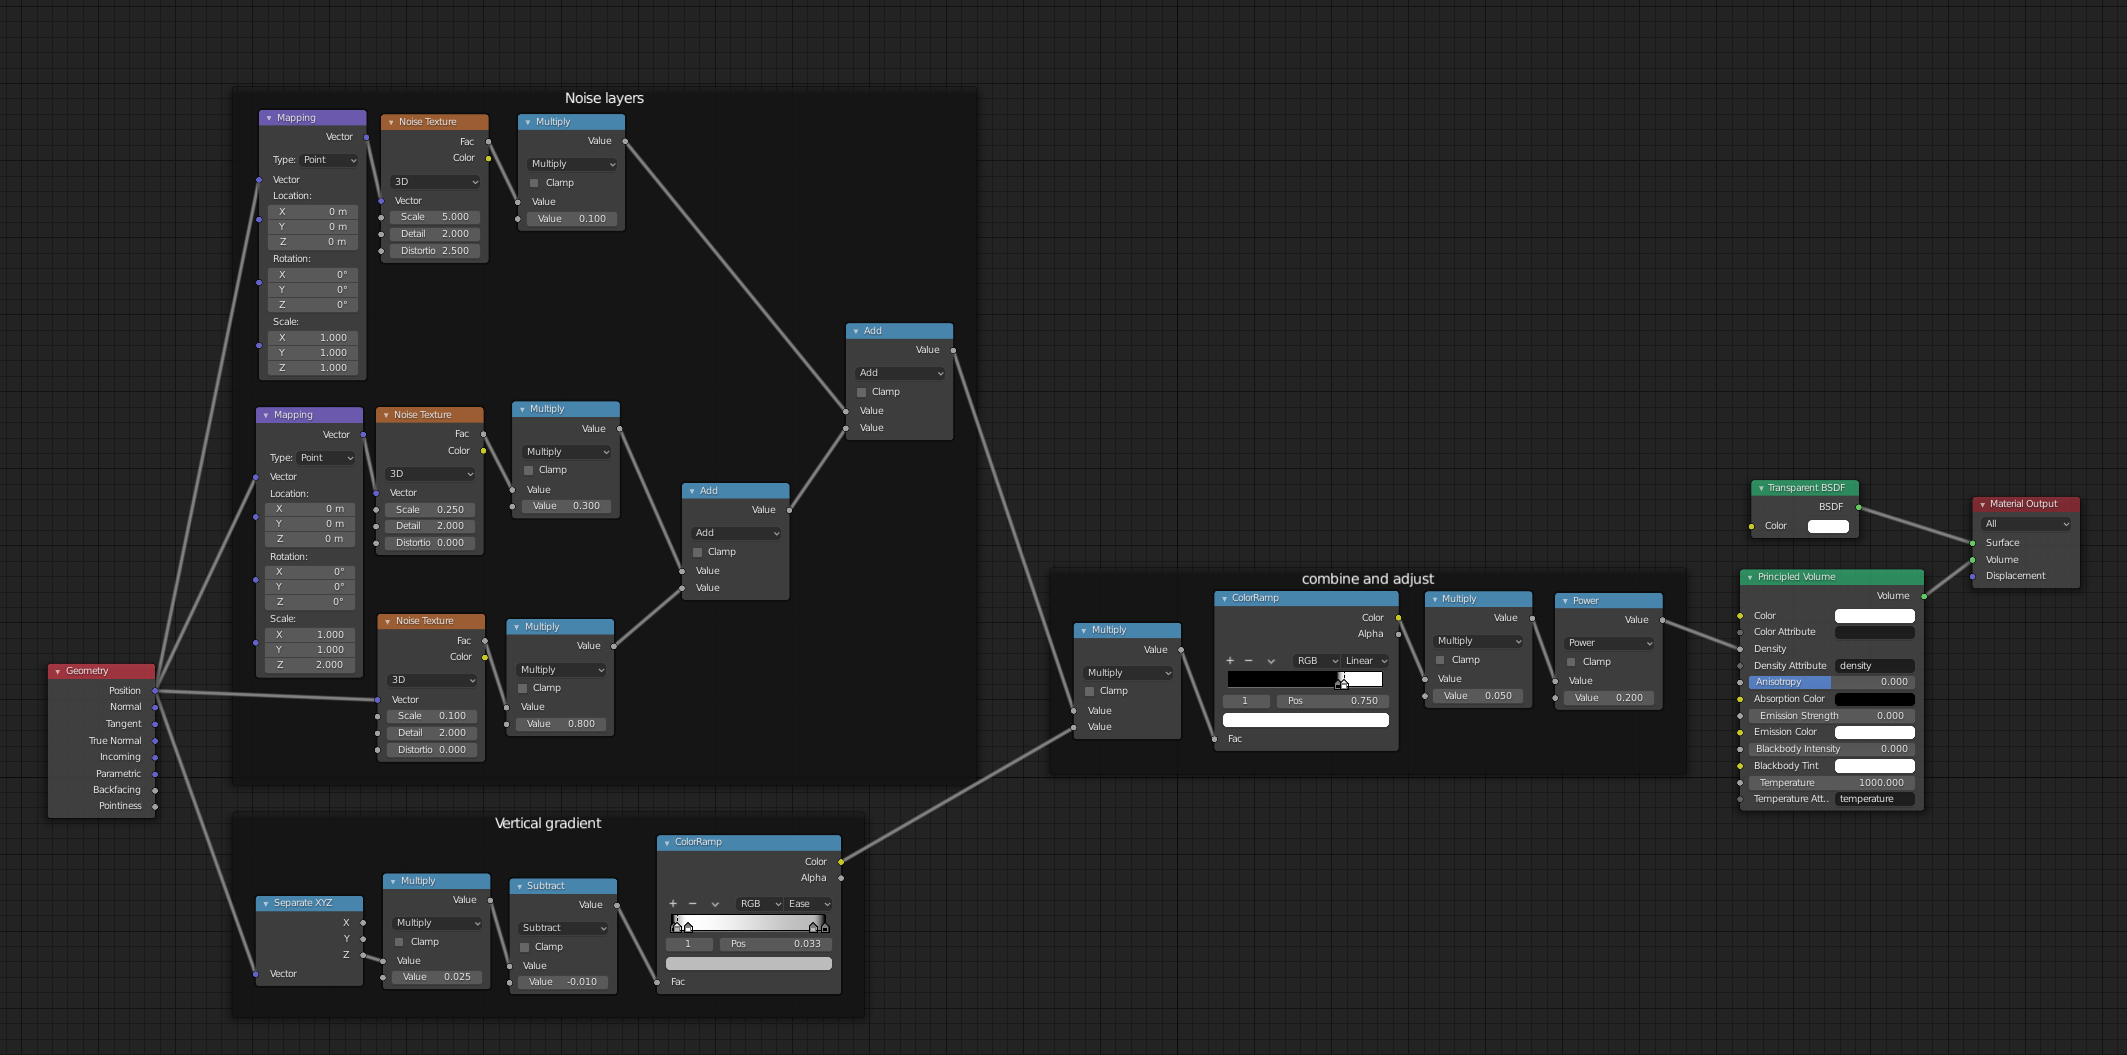
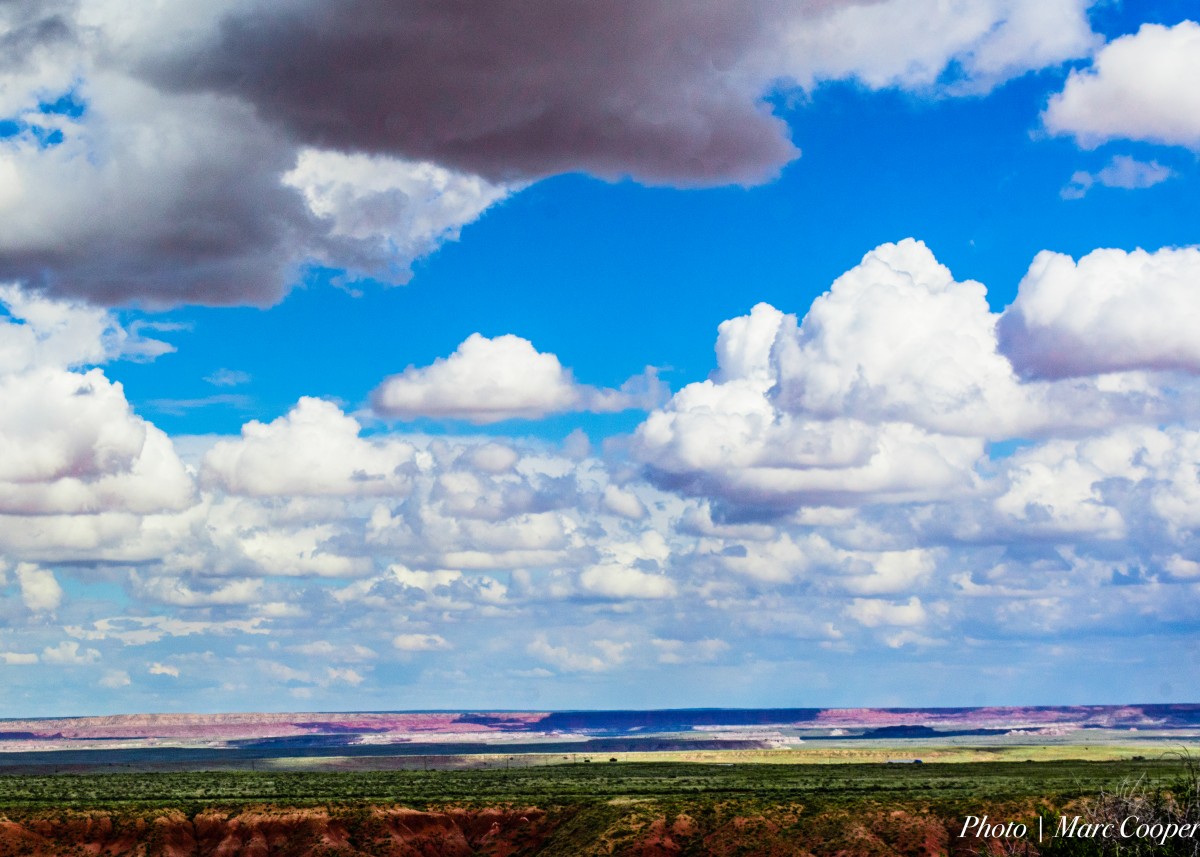
Day 2 - Clouds:
Inspiration image:
This went pretty well, Though I am getting a bit behind schedule. It’s 3 levels of noise nodes blended together, then multiplied by a vertical gradient before being multiplied and adjusted, then plugged into the density of a principled volume node.
Overall, this one is more efficient with the node count, but it renders slowly. That image took an hour to render at 1080p with 128 spp, denoised
Geometry is one box, there is a sunlight and a hosek wilkie sky texture node for the world environment.
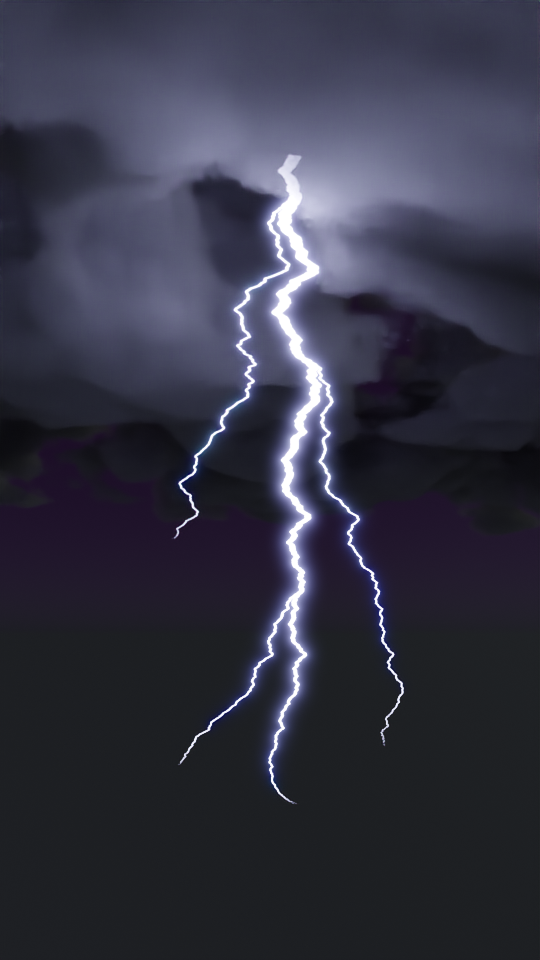
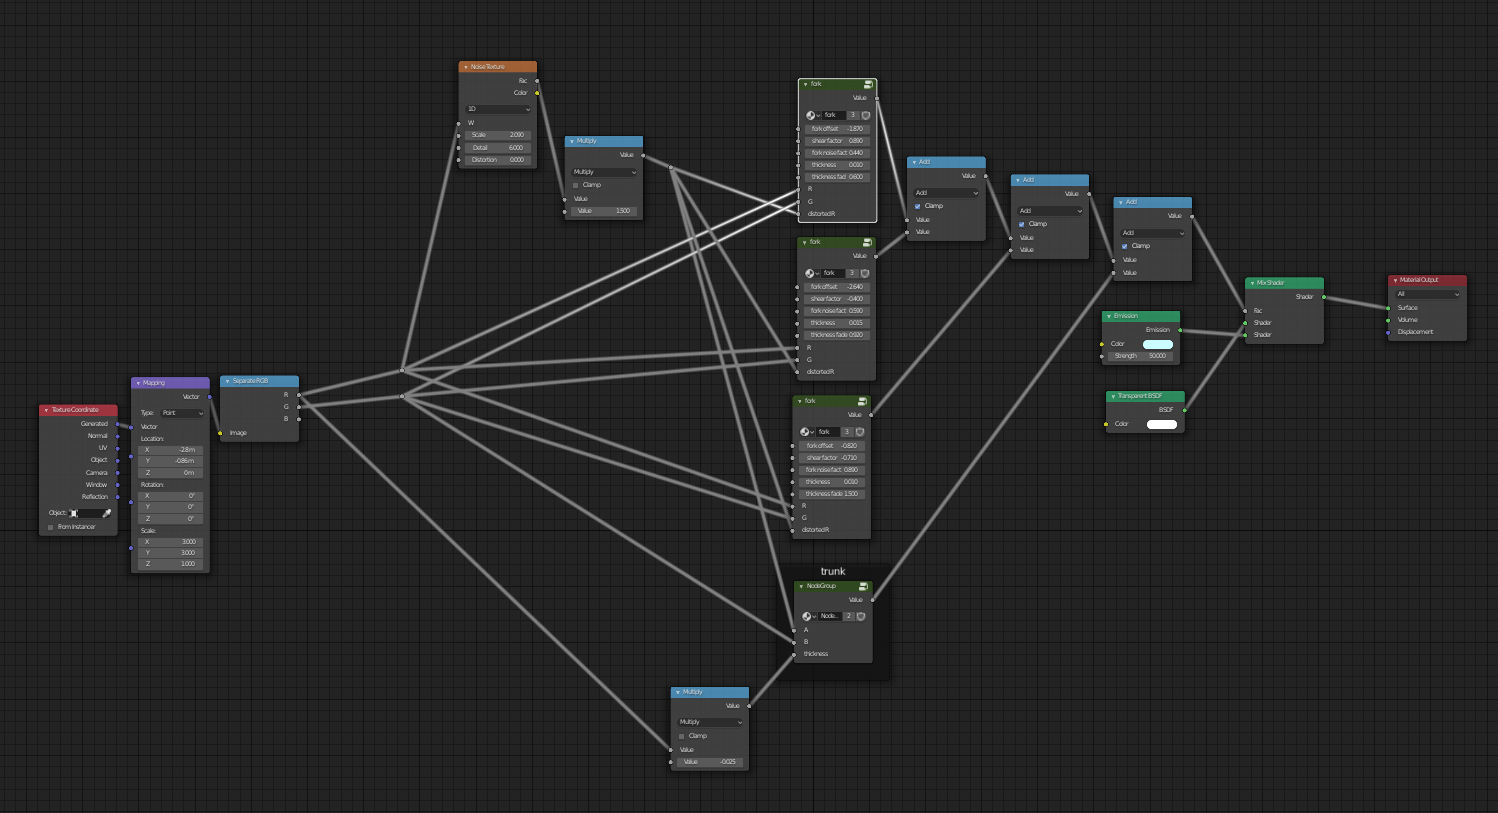
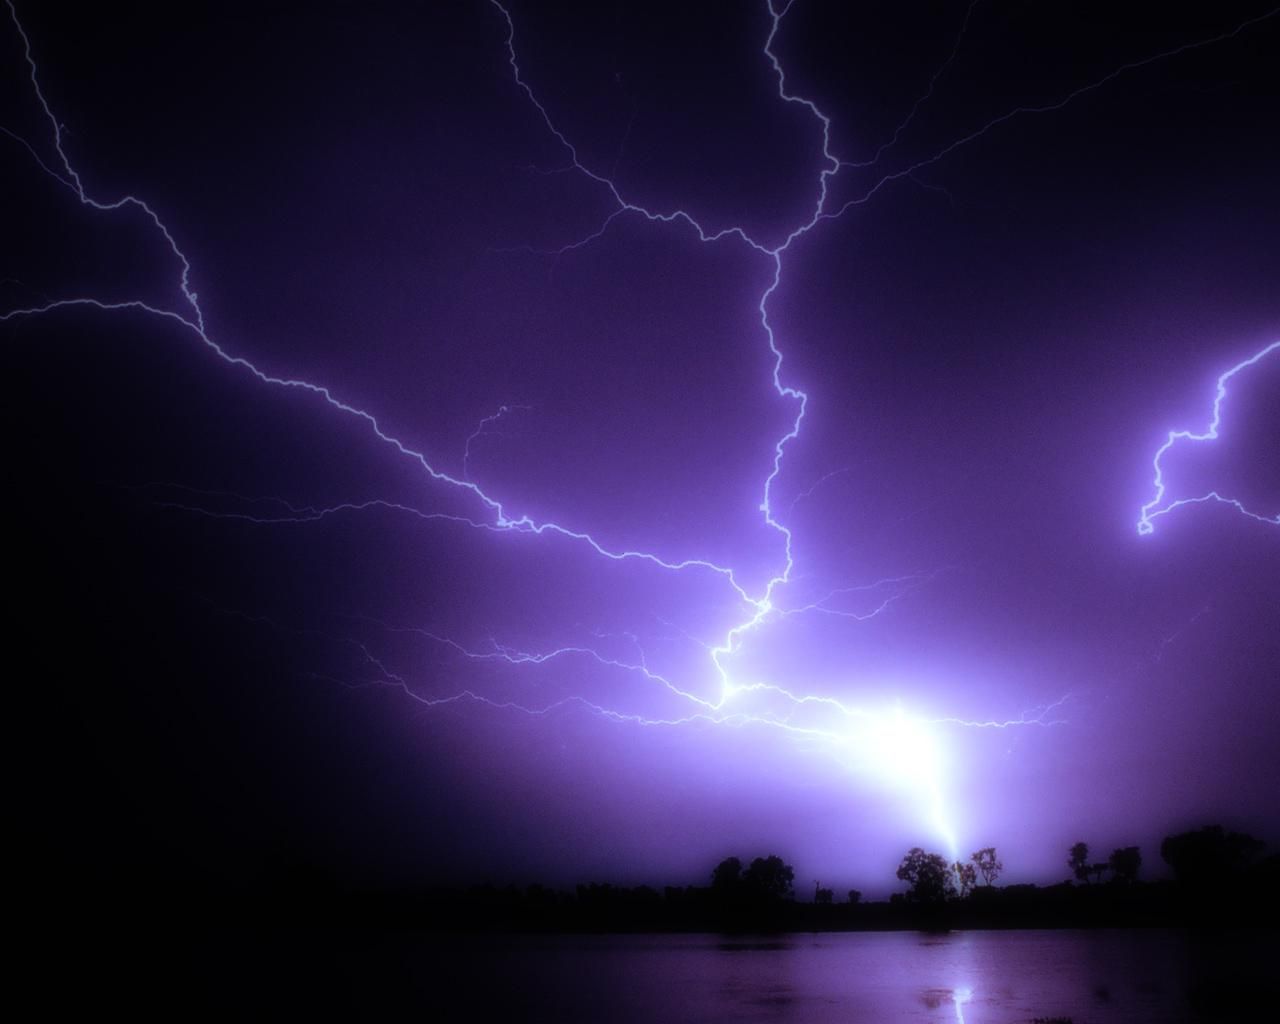
Day 3 - Lightning:
Inspiration image:
This one was tough. I’m using a 1d noise node to displace a horizontal band, and I built a convoluted nodegroup for adding forks to the lightning. Check out the file for details in the nodes.
Tweaked the clouds from day 2 and used them as a backdrop, using cycles still, but switched over to the Intel denoiser, which works super well.
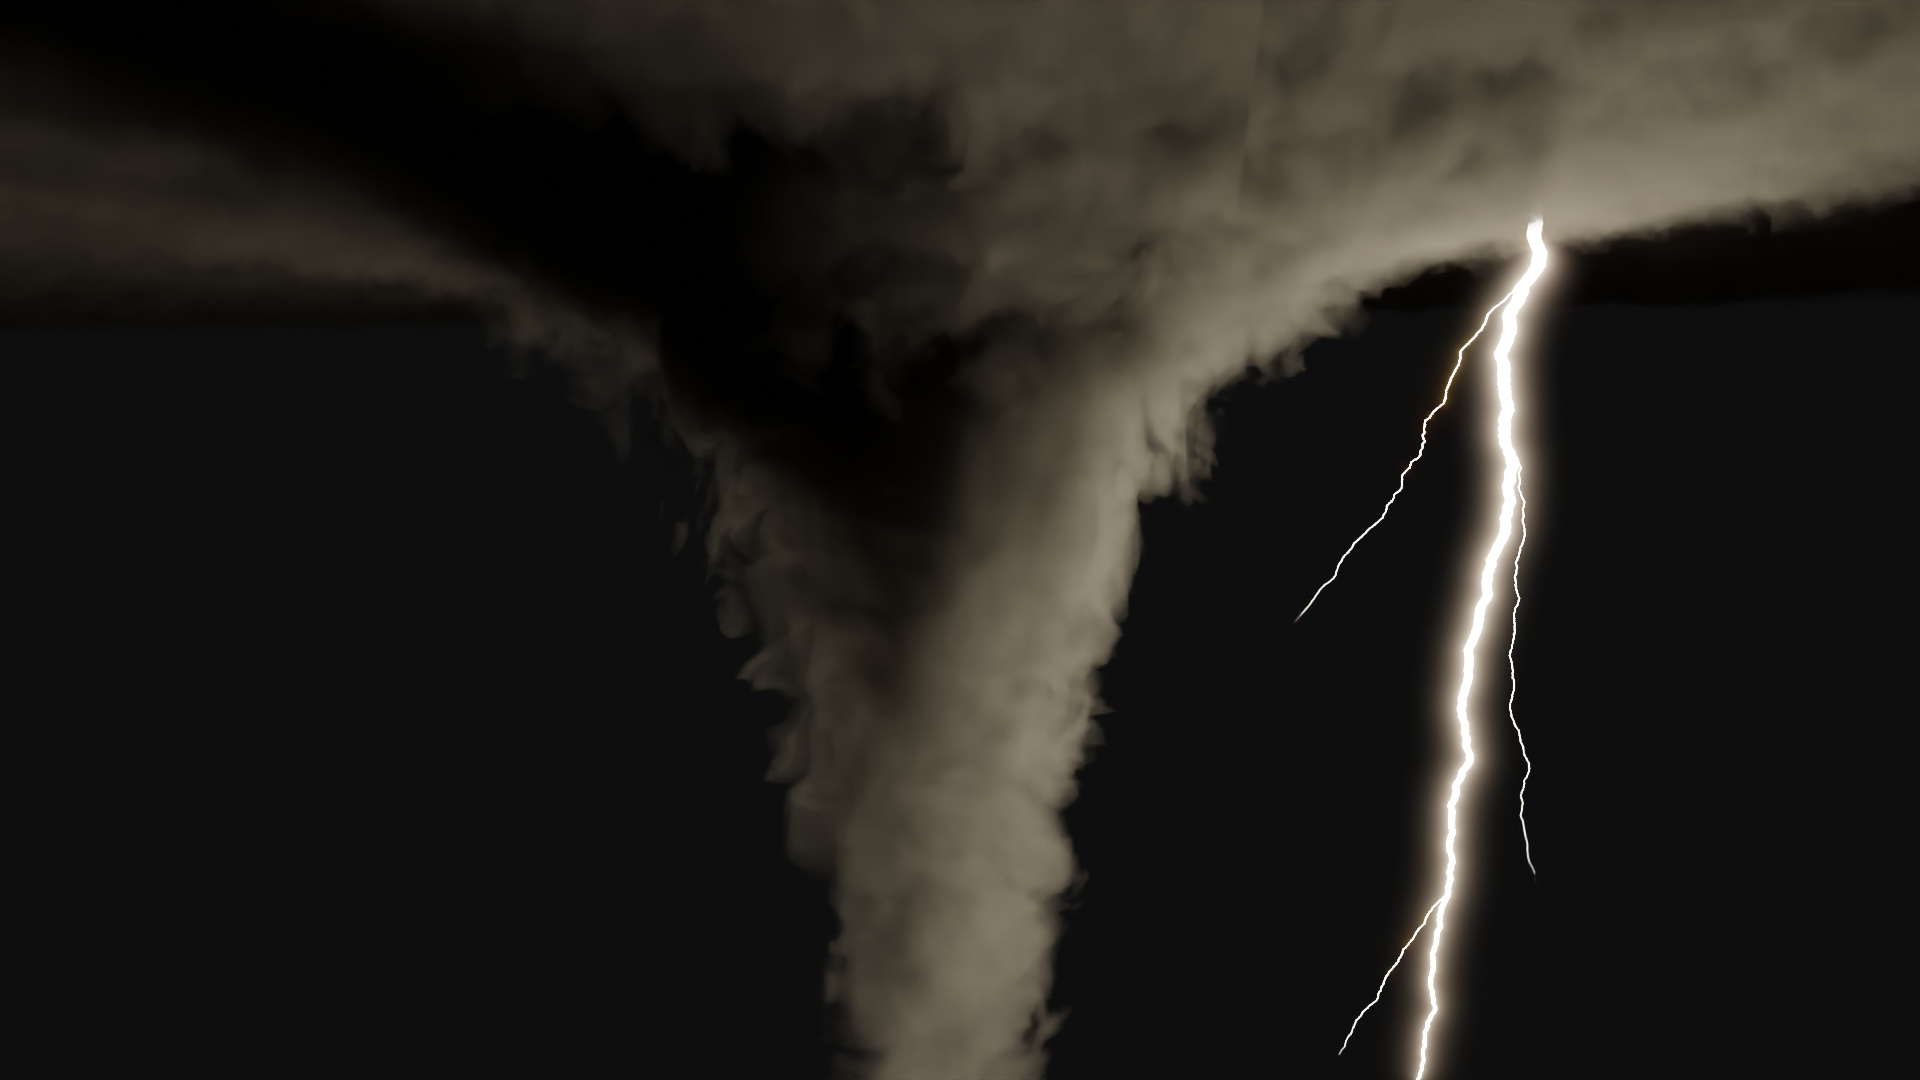
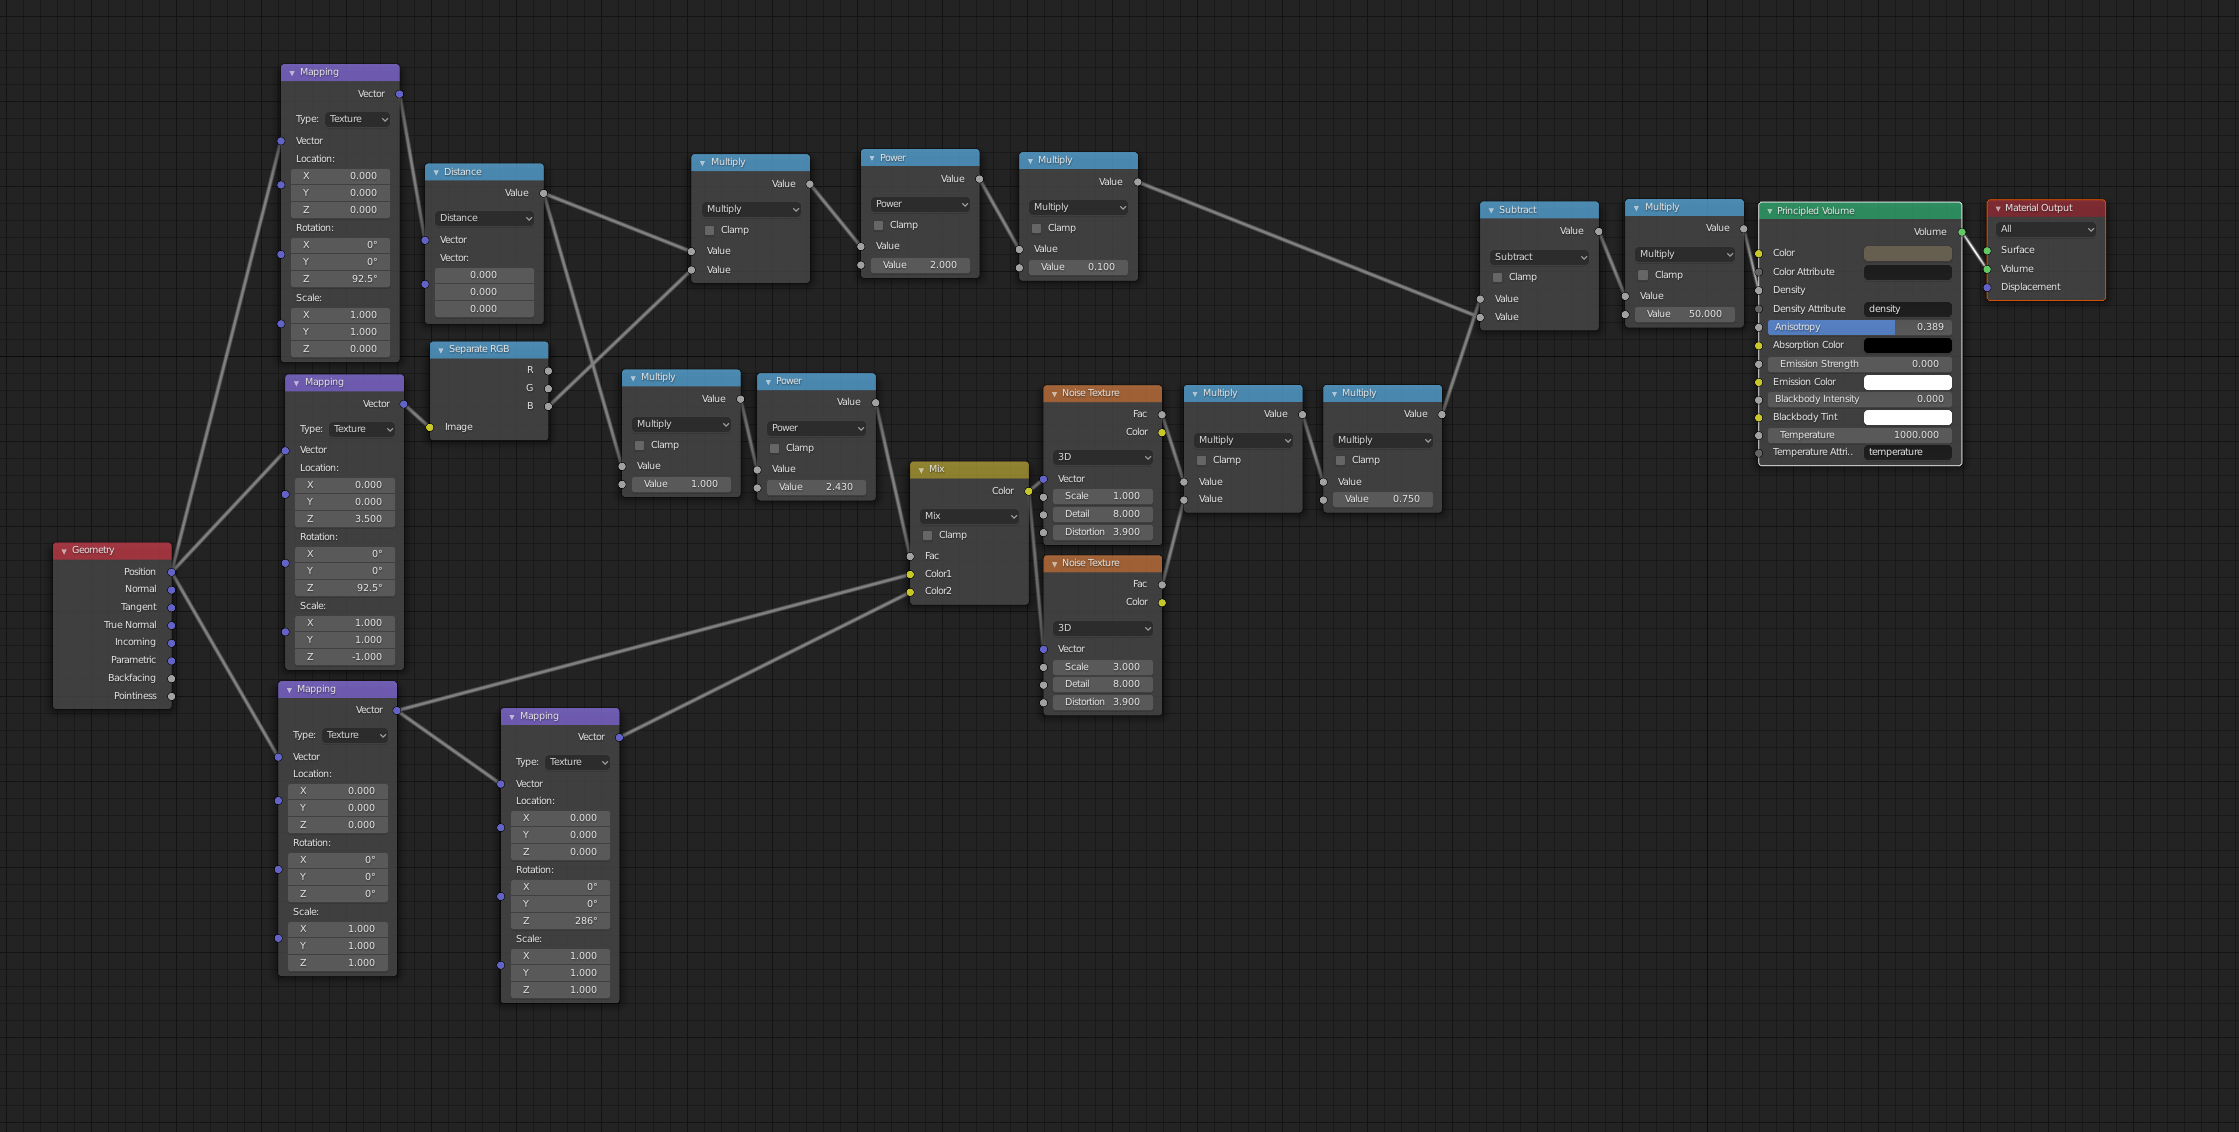
Day 4 - Tornado:
Inspiration image:
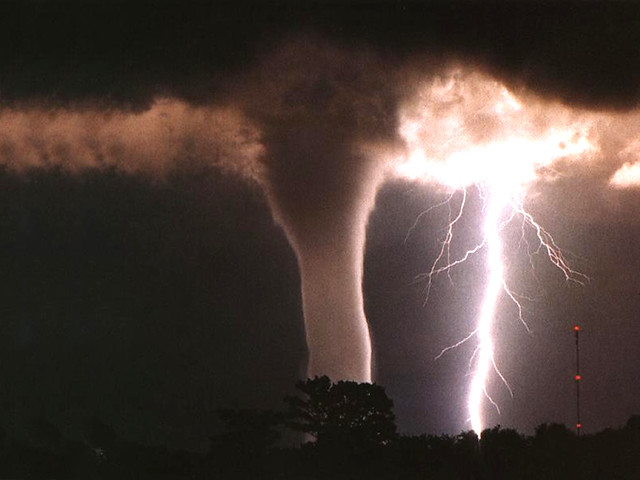
This one was a little quicker and easier, used vector math to get the central column, then scaled it along the z axis and multiplied by some noise that I twisted around the central axis.
Geometry is one cube, plus the plane for the lightning. I added an area light to boost the effect of the lightning.
I’m really liking the intel denoiser, especially for these volume effects.
Day 5 - snow:
Inspiration image:
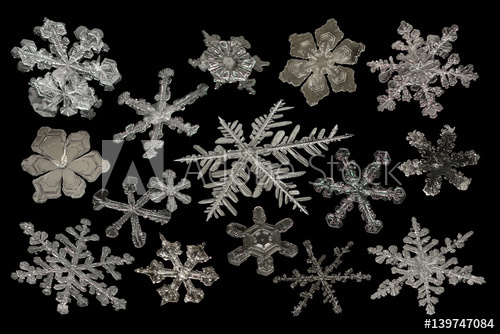
I decided to do a snowflake shader instead of accumulated snow. I tried to push myself to not linger too long on this, so there are defintely things I would do change to improve this. I’d probably include some cuts to complement the spokes and do a little more work with making the crystal structure more crystally, but it is what it is.
There are ~500 snowflakes, each randomized in shader. Lit by an HDRIhaven background (https://hdrihaven.com/hdri/?c=studio&h=studio_small_06)
I decided to mix it up and use Eevee this time.
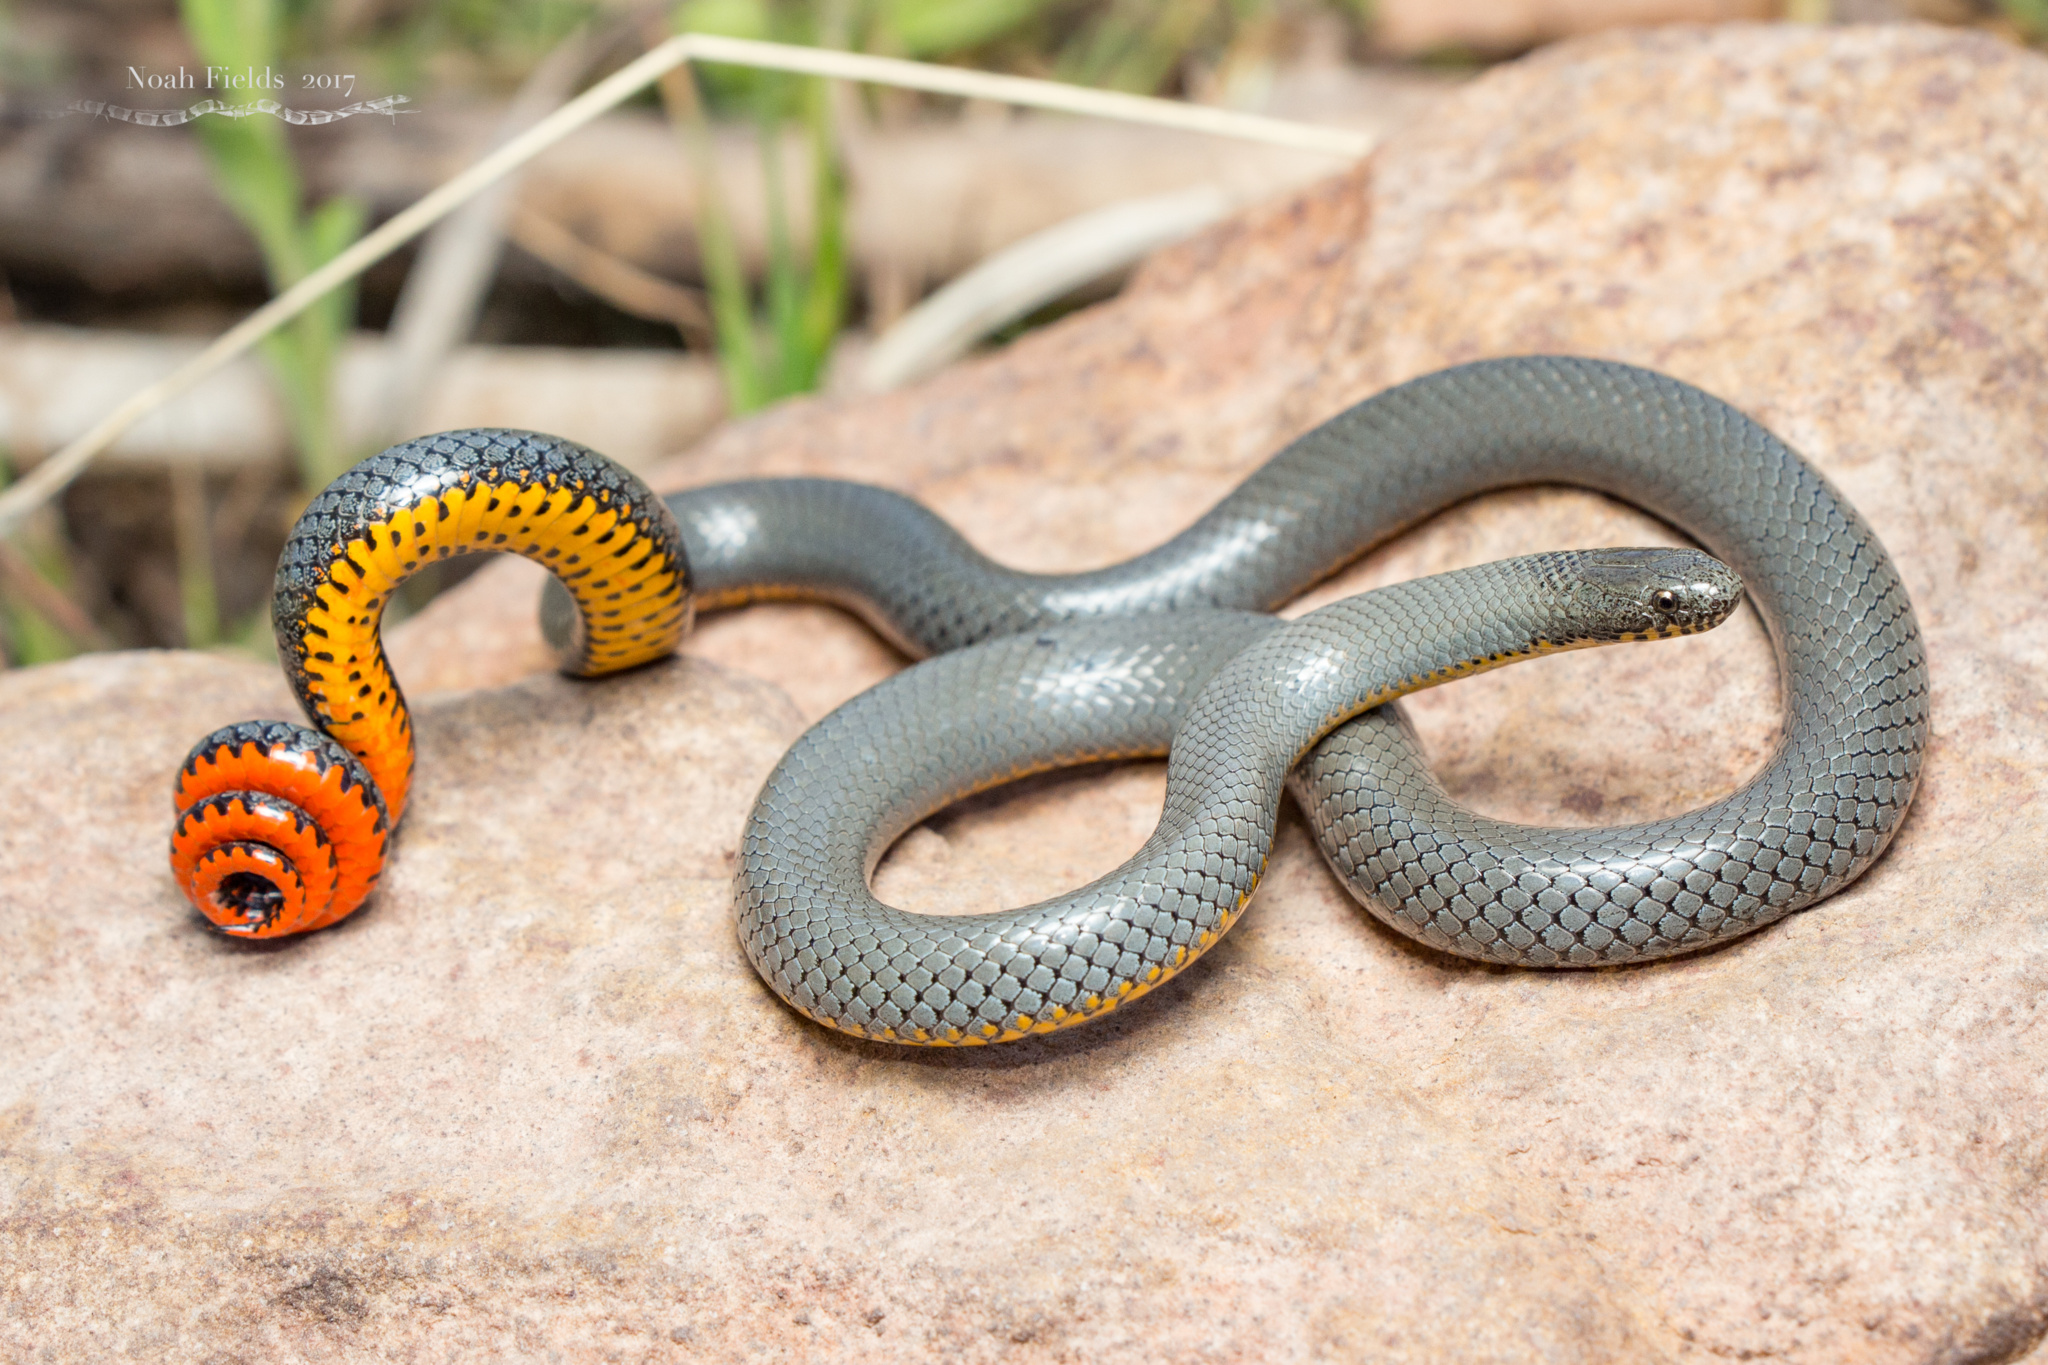
Day 6 - reptile:
Inspiration image:
This was a bit of a challenge, first with getting the scale pattern to work the way I wanted to, then preventing myself from spiraling too deeply into detailing.
I couple probably spend a full day tweaking this shader, but I gotta keep moving. lots of color ramps, a fair bit of voronoi and a touch of noise textures. Texture is mapped to UV to allow deformation of the mesh without distorting texture.
Geometry is one plane, two simple deform modifiers, and a curve deform modifier, plus a base plane. I used an HDR background and one sunlight
rendered with Eevee.
Day 7 - moss:
Inspiration image:
This was a fun challenge. I hadn’t really played with vector displacement before, and this was a fun way to dive in. trying to add light filaments was tricky, but rewarding.
Again, voronoi was important for generating the pattern, and noise textures were critical for getting the final look. Lots of math nodes that could certainly be cleaned up as well, there’s got to be a better way to do some of those blending functions.
one plane with adaptive sub-d and an hdri map: (https://hdrihaven.com/hdri/?h=green_point_park)
Day 8 - coral:
inspiration image:
This was a little frustrating, but I learned some more about vector displacement that seems worthwhile. If I spent more time on this, I would work on the coloring in the deeper groves, and figure out the node math to properly displace the finer details.
2 layers of voronoi displacement, plus an AO node modulated by the finer voronoi texture.plugged into a color ramp
Geometry is one sphere with adaptive subdivision, lit by a spotlight with a wave texture for faux caustics, and a color gradient background.
Day 9 - microbe:
Inspiration image:
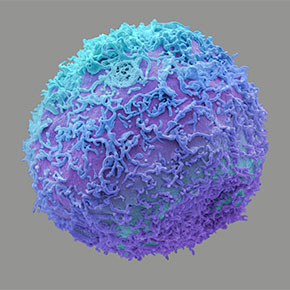
Really pressed myself to move quickly on this one. I had in my head the approach I wanted to use (which I stumbled across while making coral) It could definitely be improved with more time tweaking, but what couldn’t?
I’m particularly interested in the voronoi set to smooth f1 position output, plugged into a similar voronoi, also smooth f1, isolated below:
Geometry is just an adaptive subdivided sphere, with one sun light and a gradient background, masked to gray for the camera rays only.
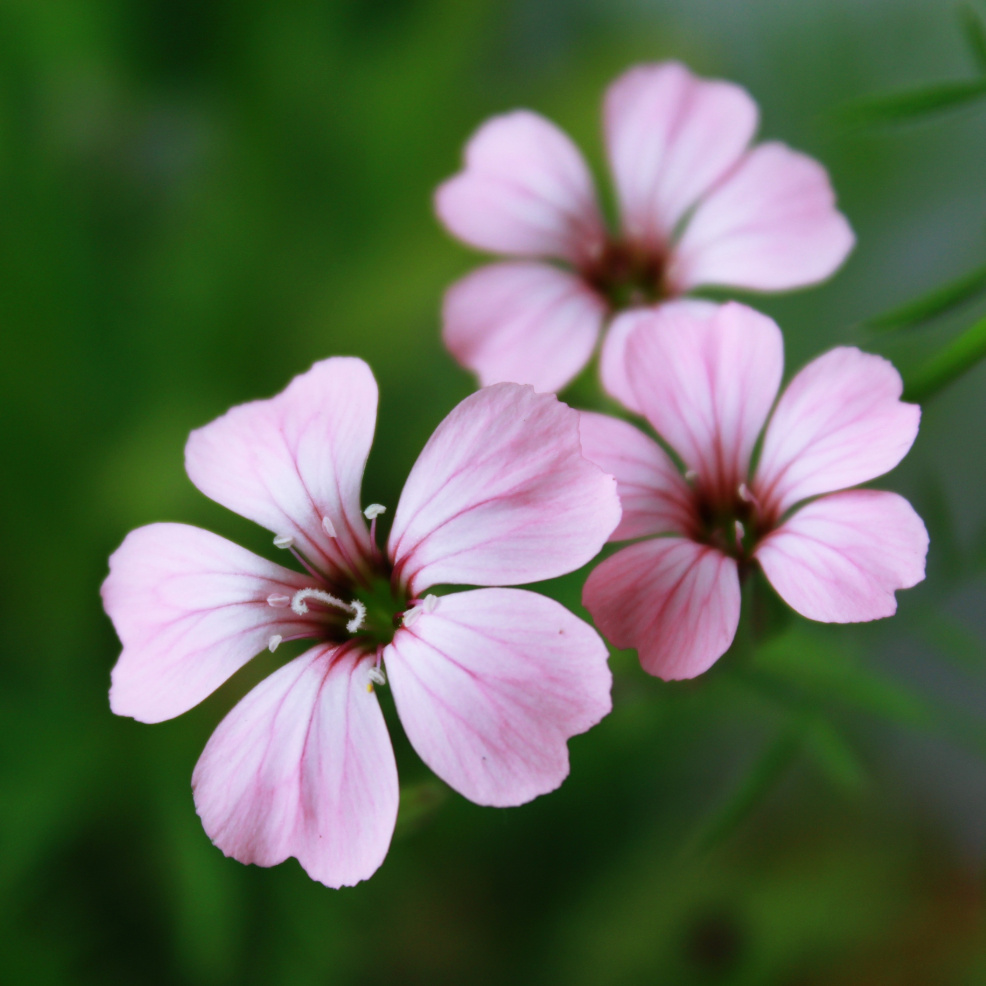
Day 10 - Flower:
Inspiration image:
This was a good learning experience. Mathematically composing shapes is an interesting challenge, but totally doable when you go step by step.
This is a volume shader with very few textures at all. There’s lots and lots going on in there, please download and checkout the nodes. I broke everything up into frames and kinda labeled the overall function within the frame.
one cube, sky texture background and a sun light.
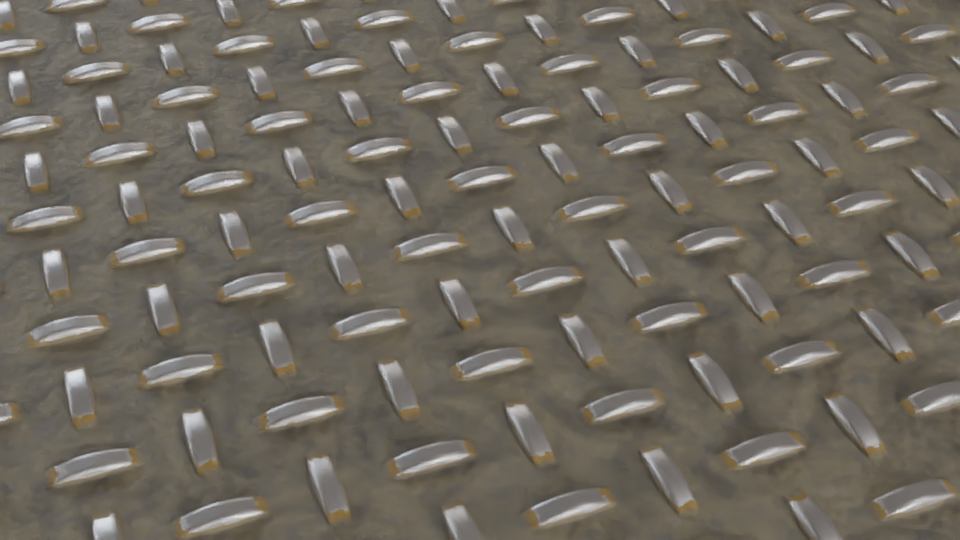
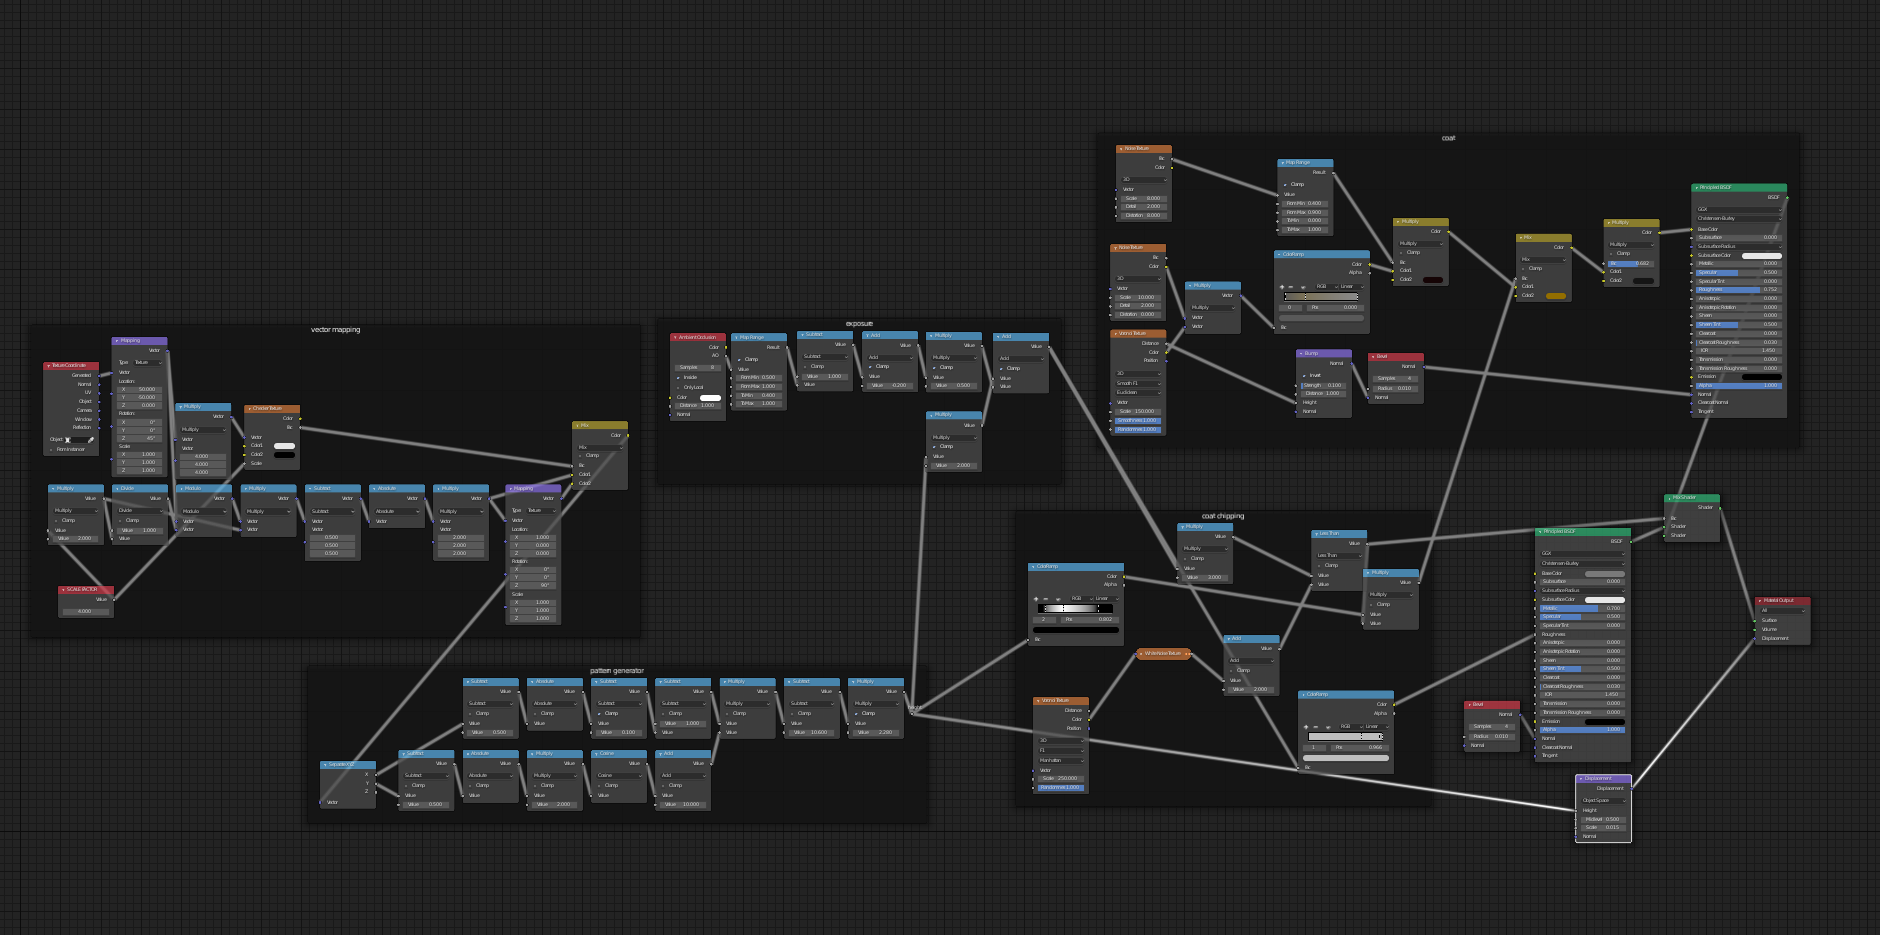
Day 11 - metal:
Inspiration image:
I feel kinda meh about this one. The pattern generation went well, and set me up well for wednesdays prompt. I’'m not stoked about the grime though.
the diamond plate pattern is generated mostly with math nodes and a checker texture to rotate every other diamond. voronoi cells for paint chipping and some noise overlays
geometry is one plane, lit with an hdri: https://hdrihaven.com/hdri/?h=machine_shop_01
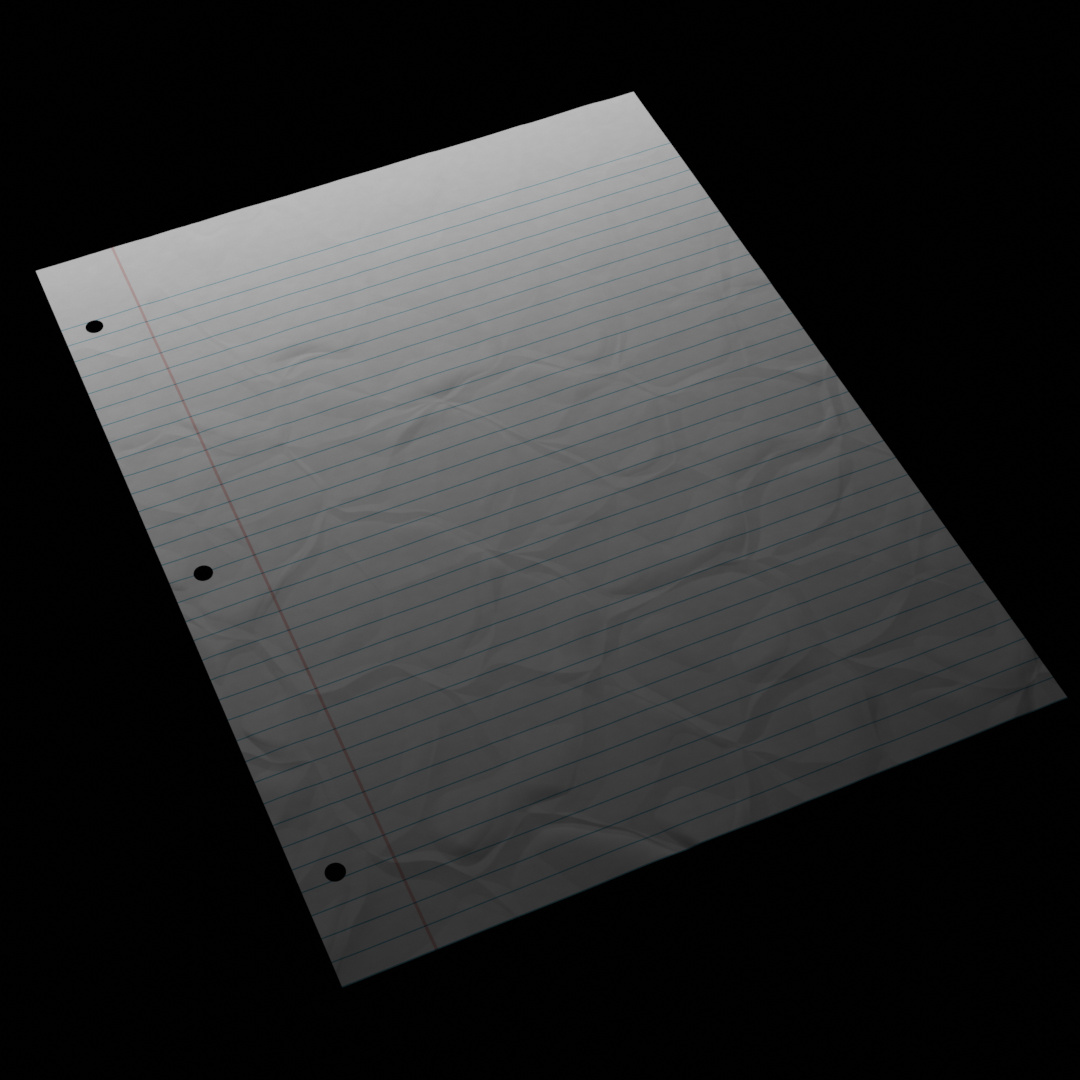
Day 12 - Paper:
Inspiration image:
I felt good about this one, wrinkles still aren’t perfect, but they’re all right. I tried to reel myself in and do a sanity check on my wrinkle nodes, I ended up removing about a dozen nodes that weren’t contributing much to the overall effect. It really helps to take the time to review what you’ve done and make sure that it still makes sense.
Wrinkles are mostly modulated voronoi. I used the position output of the voronoi, then subtract the input mapping to generate a new map per cell:
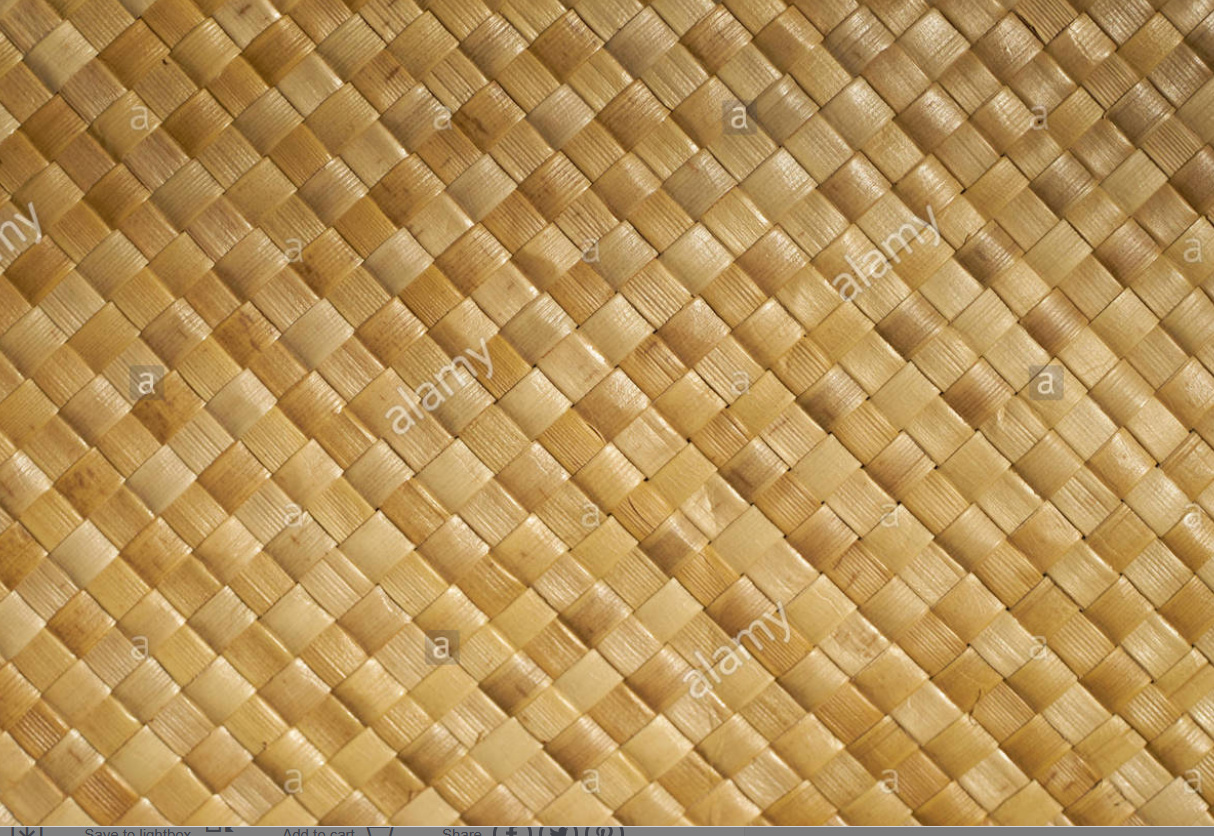
Day 13 - Weave:
Inspiration image:
I wanted to use this as an opportunity to dig into vector displacement, but it wasa nit too much of a challenge, so I fell back to a more basic displacement systen.
Nodes are based on my diamond plate shader, with a couple noise textures to add more detail to the weavers.
One plane, one point light, sky texture on environment.
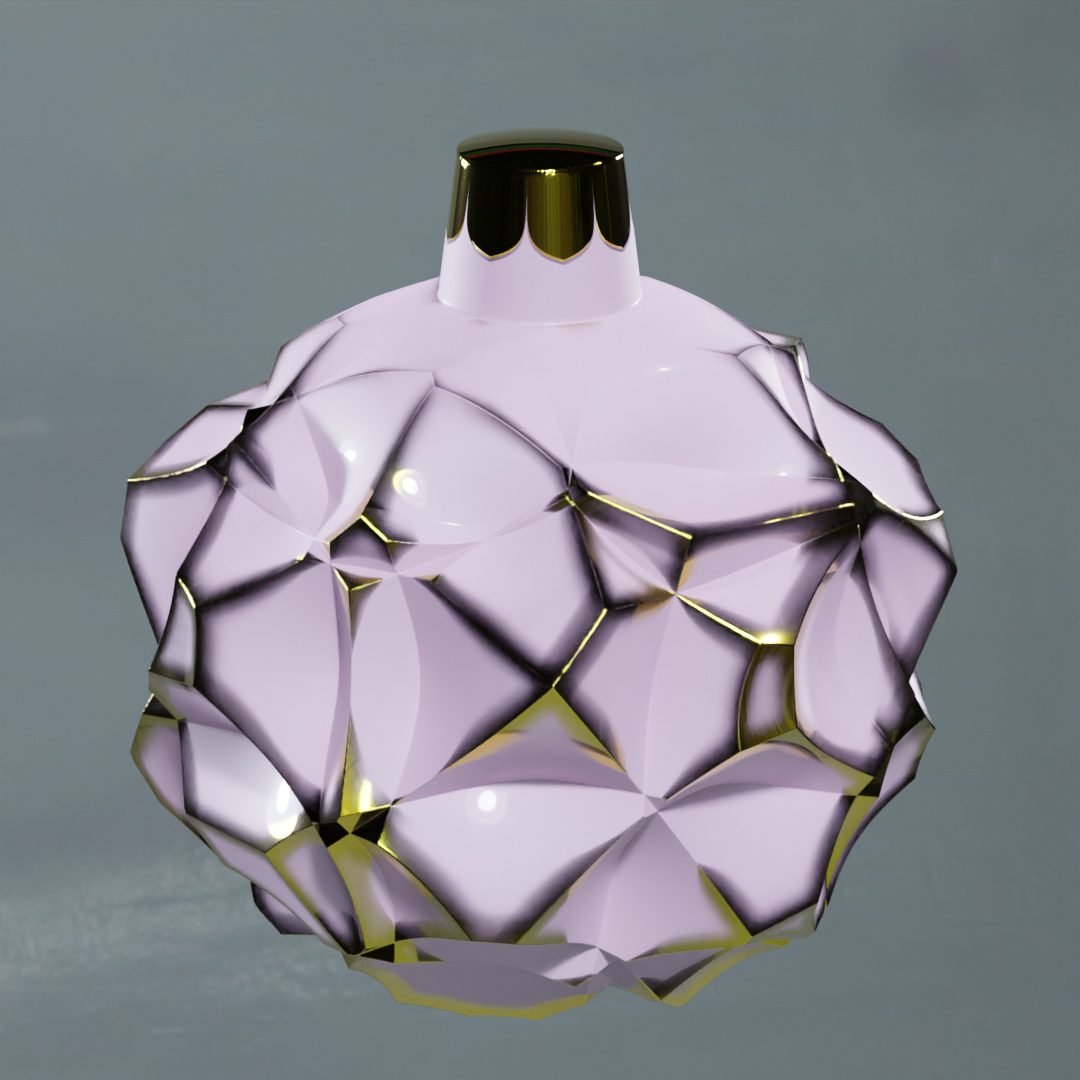
Day 14 - Ornamental:
inspiration image:
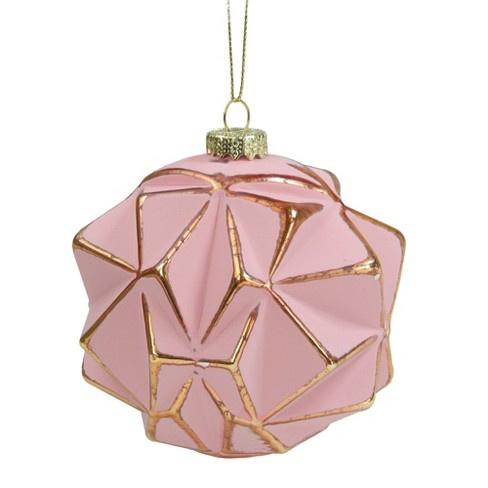
Hey, it’s an ornament! I enjoyed this one, and it went fairly quickly.
voronoi f2 for the peak displacement, then using both the AO node and the bevel node with some vector math to just do a shader based edge detection. Here’s just that part to demo the edge detection:
One sphere, lit by an HDRI (https://hdrihaven.com/hdri/?h=studio_small_02)
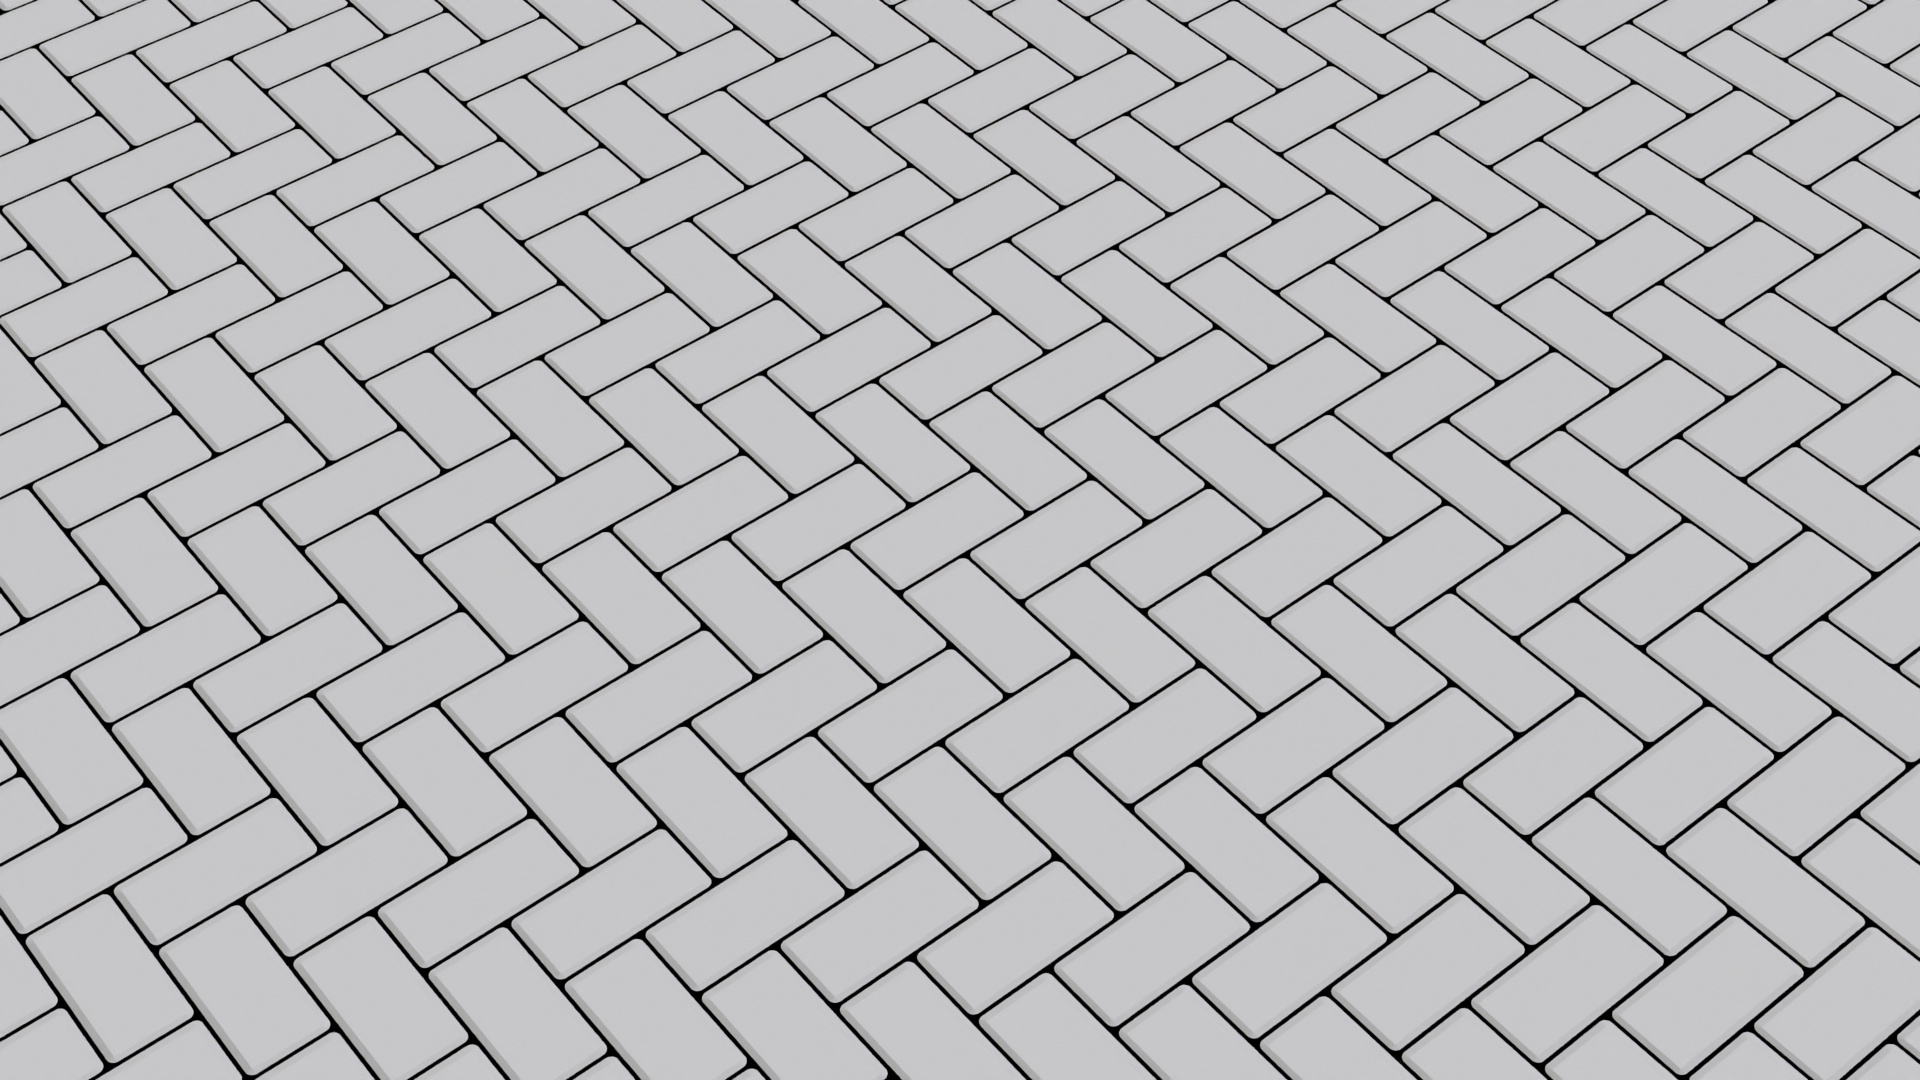
Day 15 - Tiles:
Inspiration image:
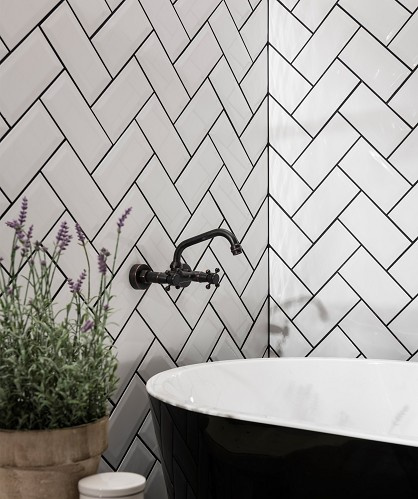
Pretty basic shader, but fun math to get the pattern.
Nothing particularly noteworthy about the nodes. The map range node chain in the vignette tile frame is a pretty cool way to make round corners without any trig, could make a nice nodegroup.
one plane, lit with an hdri (https://hdrihaven.com/hdri/?h=bathroom)
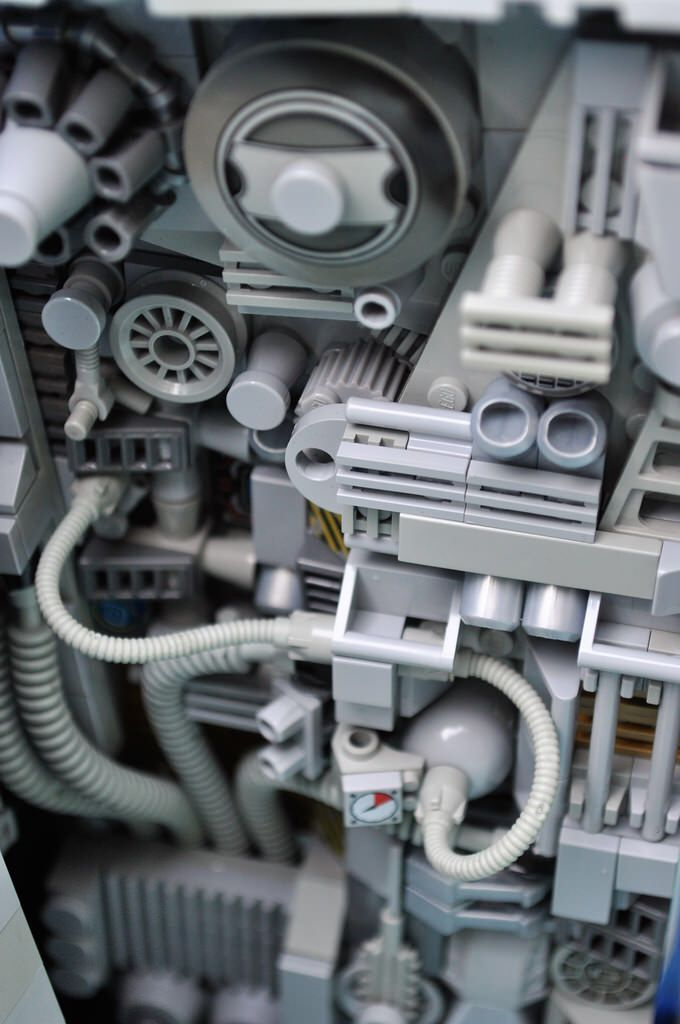
Day 16 - greeble:
Inspiration image:
Not pleased with this one, but I’ve gotta move on.
I like the hubbed spoke pattern in the voronoi, but the featured greebles are a little too stark, and I was having a hard time layering more details into the non-featured tiles
Well, they can’t all be winners…
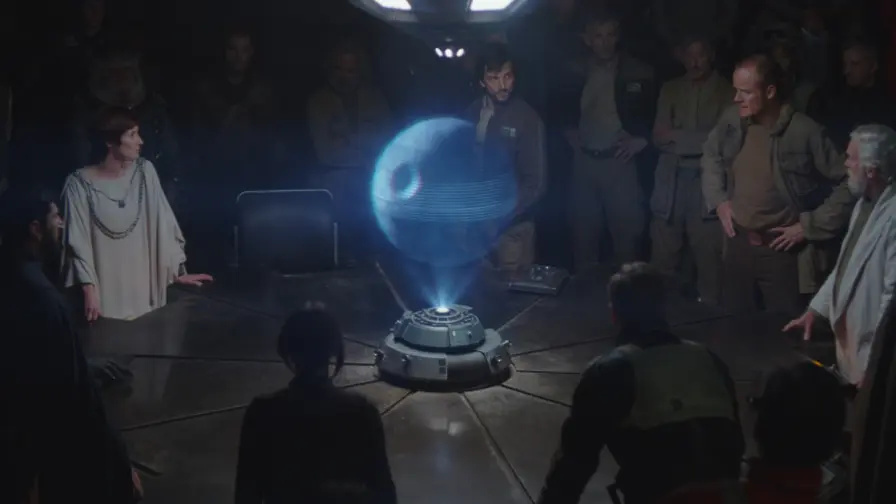
Day 17 - hologram:
Inspiration image:
Much happier with this one. Fairly simple math, just going piece by piece.
The lesson I learned most from this one was keeping boolean values and nodes separated from float nodes. Keeping them clearly separated helps me to visualize what operations I can do and when they make sense.
I broke out the nodes into a number of labeled frames, so it should be fairly easy to follow. Check it out!
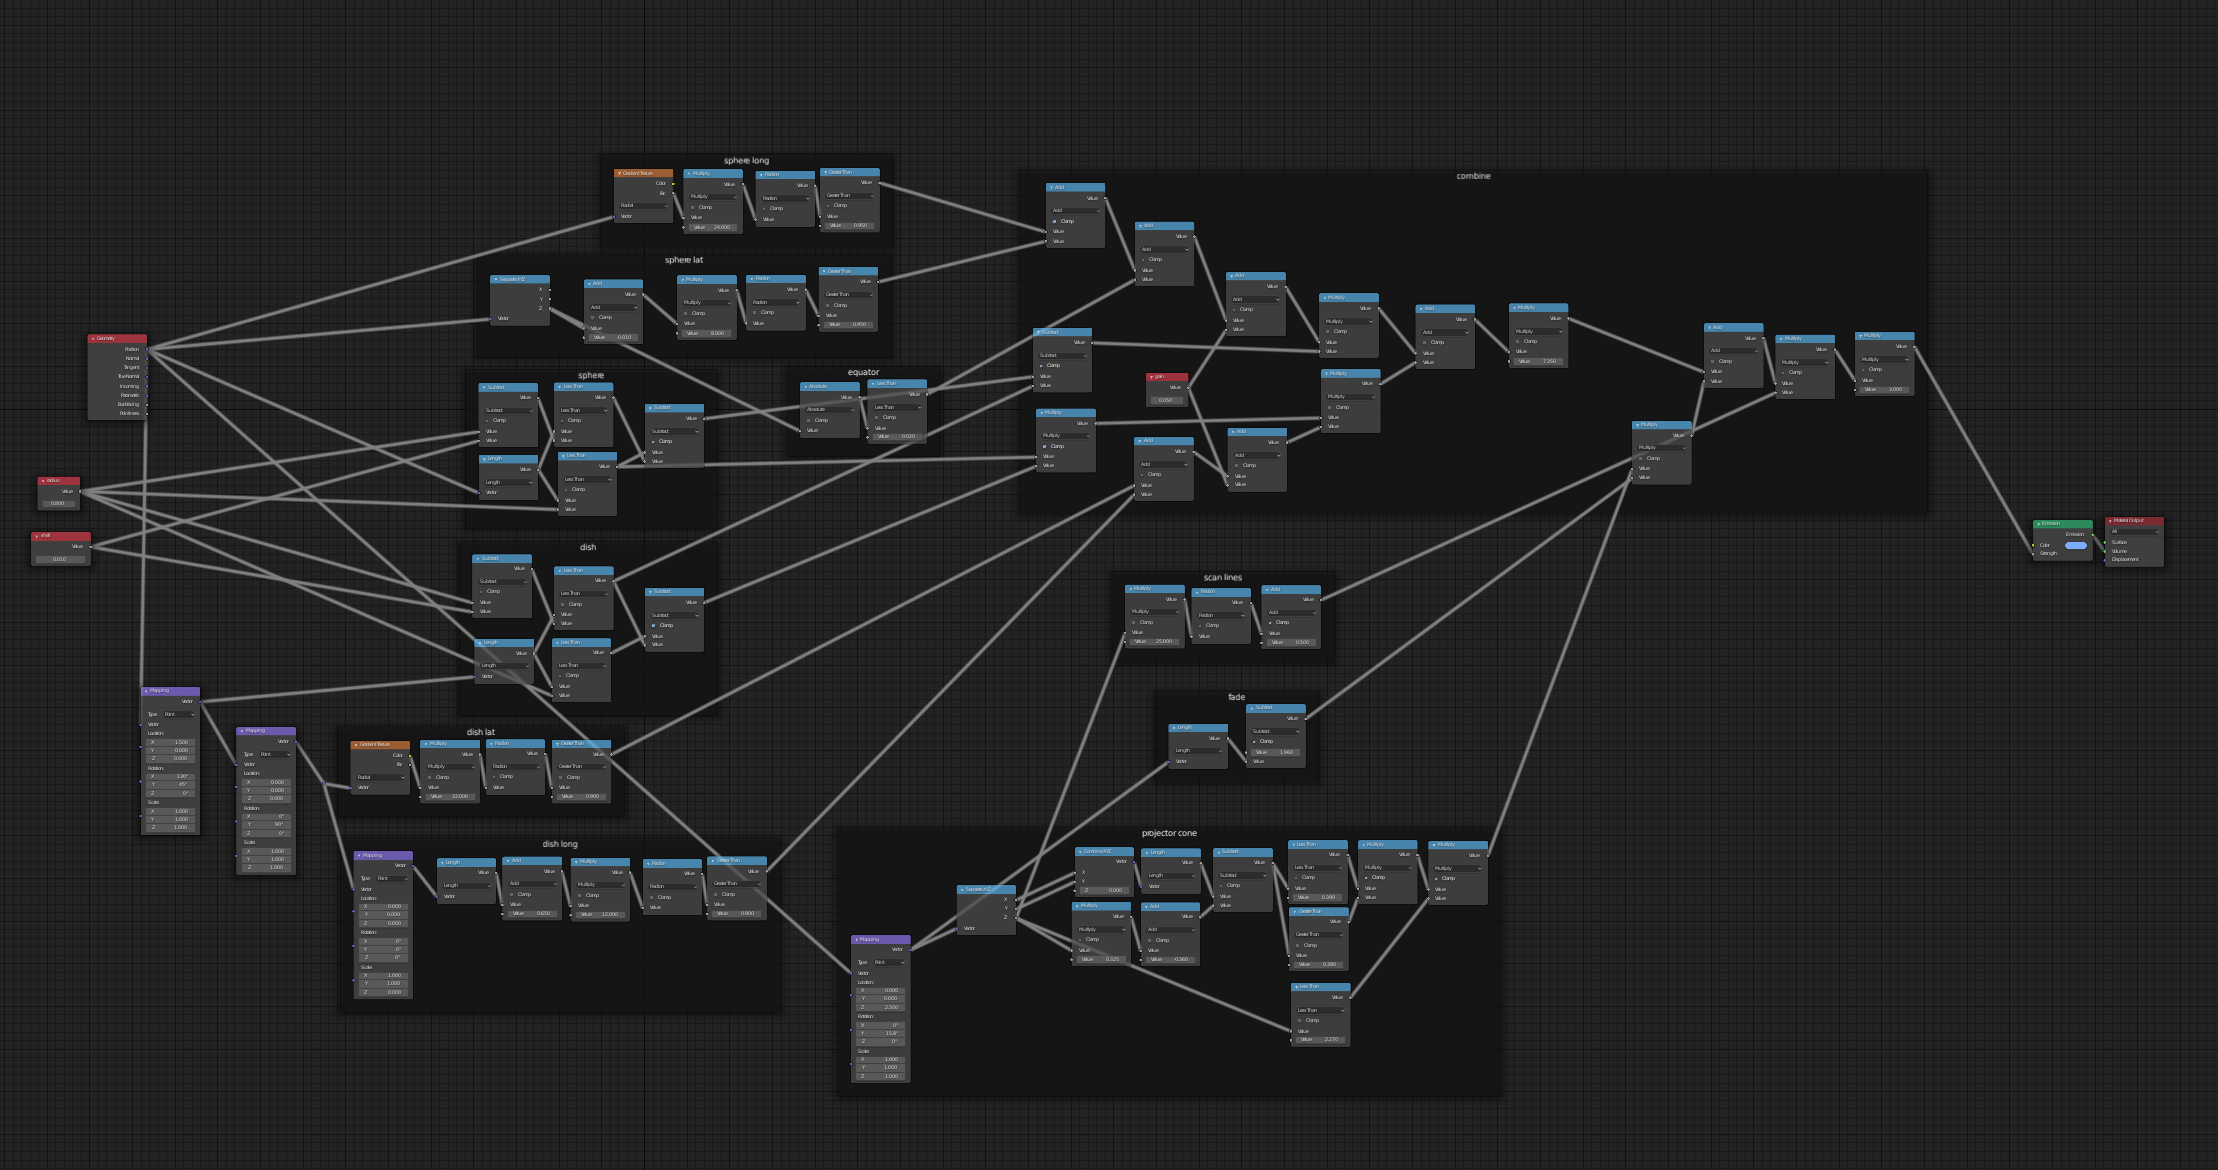
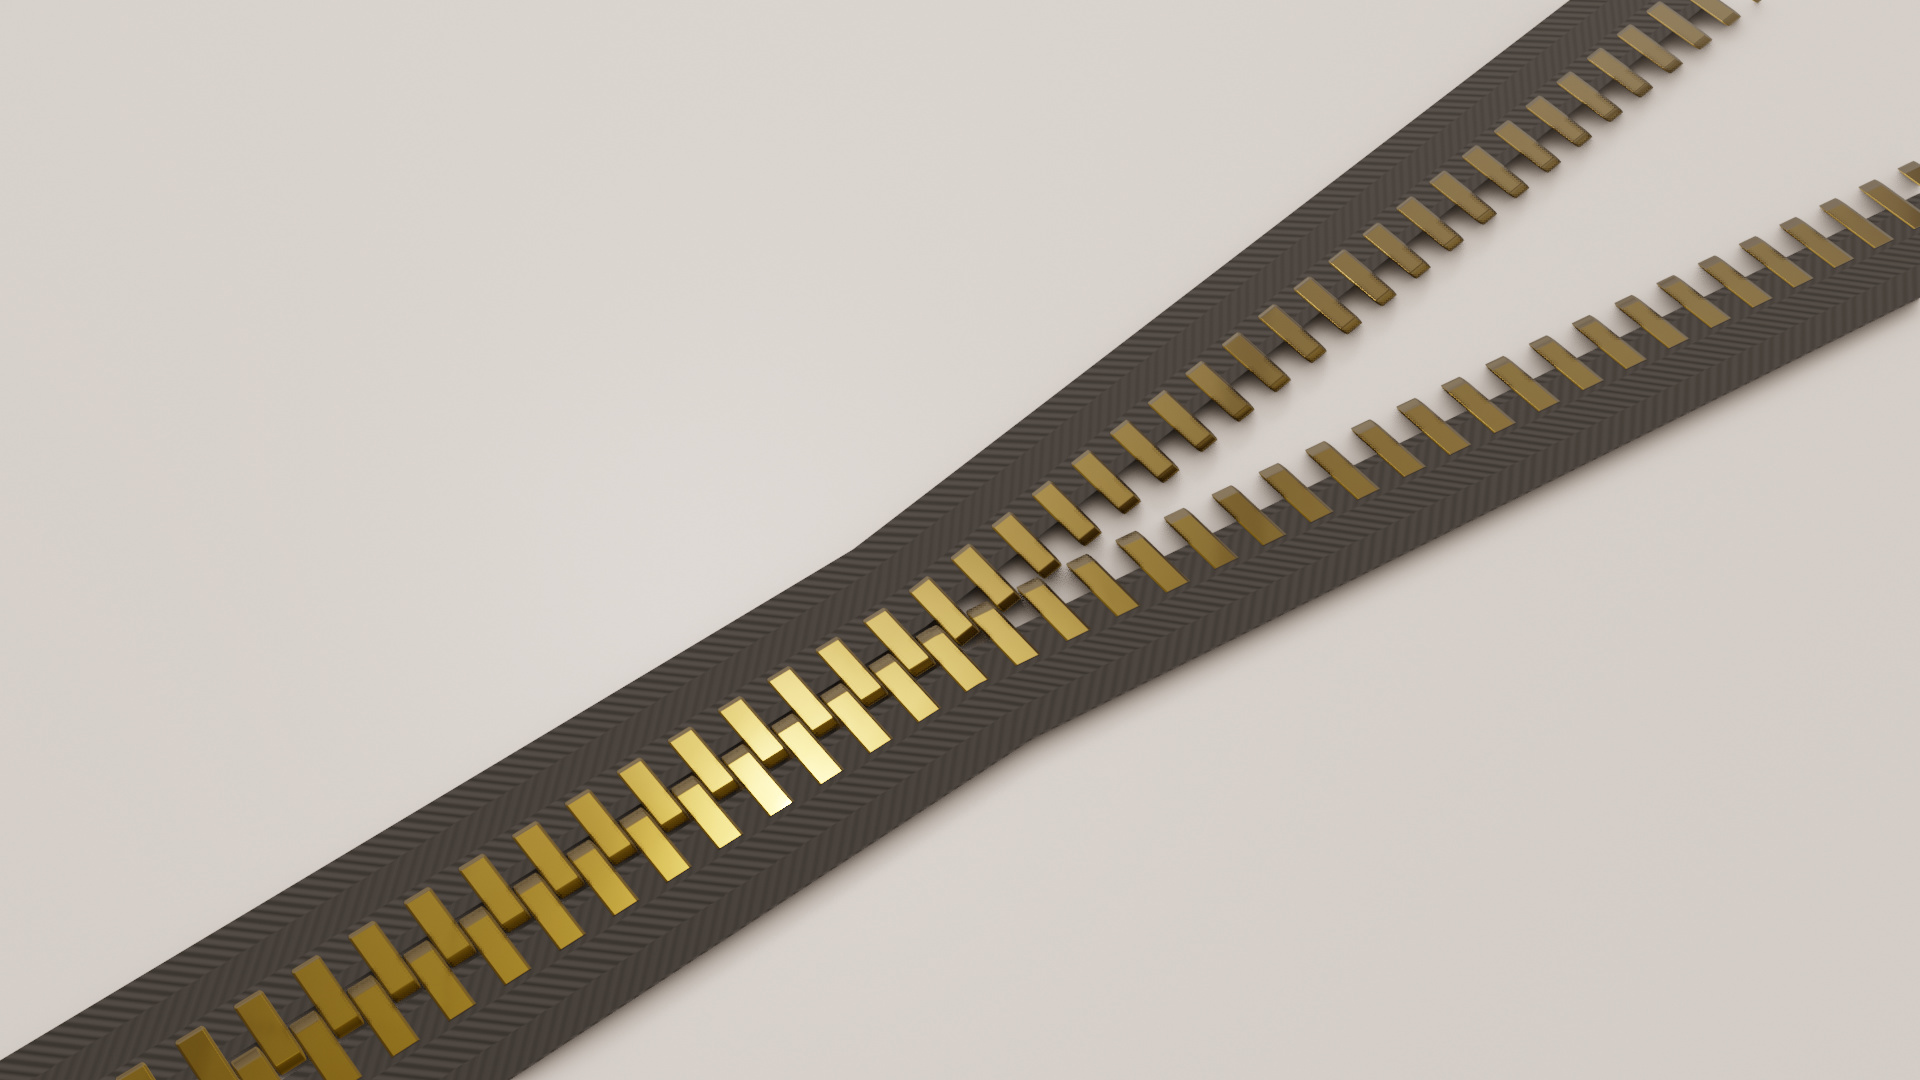
Day 18 - zipper:
Inspiration image:
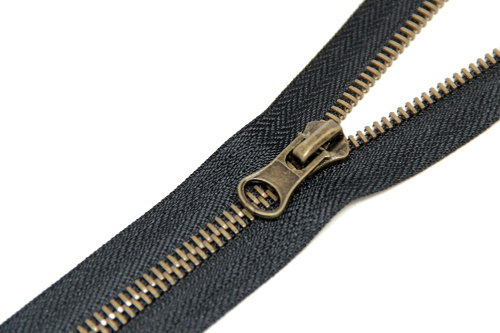
I got a bit behind schedule, but I’m not giving up! This one was more challenging than I thought it would be at first. I had to start over a couple times, but I ended up being pretty satisfied. I think it rivals the flower for sheer number of nodes. Only after it was done did I realize that there isn’t a single texture node in the shader, It’s all done with math and a couple color ramps.
Again, I broke out the shader into frames, but there are a fair bit of cobwebs in between the the frames, so it’s somewhat easy to break, but still worth checking out!
One shader plane and a background plane, lit with an hdri: (https://hdrihaven.com/hdri/?h=floral_tent
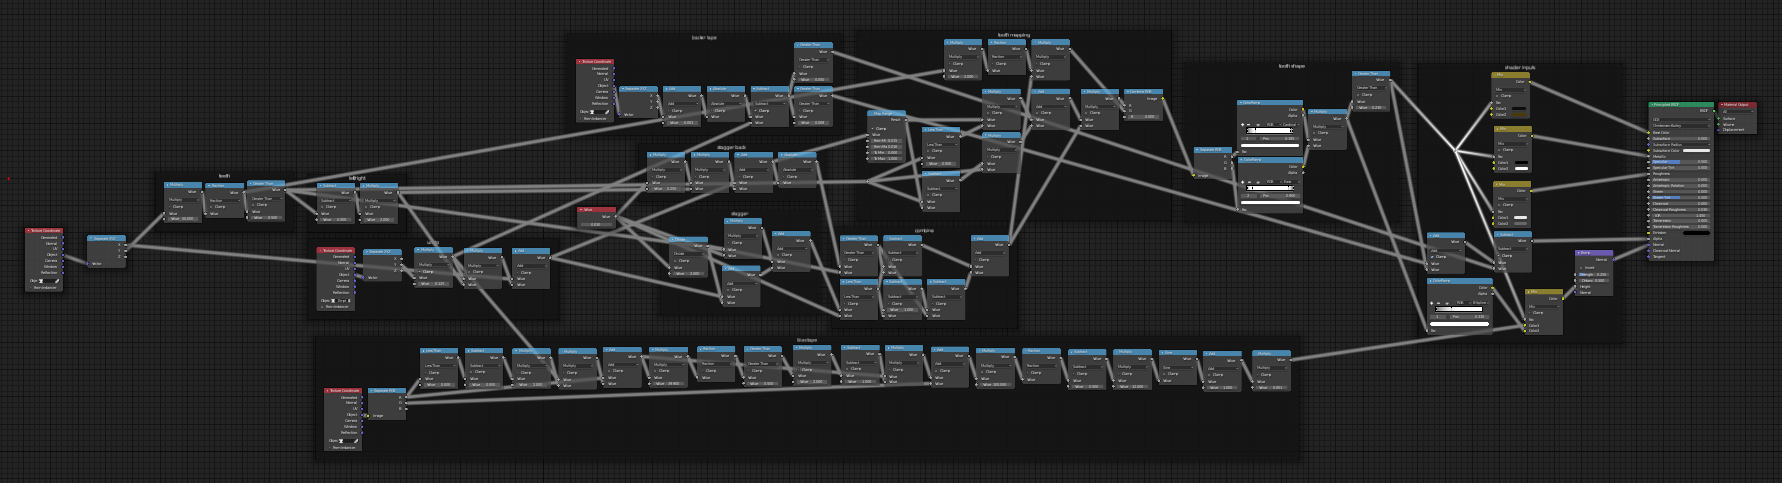
19 - circuit board:
I’ve been struggling a lot with this one, but I’m not ready to give up yet. I’ll be back!
This is a placeholder post so I can keep posting things without getting totally bogged down.