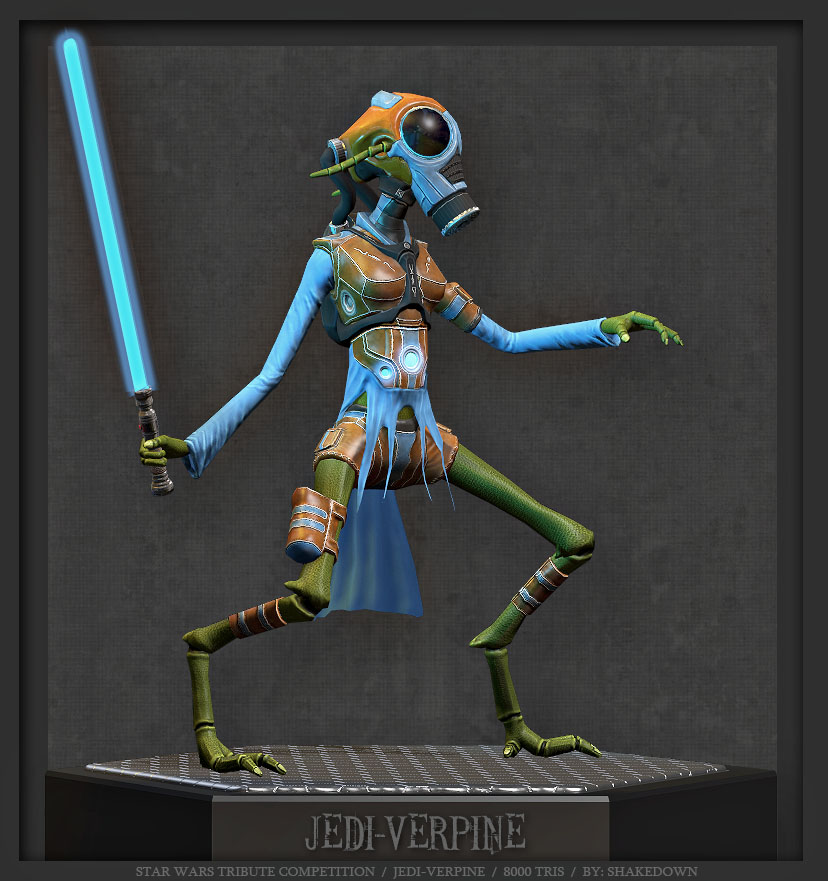
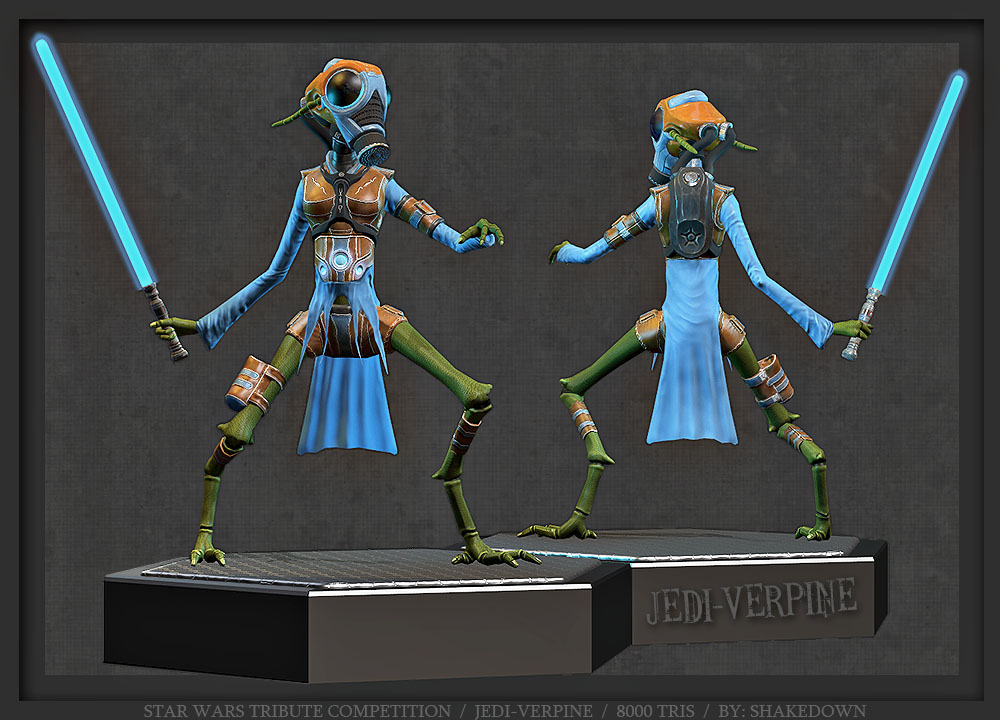
This is my first post this side of the forum. This is a game character I finished for a Star Wars Tribute mini comp over at the Game Artisans forums. It was sculpted and textured in ZBRUSH but I did everything else in Blender. This includes the low poly model, UV’s, baking, rigging, posing, more texturing and finally rendering it in the Game Engine. The final Images I show here have been slightly tweaked in Photoshop for final presentation, but the character itself is very close to the real-time images I got from within the Game Engine.
She is of the Verpine Race and is suppose to be a Jedi. She sits at 8000 tris exactly and has 2048 sized maps…Diff, Norm, Spec…etc. There are probably loads of tweaks that I could still do…but I am calling it a day on this character for now. I would love to hear any crits, feedback or suggestions though.
For me the most important part of creating this character was to find the best way to work between Blender and Zbrush, especially for Game Assets.
ToniB …Thanx
J.F.Robot… The idea was that you had to pick any one race from Star Wars and create a Jedi or Syth for that race. I am not a Star Wars fan but after reading Star Wars Wikis…etc. it seems there has been one Verpine-Jedi in the past! So it seemed like a nice rare race to pick but still plausible!
Terrific execution all around the board, Shakedown! You’ve put great detail into this character while using resources efficiently, I can’t see any areas for improvement. 5 stars!
How long would you estimate it took you, from initial concept to final execution?
Hi…Thanks for featuring my character here at BA. Much appreciated.:yes:
abc123…Thanks. I am a great fan of your work in the Blender Game Engine. Your new project looks awsome.
Nathan.Furguson…Thanx man! Much appreciated comment.
3dementia…Thanx…I like to keep it simple…
James Candy… Thank you very much. I can’t say exactly, but I have been working some evenings over the last month or so…I did put in a few full days here and there also. I think if I had to repeat the process again now…probably around 10 days of work. All depends on all the problems I run into…
Fire_Head431…I explained my whole process below…hope it helps!
Since Fire_Head431 was asking about the texture I thought I would quickly explain the process. Pretty straight forward in general.
I sculpted the high poly in ZBRUSH to around 25 million points. I then textured the model in ZBRUSH. Then exported a version of the model of around 700 000 polys to blender for retopology. Then did the UV maps for my low poly model in Blender. The model was 8000 tris when finished.
Then exported chunks of the model from ZBRUSH to bake Normals and Textures to my low poly model. The chunks varied between 30 000 to about 1,5 million polys. Till about a million polys Blender is still very fast and the process of importing and baking is super quick.(This is on my PC anyways) Because I am baking bit by bit I unchecked the “Clear” checkbox under the baking settings. I had to play around with the Distance and Bias levels to get the Normal bakes to come out nice. I also baked everything at 4096 sizes and scaled them down to 2048 afterwards. This gives much better results than baking straight to the size you are going to use in the end.
The same goes for the textures. Baking from the high polys I exported from ZBRUSH to my low poly in Blender. After the bake you end with a very basic color map. The Normal map that I generated in Blender was used to create a Cavity Map in XNORMAL. This together with a basic Ambient Occlusion bake of my Low poly model I used as Multiply and Overlay channels in Photoshot to get close to my final textures. Just added some dirt and scratches and finally painted out some seams in Blender Using the Texture Paint mode.
Then rigged and posed the model and rendered it using the standalone player for the Blender Game Engine, and setting the AA Samples to 16x. This gave a very nice crisp result. Then just comped it in photoshop with final tweaks.
I hope this helps a few people. You can use a similar process if you sculpted in Blender.
yeah that is a great work. Awesome job I think it can be also used to those high quality games or in movies also. The quality of your work is simply great and nice.
Keep up the good work and thanks for sharing with us.
Saftyman, ringbarkis,…thanks, its only a pleasure.
MmAaXx, thehorseman007, Kemmler… Thanks guys for the compliments.
Fire_Head431…no probs!
Norvman…Thank you. To do all the “glowy” bits I used a “GLOW” map. This was for the
bits on her stomach, the buttons on the saber handle and then finally for the blade on
the saber.
I had different Material groups, so for the bits on her stomach and on the saber handle I just used the “Glowy” texture I created in photoshop as an Addative Blend Mode Texture under that Material.
The saber blade, as you noticed ,is actually only 3 polys. The same “Glowy” texture is just alpha mapped to these faces…so it is transparrent where there is no “Glow”. I also made my blade Material shadeless by sellecting that tick box under the Material settings.
I found that 3 polys rotated at 60 degree angles gave a good look from just about any angle…except if you look straight down the blade…then it dissapears. You can easily fix this by adding one more poly to face in that direction. For my purposes it
was not needed.

 It literally looks like a model from SWTOR! Great Job

