As cleverly @Okidoki advised me to do in one of my scattered posts about this character, I decided to pack everything regarding my progress in this post from now on, with the sole purpose of collecting all updates in a neat and easy to access space.
Furthermore, my aim is to learn as much as possible from this project, which is why I’d like to invite/welcome knowledgeable folk and ask for your feedback. Needless to say, it will be greatly appreciated.
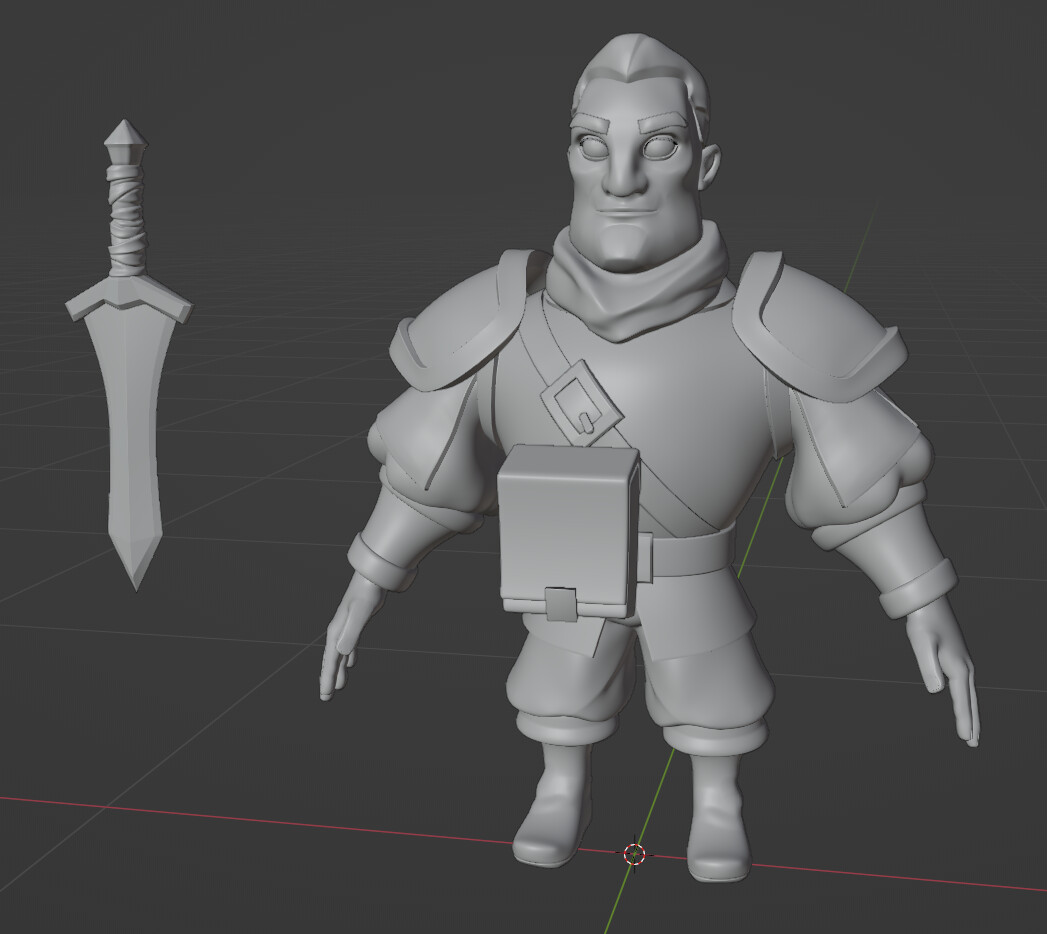
Imagine this char would be used for a mobile game. Areas of deformation will only be the arms, hands, legs and eyes. The polycount has to be low as in less than 7k tris. Mine is about 5,8k.
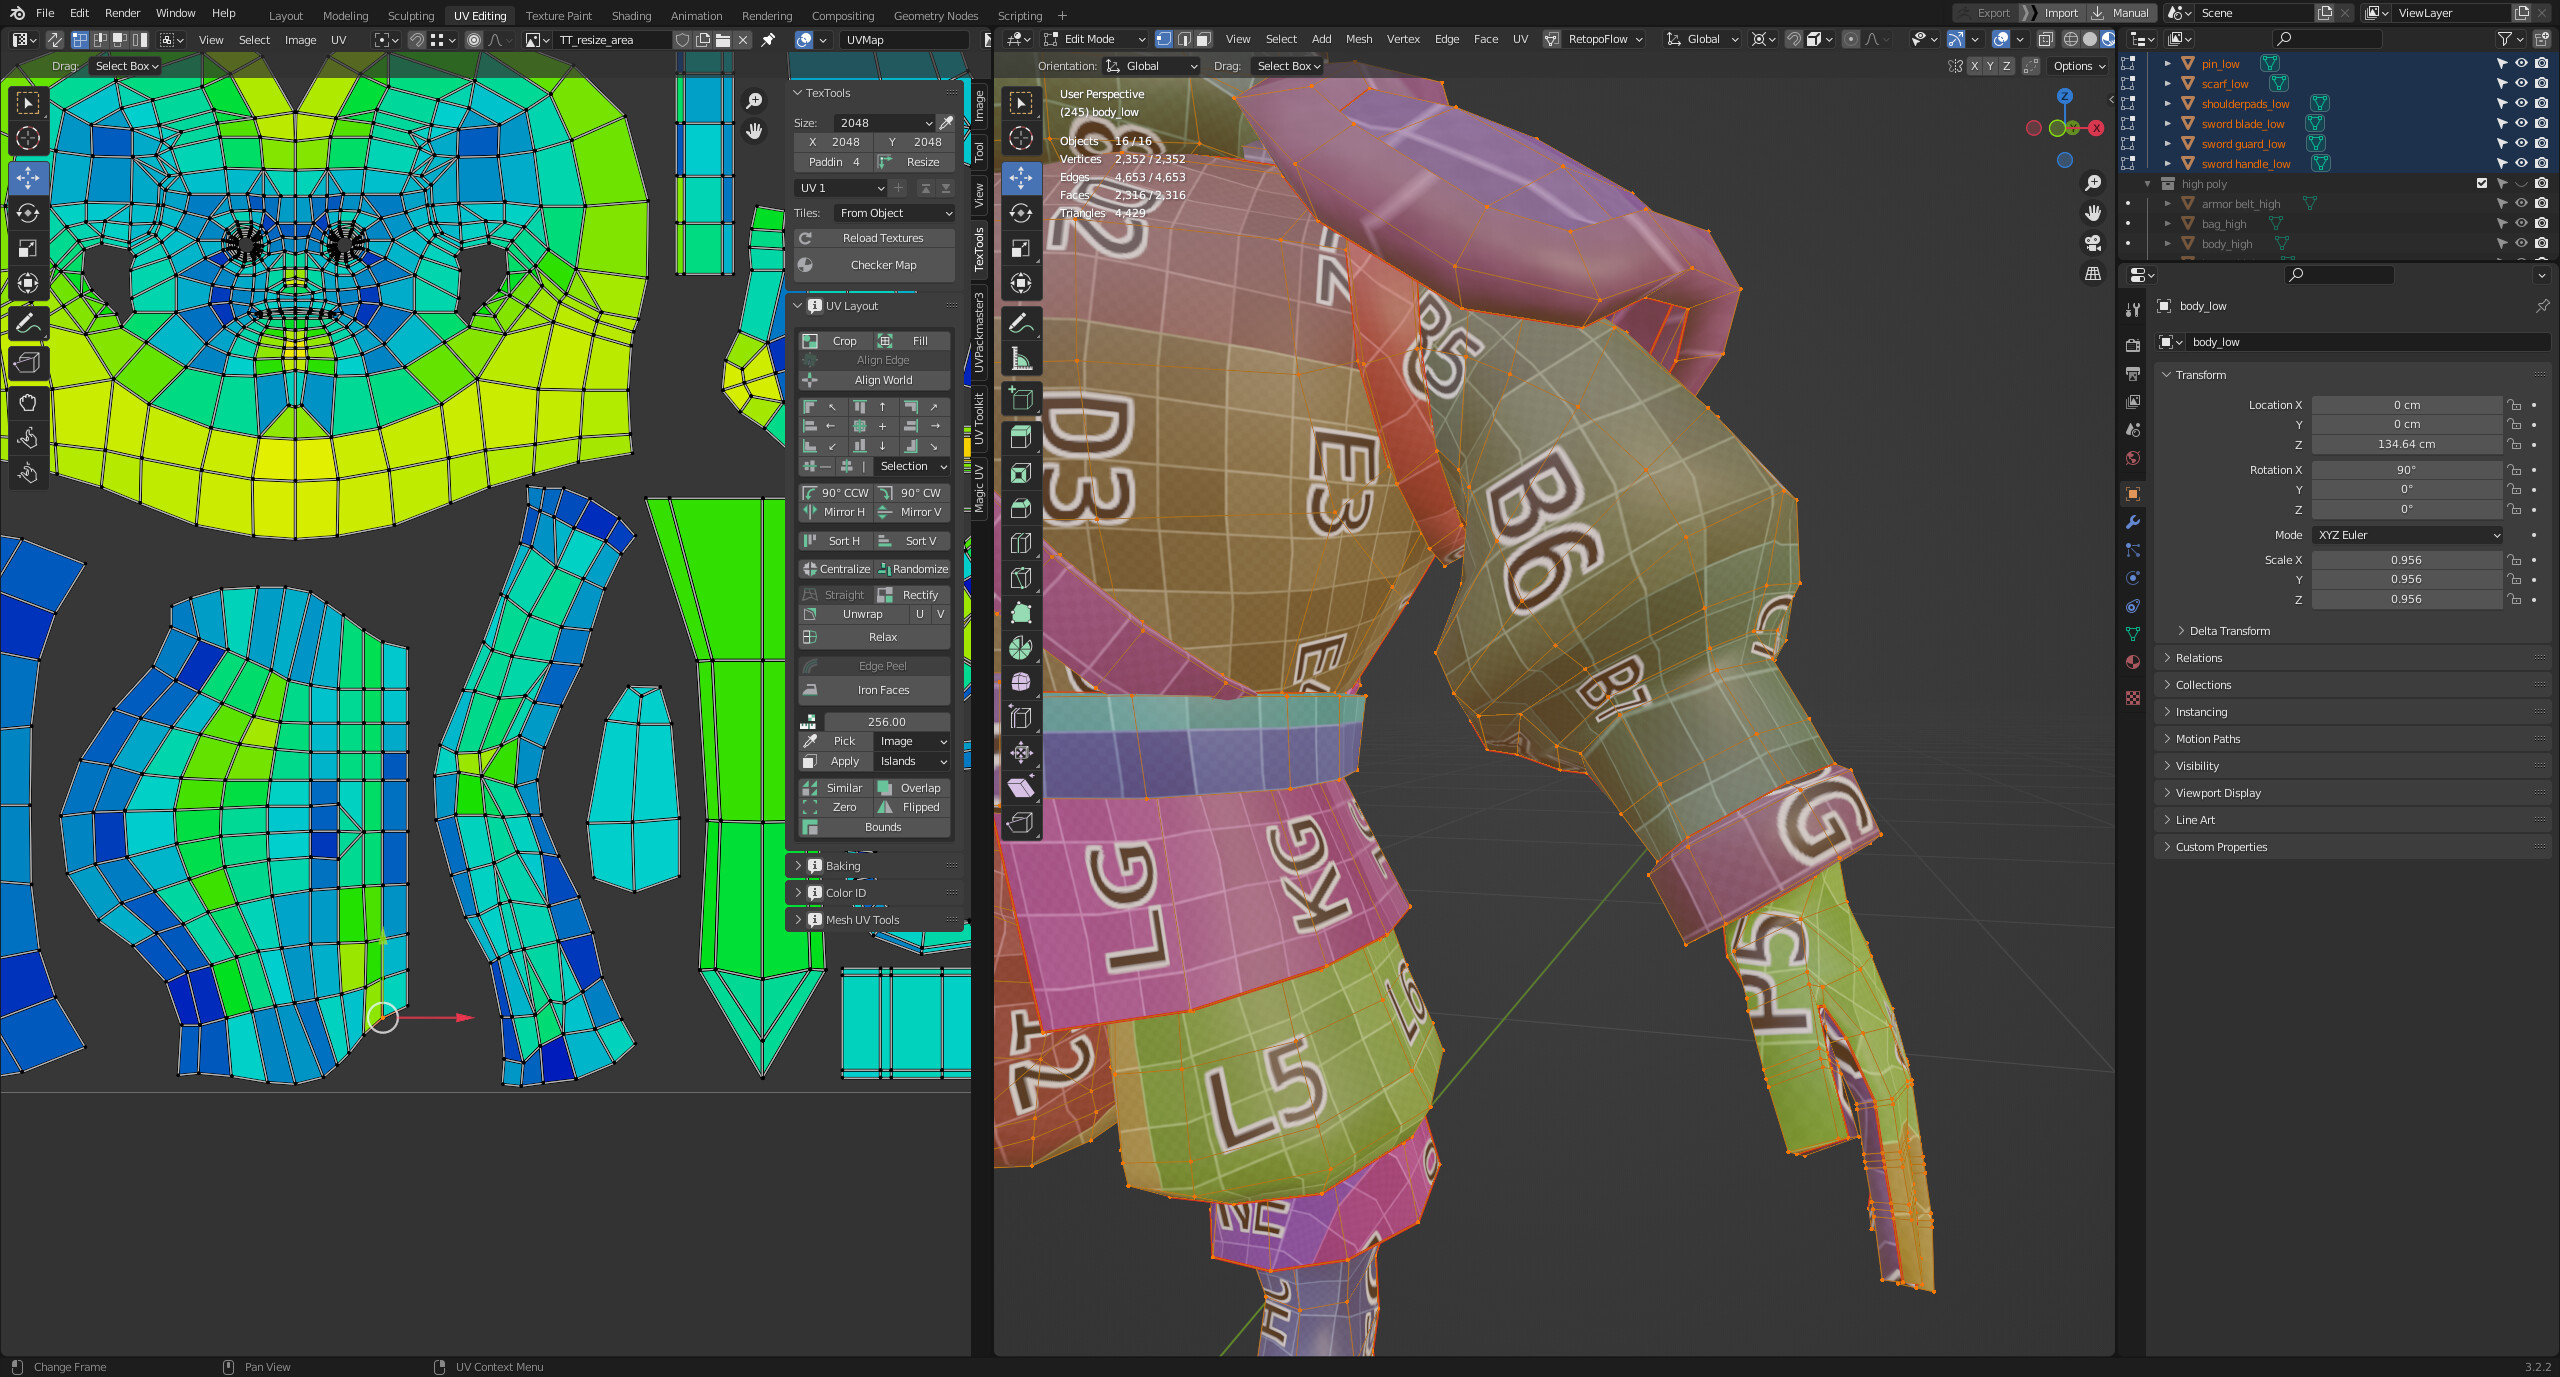
Now, I’m currently in the stage of unwrapping, fixing and packing all assets. Here’s what I’ve come to so far and I’d like to ask if it’s good enough.
Do you think this packing as well as unwrapping in general is efficient? I was told that I shouldn’t worry that much over the checker stretching but still?
Hehe so i must reply first … if you use a simple numbered pattern for UV investigation (blender generated or any other) it is a got idea to show this in the UV editor also… (the stretching informations isn’t soo usefull in my opinion…).
Lets say you wanna investigate the boots… so there is a line not in the middle of it… hmm but which part are the UVs for ?? You may even use a bigger texture than 256x256 (i guess… because of the A1 A2… oh now i see C2 on the head so 512x512) to see a bit better where what is going to which palce in UVspace… if you do want to use such smaller map (game char…) than this slanting may lead to some weird texture effect (?)
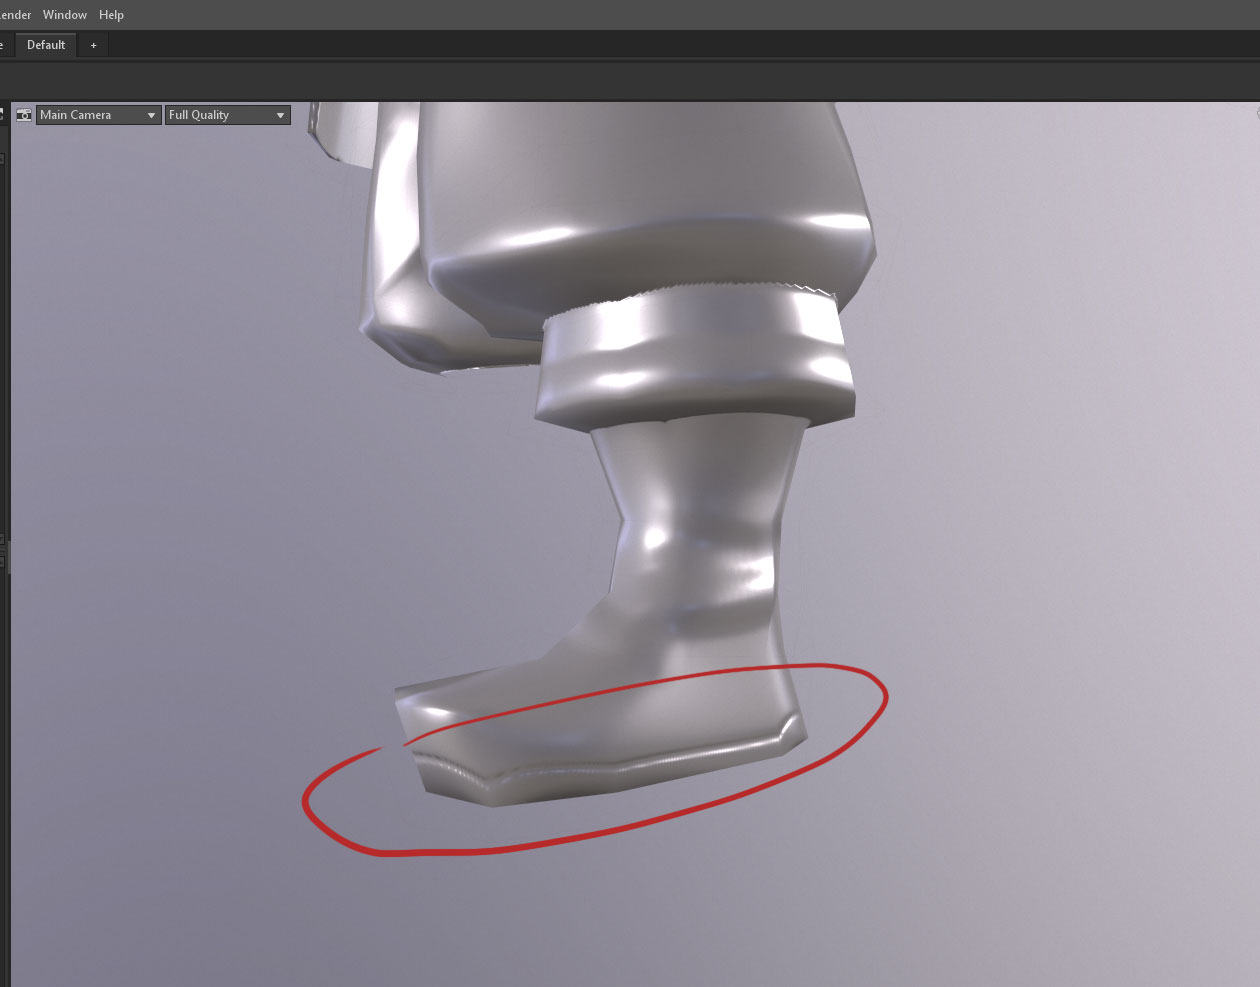
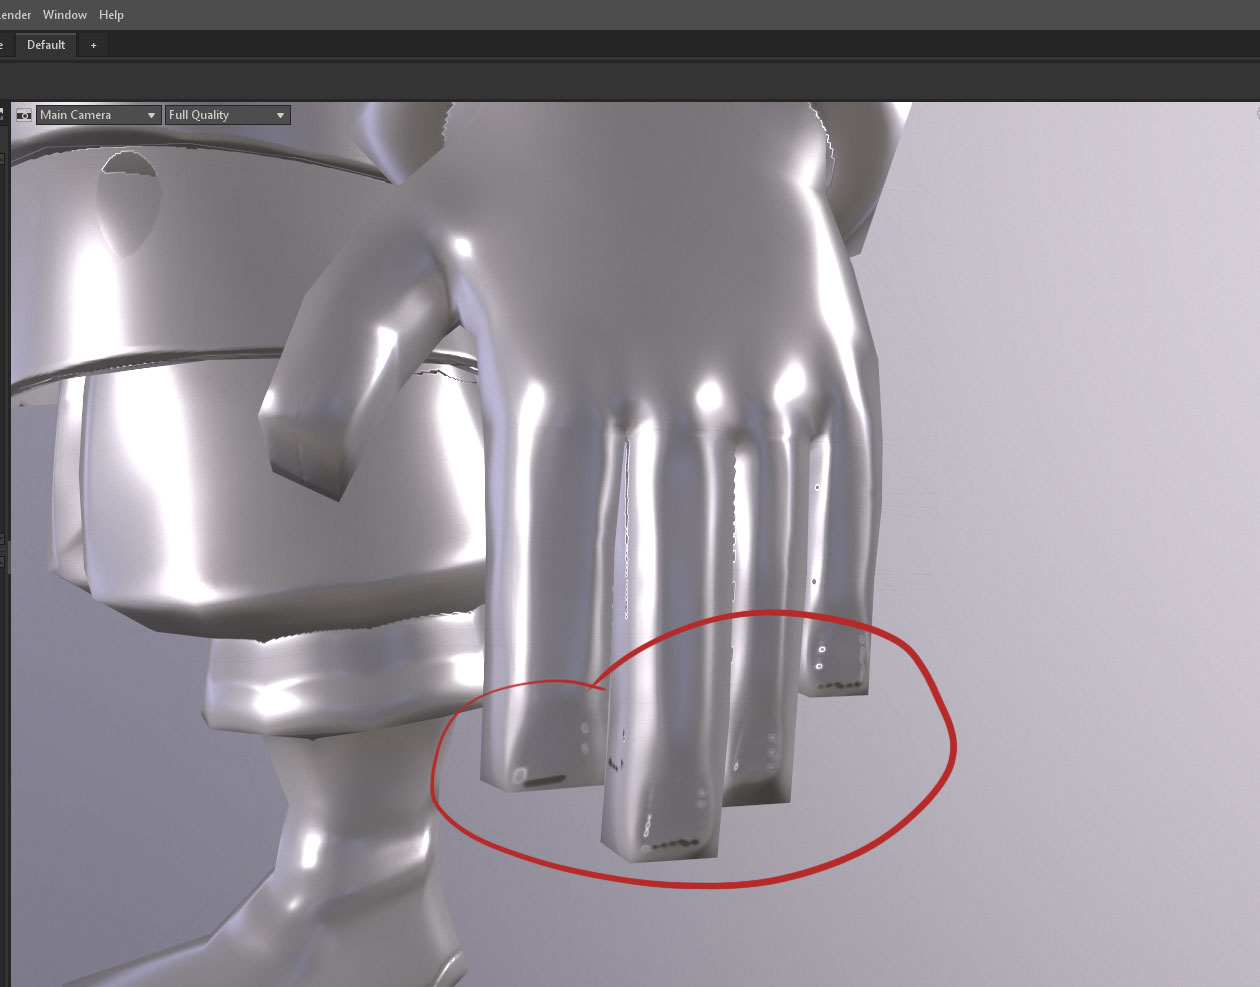
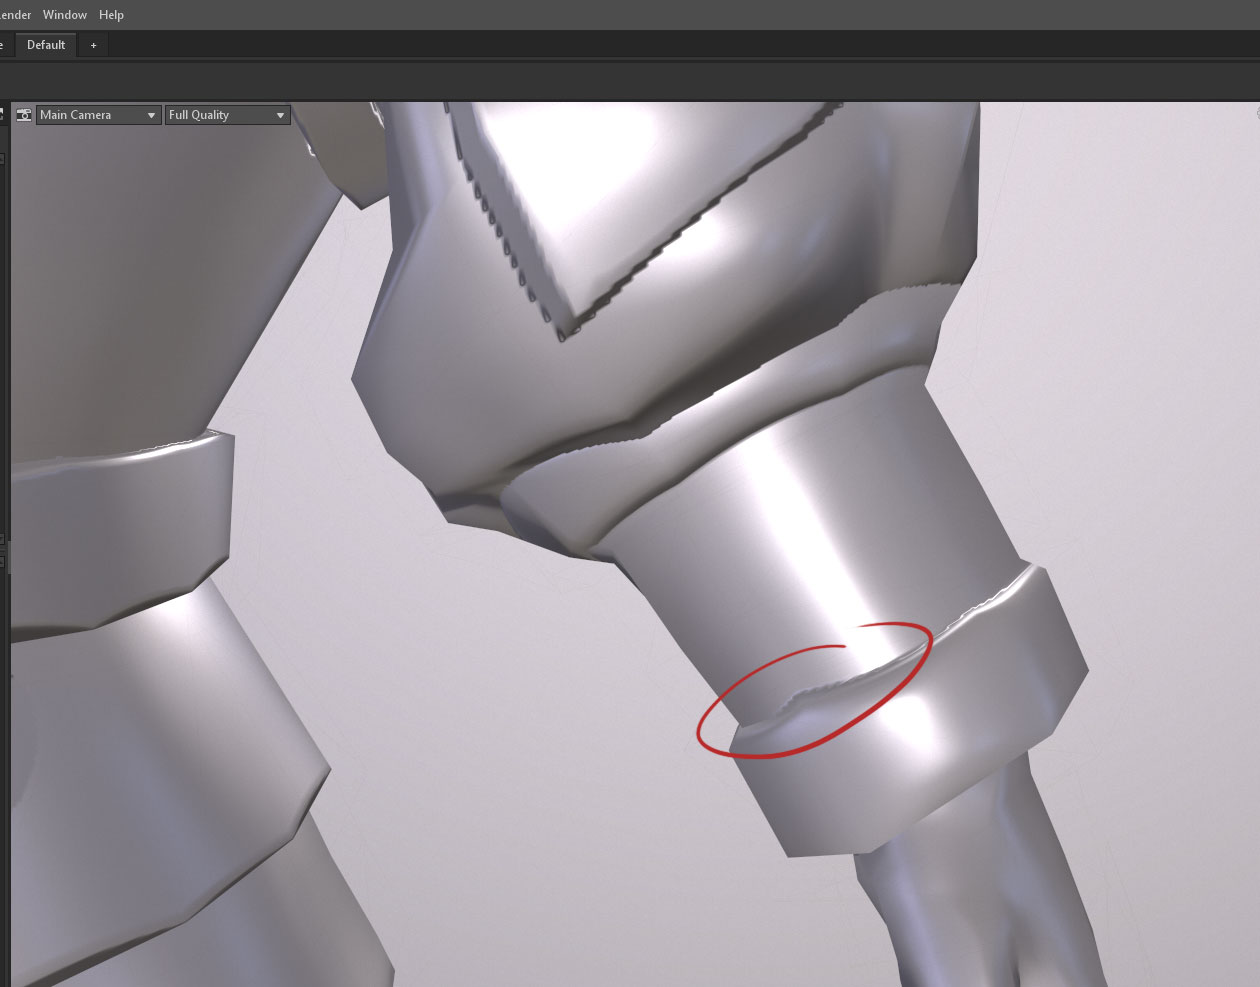
I started doing test bakes and I decided to do so with the most challenging part, namely the body, and what can I say… It’s beautiful. There are very nasty baking issues that I’d ask for some help from you folks to advise on how to fix them.
Note: I hope I’m not breaking rules with those Toolbag screenshots?
Unfortunately, there doesn’t seem to be any baking anti-aliasing. So to reduce the “jagged edges” issue, you’d probably want to bake at two times bigger of your target resolution… at least. And then scale the image down.
Also don’t forget to bake with some “margin” (or “bleed”) so that maps will go past UV island borders for a few pixels. It will reduce artifacts at seams a bit. http://wiki.polycount.com/wiki/Edge_padding
For distortions, you might need to bake with support edges since you’re going from hi-poly to very low-poly…? Maybe.
As to the support edges to fix those distortions, if I understand correctly they are only meant for the baking, right? In other words, they won’t stay on the actual low poly after I’m happy with the bake results?
Yes, you can make a copy of the mesh, add the edges, bake to it, and then discard the copy. In theory.
Can’t say I’ve ever baked with this method though…
I also read that this could be a way to go, however, I’m not sure what would happen when the model gets into an engine. I feel like there might be issues in there.
Why though? The “support mesh” stops existing after you done with it - it just can’t affect anything, and the UVs are untouched. There should not be any changes to the final mesh itself.
Also, if in doubt, you can just bring the mesh with some bakes to the engine and test. Then go back to editors. It doesn’t have to be a linear process.
(again you are overthinking this… ) the slighty modified mesh is the “high poly” version… but just not sooo high as used in ever other high to low poly bake process… and toolbag… what do you think it is made for…
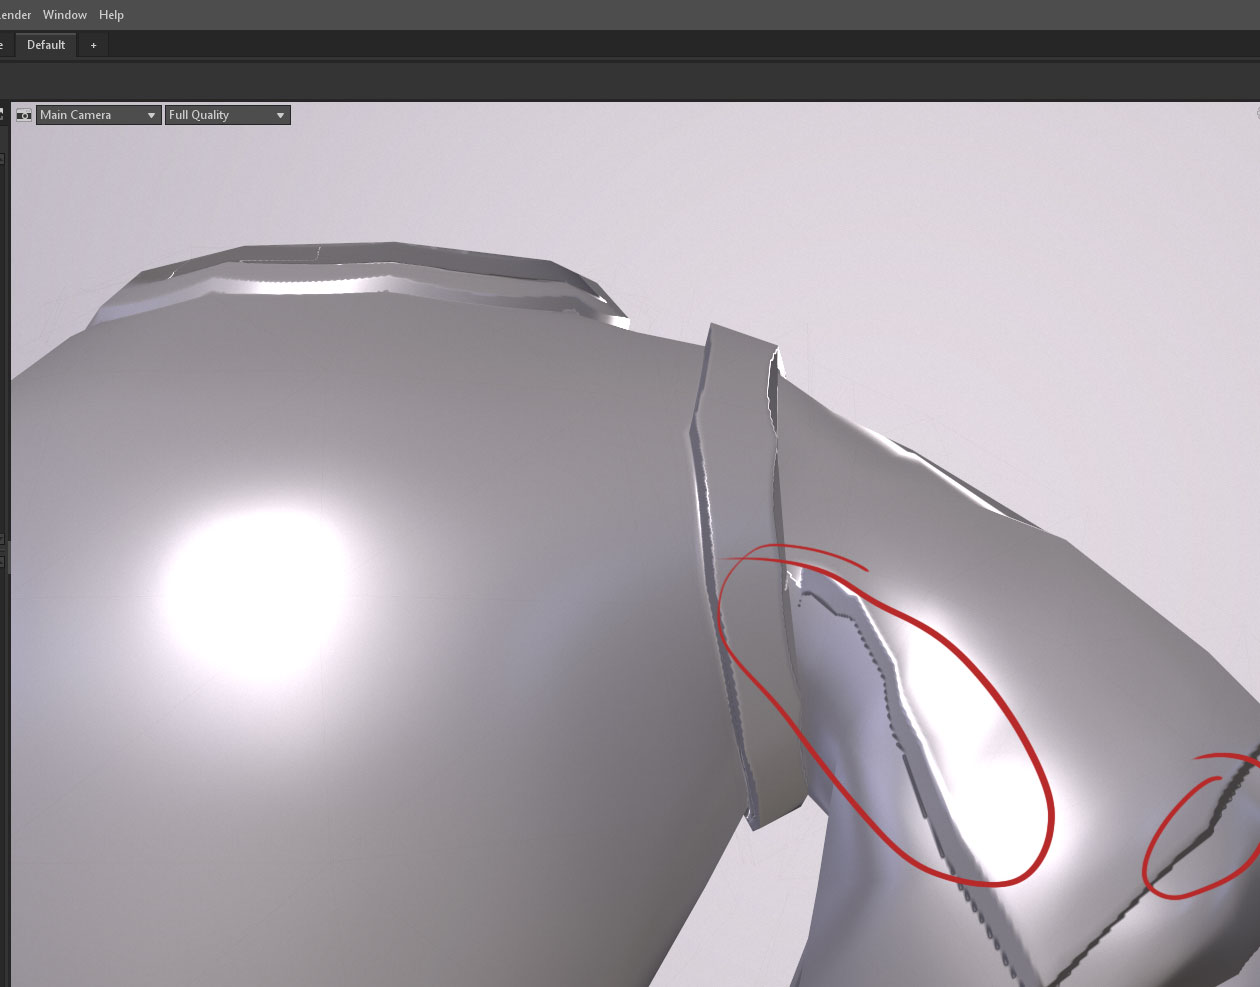
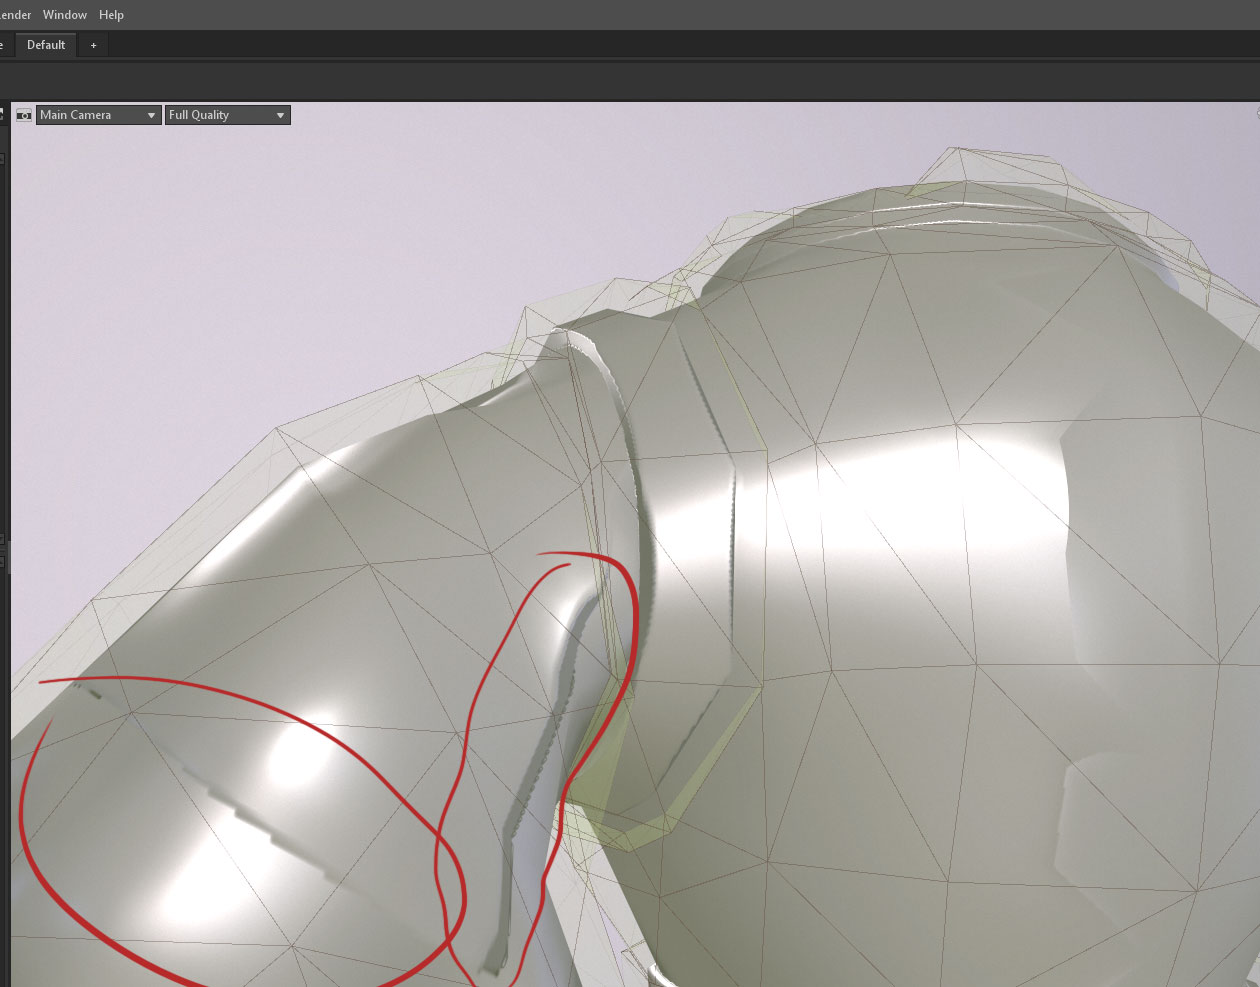
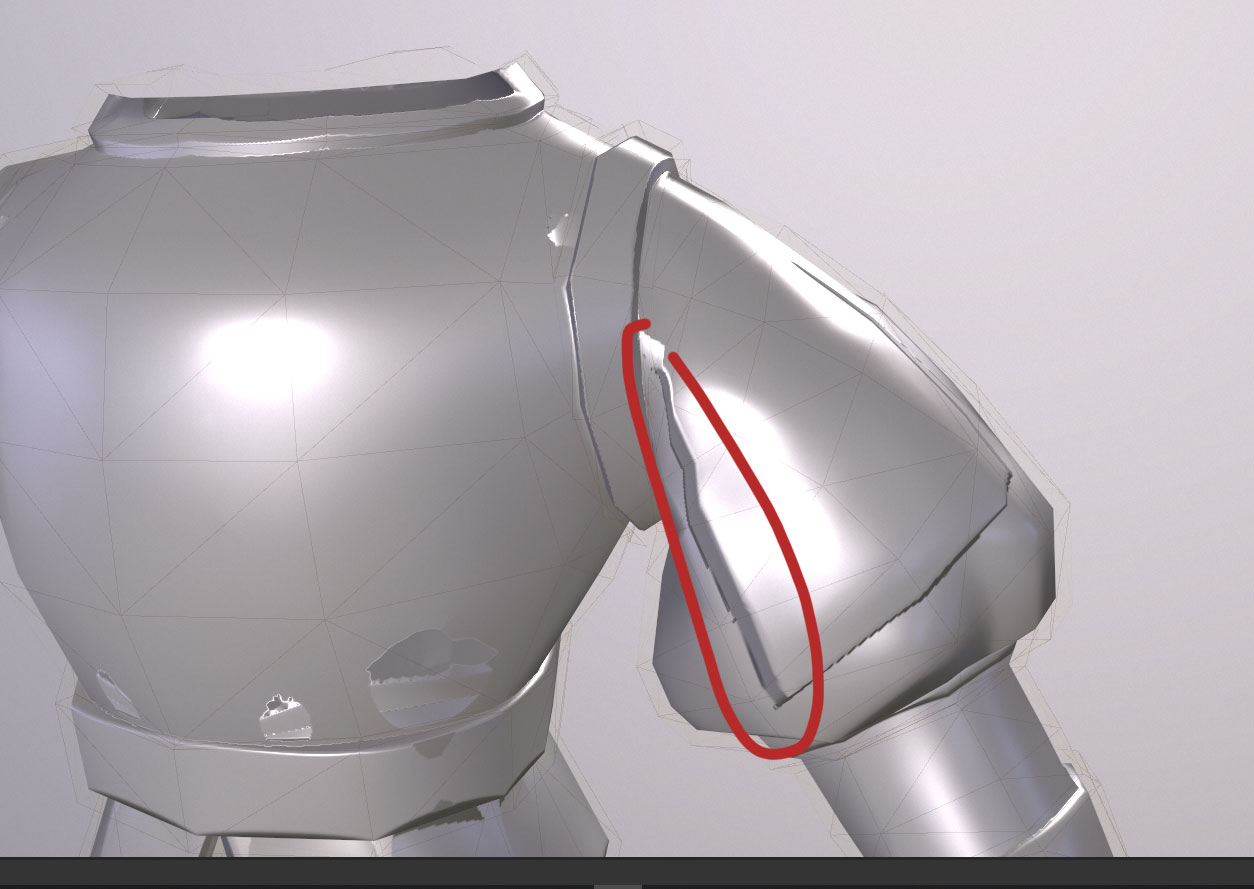
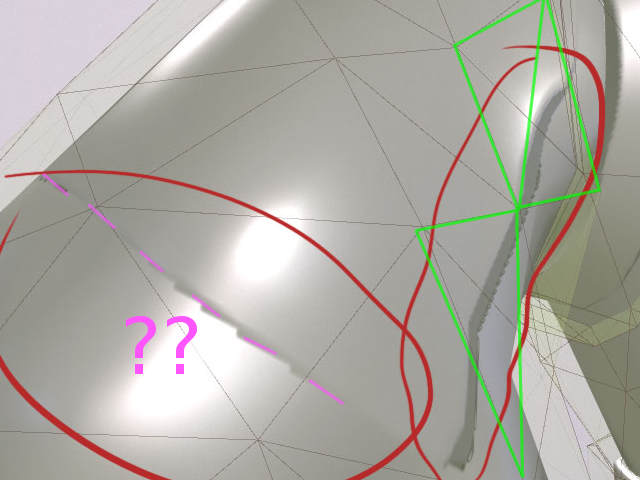
No matter how I adjust the cage, straighten the UVs, added supports and so forth, I still get that wavy effect on the sleeves, which I cannot fix. Any ideas what else I can do about that?
Here’s another one: to make some lazy pseudo highpoly for doing normal map you could use a subdivision modifier on top off a simple subdiv modifier… but then you have to thing about you triangulation… or but not… meaning using quads as base… see here (explicite nono smooth for presentationspurposes):
There’s no more geometry on the pink side you noted nor overlapping UVs. I really don’t know. Might be a triangulation issue, not sure. Even if I was, I would not be certain how to tackle the problem.
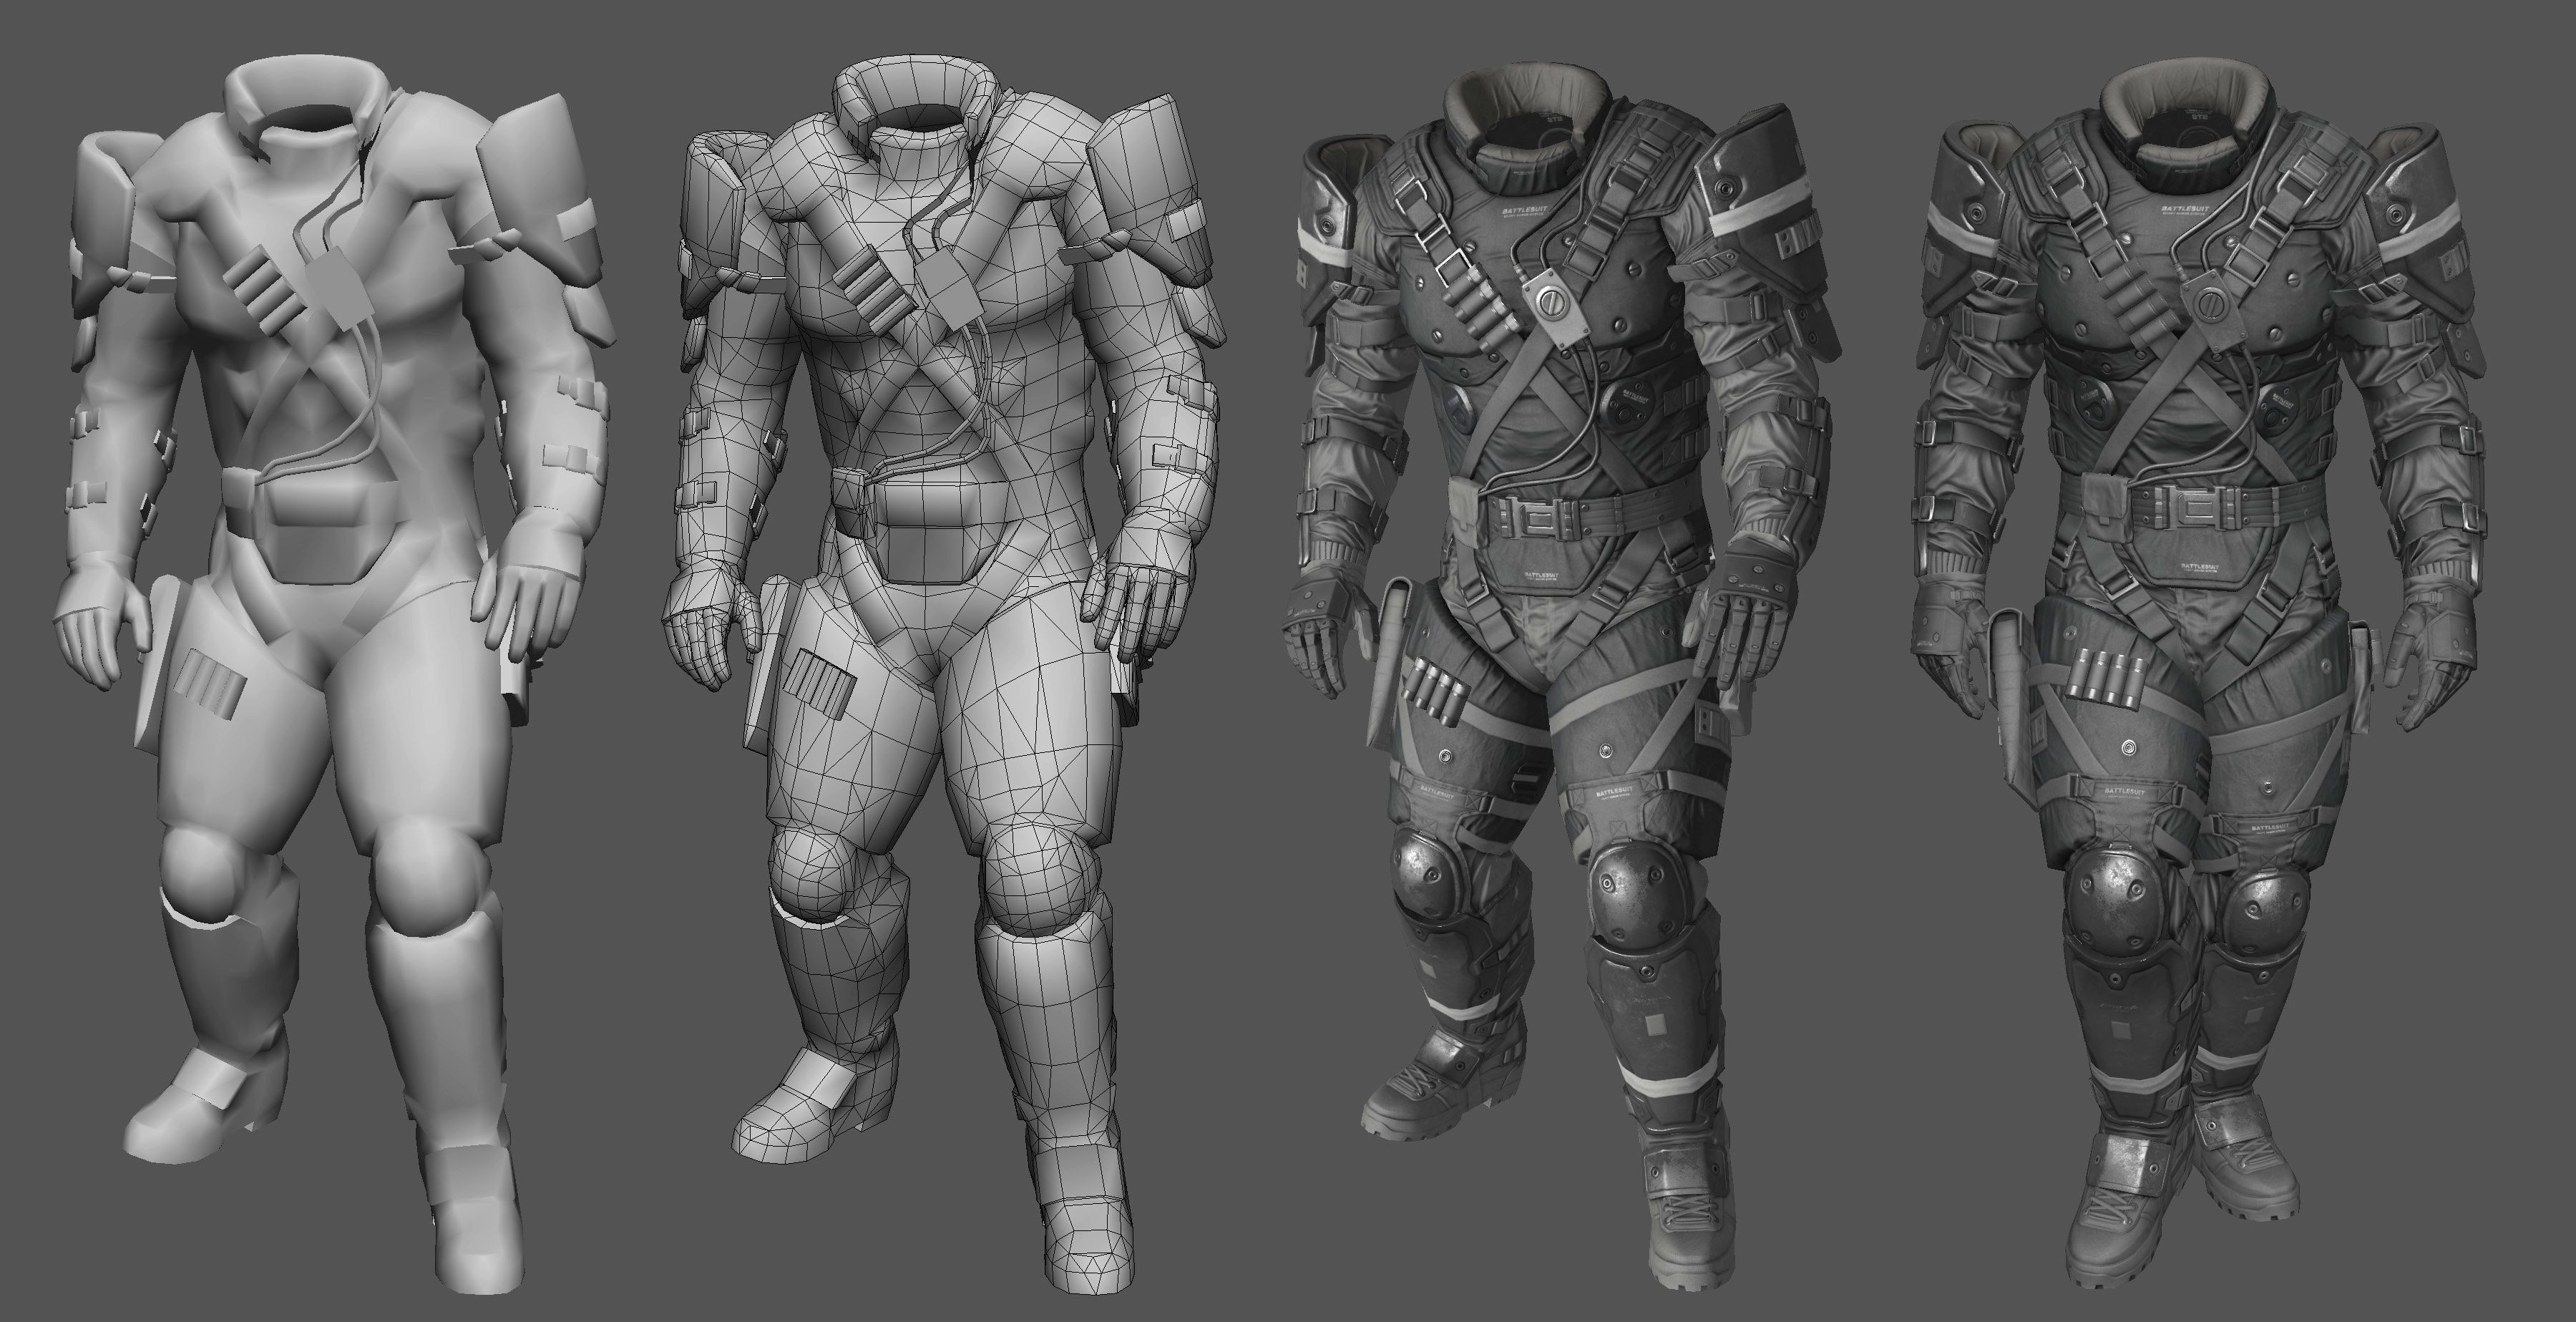
On the other hand, see this ref from Metal Gear Solid 5. The body is extremely low poly, triangulated for the game engine, obviously, and it packs so much detail, which is beyond my comprehension how it is so accurate and tight.
And you can see that the silhouette of the model is… modeled… and having a closer look at my green added marking i do now see: you are faking some “1st order geometry” by baking… this seems to missmatch too much… sometimes for those (very) low poly model this is direclty done by hand painting the details and painting the illusion of depth (like a painting artust would usually to in an 2D painting) without normalmap… like for example here (very random ) Arabic Ranger Model and texture: ALIONA LIUBCHUK…
You also can see on the Artist website who did this MG5 ref (ArtStation: Csaba Molnar)… his modern combat weapons do have the topology to make a fine silhouette and the rest is texture (maybe also even no normal or bump…)
You’re right, man. Now that I looked that super low poly of the Arabic Ranger, it makes the most sense to go for hand-painting those details. Great idea and thank you for the help.
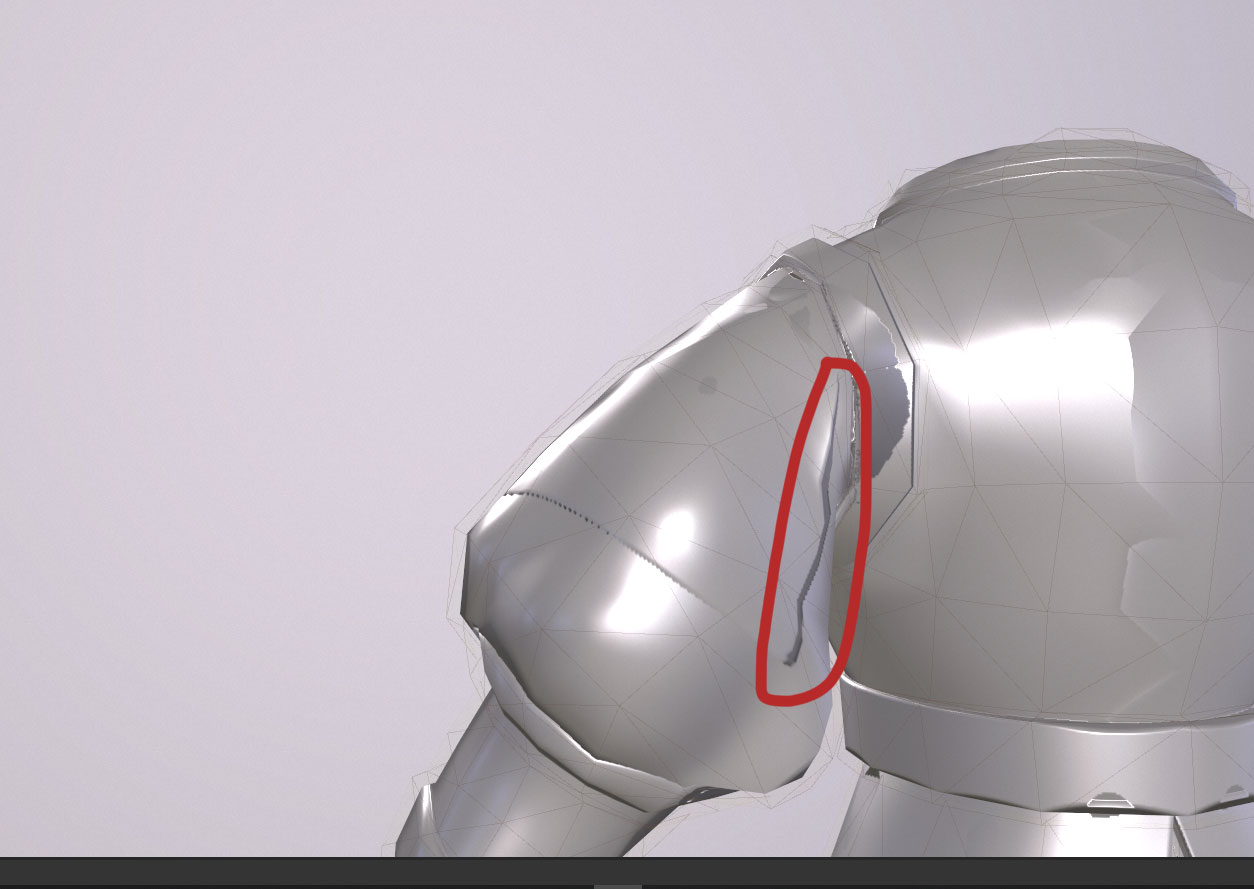
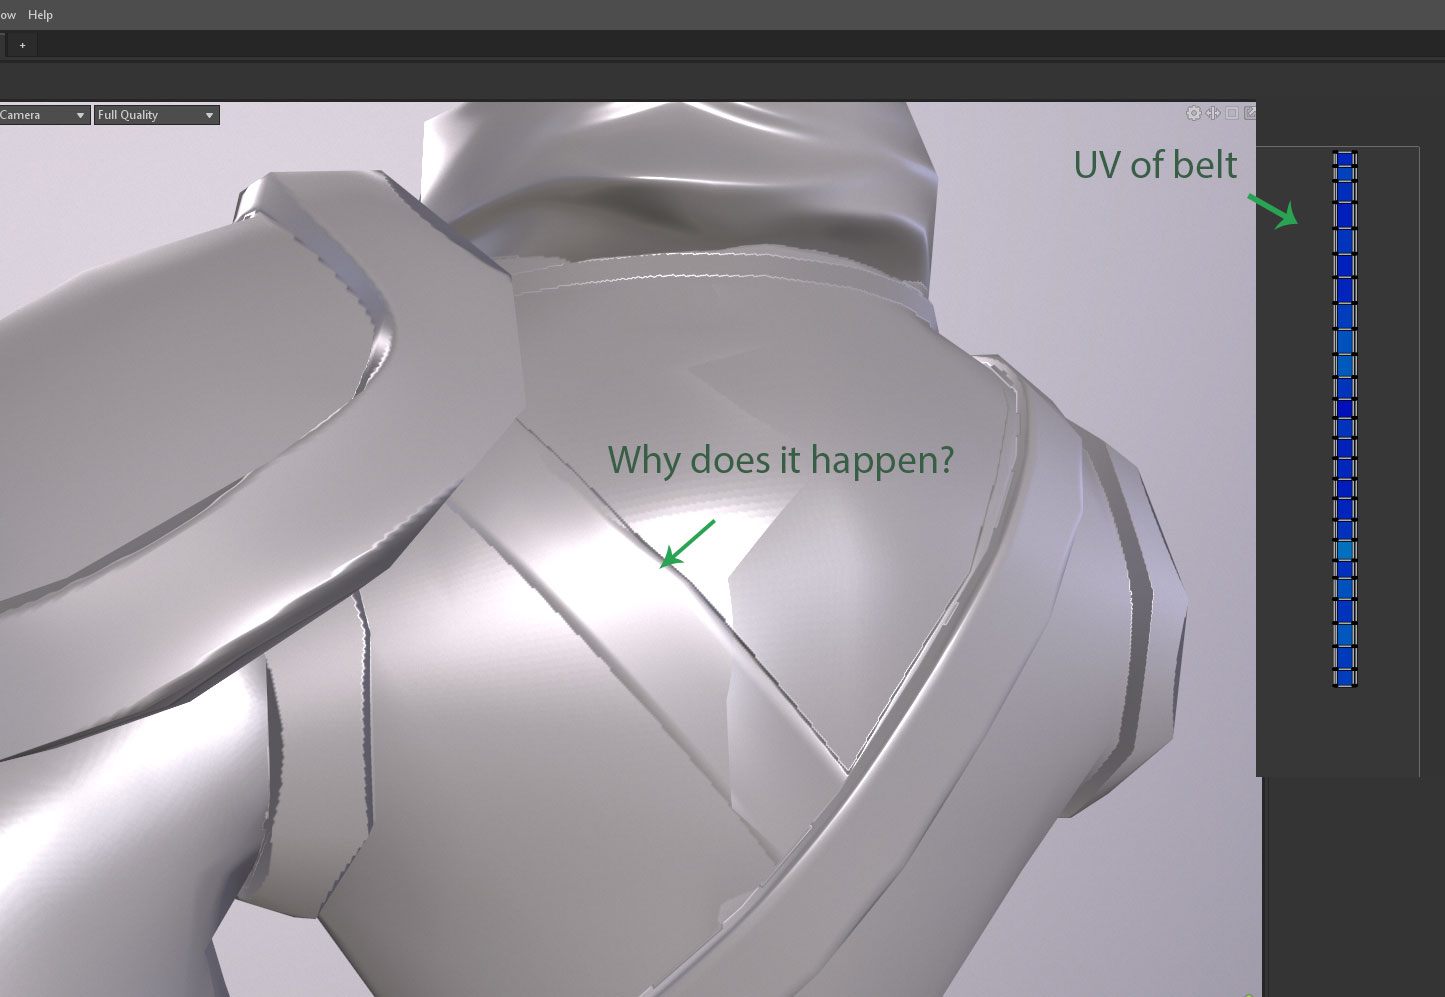
I finally returned to baking trials and errors and there’s hope in the end of the tunnel, however, I bumped into the following issue when I made my bake:
For some reason the belt on the armor (which is a separate object, not integrated to the body) gets reflected on the normal map of the back side of the armor. If I adjust the cage it can disappear but still I don’t understand why this happens.
If you have a belt as geometry in your highpoly and bake to the normalmap of you lowpoly armour plate then it will compute the normals for this belt onto the armour plate… that’s what baking is for…
If you have a special belt object (for in game cusomization or so) with low poly model and high poly details then you should bake this seperatly or should bake your different custom belts as different normal (and textur) maps to change them in game…
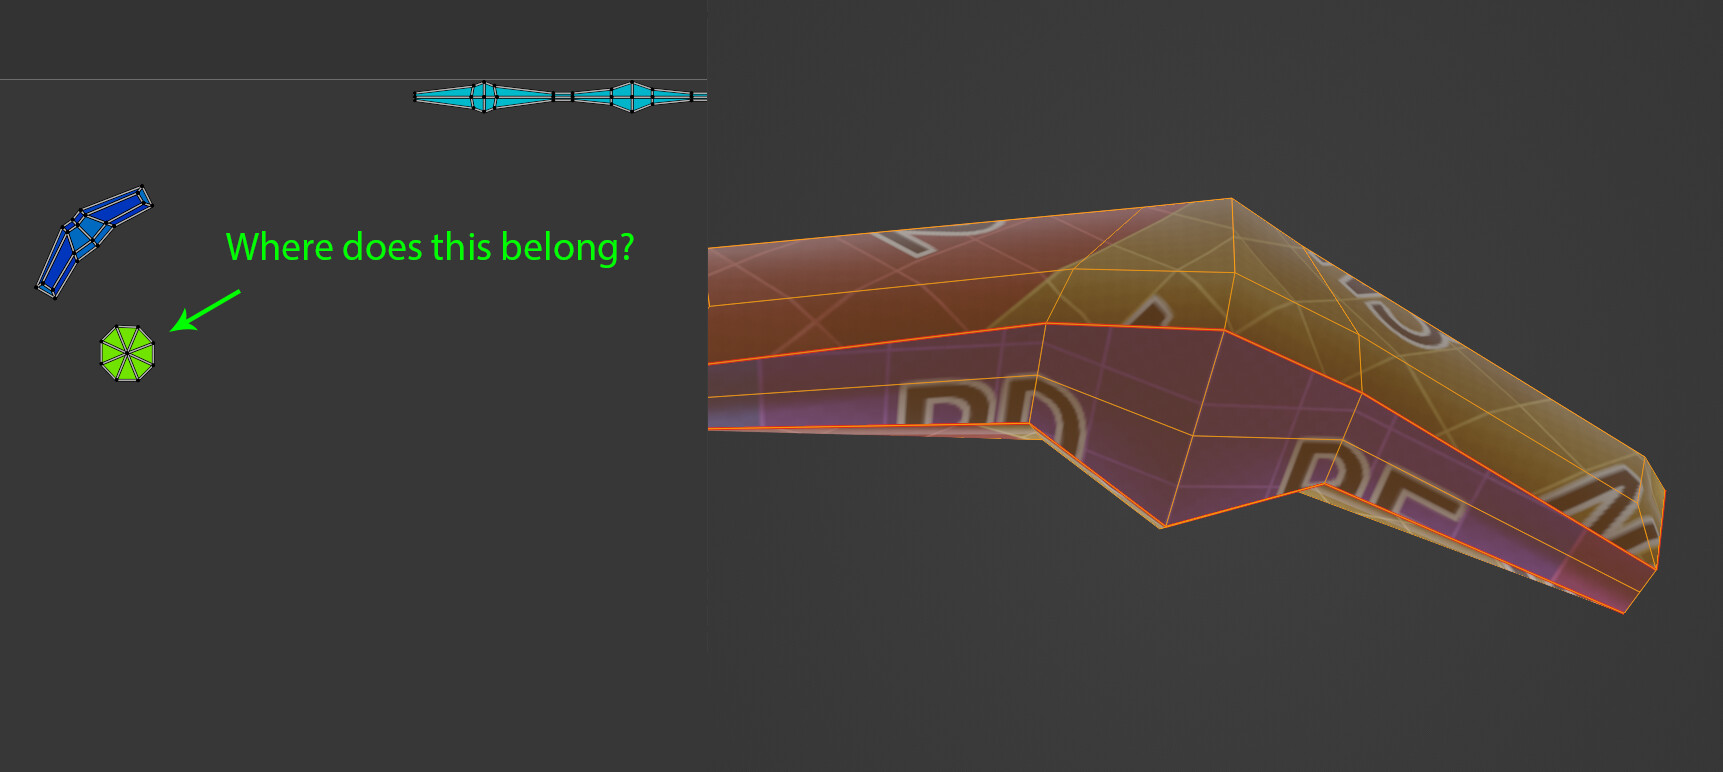
That worked itself out - it was a weird projection happening that I managed to fix after re-baking again a few times. Anyway, I now found a ‘rogue’ uv island that seems like it doesn’t belong to the following object. Check this out:
I don’t know what is called this part of the sword (I call it ‘guard’) but this circular UV island paired with the rest doesn’t make sense.
I checked all other objects to see if it corresponds to any of them but it didn’t. I also unwrapped again the ‘guard’ object and this circular island remains paired as though nothing happens…