Pablo worked on a flash overlay for object switching.
That is indirectly related to colors.
Currently, there is a Fade Inactive Geometry overlay to grey out all meshes except active one.
That is a problem if you want to see right colors of those meshes.
So, flash overlay happening when you switch to another object will be a substitute confirmation about active object you are painting on.
Object’s switching is a basic feature supported by 2.7x keymap, that was lost by switch to left click to select. It is waiting since a long period in experimental status, now. It should become a stable feature with a pertinent shortcut for Blender 3.0.
But except that, Pablo mainly worked on documenting todo tasks for future dyntopo and multires, and bugfixing during past month.
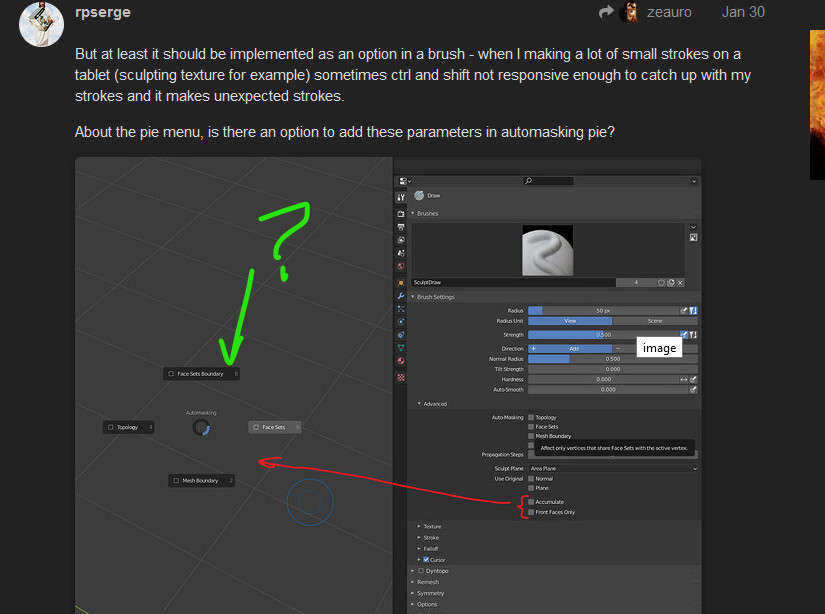
Thanks for the info, guys. I will have to be patient then. There are still a lot of things that have to be sorted out. Hopefully looking forward to when they get added to Multires
Feature has not been added to sculpt-dev branch or master. I just saw videos. I did not test the patch.
I thought there will be an option to turn it off in Overlays popover.
It is possible that Pablo did not created it, yet ; but will do that, later.
I think I see what you mean.
Psy-fi who developed the feature was not ready to make so drastic changes to sculpt mode that Pablo did.
Implementing this, as a stroke method, was allowing its use with all brush deformations without creating a new tool.
But it has disadvantage to force user to reconfigure brushes or create new ones, each time, user wants to apply a sequence of several distinct deformations to a spline.
Old workflow is several stroke methods per brush deformation.
Pablo started to change that.
He brought the idea of several brush deformation modes for certain brush tools.
And he created a Mesh Filter tool where user changes filter deformation mode.
You can use a curve stroke method for mask brush, invert mask and then, use several Mesh Filters.
Original proposal of Pablo contains the idea of brush nodes.
A brush deformation defined by nodes could correspond to a sequence of several current ones.
If Pablo makes that a reality ; just using curve stroke method for a brush with brush nodes would be equivalent or more powerful, than a dedicated curve tool able to switch brush deformation mode.
The building process takes a while (usually about 30 to 40 minutes), and sometimes there are too many errors, but if there are few or no errors, the new build will automatically appear in the Experimental Builds page.
Wow, nice. But wouldn’t it be better to leave that to devs?
Democratizing that tool will increase BF servers workload I’m afraid.
…I myself was almost starting a build “just because it’s possible”
I guess if the system is open to the public, the server should be capable of some load.
Building a new version is only sensible when something significant has changed, such as new tools or a new Master merge into a branch.
Very often devs add and change things without making a new build available to the Blender users, sometimes for weeks. I guess that’s also because a build takes time.
New versions can also introduce new bugs that can be discovered and reported to the developer(s) before the branch is merged with the Master alpha. In that sense you’re an early Blender alpha tester.