It seems that the ShaderNodesExtra addon made by @ Secrop has Vector Displacement Bake too.
Just read that in the latest ZB update “Chisel 3D and VDM (Vector Displacement Mesh) brushes now work with Sculptris Pro mode, providing an easy way to build out your base meshes using pre-sculpted elements.”
Nice.
7 Likes
That’s a massive improvement right there… 
1 Like
IMO, choice to change all 2.79 brush panels into subpanels of Brush Settings panel was a bad idea.
Brushes are not like modeling active tools.
They deserve their own properties tab, distinct from mode options tab.
That way, we can retrieve ability to order actual subpanels as panels and make their display more efficient, by making subpanels from groups of settings they are containing.
For example, brush texture panel could only display miniature of texture selector. Mapping , Offset, Size of brush texture could be subpanels.
With one tab dedicated to mode options and another one dedicated to brush settings, that becomes possible to have an automasking panel and a dyntopo panel in both tabs without confusing what settings are relative to mode and what settings are relative to brush.
Problem is that is creating a lot more panels that can not be all displayed into Tool Settings Bar as popovers. IMO, in sculpt mode, mode popovers (dyntopo/remesh) should be moved to header like stroke placement/drawing plane/guides in draw/edit mode of Grease Pencil Objects.
2 Likes
Maybe you lovely sculpting people can riddle me this:
Using this brush texture,

how can I get the indicated results -
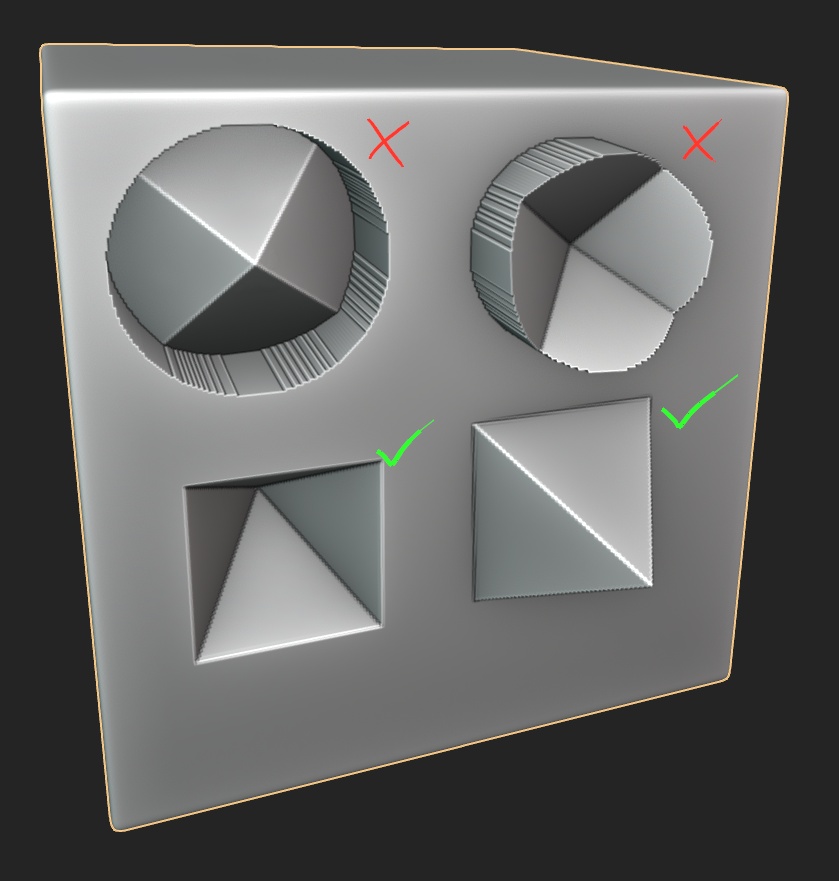
- without going into photoshop and inverting the image and pointlessly scaling it down?
Texture painting has Texture Mask, but for sculpting? Also there’s a color ramp for texture parameters, but it appears broken for images?
I was making myself some grunge brushes, but I find most of my images are in this black-on-white convention for some reason. I don’t really want to go and make a special inverted version of each image for Blender…
And what’s with the enforced circular cutoff for brushes? How do I turn that off and use the full texture?
3 Likes
In the light of Unreal 5 i am highly glad that Blender 3 will get performance boost with hi-poly & other areas/features. Blender for creation, Unreal for rendering(if configured right). Let the good times roll.
1 Like
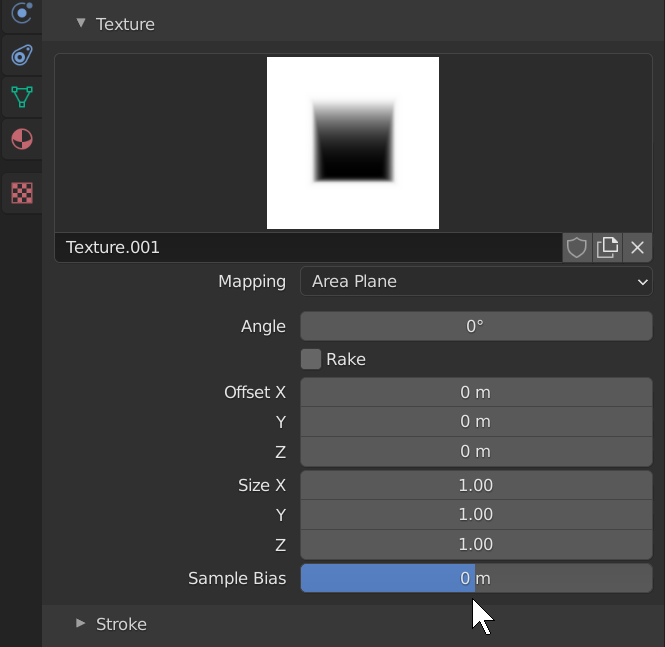
The Sample Bias works! Though I never would have guessed it from that name, haha. Thanks.
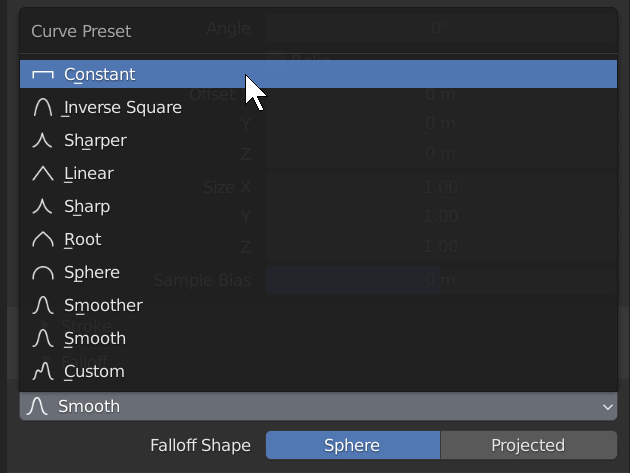
However, we’re still only halfway there. I was already using the constant stroke curve. The issue is that it’s circular and cuts off a significant portion of the texture.
You’d think using the Projected falloff shape instead of Sphere would do it, but… I don’t know what Projected is supposed to do. Is it broken?
2 Likes
![]()
You’re right. Tried all kinds of things, but can’t get rid of the circular way of texture application.
Well, nevermind the circular shape, it doesn’t really matter that much, you can use stencils.
Hey Pablo! If you’re reading this, would it be too much to ask for an Invert checkbox on the texture input? 
6 Likes
The sample bias worked for the pyramid, but here’s a more practical case that I still can’t get to work:
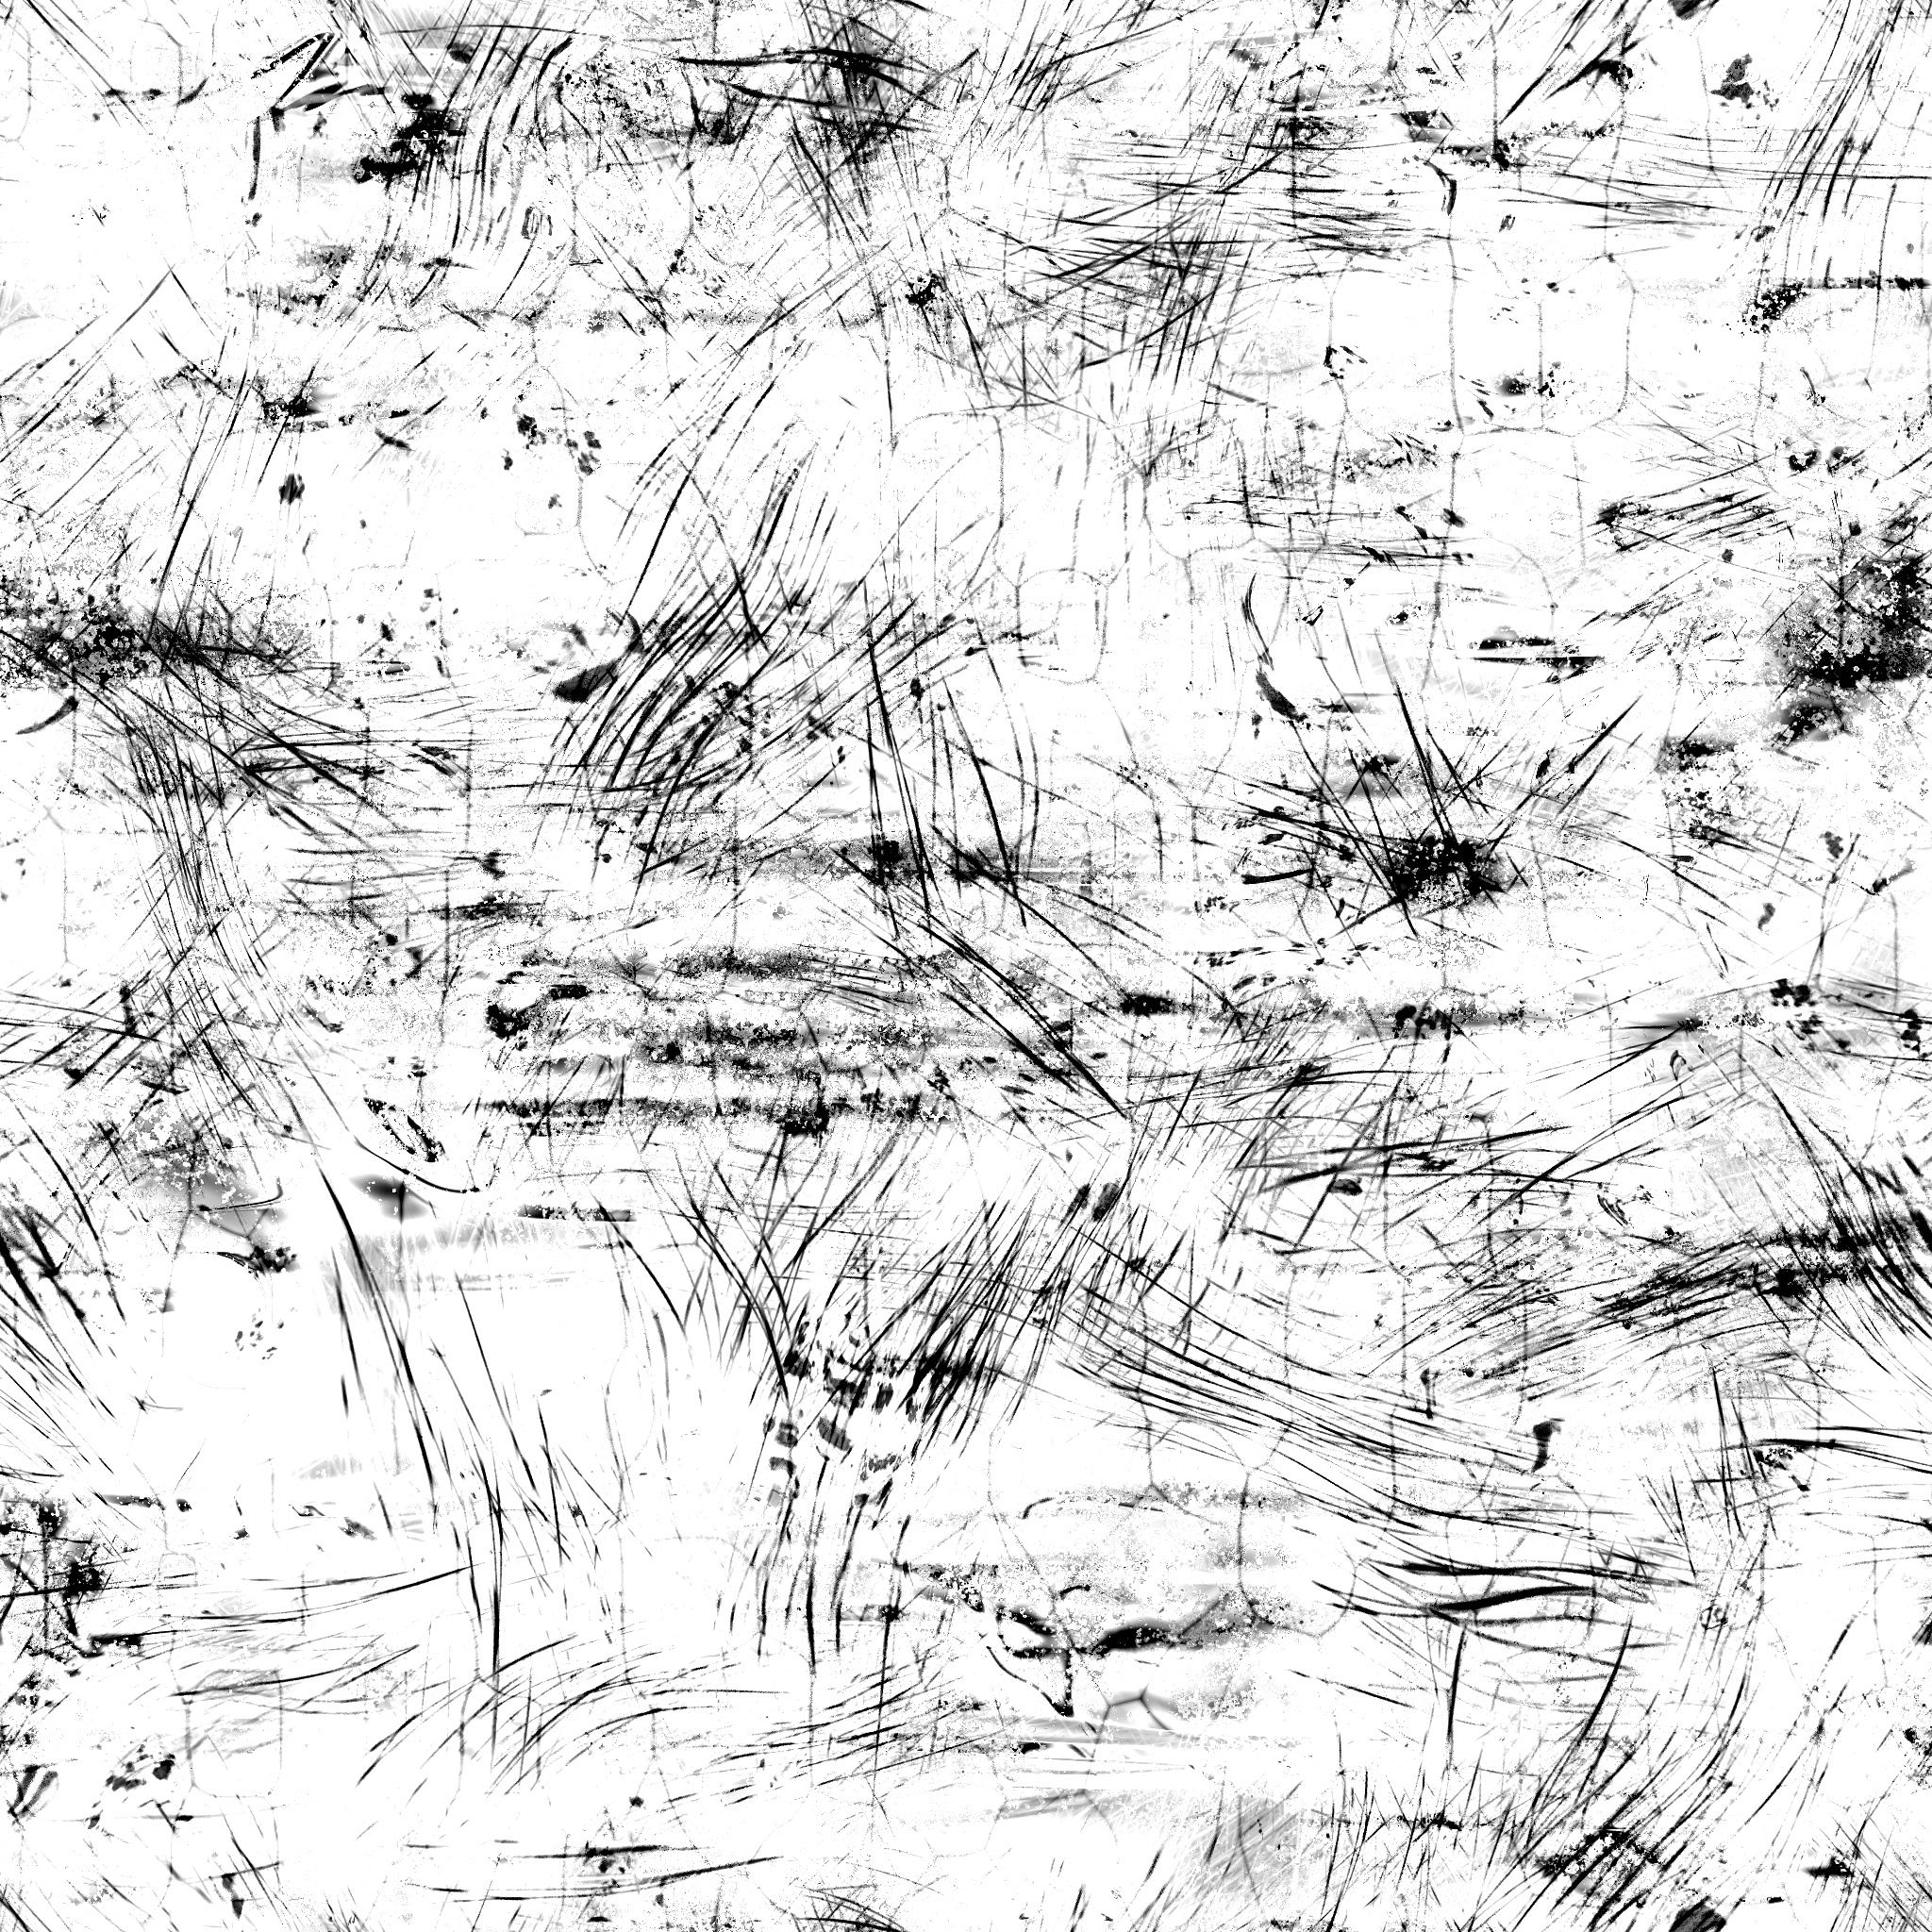
Using this as a stencil, I want scratches indented into the surface, without shifting the surface overall. When I apply the sample bias, I just get a lot of noise.
Then there’s only one solution left… It starts with a Z. 
3 Likes

2 Likes

To obtain something clean, you need several polys to displace per pixel.
Sample bias is generally helping by blurring texture.
An image with antialiasing is giving result without an abrupt change of depth between neighbor polys.
Here, your texture is simply too big with too much too small (1-2pixels wide) details of pure black on pure white background.
That is not surprising to obtain noise.
1 Like
Isn’t this why we have mipmaps?
I’d like to know this as well, every time I use a texture for sculpting I feel I just have to check/uncheck options randomly until something works
Using textures for sculpting shouldn’t be such a hassle, there’s too many options and settings to tweak
2 Likes
MipMaps are making the image looking identical when it is scaled down.
That is not main problem to look at, here.
What is important is the ratio between pixels of Stencil texture and polygon density of the mesh.
Sample Bias is a setting of brush.
That is an adjustment that happens after Mip Mapping which is a setting of Image datablock.
(Image datablock that could be used by Blender Internal engine like a material texture.)
If the pixel of detail of stencil map is smaller than polygon, it has no effect on polygon displacement.
If detail is as large as polygon of mesh, you should expect aliasing effect.
If detail boundary is passing from black to white, there is no depth graduation.
So, poly between white poly and black poly is stretched at maximum.
You need more polys than pixels. That is why this kind of details is generally not done in sculpt mode, in Blender, but through material bump textures.
It is like using a brush with a texture in vertex paint mode. You can’t expect a great result if mesh density is not huge.
2 Likes
Well that just means the texture sampling used for sculpt is naive and needs work. In the mean time you can increase the filter size in the texture properties.
1 Like
Sounds like a serious limitation / bug…
Anyone reported it yet?
Is it the same in 2.7x? ![]()
1 Like