Seeing how good this works and how it keeps geometry untouched I’ll use this feature beyond sculpting. Nothing in my knowledge fills all holes at once in edit mode (correctly me if I’m wrong), so I’ll hop in the sculpt to do that operation once in a while
2 Likes
In edit mode, there is a Fill Holes operator. It is in Mesh > Clean Up menu.
2 Likes
You can also select everything in edit mode and press F.
That fills all holes too. That way you can also be more selective.
1 Like
Close holes in the voxel remesher is more or less a quality of life feature…
On it’s own, close holes has various uses beyond remeshing as some showed above…
Would be nice to have a proper close holes command detached from anything else, imho…
4 Likes
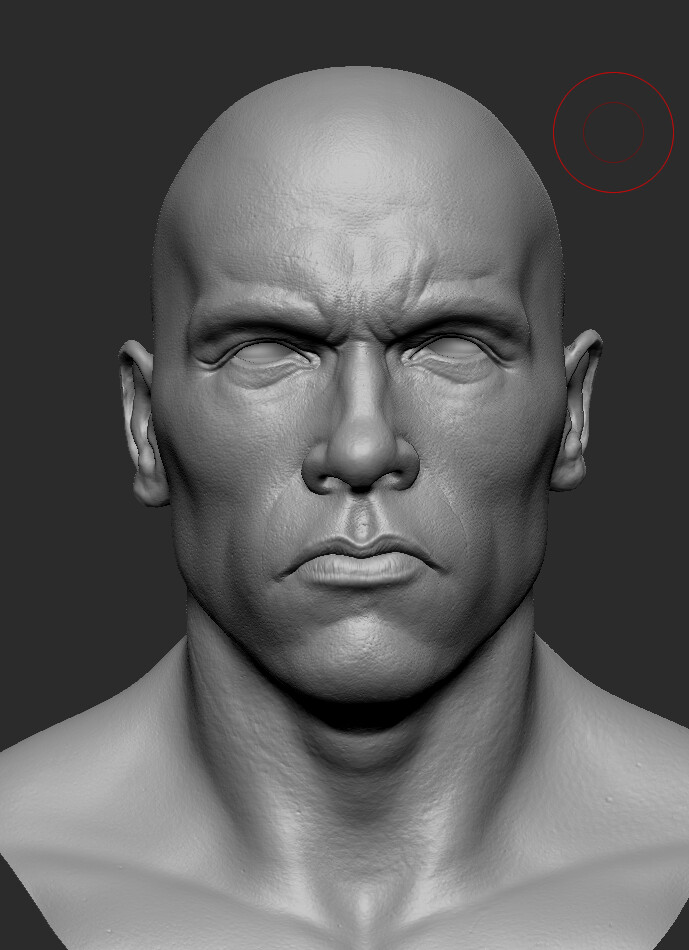
Decided to have another go at ‘head from sphere’ in Blender. Sculpted with the voxel remesher. I’m still finding my feet with the tools, but it was enjoyable to just get in and sculpt with minimum brushes. I’m still not a fan of the matcaps/eevee shading for sculpting, but it’s something I really would need to sort out if I were to do more regular sculpting in Blender.
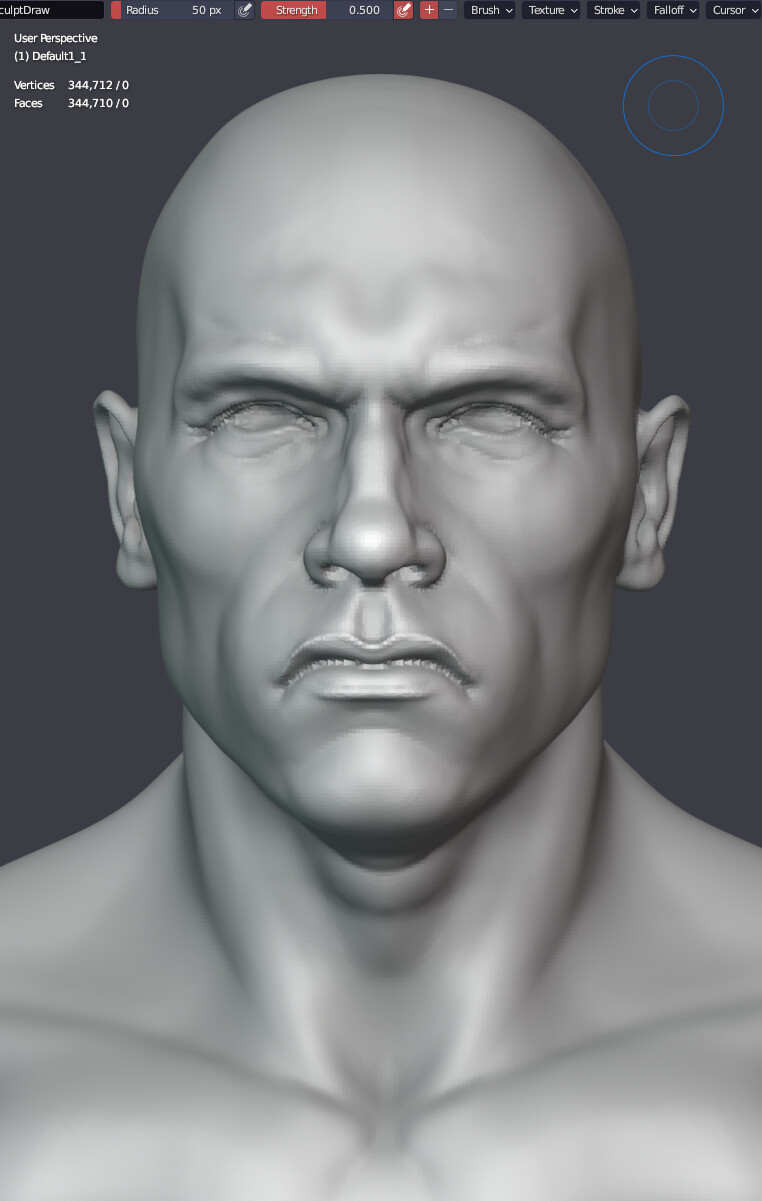
I liked the result so shot him to Zbrush with GoB>transferred to clean topo with Zwrap> still working on the final clean sculpt and detailing.
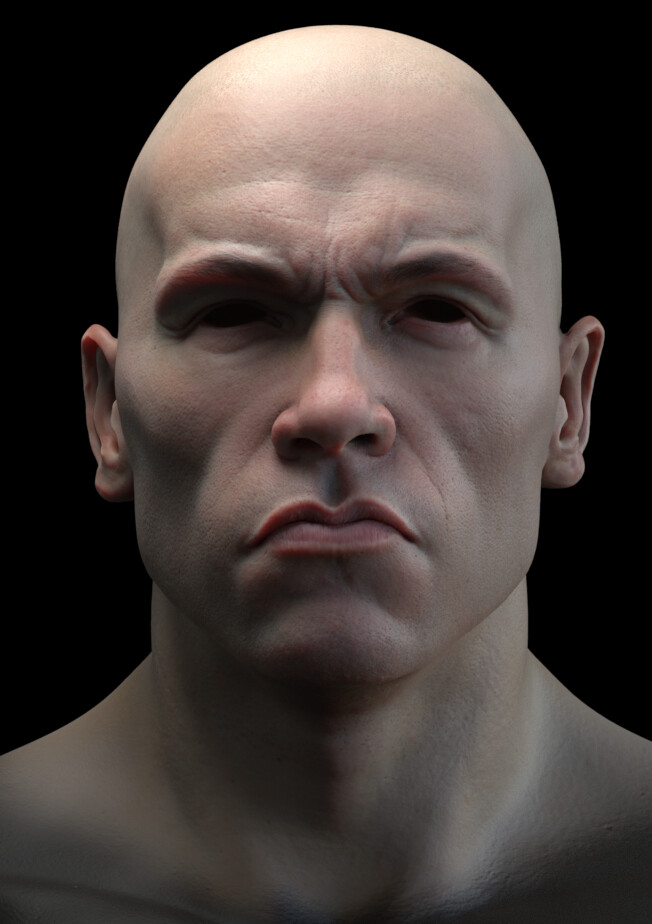
Doing some look dev in Keyshot
19 Likes
He’ll be back!
Great work, as always. ![]()
3 Likes
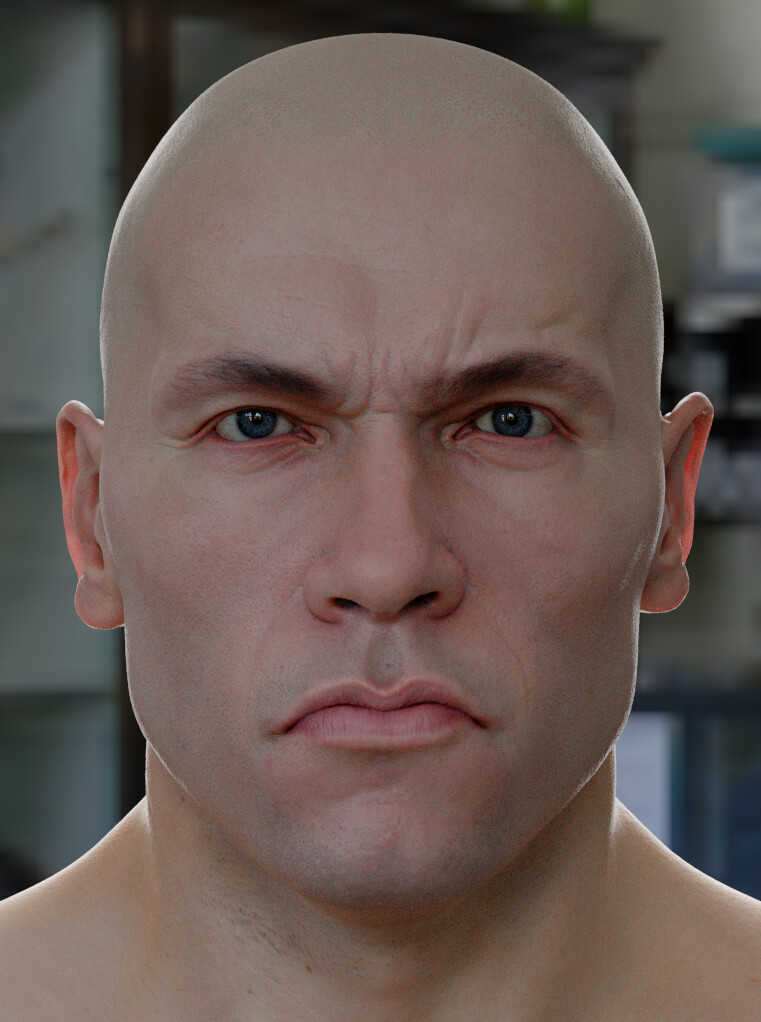
Thanks Metin, I took the look dev into Cycles. Man, Cycles GPU is so much faster than Keyshot. Cycles is crazy fast with the SSS. ![]() I won’t spam any more here. I’ll take it to a WIP thread.
I won’t spam any more here. I’ll take it to a WIP thread.
It gives me an excuse to try out the hair nodes too. ![]()
24 Likes
![]()
Be sure to leave a link to your WIP thread here.
5 Likes
I doubt that he can fix the main issue in sculpting with an addon. The sculpt mode had the issue of brush inconsistency from day one it was implemented.
One of the main brush issue is that disabling the brush size pressure makes the strength pressure act totally differently. I do not know why that is the case. The strength modifier feels like it has an inverse pressure curve of the size curve. When the size pressure is disabled the strength pressure feels super flat (as if there is hardly any pressure control), which makes it very hard to make flat tip brushes that behave naturally with pressure.
It would be great to hear from the dev team about this particular brush design point. Is this a bug? Is it a fundamentally hard thing to fix?
6 Likes
@sherholz is building a new Path Guiding Cycles version, now featuring diffuse and glossy path guiding. Feedback will be much appreciated:
4 Likes
Sculpt: Added vector displacement for sculpting draw brush
Patch: https://developer.blender.org/D17080
RCS proposal: https://blender.community/c/rightclickselect/WqWx/
7 Likes
Can we rename this to “set resolution” brush? I’ve never used it to simplify, only to add more polys. (btw I’m not a sculptor)
I’ll take your word for it. In the past I always feared that doing this had a risk of making at least one magical face of impossibility so I’d always hunt down holes one by one and fill them manually.
6 Likes
One of the main brush issue is that disabling the brush size pressure makes the strength pressure act totally differently.
@kkar I also noticed some pressure sensitivity issues, especially with the Clay brush.
If you can share your settings and report this as a bug with soem video examples, that would be super useful!
Hunting down small issues that hurt the overall ‘Feeling’ of sculpting is an essential task that often gets overlooked and needs quite a lot of testing & feedback.
I’d be happy to collect your notes so they can at some point be adressed.
Can we rename this to “set resolution” brush? I’ve never used it to simplify, only to add more polys. (btw I’m not a sculptor)
@thinsoldier I was also looking into that and it turns out the brush is either bugged or was made specifically for simplifying the resolution ![]()
In certain configurations the brush will only lower instead of increasing the resolution.
I’ll talk with Joe about that.
8 Likes
I haven’t used the Simplify brush in a while, but it used to enable this:

An image from my personal Blender notes. ![]()
4 Likes
Some feedback would be very welcome on this:
There’s currently a patch to simplify the gizmo when dragging the handles. Basically only the handle that is currently used is left visible while moving/rotating/scaling.
What’s your take? Is this helping to reduce visual noise? Would you like to still see the entire gizmo instead? Why?
17 Likes
I like it. Less is more. ![]()
2 Likes
I like it! It certainly helps to reduce visual clutter, specially when you’re working on an already busy model with lots of little details and/or colors ![]()
2 Likes
I, too, think that less is more.
But I am used to avoid gizmo and I am easily satisfied just by display of axes lines.
If you are not used to that, maybe, showing 2 arrows of gizmo for handle of plane constraint would be a good idea.
3 Likes
I always wished that Simplify Brush was a real brush.
It has no falloff, no strength, no pertinent setting in brush tab.
It is totally dependent of Detail Size, Detail Percentage or Resolution setting according Detail Type Method in Dyntopo panel.
Dyntopo adding triangles to mesh whatever brush is used.
Simplify Brush was introduced to remove triangles without applying any effect, instead of using a brush with a determined effect, with a strength at zero.
3 Likes
Why would i use that in sculpt mode. I place and change objects in object or edit mode.
A shrinkwrap brush would be nice.