This is my first real Blender project and I’m excited! I was really interested in CG, animation, etc in high school but that all more-or-less fell out of the picture for me as I pursued my programming career. Coding for a living has been good and now it’s time to go back have some fun with old passions.
I’m starting off pretty ambitious but at the very least it’s going to be a great learning experience. I’d love to hear any comments/suggestions that you have as I go along!
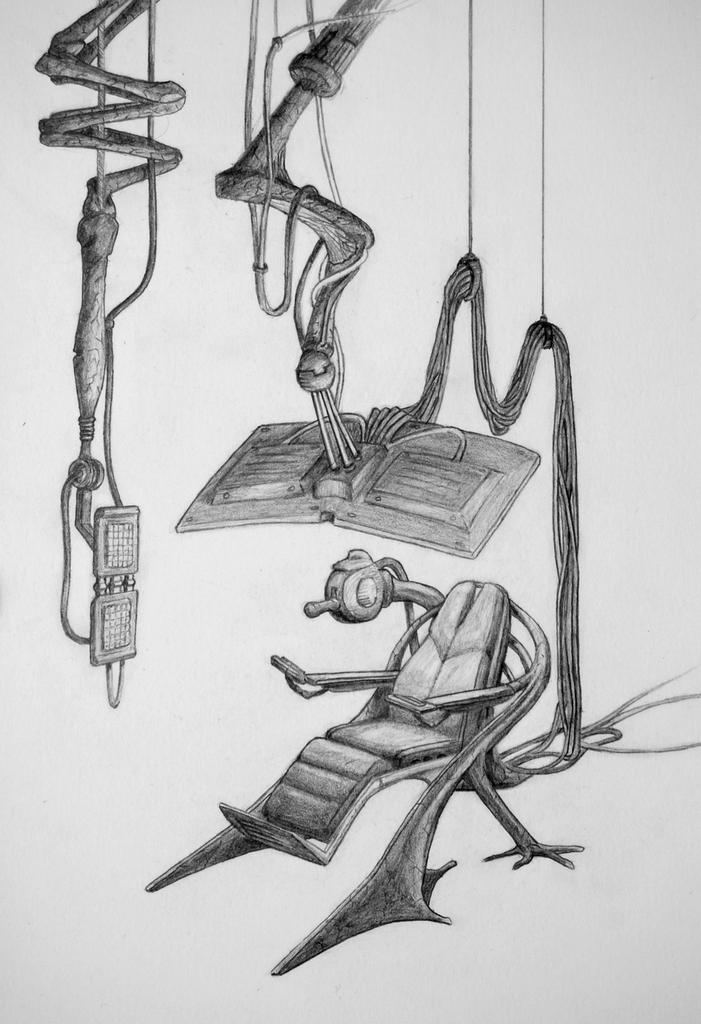
First of all, here is a concept piece that I did this weekend. The final composition will likely be different, and I may want to redesign some of the components a bit, but the point here is to flesh out the general feeling of what I’m going for.
I don’t have any shots from Blender yet, as I have not actually started modeling, hehe. But I’ll get started in the next couple days…
I have a question about modeling the frame: I made it by extruding and shaping manually but is there any way that I could have done this using bezier curves? I know that you can add curve modifiers to objects and make them follow a bezier, but in my case, the object is kind-of complex. There are multiple arcs as well as feet that probably should not be affected by the curve. Is there a way to make just certain vertices follow a curve?
I know I could make a tube, curve it, then apply the modifier to the tube mesh, and attach that to the feet in my chair frame, but it would be nice to maintain the curve itself as long as possible so I can tweak the shape as I go along.
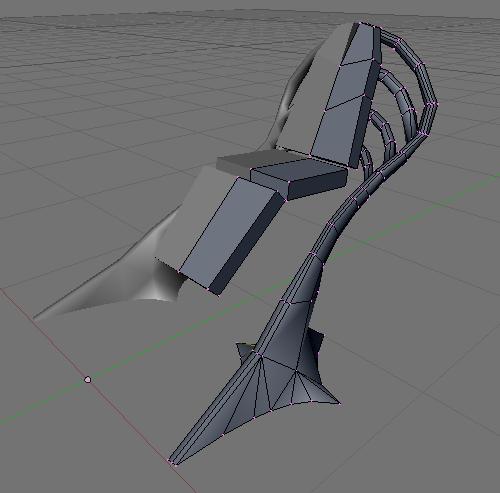
Okay, I think I’ve found the answer to my question. The curve modifier allows you to specify a vertex group. So (after fighting weird curve distortions for a couple hours) I finally managed to figure out how to get the outter bar to fit a 3D bezier without affecting the foot at all. I still need to make sure I can work out the same thing for the additional pieces across the back, but I think I know how to do it now.
…
Okay, I finally got the curve stuff figured out! (^o^)/
I ran into all kinds of problem with curve orientation, dominant axis choice, inside-out meshes, etc. But at least after working through all that stuff, I think I’ve got a decent handle on working with curve modifiers now.
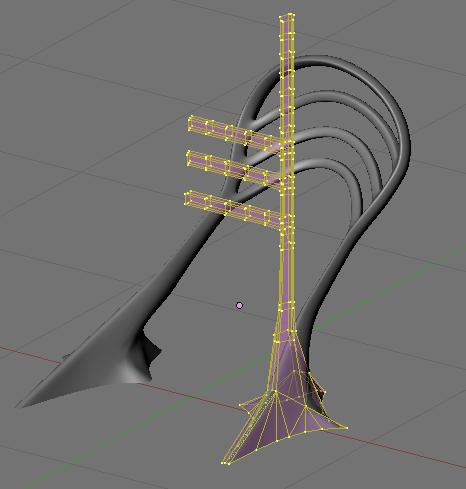
So now that the chair frame is rebuilt using curves, it’s going to be SO much easier to tweak the proportions and little details.
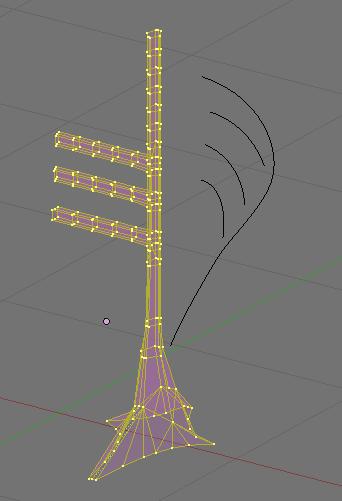
Here are some screens of my chair frame rebuilt using 3D beziers…
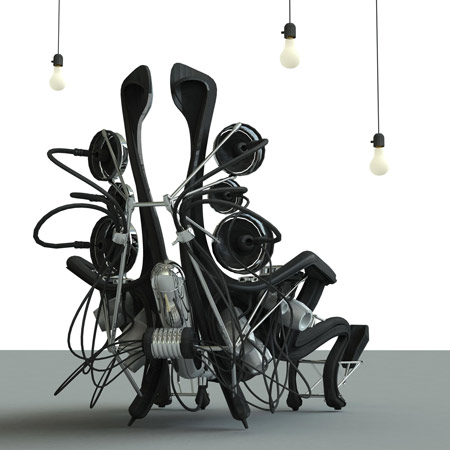
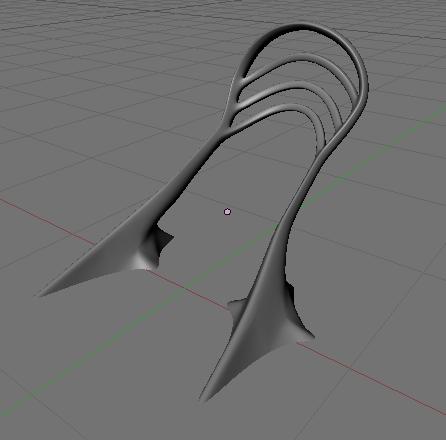
Here is an update on what I’ve got so far. I’m getting close to done with the general layout of the chair. I just need to add the side and back legs.
I know the materials are a little weak (I just threw something together for now) and it will still need a lot of detailing, but I’m almost ready to move on to another component of the scene. Then I’ll go back and do more detailing passes, once everything is laid out.
By the way, does anybody know of any good lighting tutorials that deal with lighting complex shapes? It took me forever to get the lighting like it is now and it’s still not quite what I’m shooting for. The main thing is that I want to get more light on the left side of the chair’s upper cushion without spilling more light in other areas. Any suggestions?
Okay, here’s the completed first pass on the chair. All I did was add the side and back legs and tweaked the shape of the front feet a bit. I think now I need to spend some time deciding what the final composition will be so I know which components to focus on making next.
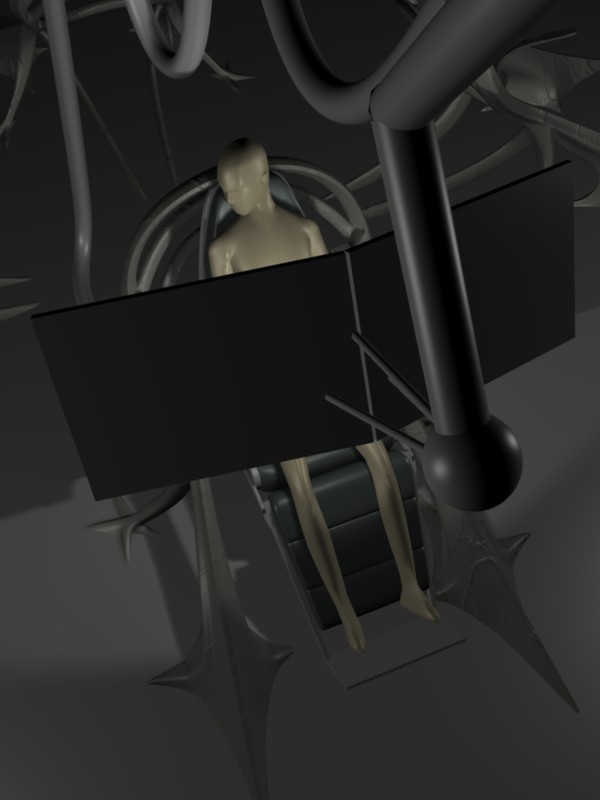
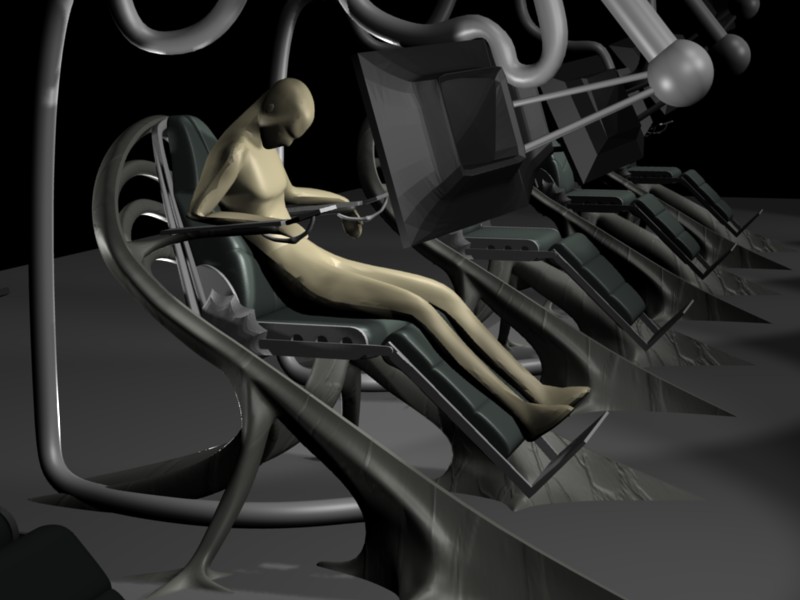
Today I’ve been working on figuring out what the final composition will generally look like so I know where to focus my efforts as far as detailing the chair and modeling the other components. Here are a couple renders of the two concepts I’m thinking about. Obviously, everything is pretty rough. I’m just trying to visualize the layout. Any suggestions?
(BTW, the guy is a model that I found on the net. I’ll probably use this as a starting point when I make the final guy, unless somebody knows of a better model out there that I can work from).
The easiest way I’ve found to do “tricky” lighting is with compositing. Set up the lights the way you think you want them, then run each of them (or, each group) out as a separate render-layer. (Substitute a reflection-only material in the layer block.)
Once you have each element of the shot separated, it’s straightforward to combine them, to mask off light “spills,” and so on. Point is, you’re not “endlessly re-rendering” to get there.
Nice modeling. I hope you’re already writing the tutorial on how you did that chair. :yes:
Don’t worry … the Gallery has plenty of room left.
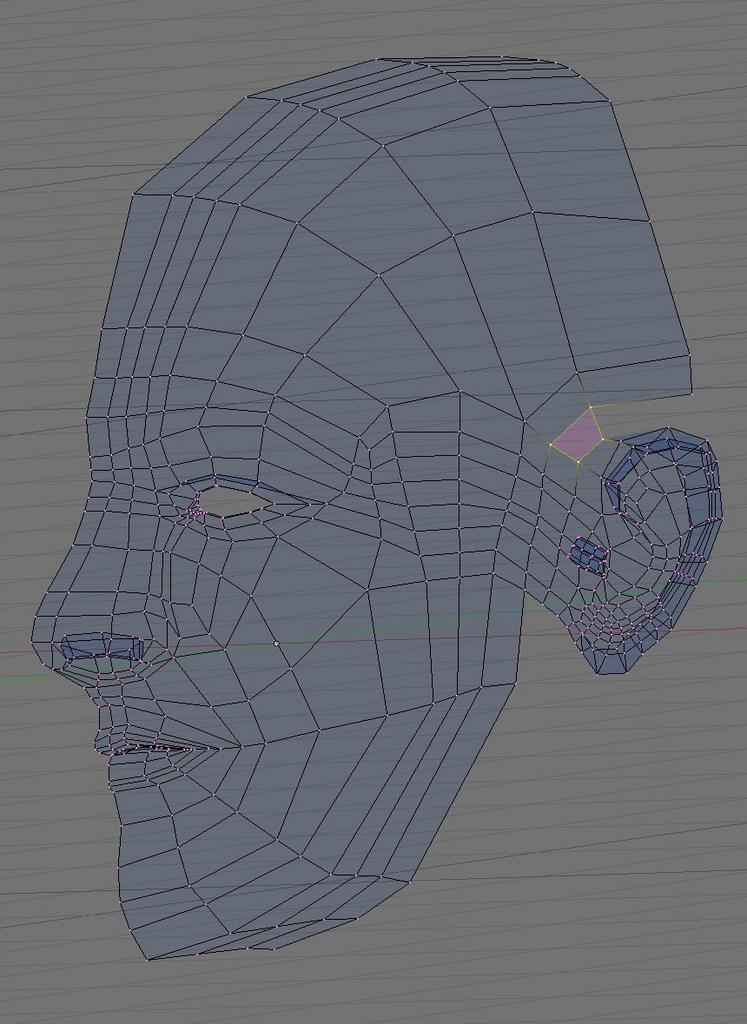
After watching this tutorial series (http://www.blendercookie.com/2009/02/16/modeling-a-human-head-part-4/) I started working on modeling the head of guy that will be in the final shot but I am having a hard time with the topology. It’s my first head model and I feel like it’s not working out. I think one way I went wrong was putting in too much detail too soon. I’m still working with it, trying to pull it through, but I wonder if anyone has an pointers in general for this mesh.
Is it really messed up? Is it okay? What are ways I can improve it? Do I need to just start again from scratch and put in less detail until everything is filled in?
I think the topology could be better, but it could also be a lot worse.
If you are going to animate this then a good topology is important but if you just want one still image then as long as it renders well you can get away with some iffy topology.
Really depends a lot on what you want to practice, modelling from scratch or modifying an existing mesh.
Another trick is if the solid model looks good in object mode then you could use it as a base to re-topo over the top of, concentrating more on topology than modelling the form.
Thanks for the links, LoopyShane! I think those are going to be really helpful. The first one looks like it’s going to be a really good reference so I don’t have to search through all of his head modeling series videos to find references. And the other two answered a couple key questions for me.
I am thinking about starting over from scratch, and this time going step-by-step through Williamson’s tutorials. I watched them all before and then just dove in the next day on my own. But I think it will be valuable to do something a bit more directed. It’ll be good practice. Although, I’ll probably put some more time into my current mesh to see if I can salvage it; maybe then I’ll retopo. We’ll see.
Redirected a lot of the topology and used some diamonds to reduce the connection points in the ear. I’m feeling much better about this mesh now. It still needs a lot of detailing, but I feel the topology is pretty good now. Agree? Any pointers?
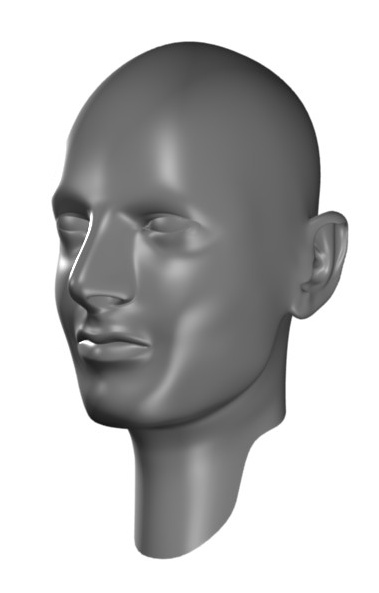
Okay, I’ve been doing a lot of detailing on the head model and things are starting to shape up, so here’s a render. I’m modeling my own head, so I don’t really need and C&C about my nose being too big or something like that, hehe ;)) I still have some more work to do to get it to match up, then I’m probably going to age the model to make it look like an old man.
 I was really interested in CG, animation, etc in high school but that all more-or-less fell out of the picture for me as I pursued my programming career. Coding for a living has been good and now it’s time to go back have some fun with old passions.