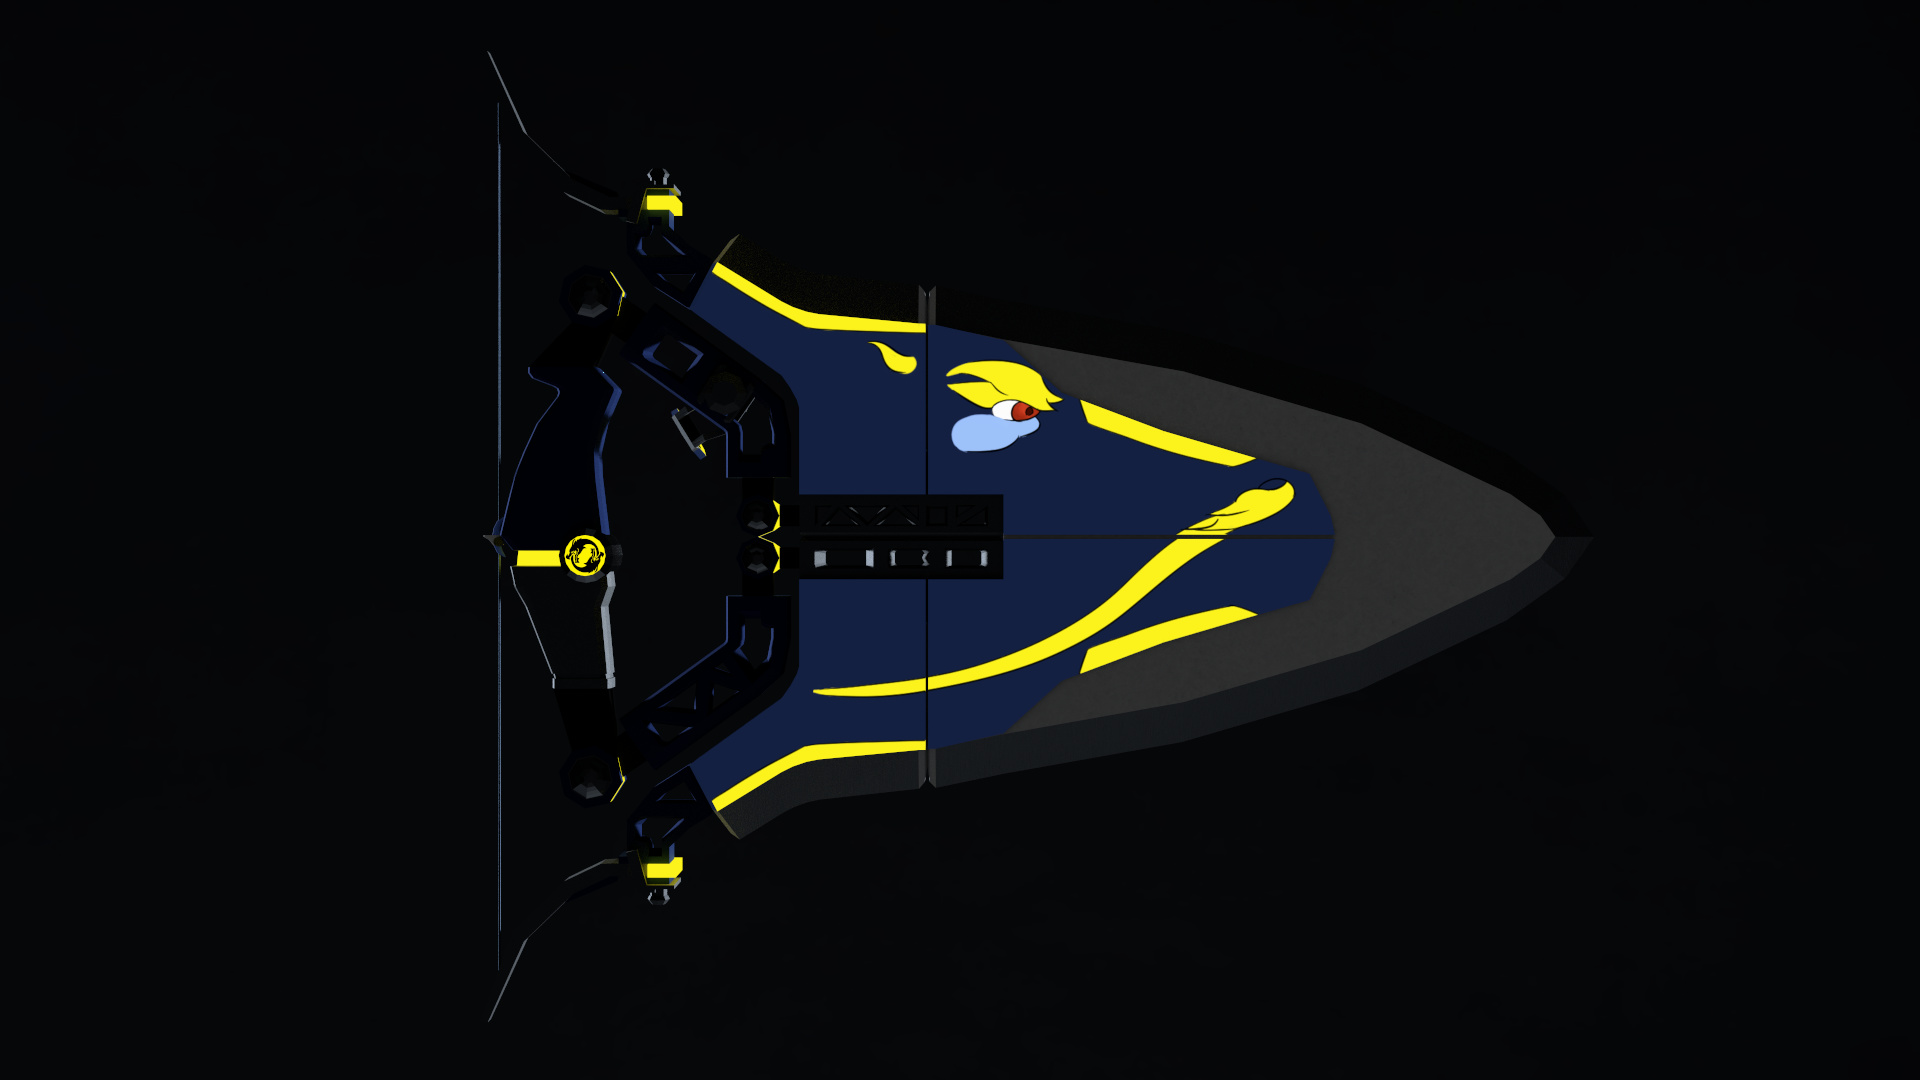
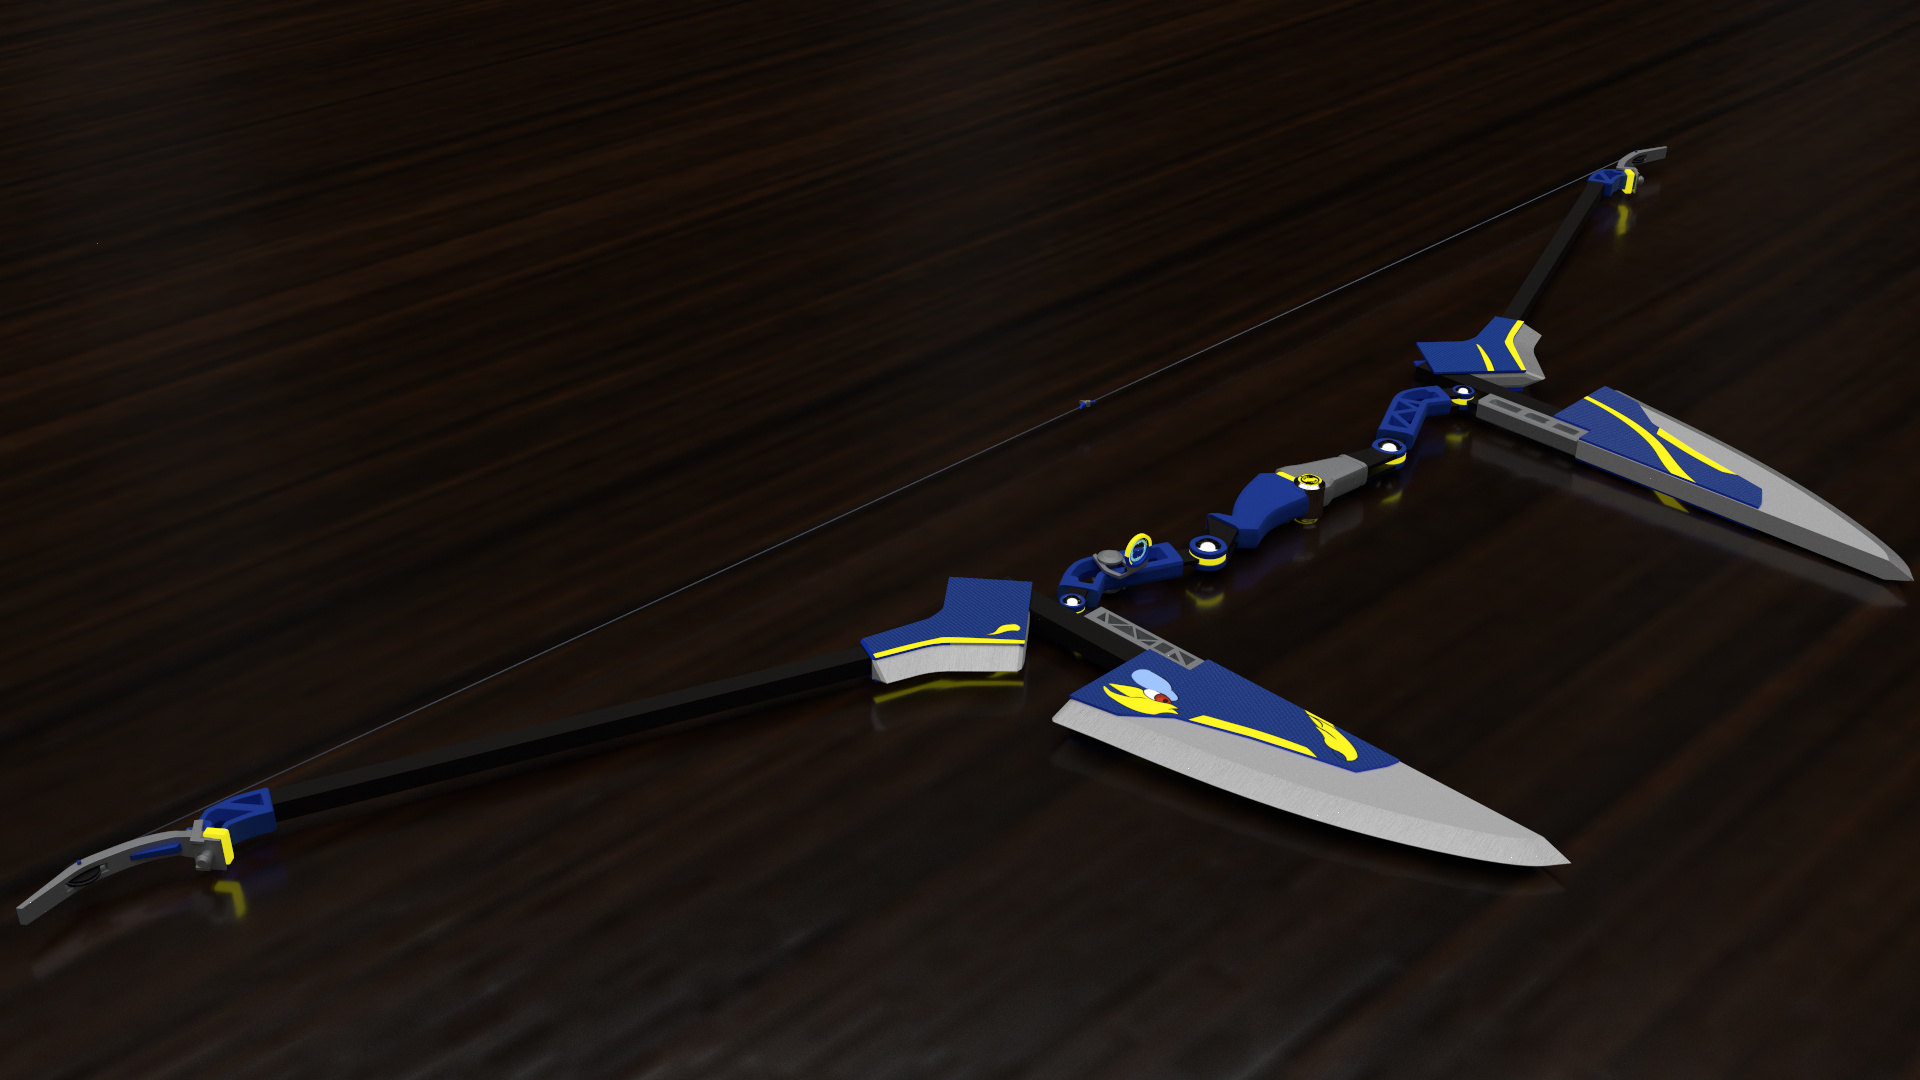
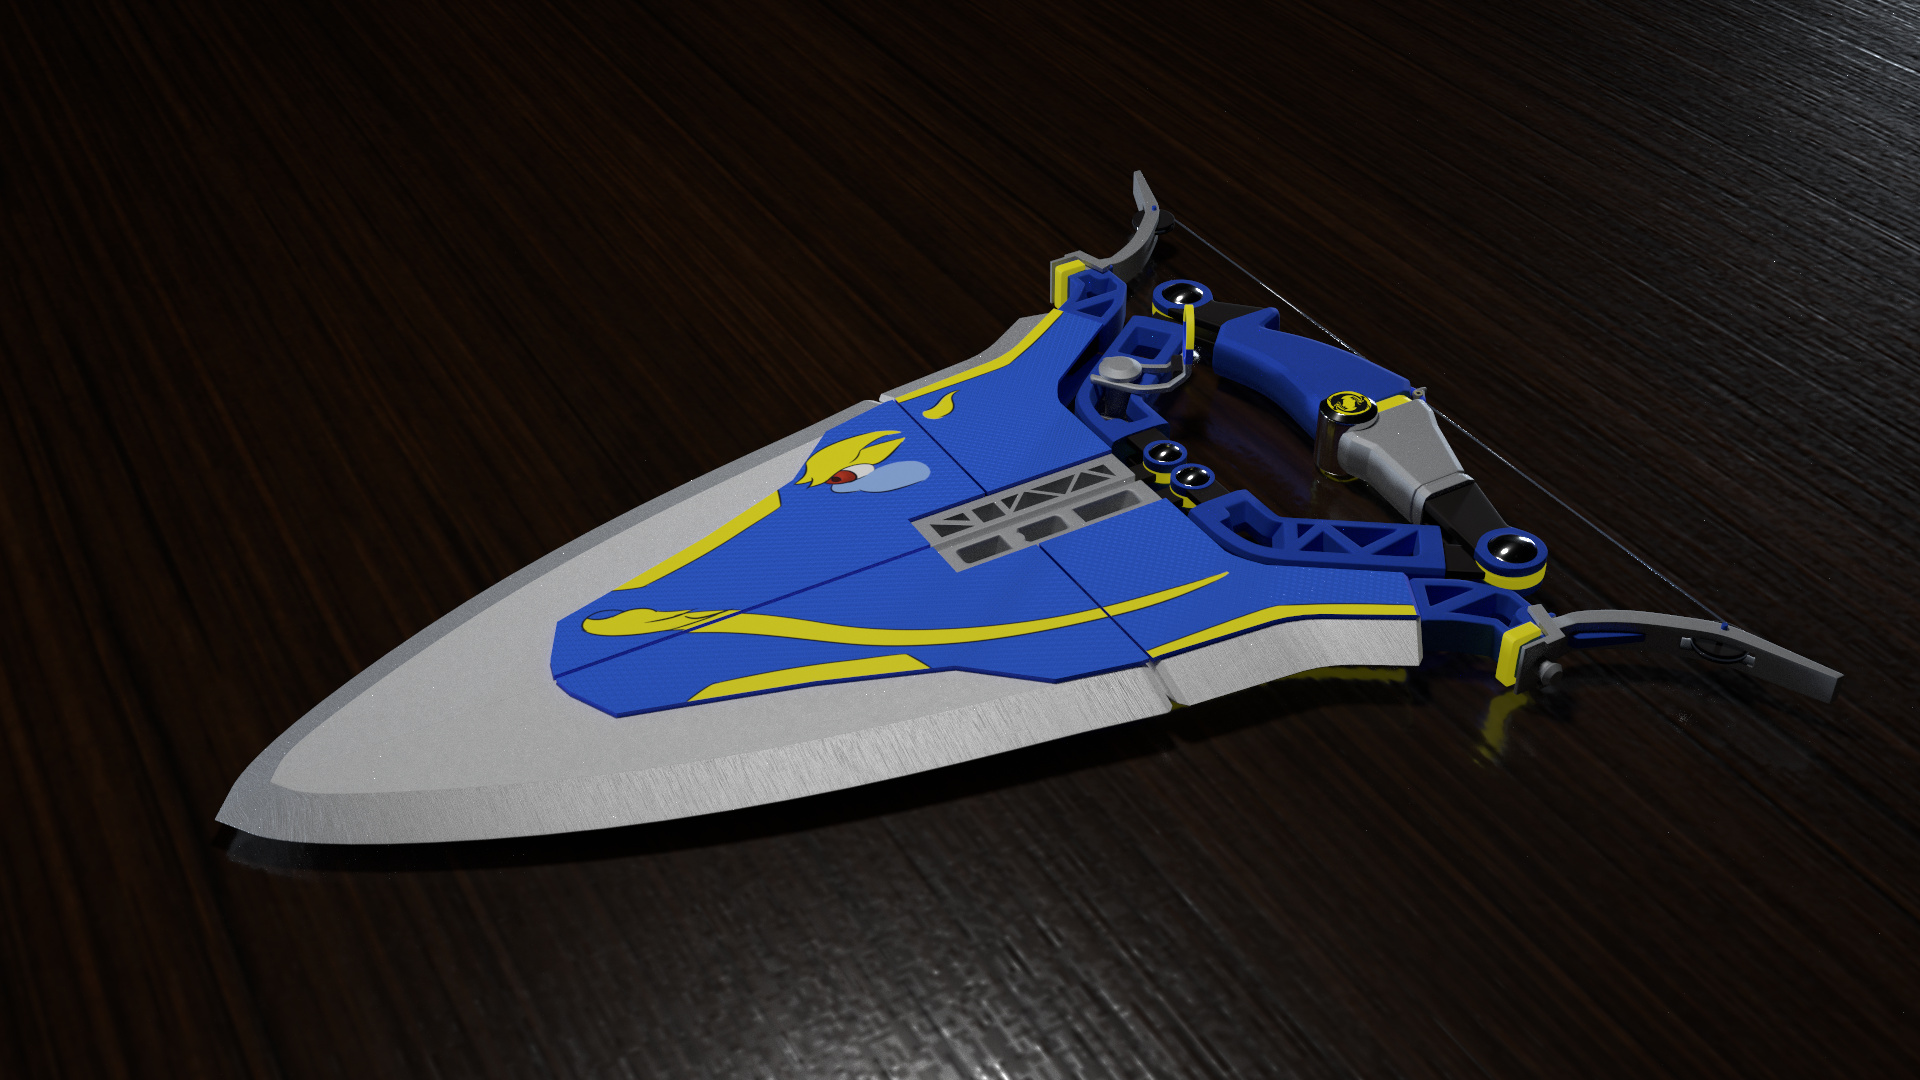
I started this project last September after I’d been following a Udemy course for a while. This is a type of bow that can collapse into a large knife/short sword/etc, allowing the user to defend theirself at close quarter. This takes the concept from Raven, my favorite character in Tales of Vesperia, released for all platforms. The bow’s design is based on Hanzo’s casual skin in Overwatch, and eventually I want to try making a SFM animation of Hanzo using it.
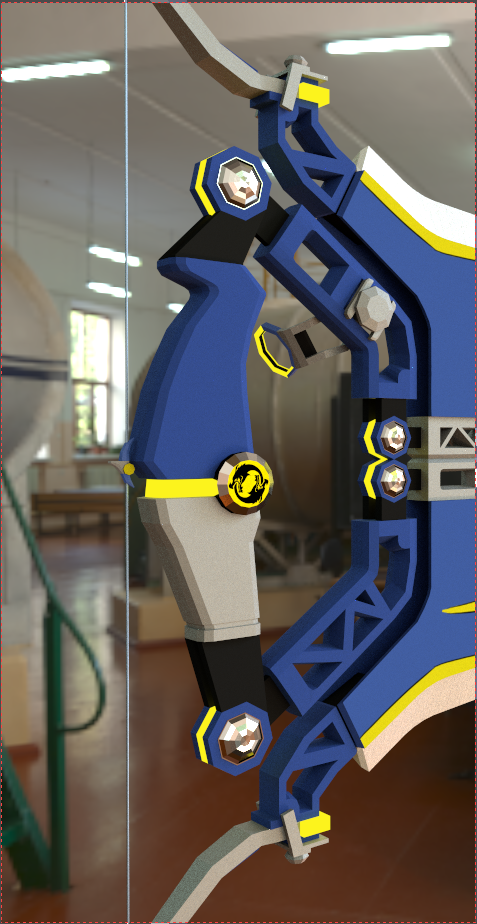
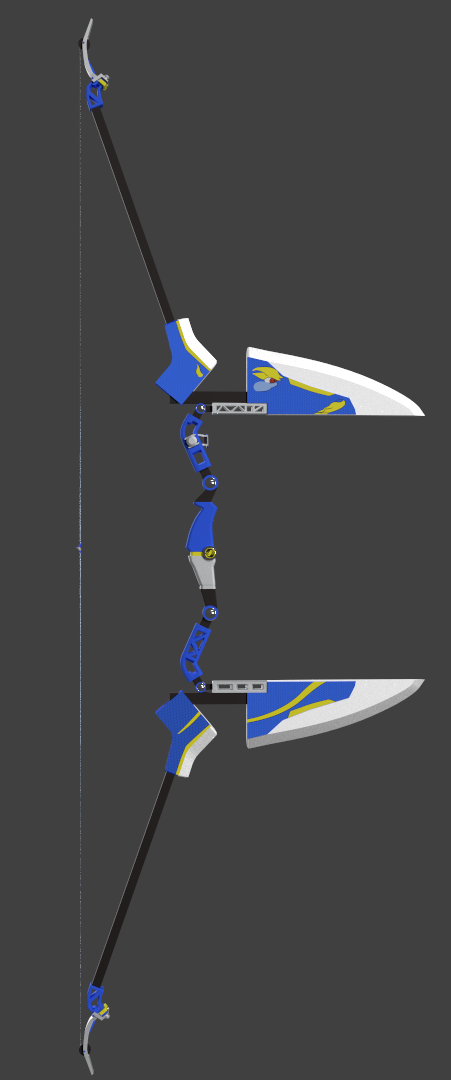
I think I finished modeling in November, then took a break to return to the Udemy course before starting it again in January. I’m trying to decide a good color scheme to go with blue and gold, and make the palette look appealing in both Sword Mode and Bow Mode. Right now the colors are flat to focus on the color scheme, and when that’s done, I can start considering how the surface of each piece should appear.
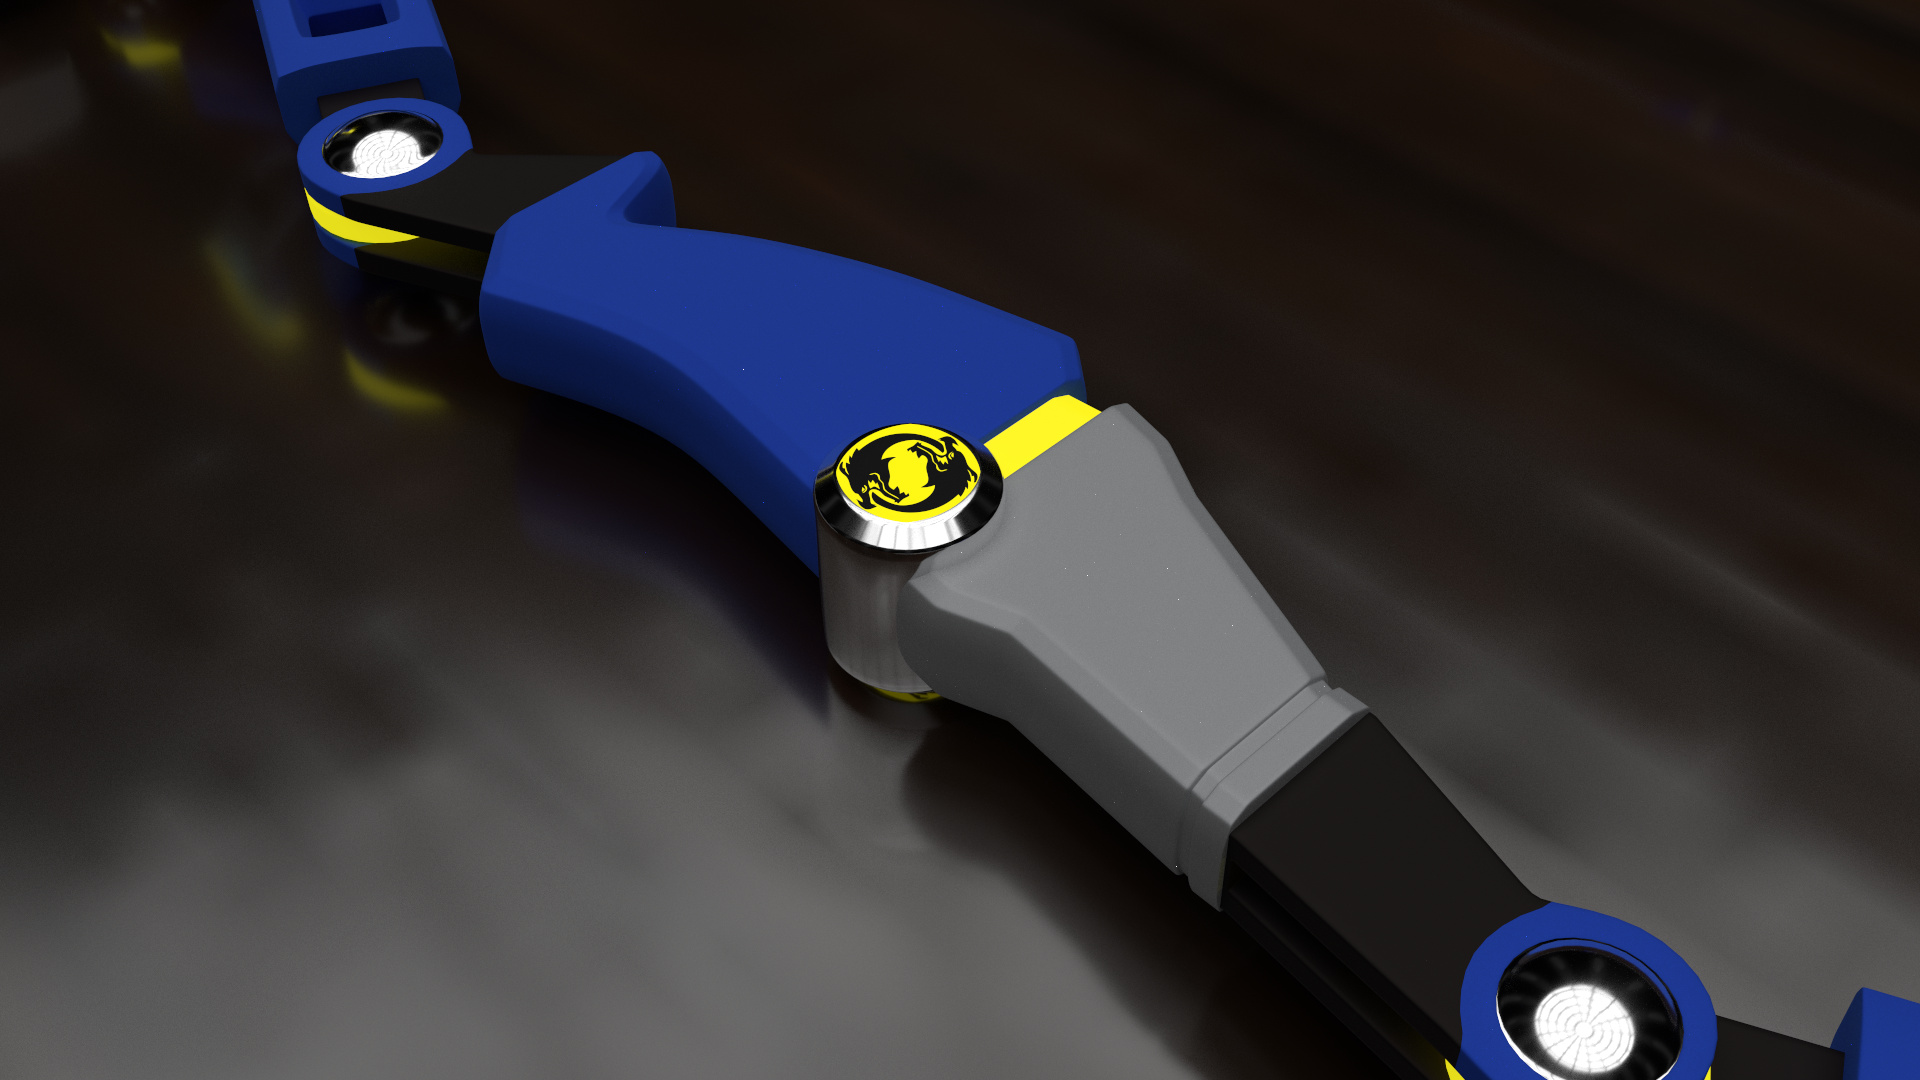
I like the desighn and pallette, the yellow currently doesn’t look a hole lot like gold though,
that might cause a bit of touble when you start doing the final shading
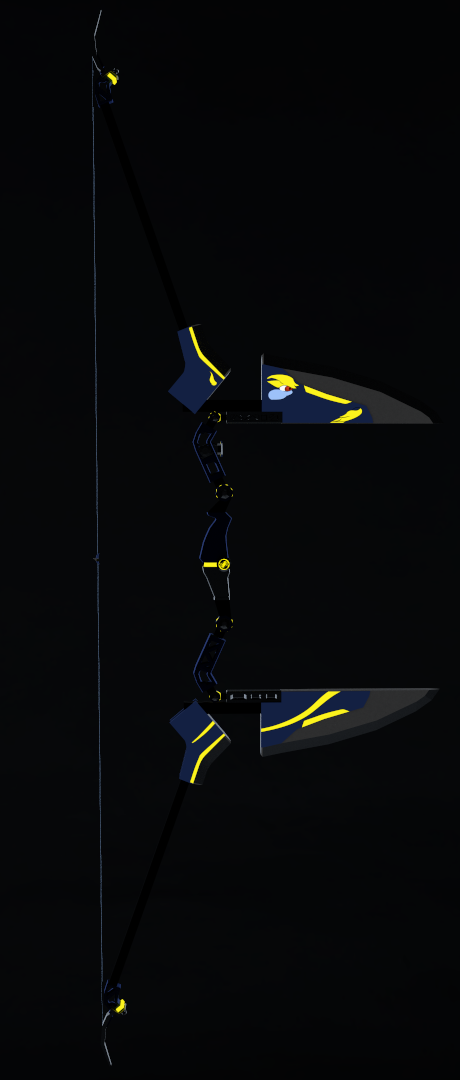
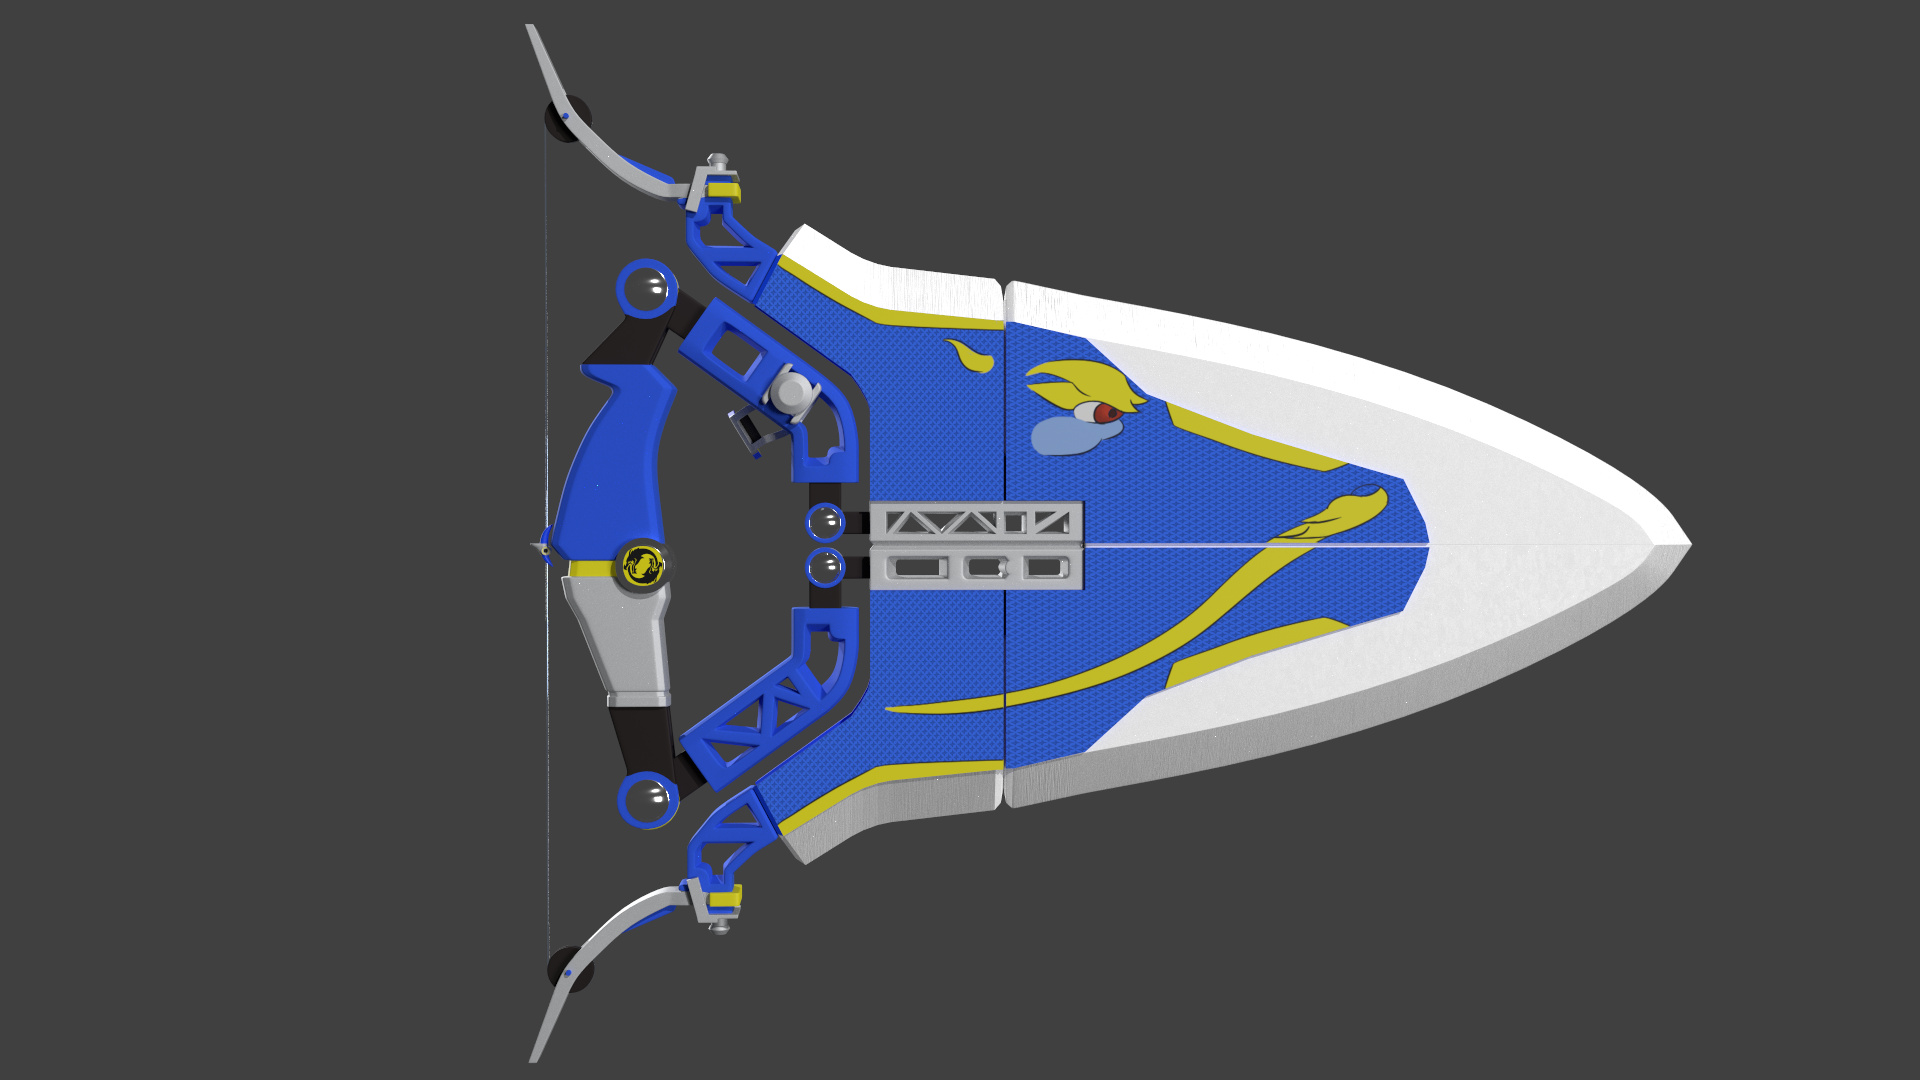
This might be a little bit of an unnecessary nit pick but I don’t think the design makes sense. A bow string isn’t elastic and it wouldn’t contract when the bow folds together. If it was a compound bow it would make more sense.
In terms of modelling it’s a pretty cool little animation and I can see some time was spent engineering it.
The string could be a circle around the front of the sword. Then the tension would remain (close enough) and it would make more sense. To unlock the mechanism there should be some kind of mechanic else it would be difficult to shoot with while trying to prevent the bow from becoming a sword.
I really like the animation would be cool to see the final textured version!
That sounds like a good idea! Maybe wind it around a drum, using a Bézier curve and bevel object. I can show you this when I get home, I am on holiday without my MacBook until mid February.
I’ll deal with the bowstring problem later, in favor of focusing on the materials…
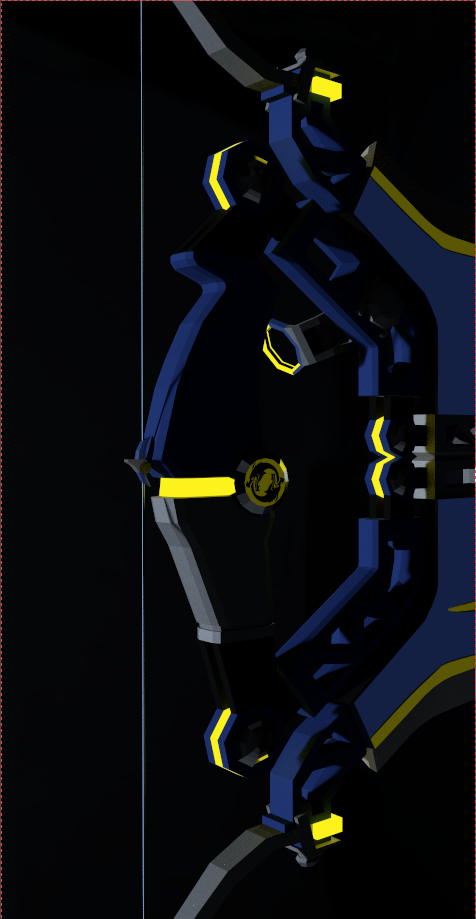
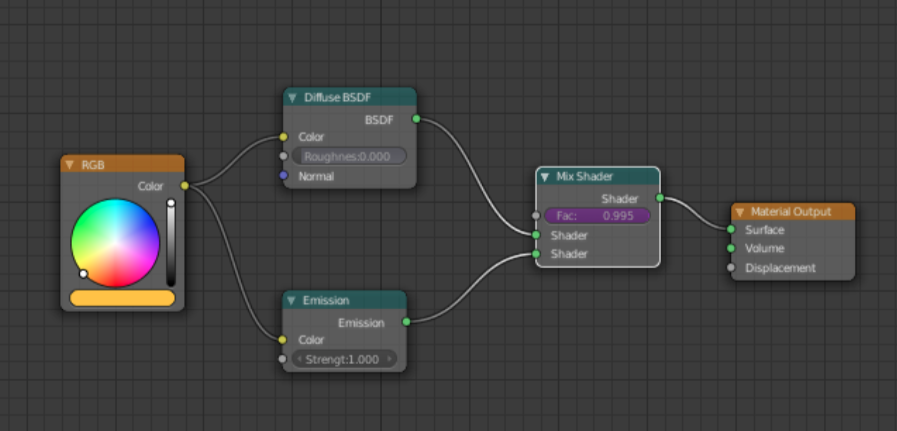
I added an emission shader to some of the yellow bands on the handle and the hinges so they’d glow in low lighting settings, but the emission is kind of obvious in normal lighting. If I reduce the strength of the emission, then the yellow strips look duller in normal lighting.
Is it possible to make a shader where the emission level would automatically adjust depending on the current lighting level? …And would it be possible to apply that to some of the strips on the Dragon texture? :x
I’m sorry if that was a really stupid question. I’m kind of new to the shading and texturing aspects of 3D :x
Yes! use a driver for the Emission Strength based upon the strength of your sun, lamps, background lighting, etc. Let me know if this is double-dutch to you and I will try to explain…
So I’ve looked through what drivers were in Blender, and they seem to be a way to set one value through another value, but it looks like I’ll need to access the emission value programmatically?
I’m still watching tutorials on this, but how much programming will be required to pull this off? :x
If It’s 2.79 I can make you a quick demo file later today, I suggest you use an Empty that controls the background and lamp emissions, along with the yellow material. I assume you want the yellow emission to fade as the background/lamp gets brighter?
It can be done through Animation Nodes quite easily, but I don’t know if you are using AN. Without the Empty, it is more difficult to control things without code, but the empty solves this issue.
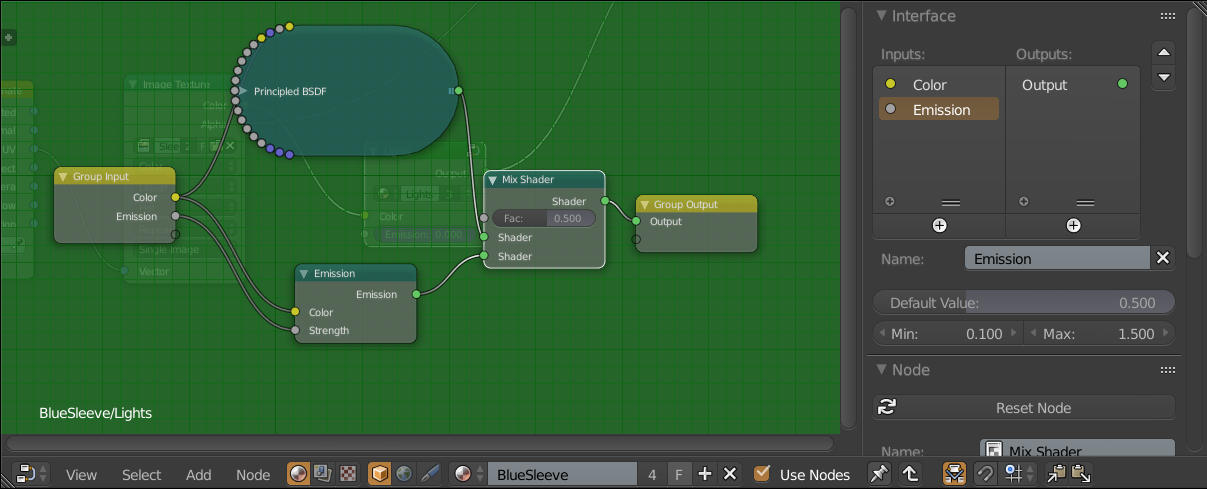
Yes please, that would be great. In addition to the Emission fading, I’m trying to get the lights to appear more diffuse was the light fades, this way the yellow bands and the texture avoid graying out. I’ll take a screenshot of my material after work today…
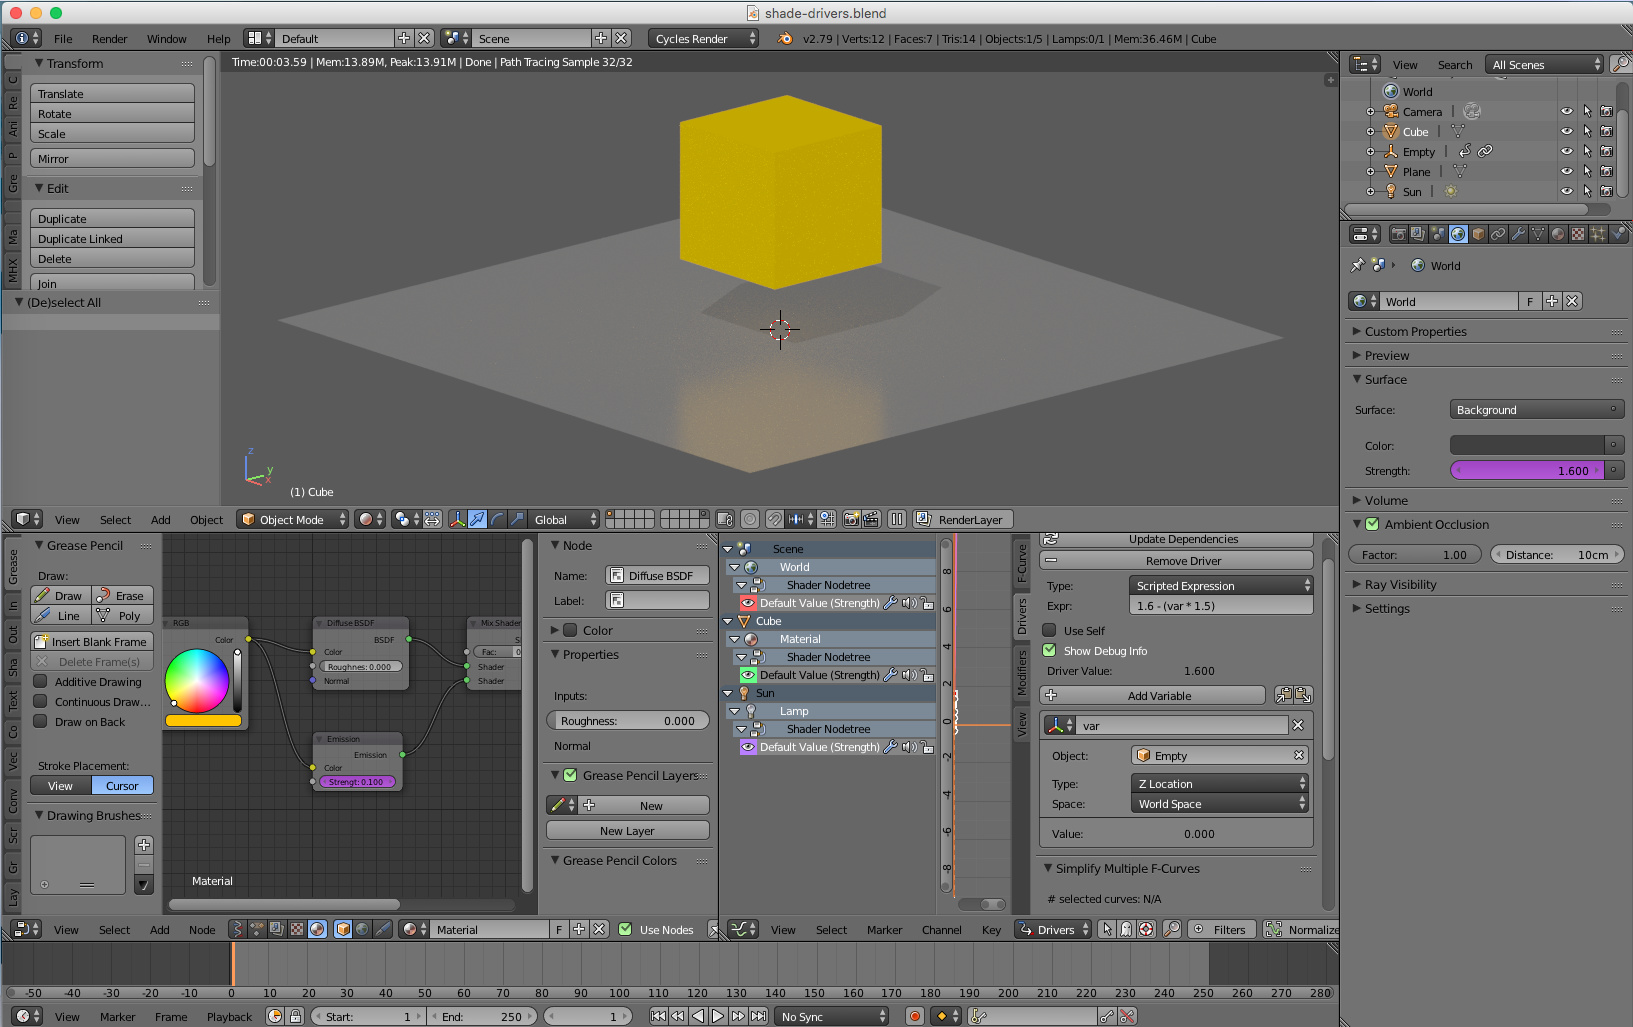
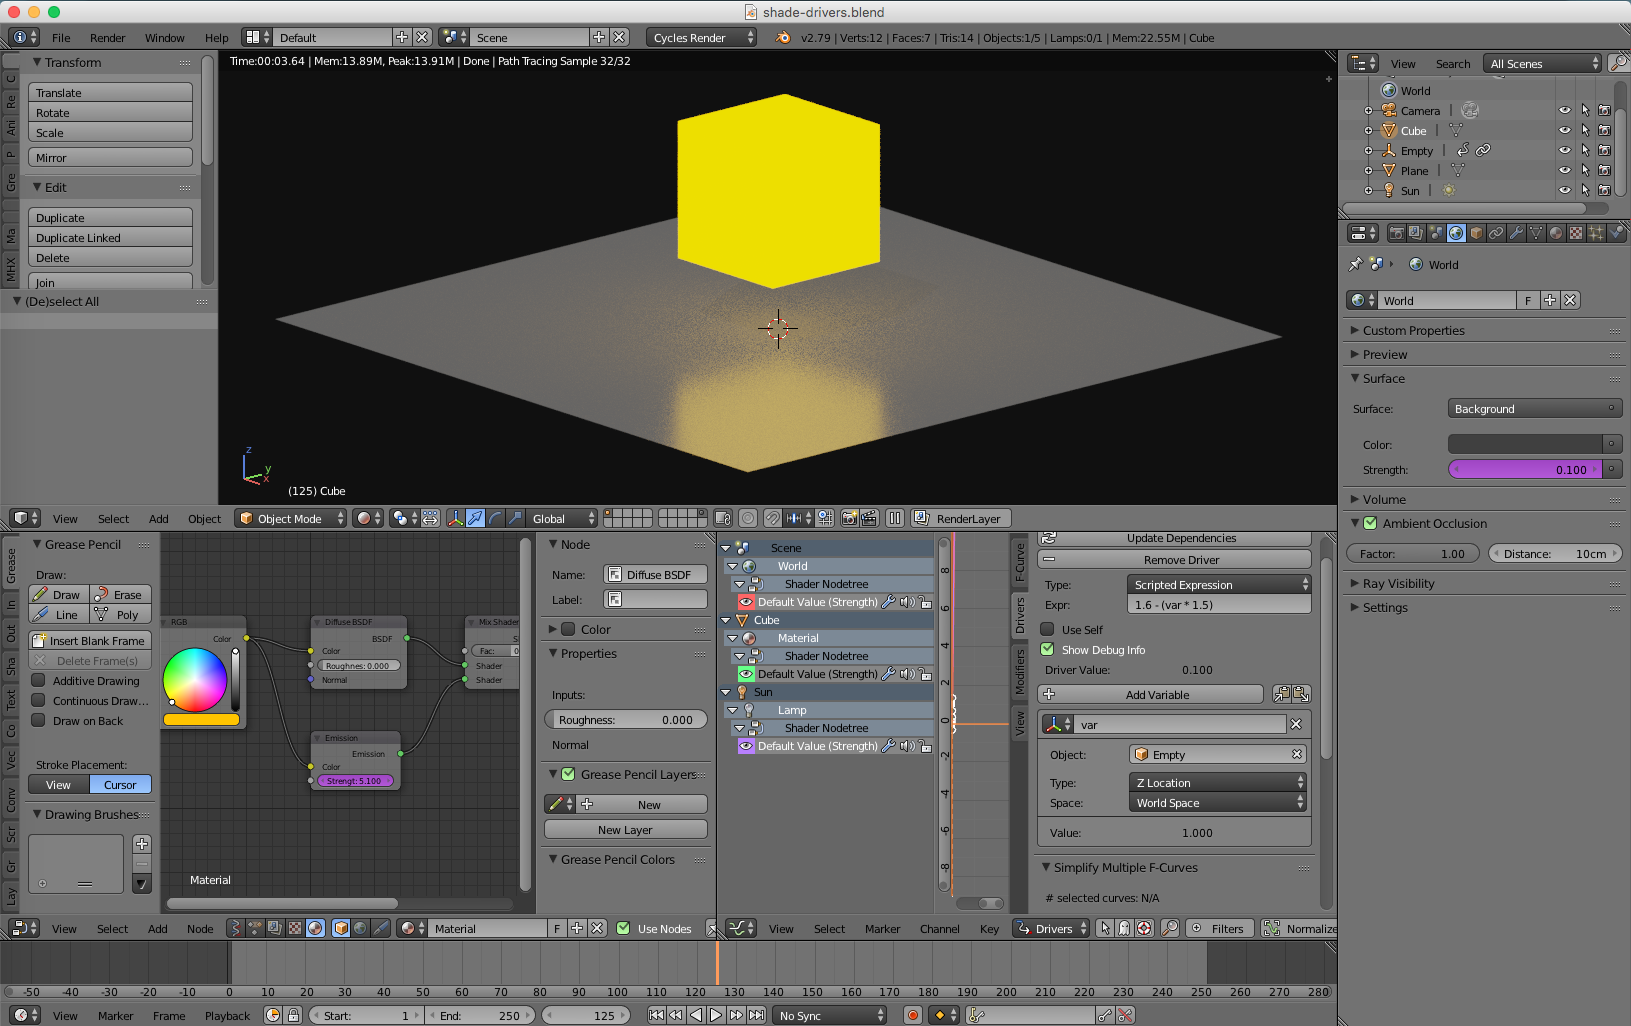
This is required to make the Scripted Expression Drivers work, then render at frame 0 (light background), advance the Timeline to frame 125 (dark background). Its goes back to light background at end frame. To adjust the system, just move the Empty in Z, it only moves from 0 to 1, this changes the driver values.
Feel free to ask any questions you may have, I will try to answer them! This is really a starter until I fully understand exactly how you want the lights and emissions to interact.
Thank you clockmender, I really appreciate you helping me out like this
This looks to be close to what I need, but I have a few questions:
In the blend file you posted, after disabling the Sun Lamp and lowering the emission level of the cube, the cube appears to remain brightly lit, do you know what Blender settings are causing this?
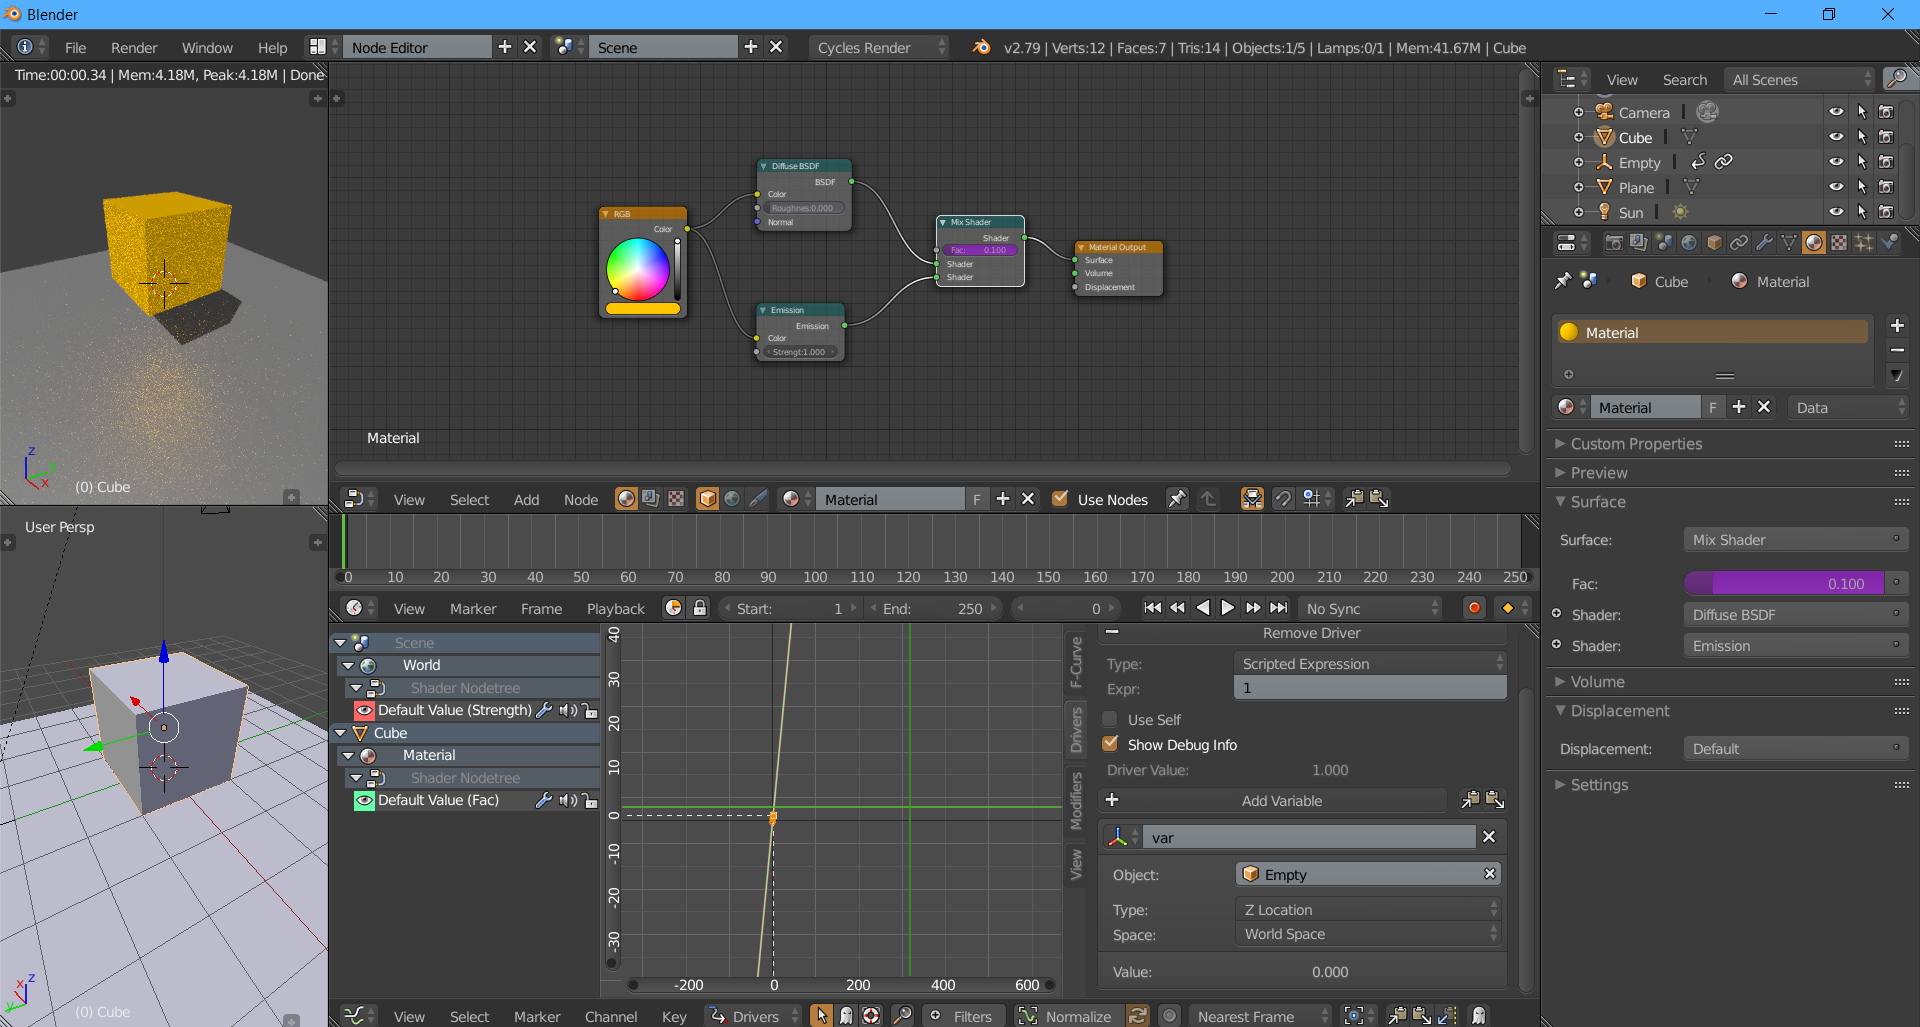
Since I couldn’t figure it out, I tried to remake the scene in a new blend file. How were you able to get the Sun Lamp’s driver to appear in the Cube’s driver list?
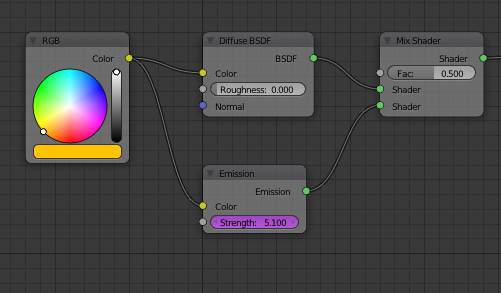
But I changed the yellow material’s setting in the node editor on the bottom left. In the first image, the emission node is disconnected, but re-connected in the second image.
I’m really, really sorry, but could we try another solution?
It’s hard to ask for help for stuff like this because I’m not even 100% of what I’m trying to do, honestly…
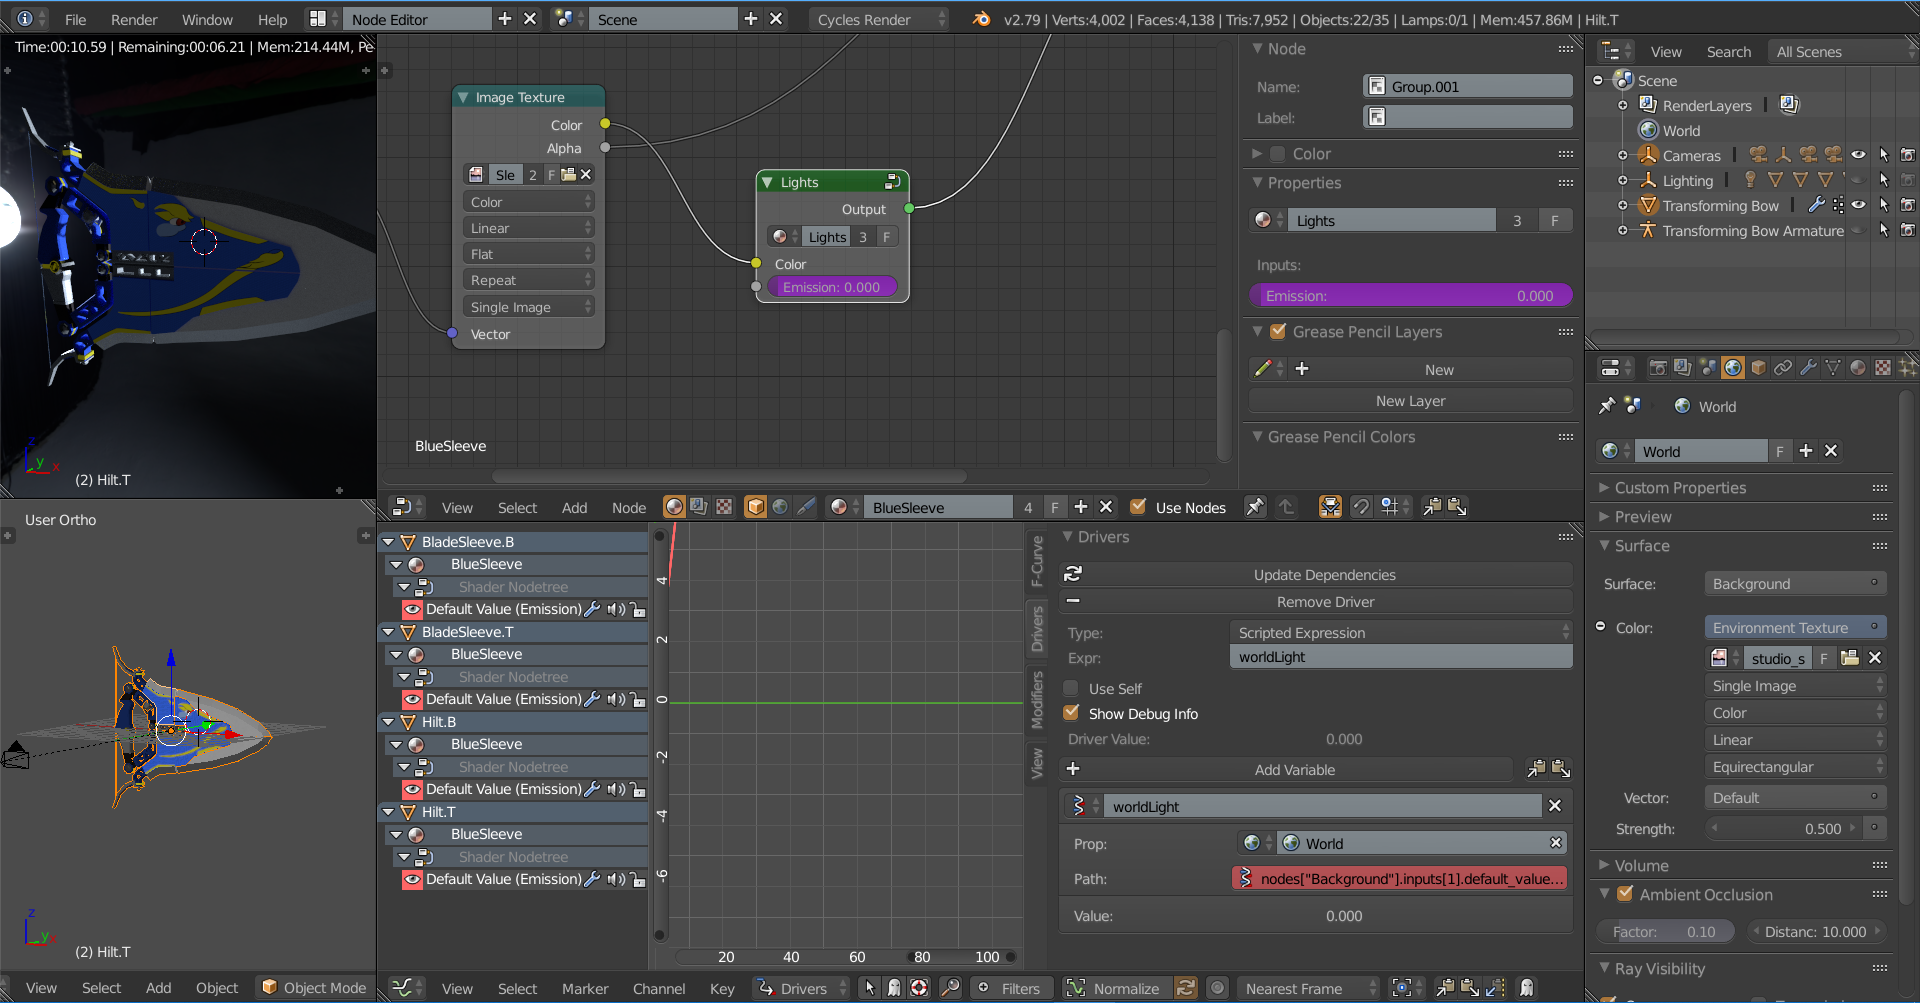
I have a new driver set up where the Dragon texture’s Emission value is supposed to equal the Strength value of the World. If I copy the Data Path of the World’s Strength, the path is “nodes[“Background”].inputs[1].default_value.” Next, in the Emission’s Driver, I made a variable called “worldLight,” whose Prop is set to the World, and the Path is set to the value copied earlier.
In the screen below, the World’s Strength is set to 0.5, but in the driver, worldLight’s value is set to 0.0?
When I set the Drivers Expression to equal the worldLight’s value, it’s also 0.0, and it remains the same when I change the Strength setting…
I know the Emission value should actually increase as the World Strength value decreases (it should also stay betwen 0.1 and 1.5), but I just want to learn how to pull and use values from other properties first.
No need to apologise! Really it’s fine by me and I am happy to help you.
Today however, we have visitors arriving shortly so I cannot get to this until later, or tomorrow. I will study what you have written and get back to you shortly.
Cheers, Clock.
EDIT:
In your first image the data path is red, so is invalid, I think you need to add stuff before this. This is a problem with copying data path, you only get half the story and you have to work out what comes first…


 while trying to prevent the bow from becoming a sword.