Did you just assume they all use Cycles ? ;p
What if some of them eyeballs are using Scanline renderer from 1995 ? ;p
Haaaaaaaaaaaaaaaaaaaaaaa
Sorry Sorry, I will leave now…sorry…
1 Like
Those were the days ![]()
Slight delay with the new release because I’ve just stumbled across what appears to be a Blender bug stopping the cache folder being set to whatever the user has selected in the user preferences when a new scene is created.
Ahh, Povray, with a side order of text file, followed by an overnight render to produce a 320x240 image… only to then find out you put a . in the wrong darn place and it all looks black.
Anyway, back to our regularly scheduled super fast, high quality renders… with a bit of late night coding ![]()
PS. Yes I know Povray isn’t a scanline renderer and it was closer to 1990.
2 Likes

Hey Guys, hope you’re all well. I wanted to let you know that Turbo Tools v3 is now available for download. It’s a massive update chiefly directed at helping you to reduce your animation render times by as much as 40x! Make sure to watch the below YouTube video in 4k when it’s finished processing, because YouTube has processed the quality and the intended flicker out of the 1080p version. Until the 4k version is available, on the 1080p version you can still get an idea of the effectiveness of the stabiliser by jumping to to 7:49
The changes are as follows:
- Temporal Stabilising. The big new feature which will dramatically speed up animation render times by letting you avoid using higher samples than necessary just to avoid flicker. Check out the video demonstrating it’s effectiveness and how to use it: https://youtu.be/bvXkfrCXaV4
- New animation option which optimises the chosen sample pre-set for animations, helping ensure better results without the hassle of repeatedly trialling different sample settings. When combined with the temporal stabiliser, the Very High pre-set will generally provide production quality renders unless the scene has extremely difficult to render elements.
- Each scene in the same blend file can now have a different cache folder. The cache folder in the user preferences is now only used as the default when adding a new scene. This adds flexibility and also simplifies setup on render farms. Any scenes whose cache directory has not yet been specified will be updated when setting the default location in the user preferences .
- Render regions will automatically be set to the nearest divisible by 2 resolution when ‘Render Region’ and ‘Crop to Render Region’ are enabled in Blender’s output properties panel. This is necessary if outputting to an ffmpg video format. The feature has been added because rendering a small region with crop enabled means the denoising process is much faster. Useful when trying to quickly ascertain the optimum ‘User’ samples using the noisiest area of the scene.
- Simplified usage so that people don’t need to worry about the compositor at all. Pre-render checks will now create missing node trees if possible, whereas previously the node tree would only be checked and created during the first render. If you have a composite node already that’s wired up, then the node tree won’t be automatically created, otherwise you’d never be able to render the compositor without the 3d scene.
- Forward compatibility added with the new separate and combine rgba nodes introduced in Blender 3.3.
- Turbo Comp operations are now greyed out during playback and rendering to avoid over zealous users launching simultaneous operations which could lead to black output during the next publish or rendering operation.
- Sample pre-sets have been revised so each gives better results with minimal render time impact.
- Two new sample pre-sets added : ‘Medium Rare’ and ‘Very High’. Medium Rare is the old medium renamed, whilst medium now produces a result between Medium Rare and High. Very High is a middle ground between High and Ultra and is recommended for production quality animations.
- The addon now circumvents a Blender bug which could result in passes that use a vector format, not being stored correctly in the EXR cache files. This could lead to incorrect results when using data passes in both Blender and 3rd party compositors.
- Menus and tooltips improved
- Bug fixes
- Performance improvements
It’s a huge update under the hood, and whilst it has been fine tuned and tested rigorously for a number of weeks, if you do run into any bugs, I’d be grateful if you could report them along with the steps needed to replicate, and any errors shown in the terminal, to the support email address found on your receipt.
Cheers
Michael
3d-illusions.co.uk
9 Likes
Its really hard to see that on YouTube, maybe it would be good to have the samples download able, less compressed.
I see Blender 3.12 and above only as alpha.
2 Likes
Yes I was surprised just how much processing YouTube did on the videos. I’ll try and stick them on Vimeo, I believe they don’t mess with the video ![]() Having a few days off though at the moment to recover from the programming marathon!
Having a few days off though at the moment to recover from the programming marathon! ![]() Re-introduce my pasty complexion to a bit of sunshine
Re-introduce my pasty complexion to a bit of sunshine ![]()
1 Like
Great news, YouTube have un-processed the 4k version of the video for me, and the flicker now much more closely resembles the original. 1080p is still completely processed by youtube, so I’m going to ask them if they can do the same for that too. In the meantime be sure to watch in 4k.
Same link as before:

1 Like
Scratch that, I spoke to soon. On watching all the way through I can see that even the 4k version has still had the flicker badly processed out of it by YouTube.
I’ve uploaded a cut down version to Vimeo, as it doesn’t process as harshly as YouTube. The flicker before running Turbo Tools temporal stabiliser is much more noticeable on this one (still choose 4k though):
2 Likes
Dear Santa Miaster,
I used your Turbo Render to get good quality render.
The result before animation denoising is already good enough to not spot any issue.

However since the new version of turbo render have animation denoise, I figured I will give it a try but this happened:
I am going to make a guess here:
Because the character is moving in and out of frame and there are frames where before whatever it was that the system is trying to reference to “denoise” simply wasn’t there for it to draw any reference from, hence…it couldn’t.
I don’t know…I have no idea, I am just guessing.
I think it might also help for you to know I rendered it out to transparent png files, just in case that might be the issue…I really don’t know.
Or of course it could be that I am a total numb nut and it was me that don’t know how to use it.
What are your thoughts Santa Miaster ?
Hi Bracer. This may be avoided by enabling the ‘process RGBA separately’ option which is found just below the ‘remove temporal flicker option’. It is difficult to avoid such issues when the 3d elements have no other 3d geometry behind them, for example a hdri or transparent background. It’s caused by some missing functionality within Blender itself. I hope to dive into Blender’s source code at some point to see if I can add the necessary fixes so this can be avoided.
Another solution would be to add the background onto a plane with an emissive material. Place it behind the 3d man, and then parent the plane to the camera. The background will then have vector data to help with the operation.
Thank you ![]()
I will be sure to always check process RGBA separately next time ![]()
1 Like
No worries. Great to see you’re still finding the addon useful after all this time ![]()
It is VERY useful.
The only obstacle is me, I still don’t know what I am doing, I would still stare at turbo render checkboxes and not knowing if something should be on or not, the fact that the render looks so clean is not me, it’s your add-on, so thank you.
1 Like
The thing that breaks animation here is, that it produce EXRs with so many outputs, instead of just the ones needed. Its simple to much Data. Had 40 MB before and now 340 MB.
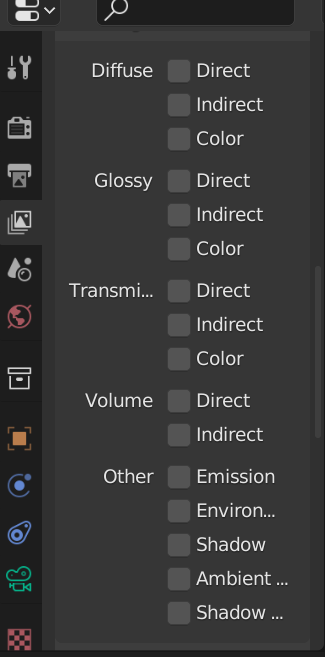
Hi Robert, the addon only saves the passes you have selected in the viewlayer properties panel. So if you want the EXR to be light, then only select the combined pass and leave the ones you don’t need unselected.
If you do want to save multiple passes into the EXR, then using Ultra denoise mode will actually reduce the EXR file size by up to 30x, because unlike other solutions, Turbo Render is able to denoise the individual passes. This works because noisy passes takes up much more data than denoised passes.
Don’t forget as well, even if you do want to save 100’s of passes and still get rapid playback performance, you can work with a very small EXR instead of the cache that stores all those passes, by putting down a standard cache node before rendering. This consolidates the tree to a single EXR file with one output, and will allow you to get real time compositing if you also utilise the skip frames option in the turbo comp panel.
See this video for more information on getting over 200 fps in the compositor’s backdrop, even if you have hundreds of passes in the EXR cache file. In the video we’re even getting fast playback directly in the compositor using the massive compositor tree in the Classroom scene because the entire tree is cached to a single standard cache node, which means the complex tree doesn’t need to execute each frame. It calculates once per frame during rendering, gets stored in the standard cache node, and then during playback just reads it back from the standard cache node instead. That standard cache node can also be used for publishing if you enable the fast publish option:

1 Like
Something very important to bare in mind is that you shouldn’t set Blender’s own file output to multilayer EXR, instead you should leave that as something light such as ffmpeg or jpg sequence, and then in your third party compositor use the Render Layer cache EXR’s found in the cache folder you selected. Multilayer EXR’s generated by Blender’s output section will get additional passes because additional passes are automatically enabled and disabled before and after rendering. This is necessary for Turbo Render’s multilayer denoising process.
You can find more information on that in the product instructions ![]()
I actually have all the passes off and render output is only used for the one under Scene/Output.
Still I get all the passes and under the tmp folder there is no image to be found.
What I want is that I can set my compositor output to what passes I want. But I guess that won’t work with turbo render. I wish there where a way I just render the sequence like I did before on a farm and then use TurboRender to clean it up. But you wrote, that this is not possible.
I do only render test local, but even though its though to use it on animation. Works fine on stills so.
By the way please continue to support Blender 3.1.2 for a while because Blender 3.2.1’s Eevee is not real time anymore and has been the case since 3.2, there has been reports:
https://developer.blender.org/T98865
It is literally slower then Cycles during preview at this point that’s how ridiculous it is.
I understand that Turbo render deals with Cycles and not Eevee but because of the Eevee situation, a number of people like myself are sticking with Blender 3.1.2.
1 Like