Hi,
I have a model of a perfume flask on which I want to apply a texture. I’ve unwrapped the model, but what do I do after that? Here’s a screenshot:
TIA,
Claus
P. S.: Here’s the .blend file with the texture:
Chanel No. 5 03.blend (1.4 MB)
Hi,
I have a model of a perfume flask on which I want to apply a texture. I’ve unwrapped the model, but what do I do after that? Here’s a screenshot:
TIA,
Claus
P. S.: Here’s the .blend file with the texture:
Chanel No. 5 03.blend (1.4 MB)
Hi
Maybe watch this series, there are 4 of them.
Shaun
Hi Shaun,
thanks, this is what I was looking for.
Claus
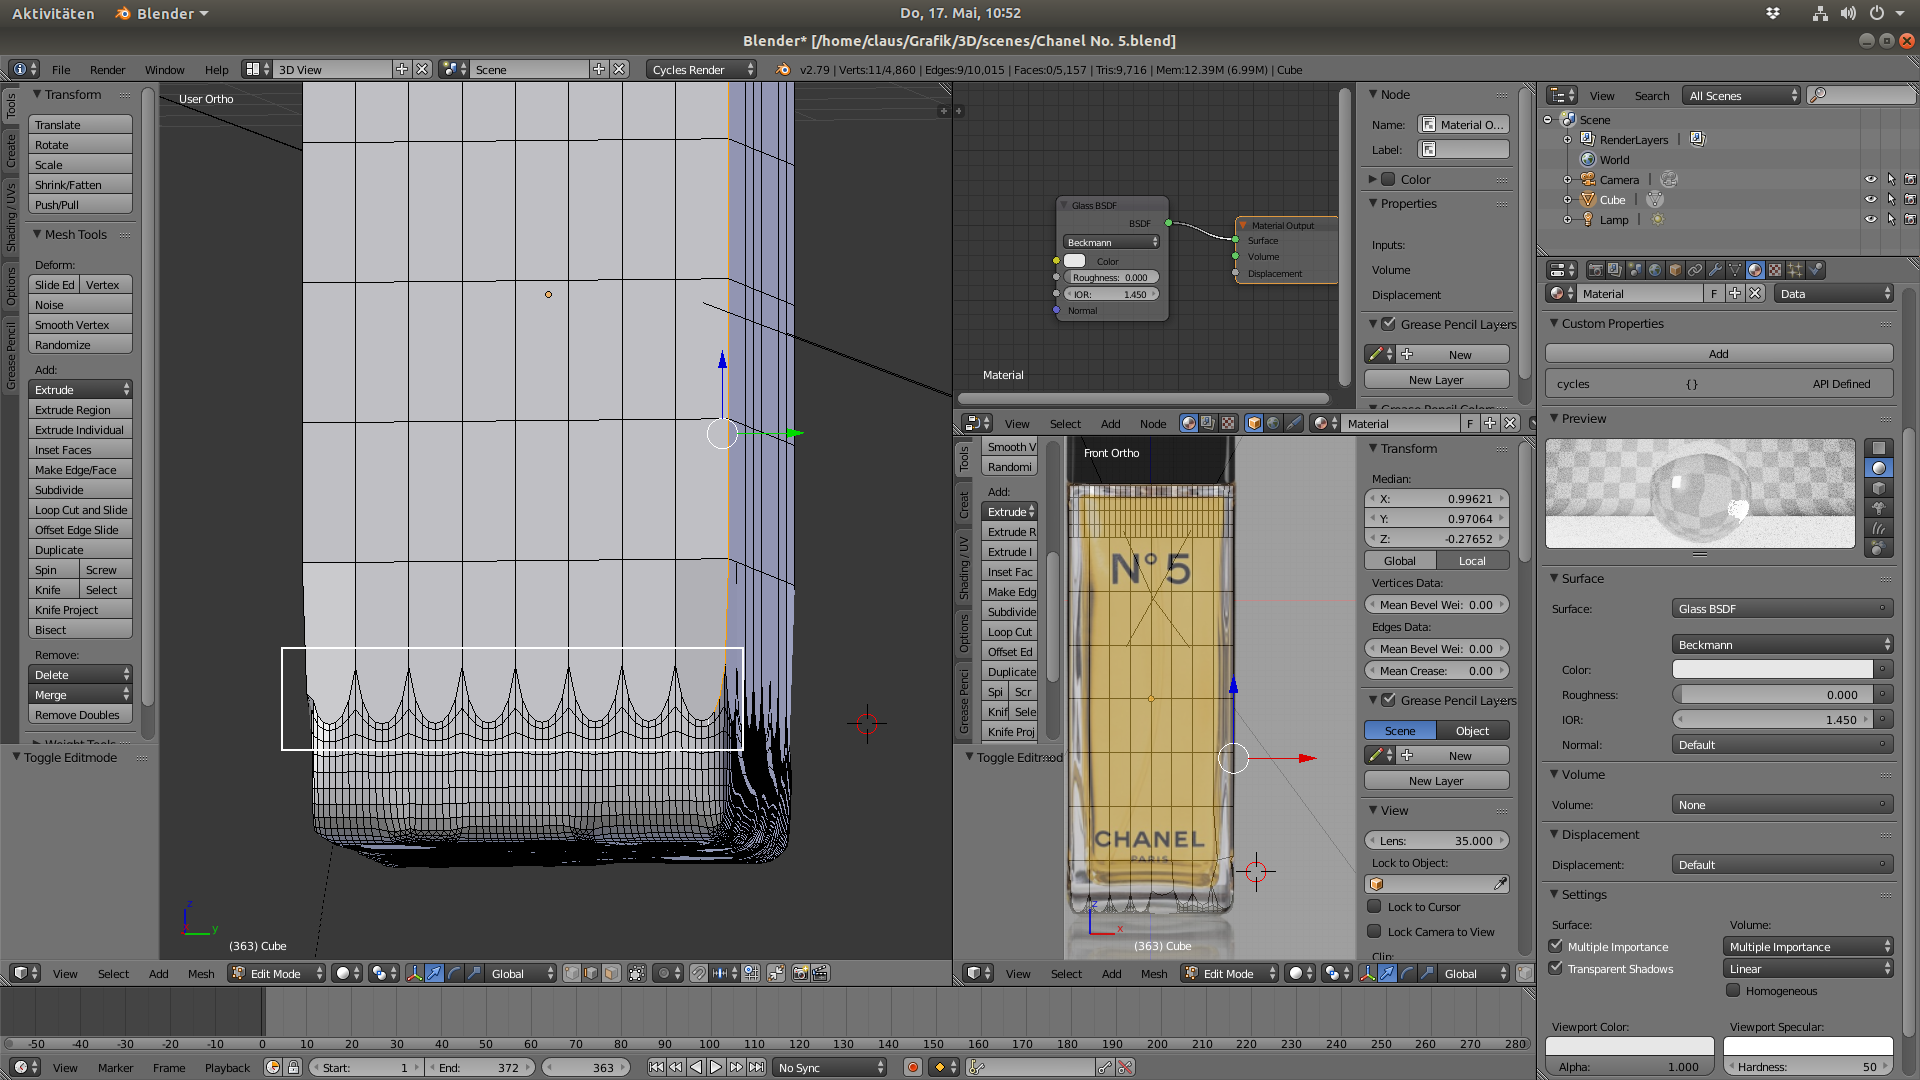
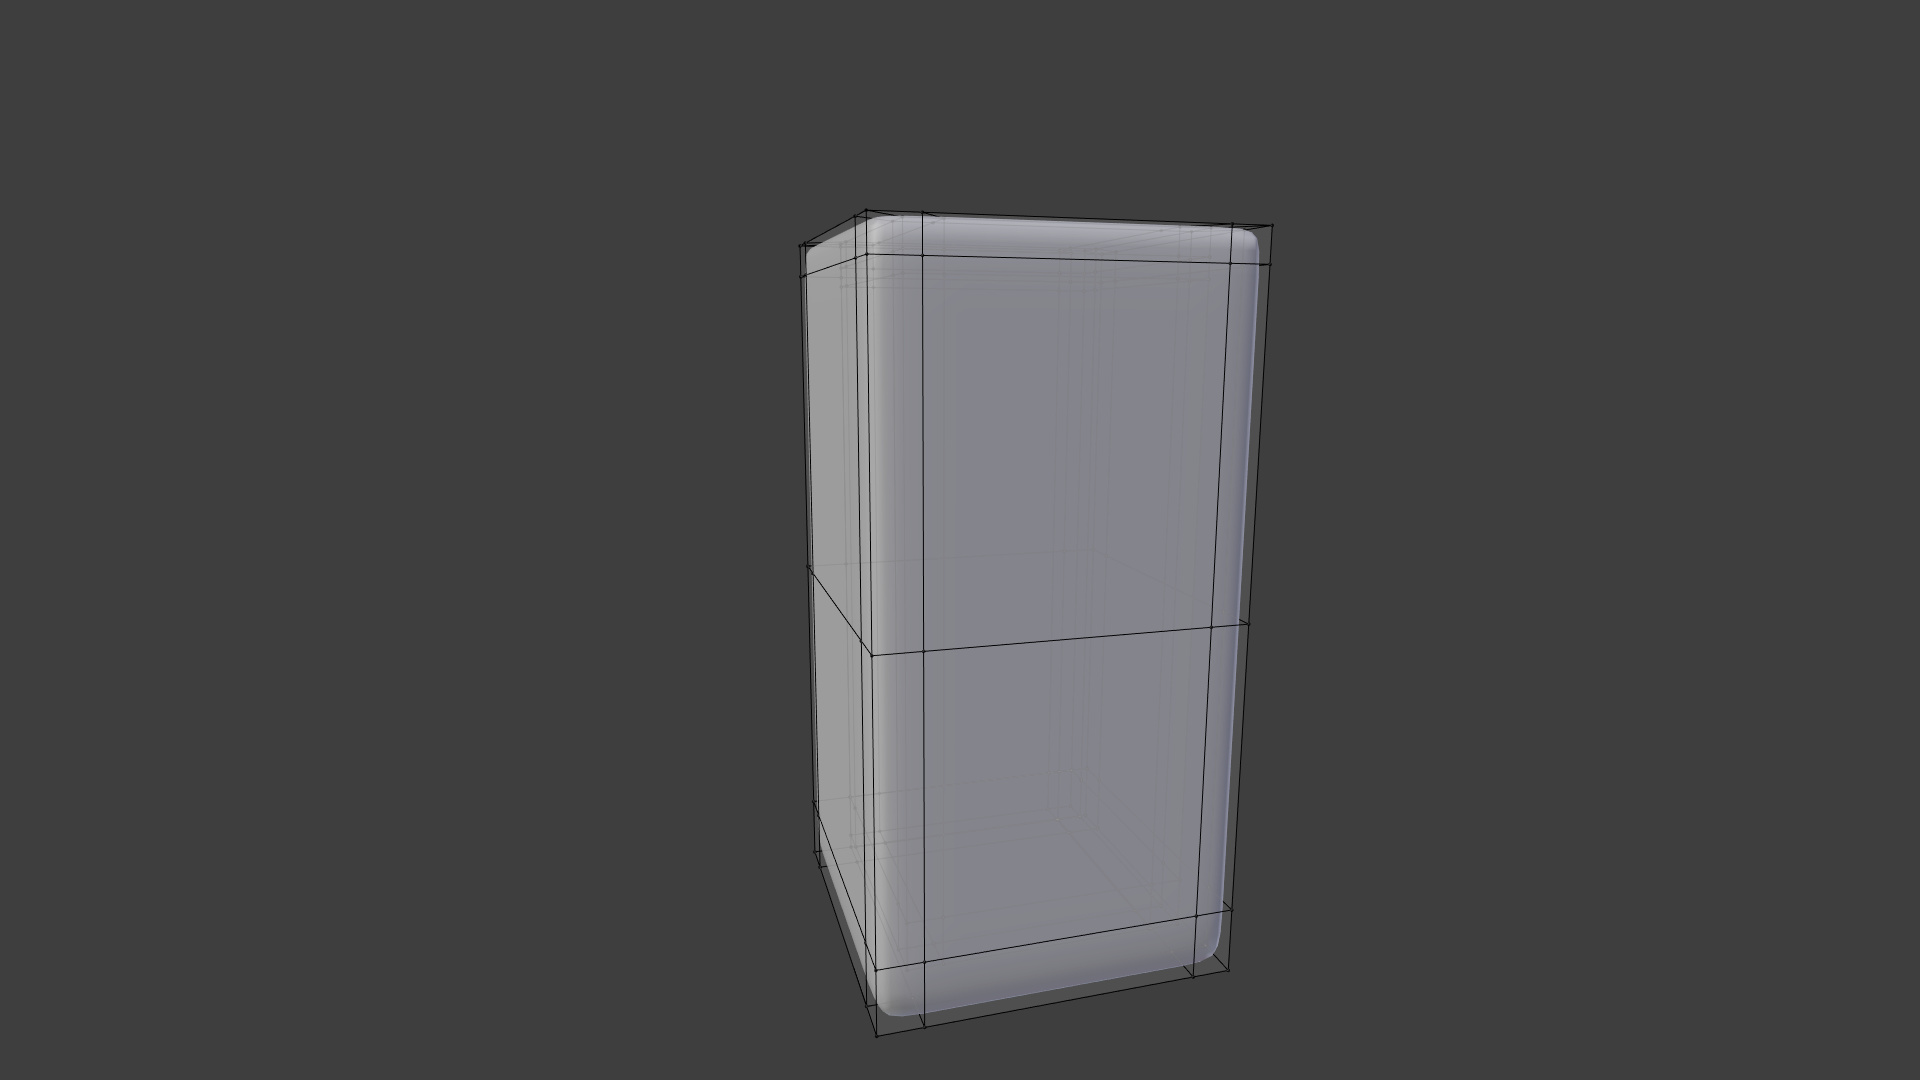
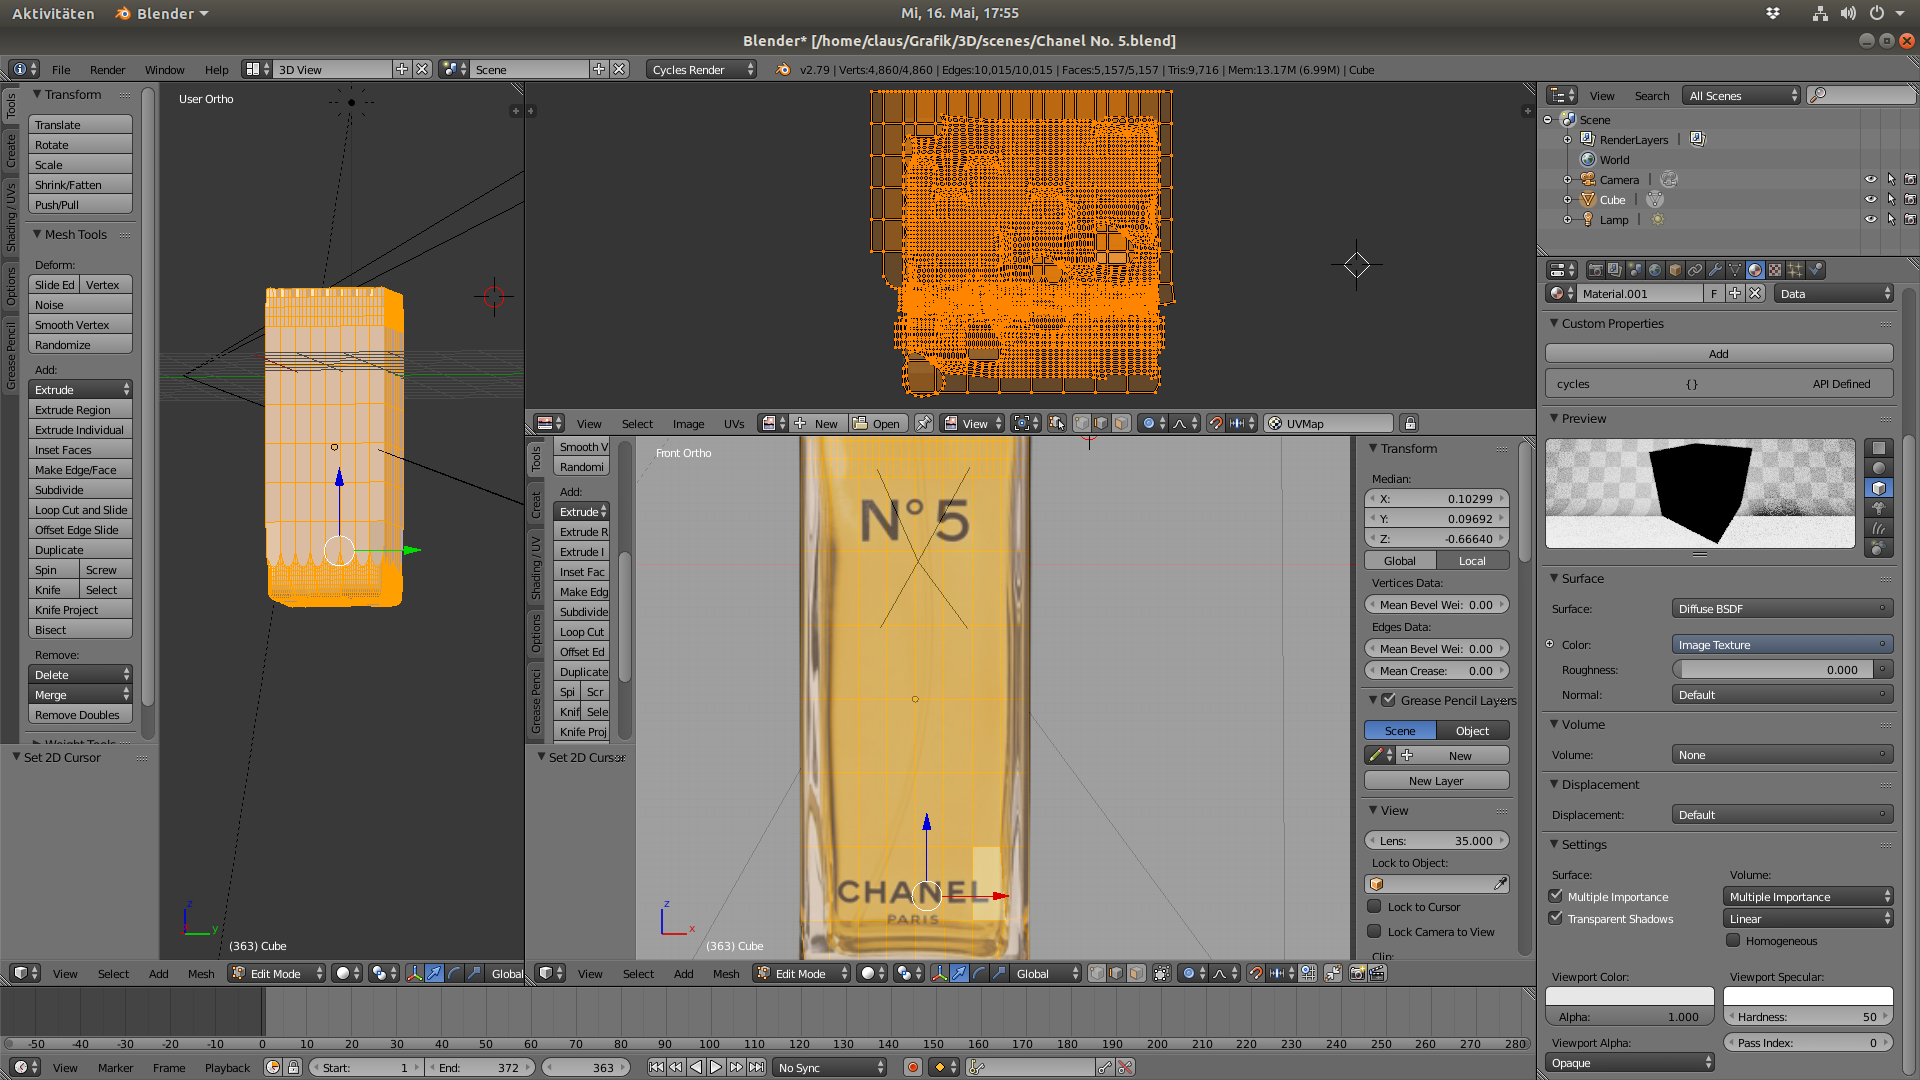
P. S.: I tried to follow the instructions in the video, but I don’t know how to select the many faces I have. I subdivided the cube I am using as a model (see screenshot): Do I have to select all the faces (white frame) manually?
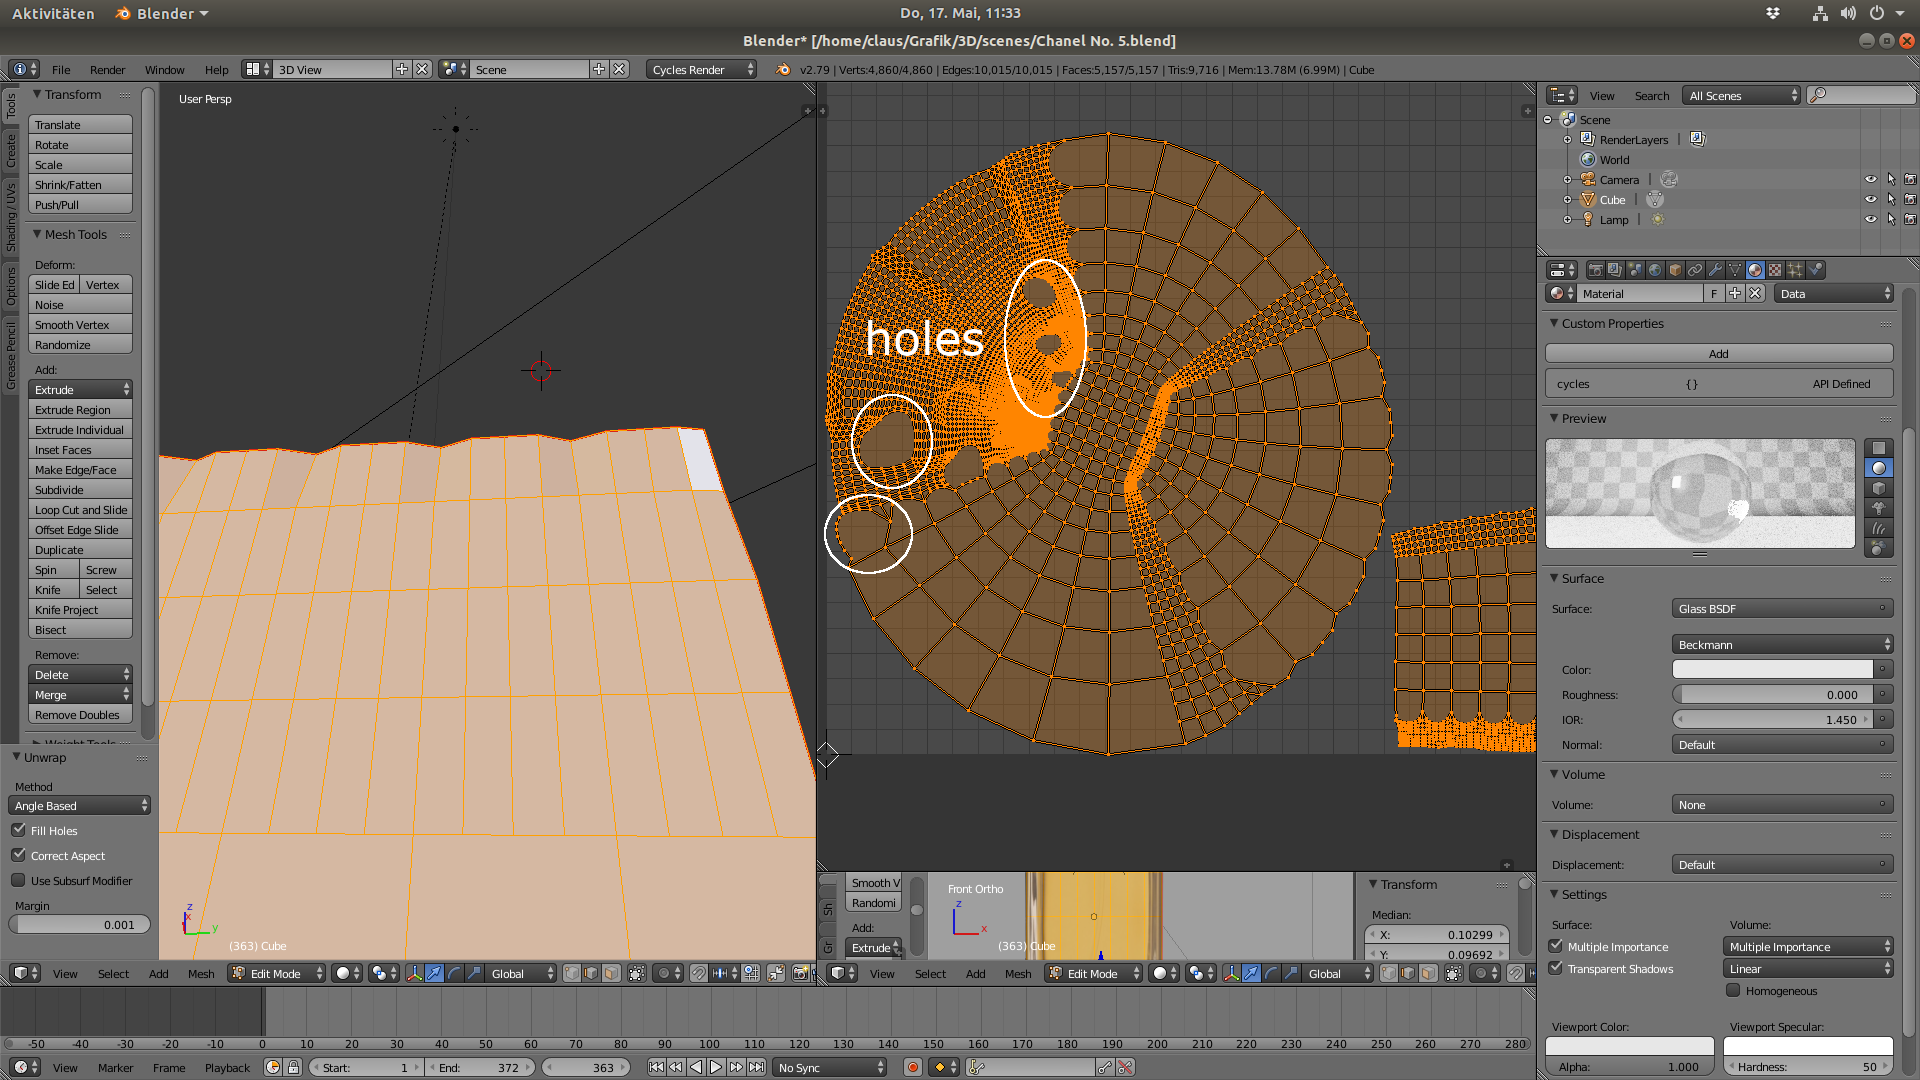
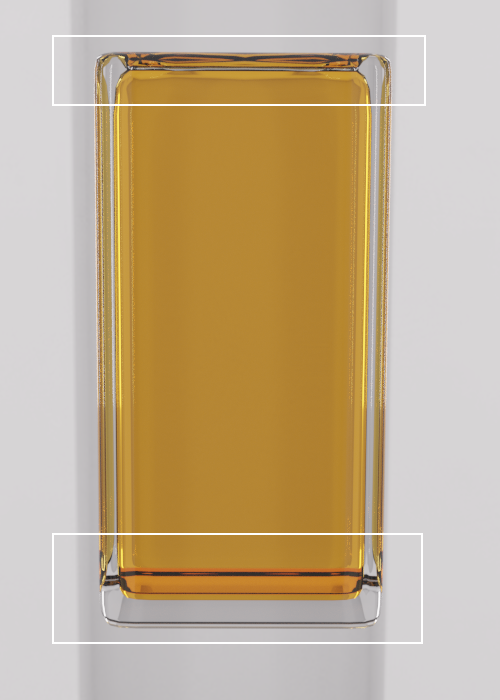
Ok, I managed to select the edges and perform CTRL+E (Mark Seam). After performing U (Unwrap) I discovered several holes in my model:
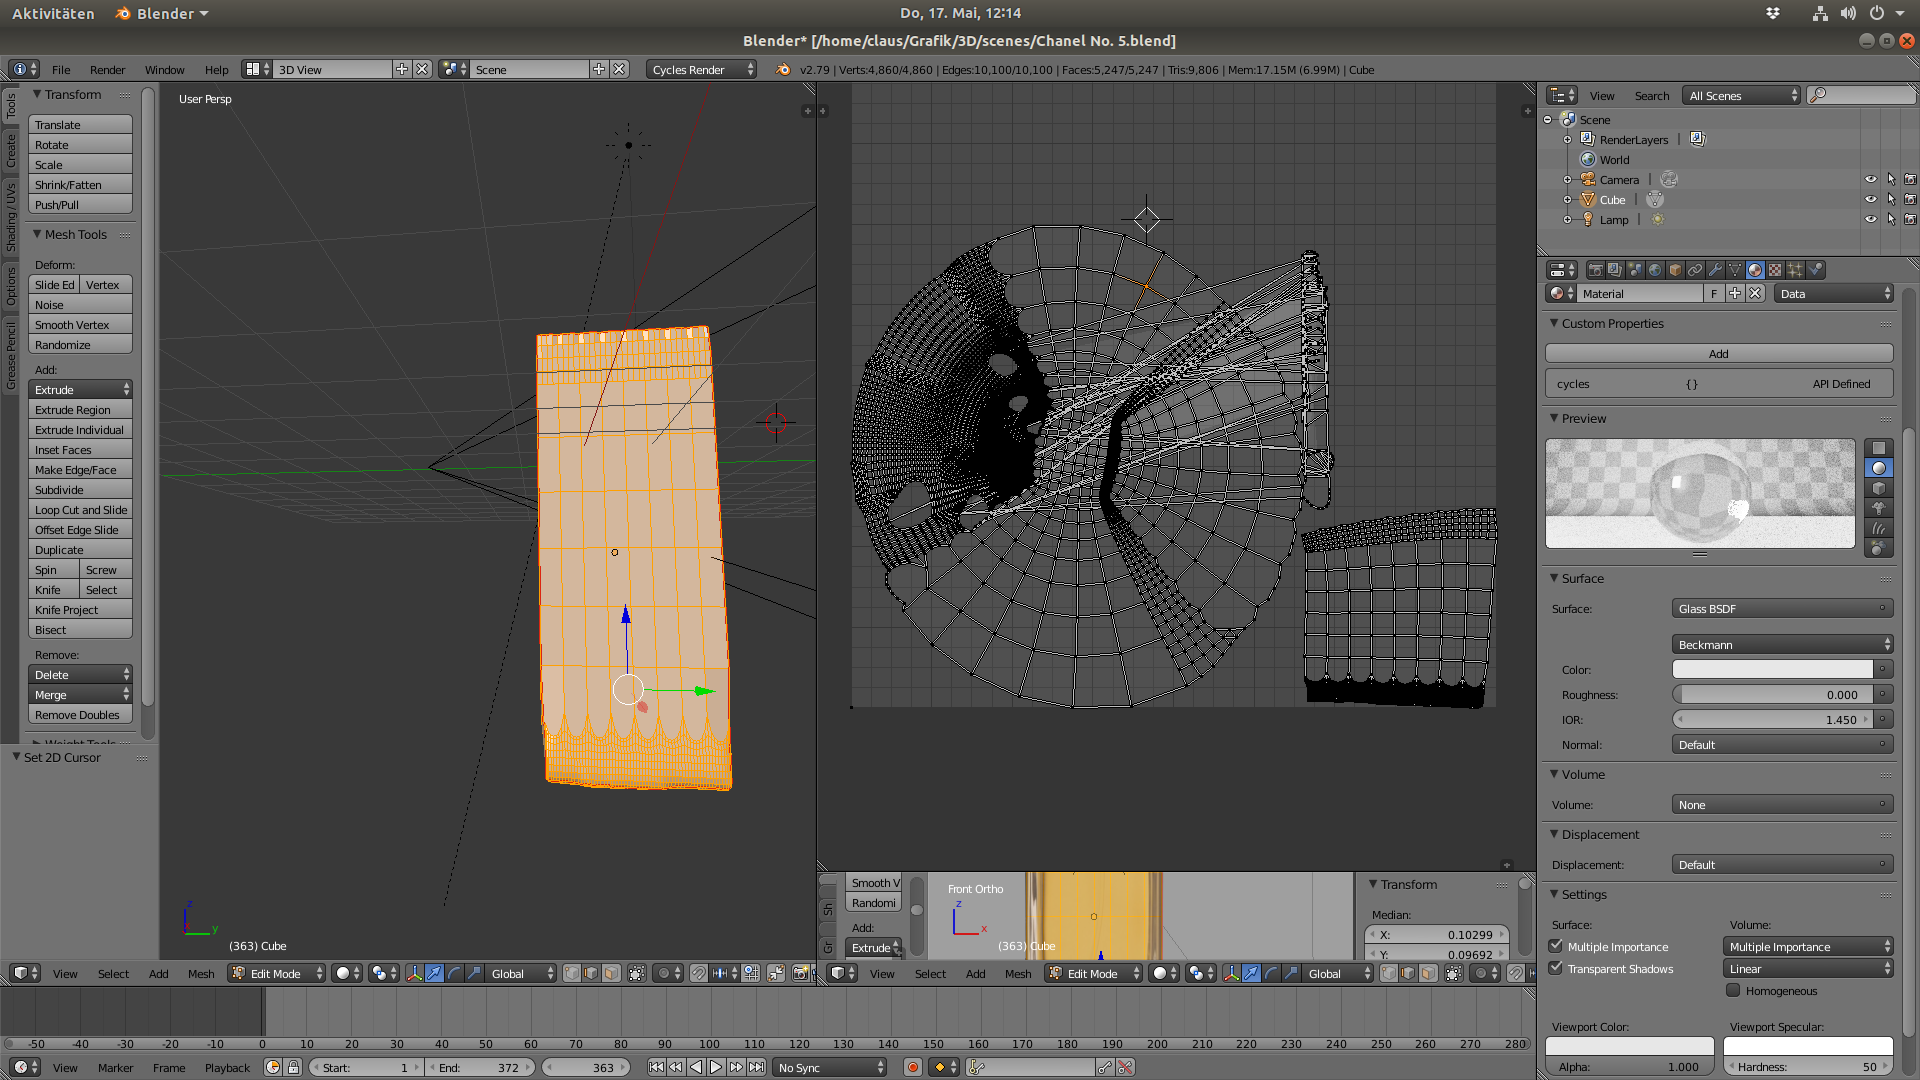
I already tried ALT+F and F inside the UV editor, but this didn’t work. How can I fill those holes? I found out for myself. I have to go to the 3D view, and there ALT+F does work. I managed to fill the holes, but now I messed up my entire UV map:
Does anybody know how I can fix this? I tried to delete the UV map, but this didn’t work. ![]()
I started all over again, making a new cube. My question: When do I do the UV mapping? Before, or after I subdivide the cube?
Looking at reference pictures, your model is way to complex I’m afraid. That bottom area of the mesh looks like a complete nightmare to unwrap. I would suggest starting over with the model. Here’s why: this same shape could be accomplished with a cube that was extruded once from on top. I would then add subsurf modifier and add loop cuts to the four faces close to the corners to round them to the radius I want. That model would quick and WAY easier to unwrap. Once I get home tonight after work I’ll make a model to show you what I mean.
Thanks! As I wrote, I made the model anew. I’m waiting for your response, then.
Claus
Oh, my bad I didn’t see that you said you had started over.
Unless I’m wrong, when you unwrap your model you are unwrapping your base mesh without any modifers unless you have a applied your subsurf. So you could unwrap before or after you place a subsurf, unless you apply the subsurf. You are then adding faces that you will then have to unwrap again.
Hi Claus
I did not have a look at your 1st model and just gave what you asked for, you have seemingly just started with Blender?
If this is the case you will need to get started watching a number of starter tutorials on YT.
Have a look at this vid, it is not the best way to model what you are looking for, but it will get you done with what you are doing. https://www.youtube.com/watch?v=D_09GTbkKSs
If you follow this one and the UV one that I posted 1st you will get done.
Anything else just shout, I am at the computer tonight.
Shaun
Edit: You can also slow the vid down in your YT settings as it may be going a bit fast.
… you have seemingly just started with Blender?
That’s right.
If you follow this one and the UV one that I posted 1st you will get done.
I have already watched it once. This is basically what I want to achieve (a perfume flask), but unfortunately there’s no text to describe the modeling process. I will have to watch it again at 0.25 speed. How do you make the edges of the bottle round?
Claus
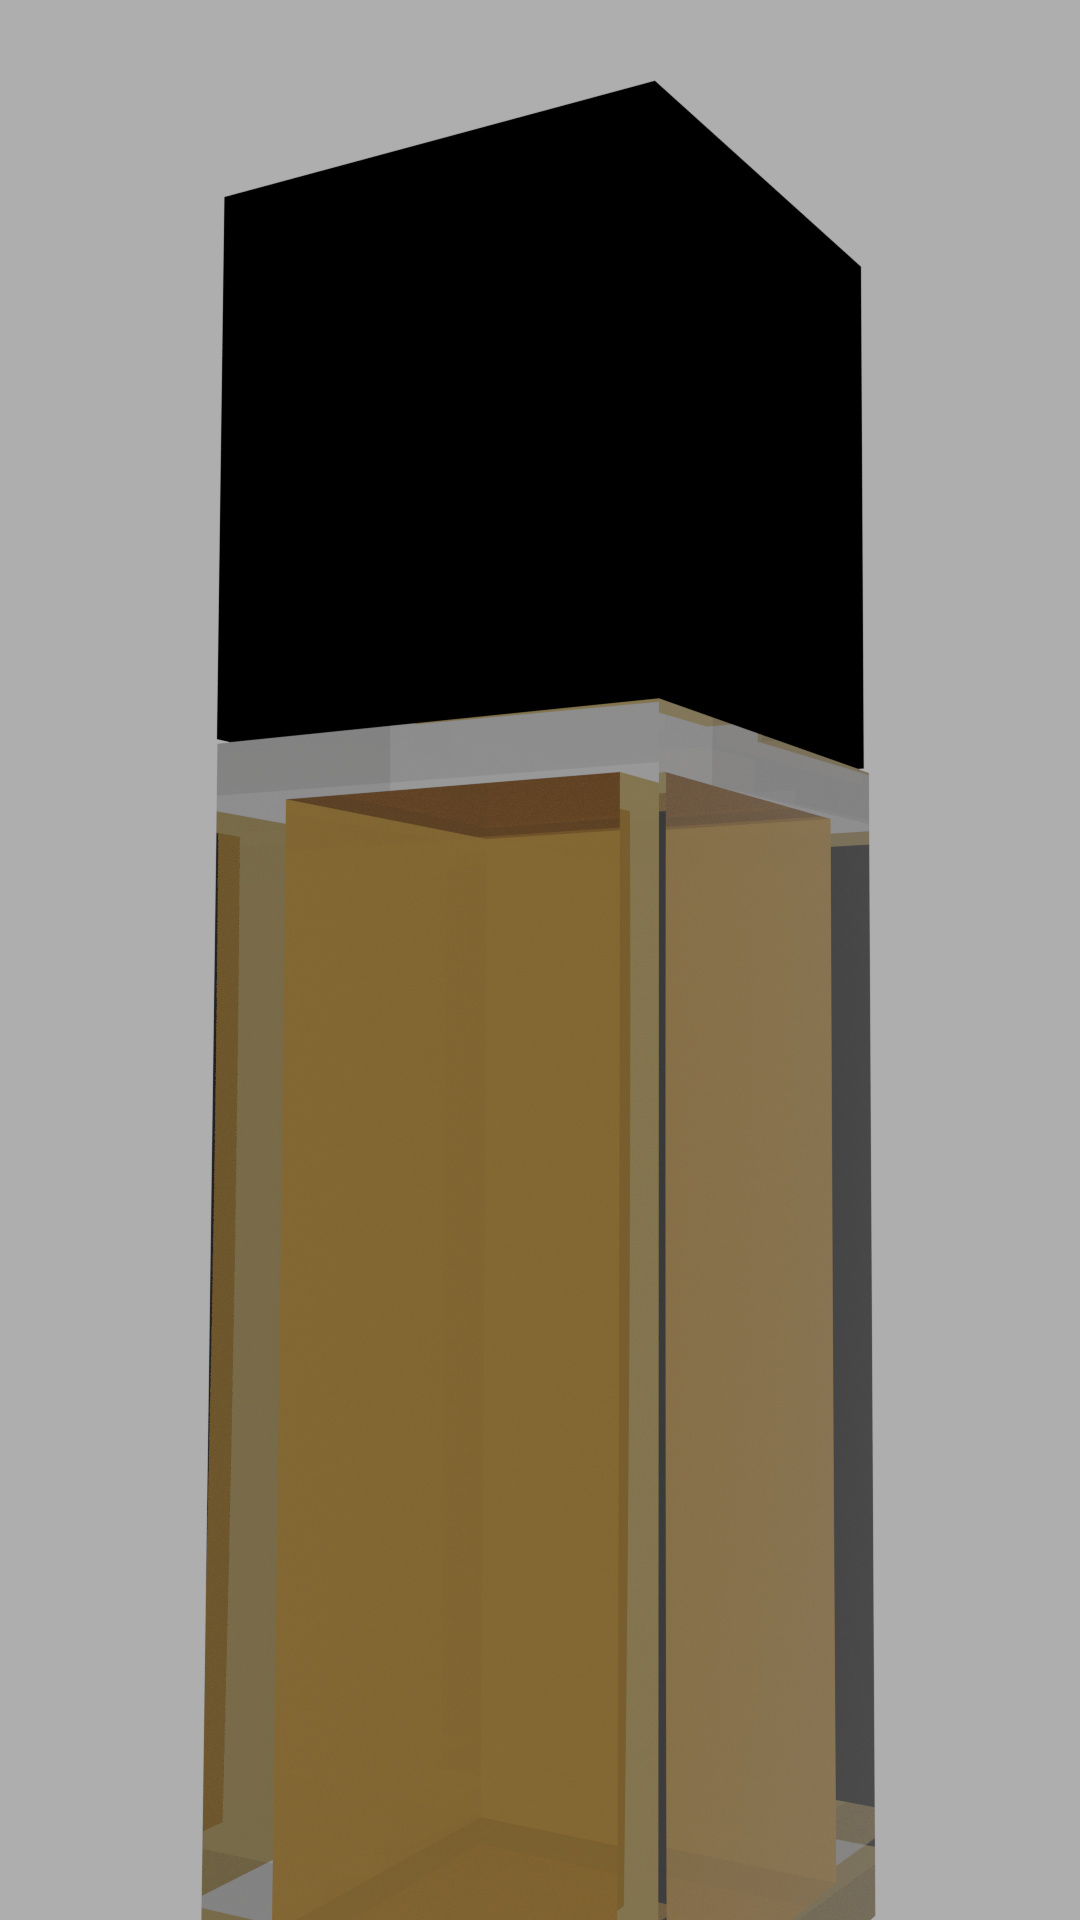
P. S.: Here’s a first test render of the flask without subdivision surfaces & without UV map:
Here’s what I whipped up in a couple of minutes
with a quick render you can get this
I have a subsurf on it but not applied
He has a subsurface (catmull) modifier on a box with edge loops to “sure up” the corners. Make a simple box, add subsurface modifier and then create and move edge loops until you get the desired results (usually just one loop per corner). The loop will sharpen the edge of the box.
He speaks truth. What did last night is create a box, extrude it one time in the +Z by 2. Took the top Pressed I to scale in the top. Extruded that down to create a hole in the top. Then edge looped all the corners then closed off the top. Took the inside faces and applied the golden glass material and then selected the outside faces and applied the white glass material.
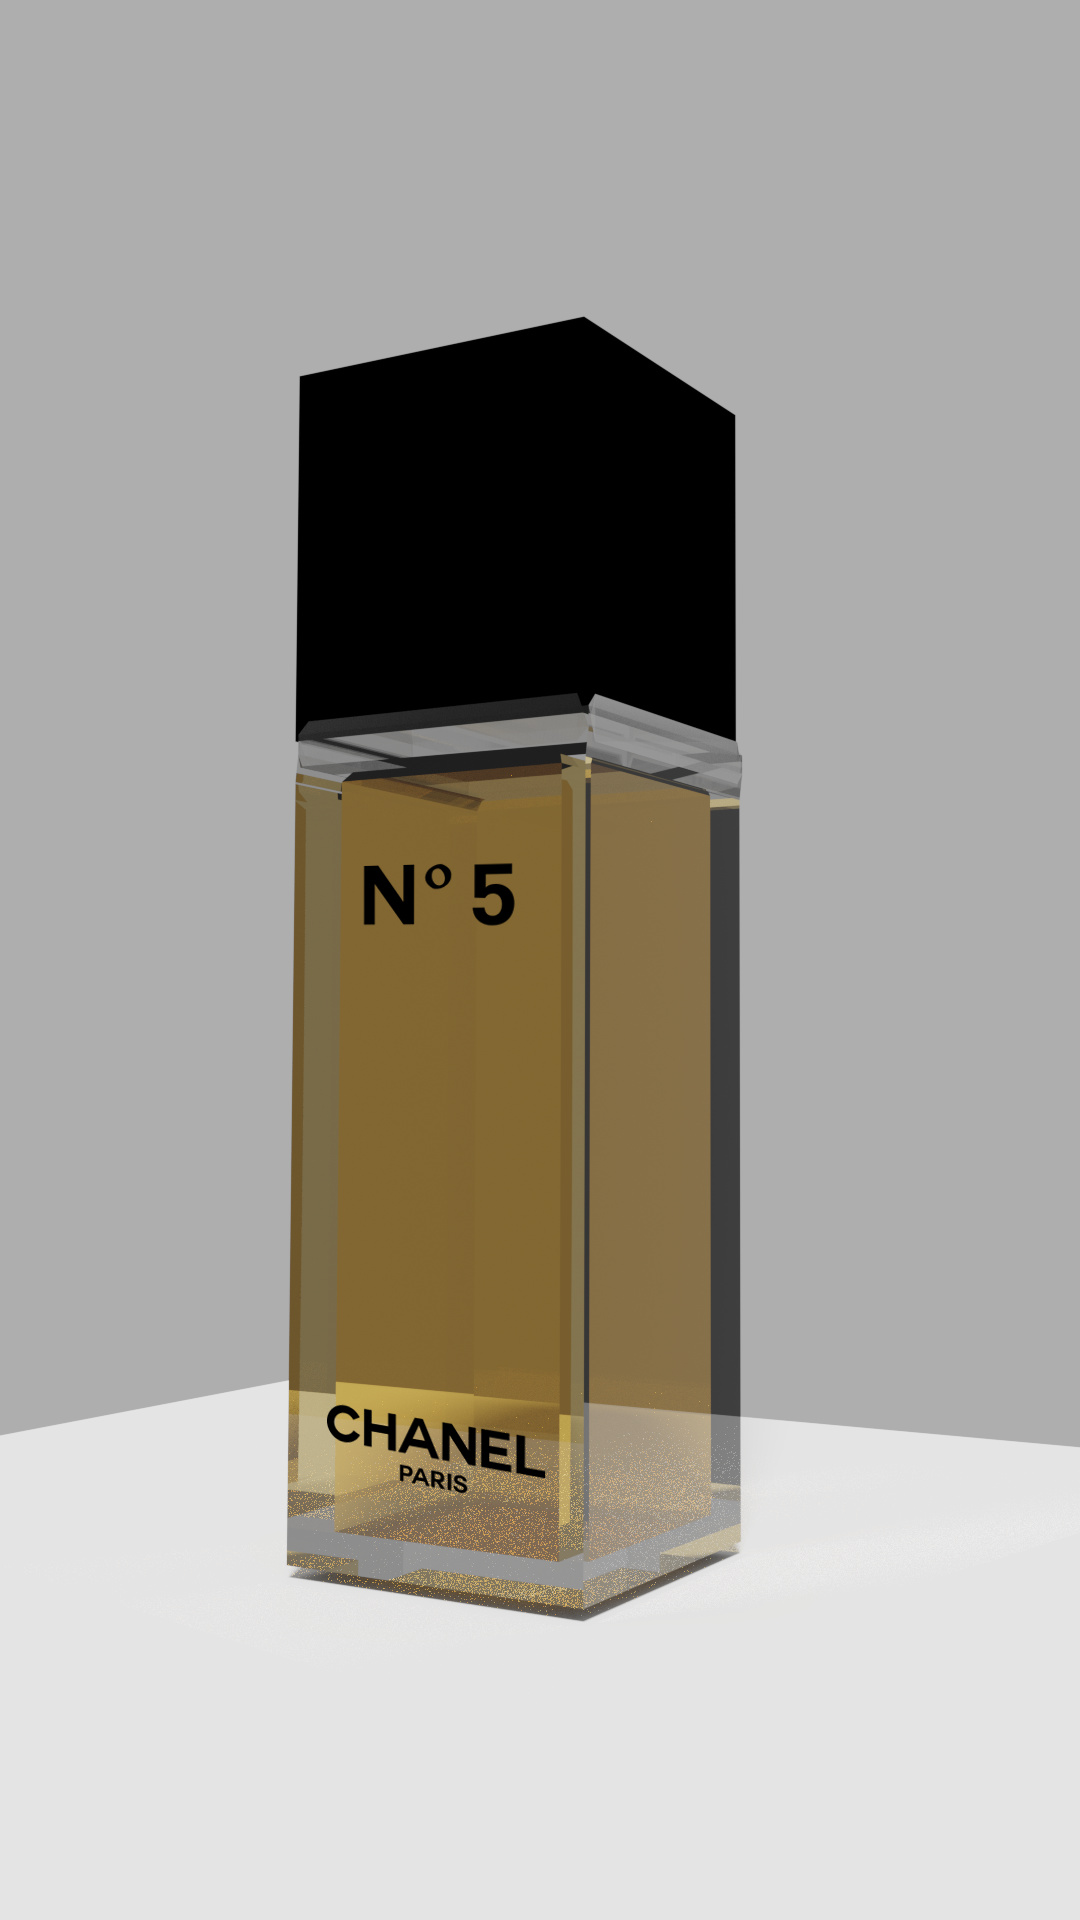
I tried loop cuts & edge loops & a subsurface modifier, but I couldn’t get the look you achieved. ![]() Now I have to watch the video on UV mapping again (all four parts), in order to apply the label to the front of the flask. I made a render & applied the label using Gimp. That’s what it shall look like:
Now I have to watch the video on UV mapping again (all four parts), in order to apply the label to the front of the flask. I made a render & applied the label using Gimp. That’s what it shall look like:
P. S.: I found out how to make the edges smoother by adding a ‘Bevel’ modifier with the parameter width=0.025.
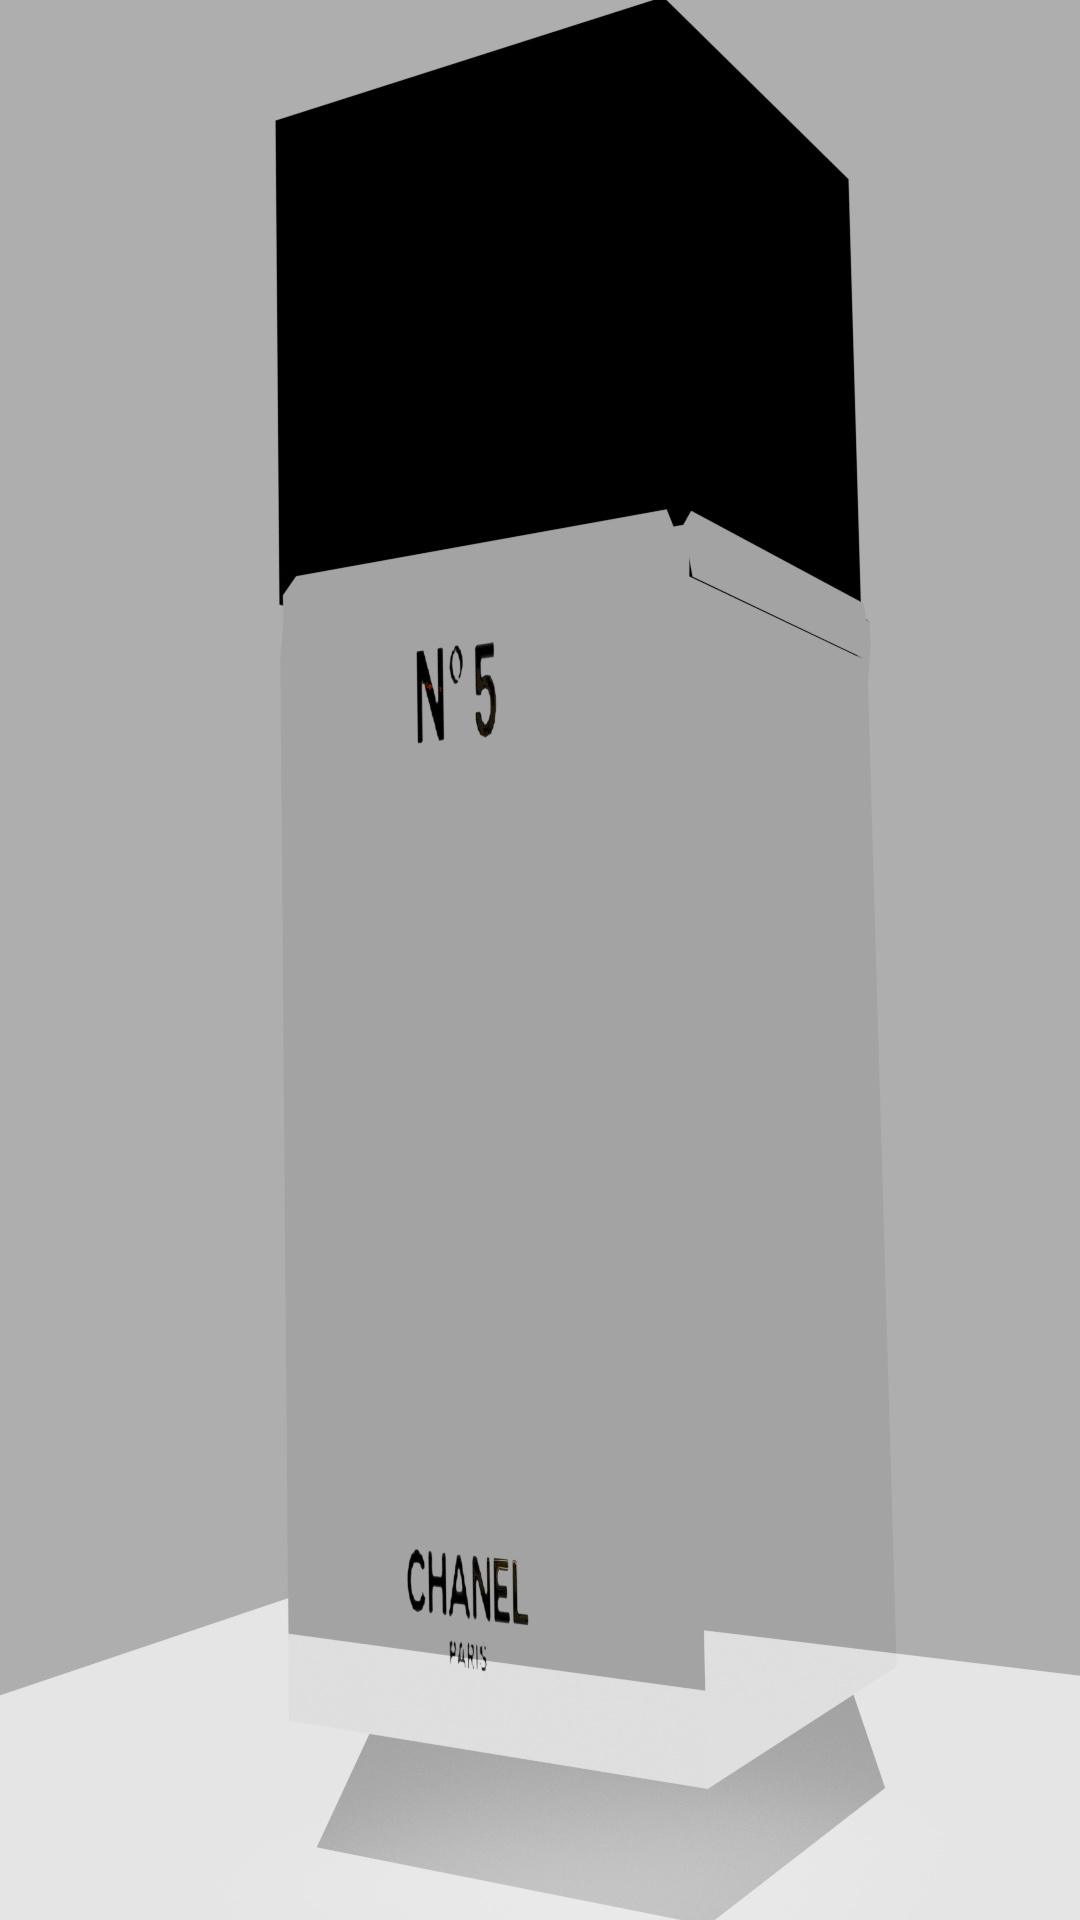
By following the tutorial above, I was finally able to apply the label to the front of the flask. But it doesn’t look so good. Plus, the golden material of the perfume is gone. ![]()
I realize now that the process of learning how to use Blender is really laborious, but I want to keep going in order to be successful.
You really don’t have to UV map the entire object, just the area you need the label, because you are giving yourself a big headache with this. Make sure you’re using a PNG or a file format that supports transparency, so the alpha of the texture can be read.
Only one face UV mapped, using the image map as an alpha. In this case it was easy since my image is black and white in the correct areas, but yours will have to be inverted to get the same result.
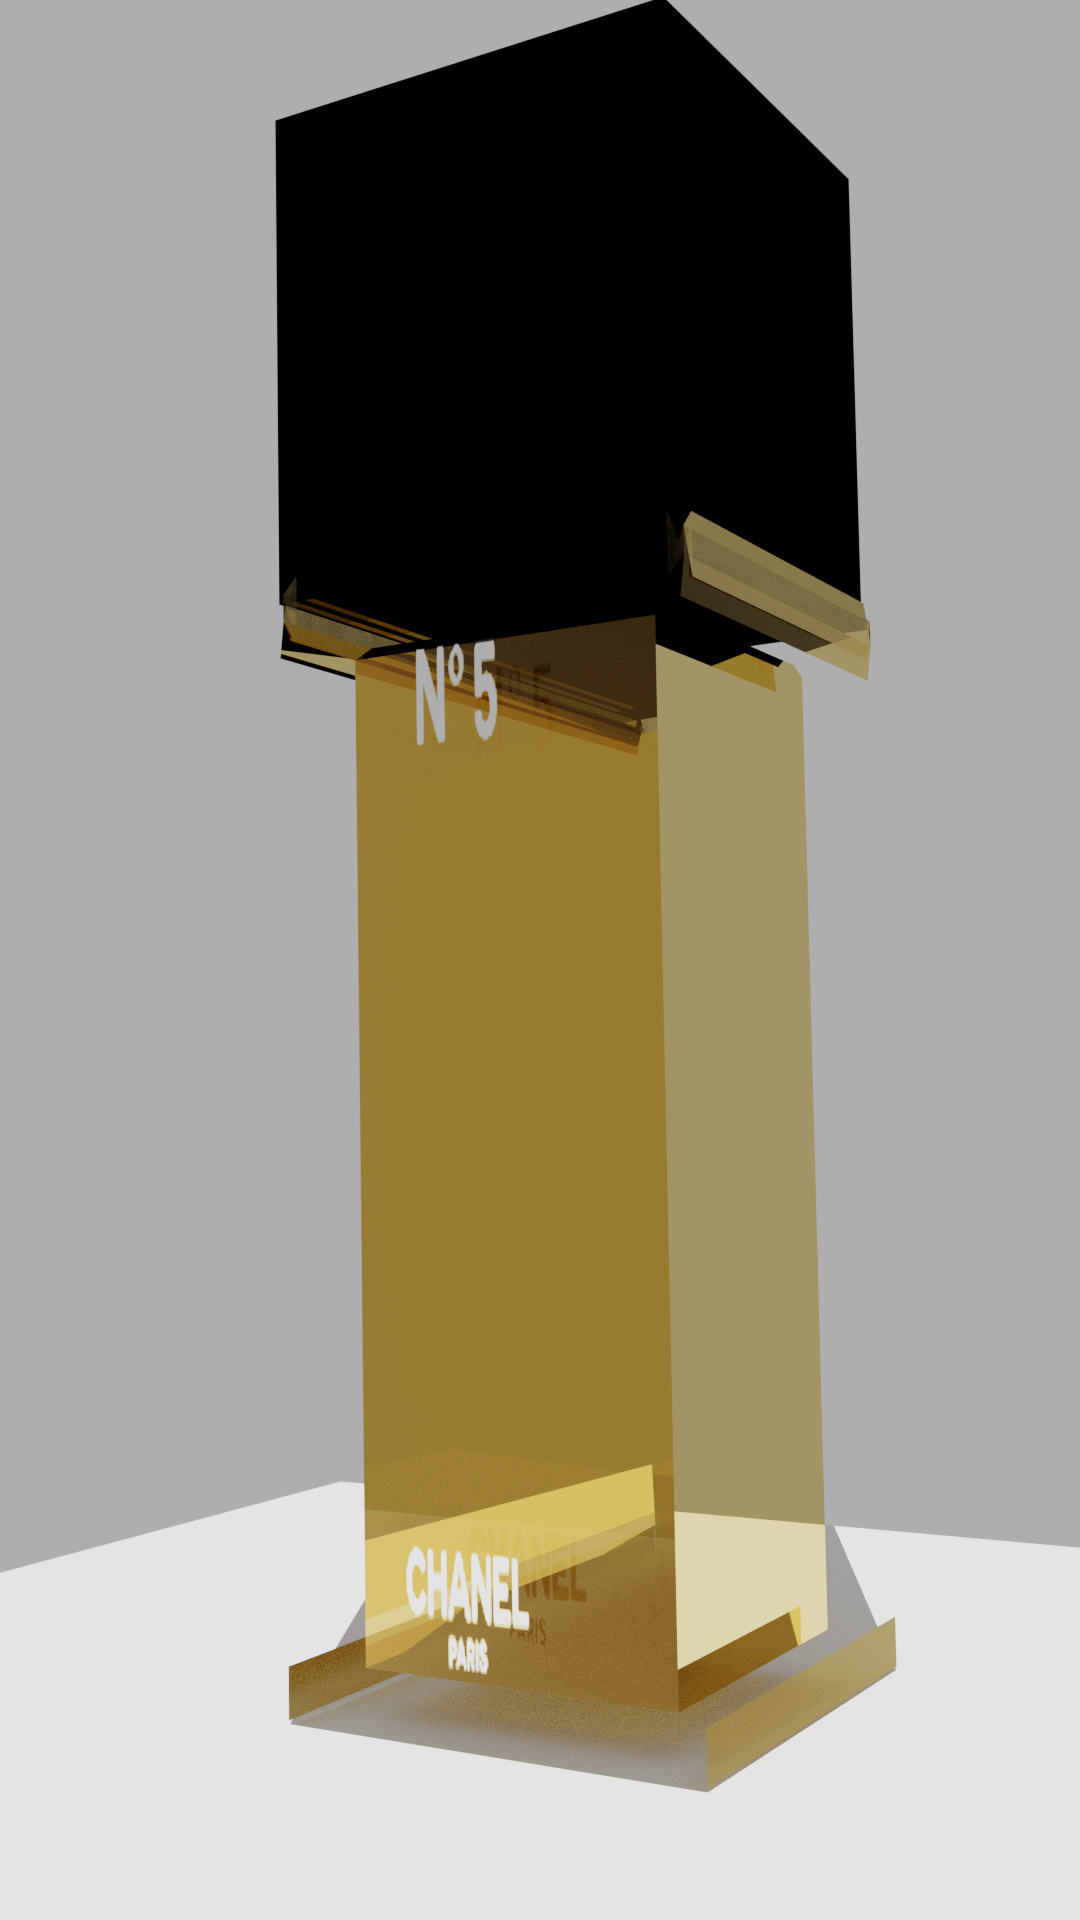
Yep, in the meantime I found out myself. I added a color inverter, and now the text is visible, but white. ![]() In addition, the glass is gone; I don’t know, why. Maybe I’ll start anew.
In addition, the glass is gone; I don’t know, why. Maybe I’ll start anew.
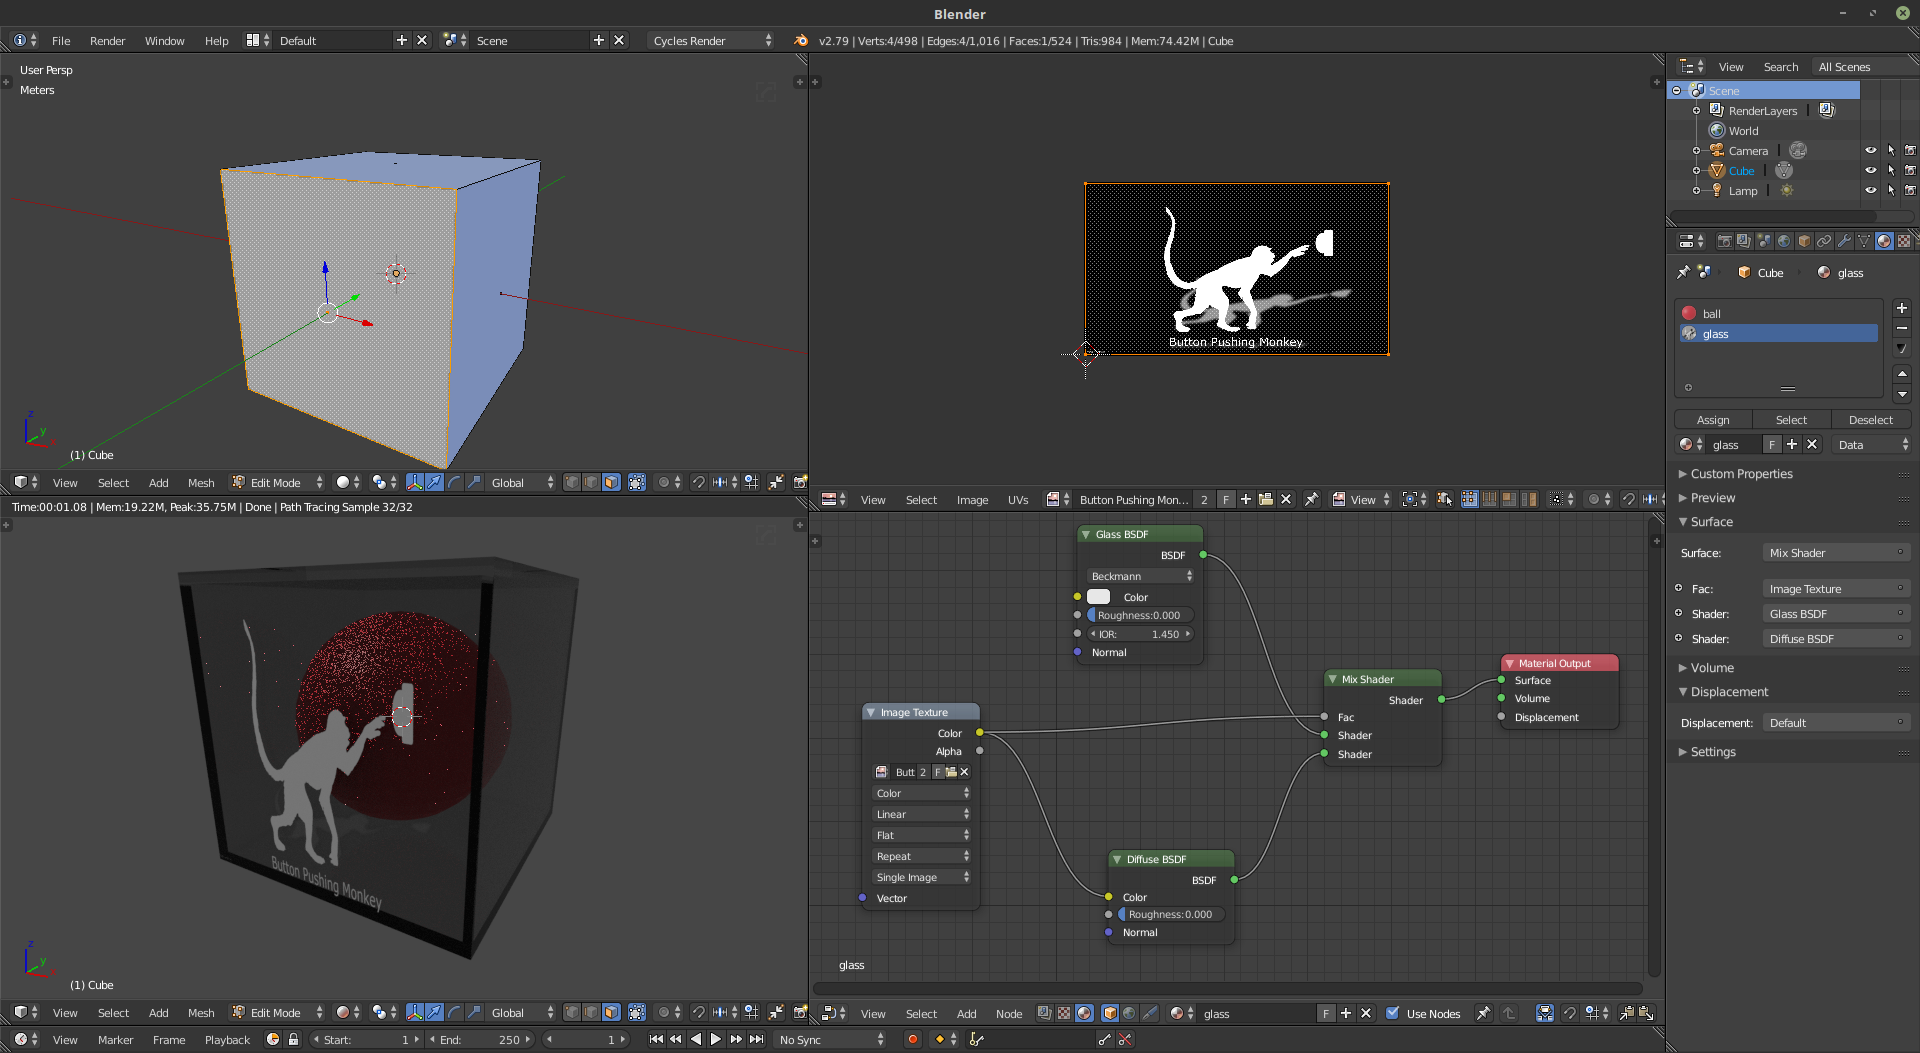
Here’s my last render:
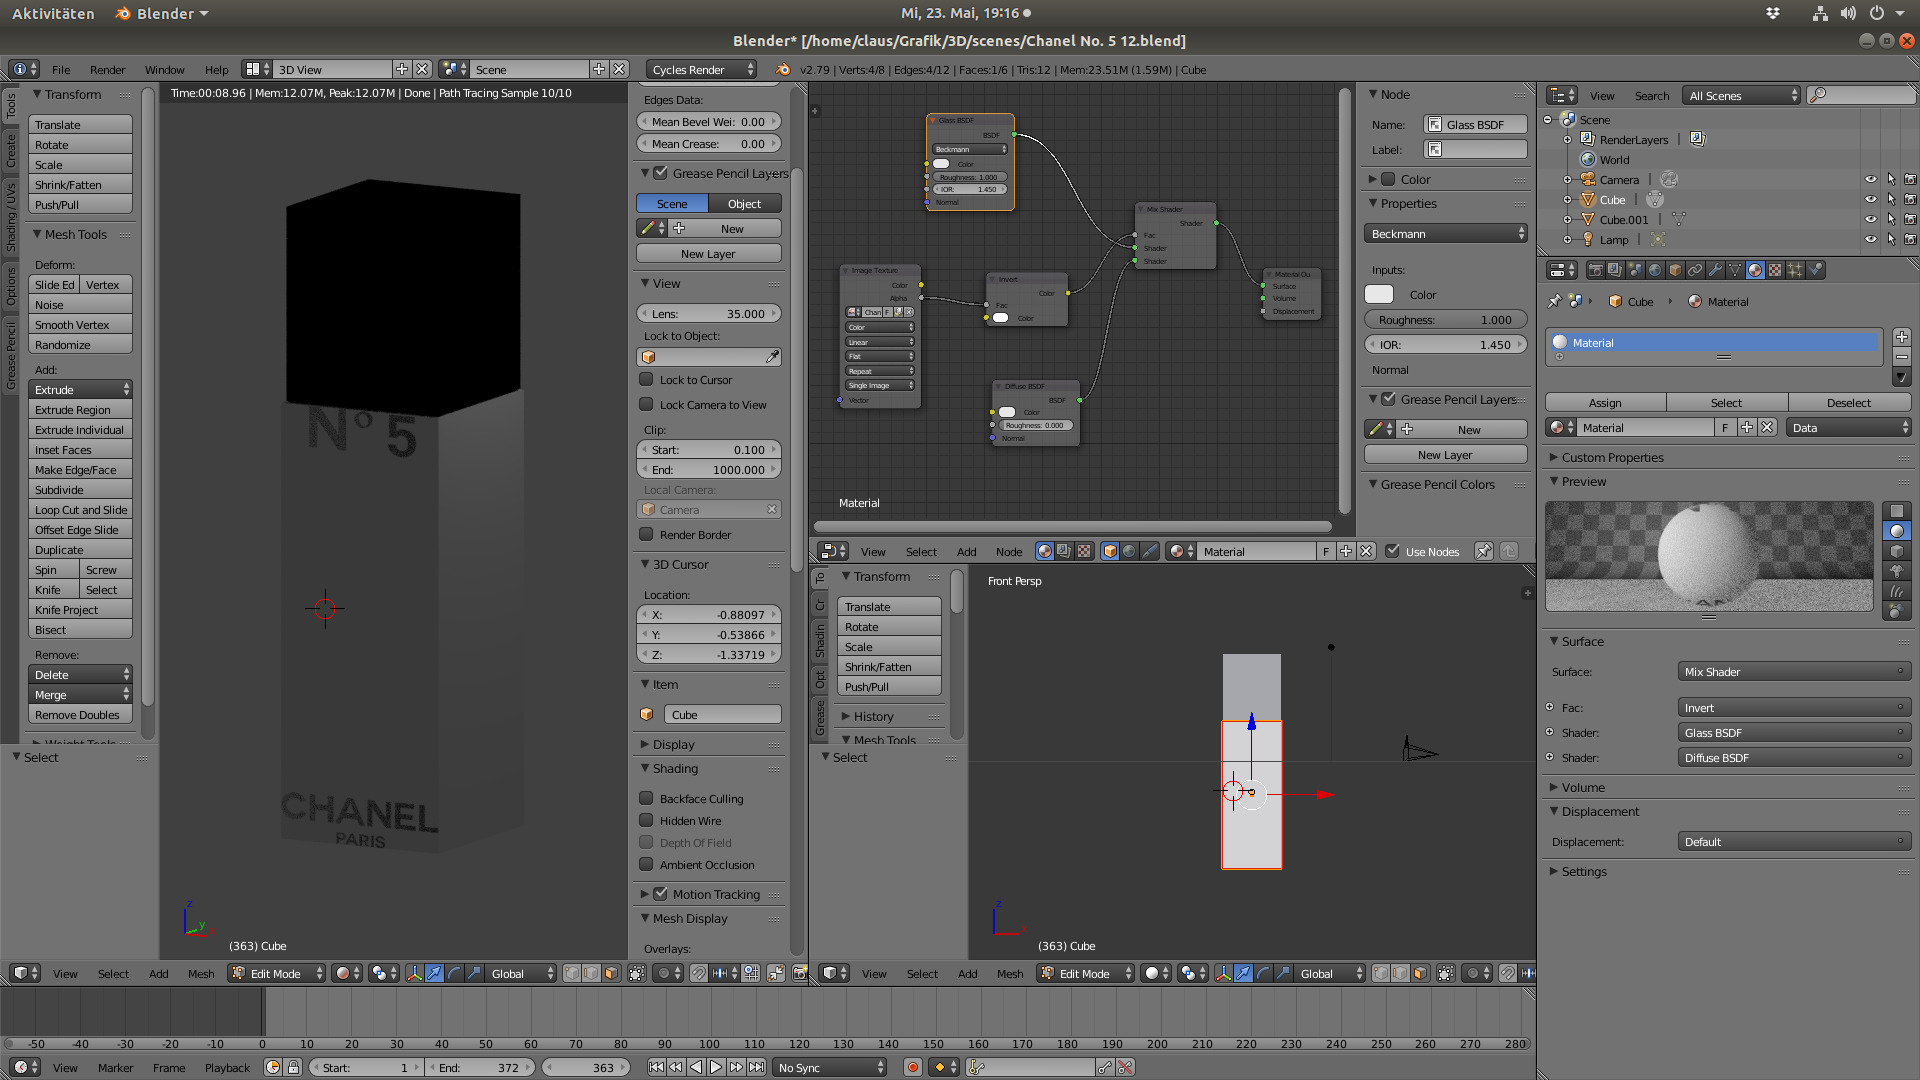
And here’s a screenshot of the Blender interface:
I see in your node setup that you have the alpha controlling the IOR of the glass. I believe that is your problem. If you look at ajm’s result he has the image going to a glass and diffuse shader & and it is also controlling the factor of the mixing shader.
You will have to make an additional node to invert and use as the alpha map or just pipe the image you have through an invert color node and feed that into the fac. That way your original map can be used to drive color and the part that goes through the invert node can drive the alpha.
In the meantime I tried different approaches & combinations of nodes, and in the setup below there’s at least the label visible. Unfortunately, the glass texture is gone although I have used a mix shader. This is just a very basic model for testing purposes (no subdivision modifier).
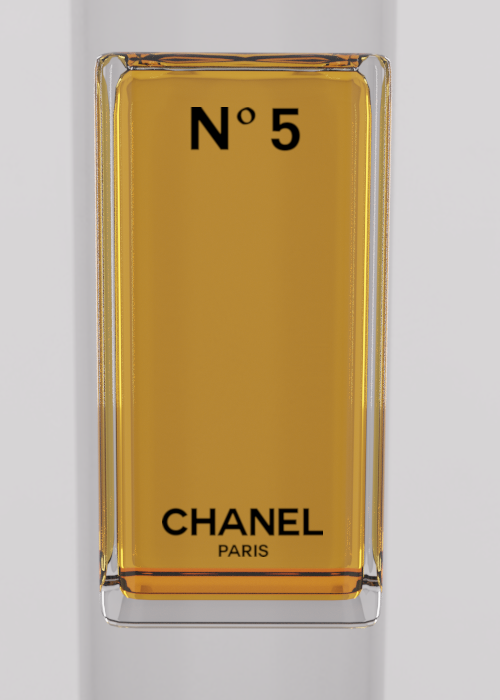
In the end it shall look like this,
but I’m having a hard time making the bevels rounded. I used a subdivision modifier but then the entire flask was subdivided, whereas I only wanted the edges of the flask to be round. I also used four loop cuts, but I don’t know how to apply the subdivision to the edges alone. ![]()
When I get home tonight, I’ll see if I can make a video of how I made the model and post it to youtube. I’m at work at the moment. I get home at 10pm CST.