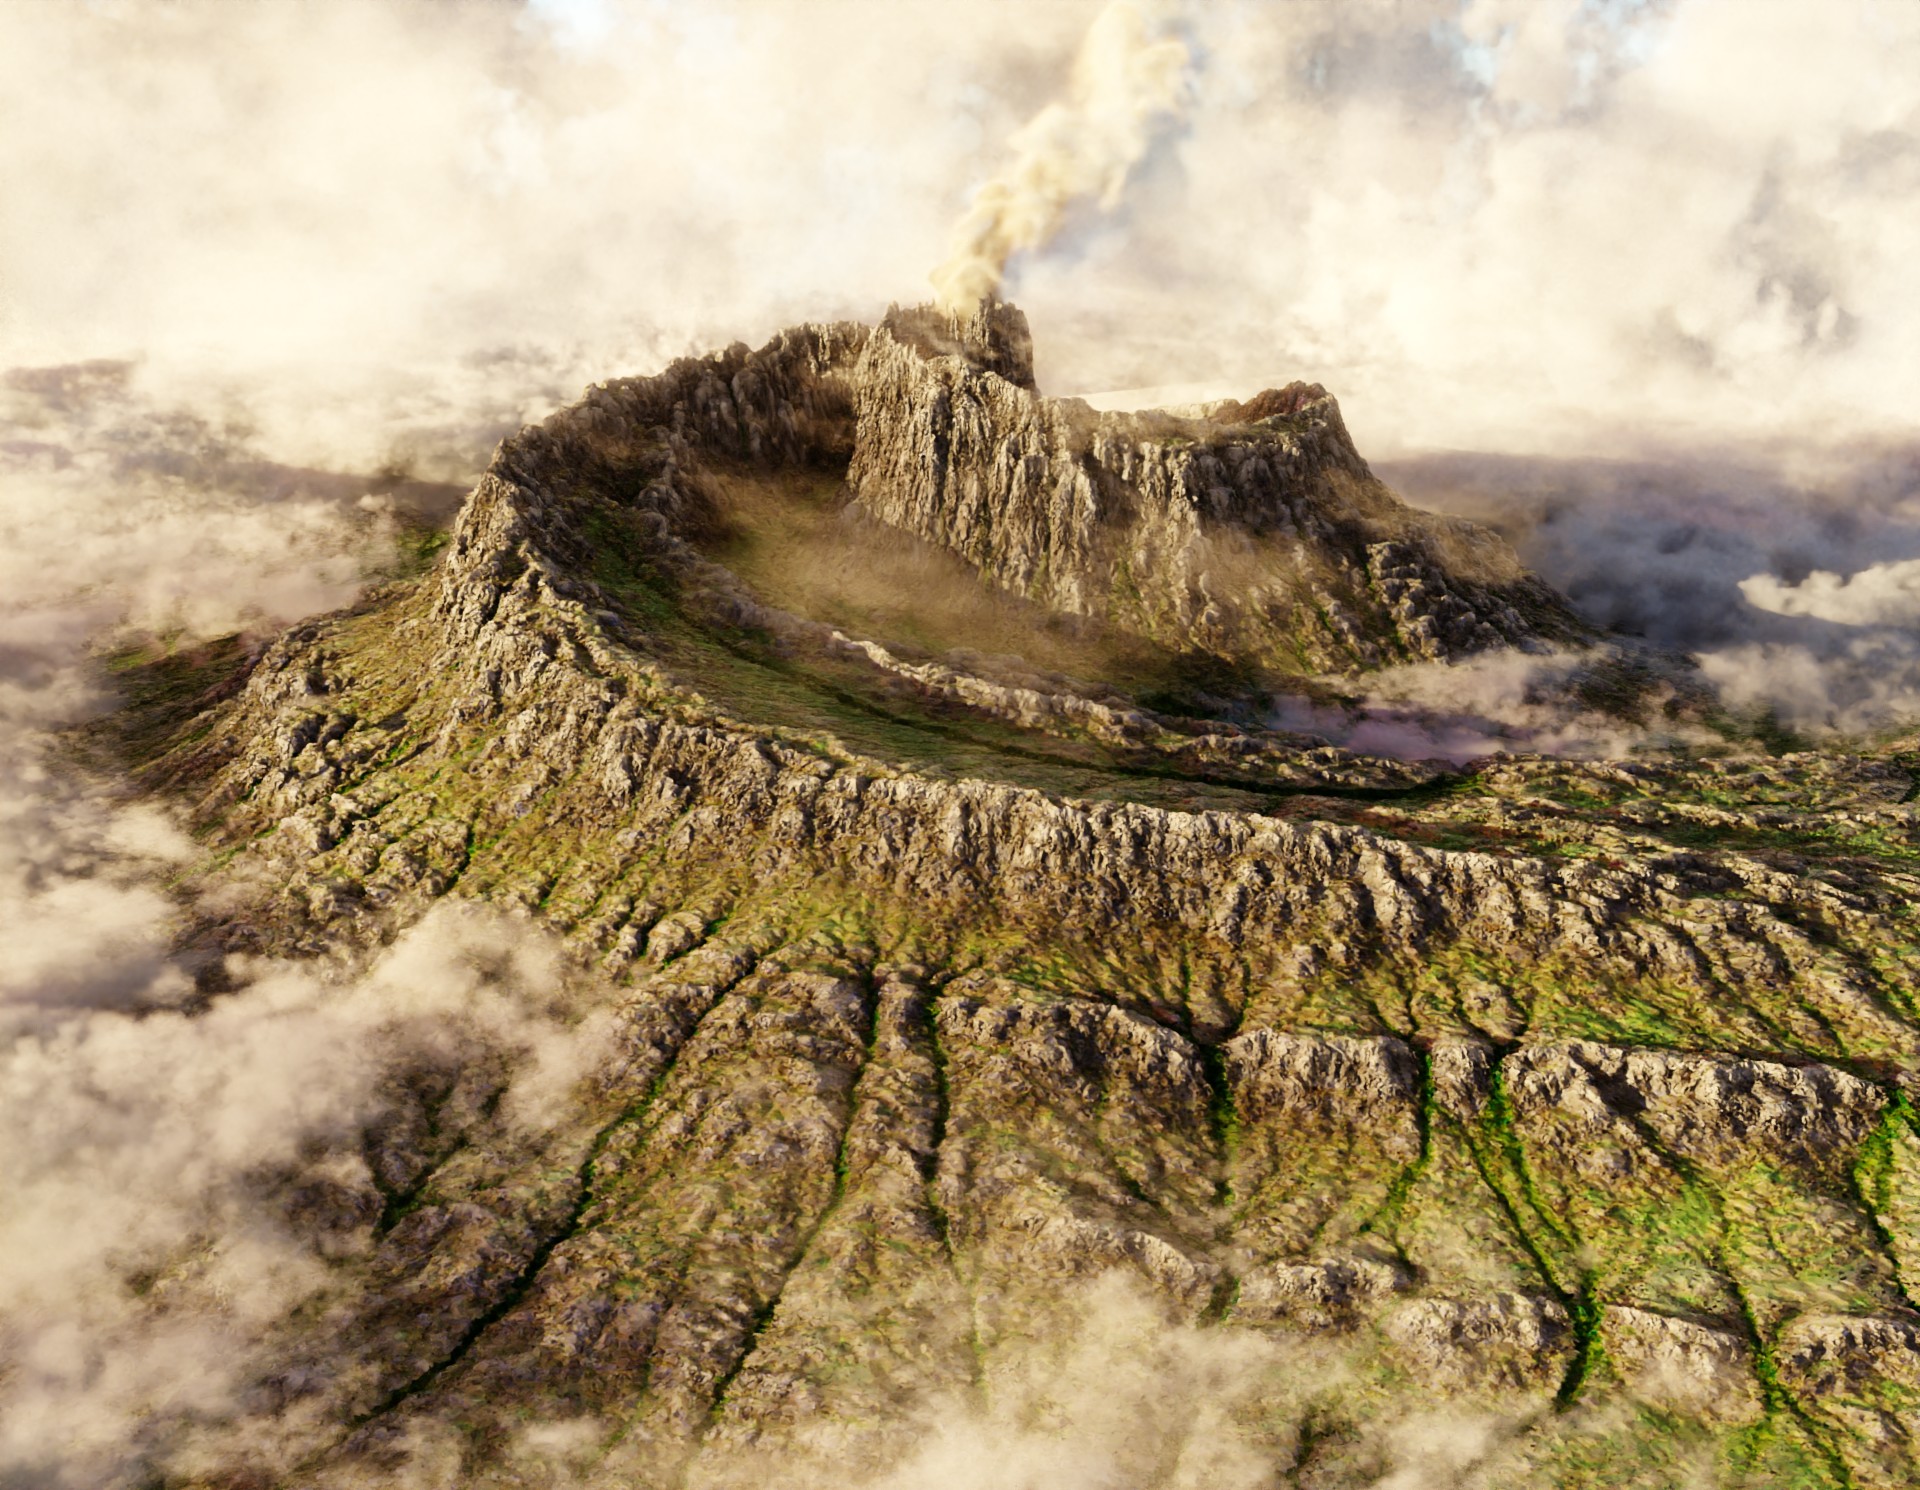
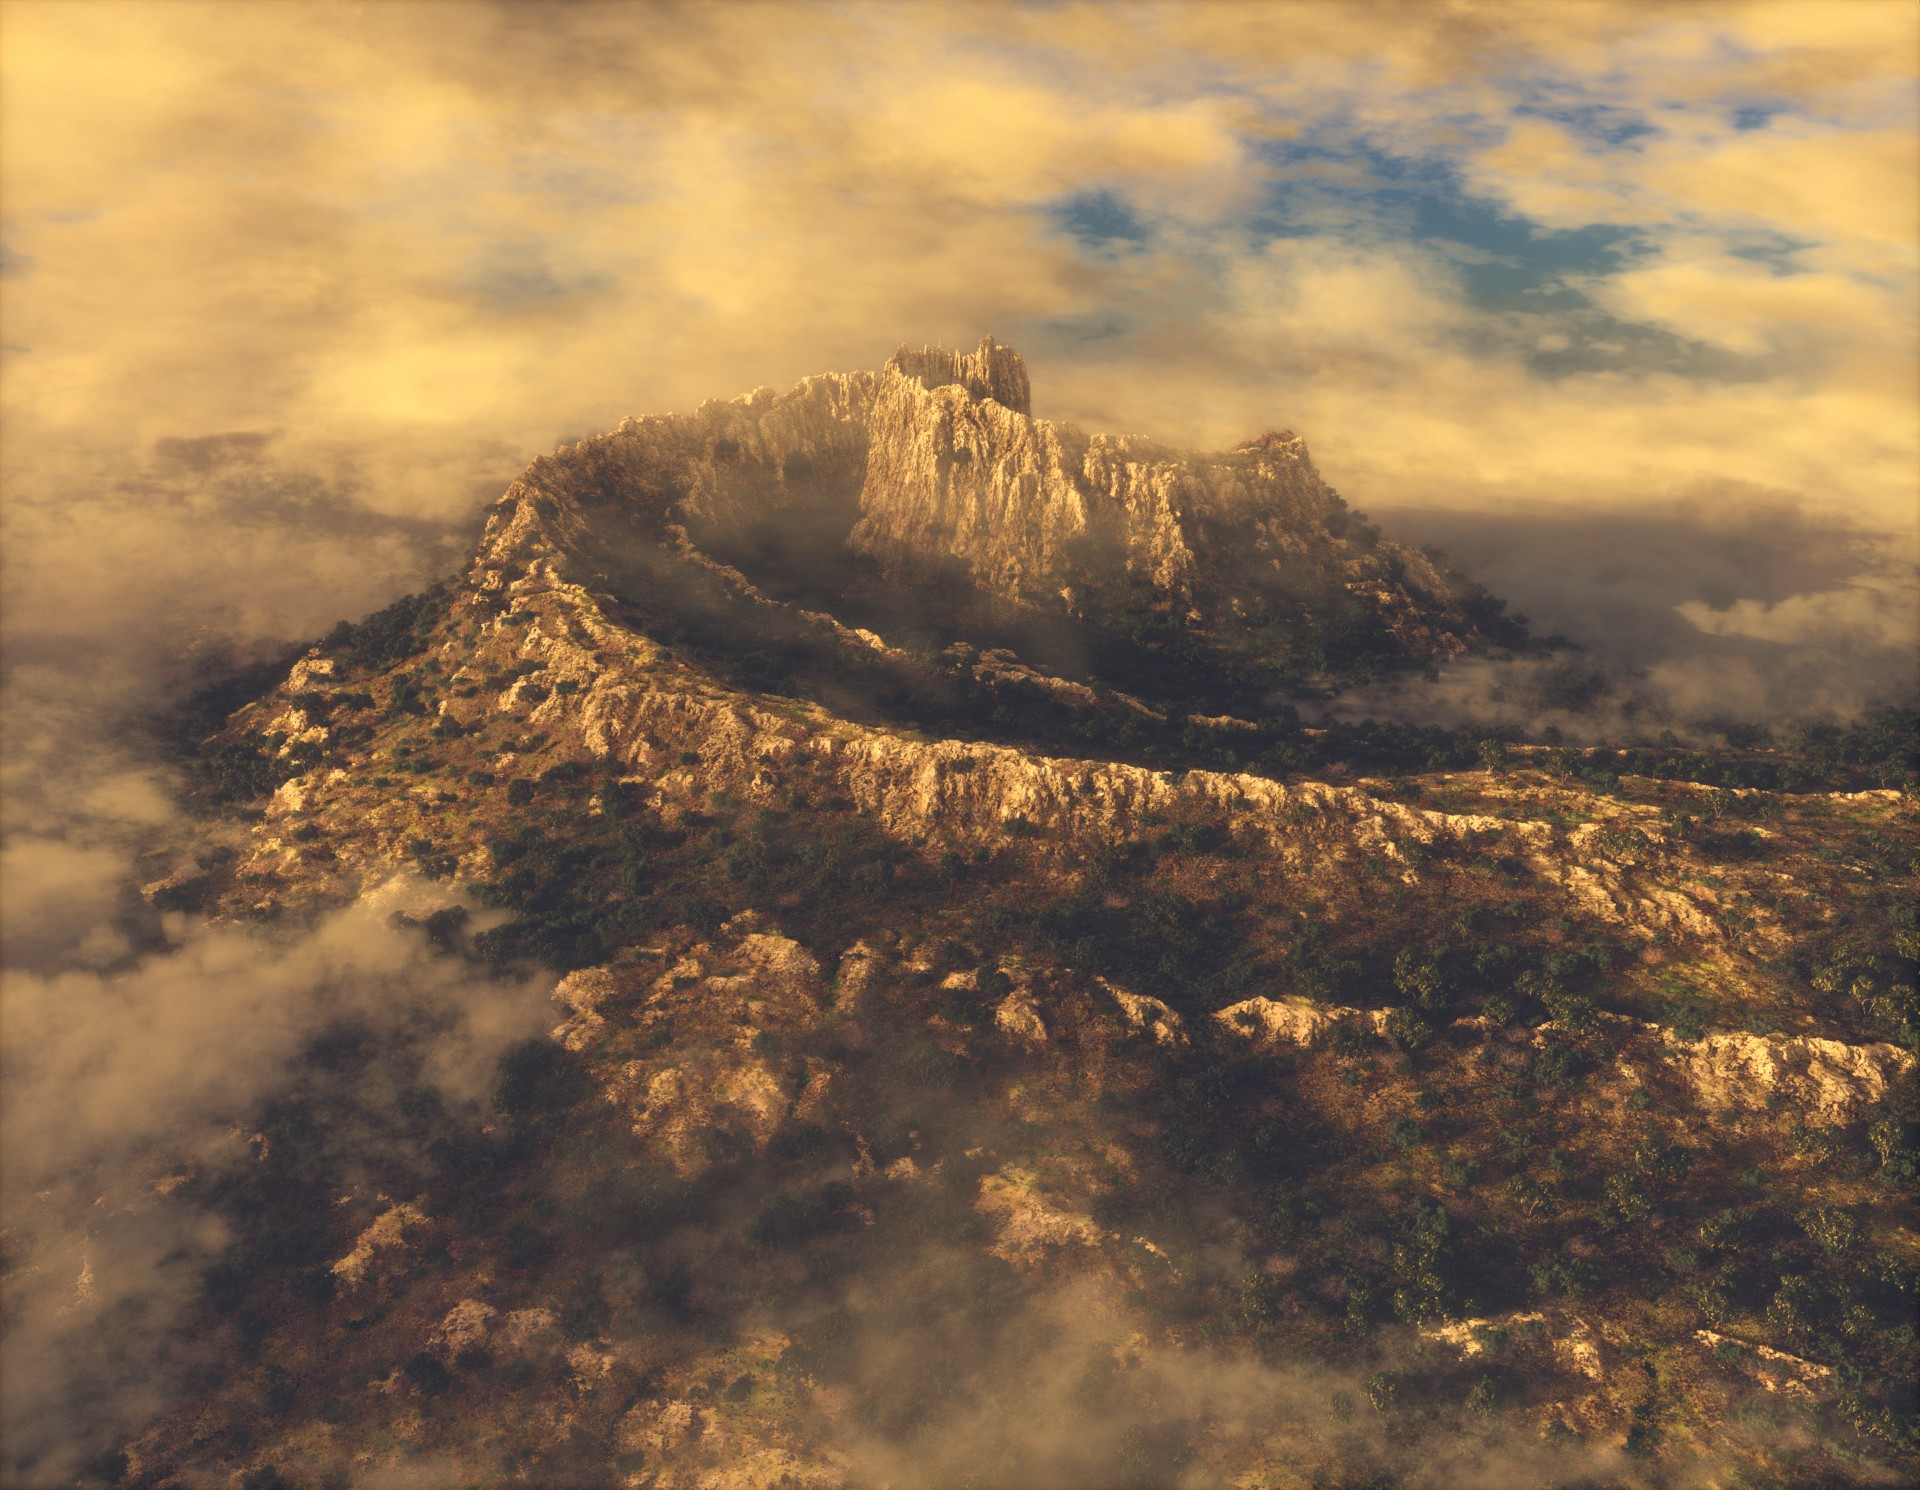
I decided to run with scene I introduced in my sketchbook this afternoon. I cleaned up the shader a bit, and figured the mountain should live in the clouds. And maybe it should be a volcano.
Still a lot more to do, but this lays out the general goal. The mountain shader still needs a lot of work, and the smoke plume is currently quite … lacking. I’ll likely poke the clouds a bit more, although I think they might hold up if I work on the lighting.
The biggest pain thus far has been overlapping volumes. If two or more volumes overlap, I’m getting harsh artifacts at the intersection. So I’ve had to arrange things carefully to avoid them, or at least keep them hidden.
I’d like to eventually add some vegetation, but as this is a shader displacement on a plane, I’ll need a proxy mesh on which to scatter. In the past I’ve not had much trouble with that, but I can’t seem to get a plane with a displacement modifier to line up properly with this one. Another hurdle. If anyone knows of alternative ways to scatter objects/collections on a shader displaced plane, please let me know!
Managed to wrangle the proxy into a close-enough shape to scatter some vegetation. Will likely add a few more models to increase the variety.
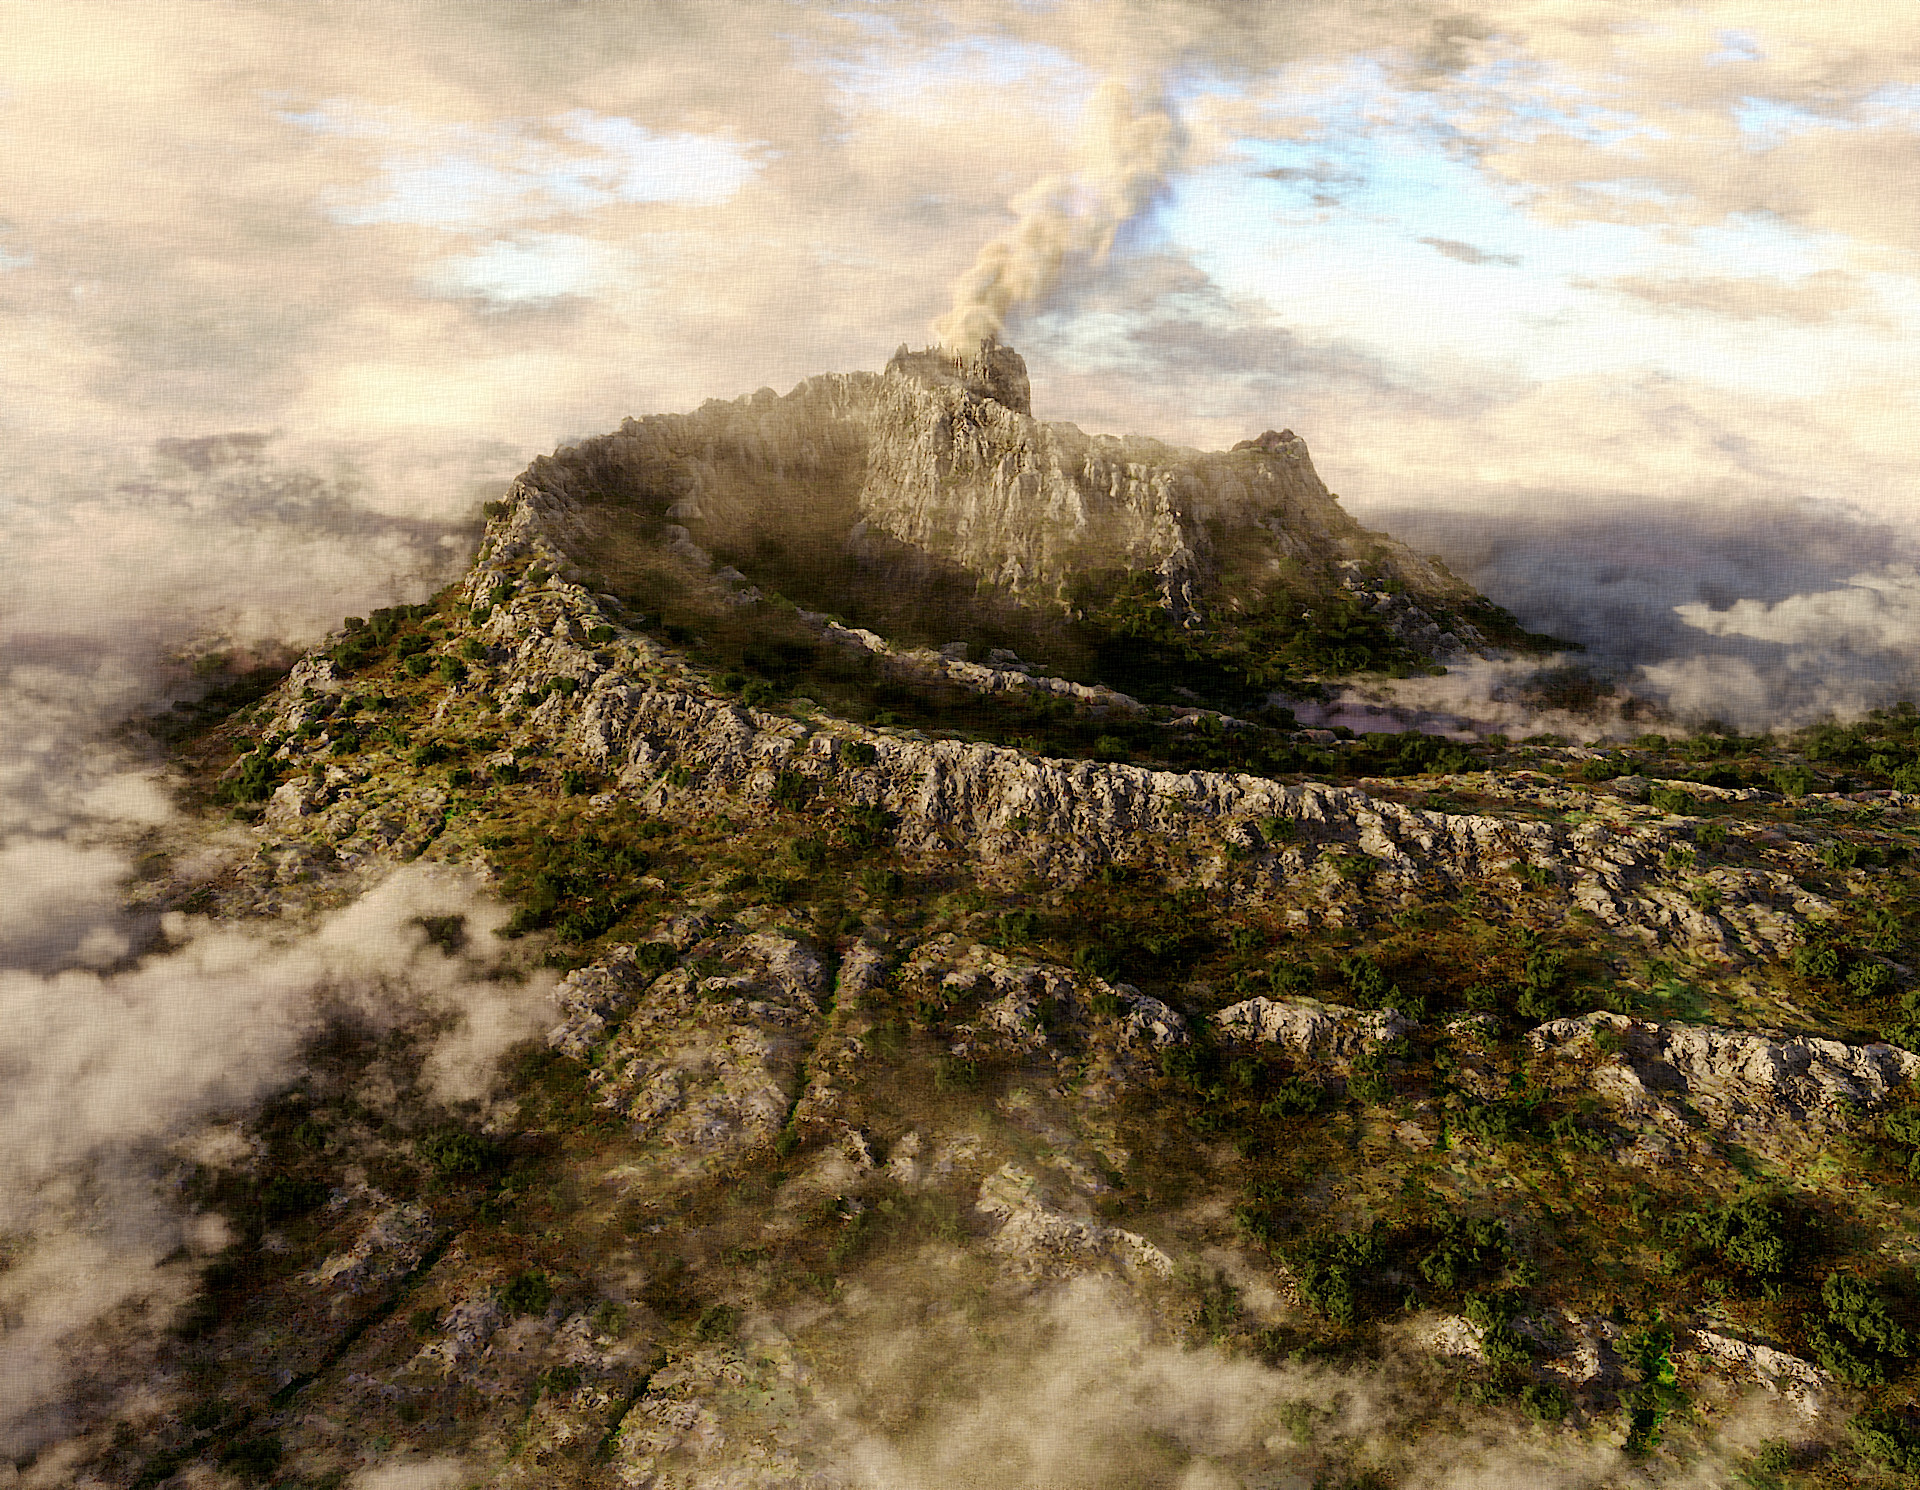
Switched to a new camera. A little lower, and shorter focal length. What do you think of this perspective?
Adjusted some clouds to open up the sky a little. It was barely peeking through previously.
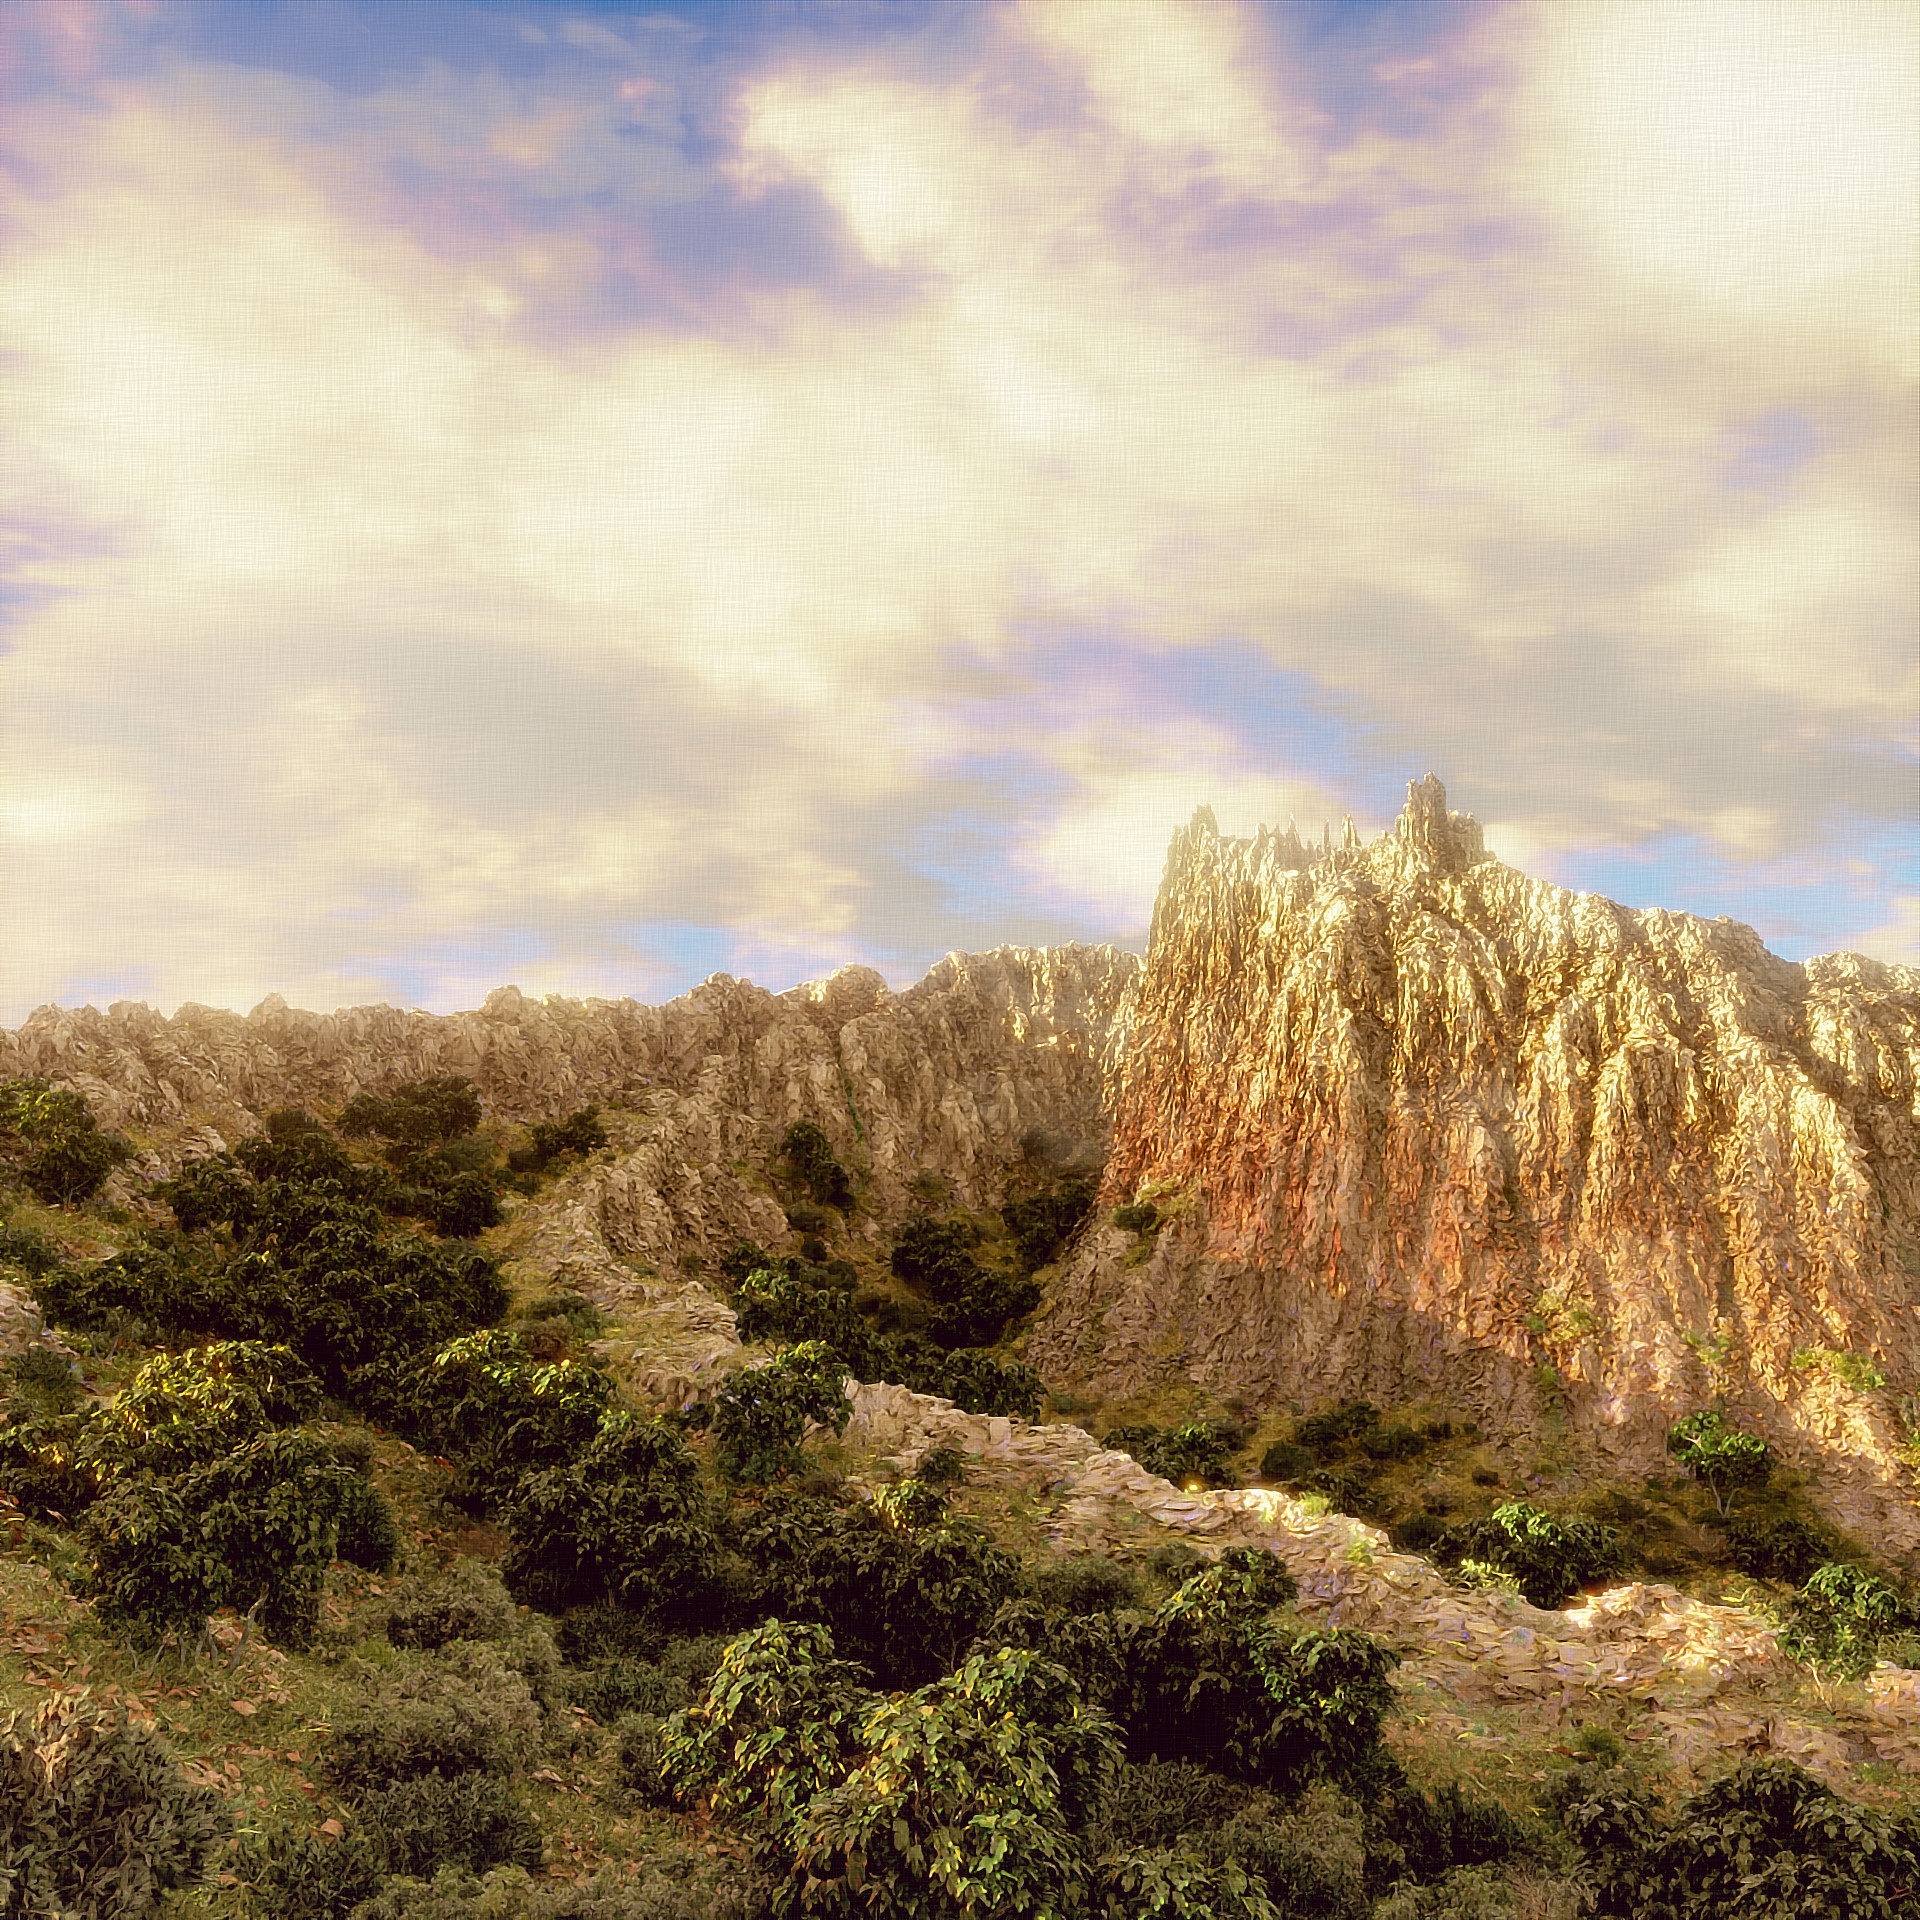
Filtered in Gimp/G’mic. What do you think of the canvas texture?
I really like the shape of the of the terrain and how it seems to wind around to the peak. And it’s proper craggy for sure! I think if you lower the camera - shooting up - you can maximize the scale, and you’ll have less sky to fill. Looking good now - I’m sure you’ll get an awesome render soon!
I like more this perspective and also the fewer clouds on the background.
Maybe I’m over interpreting the image but those two drainage lines in the foreground seem to deep because the rock seems too hard to be easily eroded (like granite).
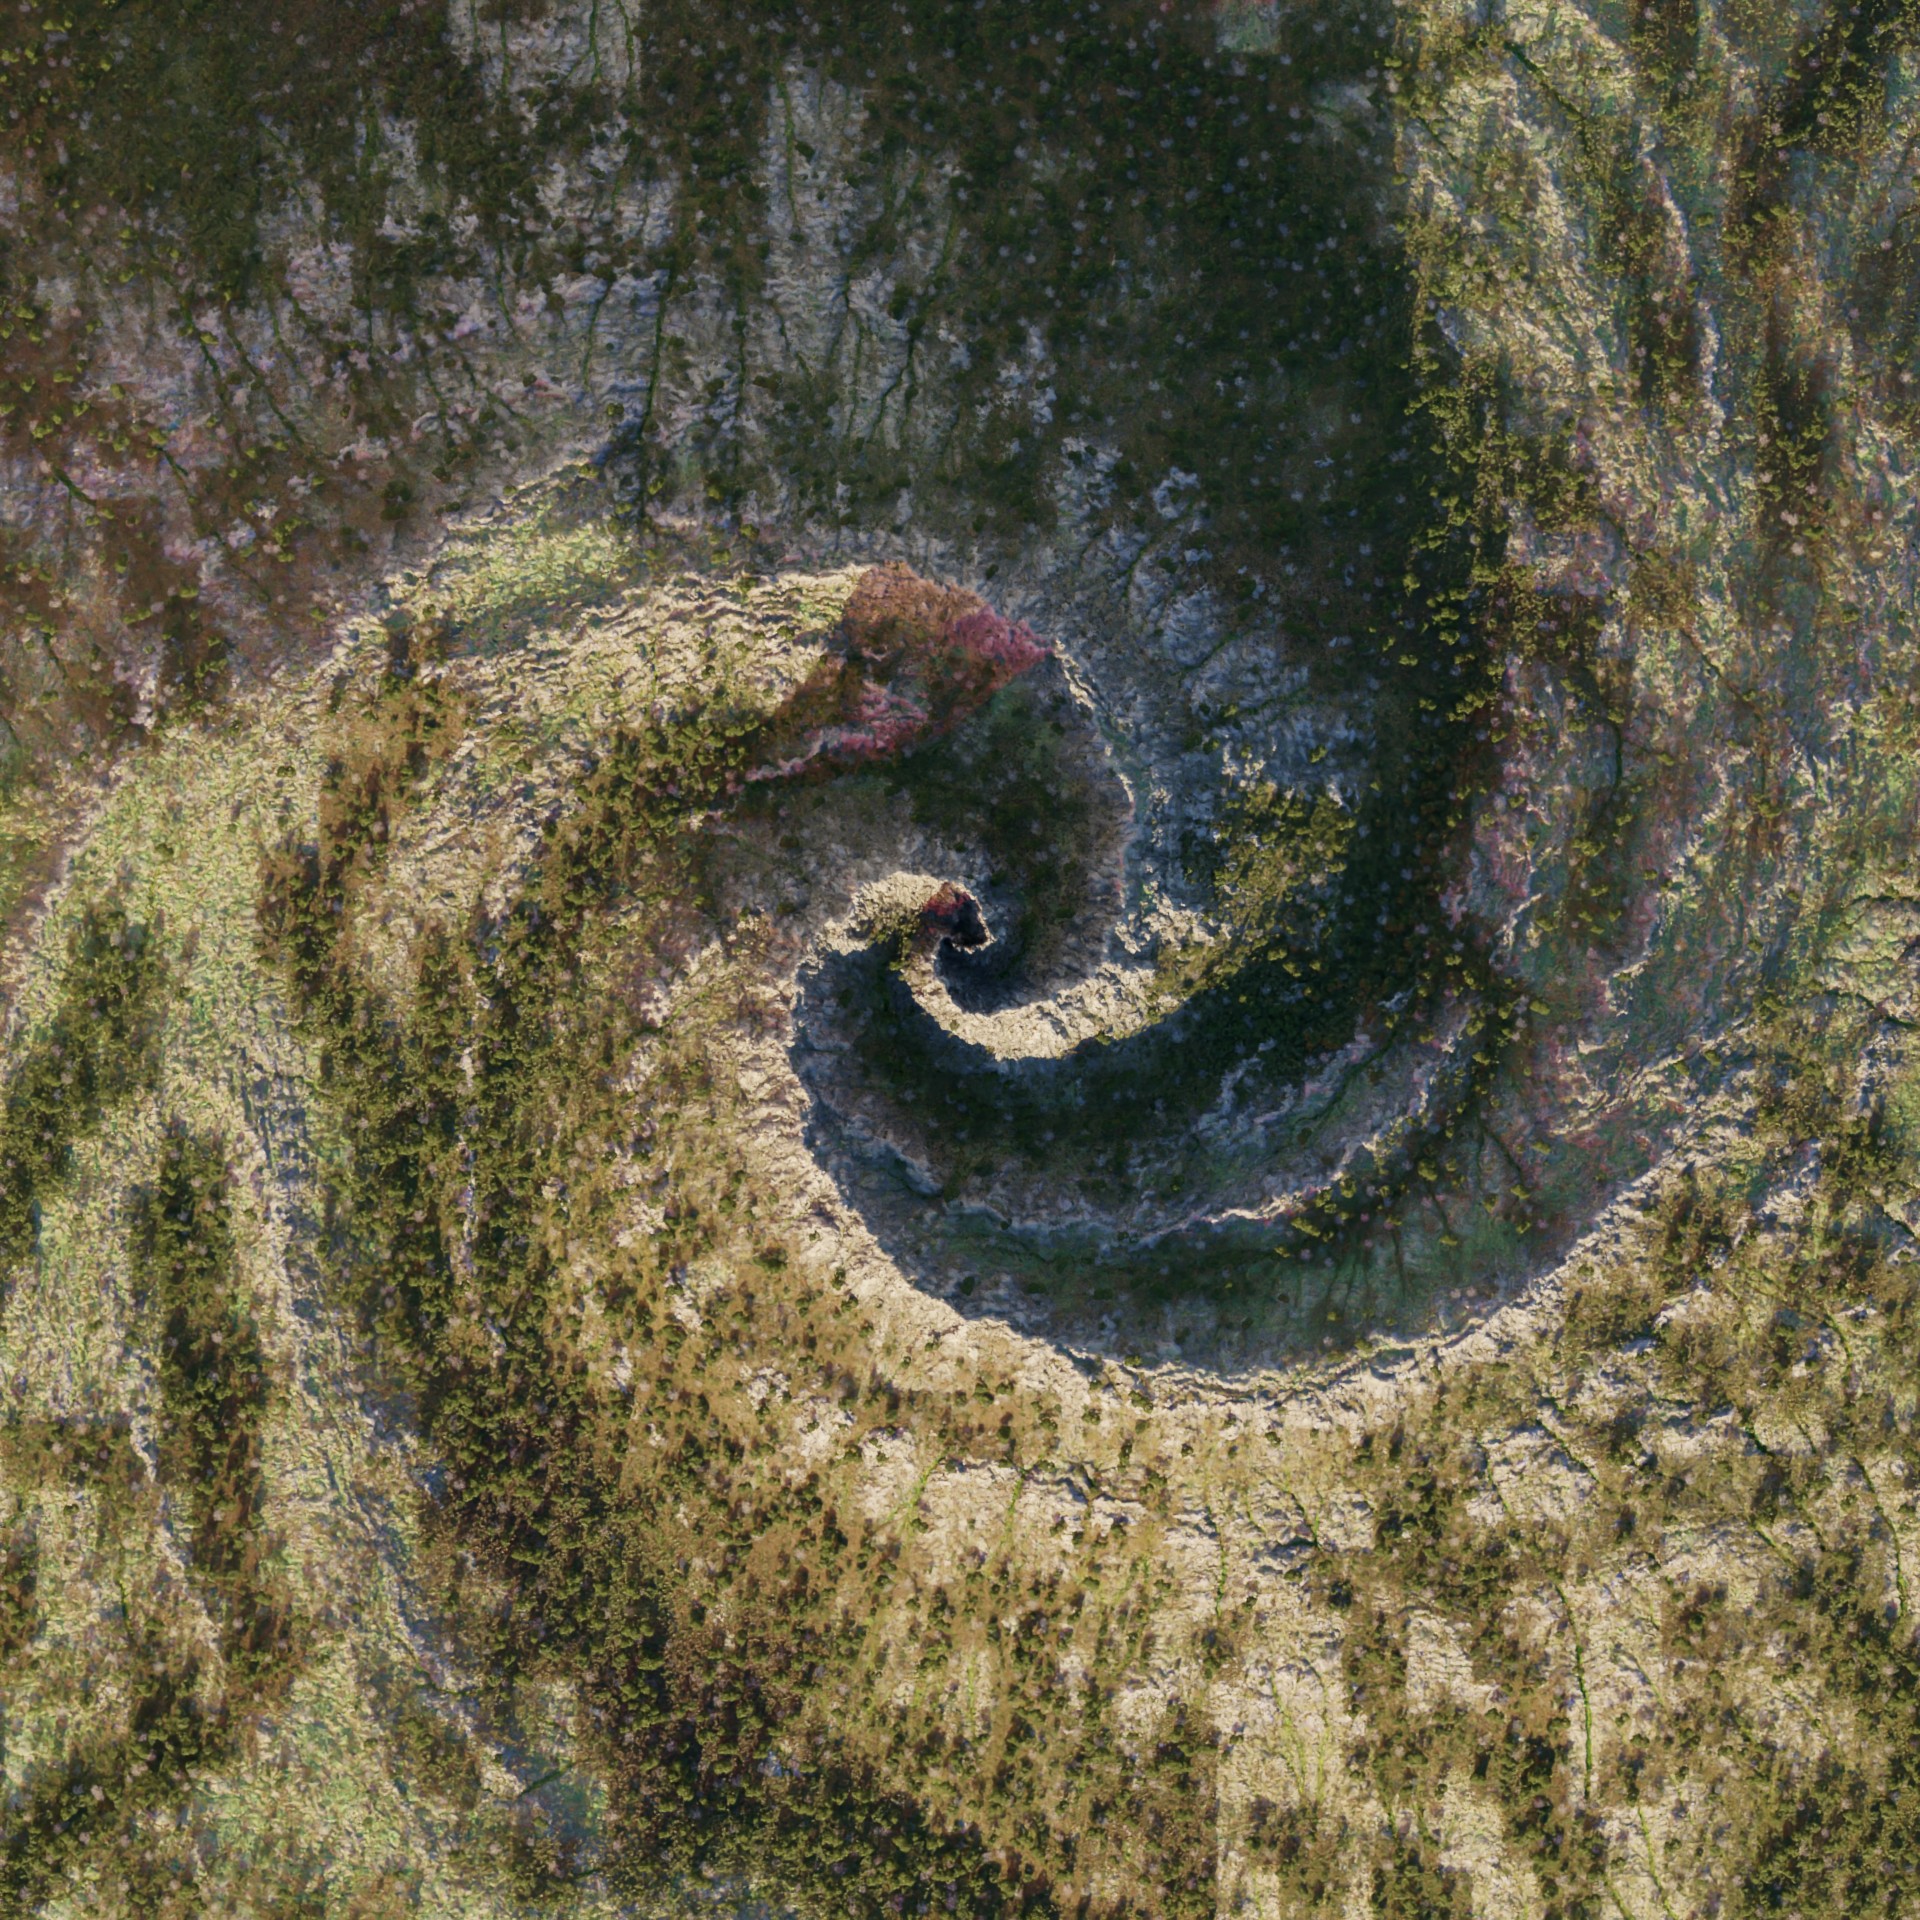
But it is a fantastic scene. I love that view from the top in your sketchbook where we can see the two spirals.
@Daf57, thanks for the encouragement :).
I worry about lowering the camera any more than this; we’d just be seeing the side of the large cliff face, and I think we’d lose view of the spiral topology. I’ll play with it some more to see. I also have to maintain some distance from the ground due to the 1k heightmap from Gaea. The final displacement is a combination of three sources: the original heightmap created in Blender’s shader editor, the Gaea heightmap which takes that original map and erodes it, and a vector displacement to flesh out the cliffsides. The 1k alone would look terrible up close, but with the other two adding high frequency detail, perhaps we can get a little closer. As for ‘sky to fill’… I like skies with clouds, so I wouldn’t want to reduce it too much. Do you think there is too much sky now?
@Kodachrome, thanks! Water has to escape, and will wear down even the hardest rock. And in cases where there is a lot of hard rock, the channels where it does break through do get quite deep, partly because the sediment can’t build up as all the water rushes through the narrow channels. That said, because I have both the original and the eroded maps, I can control the blending between them. Doing this does reduce the depth of the erosion channels, but creates an unrealistic bump in the channel where the ridge once existed. Perhaps there is a more sophisticated way to do that combining (just a weighted average at the moment). Another avenue to explore (for another project) is masking in Gaea. I’ve barely scratched the surface using Gaea, and for this scene I’m only using a single erosion node on the heightmap I imported from Blender.
I’ll be sure to include a top-down shot of the finished landscape too :).
I dropped the step rate to .5, but didn’t adjust the cloud density, so they closed up a bit again. I’ll be opening those up again so the sky comes through.
I also made some changes to the particle systems, and again, should have done a test render.
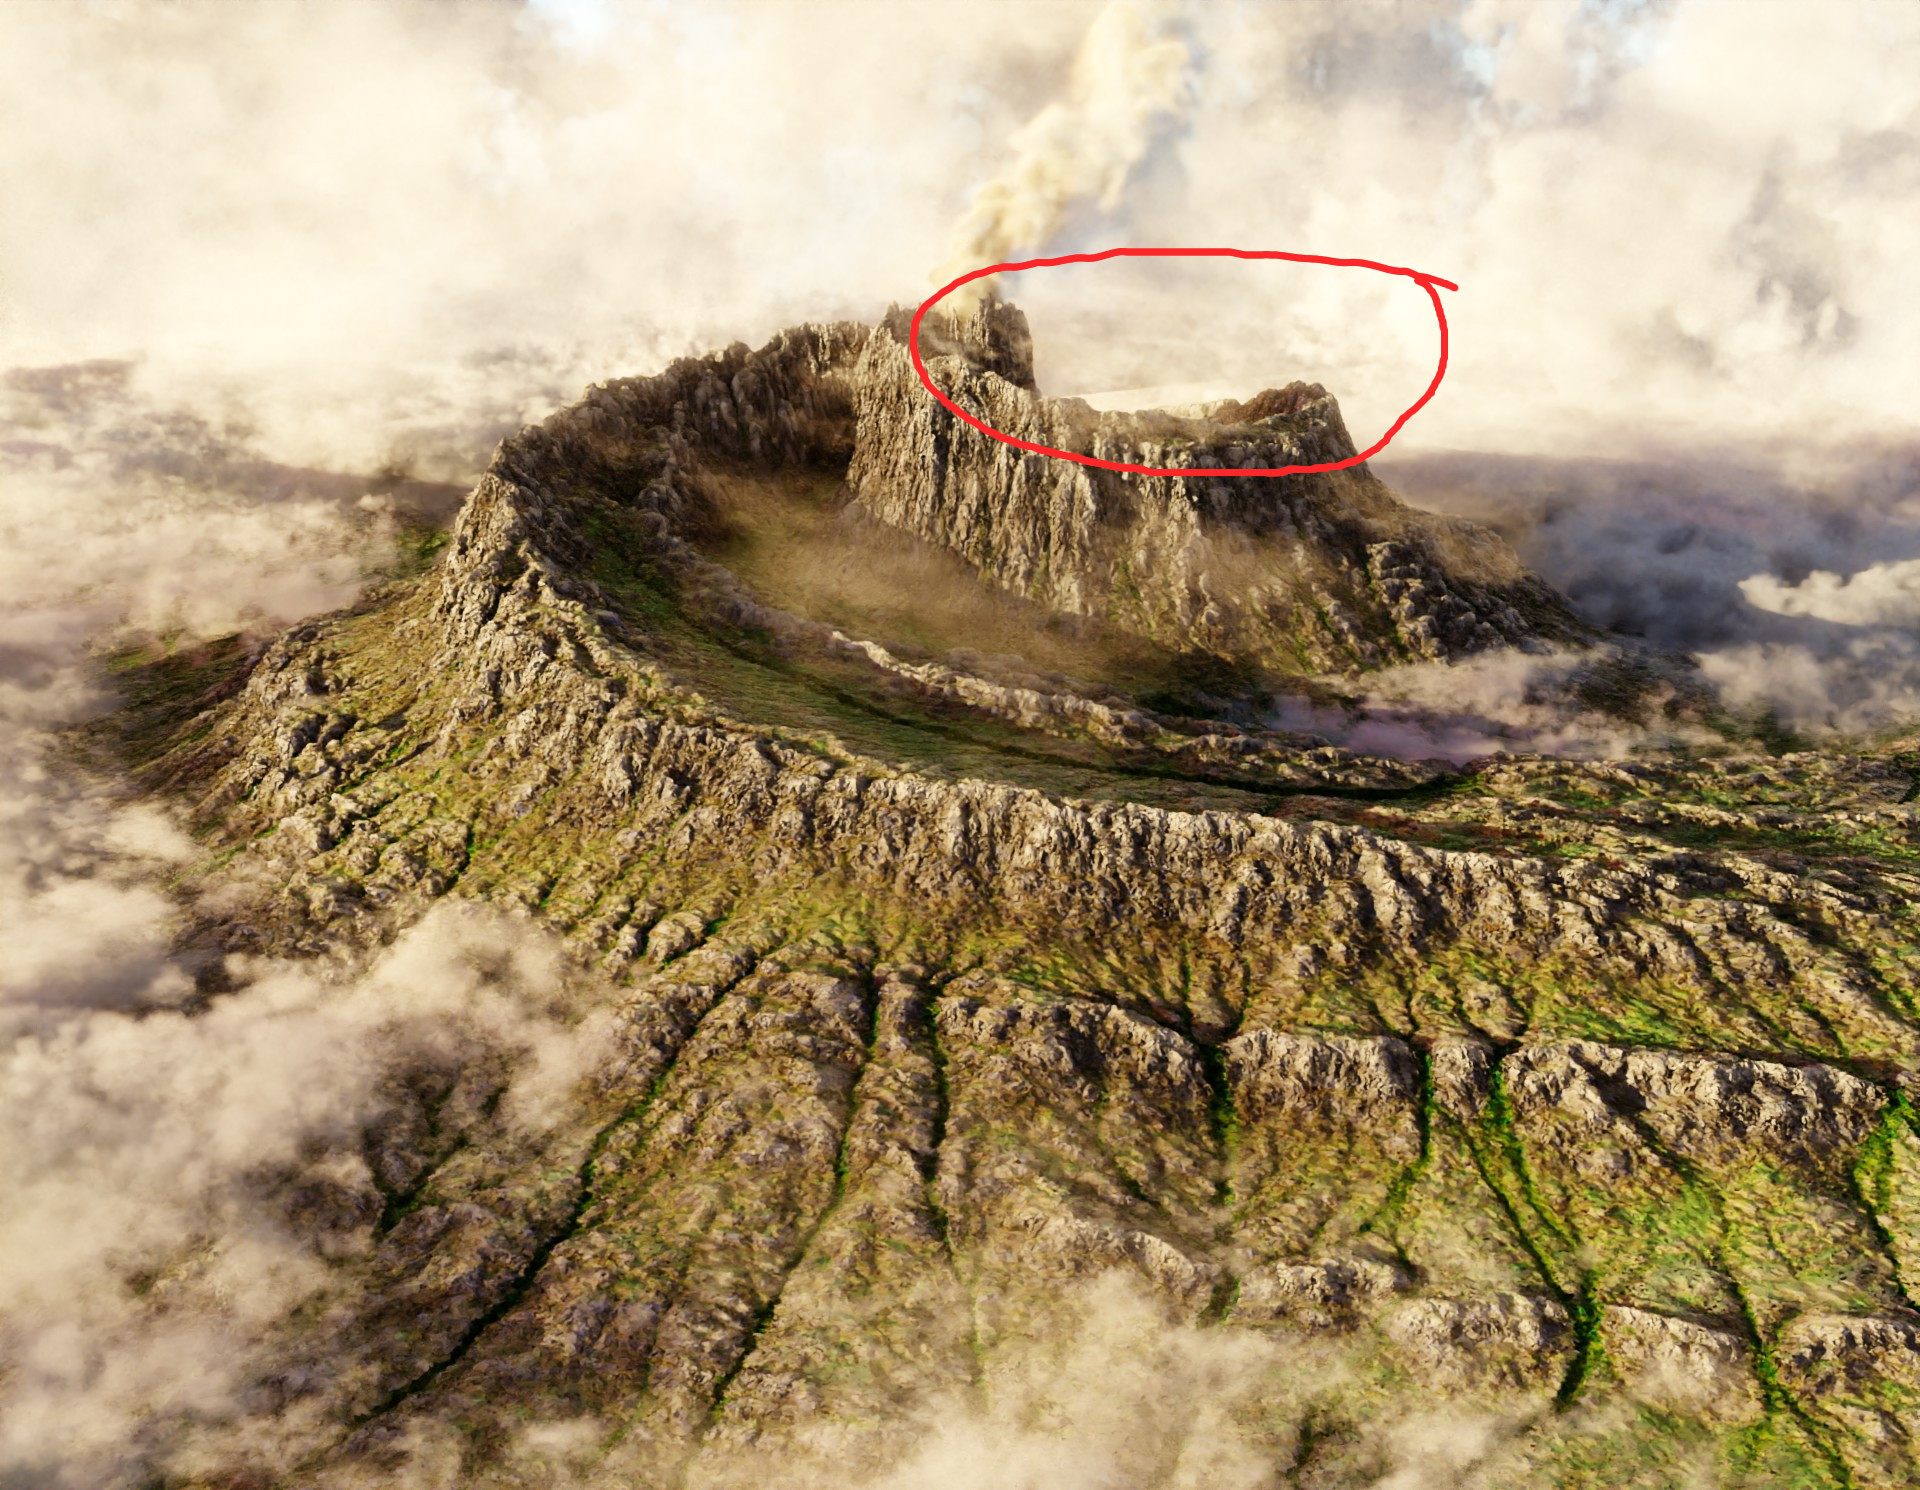
The smoke plume is still bothering me a bit… I’m contemplating just removing it. I’ll have to rename the post though!
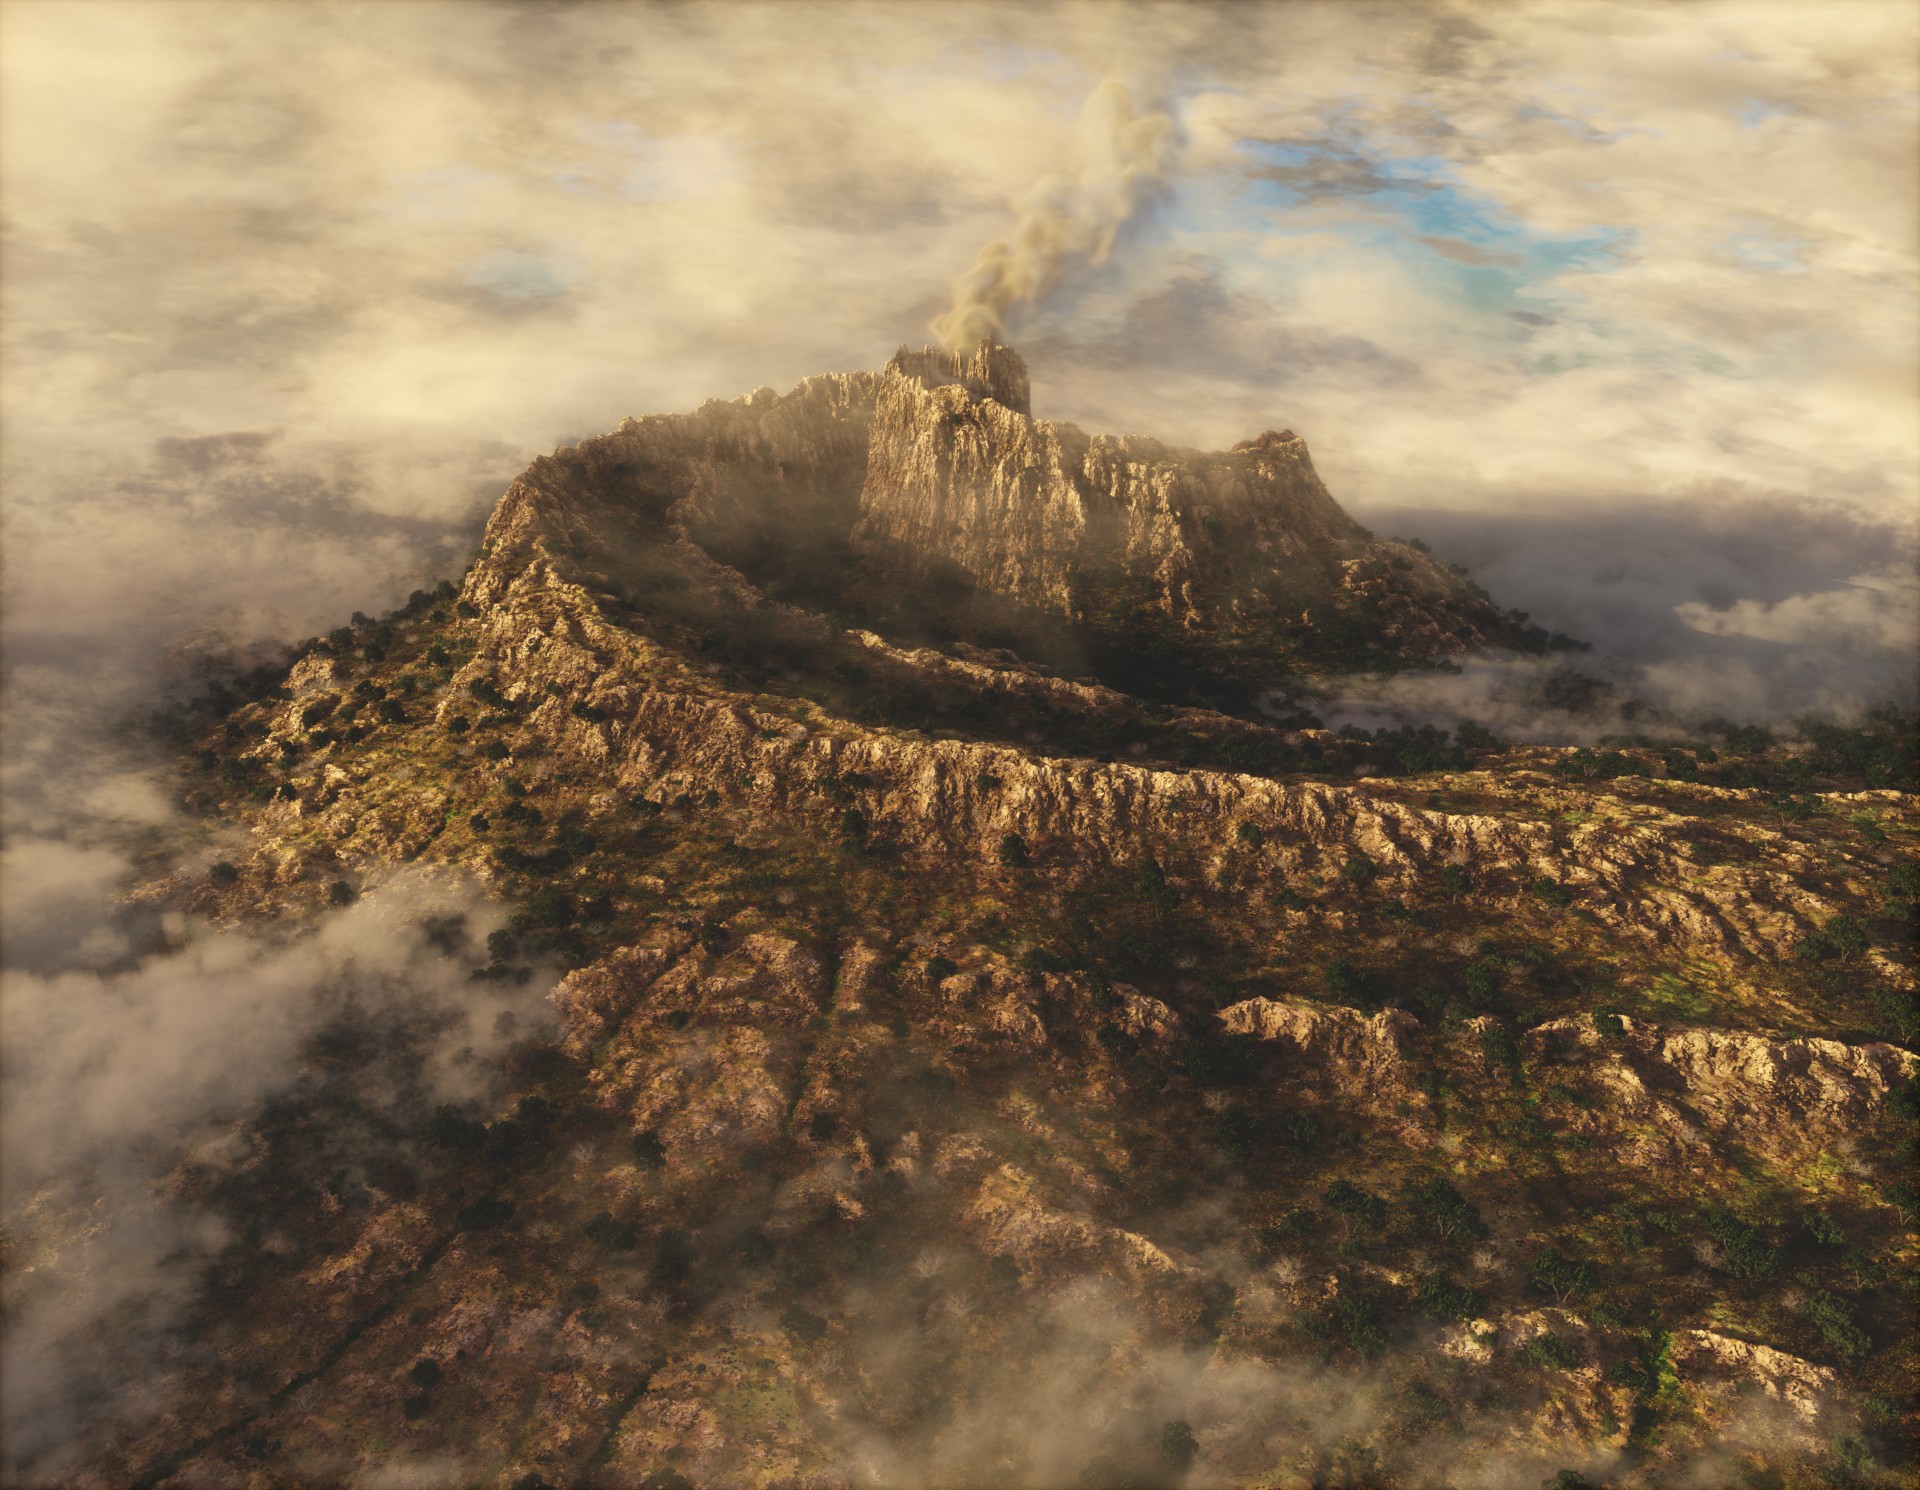
Went with a softer and warmer look this time. The previous version has the cliffs more in the grays, and the greens are more saturated.
I really like the last iteration. Has a nice painterly feel. One thing I’d propose is to add a little color variation on the scattered vegetation. It looks now as if they have all the exact same shade of green.
Thanks, @FrankFirsching. I am aiming for a painting-like feel, so let me know if I veer away from that too far :). I agree about the trees and bushes. There are still too few varieties, and they are too close in color.
I tripled the vegetation, but it tends to congregate in the denser areas of the masks which we don’t see much. So I’ll need to work on the falloff to get them to spread a bit better. At the same time, we have some very adventurous trees growing in some improbable locations. So I’ll work on the mask that is supposed to be keeping them off the slopes.
I dropped the density of the background clouds, so those which were overly dark in the last render aren’t so out of place now. I still think the openness of the Jan 24th version is better though, so I’ll be working back towards something like that.
For color, I’ve gone even farther down the rabbit hole. Probably too far into the yellows this time. And likely too dark (particularly the blue sky). None of my monitors are calibrated, and it is interesting to see the differences when switching between them (in different rooms with very different lighting conditions too!).
I’m doing the processing in Blender’s compositor, which is really neat and frustrating at the same time. So much control with all the render layers, but oh so slow to update! New to this iteration, I added some pop to the highlights of the trees and bushes, most noticeable in the lower right of the image. Subtle, but I think it helps bring out their individual shapes.
I could spend days tweaking all the knobs…
@Kodachrome, I did a couple of quick top-down renders with some of the clouds and the vegetation. They didn’t look as interesting as I’d hoped, but I can post them if you’re curious.
Almost forgot to mention, I hid the smoke plume. What do you think? Should I keep it, make a better one, or just remove it as done here?
Thanks to everyone for the encouragement to keep working on this one!
@Steah I always want to see more of these posts including the top-down renders!
This last one seems a bit to yellow as you commented. I really like the tone of the previous one. And the plume is not needed at all!
Since I first saw this post, I had this feeling that the render recalled me something but I couldn’t find what. Today I finally realized what: those famous 16th century Tower of Babel paintings!
It looks amazing! Congratulations for being featured!
I had to look up the Tower of Babel paintings, I don’t think I’ve ever seen any of them. I can certainly see how this could remind you of those paintings. I also think that recreating the paintings in blender would be pretty neat!
Here are two top-down shots. I think for these I should create a new scene with different lighting. The clouds which envelop the landscape have been removed so the camera gets a clear view, and those clouds are an integral part of the lighting team. Perhaps I’ll look into adding the “is camera ray” into the shader…
Worked on the vegetation quite a lot, although I’m not entirely sure it is an improvement. There is more variety now, but I went with a warm tone, so the greens are suppressed. I made the trees smaller, and added more grasses. One result is that the foreground cliff terraces are quite a bit more obscured now, which does effectively hide the deep erosion channels. Do the smaller trees give the mountain a larger look? I do kind of miss the more prominent larger trees from previous versions… we’ll see.
Also worked on the clouds, which I hope now have the warmth I was going for in the last post, without dragging the whole thing into a yellow muddy mess.
I adjusted the Scatter masks, brought back the larger trees, kept the vegetation a bit more on the green/yellow side rather than red/magenta, lowered the contrast a tad, and reduced the saturation.
So this one isn’t quite so dramatic, but maybe a bit more natural-looking.
I’m getting close to calling this done, I think. Most of these test renders are at 16 samples. I’ll bump that up, and render this out over night unless anyone has more helpful suggestions?
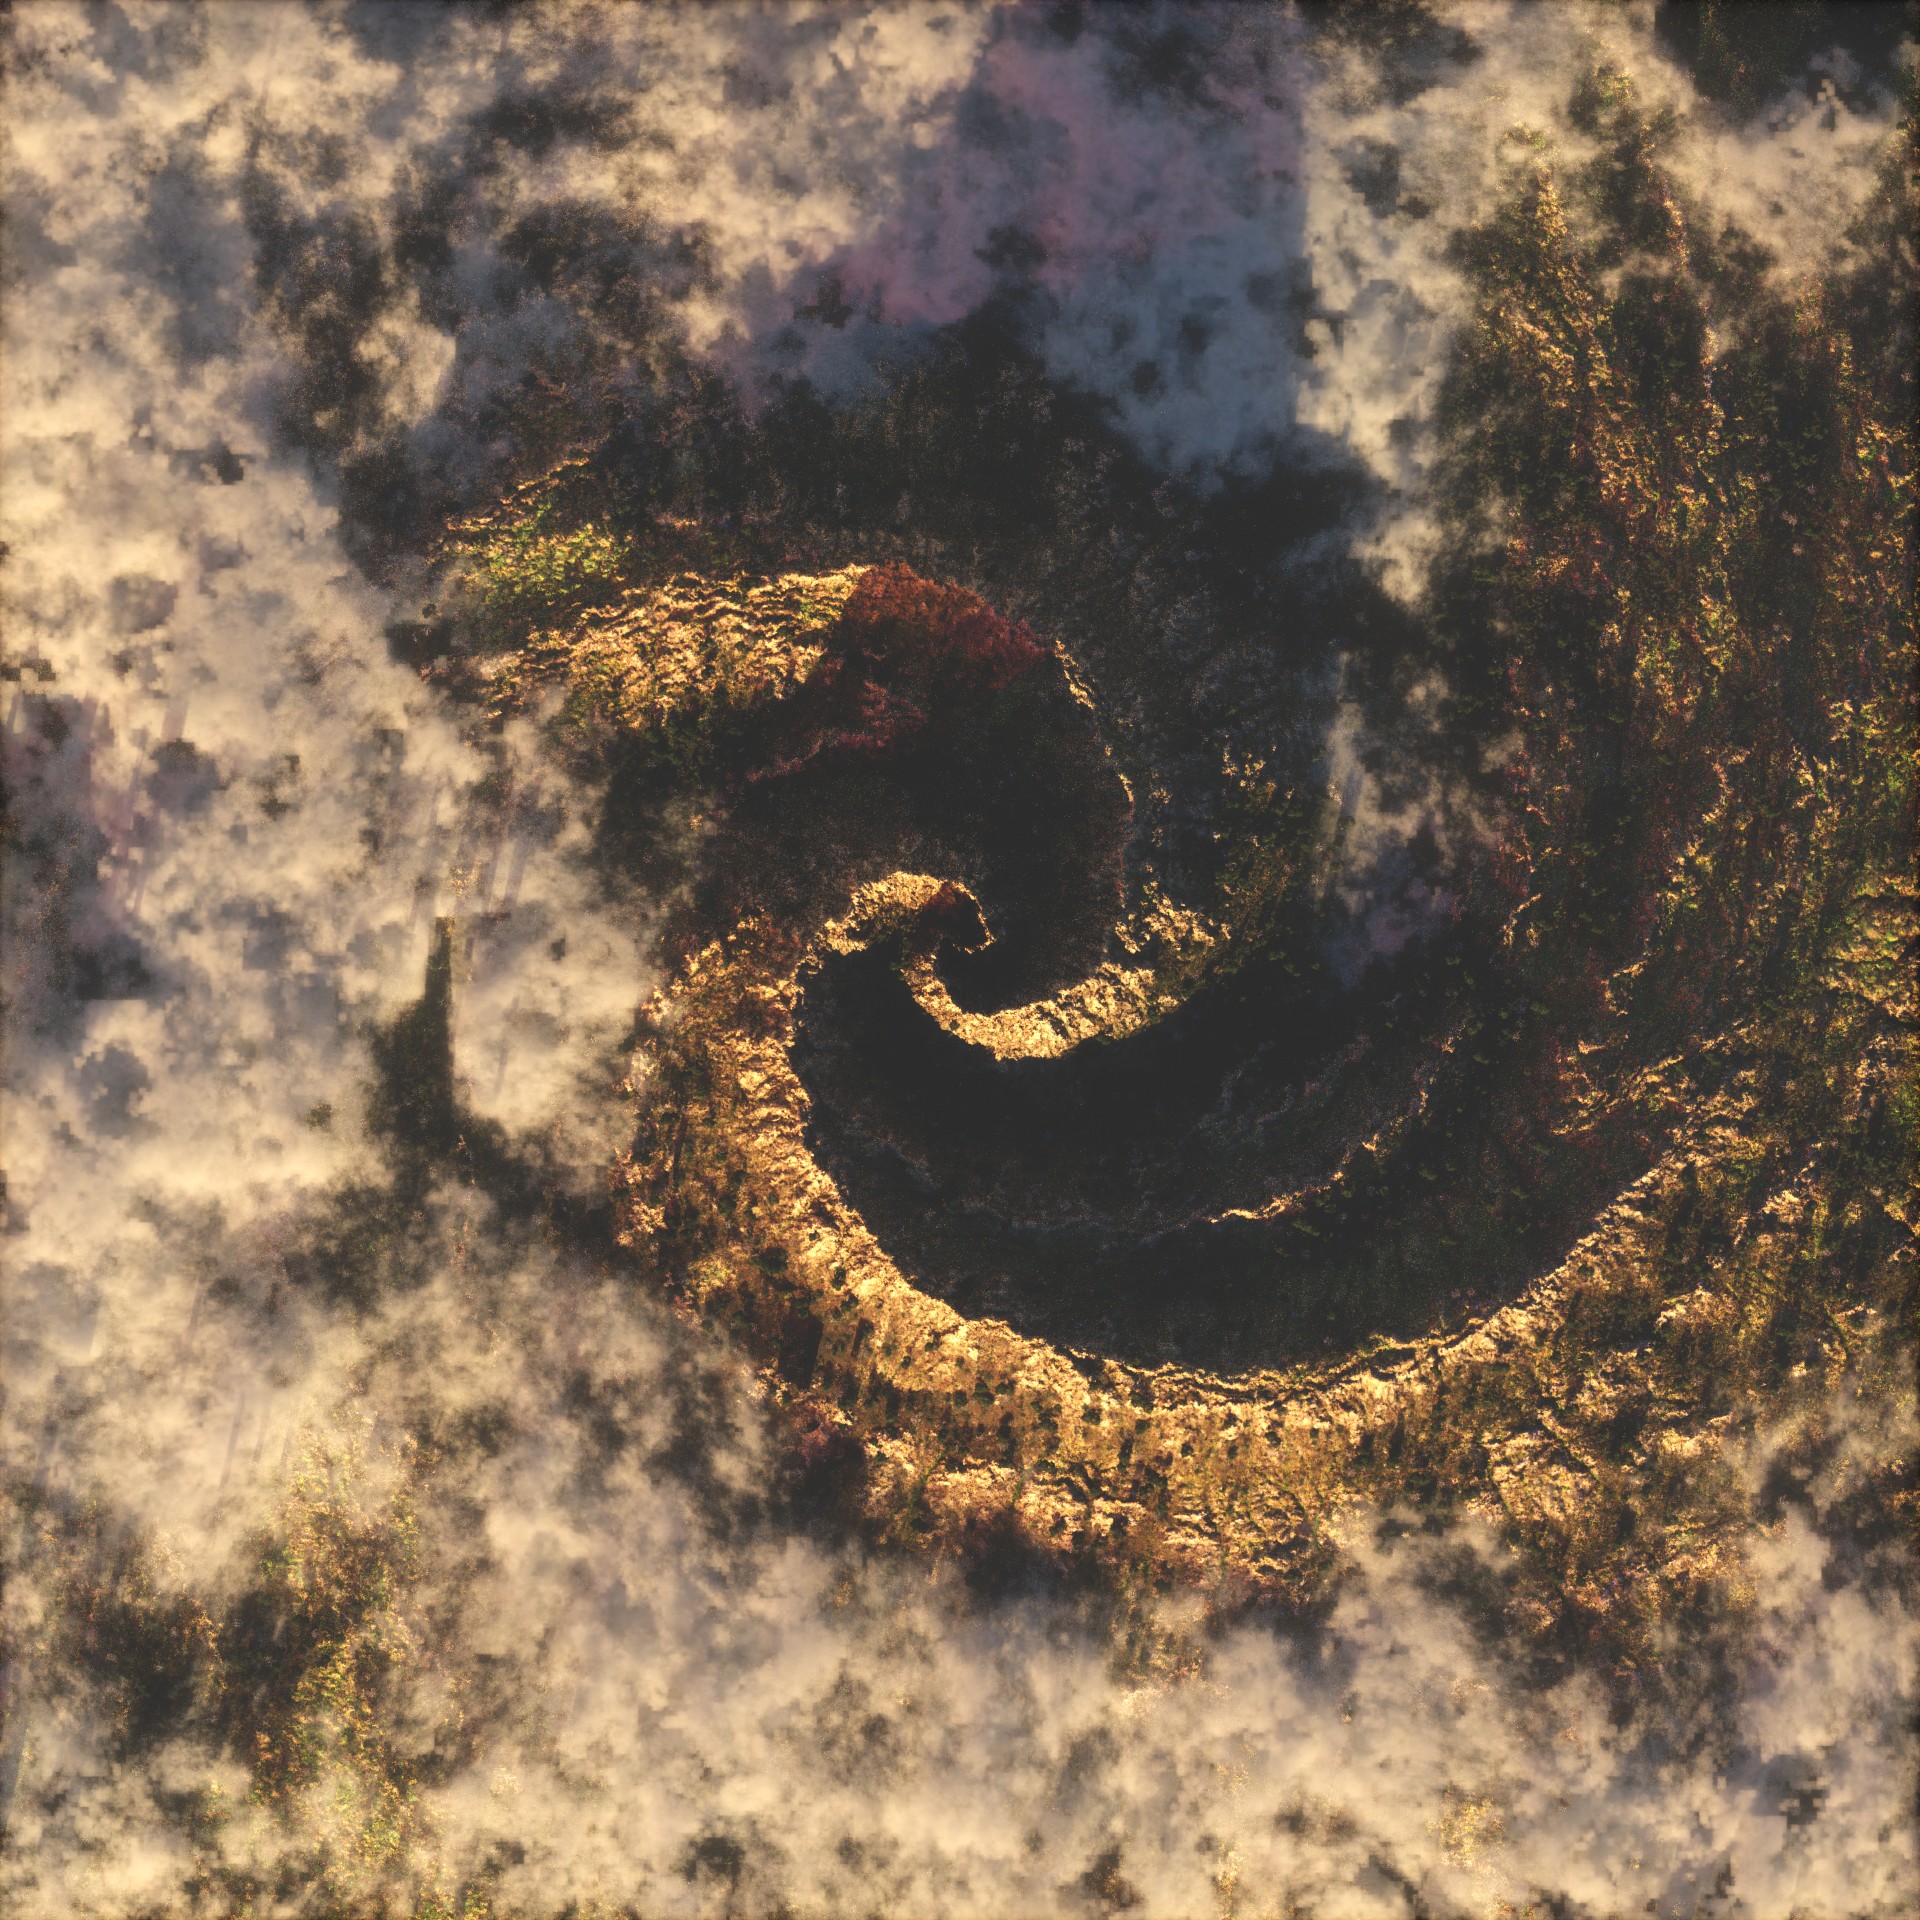
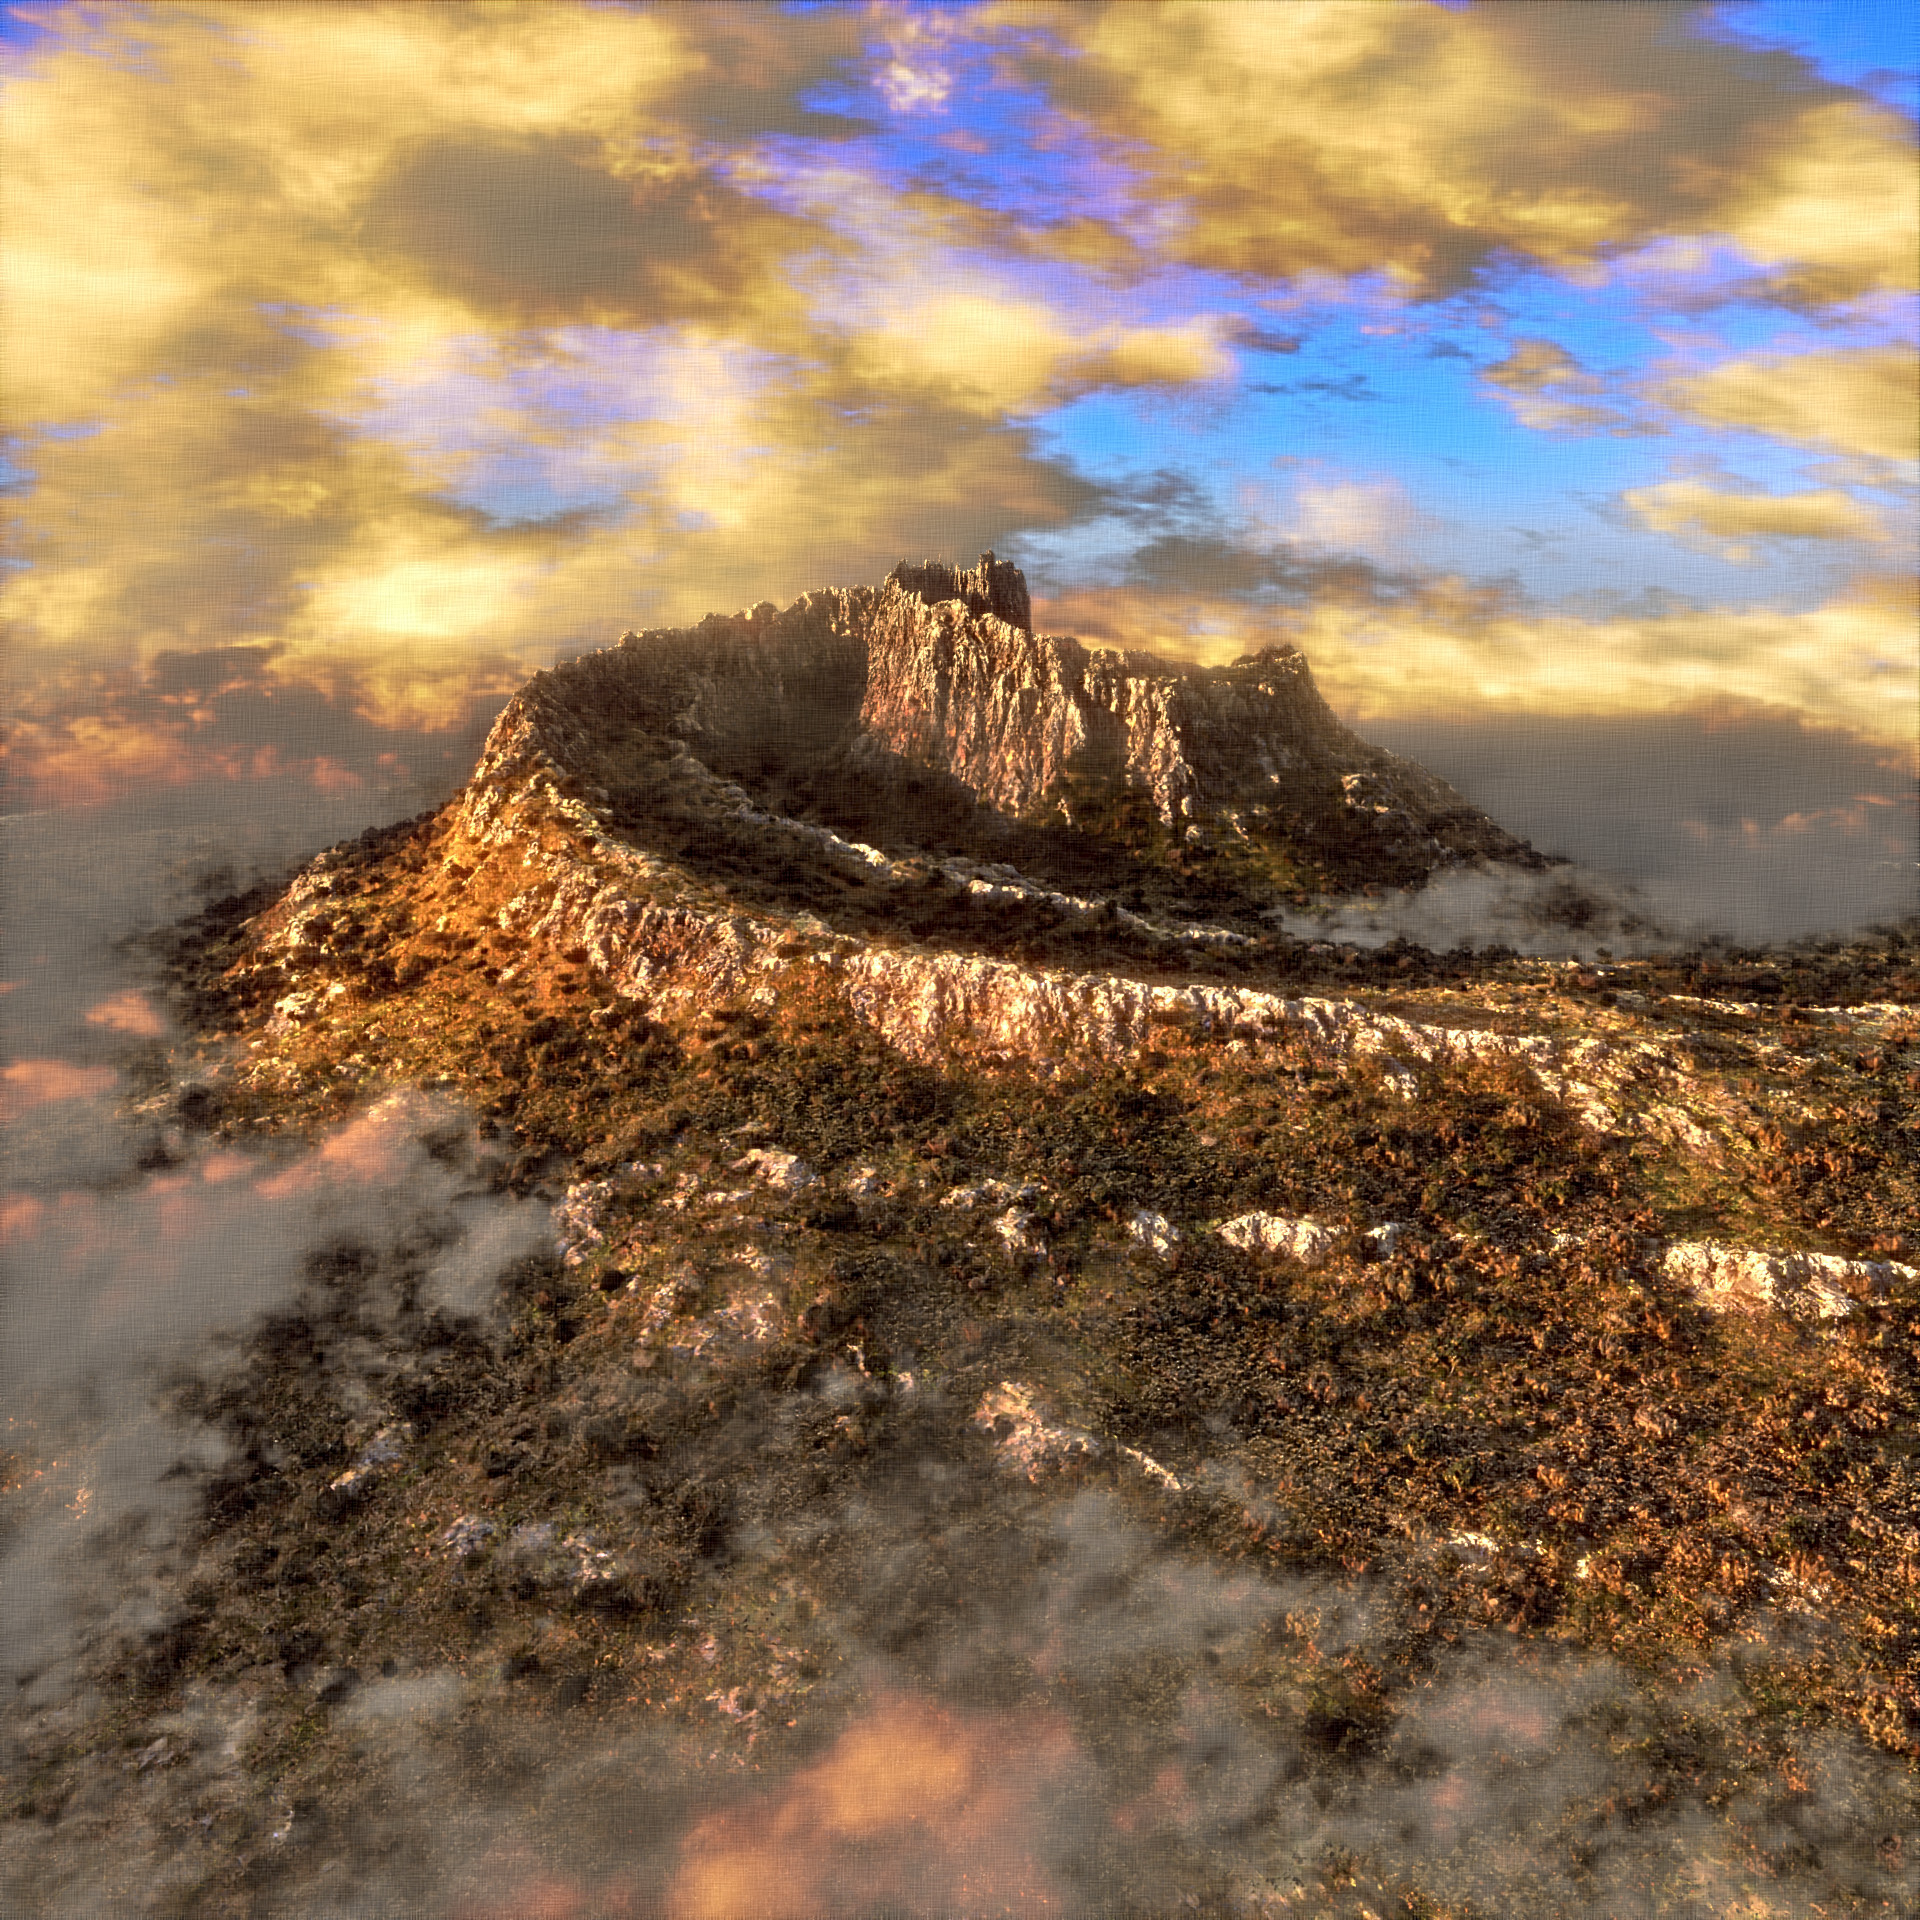
I posted the finished landscape in Finished Projects. Here are the final two supplemental renders.
For @Daf57, a closeup. It is not really what you were getting at, I know. The mountain just isn’t that tall, so getting in close doesn’t really provide much opportunity for looking up at the peak. I’ll play around with taller peaks in the future :). And we’re a little too close for comfort here, with the noise textures too clearly visible on the cliff faces.
So this one is from the perspective of someone walking up the spiral slope. I had toyed with the idea of putting a shrine on this slope, and having a train of pilgrims on their way to visit it. Decided it was far enough outside of my current knowledge that I should wait on something so ambitious.
For @Kodachrome, here’s a top-down render. For this one, I modified the cloud shaders so that they are still affecting the scene lighting and shadows, but are not visible to the camera. You can clearly see the effects of the camera clipping vegetation mask. It really helps to reduce particle counts, but you have to choose your perspective early on.
Thanks again to everyone for the encouragement/feature/likes. While this one is now done, please leave any comments which can improve my future projects!
Really nice! Thanks for the top-down render. You managed to find a good balance between the vegetation density and empty/grass area. It gives a good dimension to the mountains.
Congratulations!