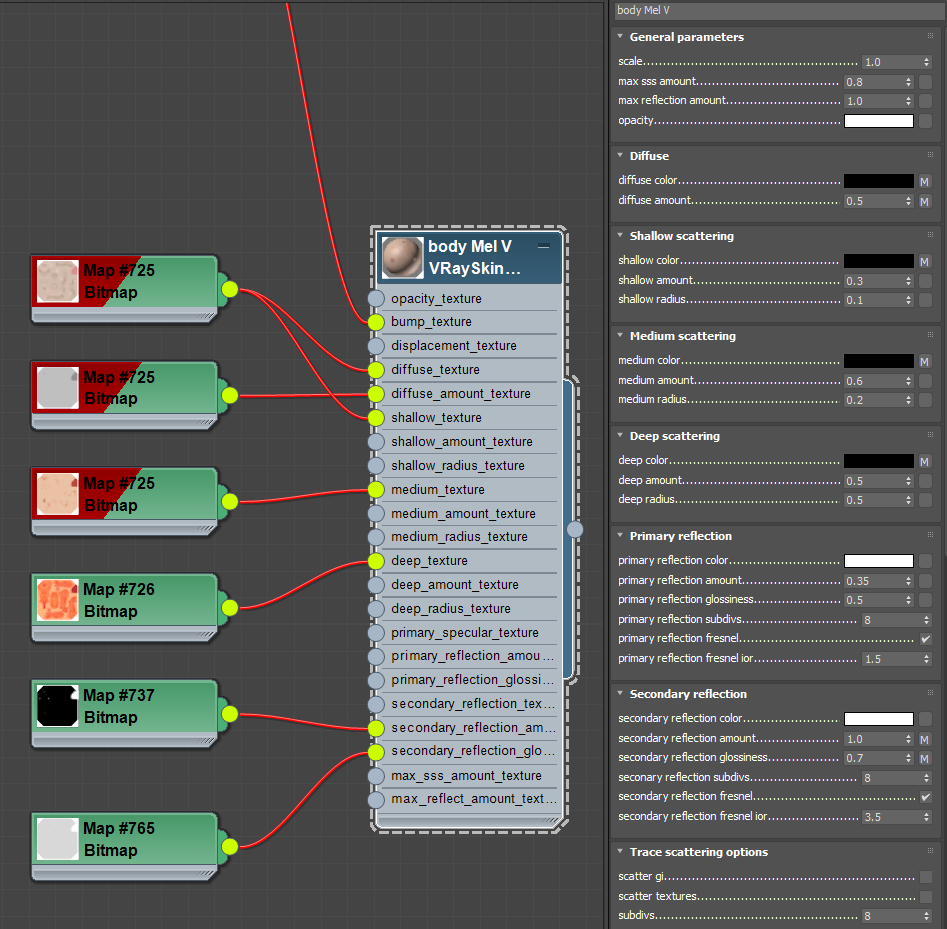
I have a problem of bought Turbosquid female character which was build with 3Ds max and Vray translating to Blender Cycles shaders. The main problem is with diffuse and Subsurface scattering. Vray SSS shader has a two levels of SSS textures (deep and medium) and ammount texture (read mask) therefore there is a problem matching the result in Cycles.
I have tried to go around that with combining (with mix RGB node) diffuse texture and medium level SSS texture for diffuse and the shame with deep SSS texture. But the result in not quite there.
I have run out of time and ideas how to solve this situation.
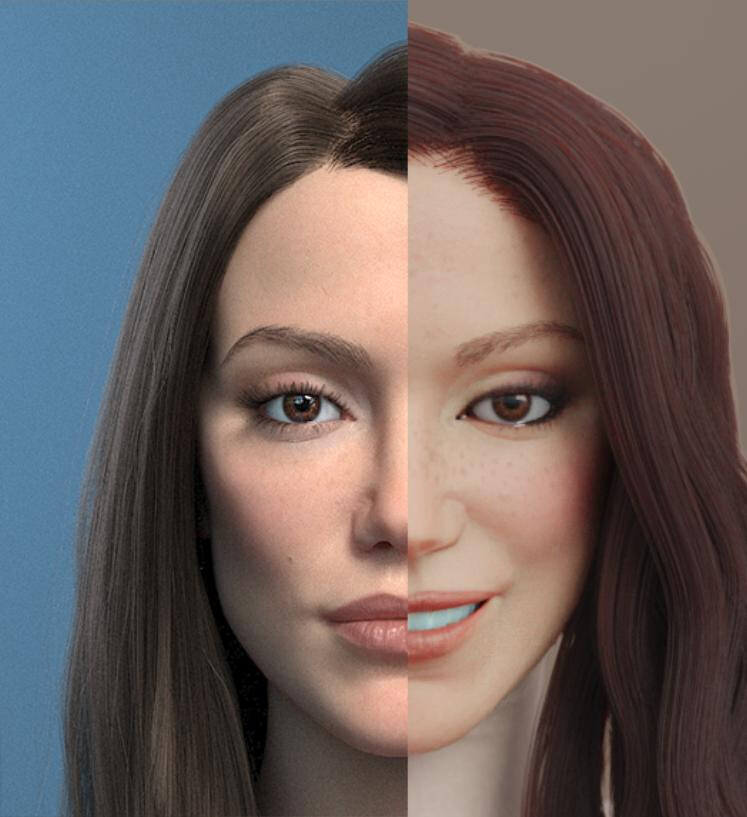
Here is a comparison of a model rendered with Vray(3ds max) and my try of matching the look
I guess the V-ray SSS shader is based on what you can read in this doc?
Notice that the Vray SSS diffuse amount means how much the diffuse color (base color) is mixed in or visible vs SSS.IE,
if 0 then full SSS
if 1 then full diffuse no SSS.
In Blender the SSS setting is working the opposite way.
If 0 no SSS mixed in,only Base color (diffuse) is visible
If 1 then full SSS is mixed in.
I dont know if you have a amount map for this,if so then try to use a color invert node after the map to invert the map and put it into the SSS amount input of the principled shader.
Further the diffuse color from vray is in blender the base color.
The sub surface color from vray is in blender the SSS color.
In Blender you can set the scatter radius for each RGB channel in Blender units.
You could try to use the scatter color map from Vray into the scatter radius from blender.
To control the same depth like Vray has, you need a multiply between then.You could use a ColorMix RGB node set full multiply.and plug a value note into the second slot of the Color MixRGB node for the control.
And place the node between the scatter color map and the SSS radius input.
The overall color from vray can be ignored for now in blender,because it is just a tint multiply.
In Blender we dont have a phase function for the SSS.
This is not the whole truth - it’s also very unintuitively documented in Blender. If SSS is 0, it’s completely diffuse. But as soon as you push the slider to even just 0.001 SSS, it’s 100% SSS - just initially with a very low radius. The SSS ammount acts as a multiplier for the radius/scale facor of the Subsurface Scattering. The SSS Color and Base Color are just mixed like usual. I think this is also the more plausible way of “Mixing” SSS and Diffuse.
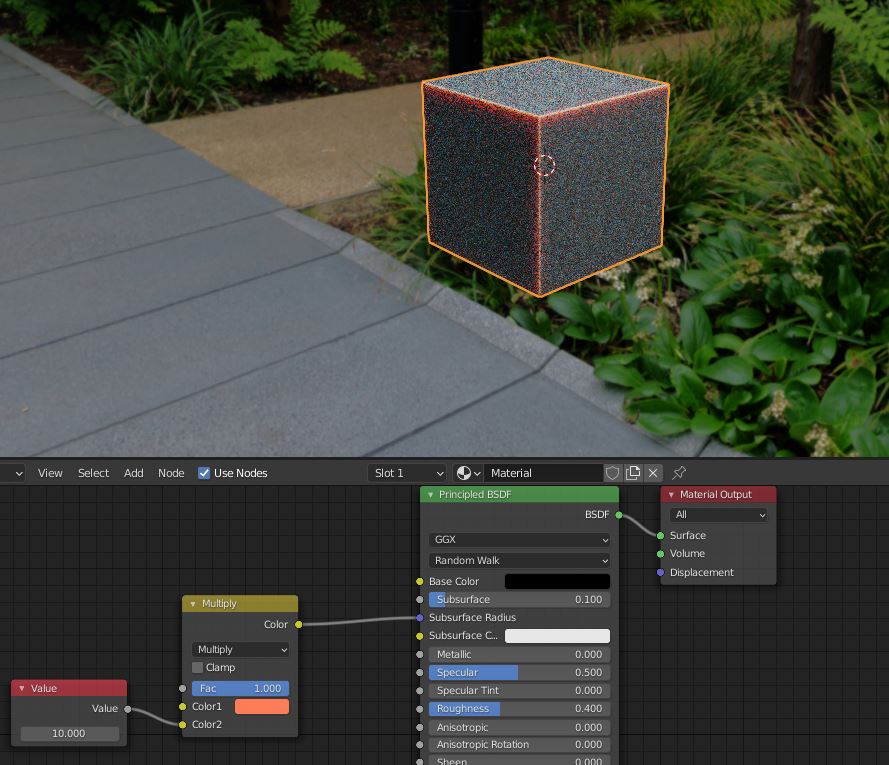
You can try it - compare it to just mixing with a diffuse Shader. In this example, I pushed the radius to 10,3,2 to make it more apparent.
Not sure.The SSS "shader"gets weighted mixed like all other shader.The scatter radius however,if its very low set can have heavy influence.If radius is 0 then No scatter should appear even if you set SSS amout to 1,since it is a connected function.
It is true - look at this example. How could it “look so SSS” with a SSS value of just 0.01 It’s identical to a Shader where I set Subsurface to 1.0 and the Radius to 1, 0.2, 0.1, because the radius is just multiplied by the Subsurface Factor.
I think this is accurate to how SSS works in RL. “Diffuse” is just an approximation of a very low SSS Radius. All materials scatter light to a certain ammount - even when it’s just a fraction of a millimeter. So in Reality there is no “50% SSS, 50% Diffuse” it’s all 100% SSS - but with varying radius.
In Reality your material has a absorption and scatter coefficent,similar to the volumetric shader.This is a material propertie that does not change,but its look is depenting on lighting.
I made a test. black diffuse color and sss 1 and radius (1, 0.3 , 0.2)default values
Yeah well the two colors are just mixed while the “mixing” of the actual material model happens by internally multiplying the radius with the SSS Factor. So it’s of course just the same when the colors are identical. I think we probably mean the same, but fail to communicate here
Notice at line 65 and 73 the subsurface gets multipled by the radius indeed.
At the blue marked line 61 you can see how SSS and Base color are get mixed.
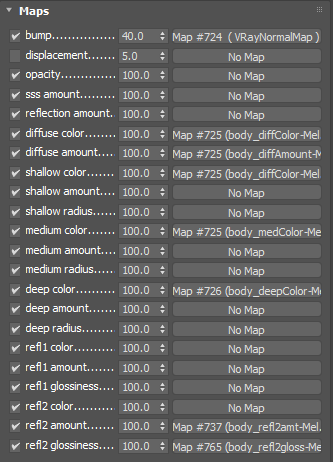
You have basicly all textures you need for a cycles setup.I think,the medium and deep color can be mixed with the colormixRGB node with a ca 50% mix,since in your settings med has 0.6 and deep 0.5 amount.
The deepest radius is 0.5.
I would suggest that if you make comparison renderings,then use the same light setup.IE,use only the same HDRI in both Renderengine for the best comparison.Otherwise its difficult to judge if the settings match.
This is now the closest look I can achieve.
Somehow noticed that with correcting gamma on texture maps it helps with bringing out detail and closing in on a color. It’s still not the same but closer.
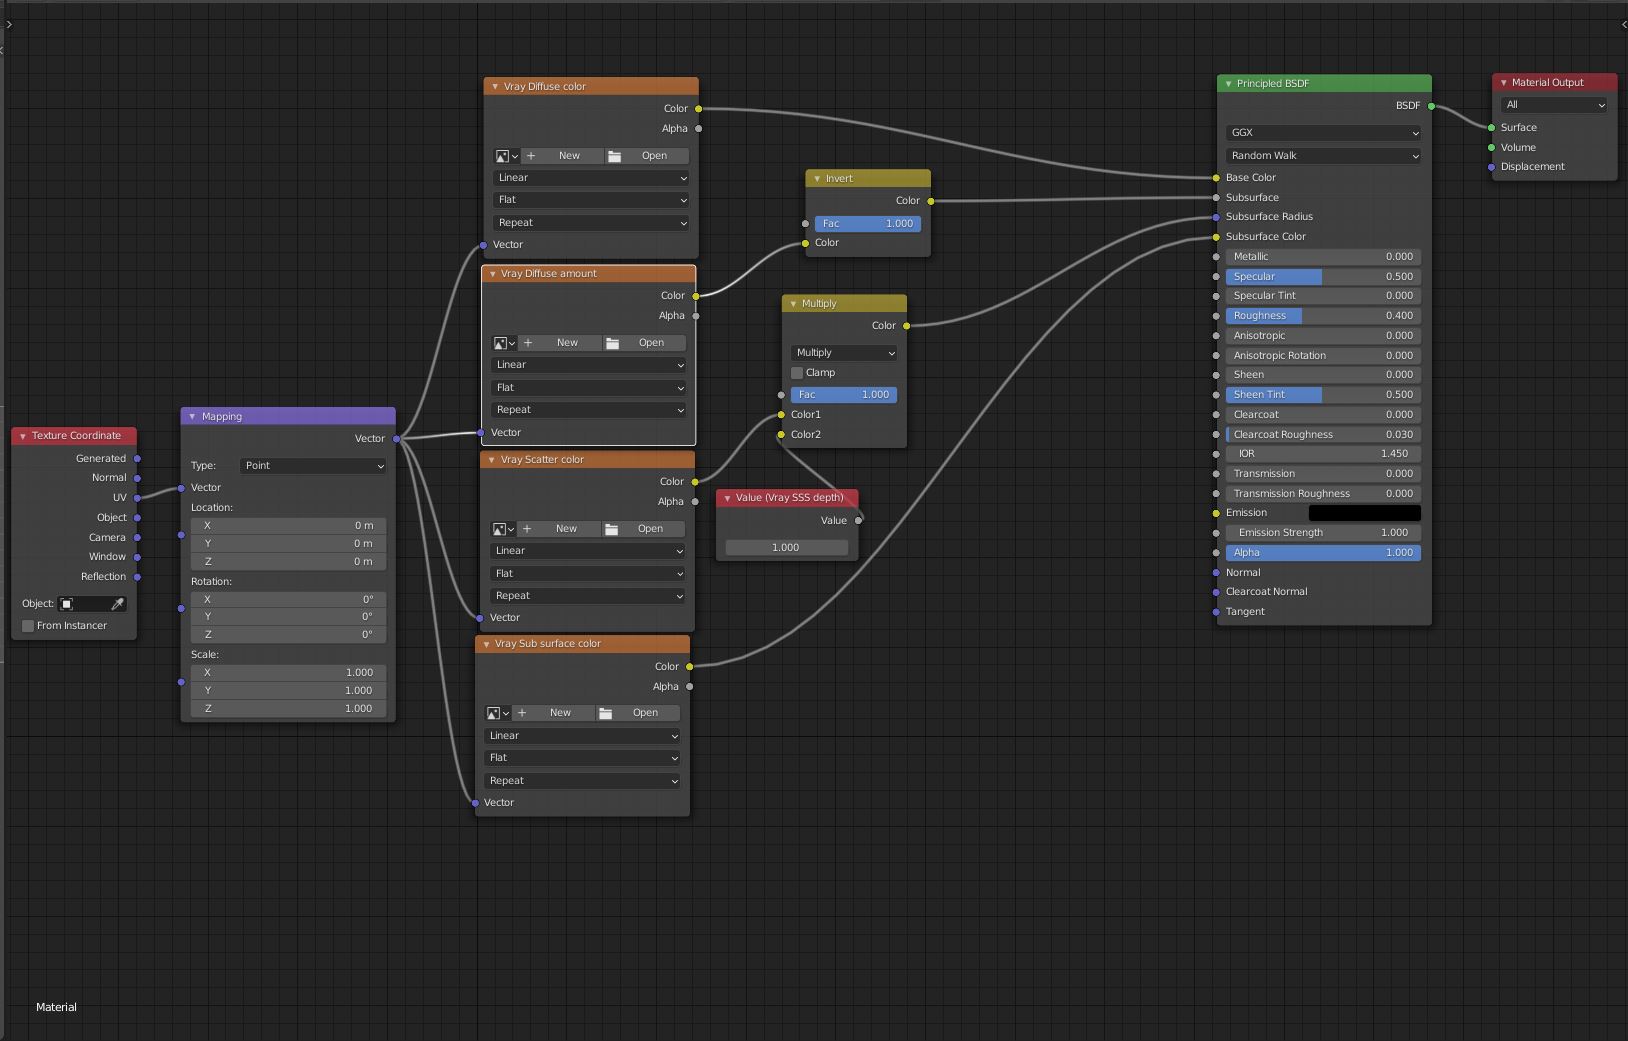
Probably not the most correct way but here it’s the setup for shader this time used texture assets provided from Turbosquid that are converted for Blender use.