Hello everyone,
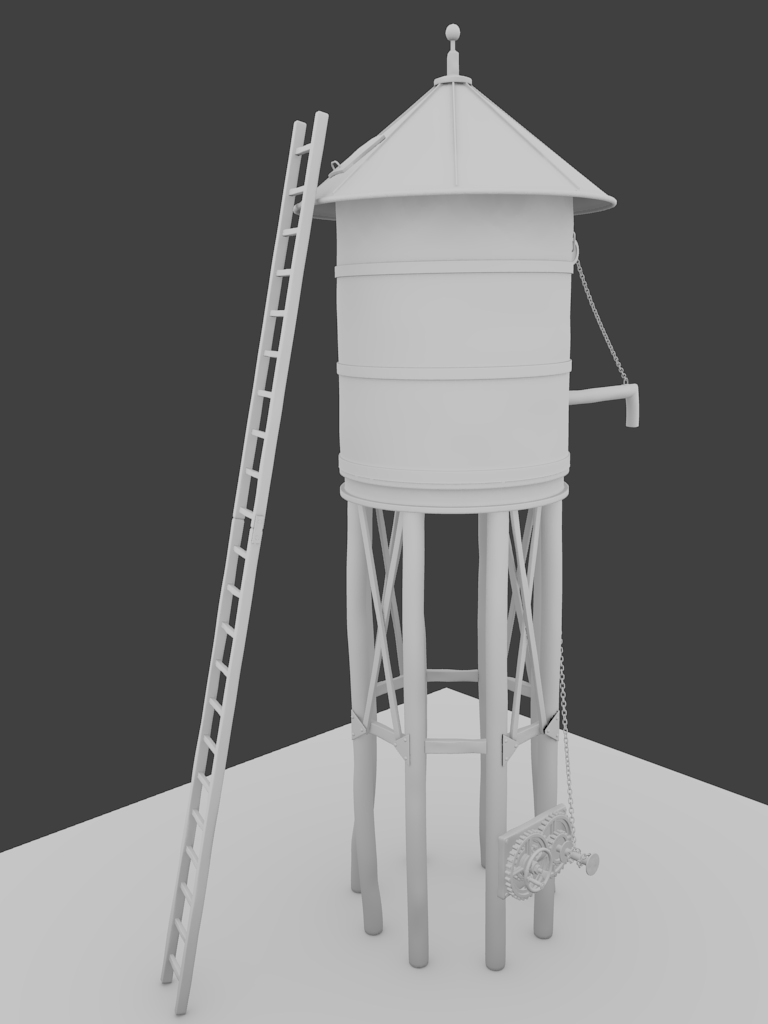
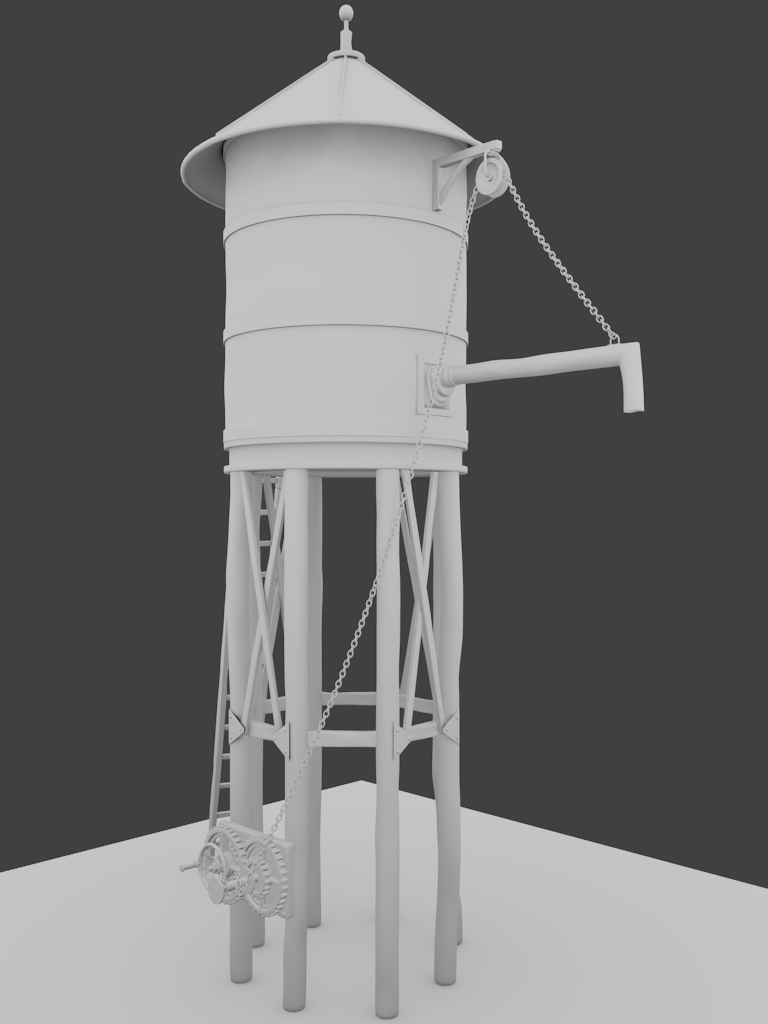
After reading and watching countless tutorials I decided it’s time to put my lazy behind to work and finally do something with all this knowledge. Inspiration came from this great tutorial: http://cg.tutsplus.com/tutorials/autodesk-3ds-max/model-and-texture-a-water-tower-in-3ds-max-day-1/ but I didn’t want to copy it step by step. Instead I wanted to use the information gained from it to make something similar but new. So, putting my self as a modeler in an imaginary CG company and given the task to model a Water Tower with some basic instructions, concept art and freedom to search the Internet for ideas, I came up with this (Note it’s still a W.I.P.). I hope you like it:
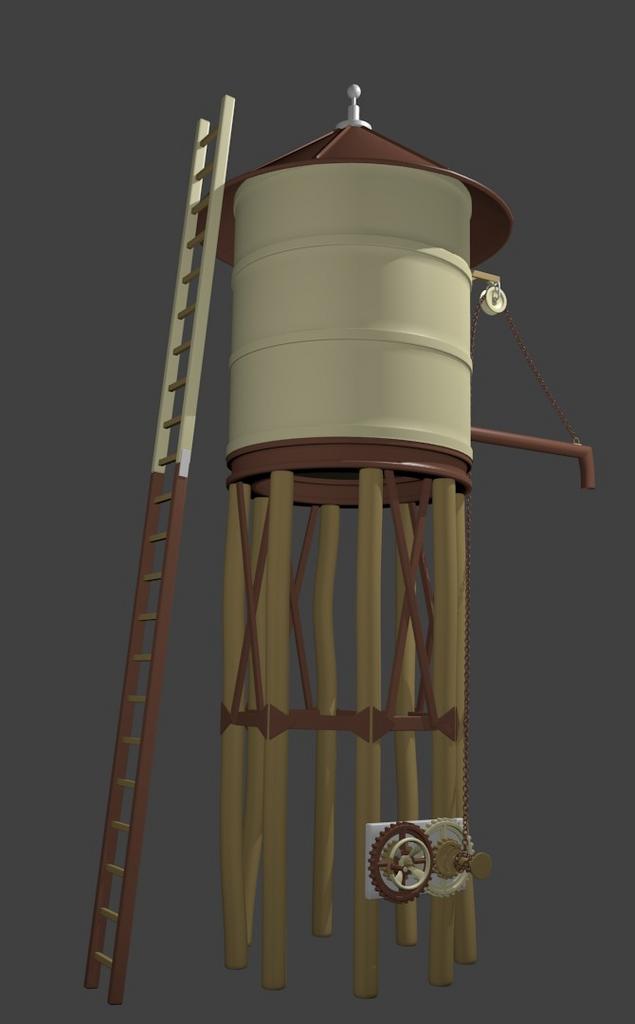


Nice overall look. The chain mechanics are not believable, however. It looks like if I were to walk up to the water tower and start cranking on it, it would just spin in place.
Needs distressed textures.
Welcome to the blender community, HiResMX! The modeling on the water tower is really good, but I agree with Atom; it needs some worn textures. But you did say it was a WIP, so you might have already had that in mind :p.
I am glad you like it guys. I know that a complete model needs textures for final rendering but as I said this is a modeling test for improving my skills in modeling. I don’t know if I will texture it since that is a whole new process for me.
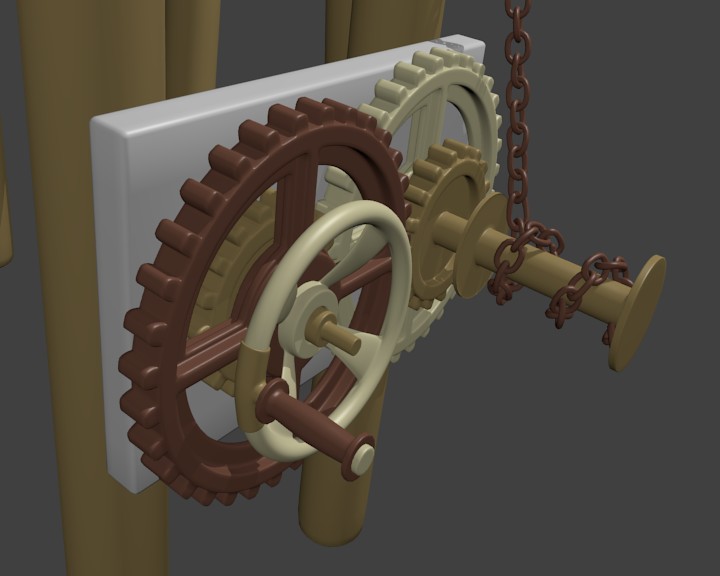
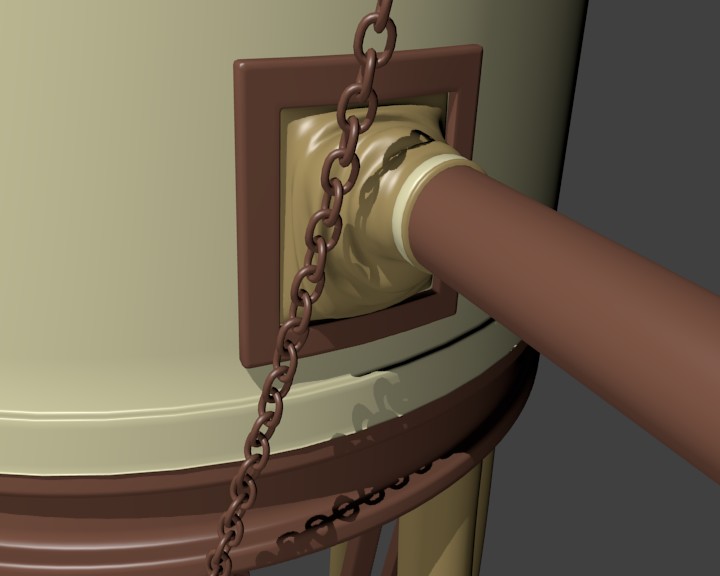
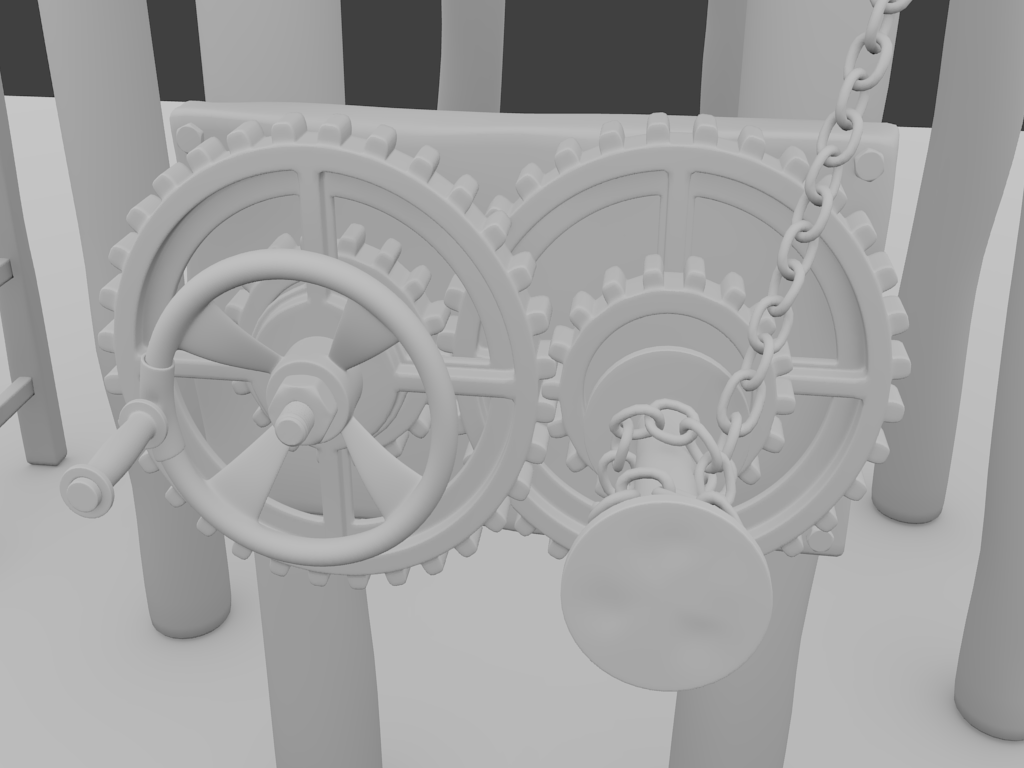
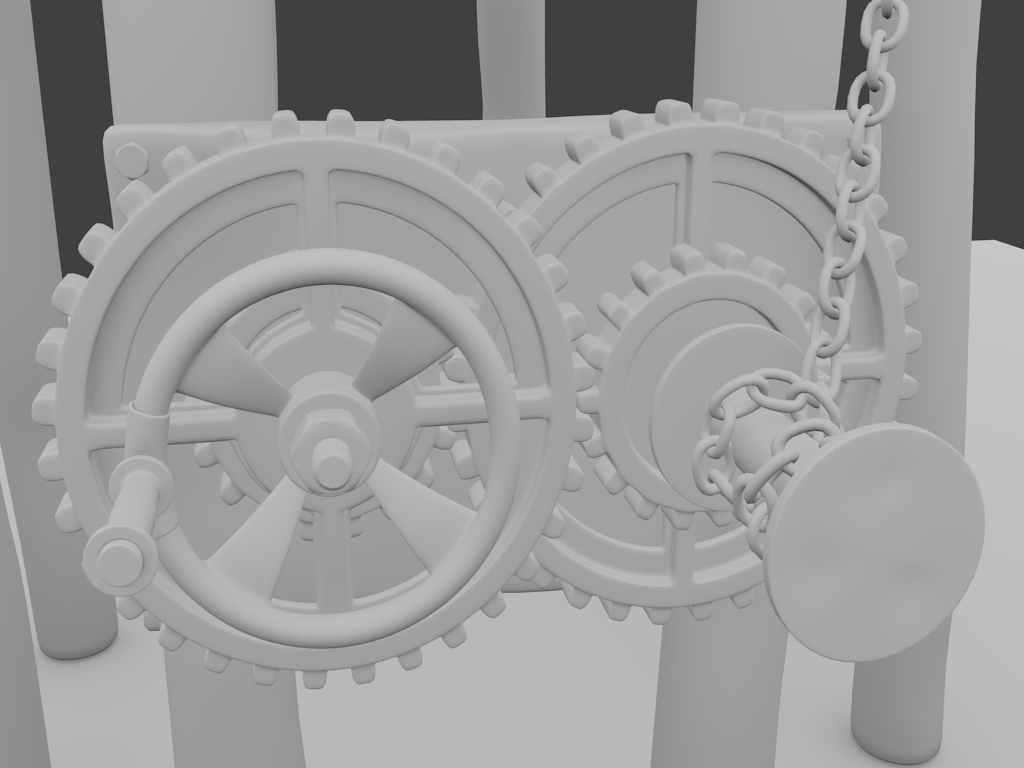
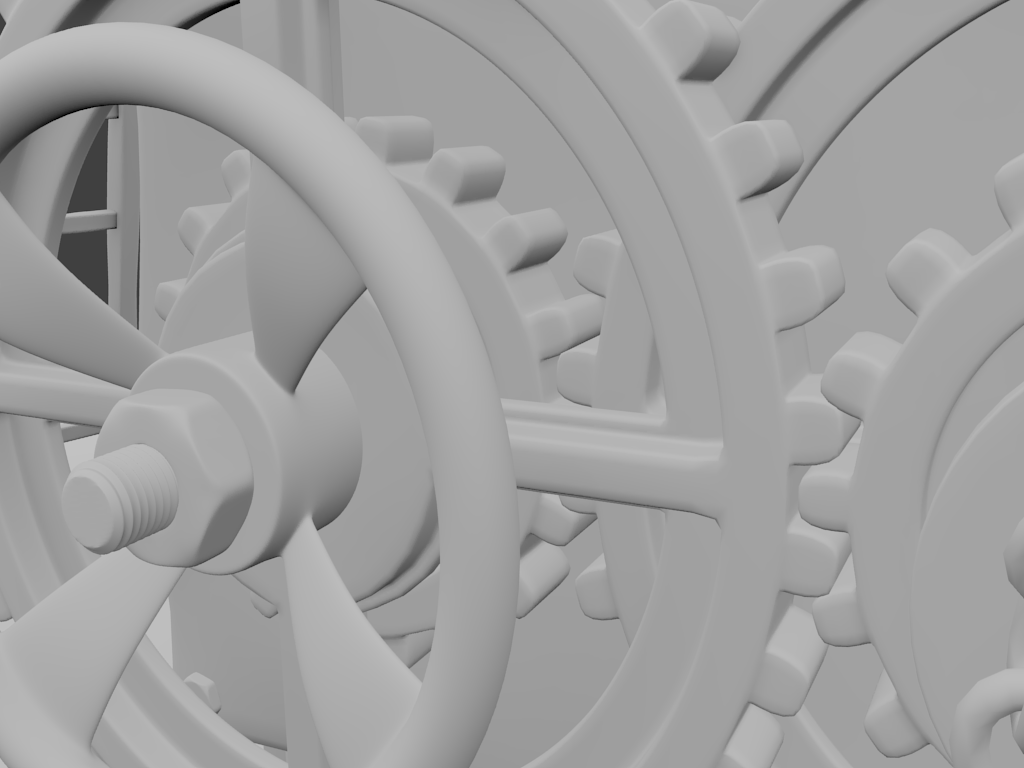
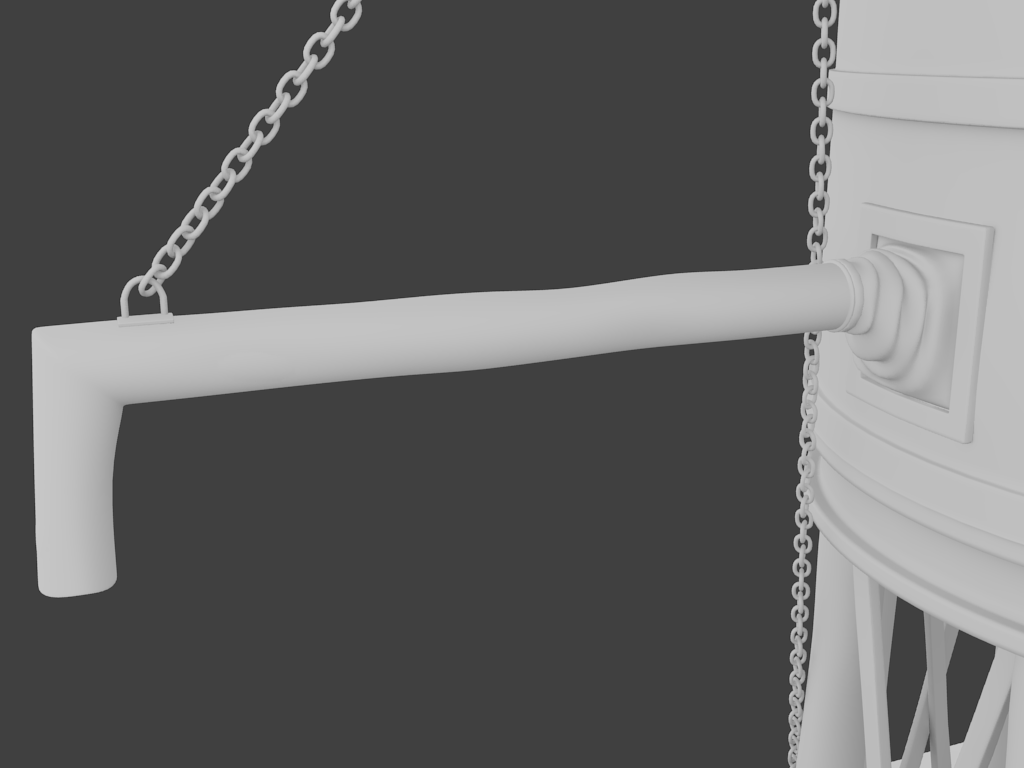
@Atom: Can you please describe what made you feel that the mechanics are wrong? I based it from real gears photo references. Any suggestions would be appreciated. Here is some progress and more realistic renders with basic AO.
Attachments
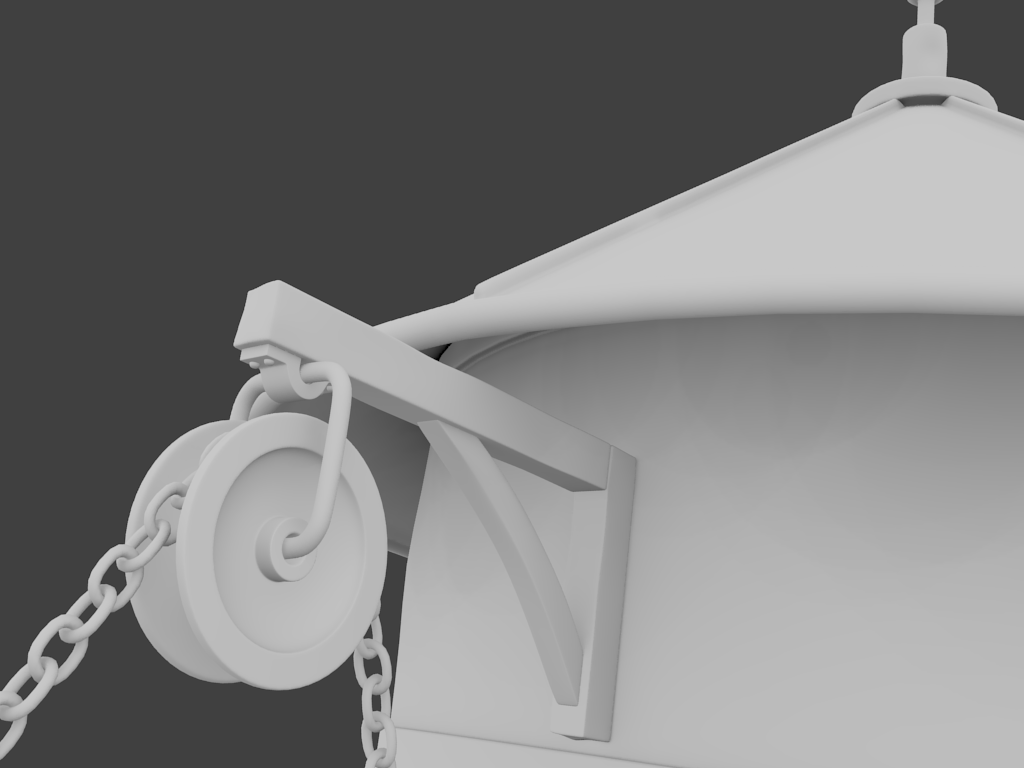

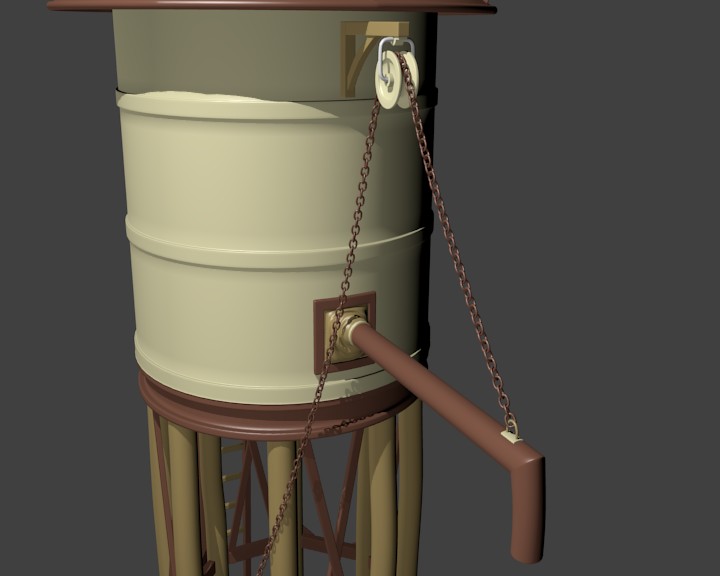
Great job! Nice touch putting a little sag into the chain and some twist too. The crank mech looks great but makes you wonder what is holding the chain onto the spindle and what keeps it from unwinding?
@walshlg: The gears will keep the chain from unwinding. The way they’re set up now, turning the crank will make the front left gear turn at a certain speed (say x). That will make the front right gear turn at (I’m guessing here since I’m too lazy to count the teeth) 2x. The back right gear is also turning at 2x, assuming it’s on the same shaft as the front one, so it will make the back left gear try to turn at 4x. Since that shaft is turning at a speed of x, though, it will bind.
Can we see the reference pics of the gear mechanisms?
@walshlg: The chain is being hold onto the spindle by a small metal ring (similar to the on at the other side that is holding it to the pipe) that is welded in the inner side of the front round-metal plate. It’s just that the angle of the camera don’t let it show.
@Skyler: You are right. Making a gear smaller (or bigger) changes the speed that it rotates and the force needed for that gear to spin. The modeling of the gears took me the most time. Well not the whole gears but rather their teeth. You can’t just take the big gear, scale it down and expect it to work. The teeth will be smaller and not match. There is a whole bunch of mathematic calculations that must be taken into account in order to make two gears with different diameter to work together. In wikipedia: http://en.wikipedia.org/wiki/Gear you can take an idea of what it takes to make gears work together. At the end I modeled the teeth with the help of this script: http://www.swineworld.org/blender/gears/gearsanimation.shtml.
Here are some references I use for inspiration:
http://www.flickr.com/photos/mikeoc/679807242/
http://www.flickr.com/photos/24130425@N07/4223452293/sizes/l/
http://www.flickr.com/photos/lrargerich/3419002324/sizes/l/
http://www.flickr.com/photos/monstergirlee/4726212681/sizes/l/
http://www.flickr.com/photos/7269585@N08/4479272155/sizes/o/
http://www.flickr.com/photos/jd_jeno/1485502705/
From the positive responses, dare I to assume that my modeling skills aren’t that bad?
Please keep us updated!
Yes, but what I’m talking about isn’t the modeling of the gears so much as their arrangement. None of your reference pics show two sets of meshing gears on the same two shafts. This one comes closest:

Notice that the top gear, in the back, meshes with a small gear on the second shaft. On the same shaft there is a larger gear which in turn meshes with the small gear at the bottom. That small gear is going to be turning many times faster than the gear on the top. The way you had it, the small gear was attached to the same shaft as the one on the top–that doesn’t work.
Your modeling does look good and clean. Nice job!
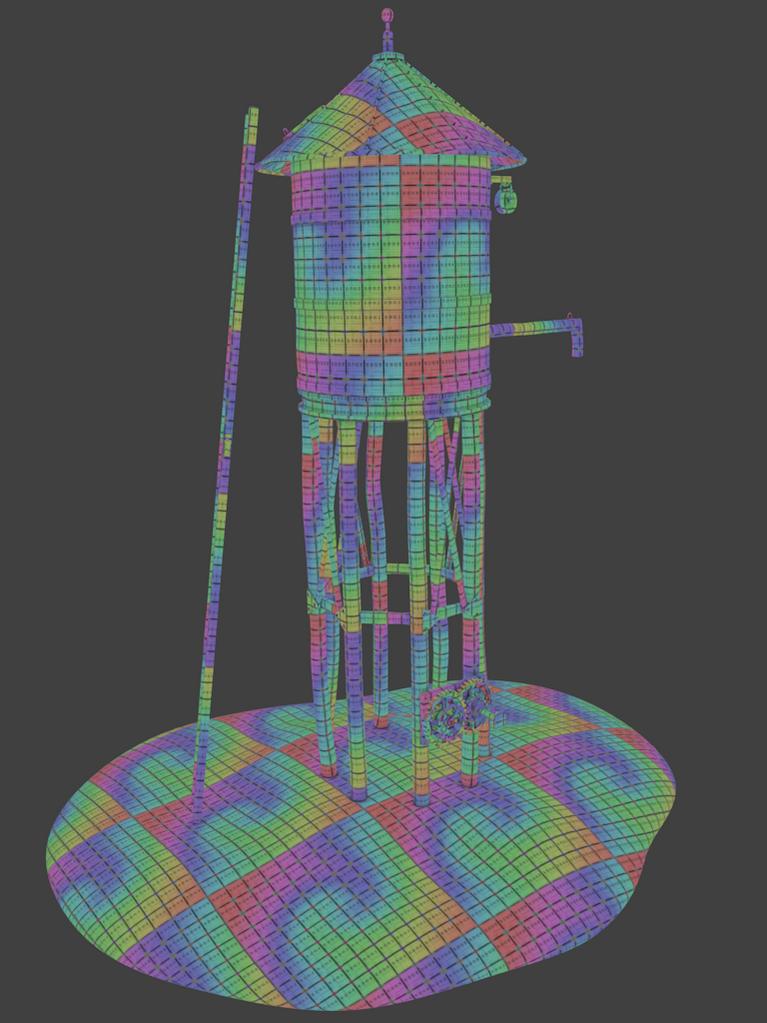
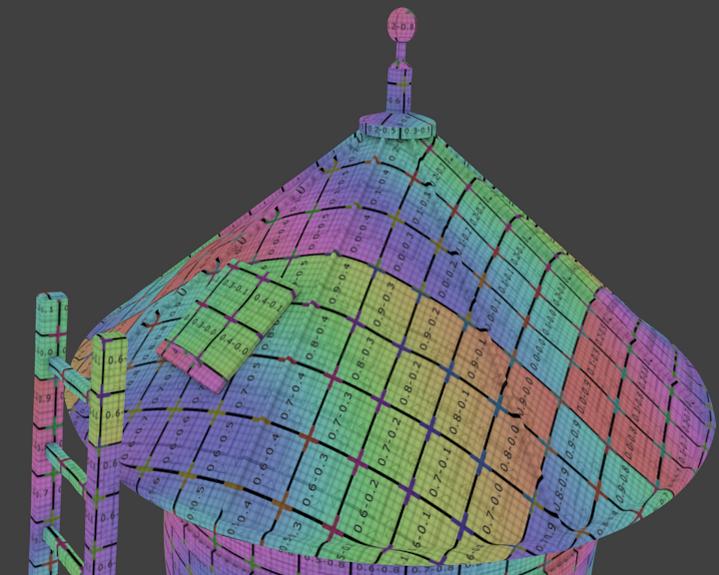
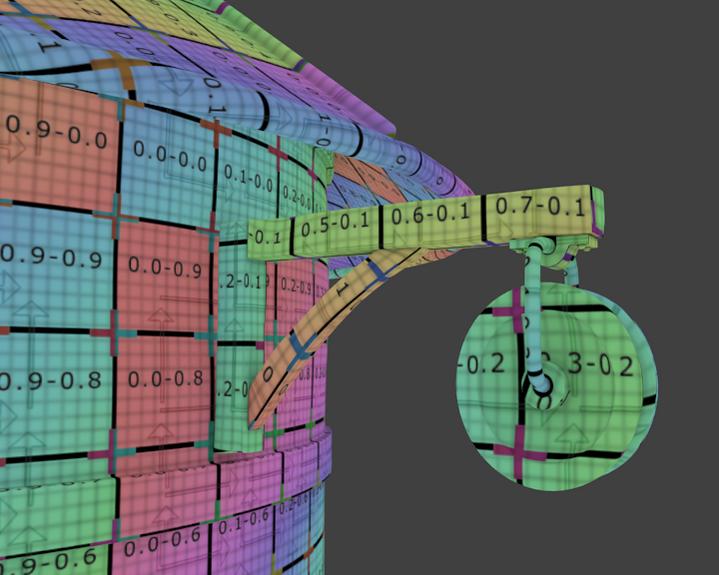
Small update. UVs are finished. Some small stretching here and there but overall I think it’s OK for first time unwrapping anything else that it’s name wasn’t Cube or Suzanne. I also tryed to keep everything I could in an upright direction. Man, unwrapping is hard.
Attachments


Wow that’s a lot of hard work but sure looks like you’ve got the seems right.
could you post a link to that nifty unwrapping texture?
I am a little confused as to what gadget does what. Basically I want to know if a Smoothie Maker is like a blender, or just for making smoothies only? Also I am after a Juicer - do any of these contraptions double up i.e. smoothie maker/juicer/blender!!! Can anyone recommend some good tried and tested machines please, many thanks
A water tower delivers water to the various locations using gravity. A small pump brings the water to the tower, but gravity then delivers the water to all of the houses. Knowing this, water is always leaving the water tower; therefore, it is always “draining”.
@walshlg Sorry for the laaaate response but I had some big problems with this project. I got the UV texture from here: http://www.davidbadgerow.com/maya/downloads/index.php?quarter=Spring07
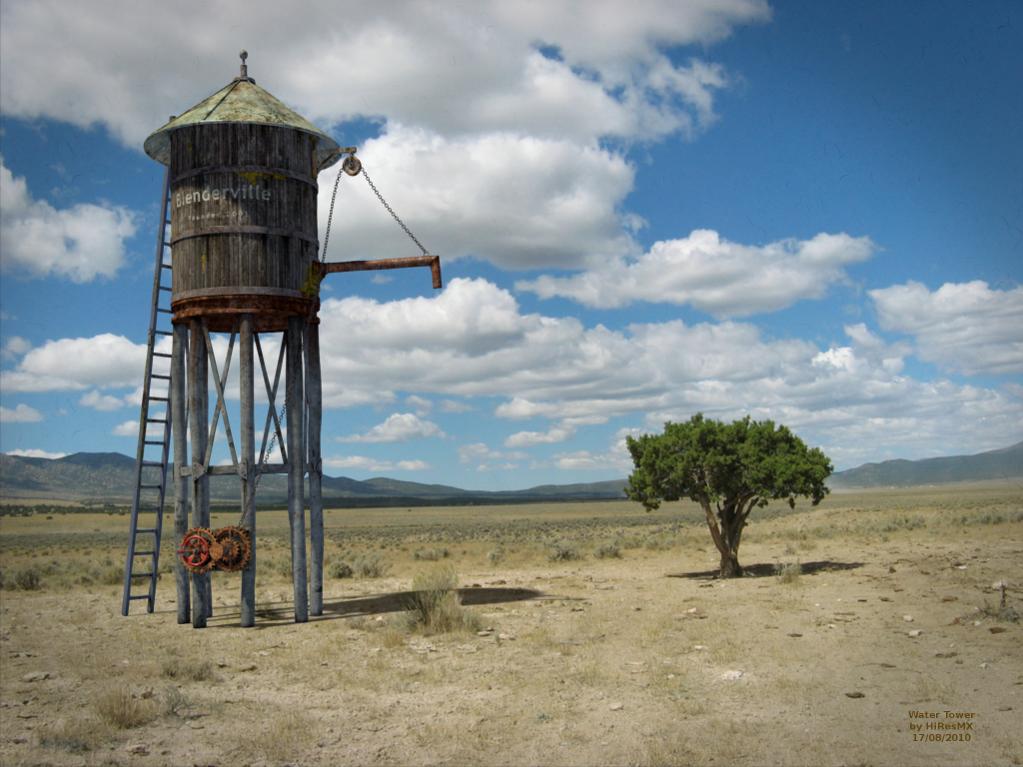
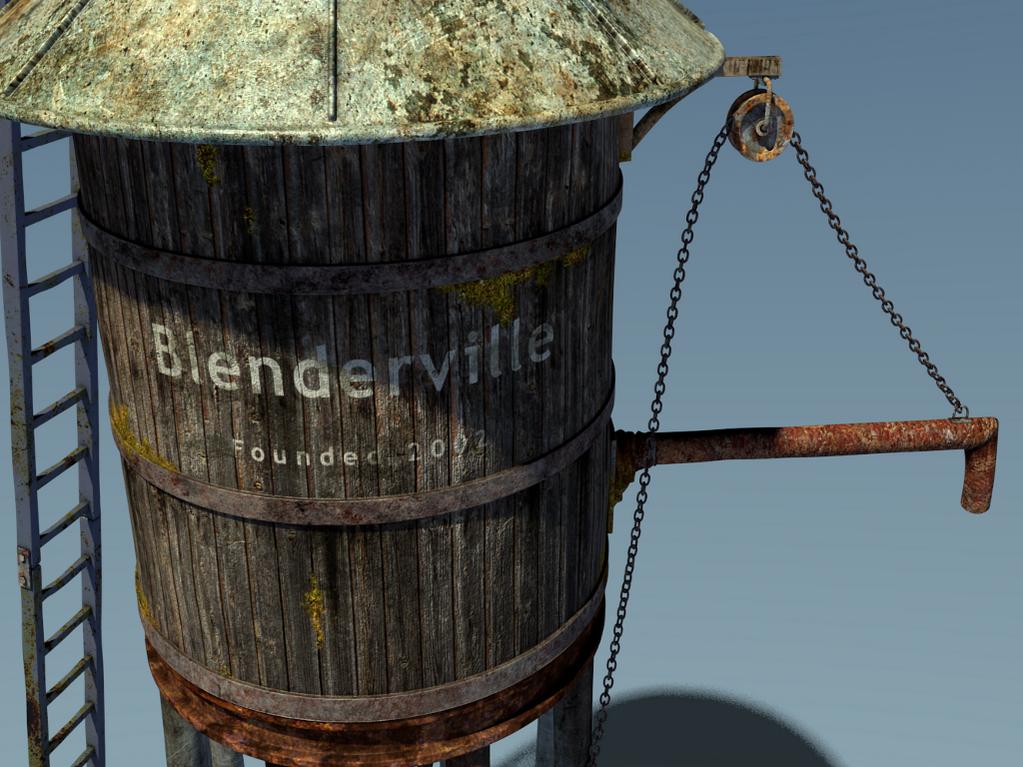
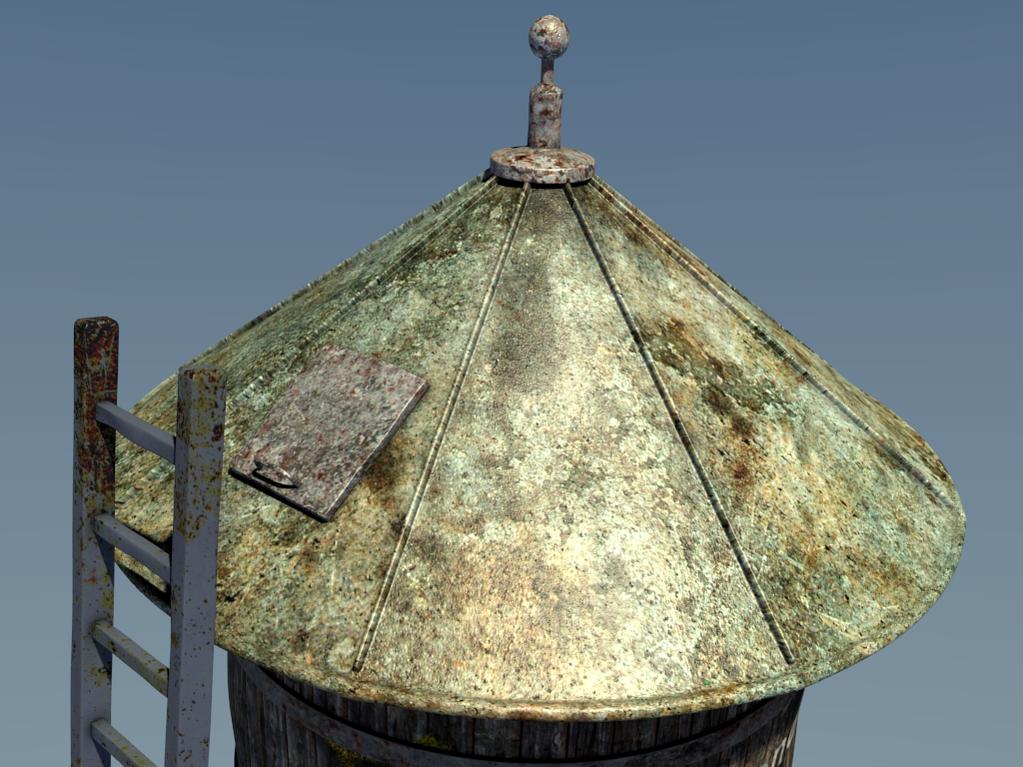
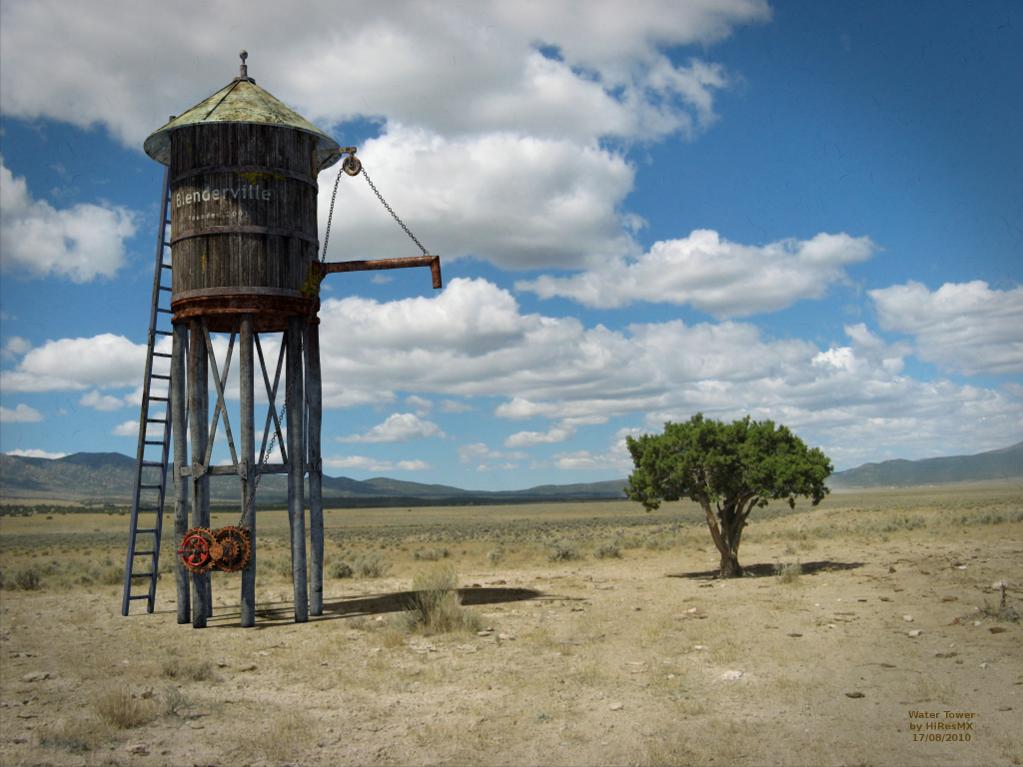
Anyway. Here is what happened the last few days. Although I said that this was going to be only a modeling project, I decided to give it a go and make a finished image out of it. But I wasn’t expecting the problems that my low end PC would give me. Texturing became a complete torture because my PC couldn’t handle the 6144x6144 image that I was hoping to work with. And Blender couldn’t render bigger images without crashing. Poor Blender was suffocating with only 1GB RAM. So I had to either abandon the whole idea or improvise. So I sliced the whole image to smaller pieces and work on them separately. Then I combined them to form the complete 6144x6144 texture. Sadly, I am forced to call this project finished even though I had so many things in mind to improve (like tweaking the diffuse/bump/specular maps, better lighting, DOF etc.) Here are some WIP images and the final project. Post processing was done in GIMP.
Higher resolution can be found here: www.p asteall.org/pic/show.php?id=5169
(I don’t know why but it seems that the word “p asteall” is beeing replaced by stars like this ******* and it brakes the link. Just remove the space between the p and the a in the link)
A big applause to the first one who guesses correctly the significance behind the date.
I want to thank walshlg and Skyler for their comments and the encouragement they gave me to complete this project.
Attachments


Wow what great materials! I can hear practically smell the hot dust and hear a creaking hinge, great work
Yay!!! The africans finally got water!!! I can’t tell if the tree and ground and grass are fake or real. That is a good sign though. Great job!!
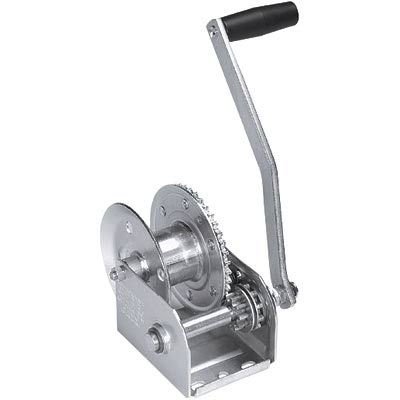
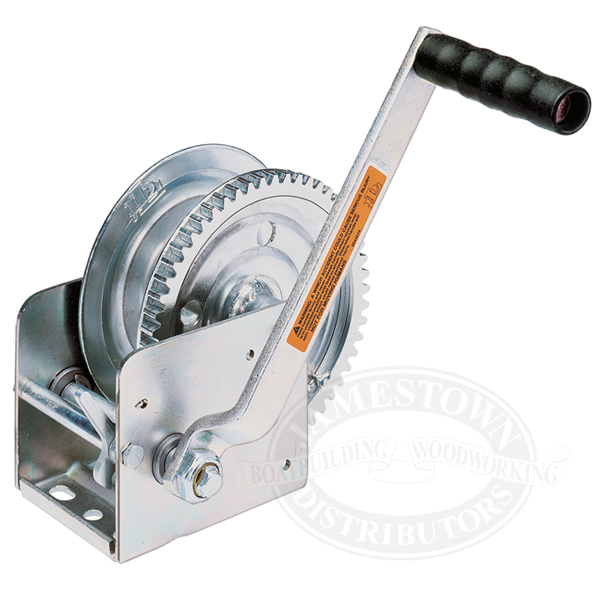
Not to be beating a dead horse here, but here’s the type of hand winches I have used before. One small gear on the handle, one large gear on the spool. There is usually a little tab that can be flipped into the teeth on the little gear to lock it in place.
Aside from that, I think the model looks great!! Good job on texturing it and good job compositing it on that background! I’ve tried, but never got that close to making a model fit a background that good, what’s the secret? I can never get the lighting to look right… Did you composite this in blender or another software package?
Randy
Edit; just re-read and read the part about post in gimp…
Attachments
Great texturing! But I think you’ll want to do some gamma correction for either the water tower or the background image because the two don’t seem to match in contrast. Some light wrapping around the tower from the background image would also help blend it in too.
Also, the chain going from the winch to the pulley doesn’t seem to flow quite right. It needs sag as though it were being affected by gravity.
Cheers,
John
Thanks guys for your comments.
@ZapperJet Yes, there are allot of things that needed to be done but my 7years old PC kept crushing. Anyway I tried some more color correction and post pro in GIMP. Here it is.
Higher Resolution: http://www.paste all.org/pic/show.php?id=5197
(Argh, again the stars ****** problem. Why the hate on www.paste all.org? Just remove the space between the words paste and all in the link and it should work.)
Anyone to take a guess about the significance behind the date on the water tower? It’s quite easy.