I am new to working with Linked files and I am trying to figure out the best practices for a smooth workflow.
Most topics I find either date from 2013 or do not provide a direct answer to my particular musings.
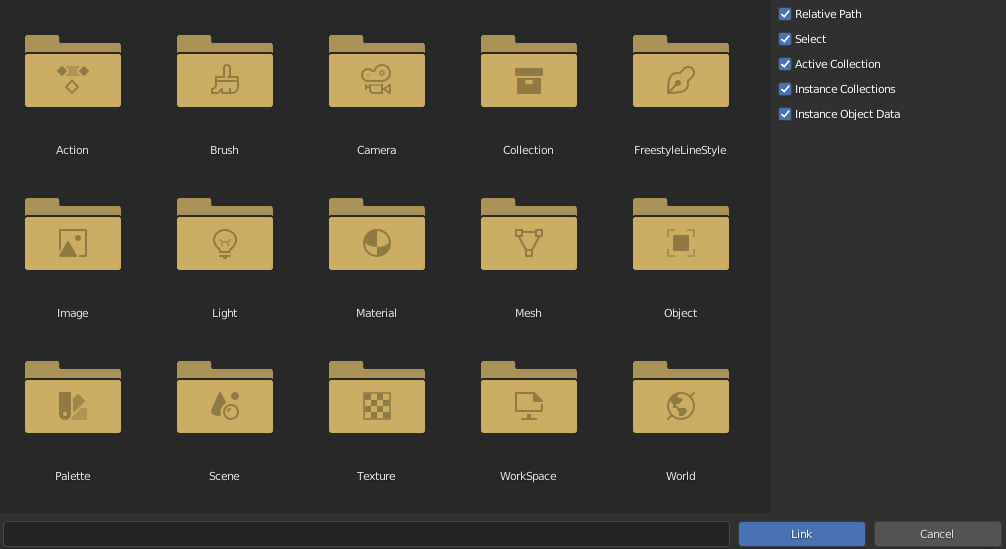
What would be the best choice to “link” these objects in a new scene?
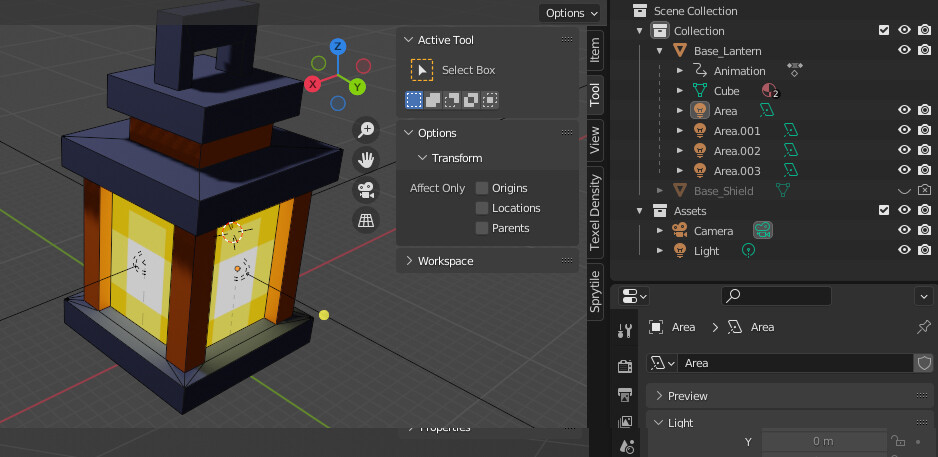
Right now I have multiple assets set up in my World / Collection, so those are out of the question until I set up the source file differently.
Currently I am linking the Lantern via the Object folder, but that means I have to select my Area lights separately.
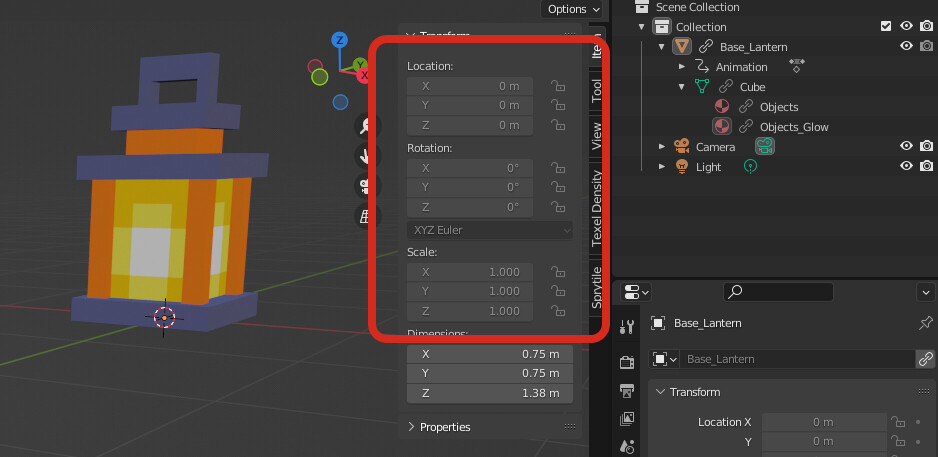
Is it possible to Link files and keep the Location, Rotation and Scale fields active in the new file?
Is there a way around this?
I figured an easy work-around would be to parent it to an Empty, but this also seems out of the question, technically.
What are pros and cons for Library Overrides?
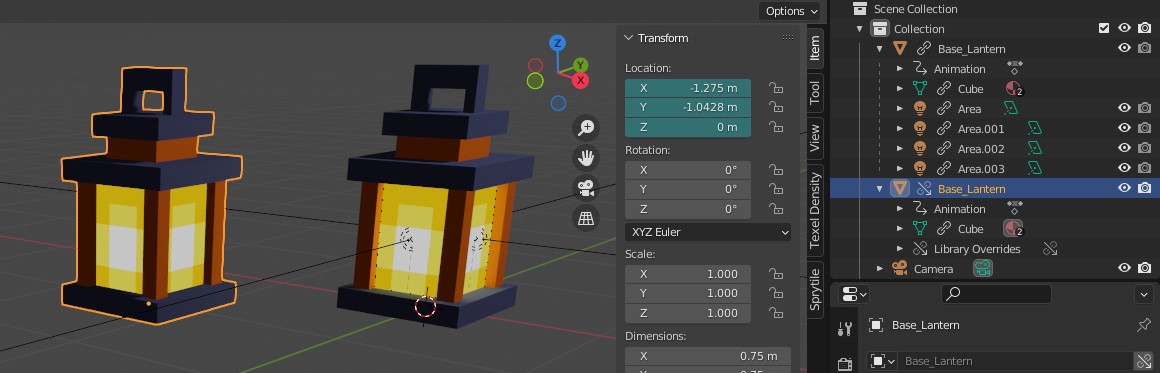
After browsing around and checking the menus, I found the Library Override function.
This seems to create a Referenced Duplicate of the object that I can manipulate, but only the Location options turn blue for some reason.
I cannot move the original Linked file, nor hide it directly, but it does remain hidden for the Renderer if I hide its Collection.
Question 4:
Would it be a common practice to create a Collection for original Linked objects and hide that from the renderer, while using Library Override objects in my scene for animations and renders?
Question 5:
Can I combine all of this with the Asset browser somehow, so that I can easily manage my models for particular long-term projects and toss them in different files without too much hassle?
In my limited experience there is nothing but frustration trying to LINK an asset comprised of many separate objects that you want to be able to tweak on the linked copy. Lights are especially problematic.
When linking a collection as a Collection Instance you should always have access to loc/rot/scale. It’s when you link an object directly that you can’t move them without doing a library override first.
The devs have discussed changing the system to automatically apply a library override when linking an object, and/or allow Empty objects to instance a linked object the same way they can instance a linked collection. There have been no decisions made and they probably won’t make a decision this year.
Hide original collections in a different scene and use collection instances in the scene you are rendering.
If you want the original stored in the same scene use the “include in view layer” checkbox to hide it. Changing the rendering setting will likely hide all instances from rendering. Warning, turning the “include in view layer” checkbox on and off will unhide (eyeball) all child and grandchild objects that were hidden (eyeball) so only use this for 100% complete assets that don’t included any left over junk you had hidden with the eyeball.
be aware that lights do no scale with their parent object. So in some situations with a chandelier I made, I wanted to scale up the object for a larger scene but that caused the candle mesh near the point lights to get bigger while the point lights themselves never got bigger. Their position in relation to the parent object did move as expected when the parent or collection instance was scaled up but the size of the point lights never changed so they were engulfed by the candle mesh. So most of the time I don’t include lights in the asset. I’ll add the asset then open the source file of the asset and copy the lights out of that file.
Sometimes an easy solution for problems with visibility of source collection is to just move it to a location that will never be on camera. That could be another scene or it could be 50 meters below the world origin. Most people think not having the collection’s contents at the world origin causes problem. It doesn’t because of the features explained here:
I have had some success with using geometry nodes to compile multiple objects into a single asset that I can tweak after linking it to another file. The unintuitive trick is you have to add a default cube to your main file and then drag and drop the LINKED node group asset onto the LOCAL default cube. This means for your asset image preview you have to render an image of the asset and then go into the asset browser settings and load that image into the node group asset item. Such an annoying workflow. I’ve gotten this to work well for a ceiling fan. As for the light on the ceiling fan I found it better to configure the nodes to allow me to choose a light object from the final scene file instead of linking in a light from the source file.
In the past I used to be able to do that geometry node setup on a cube in the source file and then turn that cube into the asset (which would look like the final lamp object) and link that into the main scene file. But the ability to do that has broken and been fixed and broken again several times with no mention of it that I could find anwhere in the developer activity website.
I’m positive that light in that video was not working that way in 3.5 or 3.6 but now works again 3.6.1 - except now if I append it, it also appends all of the source component objects but in the video it kept the outliner clean and did not append them, only the object with the geometry nodes -
Whereas in the link before that dragging a node network asset onto a local cube was working in 3.5 and then broke in 3.6 and then was fixed in 3.6.1 and I see no mention of that anywhere in any release notes.
There is another person on youtube with much better geometry node based configurable lights. Can’t find the link right now.
If you try using geometry nodes like this make sure none of the slots in the node input/output have any objects as default values or else when you link the asset to the scene it will also link or append those default objects even though you setup the nodes to let you choose an object from your main scene file.
Linking and overriding rigged characters and materials is a whole other bag of dog shit.
Appending, multiple times, an object that used drivers, was such a broken experience that I never wasted my time on drivers ever again. Who knows, it might be a good experience now.
Appending, multiple times, the same rigged character or object (a door in my example) and trying to pose each character differently is another confusing experience.