I’ve seen a few youtube videos recently claiming to show all you need to know about collection instances. They leave out a lot of useful information.
The first thing you should know is that a single object can exist in multiple collections. I haven’t seen a tutorial mention that since around the release day of 2.80.
Something plaguing tutorials lately is they don’t demonstrate multiple objects in a collection being used as a collection instance. I’m still seeing many comments asking about this basic thing.
You can also have a collection containing only collection instances and can then make a collection instance out of that collection.
Most importantly let’s talk about the origin point of collection instances. You can set it to anything you like. You do not have to keep all of your objects at the world origin if you are planning to use them as instances.
One way to do it:
Select any object that is in the collection you want to instance.
Put the 3d cursor where you want the origin point of instances to be.
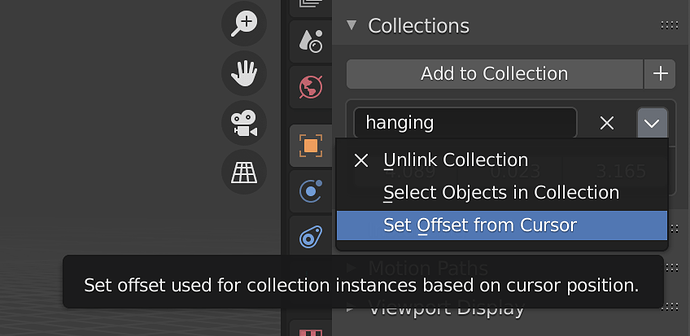
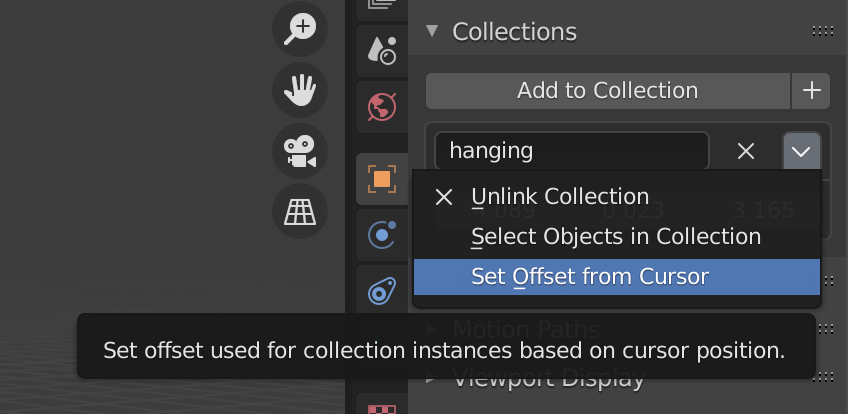
In the object properties of the selected object look for “Collections” and then the name of the desired collection.

Click the arrow and choose “Set Offset from Cursor”
.
Another way:
Make an instance first.
Select the instance.
Menu > Object > Set Origin > { whichever one is best for your needs }
What this does behind the scenes is exactly what you did manually with the first technique.
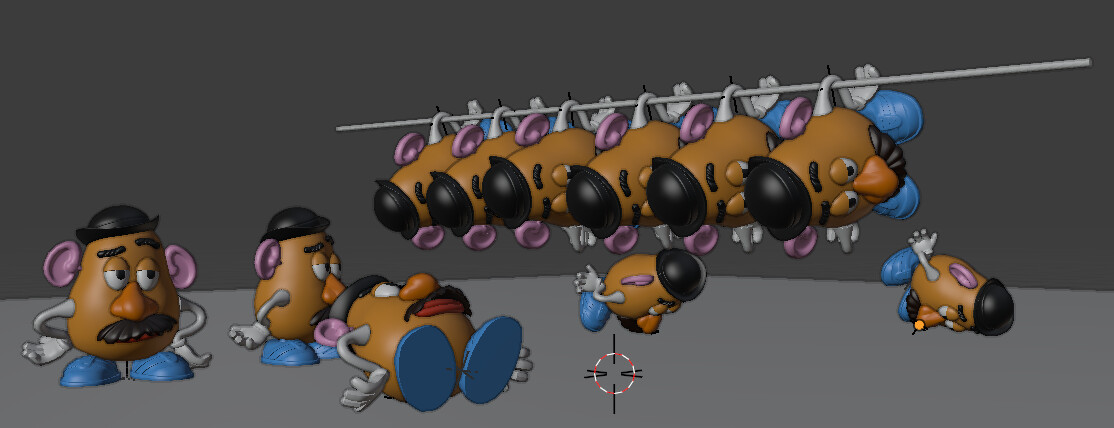
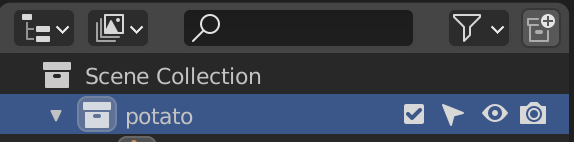
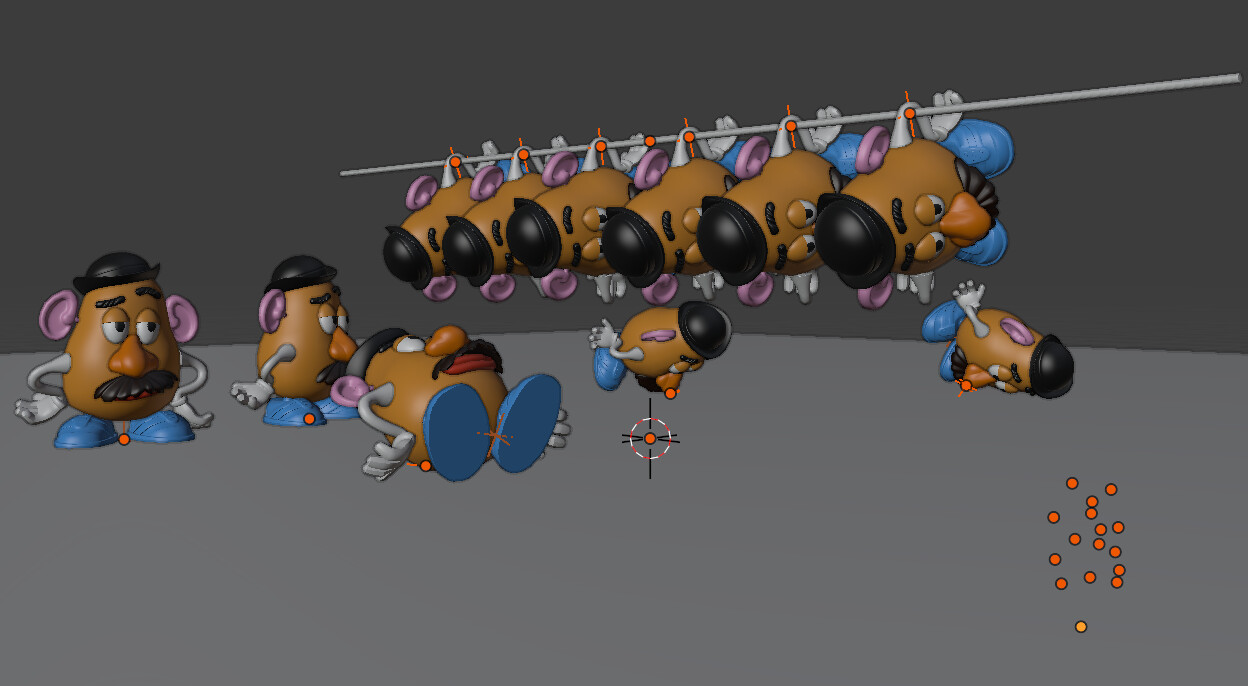
In this scene I have a single Mr. Potato Head toy comprised of 15 objects (hat, left ear, nose, etc…) in a collection named “potato”. This collection has it’s origin set to the ground plane beneath the feet. I use instances of “potato” for all toys that are standing upright.
I then made another collection named “face down” and in there I put an instance of “potato”. For face down toys it would be convenient for the origin point to be on the nose. I put the 3d cursor on the nose and set the “face down” collection to use that spot for the origin of all instances of “face down”.
I did a similar thing for a collection named “face up” where the origin is on the backside of the potato body.
Finally there is a collection named “hanging” with the origin on the inside of the right arm. Hang one instance of that, duplicate and move it, shift+r several times, select all of them and randomize tranforms ( y rotation ) so they aren’t all hanging in exactly the same repetitive orientation.
The next likely problem you might have is “what if I want to move the original Mr. Potato Head toy objects somewhere else?”
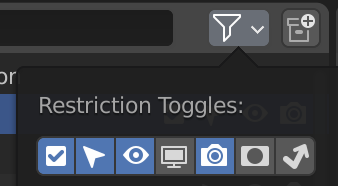
For example if I created the toy at the world origin and didn’t know how to hide the original from the final render without hiding the instances from the final render ( USE THE EXCLUDE FROM VIEW LAYER CHECK MARK)
I might try to solve the problem by putting the original objects below the ground plane or behind the camera or 100 meters up in the sky. But when I move the original objects it has an undesired effect on ALL instances. What to do? How to fix?
Before moving the originals, add an empty to the collection and place it exactly in the location that the collection is set to use for the origin of its instances. Move the objects AND the empty at the same time so that the position of the objects relative to the position of the empty does not change. It would proably be best and easiest to just make all objects the children of the empty and only actually move the empty.
After making the move, snap the 3d cursor to the empty, select any object in the collection, and do what I showed earlier:
.Now every instance used all over your scene will snap back to where you originally wanted them to be.
The POINT IN SPACE where you originally placed the (origin point OF the) instances never actually changed, only the objects relative to the point in space used as the origin of the collection is what changed. When you changed it back, they all visually changed back.
Now I just need to give 1 toy a purple and gold hat but I don’t know how to use the Library Override system or if that is even something that can be done with library overrides. So instead make a new collection name “oddity”, select all objects within the “potato” collection and ctrl+click+drag them to the “oddity” collection. Now all those objects exist in BOTH the “oddity” and “potato” collections.
Select the hat, duplicate it, name it “fancy hat”. Select the original hat, go to its object properties under the Collections section and delete the one where it says “oddity” to remove it from the oddity collection (or any of the several other ways you can remove an object from a collection without deleting it). You will still see the original hat because it still exists in the scene in exactly the same place as the new hat.
Select any other object within the “oddity” collection and set the origin of the “oddity” collection to be exactly the same as the “potato” collection.

Give the “fancy hat” object its own material.
Select one of the hanging toys. Under its Instancing properties where it says “hanging” change it to “oddity” 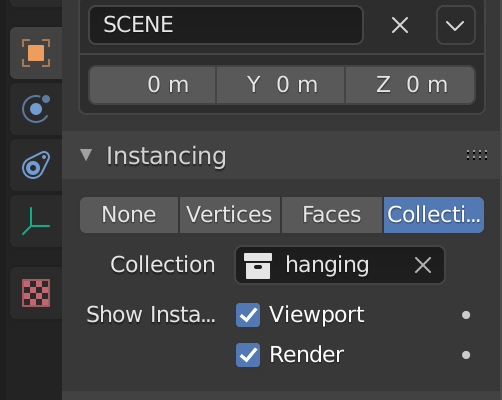
The origin point of “oddity” is between the legs like the original “potato” while “hanging” had its origin point on the arm so it won’t be an exact match but it will be close enough that only a minor location change is needed to put the odd toy in the right place.

Could also have made “oddity” collection and then a “hanging oddity” collection so I would’t have had to manually move the final object.
Duplicate the “hanging” collection. This will give you a new collection with the same origin point settings as the old collection and containing a new instance of “potato”. Rename the collection to “hanging oddity”. Select the potato instance in there. Change its Instancing value from potato to oddity.
Select one of the hanging toys. Change its Instancing value from “hanging” to “hanging oddity”. DONE!

credits: Mr Potato Head - Download Free 3D model by D.p (@Danser.com) [56909c8] - Sketchfab
If anyone has more info about Collections and Collection Instances to share, please do.