This is helpful! Thank you. I’ve got plenty of room to improve. I’ll take a look at each suggestion you’ve given.
I personally don’t feel filmic should be used without tightening the values up in post. It’s great for collecting a wide range of values, and can help manage color space and lighting for the initial render, but when left untouched can appear rather dull and flat. Similar to “LOG” footage coming out of a camera.
Have a look at these two images below. One is GH4 log footage, ungraded. The other has had the values tightened up.


This can certainly be taken too far, like everything else in art, but in my opinion filmic, like log is a tool to obtain better control in post. Left alone it appears to be unfinished. Just my opinion though.
Just looked into the thread and your node. Thanks for linking this! I was definitely naive to this. I’m excited to implement this and see what sort of results I get.
Would this be considered a proper setup for the Principled BSDF shader?
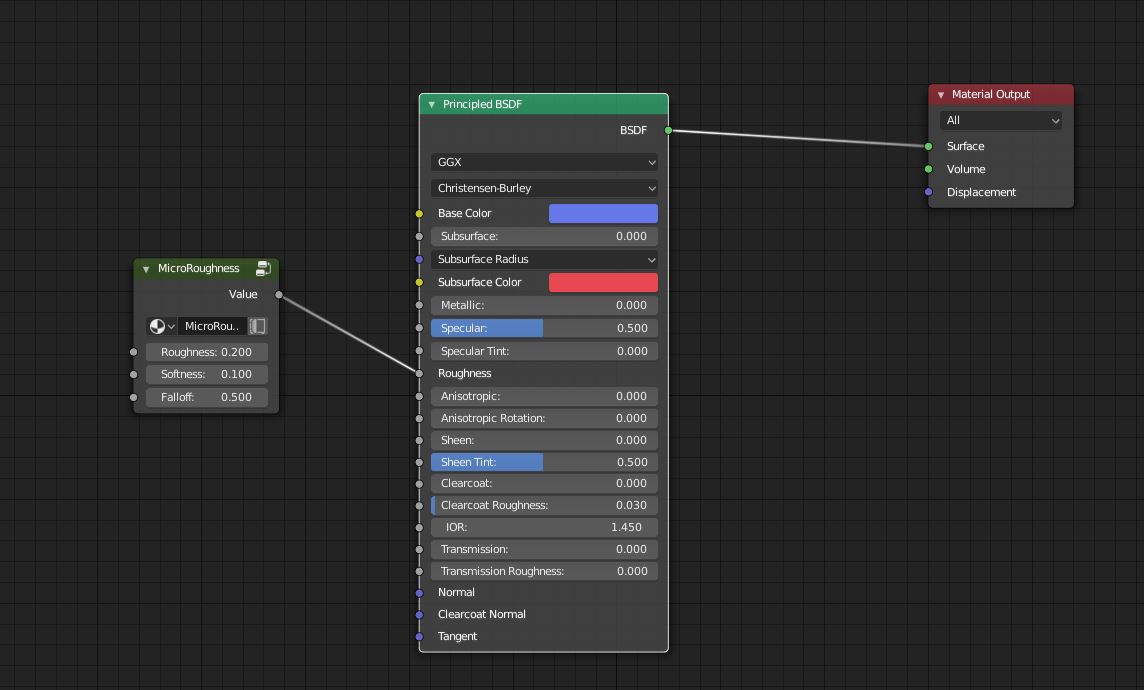
I did a very quick test with the principled roughness, and the addition of your micro roughness shader. I don’t know that this scene really shows off the shader very well, but maybe you could point out to me the difference?
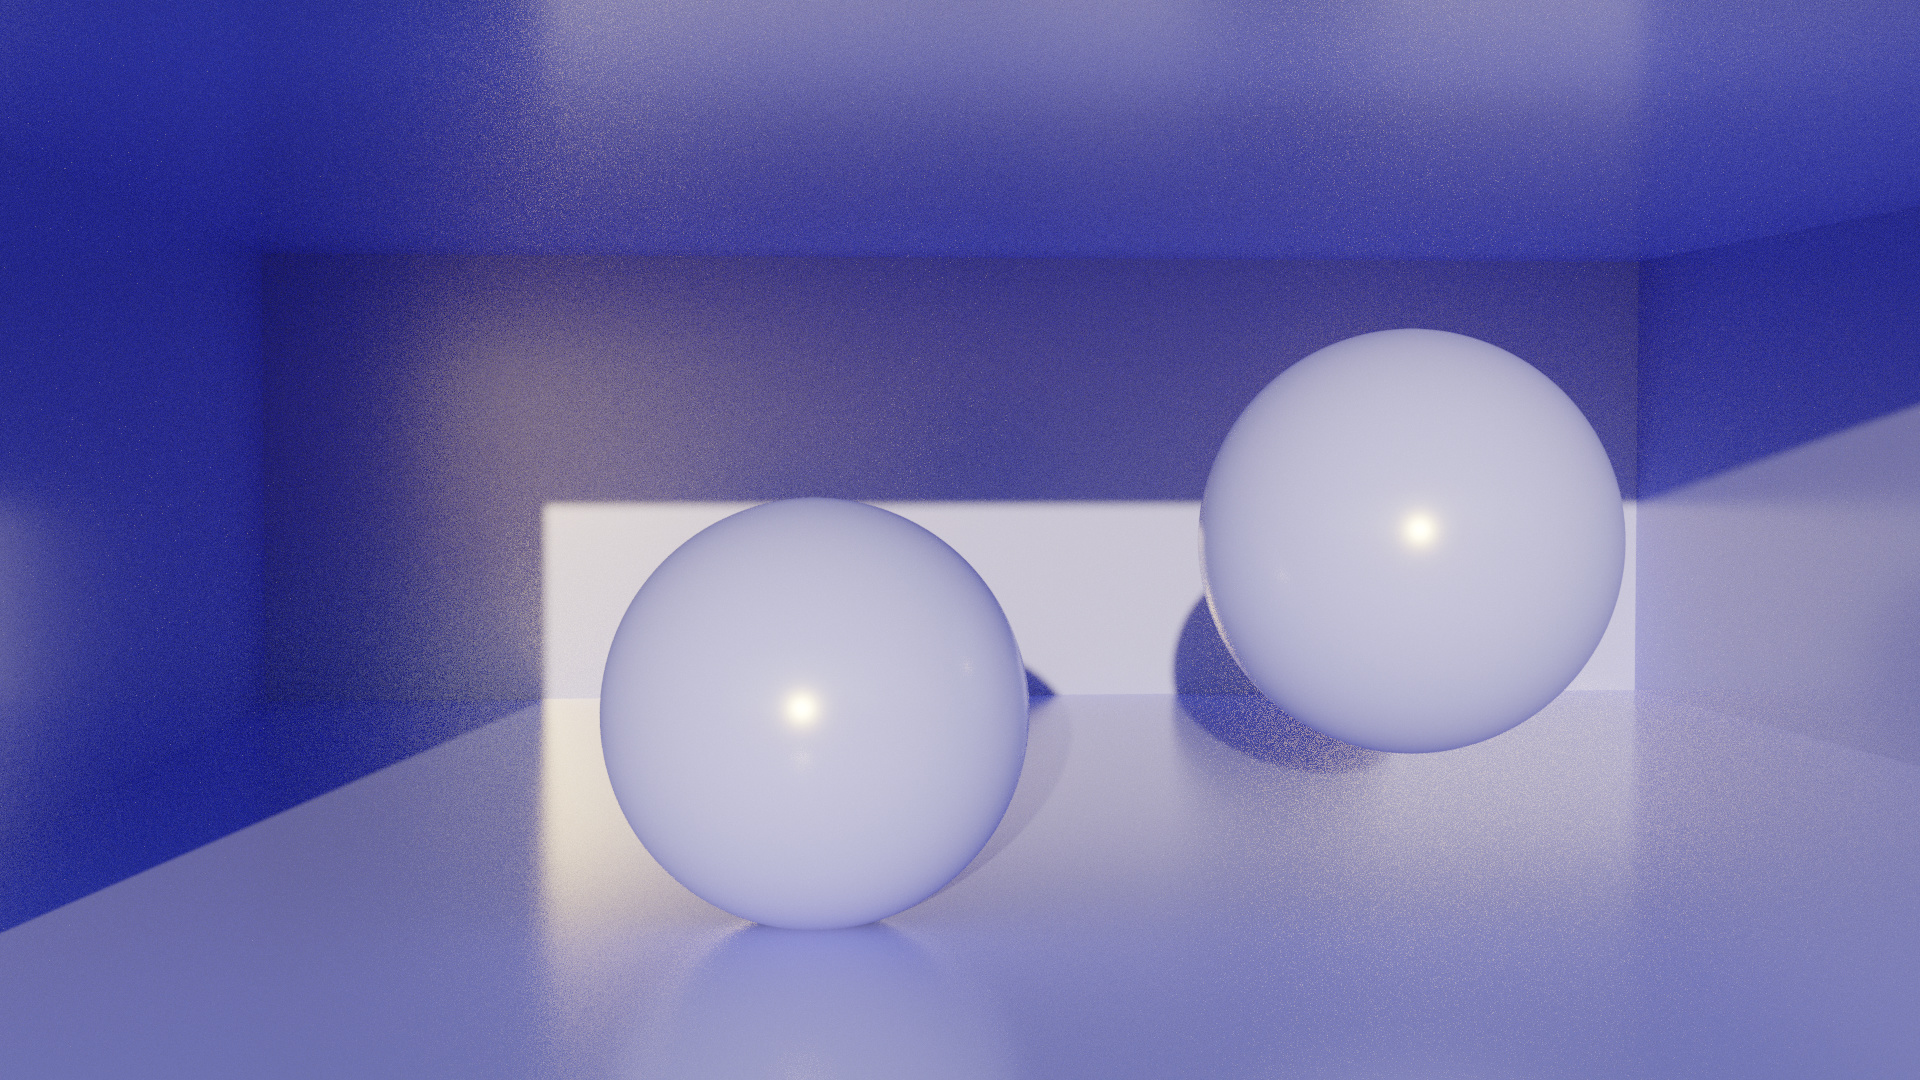
Here is with just the principled shader roughness value:
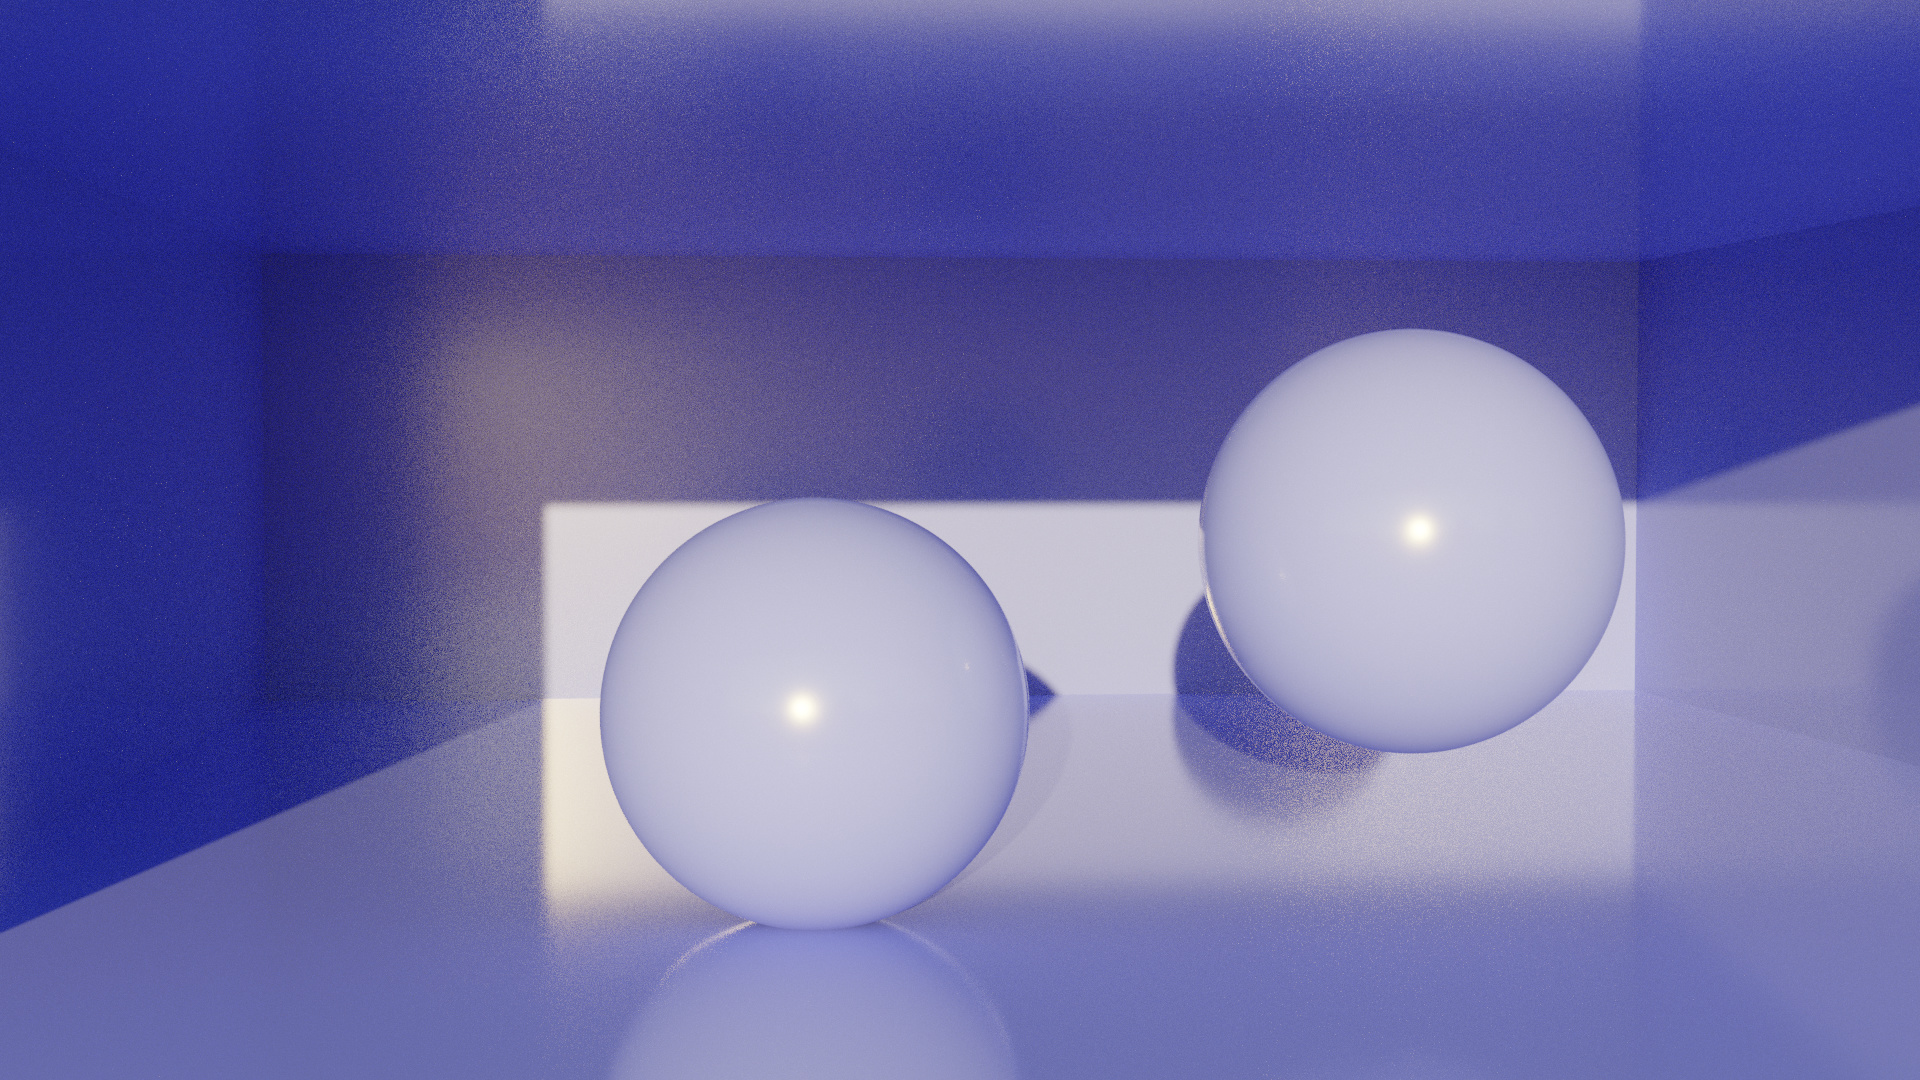
And here is with the addition of the micro roughness shader as pictured in the node setup above:
Filmic color space
Using. Please review the topic discussion prior to this point.
Yes. To properly see the effect though bump up the roughness value. You have to remember that the roughness value in Principled works a little different to that of the standard glossy shader. Roughness values in principled are essentially squared.
That means that (currently at least) a roughness value of 0.2 in the principled shader is equivalent to a roughness of 0.04 in the glossy shader.
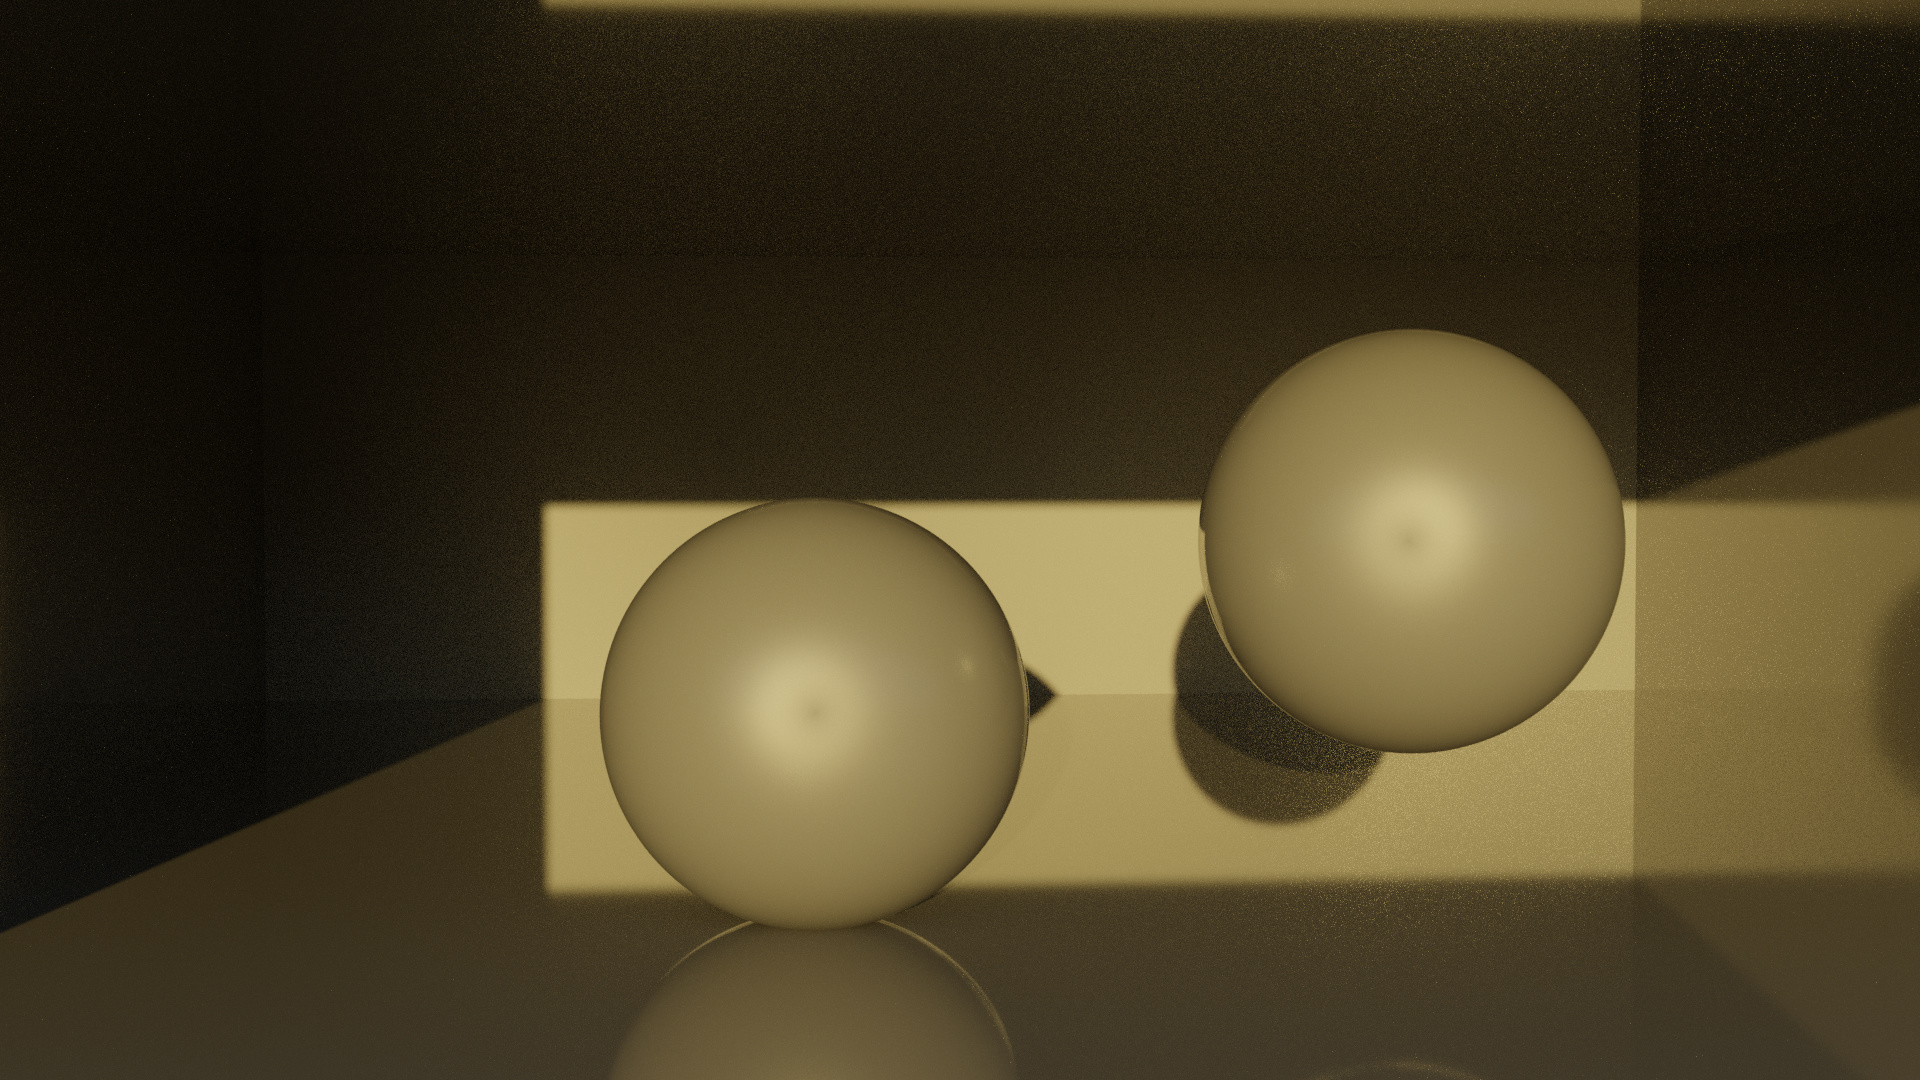
It is also more noticeable on darker colours. Try making your sphere black.
Okay, seeing a very different result now. The “straight on” view has a more diffused look, while the angled surfaces are more glossy. Interesting… Could a roughness map then be plugged into the microroughness node? I’m assuming yes?
I’m excited to implement this into some more thought out scenes to see what results I get.
What is the use of the softness value?
The microfacet roughness material scene that can be downloaded from BlendSwap has a power Math node between the MR node and the Glossy shader. Can the power node be left out when plugged in the Principled shader, or should it maybe be set to 2 in stead of 0.5? Or maybe a multiply Math node is better than power when plugged into the Principled shader’s Roughness input?
The quality is high, but you get an immediate uncanny jarring because you are so close. The biggest issues are: (this is mainly the lucid bed with blue carpet)
-
the corners/edges are too sharp. the corners on the bedstand, bedframe,pictureframe look sharp enough to split your head. When you round those off you will get a specular falloff which the eye will not be drawn to in a bad way.
-
lower the highs some (the ambient light from the left), when you flood pixels at 1.0 you lose ever last ounce of range it becomes a void. all shape is lost. The mattress cannot even be viewed really.
-
add transparentcy to the drapes/curtains and the lampshades. you can use a textured mask to give it like 20% less is more.
-
mix in grunge texture everywhere, but at an almost subliminal level.
-
floor bump is too much, lower it, it’s too plastic looking too. experiment with roughness, and clearcoat.
1 Like
Yes - just pass it through the roughness slot of the microroughness node instead of directly into the roughness slot of the principled.
On a slight side note - the node group was designed to work with the glossy shader - not principled. It’s giving some odd results when used with principled.
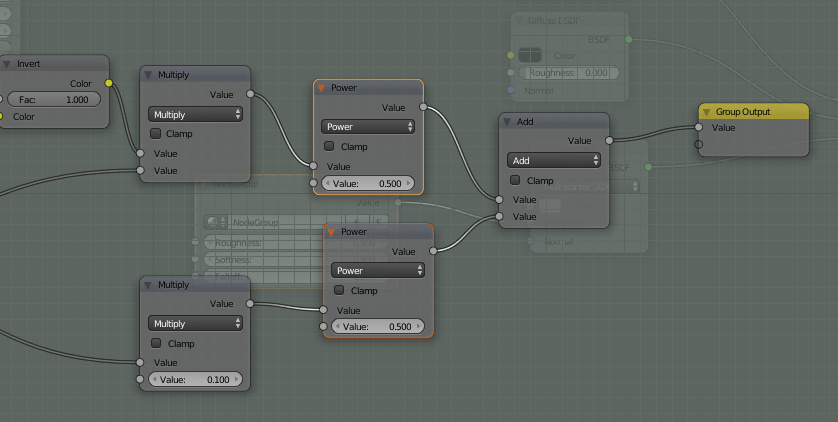
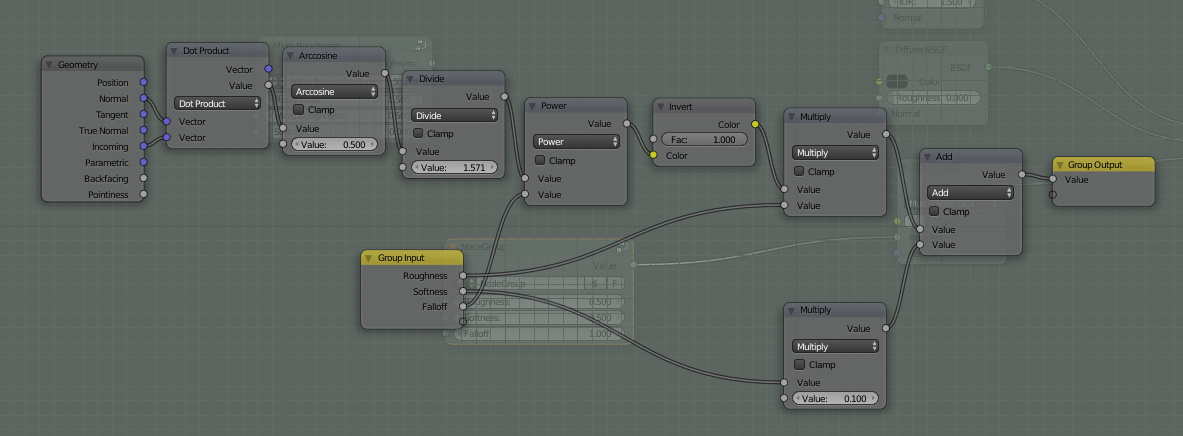
If you want to make a tweak that will make it work better with principled - open the node group - and place a math node, set to “power” after the two multiply nodes (like this).
1 Like
Thank you! Very helpful.
It’s a bit beyond me how this works, but thanks for the tip! I’ll make sure to adjust that for principled. Do you by chance know if this is something in the pipeline as a default for cycles in the future? Perhaps you’re the one for the job?
I don’t think it’s in the current pipeline - and no i’m definitely not the one to implement it even if it was.
It took a few heads together to come up with that node group, MartinZ and Isscp in particular made some important contributions. I can’t take the credit by any means…
Here is the thread where it was developed in case you are interested in seeing how it evolved (and then branched into looking at different approaches to iridescence too).
1 Like
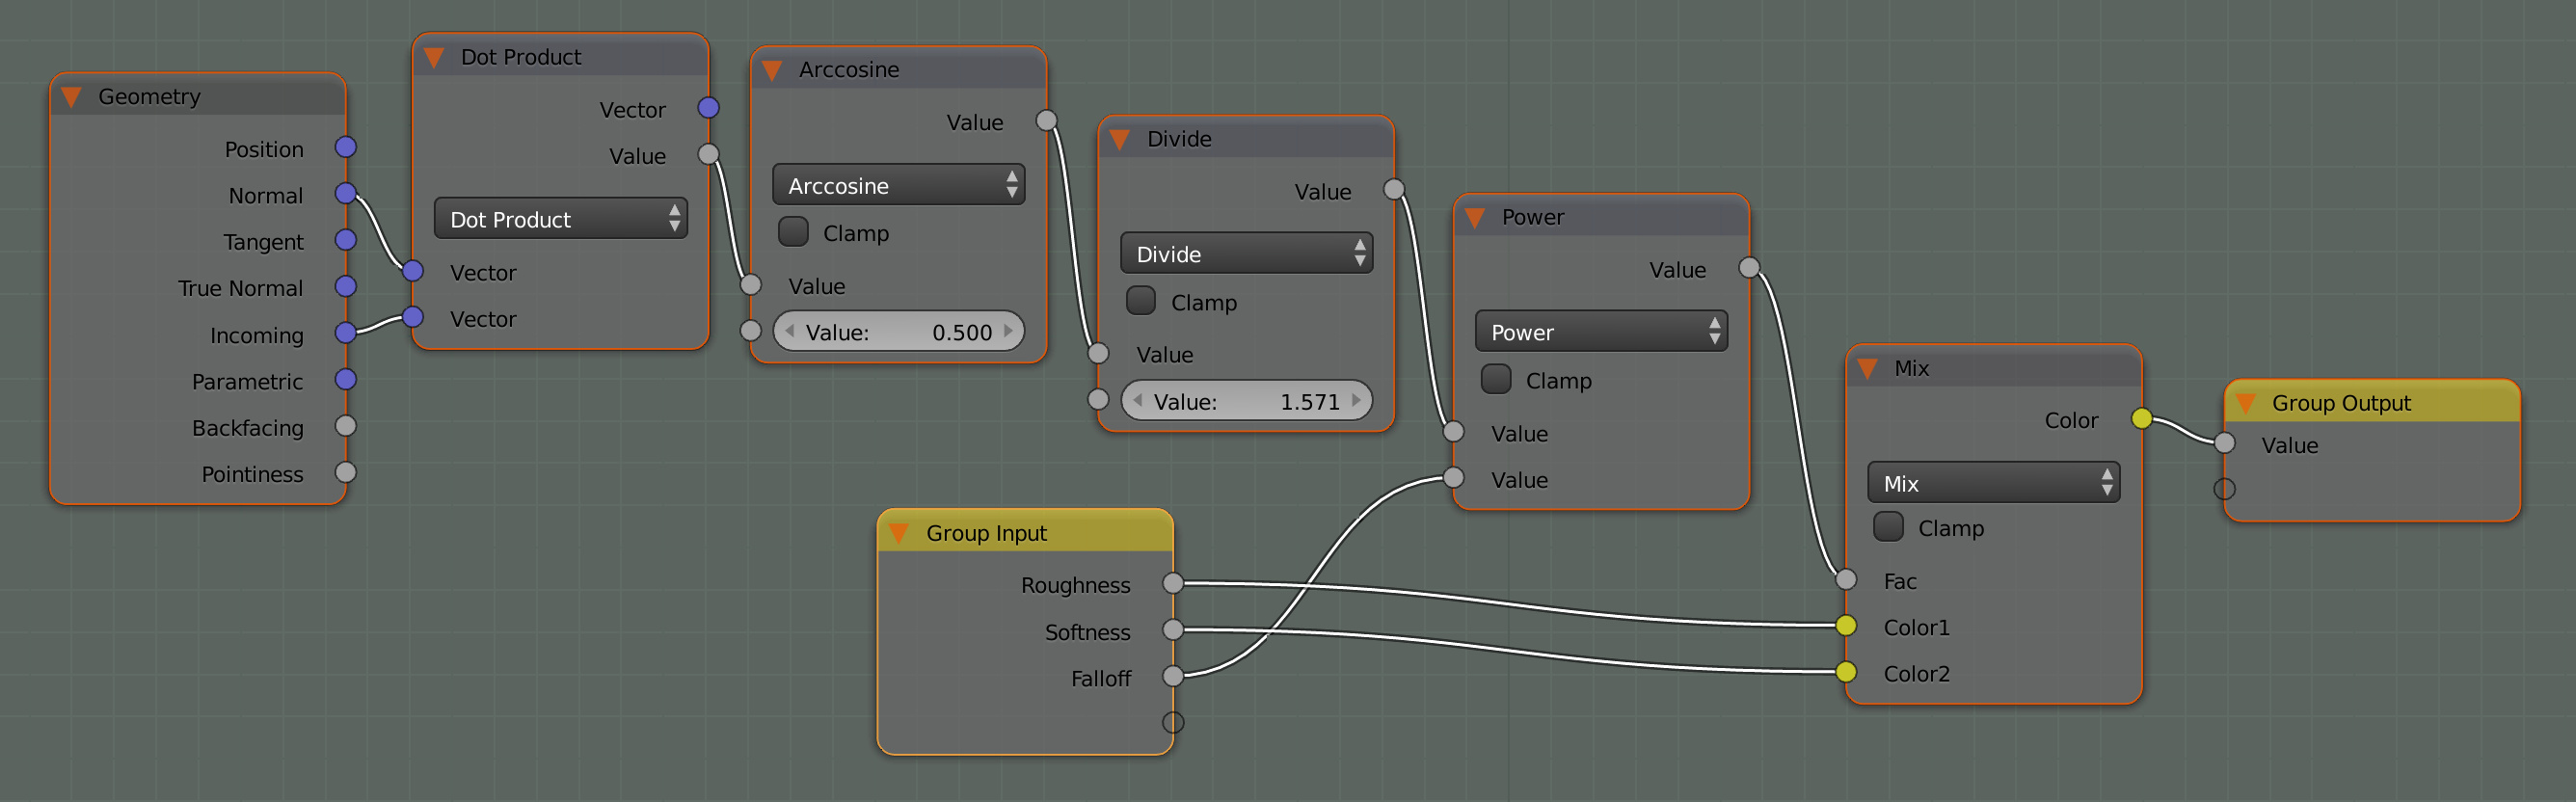
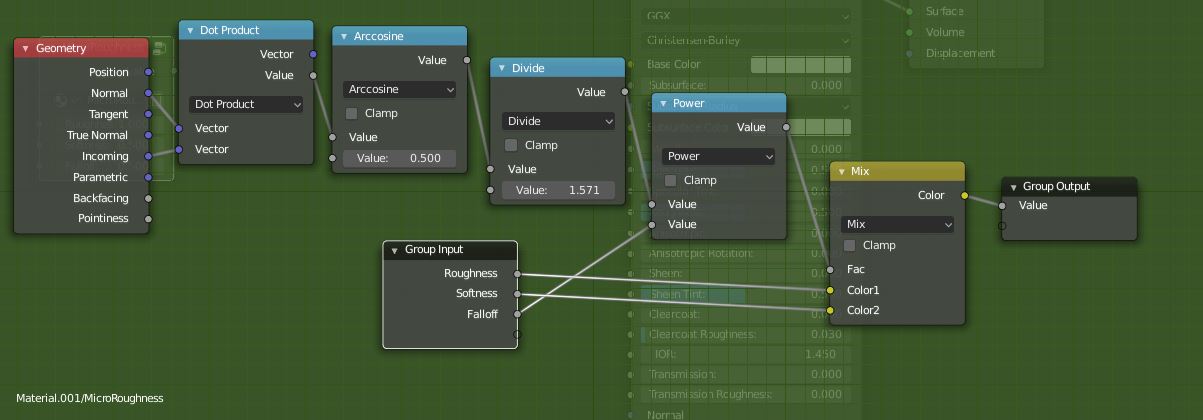
That’s weird, the microfacet roughness group in the Blend Swap file has a different node setup, see attached screenshot.
Which node setup is the correct one? The one that’s assigned to the material test object in the scene?
— Edit: Correction, the node setups in the Blend swap file are the same, but with different default input values. But I still don’t see the node setup from your screenshot above, so where should the power Math nodes be placed in the Blend Swap file node setup, if that’s the latest version?
Hmm - now you are asking. It’s been a while. Let me take a look over my blend files and see what’s what.

Sorry, one more question, @moony: after adding the two power (value 0.5) nodes in the node setup, which of these two default input value sets are the best to use in the Principled shader?
