Hi all, in this topic I want to show you the new personal project I’m working on.
Maybe some of you have already seen it on other channels (twitter) because I’ve started it some months ago.
But I think it’s a good idea to upload it here anyway, in fact during last project (Ferrari 641), I got very precious feedback.
I’ll try to upload quickly all the steps I’ve done so far: the topic should be updated in the next week.
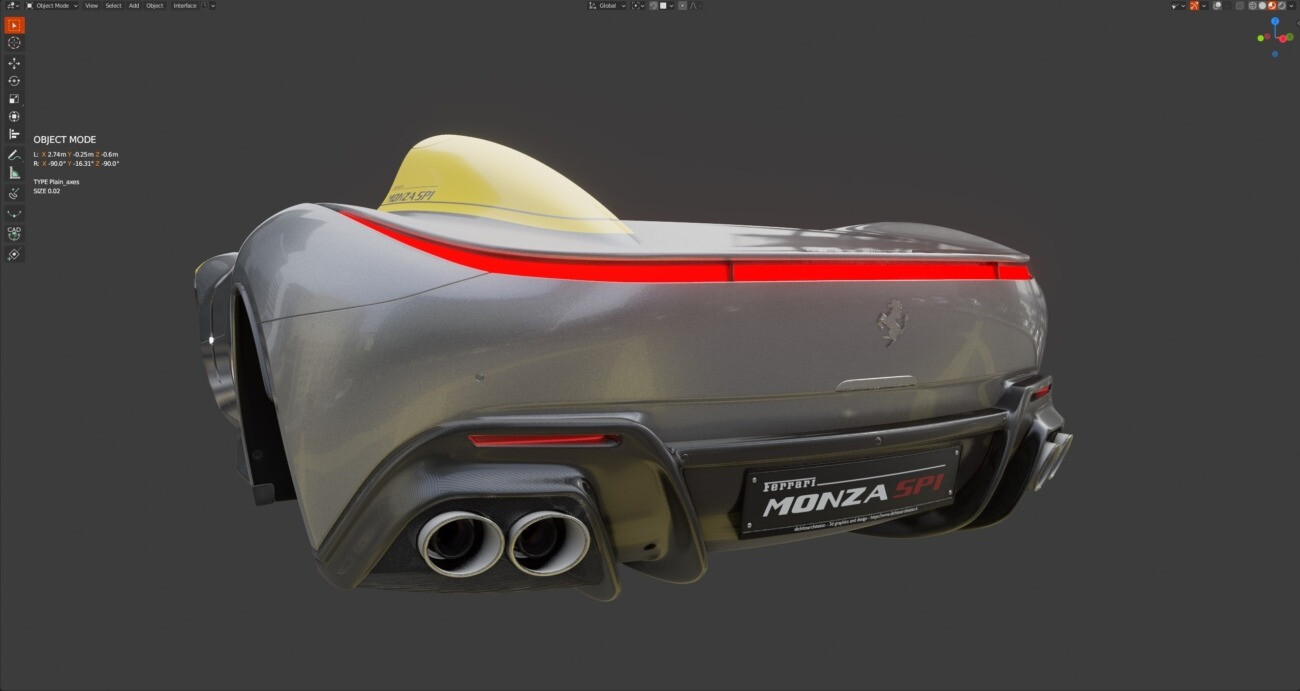
The new car I’m modeling is a Ferrari “Monza SP1”, a very unusual car inspired to the old “166 MM Barchetta”; if you are interested you can find more info here: Ferrari Monza SP1 - Ferrari.com
I must say that I’m not 100% satisfied because I’ve realised that there are few images of this car available, often low quality ones and few details (if anyone has more images, expecially about the front lights, please contact me).
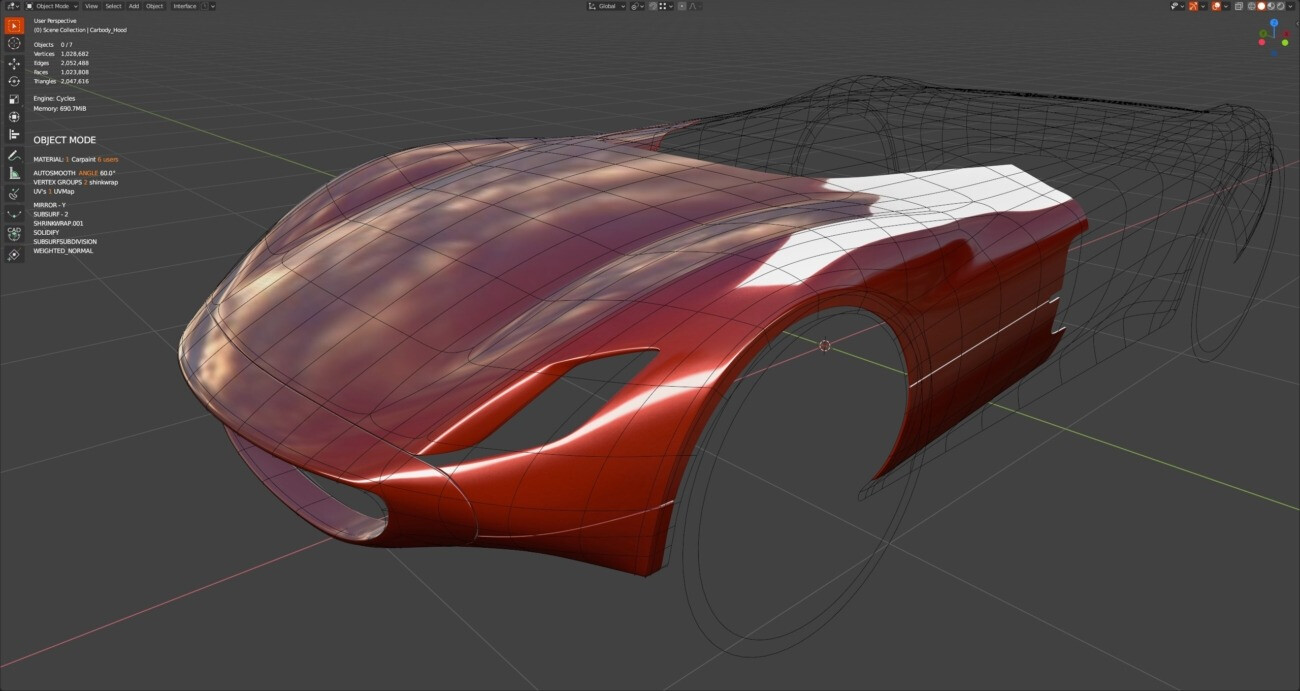
The project is based on the well known “Master car creation” course by CGMasters and Chris Plush, so that I’m using a basemesh to create the carbody
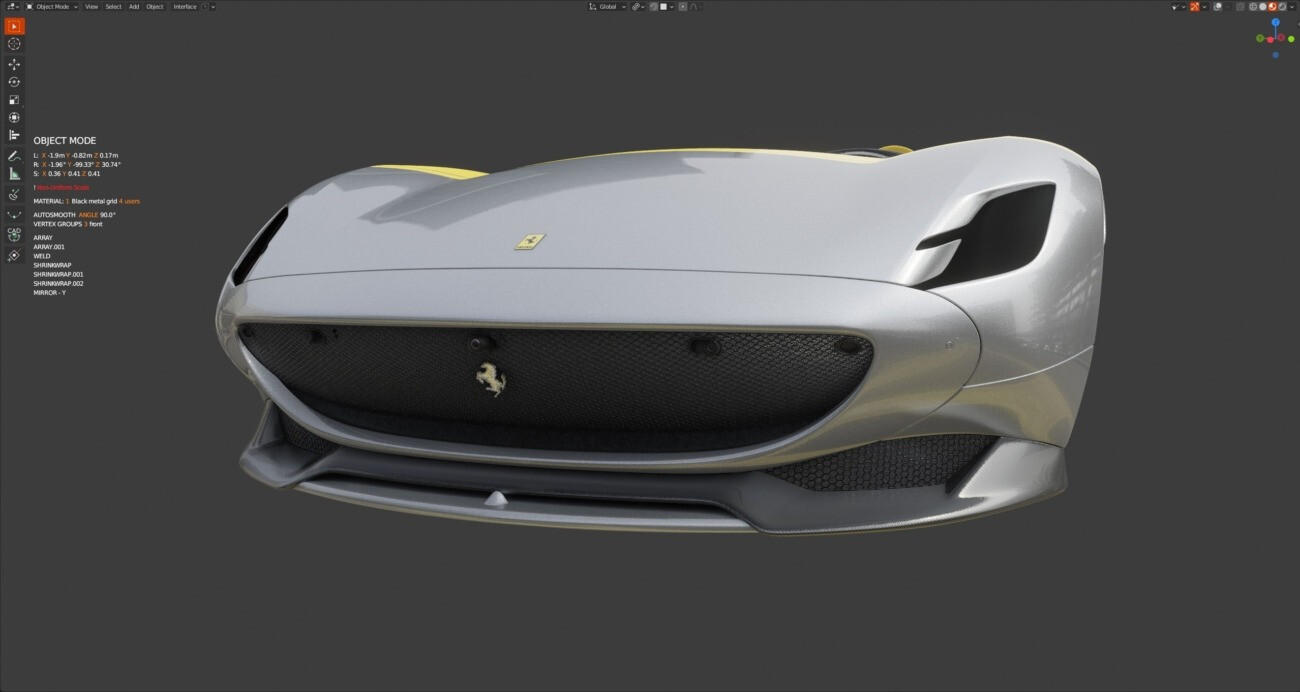
As you can see, the car is not symmetrical (see the rear of the car, where probably there is a roll bar) and doesn’t have the roof.
All carbody elements are shinkwrapped to this basemesh:
The last element to be done is the rear hood; I tried different solutions for it until I decided for this: asymmetrical topology and shinkwrapped to two different meshes:
Love the basemesh, its very clean as I can see from the reflection!! How do you achieve that , it’s already looking high quality and you just started…great work!!
I’ve used the basemesh technique on these elements as well because of cuts, holes etc. I had to create on these meshes.
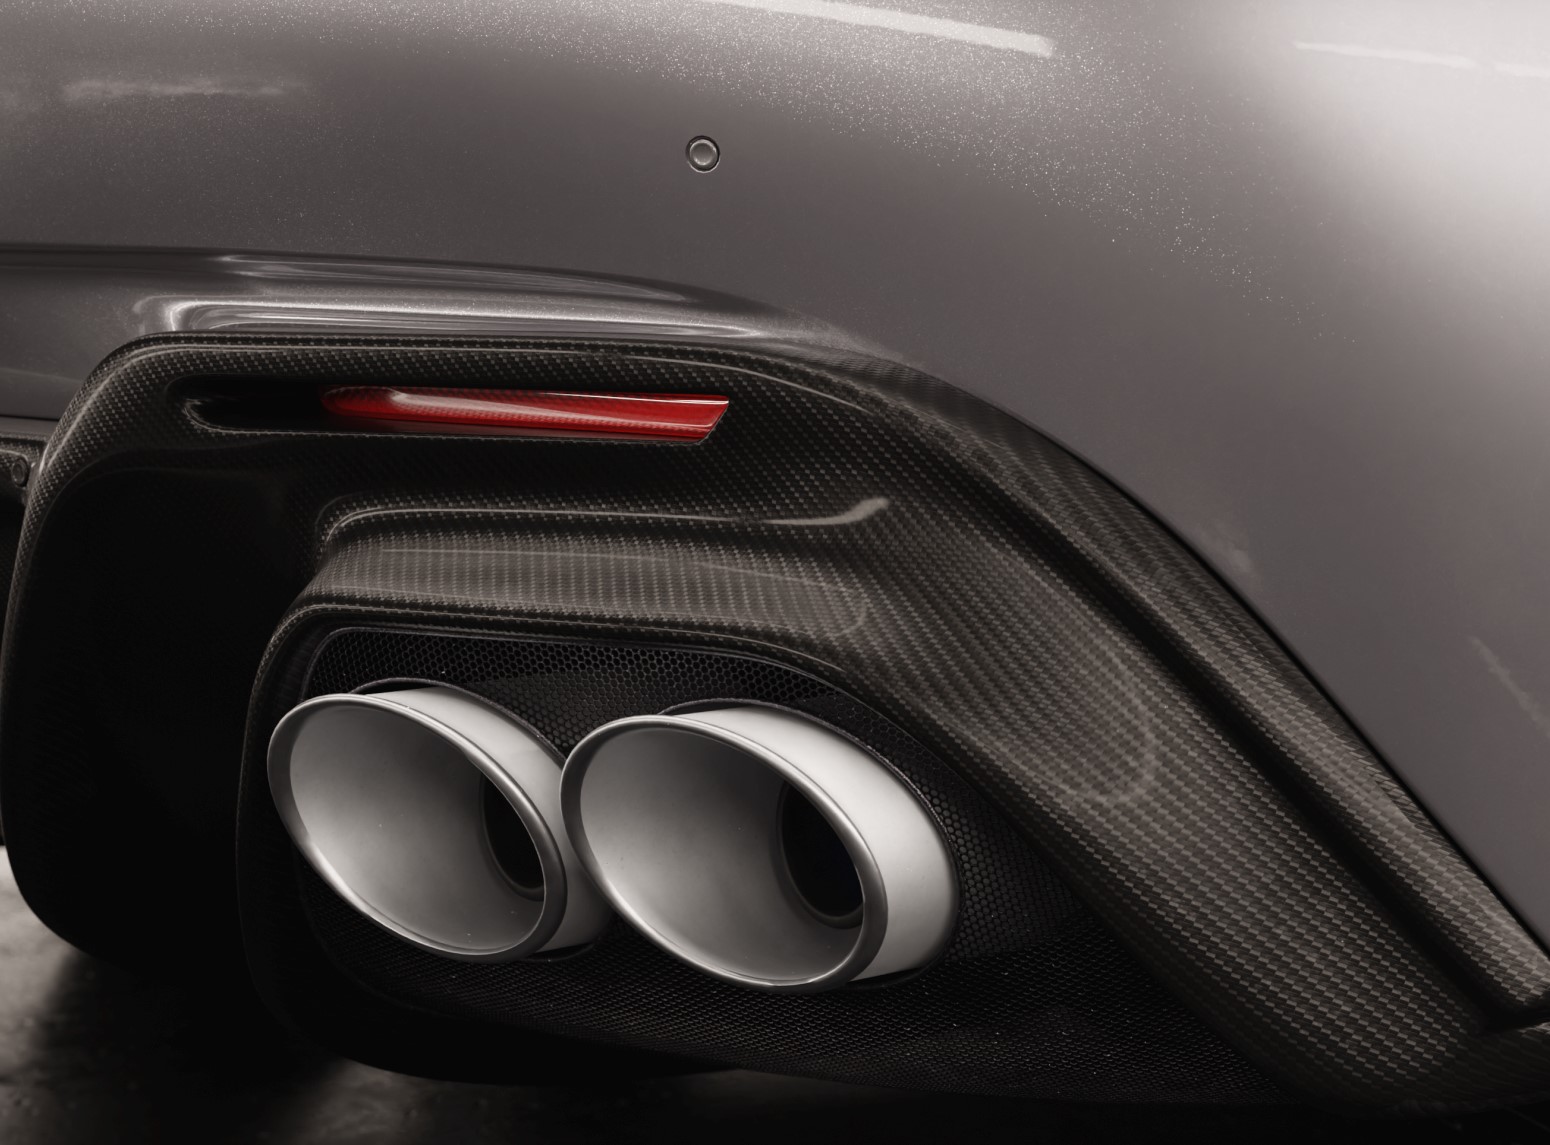
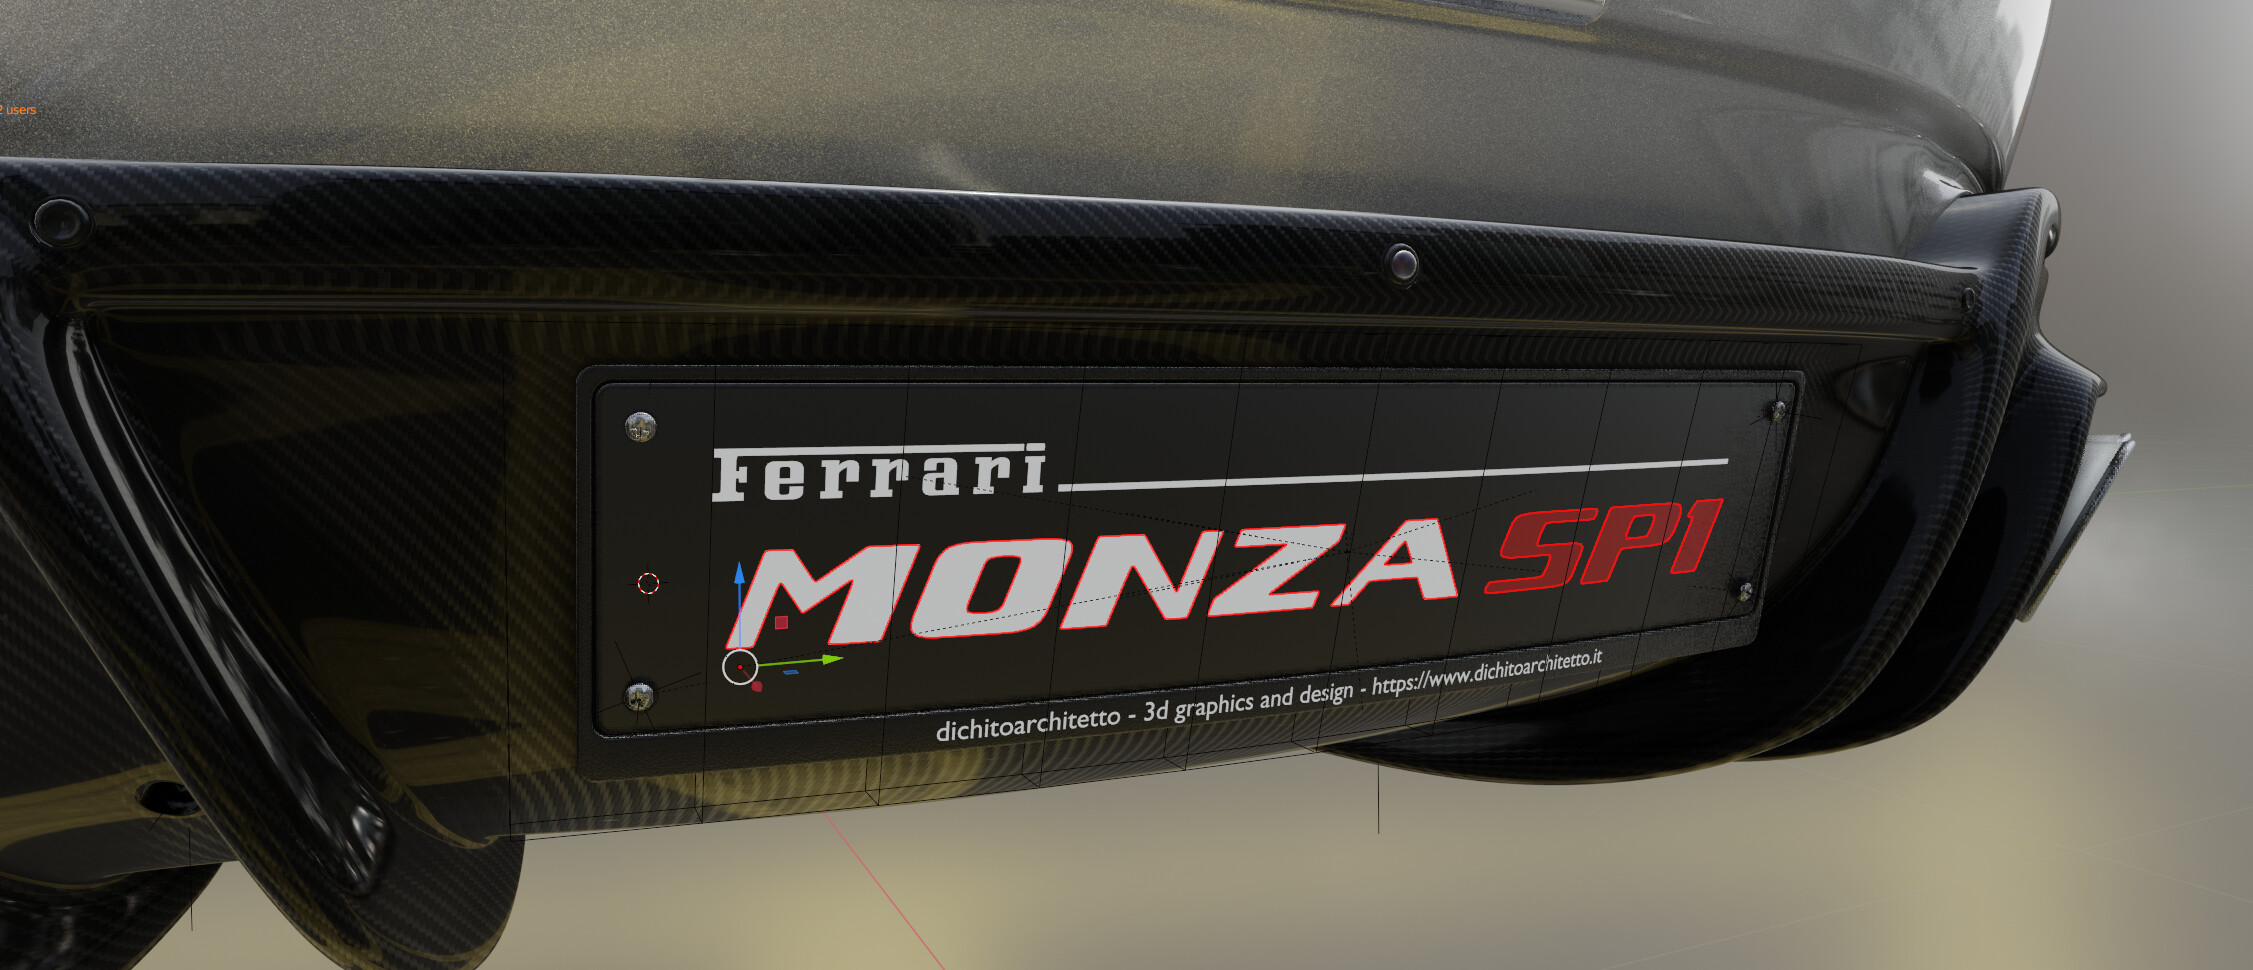
Another curiosity: I’ve also used “meshes decal” + shinkwrap to avoid pixelation problems; I used this technique with the Ferrari 641 and, in this way, I could easily create high quality closeups
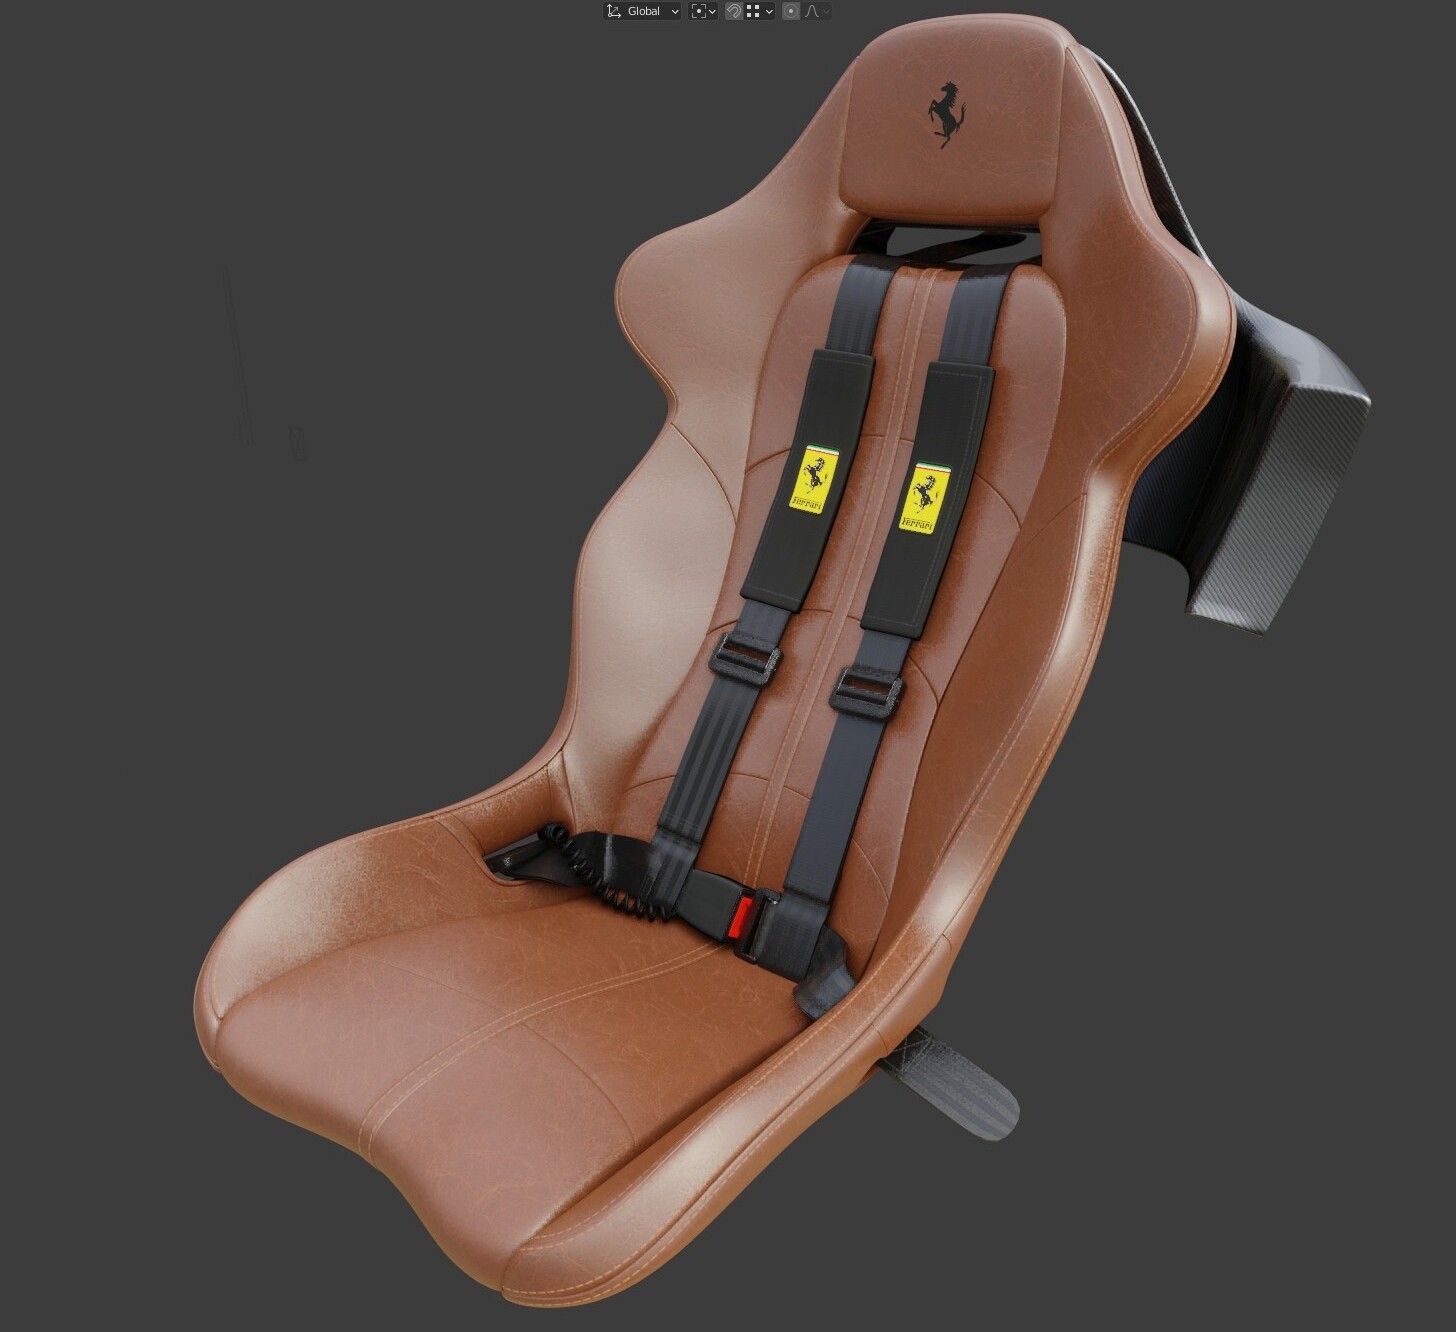
Here some more details on the side of the car (mirrors, sideports, carbon elements, decals…) and some elements of the cockpit, included the strange “virtual windshield” (they call it this way )
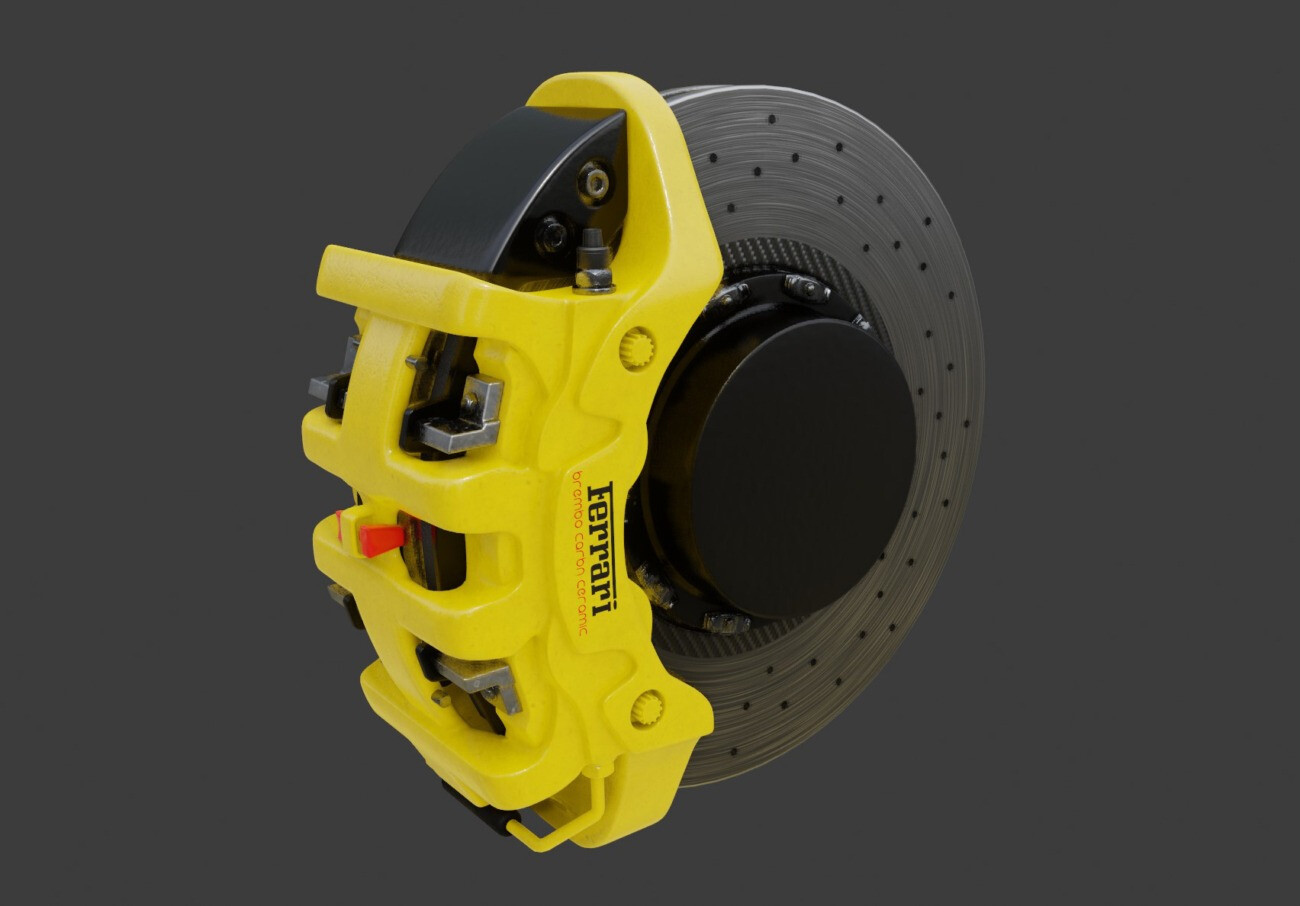
It was a difficult task because reference images I had weren’t very clear; materials are also temporary, brake discs are carbon-ceramic
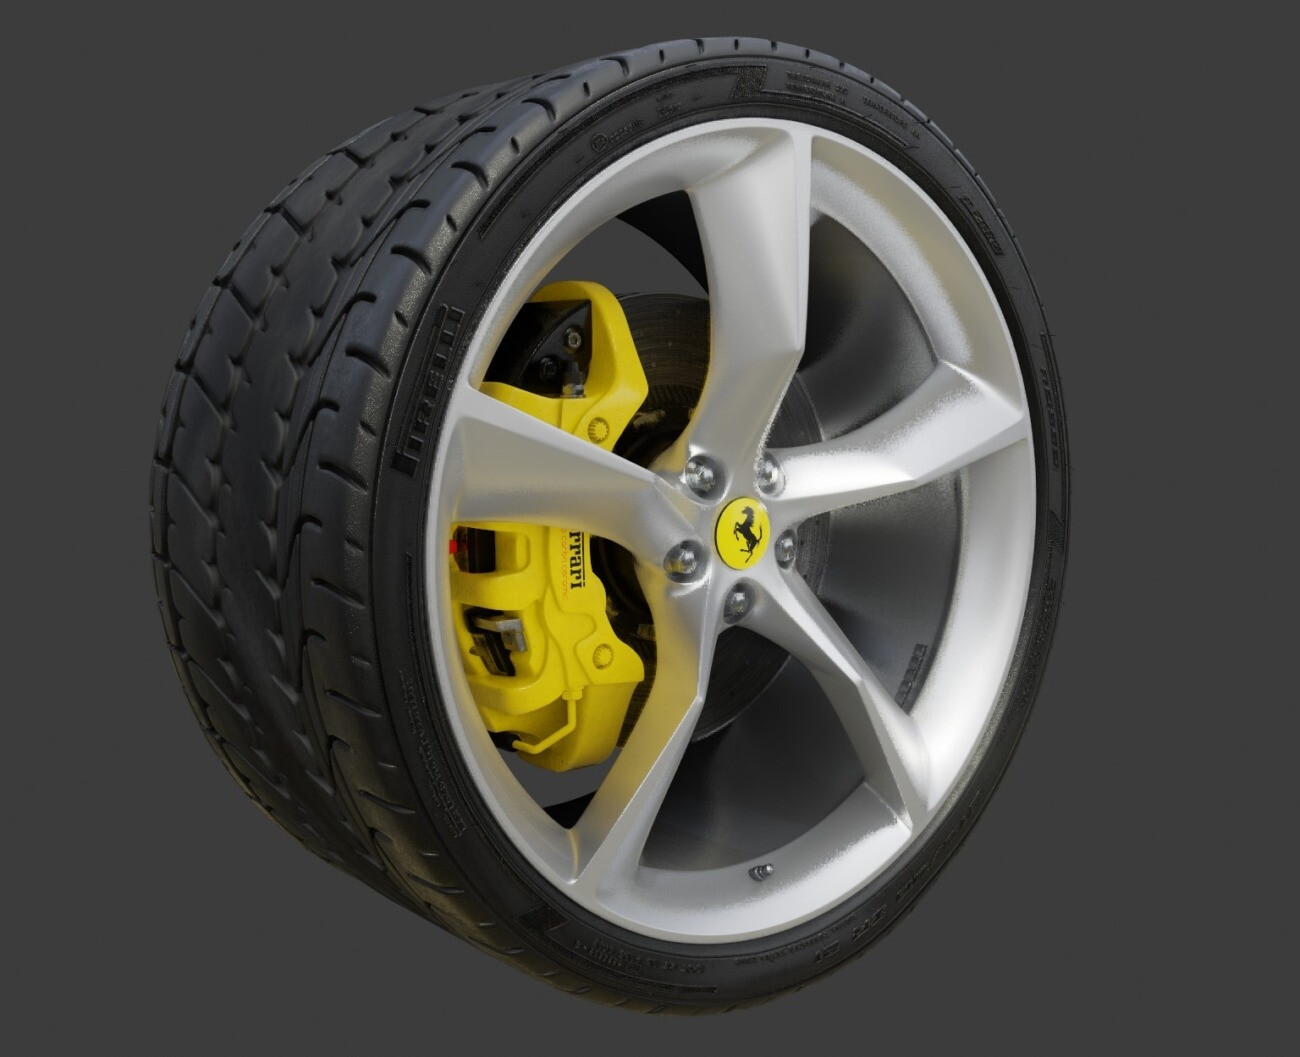
Front and rear tires:
I’ve made all the icons as shinkwrapped geometry, so that I can take closeups without loosing quality.
I’ve also used the basemesh tecnique here and there: the side console has many holes and cuts without any artifact thanks to that trick.


 I’m really satisfied with your progress! Keep going on! Good luck!