Working in AGX color management

Hi. I recently replaced color management with AGX. I have a few questions to those that have been using it in projects.

  1. How do you set your node’s color space (Diffuse, Roughness, and normal)? I can see the nodes have a long list to choose from.

  1. How do you export your renders to keep working in other software like Photoshop or After Effects without losing the AGX look?

  2. Is there any way to set Blender to have Filmic and AGX instead of getting rid of Filmic? I work with other people, and forcing them to make this experimental switch might not be the most efficient. I rather have the option to switchback to filmic depending on the work pipeline.

Thank you

1 Like

I’m new to Agx in Blender as well here’s the results that seems to work:
For the Roughness/Height/Normal_maps use “Generic Data”.
Diffuse is set to sRGB.
Hdri images Leave it at default “Linear BT.709”.

1 Like

Thank you !

Can I ask from where did you download it? Is it possible there are many different githubs of this?

1 Like

On github

I recently adopted a workflow to work with filmic in After Effects. You can check the steps I followed here;

I will check if this also works with AgX But I don’t see why not. Btw you don’t have to alter the ocio file anymore so you can skip this step.

1 Like

With this file, he loses Filmic. There’s this video that shows how to install AGX and keep Filmic.

There is a link in the description for the files.

I also don’t understand what these golden and punchy looks are supposed to be. The video I sent keep the contrast control for the looks, I believe that’s more understandable.
image
Actually, that version of the video offers a lot more look options. Including the golden and punchy.

Edit: The contrast controls work but I believe they are not supposed to be used with AGX, but just will Filmic. This install keeps the Filmic color management, but it doesn’t install the filter for the HDRI images and in this case, they should keep using linear. I tested both here and there’s no difference.

If your intention is to keep Filmic and have the option to change to other color management options, this is the right way. If you decide to stop using Filmic, maybe the other install is a good option.

I like AGX, the only problem with using exclusively this color transform is that it doesn’t give a good visualization on the viewport or in the render as everything looks a bit washed out and you only have good results after making the color balance in the compositor. So, I think Filmic is still important to create the scene and prepare the materials since you can see in “real-time” how they are looking and not a washed-out version of them.

3 Likes

Nice stuff, thanks for the headsup.

I was testing here both versions of the installation of AGX color management and I was not able to make Sobotka version work in the material preview mode in any version of blender I tried.

It works for rendered mode, but not for material preview mode.

OK so, I need a bit of a clarification here. I’ve played around with AgX for a minute and I’m very confused about something. I feel like a lot of people are confusing color spaces with view transforms.

EDIT: did more reading, no longer confused :slight_smile:

ACEScg is a color space with transforms to displays (sRGB, Rec.709 etc.).
AgX is NOT a color space, just a transform, so can it not be used on top of a more common wide gamut cs like ACEScg or 2065-1?

EDIT: apparently Troy is working on a version based on BT.2020? Haven’t dug too deep but I think I see why he wouldn’t use ACES as a base.

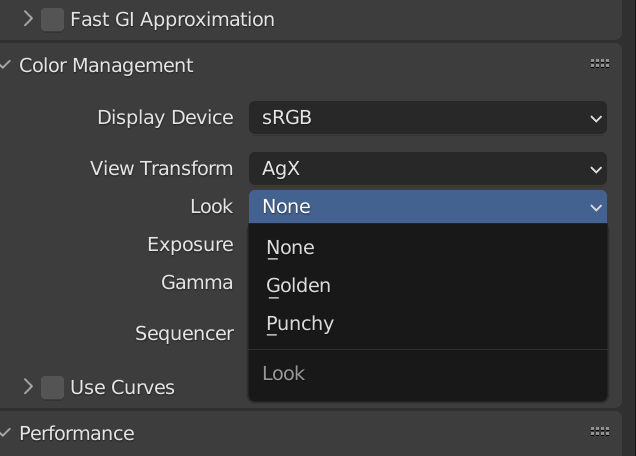
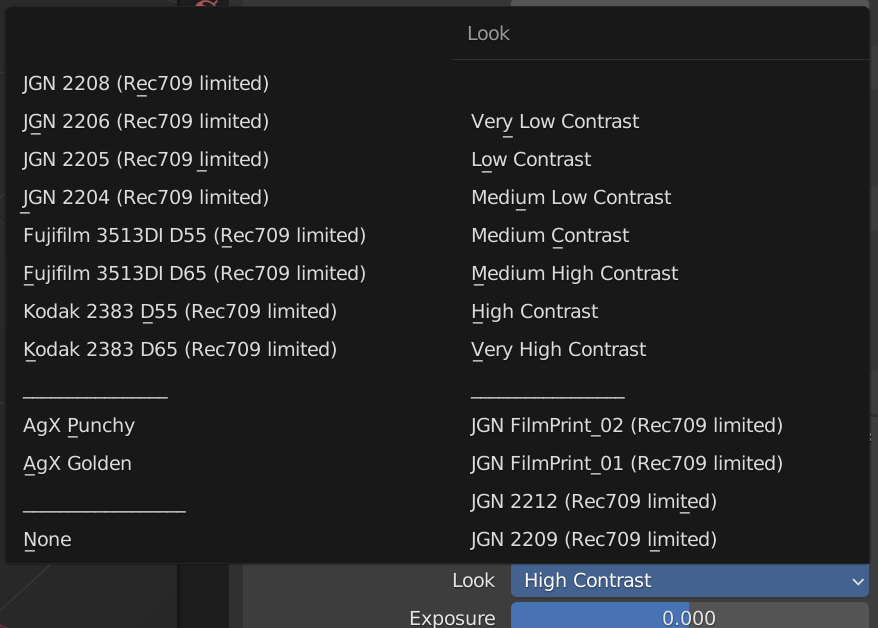
I agree with things pointed out above, it’s not that great to have a “ARRI raw preview” if that makes sense, without being able to apply a proper LUT, punchy is anemic (albeit useful in post I guess) unless you use curves (big no no for me as they’re not accurate for replicating down the pipeline) and golden is there for giggles/experimenting.

EDIT: seems to be more of a Blender limitation than anything else? I did resort to temporarily using curves for viewport preview approximation and then disabling them for final renders.

It looks wonderful, don’t mean to come across wrong, I genuinely do like what I’m seeing but I am very confused as with all craftsmen problems - ask 5 people, get 5 answers.

I like ACES, it’s simple, it makes sense but if it’s not the best tool then sure, on we go to AgX but in my pleb opinion, it’s nice to have a solid standard (i.e. ACEScg > Rec.709 for me > grading) instead of receiving someone’s improperly baked sRGB files)

EDIT: I’ve stumbled upon T-CAM v2 and FilmLight, instant love, instant heartbreak because I can’t get the profiles to work with my other apps for some reason. AgX is a wonderful simplification of the process - if it’s good enough for you, stick to it! If clients need ACES, then use ACES, I think I’m switching to T-CAM for now as it seems to also be an amazing system.

I will keep reading and keep learning, I welcome any corrections and I will correct myself as well if my readings show otherwise.

EDIT: As mentioned above I have no issues with corrections upon much more reading:

AgX’s strong point seems to be gamut compression and making the whole process WAY WAY easier. Unfortunately it doesn’t seem to work with anything but Blender as both Affinity Photo and DJV which I use don’t work with it, I guess due to AgX being OCIO 2?

I’ve also attached a graded comparison between Filmic, ACEScg, AgX and T-CAM v2 in an attempt to get them close to each other, it’s really just (de)saturation making a huge difference. I’ve tried replicating Riley Brown’s scene as close as I could but the principle stands and I didn’t spend more than a few minutes on each, I’m sure a more dedicated tester would do a better job. ACES cyan shifts to green and hangs on to magenta A LOT by comparison, Filmic has an odd over-exposed look, AgX looks great and imho, T-CAMv2 looks best for my liking, entirely up to you.

Imgur

Sorry for the wall of text, just sharing my findings. Good luck!

7 Likes

Do you have the scenes for those ball images so that we can test the settings ourselves? That would be awesome.

This 3 part video series explains AGX very well.

4 Likes

Of course, here it is: Spheres Color Spaces Comparison

I’ve also included the colormanagement folder for Blender, you have OCIO configs for Filmic, AgX, ACES and T-CAMv2, someone did combine them in one config but for the sake of validity, I’ve only used the files as taken from their sources. Pain in the rear but it is what it is. You’ll also find three different Color Balance nodes in Compositor, they’re just to try and equalise looks between configs, they’re names so… yeh, good luck I guess :slight_smile:

Have fun! Oh and I’ve found 3.3 LTS to be a crash fiesta for some reason, 3.2 is still way more stable for me. The irony…

2 Likes

I’ve seen it and is a broad explanation to put it mildly but it gets the message across. AgX is pretty nice but can’t really use it since it doesn’t work with anything else I use (literally the OCIO file won’t work with any other app for some reason).

A more interesting read is Troy’s The Hitchiker’s Guide to Digital Color https://hg2dc.com/ I strongly recommend giving it a gloss at least.

At the moment I’m messing about with T-CAMv2 which is quite neat, from what I understand it’s modelled closer to human perception than absolute metrics, but again, as with all color spaces, for most people it’s an exploration and rarely a necessity - if AgX works for you, go for it! If you need more, go for them then!

Happy Blending! :slightly_smiling_face:

4 Likes

That’s awesome. Thanks a lot.

What are the Color Management settings for T-CAMv2? Is that Filmlight Display?

Sorry for the later reply, you’ve probably noticed by now they have a rather organic definition for their display devices, I went with “100 nits video dim” since I work in a darker environment, realistically that’s what I’m using, a wide-gamut 100 nits viewing setup, with either sRGB or BT.1886 EOTF.

The weird part that confuses me to hell and back is linear maps, like roughness, normals etc need Linear - E-Gamut to show correctly instead of CGI: Linear Rec.709, I’m… SO confused, it’s a significantly different way of approacing color spaces than with ACES, at least to my understanding so far.

2 Likes

You’ve lost me at “nits”. Have never heard of that term. But it shows you, how little I know about the whole color management topic. The thing is, that I don’t really want to dig too deep into it anyway. My workflow is rather simple, as I only work on still images for now. But at the same time, that’s a bit of a problem as well, as my go-to-program is Photoshop which doesn’t have the best color management/grading features.
My main target is to get an output that has a wide tonal range as well as good color information. So far to go through 32-Bit-EXR seems to be a good choice. But there I have to deal with tonal mapping and then add character to the usually very flat image. AgX/Punchy delivers good looking results, yet comes out a bit too dark compared to sRGB. I wonder if that tonal limitation costs me some dynamic range. So I will have to continue comparing results and weigh, which workflow is both the fastest as well as visually appealing.

You might now nits as candelas, the measurement in cd/m2 for the intensity of emitted light.

Here’s my recommendation - read the lecture I linked before, that’ll clear up a bunch of questions; second - for post-processing just use whatever works, as long as you haven’t clipped values at export. Understand that these color spaces are not really intended for photography post-processing, but for grading applications.

The flat-looking image is due to gamut compression, I prefer working under an OCIO layer, like this. The reason is all the adjustments are on the widest possible gamut but the preview is mapped to your viewing conditions.

If you really want to experiment, try this: it’s a pain in the side because of the process but for a noticeable difference, use Davinci Resolve to grade a still. You’ll see a significant difference in process and flexibility. Adobe used to have SpeedGrade but it died a swift death, as most apps do with them, but that’s a rant for another time.

I’ve just stopped caring for stills so I just export the render as PNG 16b after general compositing in Blender and frankly that’s already more dynamic range than your 14b camera RAWs, so unless there’s some major mistake at play and the image is clipped to hell, that’s more than sufficient. I also use Affinity Photo which does have some color management options, so I could just as well use EXR and apply an OCIO on top and be done.

I’m sure if Troy pops in this thread and sees my typing I’m probably as good as dead but I do welcome corrections as always.

1 Like

Thanks for the additional information. I can also use the AgX LUTs as lookup tables in Photoshop. So I might give that workflow another try. With which color management settings are you exporting your 16-Bit PNG?

Literally just tick “Save as Render” and save as uncompressed 16b RGBA PNG, that’s it. It’s not worth complicating things, especially for stills and basic freelance work.

I wasn’t trying to complicate things. My question was about the color management settings that you embed in the PNG file, not about how to save PNG files. That’s not difficult indeed. And I use compositing nodes for that anyway.