Hello there,
I’m a french user of Blender and I found a simple way to add the MatCap look in Blender materials with the use of material node.
To see the matcap in the 3d viewport you need to active the glsl preview.
-First step: Get the matcap !
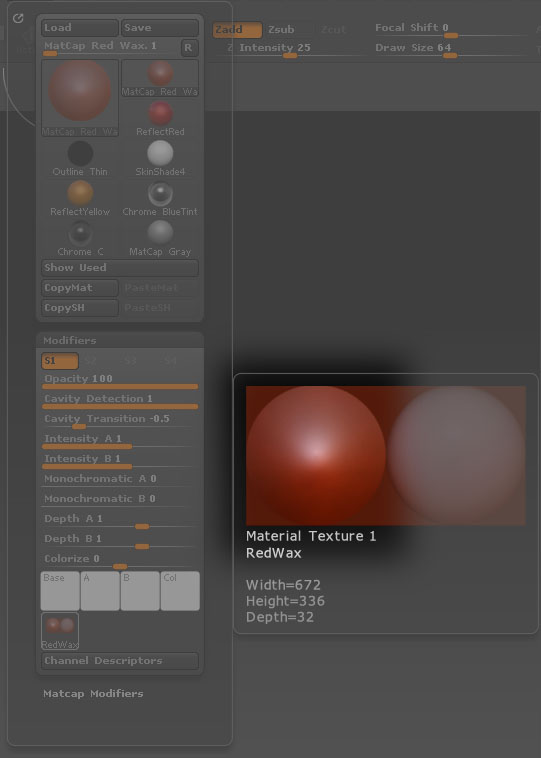
In ZBrush, open the modifiers options of the Material panel and move your mouse cursor over the little bottom picture:
(i.e. RedWax in default ZBrush material), do a screen capture to get this sphere picture.
-Next : Crop the circle.
Open a software to crop properly the sphere.
-Now you can open Blender.
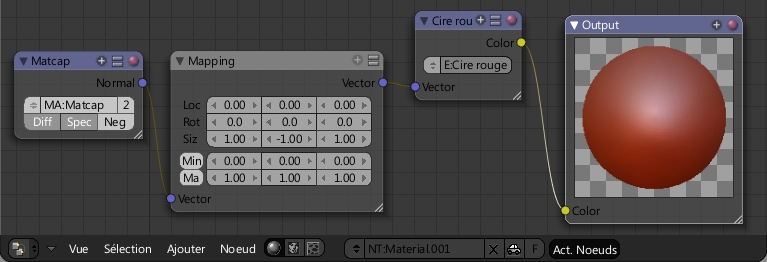
In Blender, create a node material. You need to add only two node in your material node, the Texture node and the Mapping node.
The texture node is the picture precedently cropped. The Mapping node is just for invert the Y axis (always the same).
Link the default mapping node (Vector in) to the normal channel of your material node (Normal out).
Link the texture node (Vector in) to the output of the mapping node (Vector out).
Link the color channel of the texture node (Color out) to the RGB output (COlor in).
Now, in the Mapping node, invert the Y channel : enter -1.0 in the second Size value.
I have been playing with this method in sculpt and see an issue. You need to come out of sculpt and back into sculpt for the vector information to update. Do you know of any way around this so it works in realtime while sculpting?
This is insane!!.. there’s no better way than this to reproduce Zbrush materials. This way you don’t even need a light in the scene, so it optimizes sculpt speed!, and since it doesn’t need a light you can rotate it however you want and you don’t get dark areas (nor need a second light which would slow down things even more).
There’s a much simpler way of doing this, without using nodes. Just set the texture to map using nor, and make the material shadeless. Works fine, and realtime in sculpt mode:
Here’s a collection of ten ready made PNG’s that I’ve created for you. All have the relevant alpha channels. Follow padfoot7726’s advice and you’ll have it working in no time.
really cool. this also helps when you’re working with subdivided hard surface, because you can see the mesh flow better. i have some friends working in studio tools and xsi, making cars, and they use this kind of maps to see the surfaces and the mesh flow. me likey!
VERY useful technique. I like the streamlined version pointed out by padfoot7726. I have been using the matcap method in blender GLSL for a long time now. But never with the efficiency of the setup described by padfoot7726. I used to have a lengthy node setup that also works in GLSL, this method is great!!!
wish I could find the “mat3.png” texture in a much larger size(natively, not resized).


