Hello, I’m finally done with this cannon project, it was quite the experience to learn this style.
Continuing with the breakdown, here’s how the process of painting went:
1. Baking the lighting
First I used Cycles to bake the lighting into a texture to use it as a base for painting. The lighting setup uses 3 lights on top of the weapon:
- The sun lamp is the main source of light and it shines at a small angle from the top;
- A point light to give a boost to the front of the barrel;
- A thin area light for the glossy reflection on the barrel.
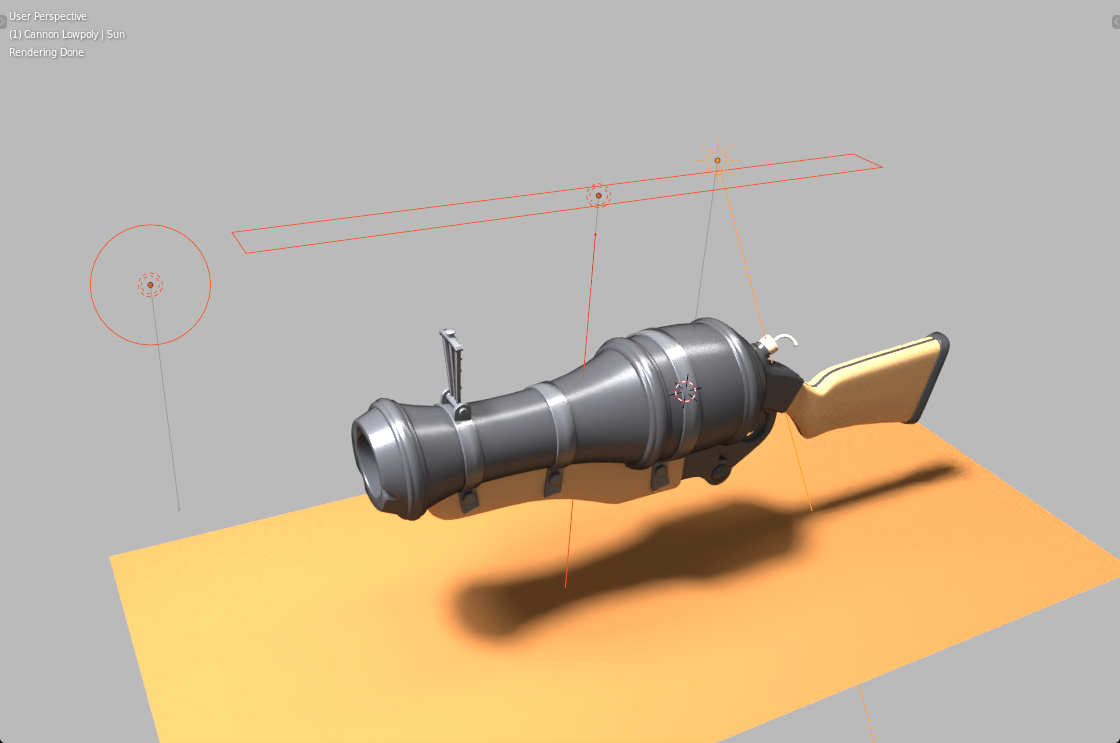
At the bottom there is an orange diffuse plane to bounce the light back into the cannon, giving it this nice orange tone. The world shader is just a gray value to fill the ambient light.
The model materials were separated into only diffuse for the wooden parts, and a mix of diffuse and glossy for the metals. Each part had a solid base color.
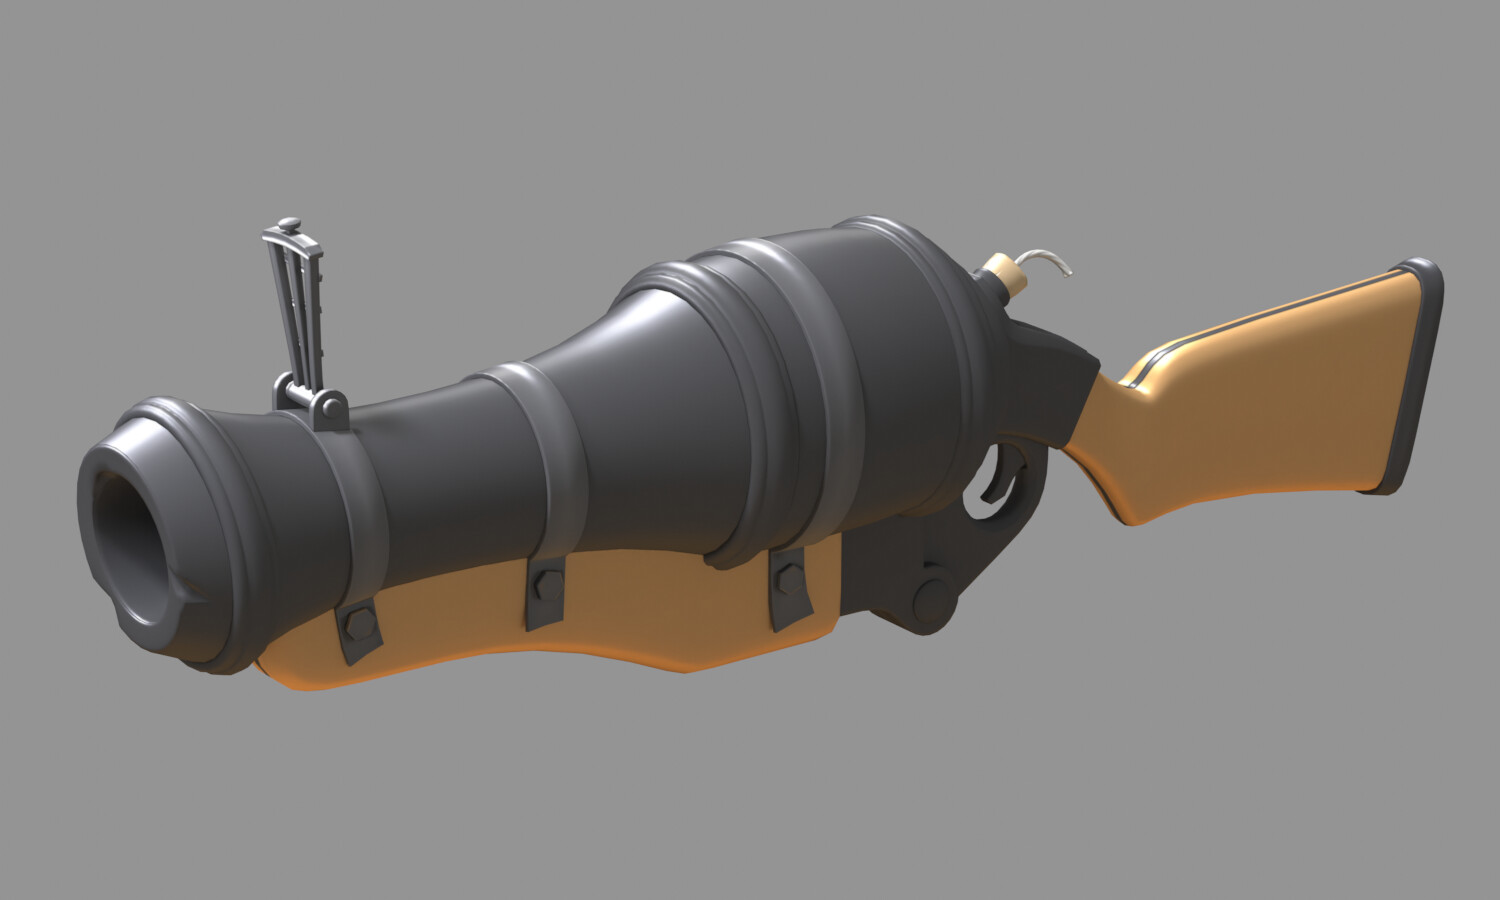
This is the result after baking the lighting. I used the standard color management for baking so you can see that the highlights are blow out. I mixed this result back with the base colors to dim the effect a little and give me some room to push the values in the painting.
2. Painting in Krita
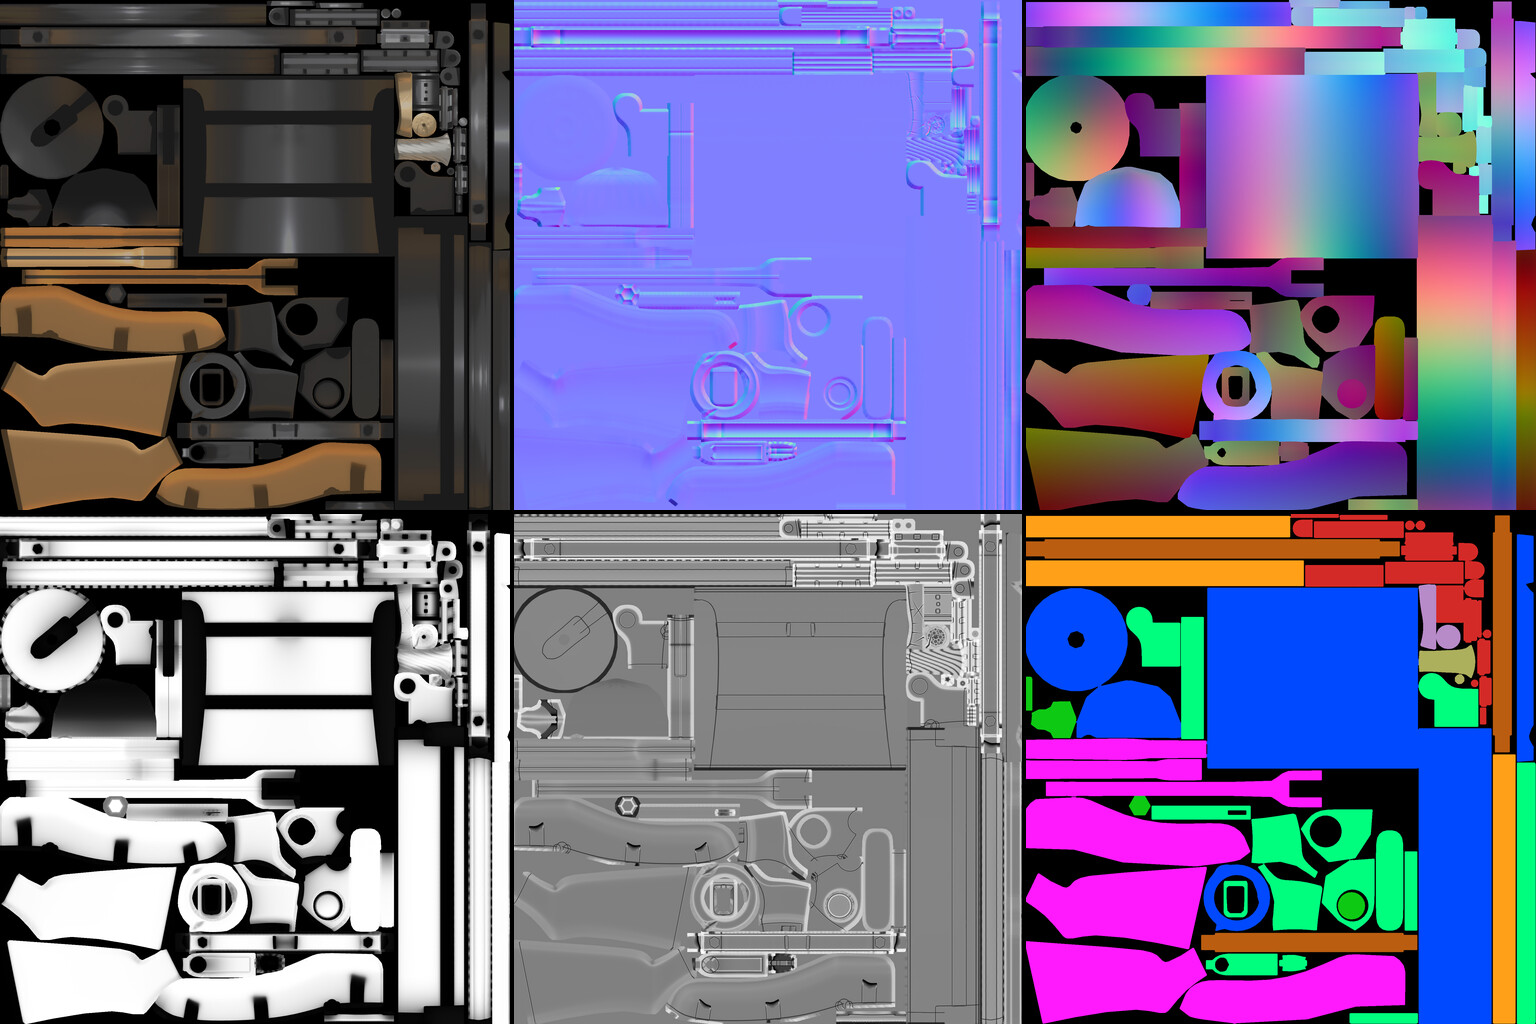
For painting in Krita it was important to have some auxiliary textures.
- I exported the UVs to see where each piece is;
- In blender I assigned random colors to different parts and baked that to use as an ID map. This was extremely useful for quick masking in Krita so I could paint without worrying about bleeding into other areas;
- I had a position map that I used to generate gradients across the model;
- A curvature and AO maps that were baked in Substance Painter, which I overlaid on top of the painted texture for extra details.
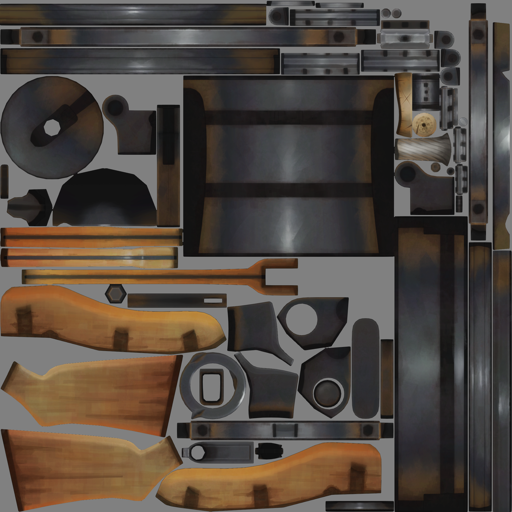
The painting process was very experimental and gradual. I started with the wood patterns by using a brush with a square tip to paint some splashes of color. Then with a darker color I painted the wood stripes.
For the metals I painted this blue-ish reflections just above the orange tone, that then fade into a faint purple at the top. I also painted a layer of rust at every crevice of the metal parts and kept the strength somewhat low so it blended really well with the other colors.
I tried to keep the colors across the whole weapon consistent by using a palette, and by always checking the grayscale image to see if the values are not too bright or too dark. Having the baked lighting to start with made this a lot easier than choosing the colors from scratch.
3. Final touches
To finalize the painting I used a blending brush in Krita to scrape the colors into each other and give the texture a bit of a traditional painting feel.
After the painting was complete I went back to blender and did some further tweaks in the shader editor, like changing the RGB curve and overlaying a horizontal gradient across the whole model, from dark to light. Next I baked these adjustments into the final color texture map.
I tried giving the weapon an outline and to my surprise it worked perfectly with this style. I used the traditional method of duplicating and inflating the mesh while inverting the normals. The outline is a very dark brown instead of pure black.
Comparison with outline on / off:

Finally for the render I painted a simple background in Krita to go with the handpainted style. Since there’s no lights it was really quick and easy to render everything. For the wireframe render I used the wireframe node and mixed it on top of a simple white shader.
Final render:

And that’s it for the Loose Cannon!. You can see the extra renders of it here: