Bomb and dart projectiles completed.

The highpoly is pretty much done, the next step is making the lowpoly and then painfully rename every single mesh so I can bake the textures on substance painter ![]()
Bomb and dart projectiles completed.
The highpoly is pretty much done, the next step is making the lowpoly and then painfully rename every single mesh so I can bake the textures on substance painter ![]()
can’t you bake them on blender ? ![]()
Well I could… but for me it’s way more complicated and slower, and I’m going to paint the textures in SP anyway so might as well bake there too.
I know there’s addons to improve baking in Blender, but in my experience they always have a lot of problems when baking so many parts together, and they don’t fix the slowness of the baking system in Blender. SP can bake all the texture maps in 4k in less than a minute.
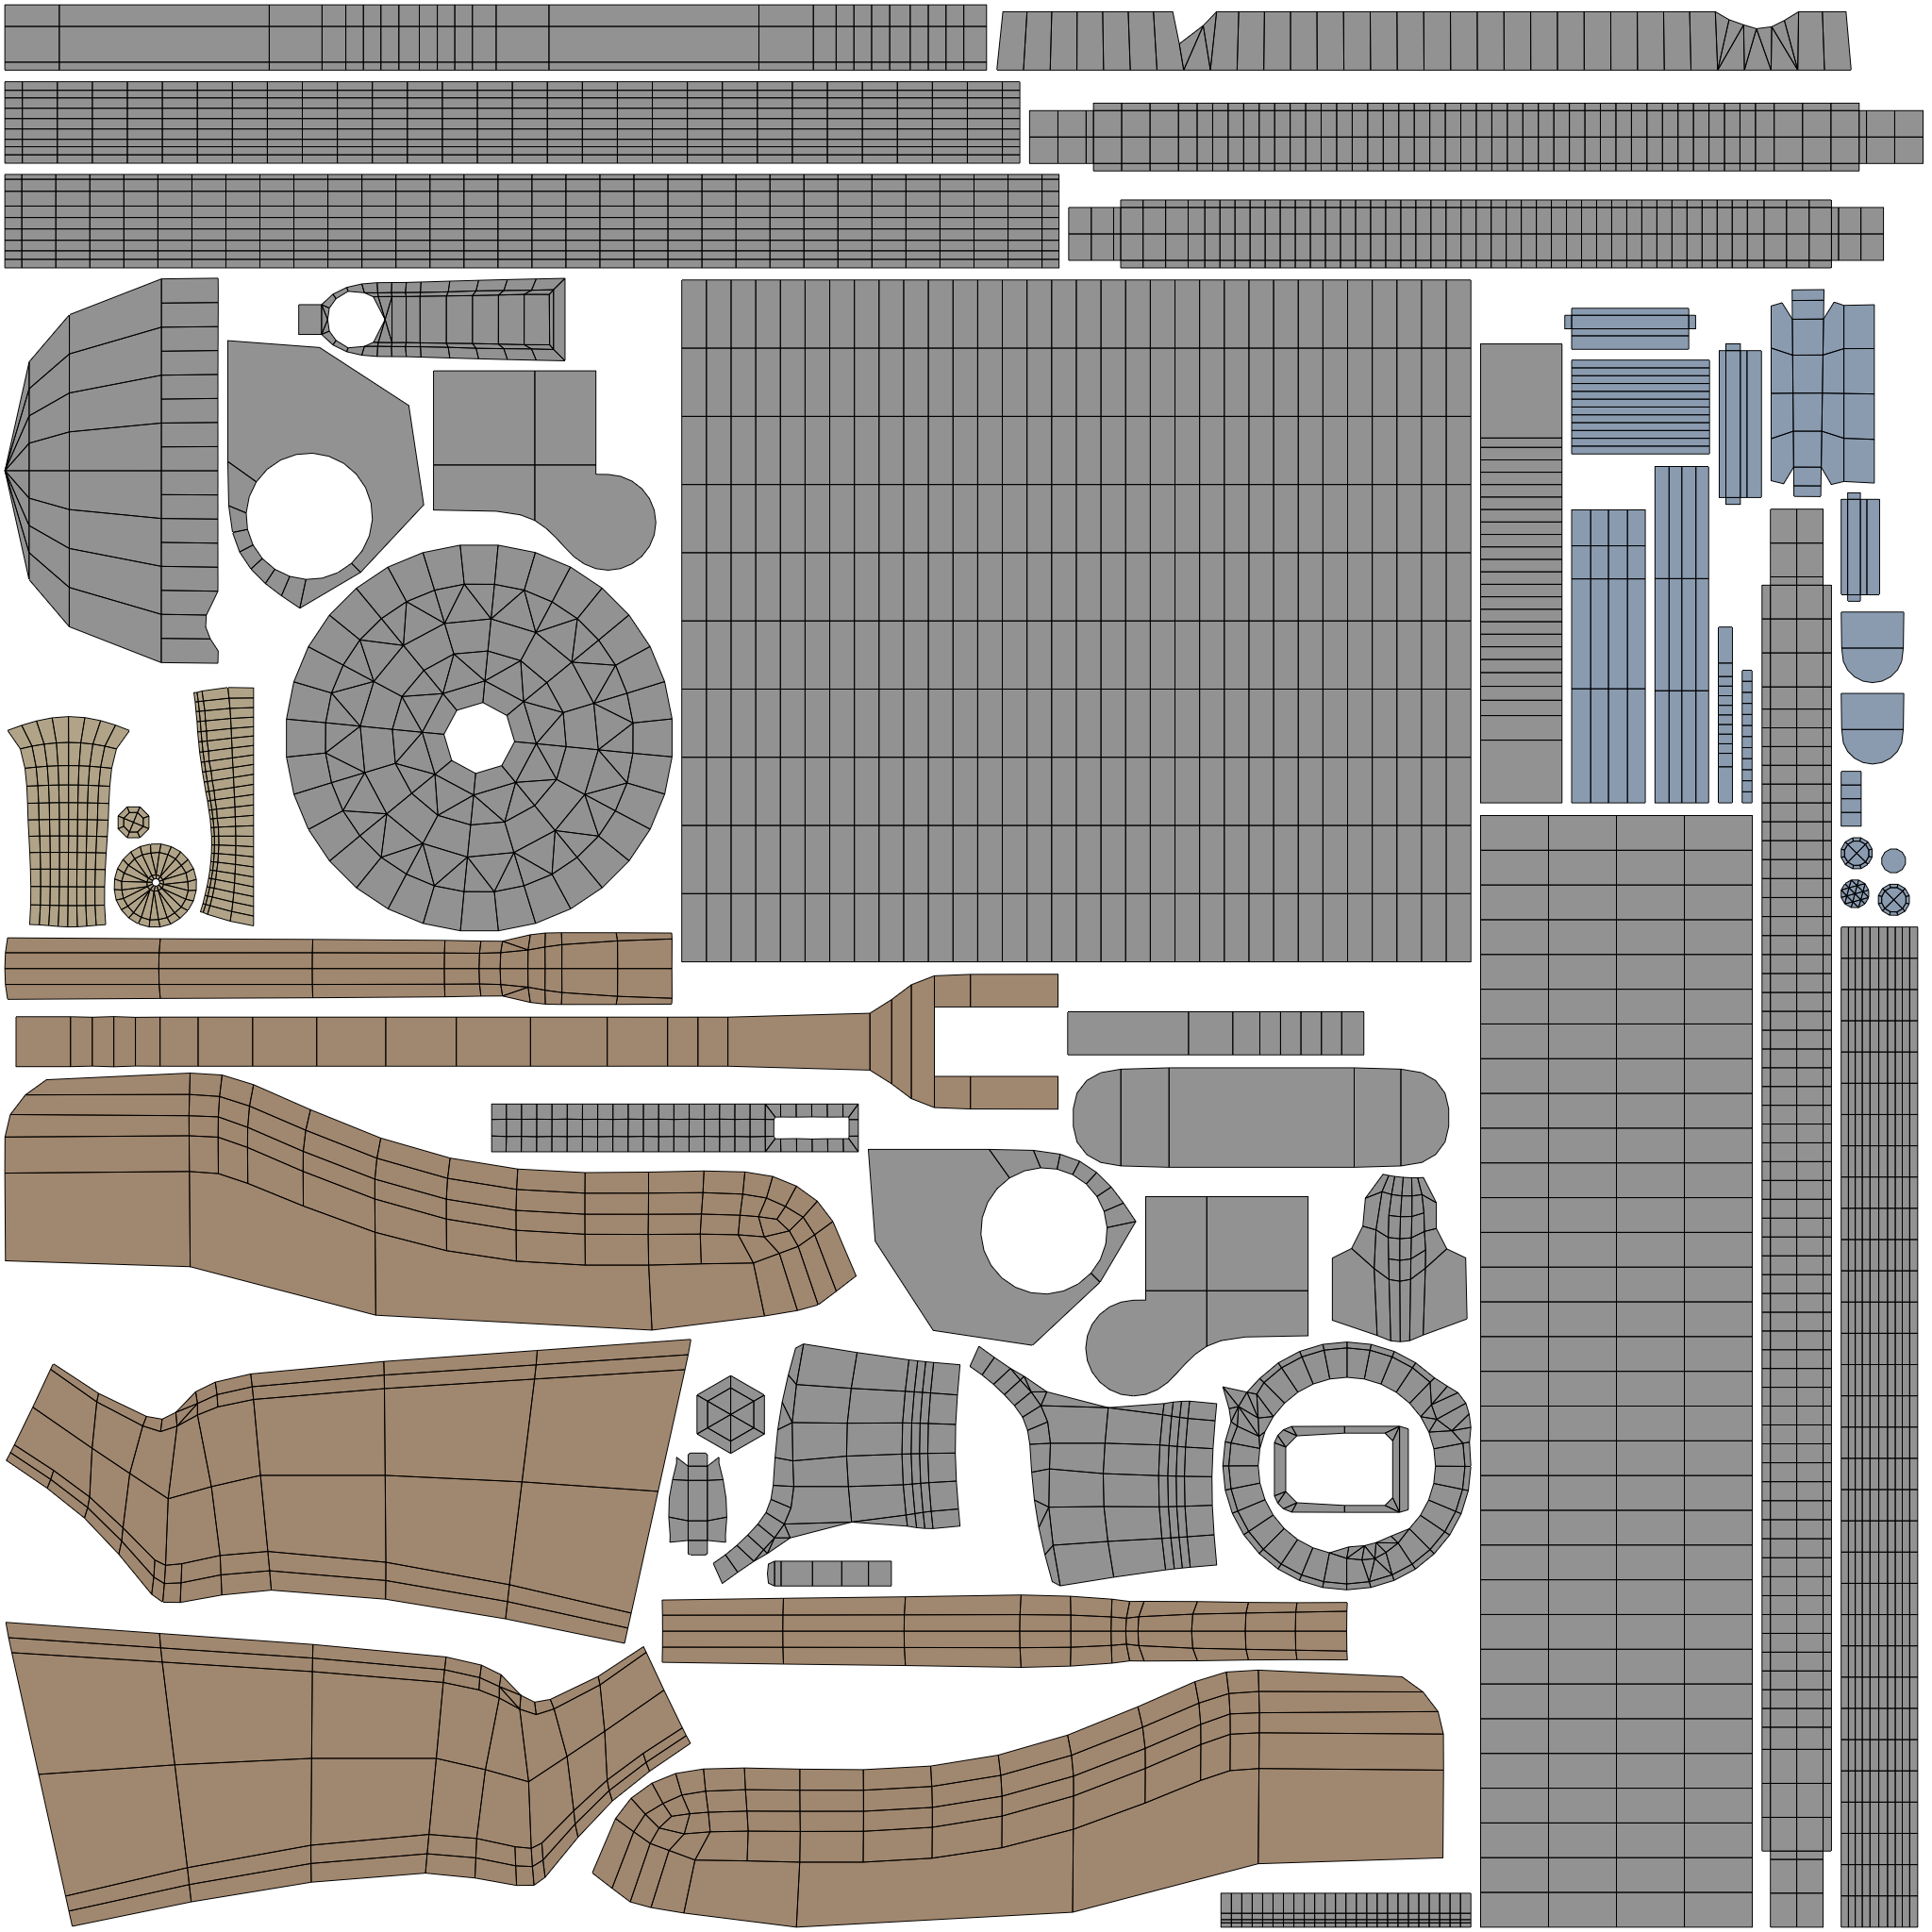
Lowpoly and UV mapping is done. I decided to go simple and pack it all in one tile and use 4k resolution, I never used UDIMs but I want to try it in the future.
Things are going well! I had almost no trouble baking in SP and the result is really good, here’s a test render with the normal map and AO
After a bit of procrastination I finished texturing it. The 4k textures using .jpeg (except the normal map) sum up to 16 MB, which is good for the sketchfab limit.
Very nice sketchbook here, keep up the great work!
Thank you!
I almost forgot to post it here, this project is now finished!
At first I tried to do the compositing in Natron but I didn’t have a good experience with it, the software had a lot of visual glitches which was very frustrating, so I went back to composite in Blender. I’m really excited for the new viewport compositor that is being developed.
Hello, it’s been some time since I posted here.
It’s past 1am as I’m writing this so this might be a mess.
Back in September I made a challenge for myself where I would try to make one 3D render per day til the end of the month, I made a separate topic just for this challenge:
It was nice and fun at first but I quickly started to lose focus and get tired. In the end I completed just 11 renders out of the 30.
I was thinking about continuing the challenge anyway and complete the remaining days, but October went by and I didn’t have the energy to work on anything. It was weighing down on my mind that I had to complete this before I could work on any other project, so I made the hard decision to abandon the challenge and move on to something else.
I have also decided to not participate in these kinds of daily challenges anymore as I always give up less than halfway through. I prefer to take my time with art otherwise it becomes too frustrating.
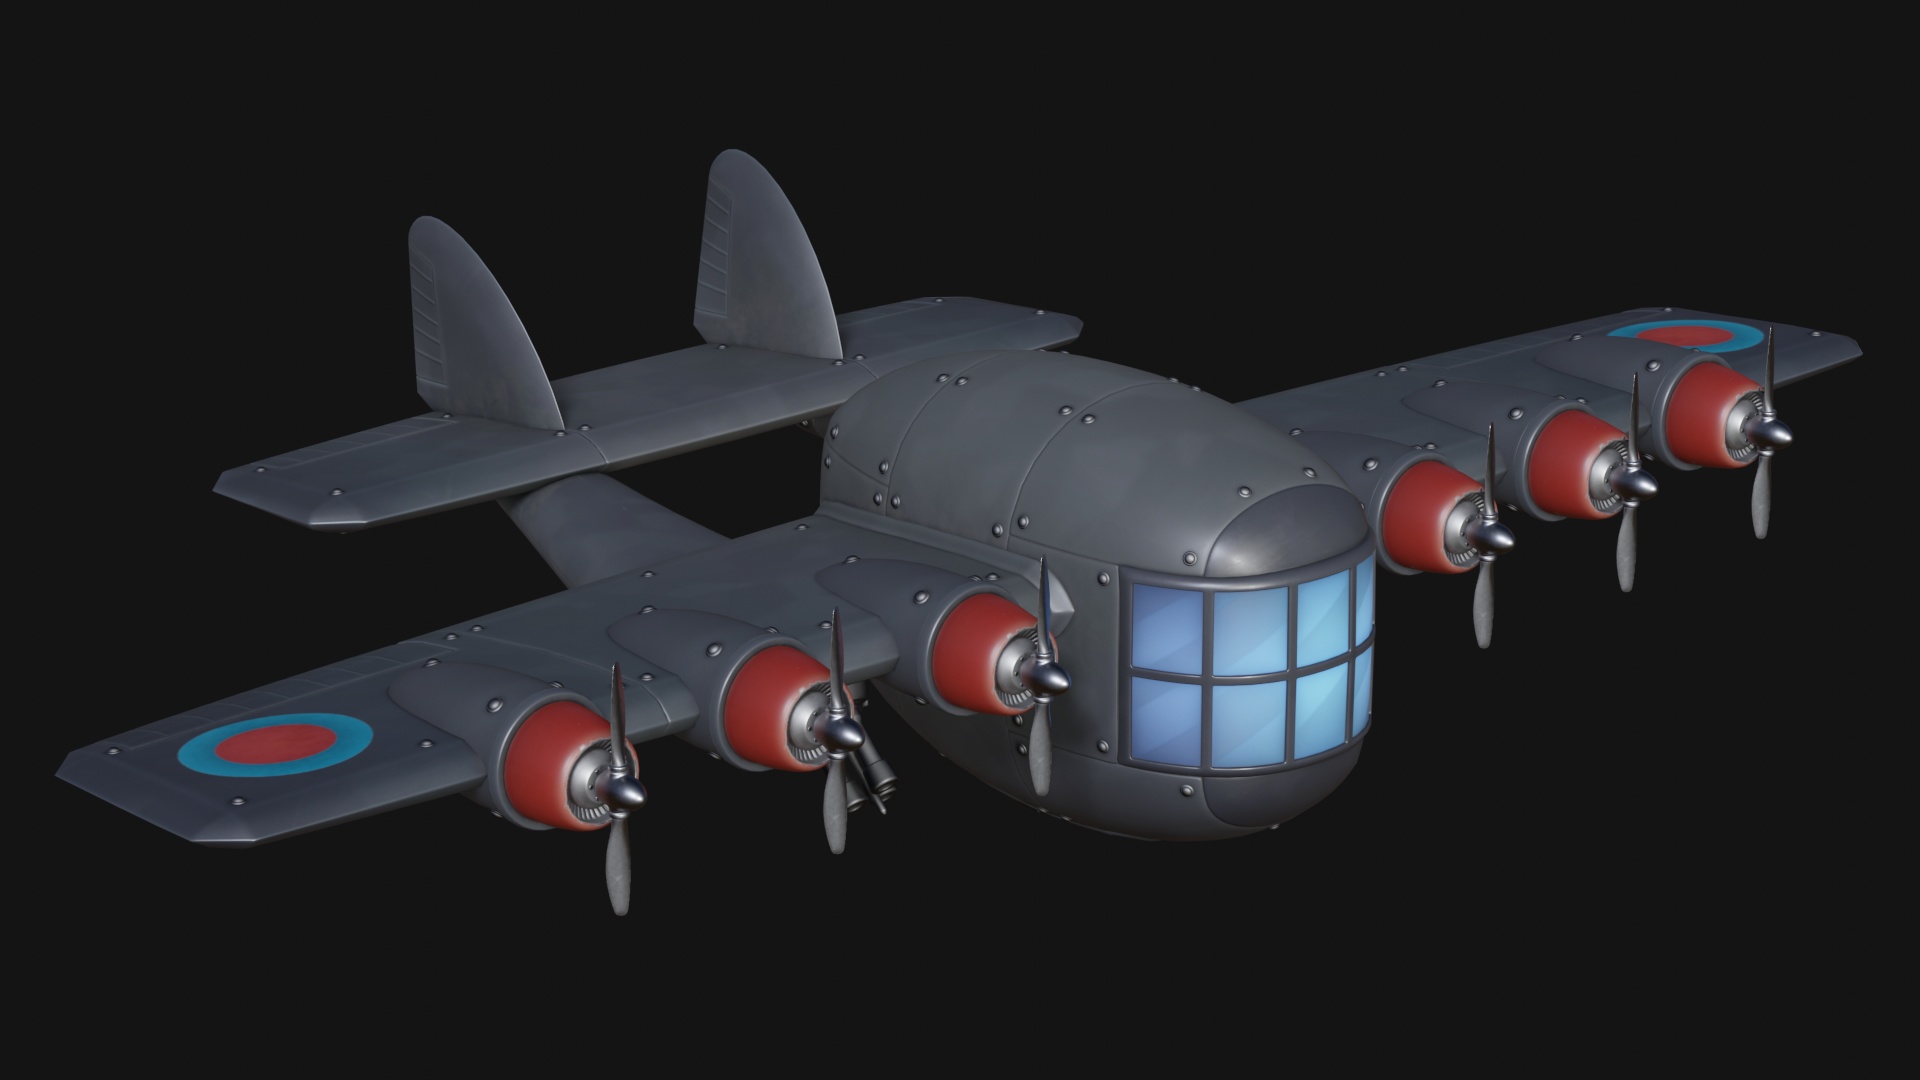
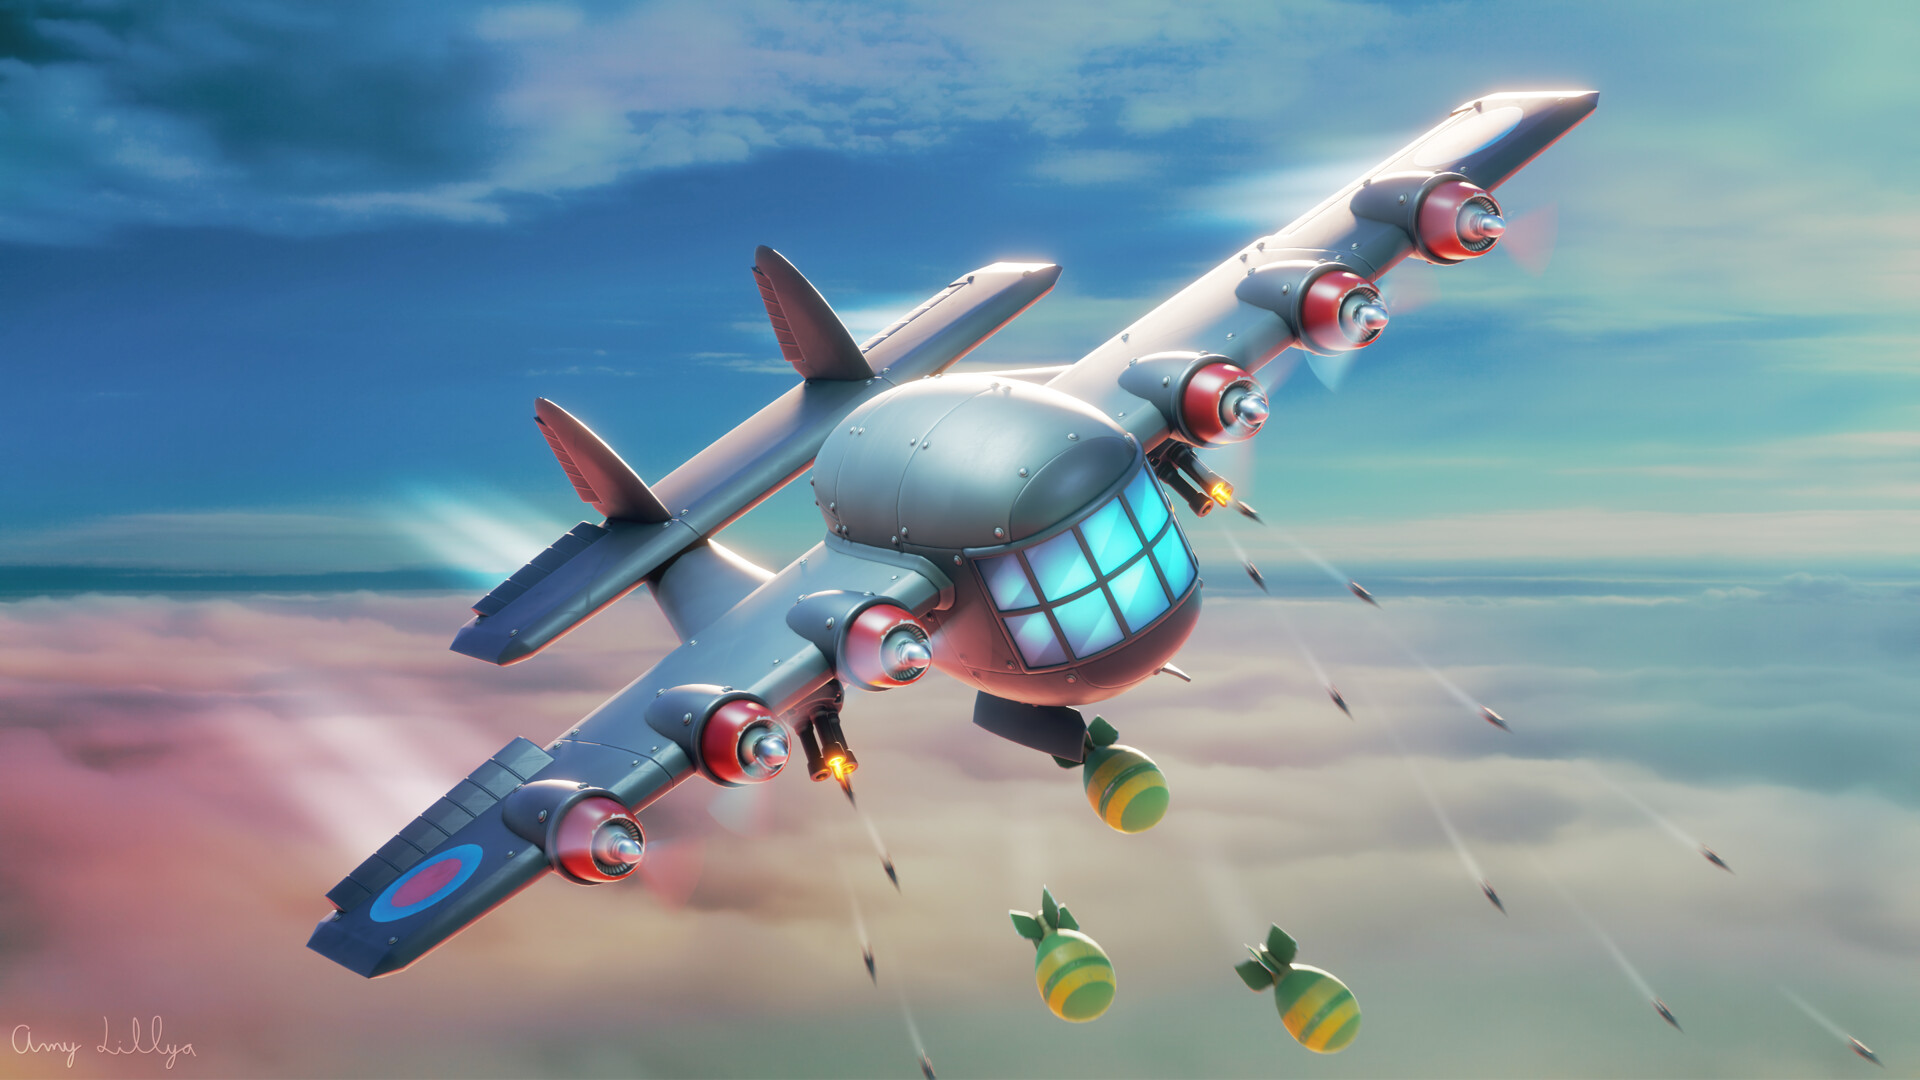
Now for what I’ve been working on recently, I’m making a fan art of the Loose Cannon from Team Fortress 2. I haven’t played the game in a while but there was a time I was having so much fun playing demoman with this weapon. With practice you can time your shots just right so you can do a combo on the enemy player, it’s one of the most satisfying mechanics in the game.
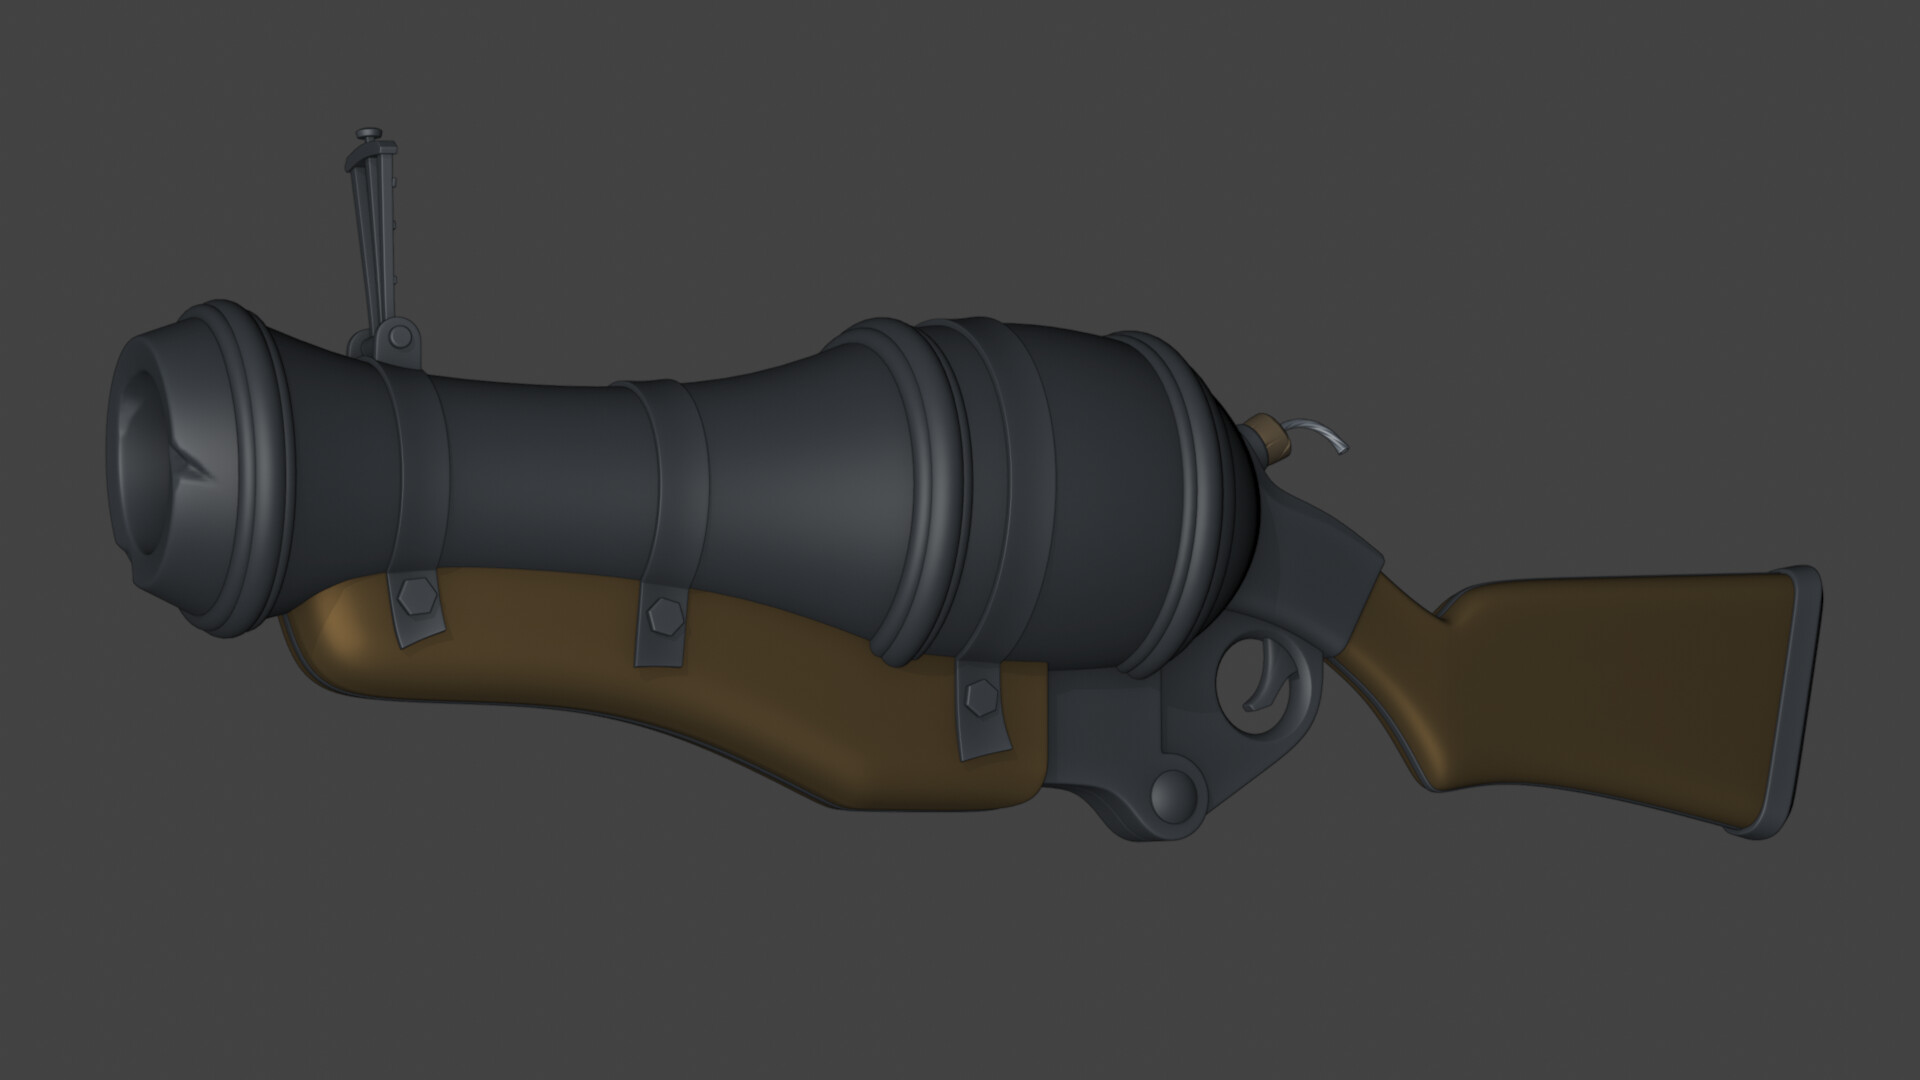
Here’s the highpoly. I extracted the original model from the game to use for scale reference, then I adjusted the proportions a bit for a stylized look. I did sculpt some parts but kept it very simple.
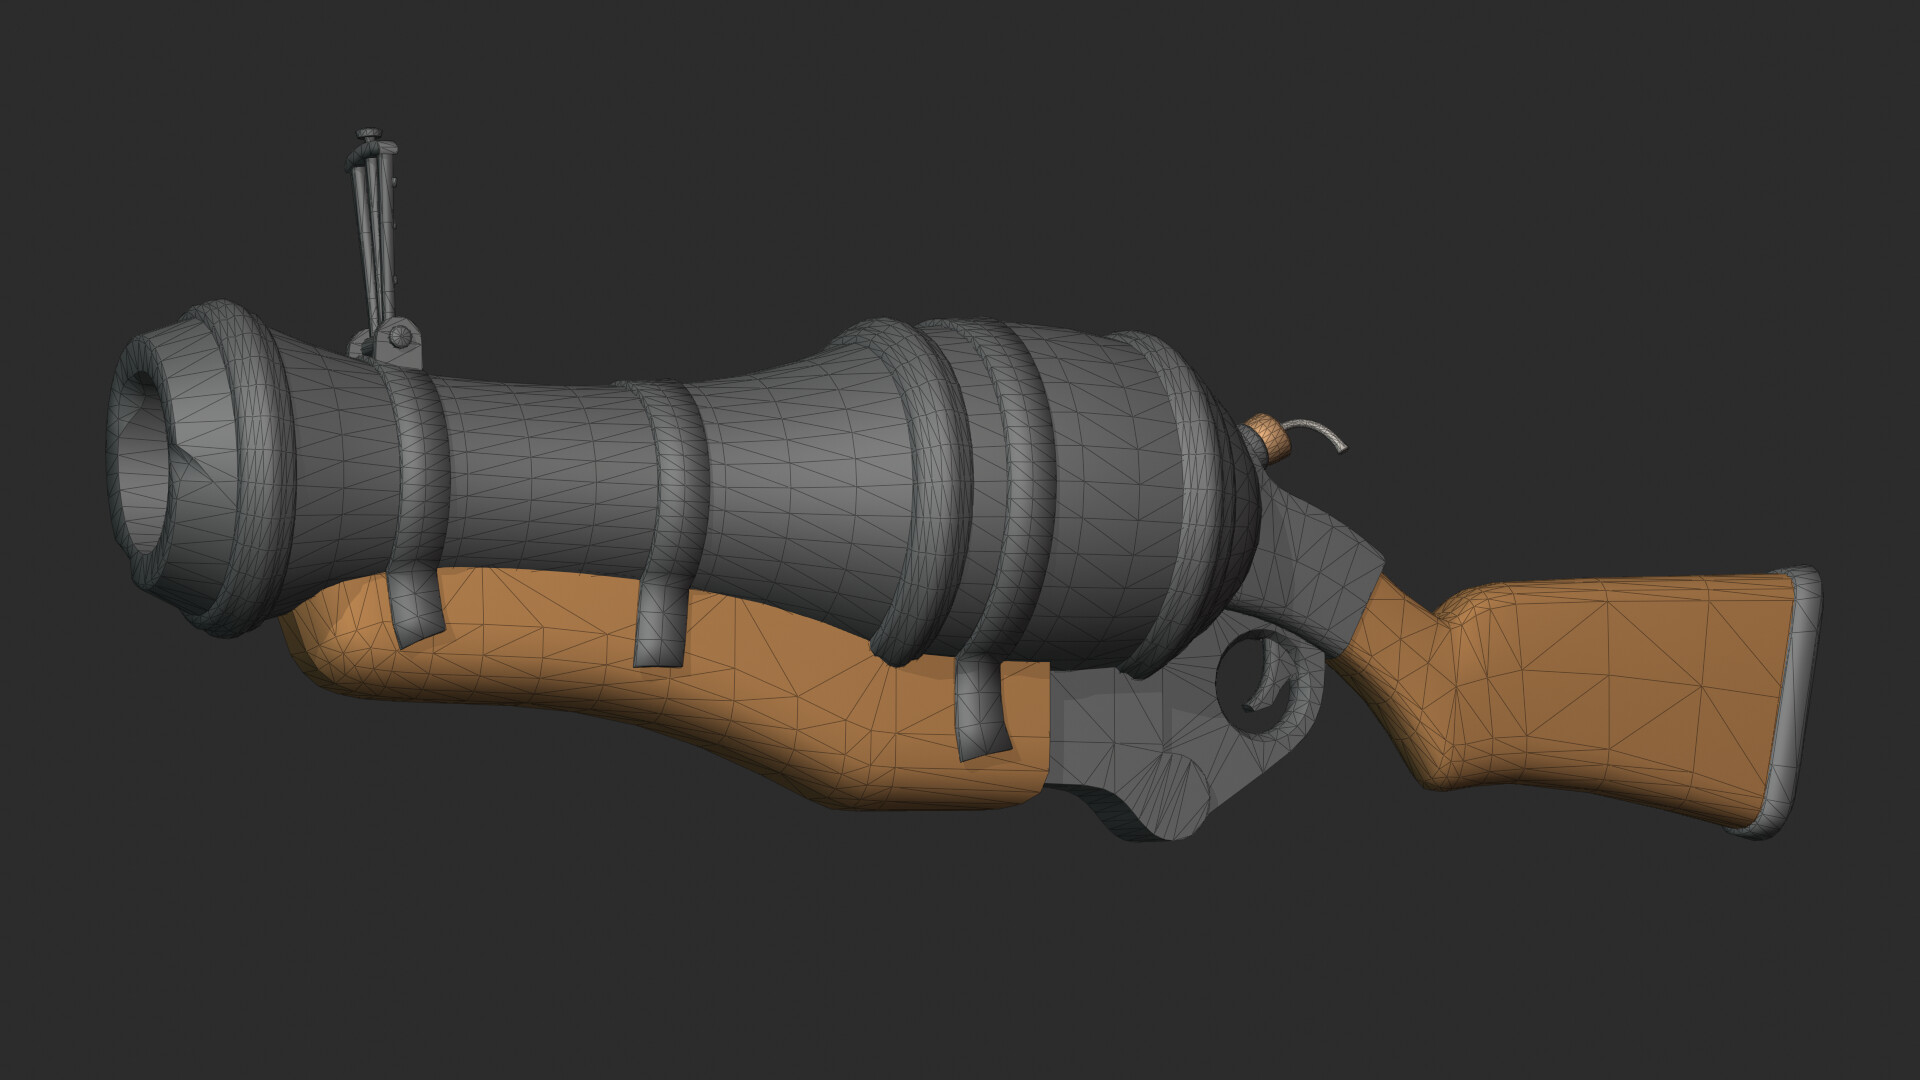
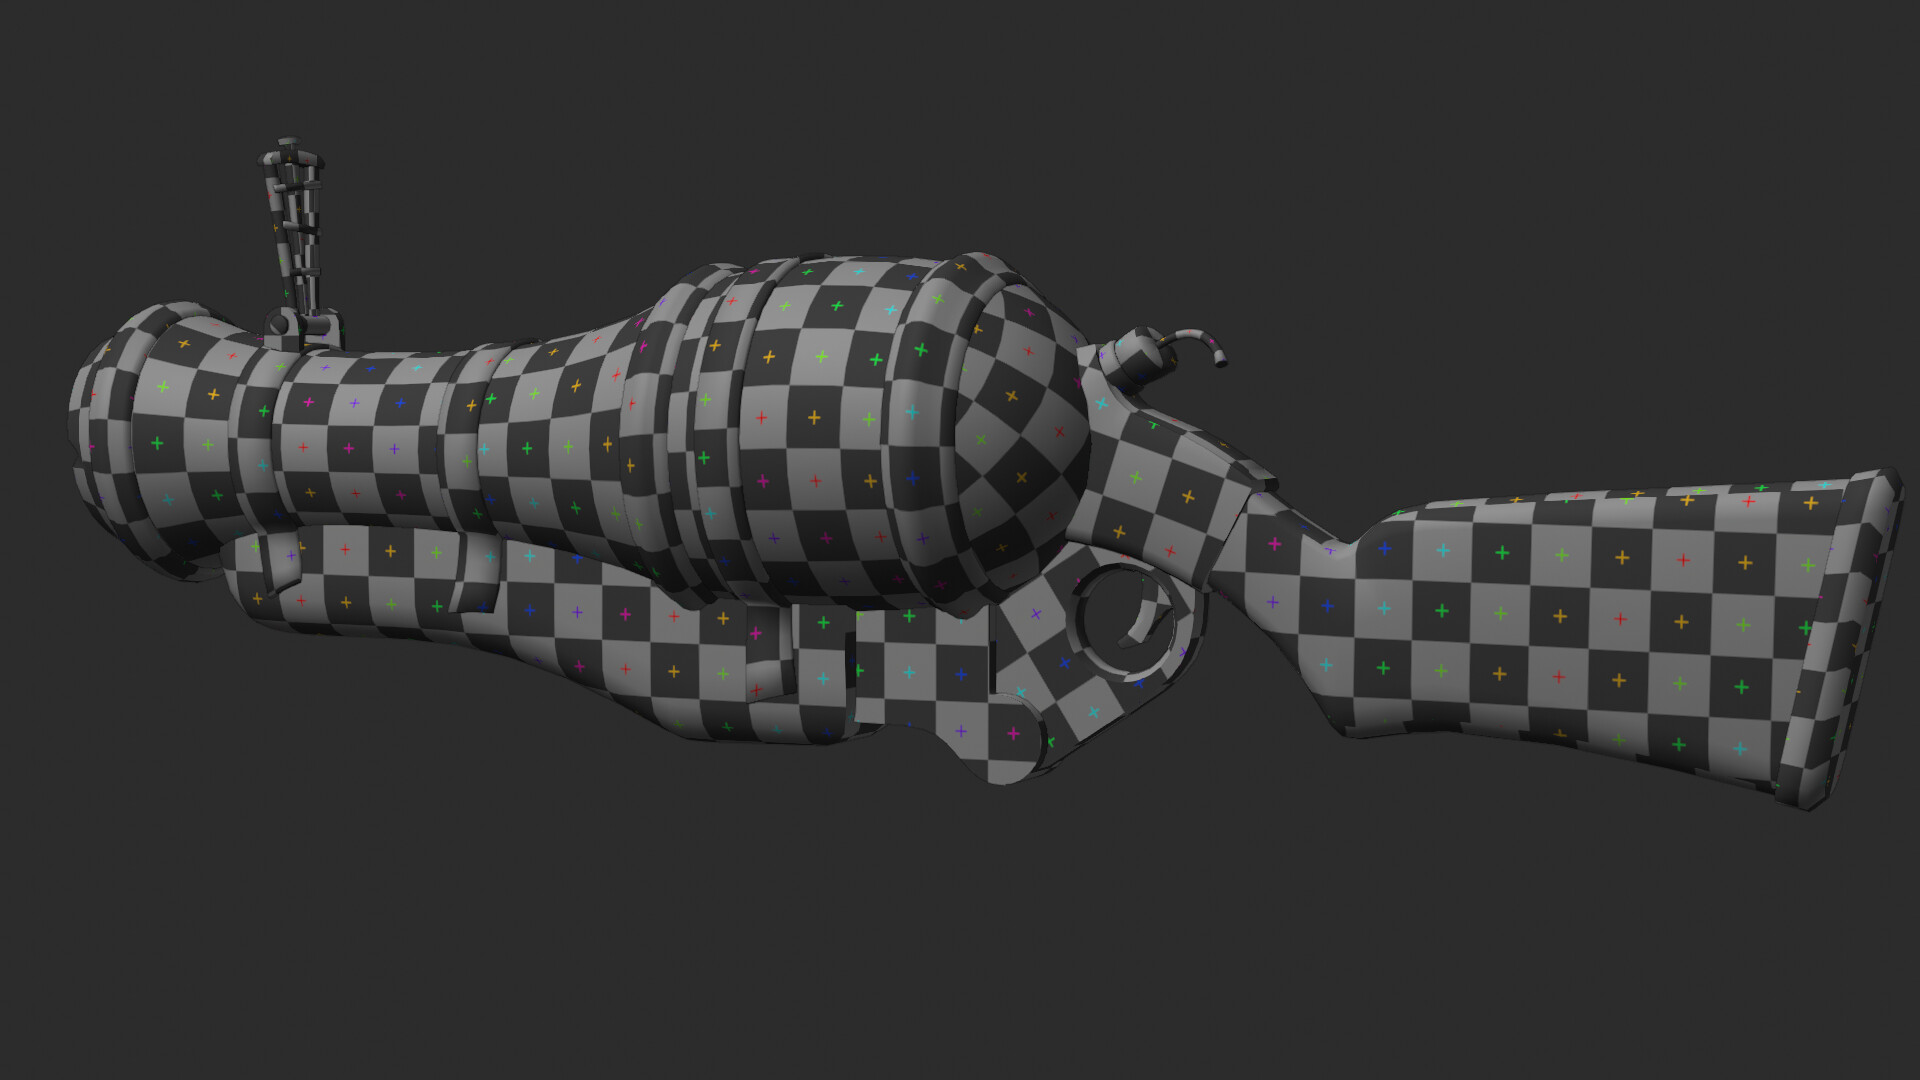
And here’s the lowpoly mesh. For most pieces I made the lowpoly by duplicating the highpoly and applying 1 level of subdivision with creasing to smooth only the curves, then I remove unnecessary edges and push and pull vertices around until it looks good.
For the UV map I unwrap every part and adjust the UVs first, like straightening long strips and fixing distortions. Next I select all the UVs and equalize their scale, then I scale up only the islands that I want more texel density.
To pack the UVs I use the addon UV Packmaster. For this model I set the addon to group the wooden parts and the scope bits to be packed together. Then you just press the button and it’s done! this addon has saved me so much time making UVs.
And that’s it for now, next I’ll try to figure out how to texture it.
I’m happy to post again in this sketchbook ![]()
Hello, I’m finally done with this cannon project, it was quite the experience to learn this style.
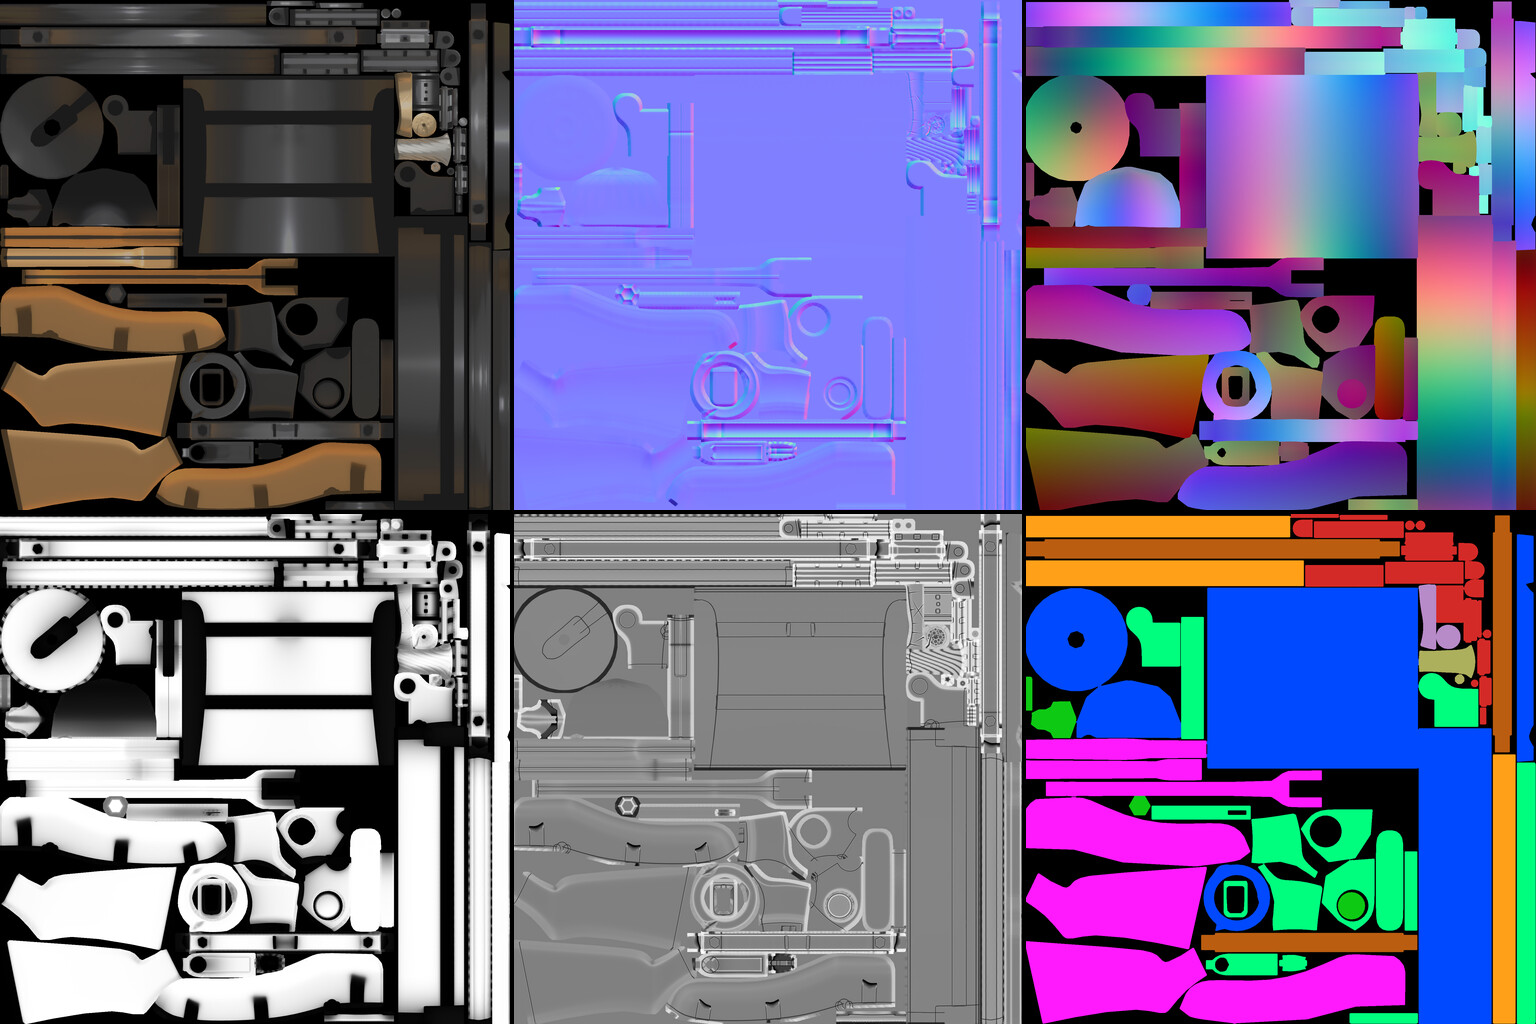
Continuing with the breakdown, here’s how the process of painting went:
1. Baking the lighting
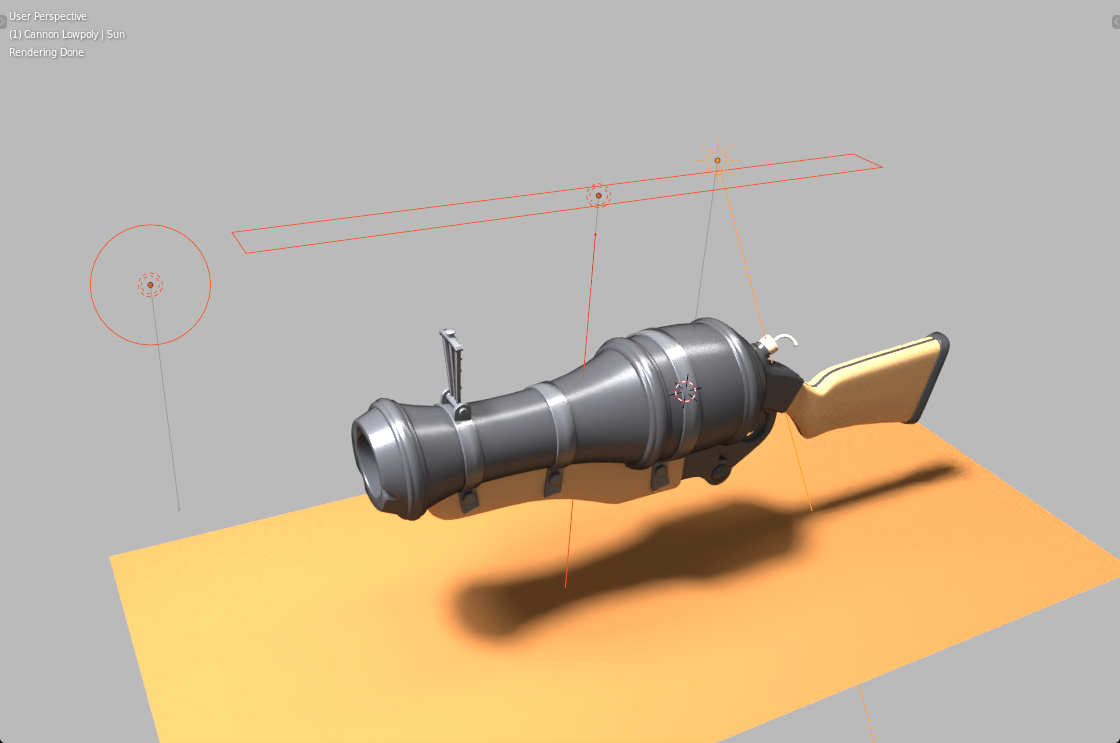
First I used Cycles to bake the lighting into a texture to use it as a base for painting. The lighting setup uses 3 lights on top of the weapon:
At the bottom there is an orange diffuse plane to bounce the light back into the cannon, giving it this nice orange tone. The world shader is just a gray value to fill the ambient light.
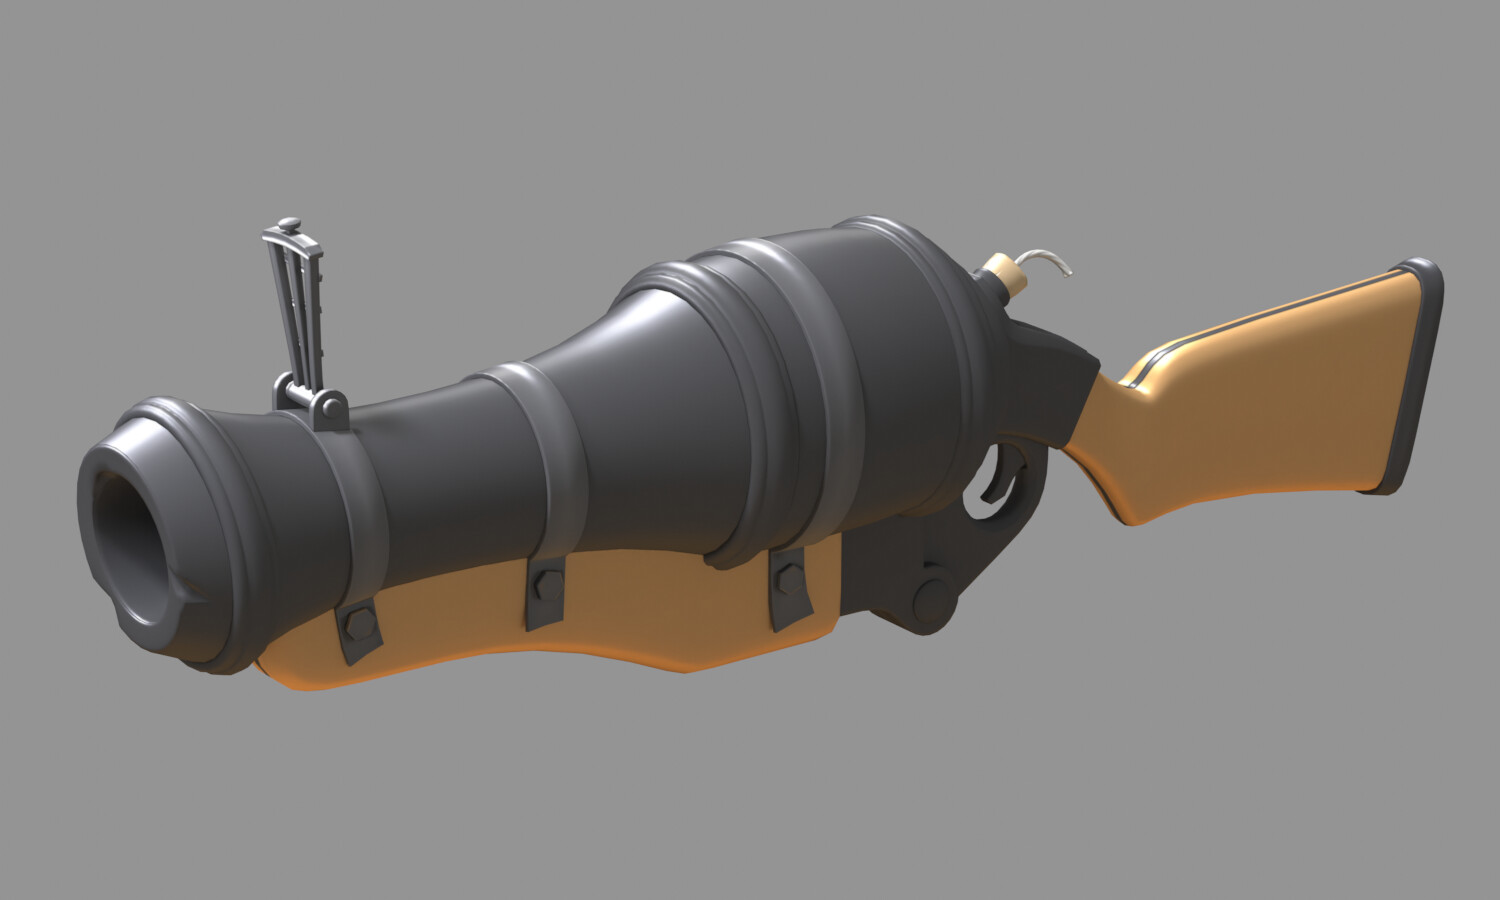
The model materials were separated into only diffuse for the wooden parts, and a mix of diffuse and glossy for the metals. Each part had a solid base color.
This is the result after baking the lighting. I used the standard color management for baking so you can see that the highlights are blow out. I mixed this result back with the base colors to dim the effect a little and give me some room to push the values in the painting.
2. Painting in Krita
For painting in Krita it was important to have some auxiliary textures.
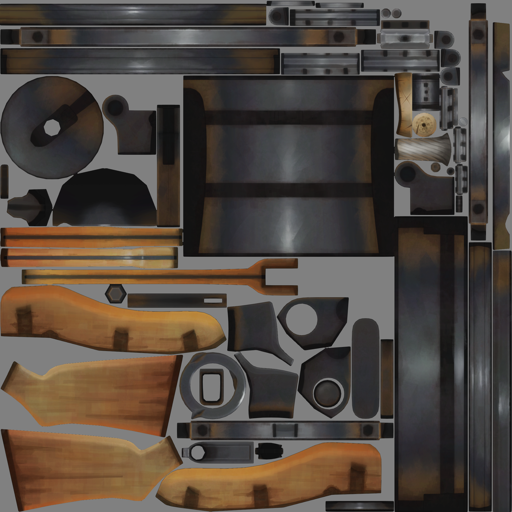
The painting process was very experimental and gradual. I started with the wood patterns by using a brush with a square tip to paint some splashes of color. Then with a darker color I painted the wood stripes.
For the metals I painted this blue-ish reflections just above the orange tone, that then fade into a faint purple at the top. I also painted a layer of rust at every crevice of the metal parts and kept the strength somewhat low so it blended really well with the other colors.
I tried to keep the colors across the whole weapon consistent by using a palette, and by always checking the grayscale image to see if the values are not too bright or too dark. Having the baked lighting to start with made this a lot easier than choosing the colors from scratch.
3. Final touches
To finalize the painting I used a blending brush in Krita to scrape the colors into each other and give the texture a bit of a traditional painting feel.
After the painting was complete I went back to blender and did some further tweaks in the shader editor, like changing the RGB curve and overlaying a horizontal gradient across the whole model, from dark to light. Next I baked these adjustments into the final color texture map.
I tried giving the weapon an outline and to my surprise it worked perfectly with this style. I used the traditional method of duplicating and inflating the mesh while inverting the normals. The outline is a very dark brown instead of pure black.
Comparison with outline on / off:
Finally for the render I painted a simple background in Krita to go with the handpainted style. Since there’s no lights it was really quick and easy to render everything. For the wireframe render I used the wireframe node and mixed it on top of a simple white shader.
Final render:
And that’s it for the Loose Cannon!. You can see the extra renders of it here:
Looks fantastic! And I learned a lot from reading your breakdown; thanks!
I’m glad to hear that!
I really enjoy watching your sketchbook and it certainly inspires me to make more detailed posts here.
I have to say I’m impressed with your dedication to update your sketchbook so frequently. I think the work it goes into writing text and preparing images for these posts is often unappreciated. I struggle with writing so it took me over an hour just to make the breakdown above.
I’m not surprised it took you a while – it’s a really different effort to describe what one did and doing so in terms that other people can understand, especially if they’re not familiar with your artform.
The entries sometimes take me as long as the exercise took – but it’s also good for me because it means I have to really understand what I did, and it sometimes becomes clear that I didn’t quite, so I get to review and amend my knowledge.
Glad you’re enjoying it!
Feels very cinematic, like I’m waiting for that door to open. ![]() (If it is a door
(If it is a door ![]() )
)
Hey uh… happy new year everyone!!
I didn’t forget about this place, I just haven’t done much in Blender since the year started, and being honest, I’ve also been too lazy to update this sketchbook.
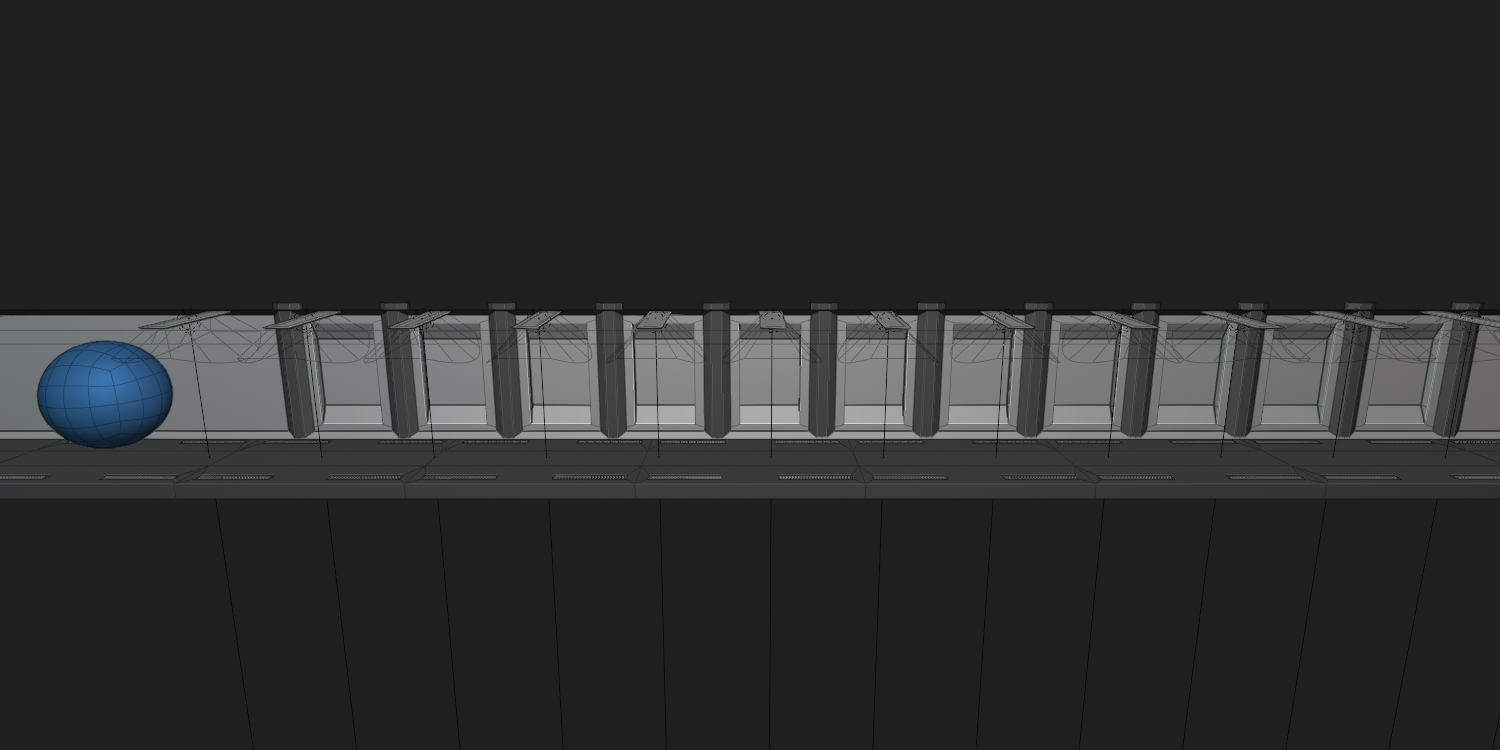
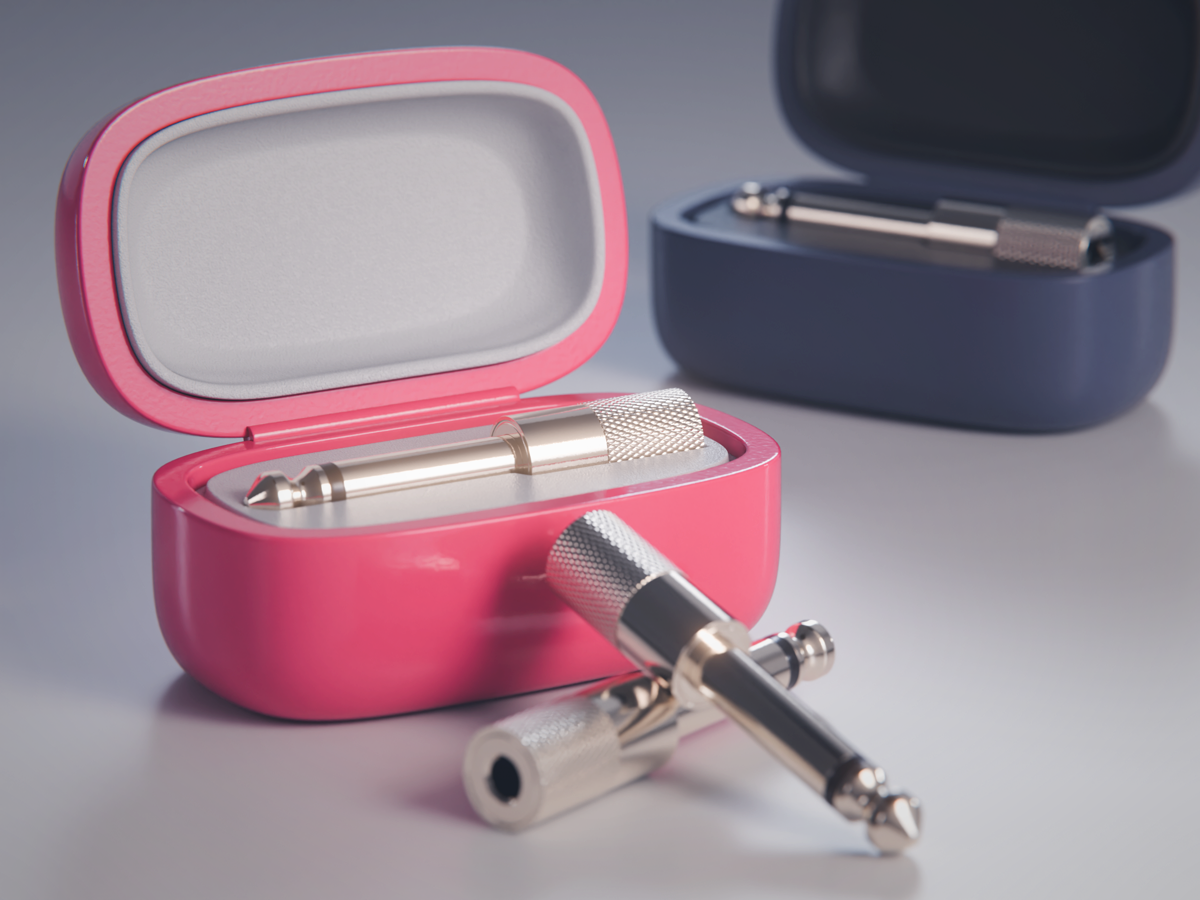
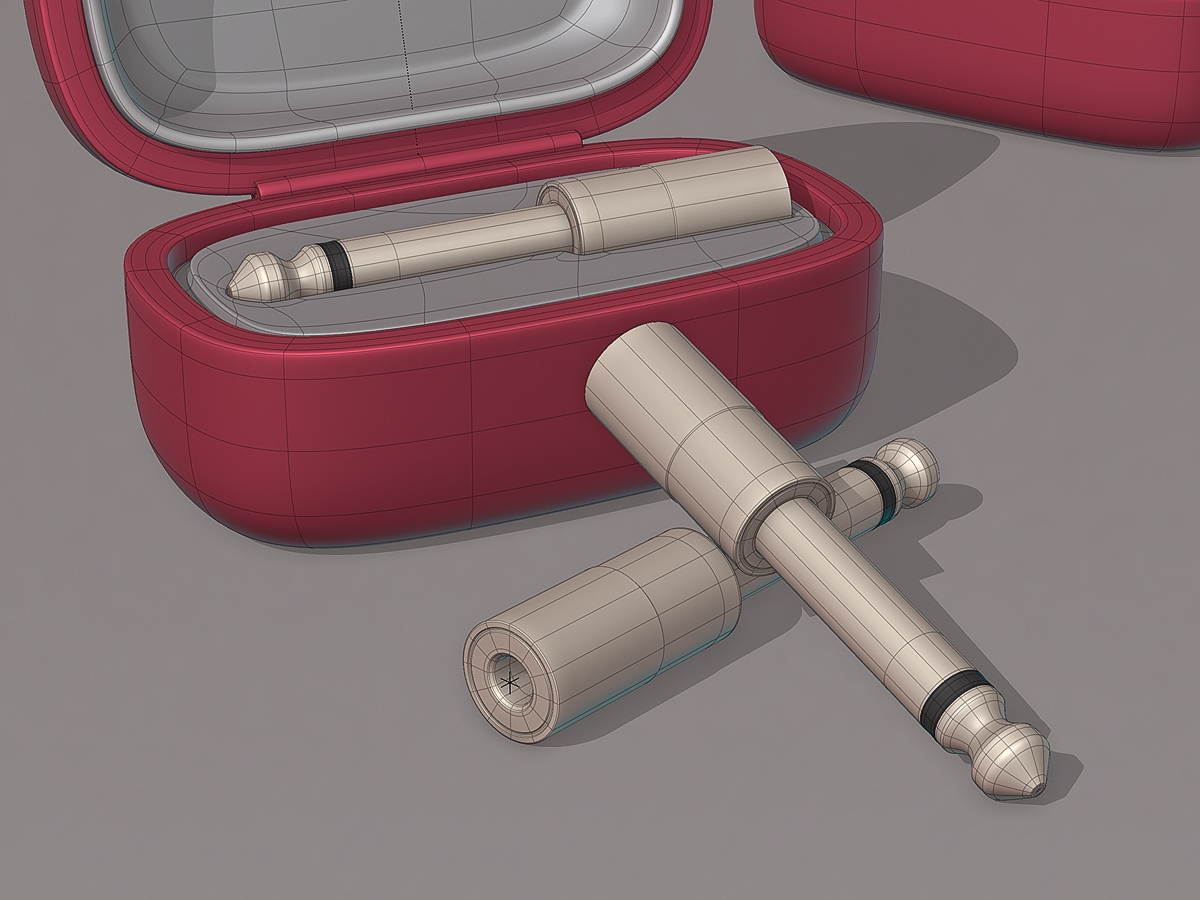
Anyway, I wanted to do some subdiv modeling today so I made this P10 audio adapter, how exciting!. I also made an elaborate case for it so it looks good on camera:
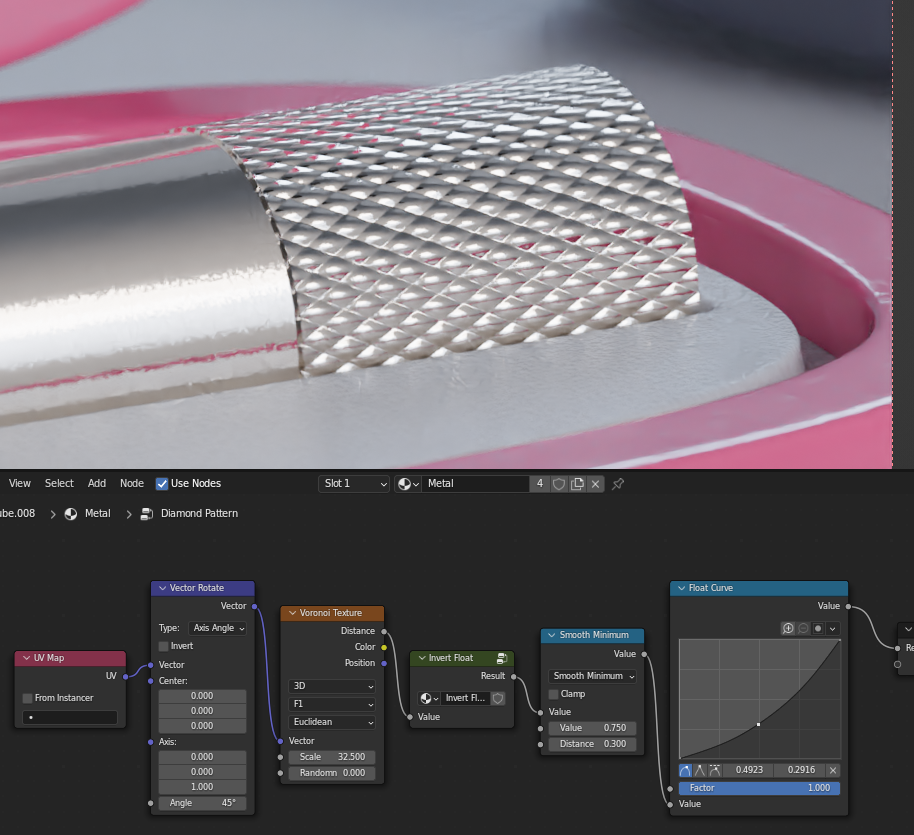
The diamond pattern on the adapter is just a voronoi texture masked using vertex colors:
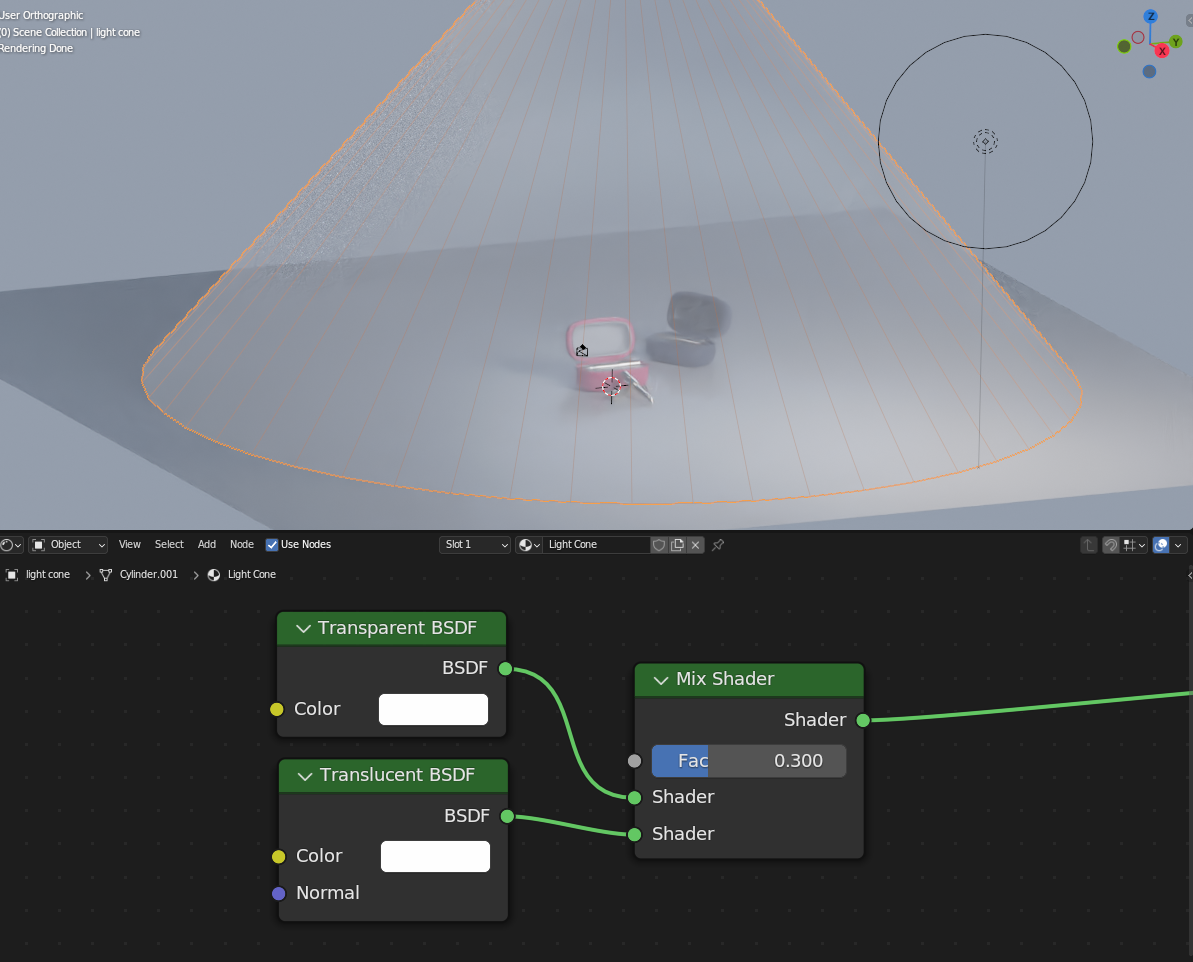
I used this translucent cone to soften the lighting (it can be any shape really). The scene is illuminated by a key light at the front and an area backlight, together with this studio HDRI from Polyhaven.
I’m currently using Blender 3.5 for the realtime compositor, it’s super convenient to see the changes directly in the viewport. I’m also using AgX for the color management.
Here’s a wireframe view:
Happy New Year! Always nice to see you pop up again.
A translucent cone is something photographers use for real life product shots; neat to see that replicated in Blender.
Cool to use a Voronoi for the knurling; I know a trick for how to make that pattern with geometry, but I am a bigger fan of doing it with a shader.
And I really enjoy that you made a case just to show the adapter off better. That’s dedication.
Indeed I used the cone because I remembered a video I saw about photographing products using it and I thought it was genius.
Also thanks for the new word, I had no idea the process of making the pattern was called knurling ![]()
Amazing idea this semi-transp cone ![]()
Couldn’t it be a sphere around the light source ? So that this light softening object always follows the light ?
Happy blending ! ![]()