I swear I’m not trying to be contratian here, I don’t think nodes are very intuitive either (and I’m fully aware that this is an even more futile hill to die on than the general topic of this thread). I just think nodes require a similar level of understanding of concepts that DOS once required, before Mac/Windows made everything more intuitive and lowered the threshold… nodes feels as if you take all of the user-friendly progress we’ve made in the past three decades, cut away their connective tissues and throw the severed bits back into a command line sort of paradigm where everyone has to figure everything out for themselves again.
Anyway, nodes seem here to stay until the next big thing that interests coders come along so complaining about that is well and truly futile.
The video is a bit long so I’ll explain what I do instead : I have one IK bone chain, one FK bone chain, and one chain that interpolates between the two for animation and deforms the mesh. On this third chain reside the bendiness controls.
I think a workaround would be to duplicate the stretch bone and give the duplicate a copy location (to the stretch bone) and a stretch to constraint (to the child of the stretch bone).
The “origional lenght” in the stretch to constraint allows you to decide where the bone starts “streching” and stops “sqausing”
Then hide the stretch bone. Stretch.blend (110.8 KB)
Yes it is a workaround but fairly simple. Only one more bone and 2 constraints.
I do like nodes but you have a point here. I think there should be a library of node setups to replace modifiers, and functionalists that we already have at the click of the mouse.
Ok you could go into the nodes if you want to edit them, but users should not be expected to make an array node setup, or an IK node setup from scratch for example.
Edit:
It is a bit ironic that the tool tip in the IK modifier says “enable IK stretching” where as in the bone Ik stretch slider it says “IK stretch, allow scaling of the bone for IK”!
Well, I do most of my rigging stuff in other software with nodes, Drivers and constraints like in Blender is super old school. For an Ik it may be difficult to say whats best, but once you want to control a transform via parameter, rigg or input, Blender is stone age.
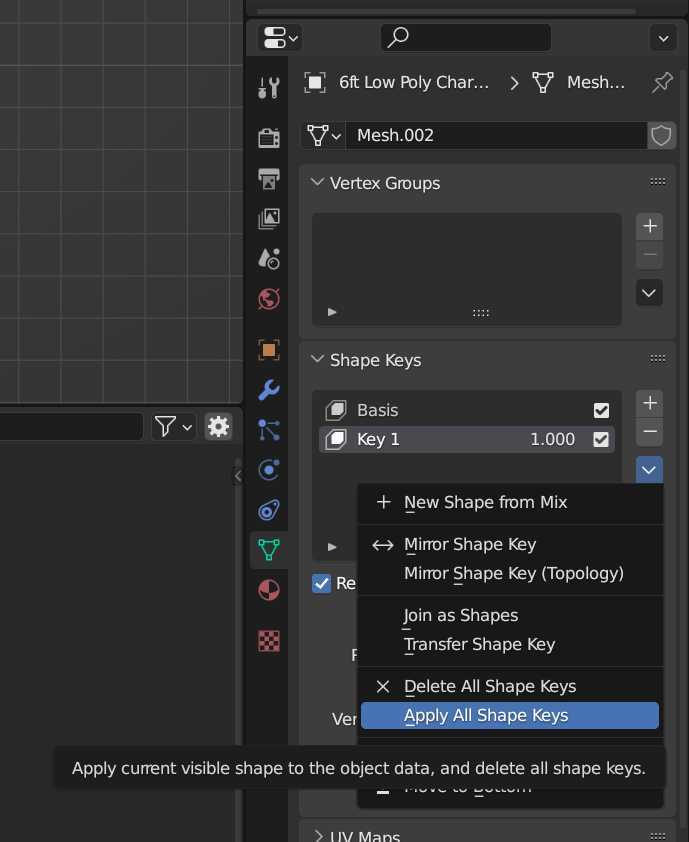
That Stack Exchange answer reminded me of the Corrective Shape Keys add-on which I used the last time too, and looking at the date of my file which had the shape keys, it’s from 2020. So was the “apply all shape keys” menu item added within the last two years at least? If so, nice to see progress! (Still swear I didn’t see it earlier today.)
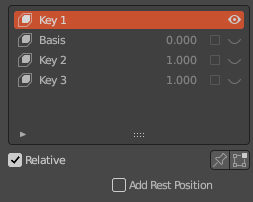
It absolutely will. I tested it out just seemed so strange. Can’t figure out what OP is asking. Is that a feature in other softwares? All the Shape Keys are relative to Basis, you can move any shape key so its second in the selection, then delete the Basis, and that key now becomes basis, basically is applied.
But that screws up everything, since all the other keys are now relative to geometry that is different from what they were built upon.
Alternatively, what you can do, is Just move whatever key you want to be applied to the top, and it becomes the new basis. This way, all the keys are still referencing old basis, which you haven’t deleted, but key on the top of the list becomes new base geometry.
If you edit Basis, modification will persist for all shape keys.
If you delete it, like nickberckley suggests to do it, a new shape key is used as basis ; but keys are staying as they were when they were created.
For each shape key, you can define which one to be relative to.
You can create shape keys from mix.
You can copy shape key from another object.
So, basically, you can do anything, keep old shape or obtain a new interpolated one, for some shape keys or all of them.
I got stupid and began submitting bug reports once again, which of course almost immediately get closed because that’s not the place to take any sort of hints regarding things which a regular user expects should work or any feedback on UX as long as things are “technically correct”…
So, back to shouting into the void here and perhaps once in a while I will get proved wrong again and learn something new, which is a much better track record than futile bug reports!
The “mean radius” property of a curve point is not a radius, it’s a scale because it’s only used to scale curve profile geometry or path animation. However, apart from the poor naming, it also doesn’t get applied when you apply the scale of the curve object.
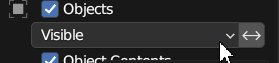
Overriden Linked things don’t count as external files. Running the Report Missing Files option in the External Data menu says nothing is missing, yet I don’t see my character and I’m guessing this white symbol here indicates a broken link? And of course, there’s still no proper UI for seeing what location links used to point to or individually re-link them.
The right-click rename menu option for a collection is not at the top level. It’s under a sub menu called “ID Data” where of course everyone who is new to Blender automatically looks.
Guess why I can’t see anything in my geometry node window here despite the correct object being selected… does anyone think a beginner can figure out why this happens?
Someone finally implemented this… but only for geometry nodes, not materials because a beginner should of course know about drivers and their hidden keywords (a bit similar to something else I posted recently).
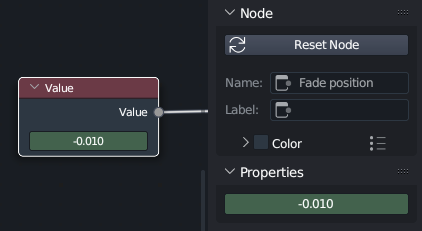
You can rename a node in the side panel, but the editor will still show the default “value”…
Just as how there’s no 1, 2, 3 shortcuts (even visible buttons) to select curves, points, handles in the curve edit mode like there is in the mesh edit mode, this brilliant quick filtering selection is also missing in the graph editor. A box select always selects the curves, even if you wanted just the handles. And similarly, a box select around a point always selects also the handles, so if you want to scale keyframes you have to switch to the dope sheet.
However, in that graph editor, you do have the common show and hide shortcuts and even visible buttons, but in the dope sheet you don’t…
The live filtering string in the graph editor refuses to work some of the time or even most of the time. Not sure what the problem is, but some words it just refuses to find, while others it can find with no issue.
The above gets even worse because when you have an object selected you don’t see any keyframes for its materials in neither the dope sheet or animation graph. Only way to see them is to remove the selection filter and then search through the entire list.
But with selection filtering disabled, you can’t use the next or previous frame button (in the graph editor).
If you shift-H to hide everything but the selected curve in the graph editor, and then move to a different object which isn’t keyframed yet and add a keyframe, the new curve won’t be visible (even if you switch to selection filtering).
If you alt-H to show everything in the graph editor, collapsed channels still won’t show (this might be good for advanced workflows, but compounded by the UX issues mentioned above, this bit me in the ass at one point… also, are certain things collapsed by default, like keyframed material nodes?).
When you select a curve in the graph editor, it doesn’t highlight in the sidebar and you can’t zoom to it in the sidebar like you can in the graph editor either (or like how you can zoom to selections in the outliner).
When you link an object, the first step is maybe you want to move it. For that, you need to make a library override, but the default behavior of what looks like that button is to instead make the entire thing local. But local is the last resort of something you linked, isn’t it? So why do you have to shift-click that button to take that first step? What’s the UX thinking here? I linked something, but then immediately I want to make it local?
There doesn’t seem to be a proper vertex group input for Geometry nodes, rather you must use a Boolean group input (not logical) and then click a magic button and select your vertex group amongst a lot of other options. Further, if you rename your vertex group, the geometry node doesn’t update.
Not sure why I have to separately save a texture painted image even though I’ve saved the .blend file itself. Seems like an unnecessary extra step, but at least Blender warns when you’re about the close the file.
The Texture painting workspace can become de-synched between the left and right windows, so you’re actually painting on a different texture than you think. I guess this is a limitation between how loosely the workspaces are implemented, but it’s very annoying when it happens and took a long time for a first timer to figure out. (Similarly annoying as to when the same happens in the shading workspace with the texture preview in the bottom left.)
Oh, and I don’t know if this happened in 3.5 or 3.6 but:
Blender developers finally added a confirmation dialog for applying transforms to instanced objects, but the only option they gave the users was to remove the instancing for that object. There isn’t any option to apply the transform to all other instances, so that still has to be done in two separate steps…
I actually can teach you how to solve some of the “problems” you listed here, but I don’t want to really, because that is one miserable post and whining and as it seems in 2 years of people telling you you can actually do/get what you want, your default is still whining and complaining, instead of reaching out to people and asking for help and information. I’m assuming that’s what gets you off so I won’t interfere.
But you made this topic in 2021, if you still consider yourself “beginner” and haven’t figured out or learned such basic functionality you’re complaining about here, maybe computers aren’t your strongest suit. Just press the F2 and rename what you want mate, that is embarrassing.
That is in Blender File View of Outliner.
You can also have the info by using bundled Edit Linked Library addon.
Your screencapture is showing that you selected the wrong modifier in modifier stack.
Beginners in animation don’t do this kind of things. They are using keyframes.
If you use drivers, you took a look to a tutorial or read manual. So, you are able to find that you can type appropriate python expression.
And if the node is usable as a geometry node, it can be changed into an attribute usable by material nodes.
If you change name of node, you change its identifier for software, for animations, script, etc…
If you want to change its identifier for user in node editor, you have to use the Label field.
Filtering by components exists since 2.45. Before that Mesh Edit mode was acting like Curve edit mode, to select a face, you had to select corresponding vertices.
Developers never find the time to do it for curves. But they did not develop editing tools specific to this filtering. You can duplicate, extrude, delete or subdivide segments.
But there is no transformation, deformation really specific to segments.
In grease pencil edit mode, there is no segment selection, either. You select points or spline or parts of spline delimited by other splines.
In curve edit mode, you can select a spline by pressing S.
No. In Graph Editor, box select selects according to what was contained in drawn box.
If drawn box is over a curve without containing any point, it selects the whole curve.
If drawn box contains points, it selects points.
If it only contains handles, it selects handles.
Same principle applies to Lasso select. That will be a more appropriate tool to select only handles.
You can hide Handles by pressing Ctrl H. That way, you can distinguish keyframes better and scale them.
That is because there is no operator to hide in dope sheet. You can only filter or move channels.
It works with names of channels (F-curves) based on properties animated, but not with names of groups of channels.
If you animated Roughness property of a Material, it will work with Roughness but not with Material.
You can Collapse Channels by using right click menu. Then open first level of hierarchy by clicking on triangle arrow. And you should end-up on Material group quickly, with all channels above reduced to summaries.
No. That is not the issue. You can do it for Transform channels for example.
That is not working because you are trying to use them on Material properties channels.
During a long period, we could not have material properties in dopesheet because they are depending on nodes used. Now, we have them. But re-ordering of them is still not supported.
That is not the case with 3.6 for me. New curve is visible and collapse channels are also restored.
It is possible that you get confused by Only Show Selected object filter.
Absence of Highlight may be due to your theme. By default, there is one.
You can’t zoom on channels in sidebar. They have a fixed height determined by keyframes display.
You can increase Keyframe Scale Factor in Dopesheet Theme.
That is an absence of UX modification. That is inheritance of past workflow.
Before library overrides, workflow was to create a proxy from linked object without using that button.
So, that button was only used to make a linked data local.
We have to use shift click to create a library override ; just because that option was made possible, later, in development of software.
That is the old workflow. You had to create an input in Group Input node. By default, a new custom input for this node has a Boolean type. And for primary version of GN, there was a button in modifier UI to switch to ability to precise an attribute of mesh.
Now, you can directly create a Named Attribute node, instead.
But yes, renaming of Vertex Group is not handled by GN.
If you have to do it, that is because saving 3D scene and 3D animation data is not the same as saving image data.
We could consider that should be the blend file data if texture is packed. But that implies to modify operator to save blend file, that is anterior to ability to pack textures.
For that, you have to modify image in header of Image Editor.
But the moment, you click in Texture Slots in Properties Editor, textures are re-synced.
That can only be a conscious de-synchronization.
And that is a really simple check to avoid such problem.
That is 3.2.
They choose to apply transforms to active object of selection of multiple instances.
And that way changes reference for all instances. Before that, only original copy could be reference. https://wiki.blender.org/wiki/Reference/Release_Notes/3.2/Modeling#Multi-User_Data_Object
So, yes. You have to make all objects single users and then apply transform.
That is two steps. But you just have to create a macro, an addon to make it one step.