For an extruded curve or for mesh primitive?
I was coming here hoping to find the answer to the same question. I’m betting that there’s currently no way to do it, but it feels like converting curves to uv’ed meshes should be pretty straightforward.
Weird… I’m having that weird experience where I’m sure I’ve seen this question answered many times on here, but when I did a search I couldn’t find the answer either.
This is actually pretty straight-forward:
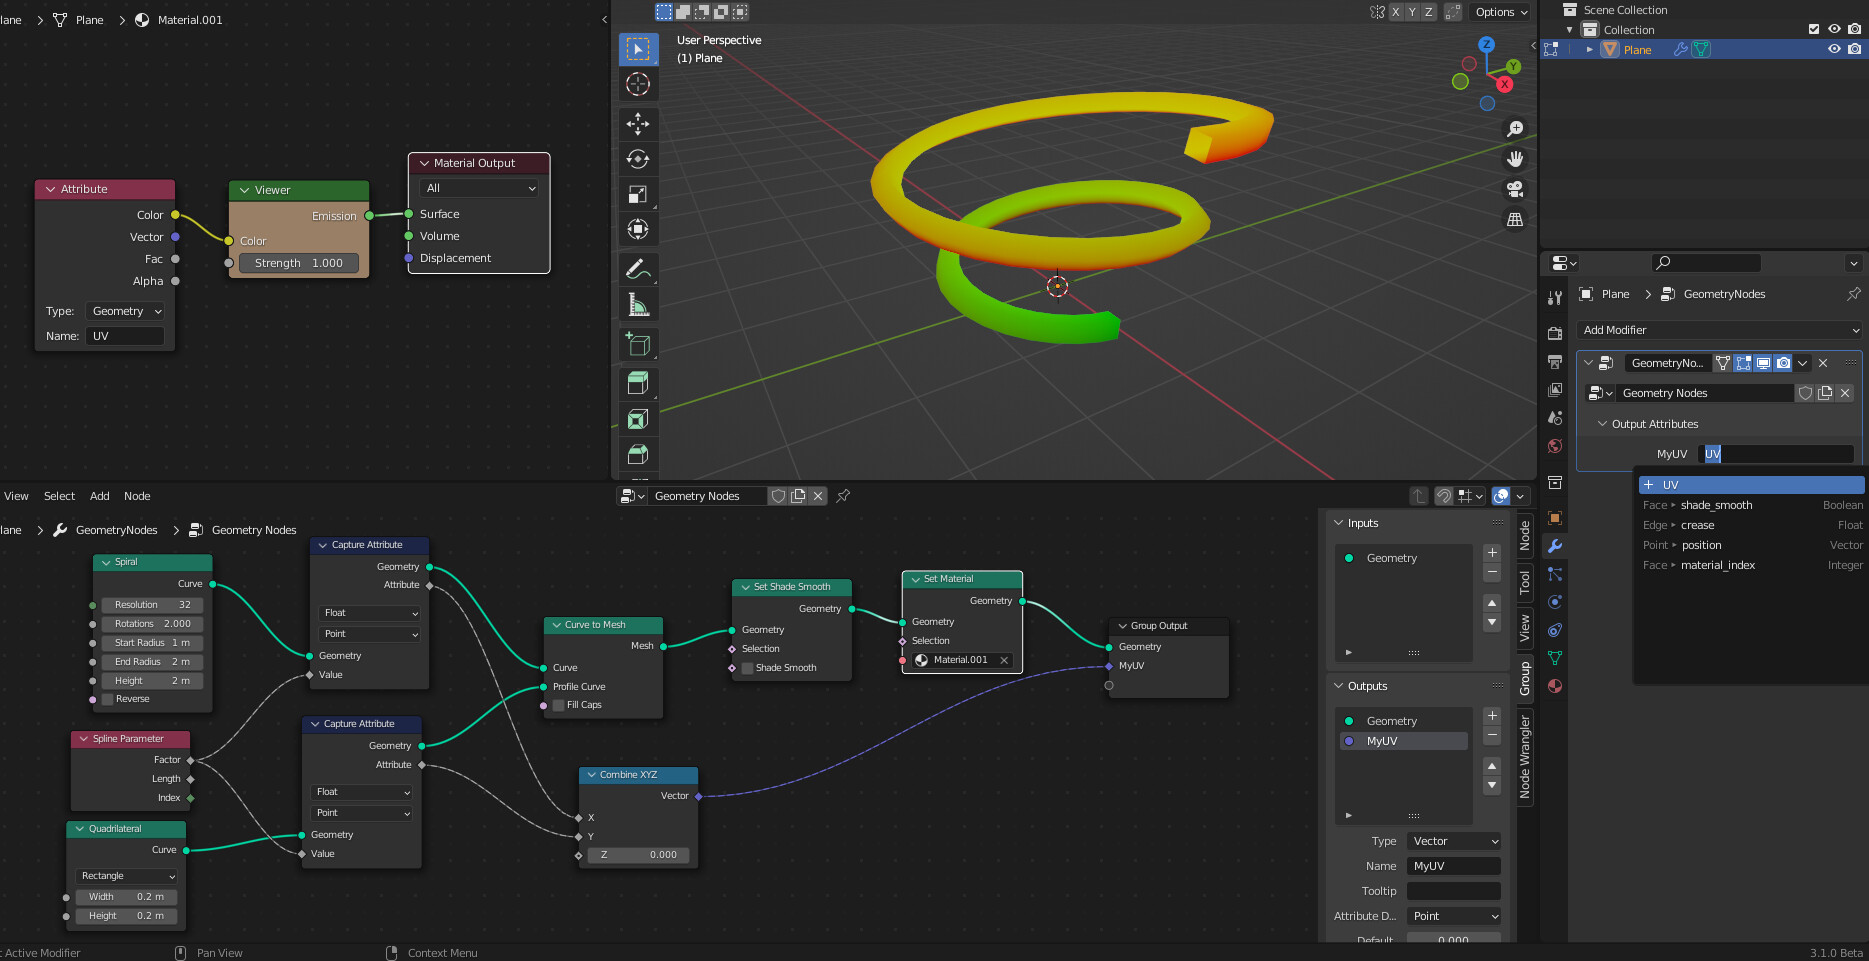
Capture the curve-parameters into a vector and plug that into an output socket… call it whatever you want, then add a new attribute in the modifier panel and access it with the Attribute input node in the Shader Editor (you still have to manually type the name in (which will hopefully get improved)).
3 Likes
Thank you! I’ll give this a try. 
Hey Zeroskilz, it seems like your name is wrong! Ha ha.
Anyway, thanks for this, I tried it out last night. Some of my nodes were different, but I was able to find comparable nodes and make it work… with one caveat. It seems like this doesn’t assign uvs to the filled caps. Dunno if that’s possible. I sure hope that we get more uv nodes in future releases!
Hi, thanks…
You’ll actually notice an issue where UVs also get squashed for any cyclic curves you use in curve-to-mesh…
I’ve uploaded a partial fix to this issue here:
The idea is to disconnect any cyclic curves so you get the full UV range for the geometry, but it does mean that with “shade-smooth” you’ll get a obvious seam - I included a modifier-based fix for this issue also as an example.
Originional issue discussion here:
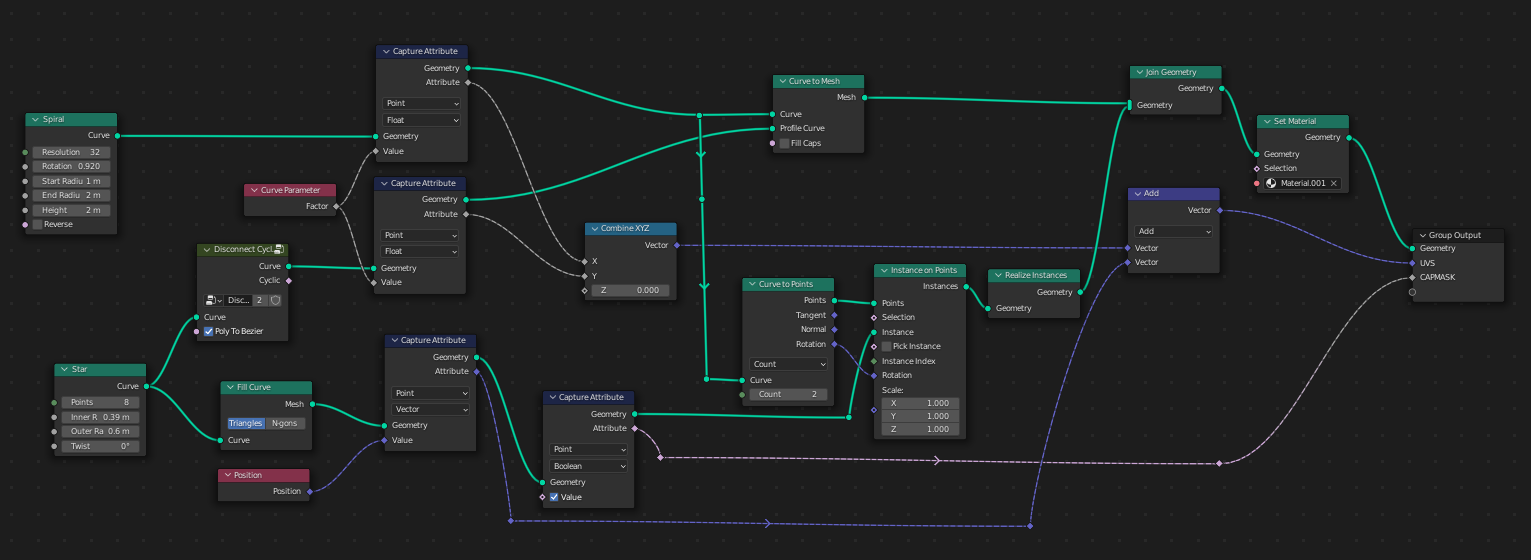
You’ve got the correct idea, but it doesn’t work porperly when using “closed” curve primitives as a profile (circle, quadrilateral or star ) . I got to work correctly though… more on it in the video GN uv fix
Does anyone have ideas on how to handle the caps ?
Hi, check the previous response and the disconnect-cyclic-curves node-group… Does that for any curve, including Beziers (With option to pre-convert poly-curves to Beziers so the end-points match up with Curve-to-Mesh on cyclic base-curves).
It includes a fix for the seam for smooth-shaded geometry that works in Blender 3.0
I think handling the caps will be far more involved…
Maybe something along the lines of storing the point position of the profile before the Curve to Mesh,
Then isolating the caps and adding their position to the UV map…
In the meantime there is this patch : https://developer.blender.org/D12482
So there is maybe no need to struggle too much with it , unless you want it right here , right now 
1 Like
Nice… 
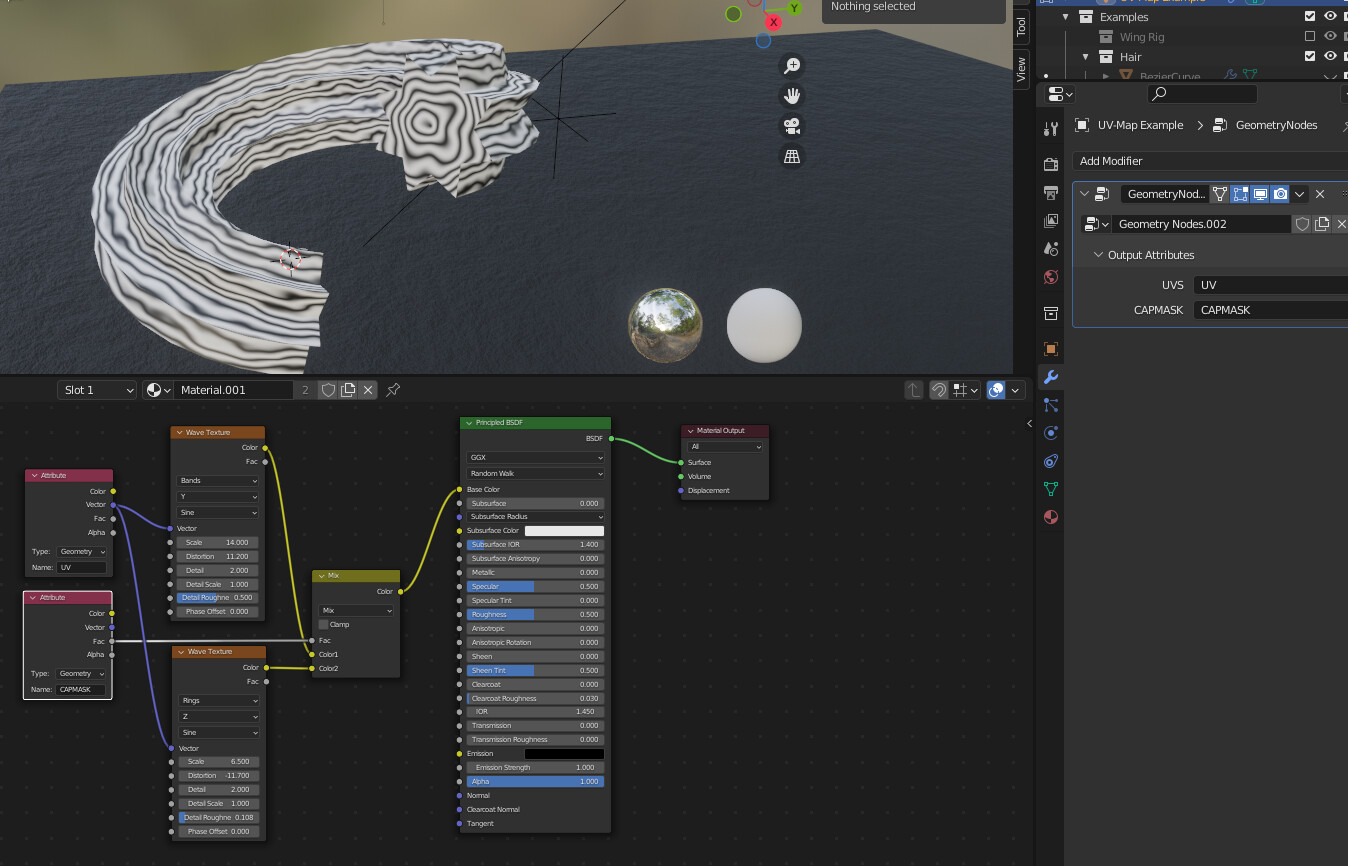
For Blender 3.0 there are workarounds - you can capture the profile’s positions in X-Y 2D and you can use that as a separate coordinate in the Shader Editor. This is generally good enough as you seldom use the same texture for the sides as you do for the caps.
Yes thanks ! Seems a bit simpler than what I thought !
It’s cool that at some point we don’t have to add 7 nodes just to output the UVs
But in the meantime it’s great to have some workarounds !
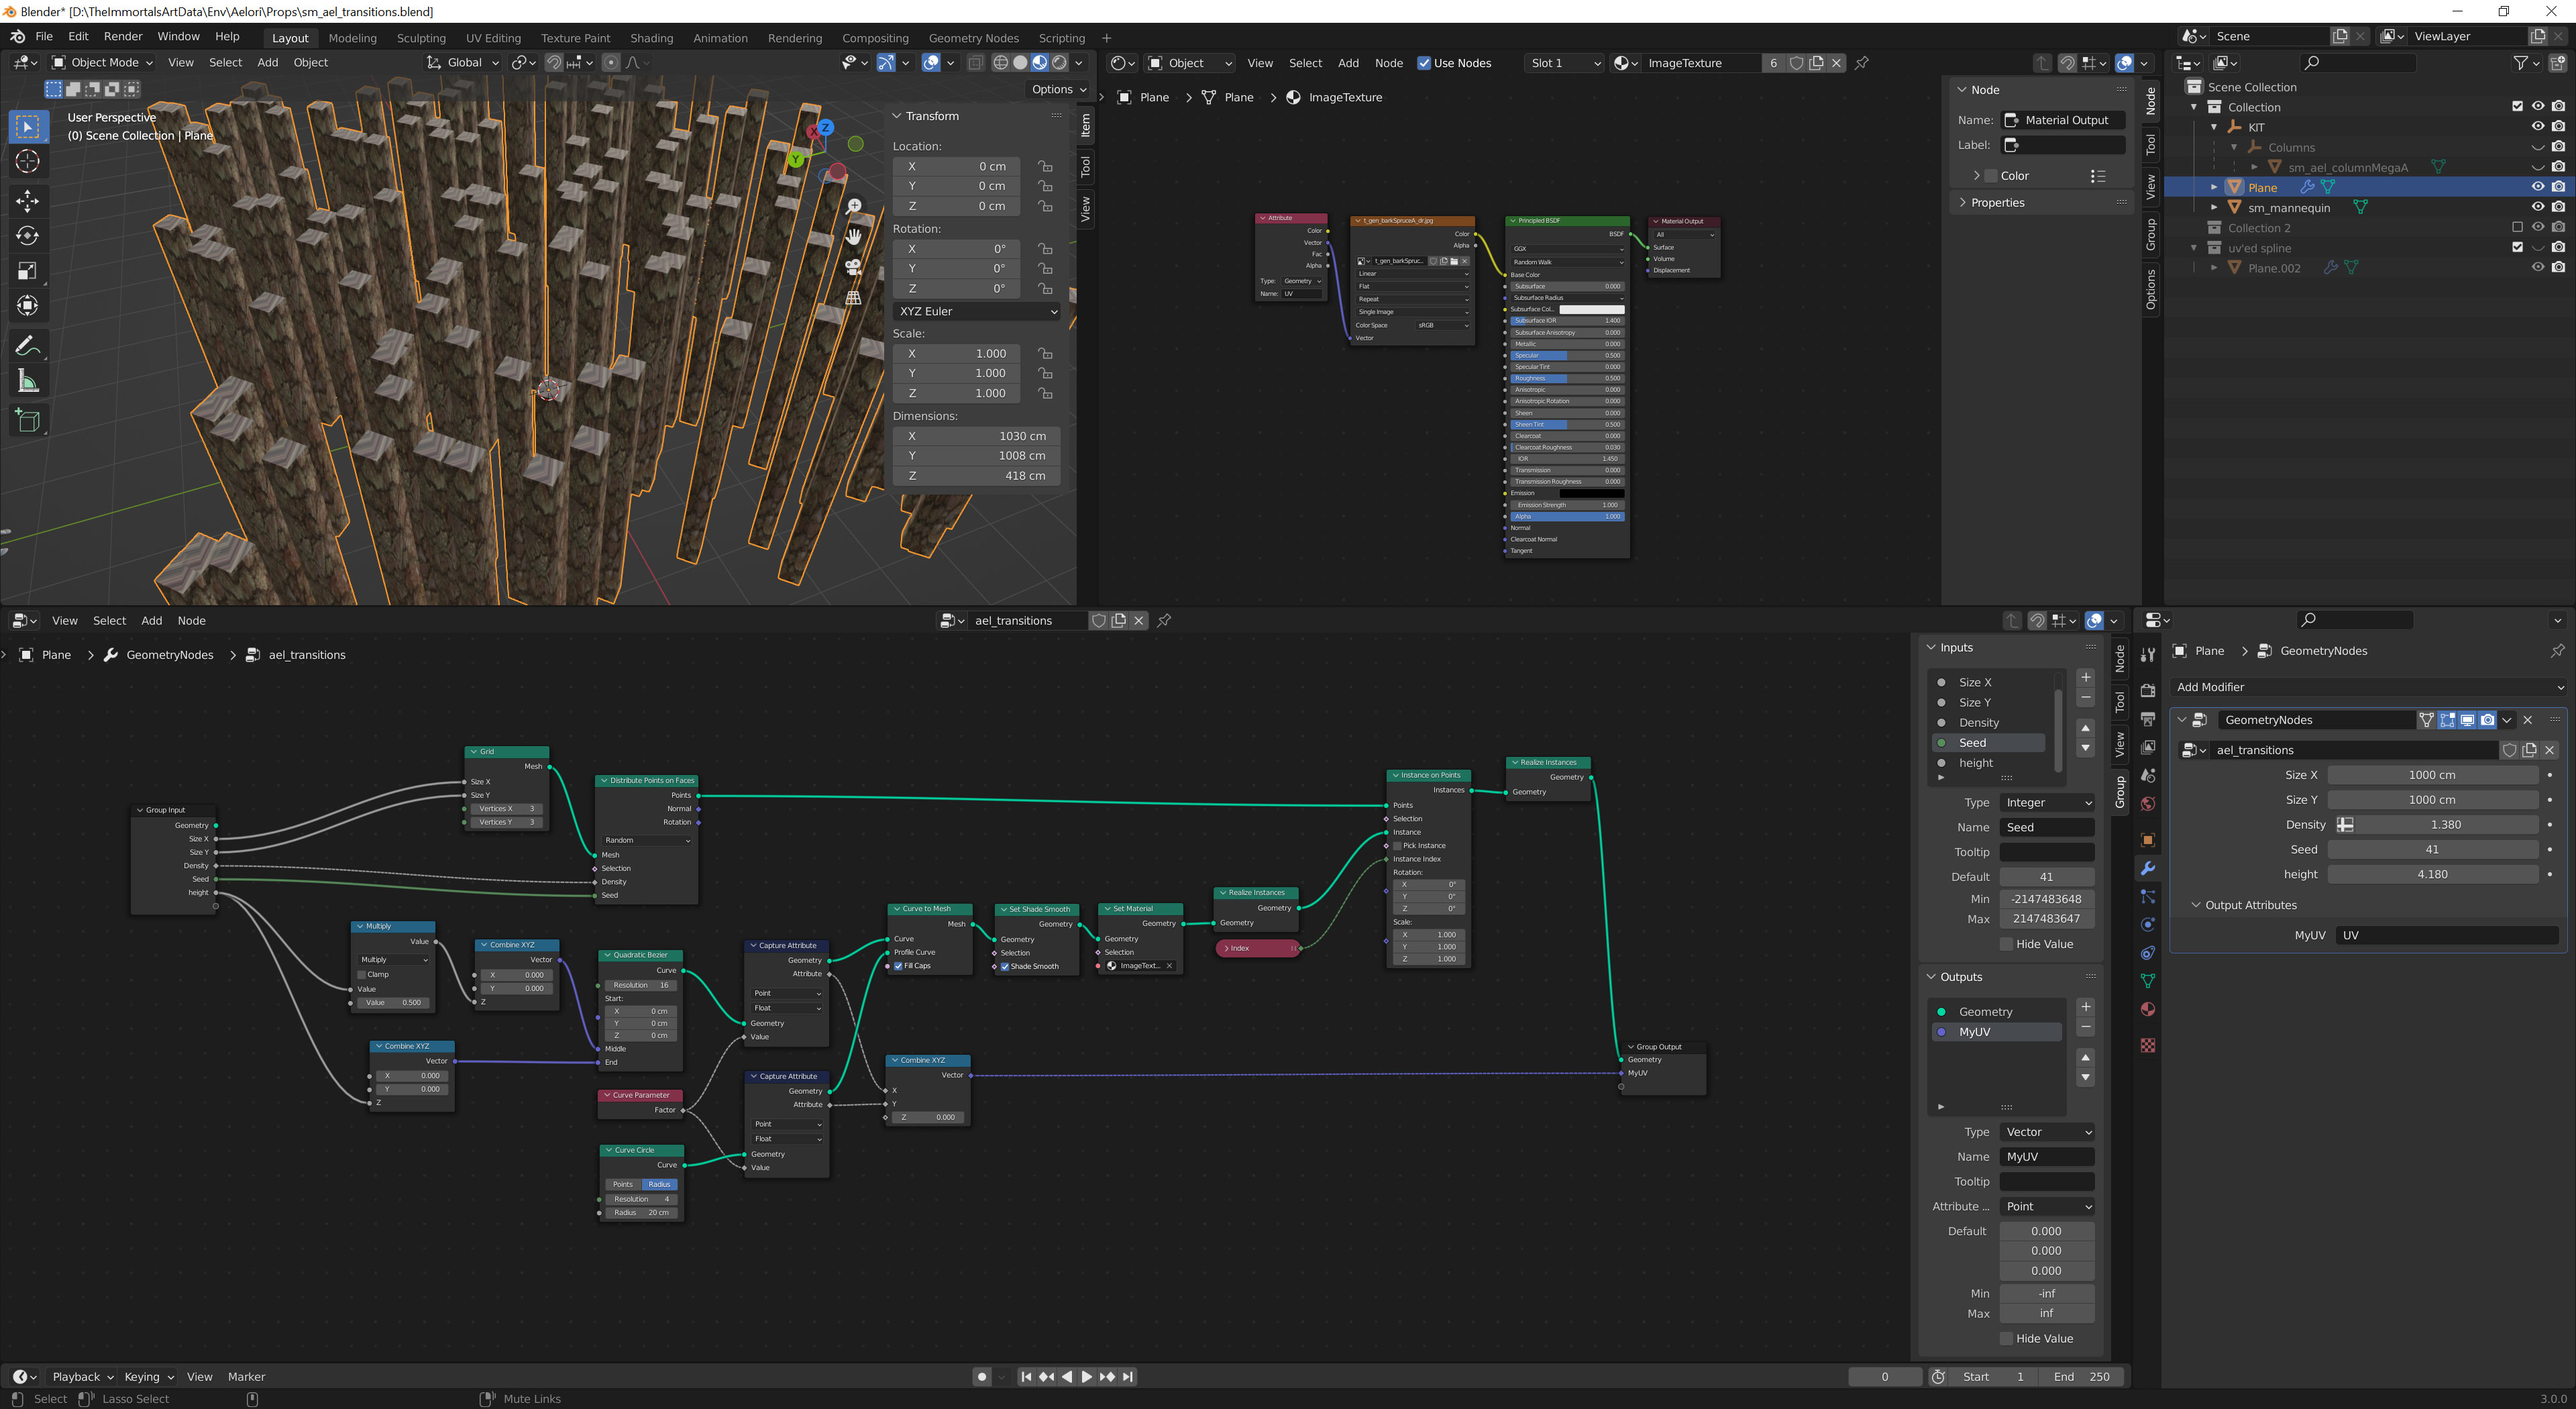
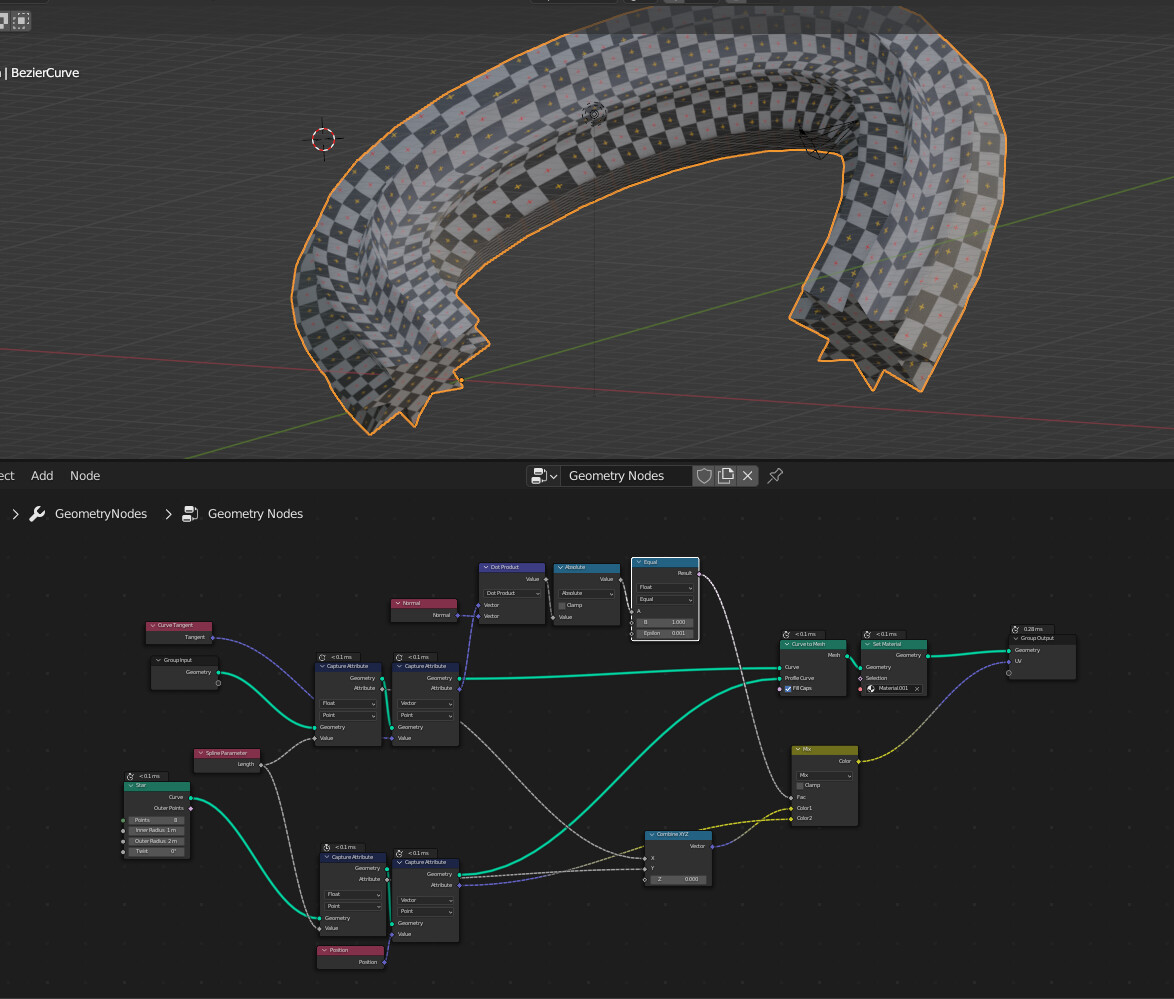
7 nodes… Ha! ![]()
… That’s what the Blender 3.0 workaround for cap UVs looks like
To do something like this:
Yeah, I do look forward to it being easier ![]()
In the meantime, I’ll add UV outputs to all my 3.0 curve-to-mesh node-groups with cap UVs and mask… just in-case it doesn’t make it into 3.1. ![]()
Fill-Curve-3D would be nice also.
2 Likes
Hum, yess @zeroskilz … I was a bit too optimistic…
Here is is the approach I had in mind, a bit simpler but it won’t work for your case…
Curve_Caps_UV.blend (145.8 KB)
1 Like
True - as soon as you disconnect the profile you lose the caps, so you then need to manually reattach them (the whole fill-curve-set-position thing like I had to do…)
No reason why I can’t also mix the UVs tho, the mask should be enough to distinguish coordinates in the Shader Editor, so thanks for that tip
1 Like
Damn ! I forgot about it, now I understand better all this necessary evil !!
It’s fascinating how hard it is to do these simple stuff, but still there is a way by adding an insane amount of nodes…
I don’t know what to think about it… I’ll ask my therapist …
Try this:
1 Like
Nice work! I was exploring another route for disconnecting by resampling the curve to the curve’s domain size plus 1 and then repositioning all points to their original places and the last one on top of the first. worked out well with cyclic curves but it had trouble handling non cyclic curves whereas this method habdles both whit relative ease Had some trouble wrapping my brain arroud how the subdivide curve figures out what to divide, but hei it works…
Anyway this was my attempt at disconnecting curves
gn uv fix blend.blend (703.4 KB)
if anyone is interested 
2 Likes
Yeah, I needed help with that. Lots of tricks rely on the fact that in Blender GN, a Boolean true auto-converts to a 1 or 1.0 (for integers or floats). @Xeofrios pointed out the subdivide trick using the end-point selectors which made the disconnect node-group possible (since the cuts input is a field) - didn’t occur to me before then. ![]()