@moony, Hihihi!!!  basically, it’s just a photon mapper, using a camera to check where the ‘photons’ hit.
@wolfgannn, unfortunatly no video tutorial. I’m still performing tests, and the process is still very clumsy.
anyway here the steps to do it:
1- Make a copy of your scene!! 
2- create a new UVmap for the object that will recieve the caustics (objP). try to keep the affected faces occupying the most of the uvspace. (faces that dont’ recieve any caustics can be placed away, or scaled to 0 at one corner)
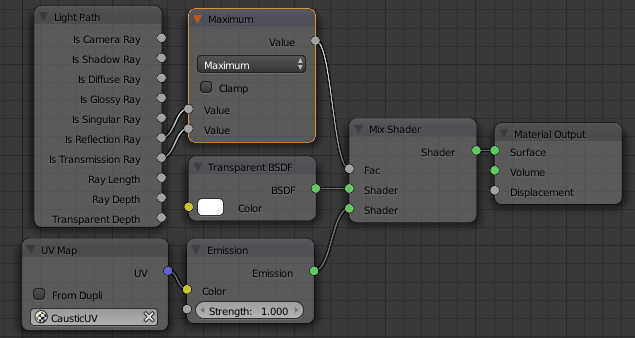
3- create a new material for objP:

4- create two materials for the refractive/reflective object (objR), one with a pure white refraction and the other with a pure white reflection. (the white color is important as we don’t want to change the result color of objP. if you have normal maps, you can use them in these new materials)
Note: you need to render refraction and reflection in separate, and combine both textures in the end.
5- select your camera and add a ‘copy transforms’ constrain and pick your light source. Adjust the render size to render objR completly
6- set your background to pure blue, turn all lights off and hide any other object.
7- render settings are:
samples> 1 (yes!! just one sample!  )
)
no Transparent shadows, no caustics, and diffuse/volume bounces to 0
Film filter to ‘Box’
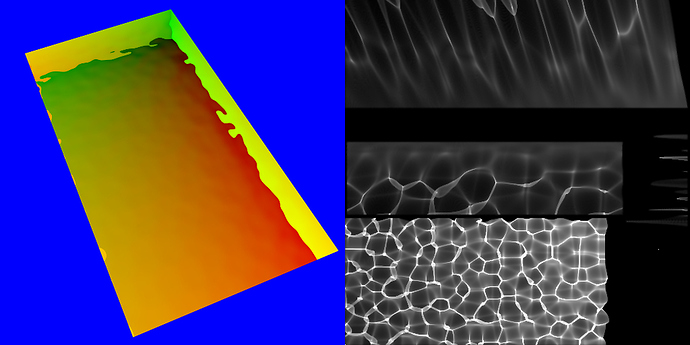
8- render and save at 16bits!
The biggest render the more photons but it will be slower to calculate. In fact, in my first post, the render is 4000*4000, and it crashed python when reading the image.pixels data, with memory problems (done in an old laptop with just 1Gb!!!)
9- create a new texture in the UVEditor
and run the following script to convert the render into an histogram.
Note: you need Numpy installed, and the script is far from perfect as this was just the first test!
And you’ll need to change the names of your textures in the last line!!!
import bpy
import numpy as np
D = bpy.data


def Histogram(imgS, imgT):
    resx=imgT.size[0]+1
    resy=imgT.size[1]+1
    xed=np.arange(resx)
    yed=np.arange(resy)
    destiny=np.zeros((resx-1,resy-1))

    #if there are memory problems, one can do a loop with smaller arrays
    source=np.array(imgS.pixels)
    X=source[0::4]*(resx)
    Y=source[1::4]*(resy)
    H=np.histogram2d(Y,X, bins=(xed,yed))

    stream=H[0].flatten()
    ostream=[]
    for n in range(0,stream.size):

        #I divided the samples count for each pixel by 400 to keep the results away from very big values,
        #but there's definitly better ways to keep the result normalized, or even to take light power into consideration

        v=stream[n]/400

        #there's probably also better ways to do this:
        ostream.append(v) #Red
        ostream.append(v) #Green
        ostream.append(v) #Blue
        ostream.append(1) #Alpha
    imgT.pixels=ostream

Histogram(D.images[your_render], D.images[your_new_texture])
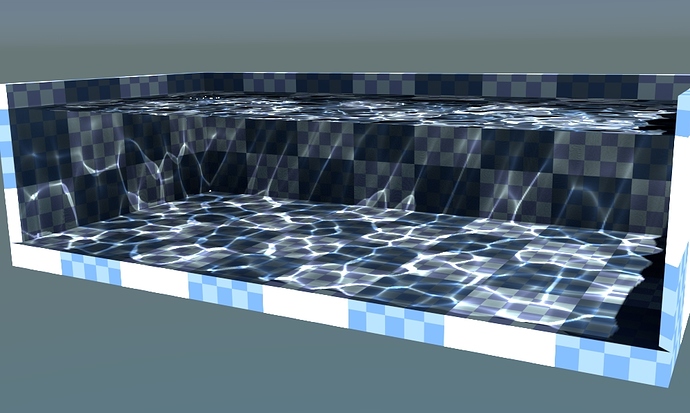
with the result texture, you can mix the original shader with a emission(with the same color as your diffuse)
just don’t forget to use the new UVmap for the Caustic texture.


 basically, it’s just a photon mapper, using a camera to check where the ‘photons’ hit.

 )
)
