Tx Layer

Texture paint with a Layer Structure.

Provides common layer operations in texture painting.

In addition to blend mode, opacity adjustment and basic layer operations, node groups and fill layers are supported.

This version has add-ons from other authors that were the original.
It looks like it hasn’t been updated for a while, so I updated it and added some features.

Download

A free version is also available.
Proceeds will help in the development of this derivative version.

gumroad

Blender Market

Functions

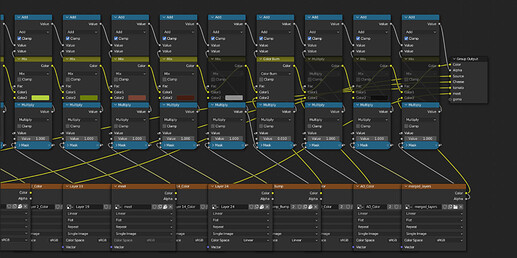
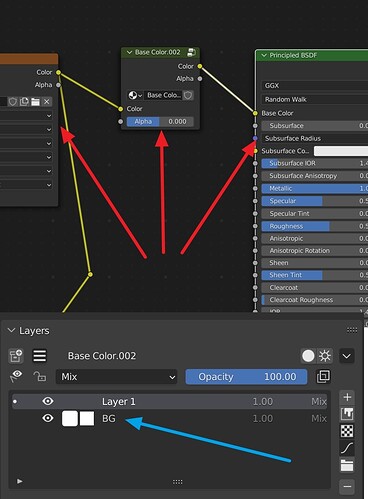
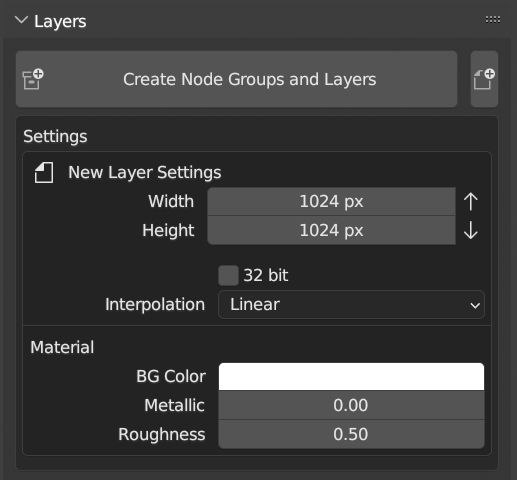
When you create a layer, a group of nodes for the layer will be built in the shader node.
The node structure is automatically adjusted each time it is added or reordered from the add-on menu.

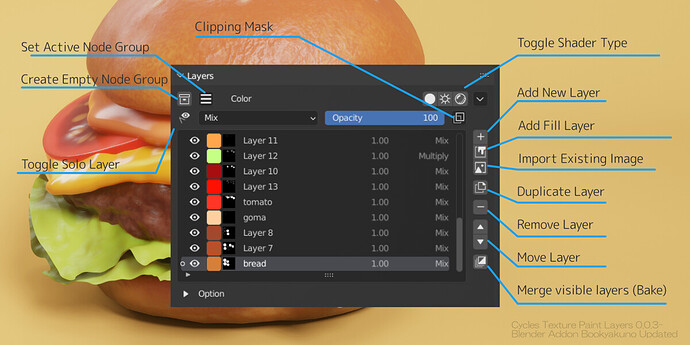
  • Add / Remove / Move layers
  • Blend modes / Opacity
  • Fill Layer (New!)
  • Clipping Mask (New!)
  • Node group support (New!)
  • Solo layer display (New!)
  • Switch to Emission Shader ← → Principled BSDF (New!)

Screenshots

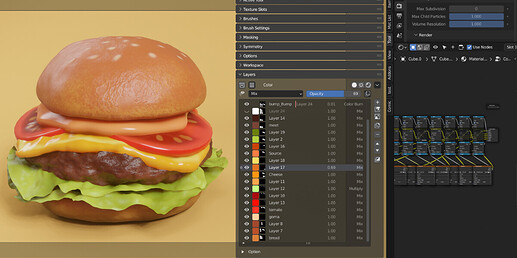
2021-12-30_03h35_13

Support version

For Blender 3.4 or later, please use Tx Layer add-on ver 0.0.53 or later.

(Because the specifications of the Mix node have changed since Blender 3.4, it does not work with versions below ver0.0.52)

Author

  • David DiGioia
  • Alexander Belyakov
  • Bookyakuno (This Version )

Link

old versions.

The original author’s distribution link and older versions can be found in the zip file in this thread.

Documents

bookyakuno.com(japanese)

13 Likes

Tx Layer ver0.0.5 Updated

Added procedural layer and color correction layer, and improved node group.

Renamed to Tx Layer

Renamed the add-on from “Cycles Texture Paint Layers” to " Tx layer ".

Because many features have been implemented and are far from the features of the original add-on.
The other reason is that the name is long and the name “Cycles” is now less relevant with the advent of Blender 2.8’s Eevee.

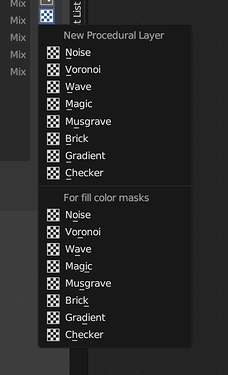
Procedural texture layer

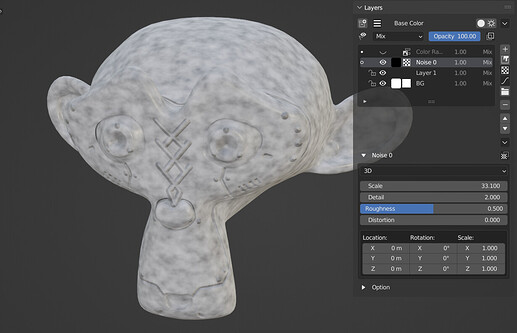
Added a procedural texture layer.
It is convenient to use with clipping mask and color Adjustment.

As with the fill layer, you can adjust the color from the list item left color icon.

(Because it is a texture node, it needs to be imaged with [Combine (bake) display layers] so that it can be edited directly.)

Available texture nodes
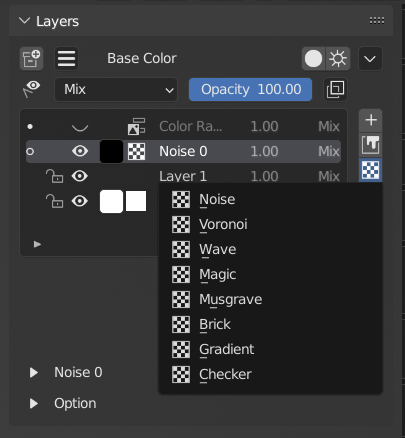
2022-01-11_03h25_56

  • noise
  • Voronoi
  • Wave
  • magic
  • Musgrave
  • Brick
  • Gradation
  • checker

Adjustment menu

2022-01-11_03h26_13

Below the list is a menu for adjusting node parameters.

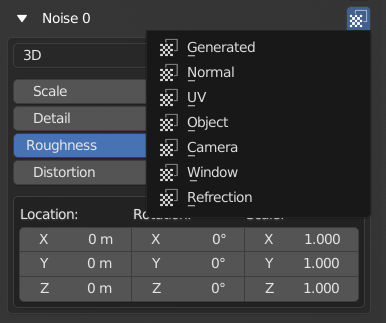
  • You can change the texture coordinates from the icon to the right of the layer name.
    • The default is Generate.

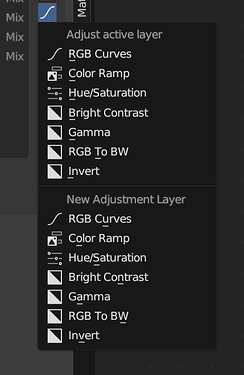
Adjustment layer

Added a Adjustment layer.
Connect the composite result of the layer below the color Adjustment layer to the tone Adjustment node.

Below the list is a menu for adjusting node parameters.

Available Adjustment nodes
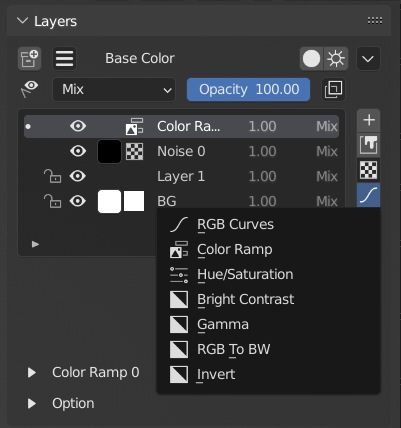
2022-01-11_03h26_04

  • RGB curve
  • Color lamp
  • Hue / saturation
  • Brightness / contrast
  • From RGB to BW
  • Inversion

Change default shader to Principle BSDF

Changed the default shader to Principle BSDF.
This is because the Principle BSDF can create more textures.

Diffuse / Radiation shader switching function

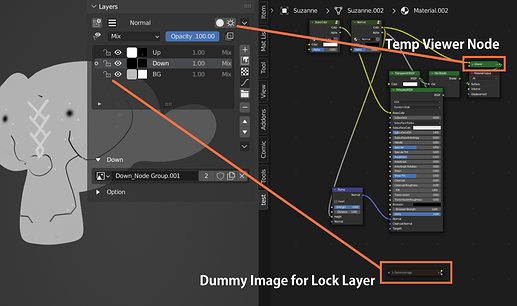
The diffuse / radiant shader switching function has been redesigned to temporarily create a viewer node without changing the main shader node.
Enabled to check the active node group individually.

To restore the viewer node, click the same button again.

Use this to make the diffuse BSDF as before.

Added layer lock option

Added an option to protect layers from texture paint.

specification

Editing is not locked in Blender’s Texture Paint, so I’m using a pseudo method.

Make a dummy image (small 4x4) at the time of selection and select it for the active paint slot each time to avoid selecting the original image.

If you actively select a procedural texture, it will be processed in the same way.

Node group

When creating a node group, a background layer and a normal layer are created in the node group.

Improved to be able to select the connection destination socket

When creating a new node group, you can now select the socket to connect to the Principle BSDF.
You can select base color, metallic, roughness, normal, alpha, etc.

Enabled to select the connection destination of Principle BSDF when creating a node group.
If you do not set the node group name manually, the socket name will automatically become the node group name.

Bug fix

Fixed an issue where when selecting a layer in a node group, undoing would cause the texture slot selection to revert to another texture.
(Every time you select a layer, make the node group in the material’s node tree the active selection)

alpha

If the destination socket is Alpha, set the material setting to alpha blend to disable the backside display.

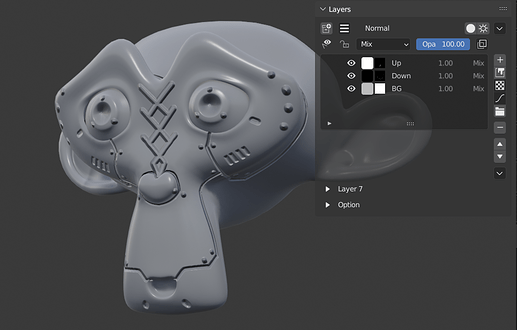
Bump map

If the connection destination socket is [Normal], a bump map will be created and connected, and three layers will be automatically created so that you can write immediately.

Writing to Up makes it exciting, and writing to Down makes it a groove.

  • Up Convex white [Fill layer]
  • Down Black for concave [Fill layer]
  • BG Gray neutral color [Fill layer]

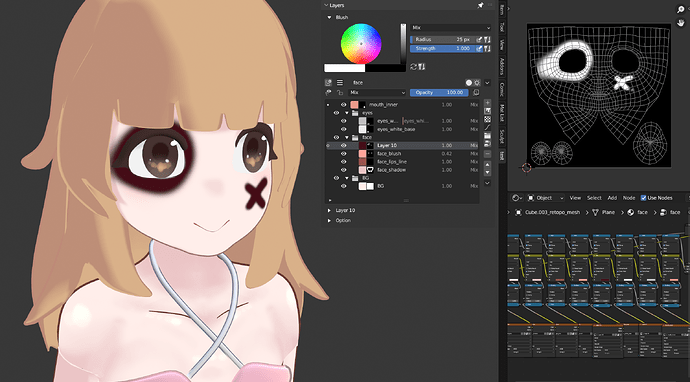
Folder function in the list
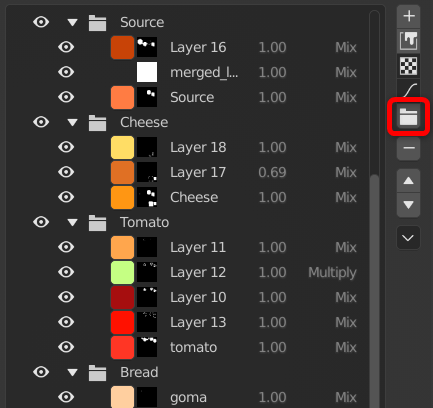
2022-01-11_03h49_16

Added the ability to sort by folders and organize layers.
By switching the eye icon, the display of items under the folder can be switched at once.

You cannot move layers in a folder at once, blend mode, or adjust opacity.

specification

  • This folder is an item only on the list menu. Does not involve the node.
  • Therefore, it does not mean that “there is a layer in the folder”, but that it is a specification that “operates all the things under the separator called folder”.
  • It is similar to the group function in texture paint software, but it is named “folder” to distinguish it from node group.

Improved Bake function for display layers
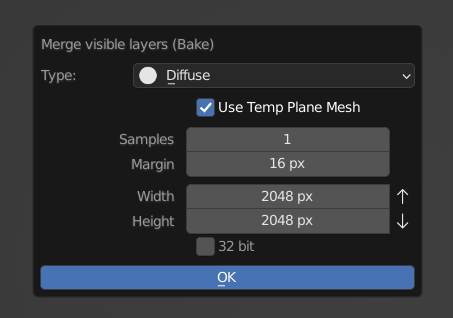
2022-01-11_03h52_43

Added the Use Temporary Plane Mesh option.
Bake all areas of the material by baking with a temporary flat mesh.

Bake with a simple mesh, so the bake time will be a little faster.
You can avoid the problem that normal baking only bakes the area of ​​the selected object.

  • If you are using texture coordinates [Generate] etc., turn it off (especially if you are using procedural textures etc.).
  • This option is not used for bake types such as joins, AOs, and shadows.
    • (Because we need information on the unevenness of the mesh)
  • Not required if all required objects have been selected or if the mesh is originally simple.

others
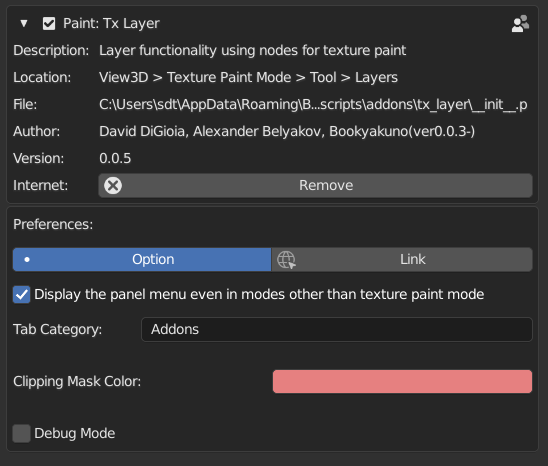
2022-01-11_04h00_27

  • Added an option to display the panel menu in modes other than texture paint.
    • If you want to make a big change in the layer structure, you should adjust it in this panel because you can redo it normally in modes other than texture painting.
    • It is off by default. You can change it from the add-on settings.
  • Added an eraser brush.
    • It is off by default.
    • You can use it by registering the following in the key map.
    • layer_list.brush_set_eraser
    • If the operator-configured circular option is enabled, it will switch to the DrawTex brush each time you press a key.
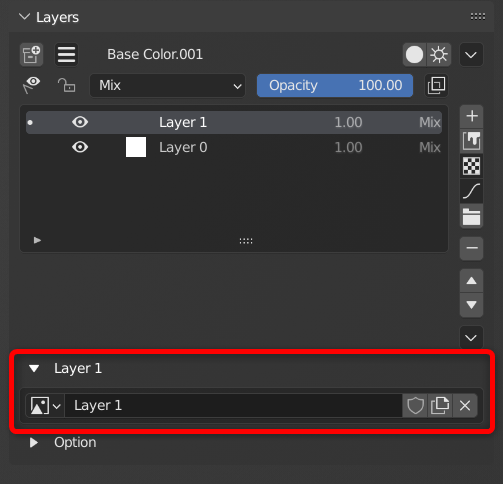
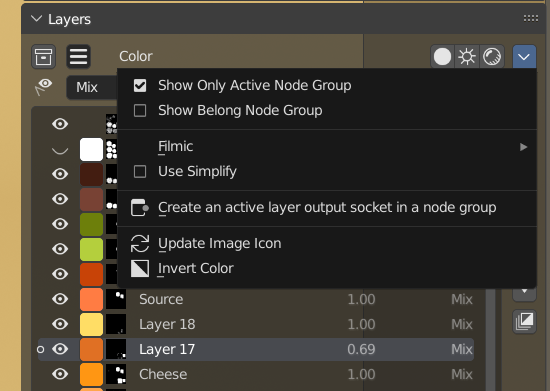
  • Added a layer option menu.
    • You can change the image of the active layer from this menu.
  • Fixed an issue where the opacity value would change slightly each time you switch layers.
    • Made the opacity slider a floating point type instead of an integer type.
  • Increased the positional spacing between the shader node and the layer node.
    • To fit the size of the Principle BSDF.
4 Likes

Thanks so much for this addon! I’ve shared it with all my friends who use blender and they love it.

Unfortunately, since I upgraded to the latest ver0.0.5 I get an error when trying to make a new layer.
I’m using Blender 3.0

IndexError: bpy_prop_collection[index]: index 0 out of range, size 0

Thank you for using it.
Probably the error that occurs when opening the layer made with the old version ver0.0.5.

2022-01-14_03h42_40

I don’t know the exact cause, but recreating a new layer is a surefire way.
Recreate from a new material, recreate the layer, and replace the image with the image used in the old layer.
When reporting an error, it is easier to resolve it by posting the full text of the error.

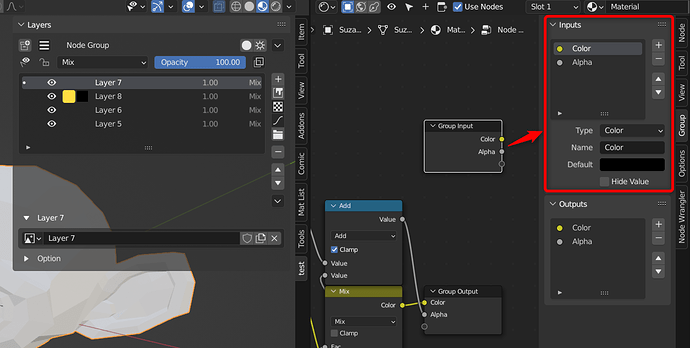
For node groups, add “Color” and “Alpha” sockets

For layer issues in node groups, manually create new “Color” and “Alpha” group input sockets.
(Added an input socket to the node group in ver0.0.5)

Could you add a blend mode specifically tailored for mixing two (or more) separated normal maps? The video is an example, in the comments section there’s a second link for a more precise method (which use Photoshop but it should be replicable within Blender just fine)

Thanks for the addon I’ll donate before downloading it

https://www.youtube.com/watch?v=8ZnpBBD5050&lc=UgxdfIMIcAW0BQ4fqQB4AaABAg

This article is a commentary on how to synthesize a normal map that I created earlier (please translate automatically).
It can be reproduced by multiplication and division with (0.5,0.5,1.0) colors.
(This add-on alone cannot set the image color type to Non Color, so you have to set it manually)

【ノード編集】ノーマルマップの画像を複数枚合成する方法【Blender Eevee・Cycles Render】 – 忘却まとめ

1 Like

@Bookyakuno I really love this addon as it gives you an easy workflow towards layered texture painting. However, I’m experiencing this weird error whenever I try to create a new node group.

I really don’t know what to do every time this happens.

Thank you for reporting the bug.

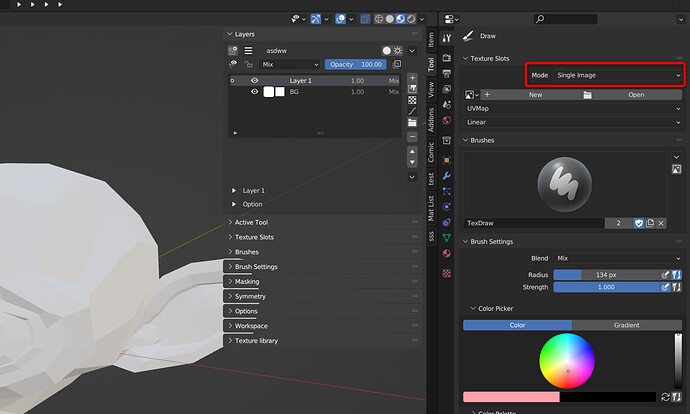
I don’t know your details, but the error occurs when Texture Slots > Mode is “Single Image”.
Change the texture slot mode to “Material”.

1 Like

YES! Thank you so much! It worked. Hoping to see some updates in the future with your amazing addon.

Hey @Bookyakuno
Just started to use your addon, and its simply amazing!!
Some feature still not pretty obvious, but anyway it’s super handy!
Is it possible to implement two features?

  1. Saving options for layers (because if blender crashes, all progress is gone) and saving from Image editor not very handy.
  2. In case if I already have material with diffuse, would be great to generate this nodegroup between image and principled bsdf node
    as well without generating background layer.
    So you can just push the button and start painting overlay above already existed texture

Thank you for using this.

1

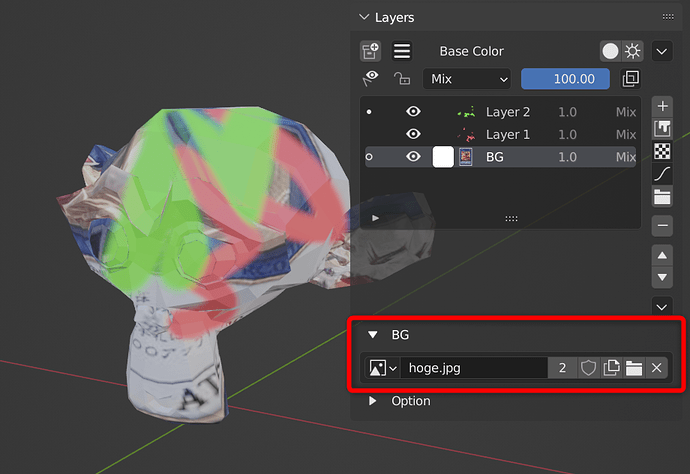
To save the image, press Alt + S frequently with Texture Paint.
Image files are saved (packed) in blend files.

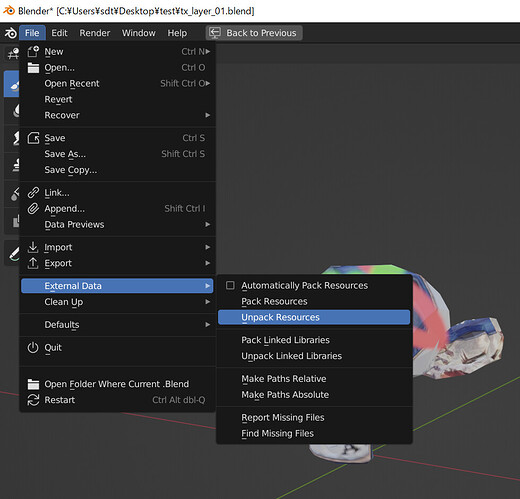
If you want to save the image files as external data in a batch, it seems that you can save them in a batch externally with the following function.

  • File > External Data > Unpack Resources

2

I don’t implement this because I don’t feel it is very necessary.
Basically, texture processing is supposed to be done in the layer.
Add an existing image inside the layer or manually socket it to a node group to hide the BG layer.

1 Like

Thank you for respond and for your help)
According to case two there is some arguments)). It’s perfectly works for one single texture (Probably already baked)
But some materials are not made from scratch, and diffuse not always an image, some of them are library materials with procedural tiling, color correction etc. So in most cases all needed just add some cool hand painted effects, so I am pretty sure that will be very useful)) For sure it’s not a big deal to rebuild this manually, but repeating of this just a bit annoying))

ver0.0.53 Update

Added support for mix nodes in Blender 3.4 and later

The MixRGB node in Blender 3.4 and later is compatible with the new Mix node.
Due to the specification change of this Mix node, the add-on could not be used, so I fixed it so that it works.

As of Blender 3.4, this addon uses the new Mix node.

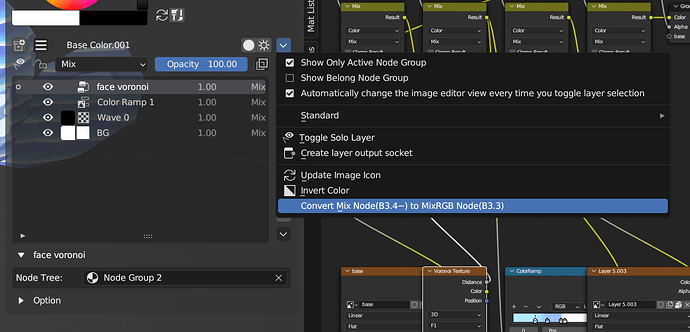
Added conversion function for Mix node

Added a function that allows upward/downward compatibility of created layers.
Convert Mix node (Blender3.4~) to MixRGB node (~Blender3.3).

  • Use this function to convert layer nodes created with Blender 3.4 or later to Blender 3.3 or less.
  • Please use this function to convert rays created with Blender 3.3 or lower to Blender 3.4 or higher.

Added a simple brush setting menu

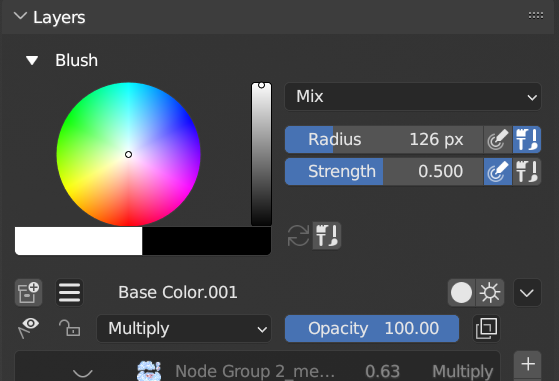
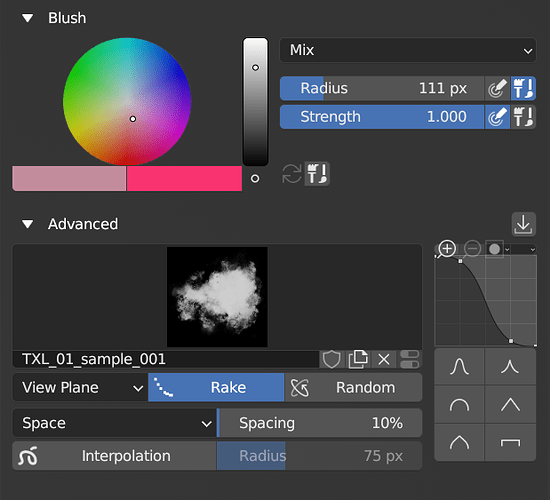
2023-06-16_13h30_59

A simple brush setting menu has been added so that operations can be completed within the add-on menu.

You can change the color circle, blend mode, radius, and strength of the brush.

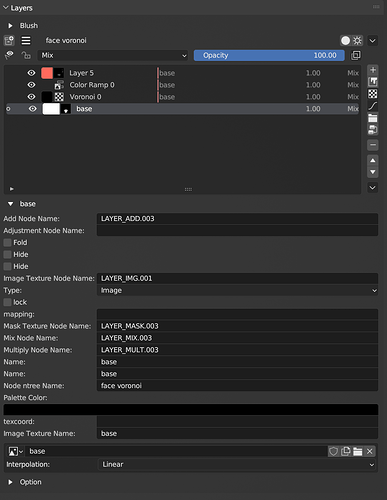
Add Node Group Layer

Added “Create Node Group Layer” function.

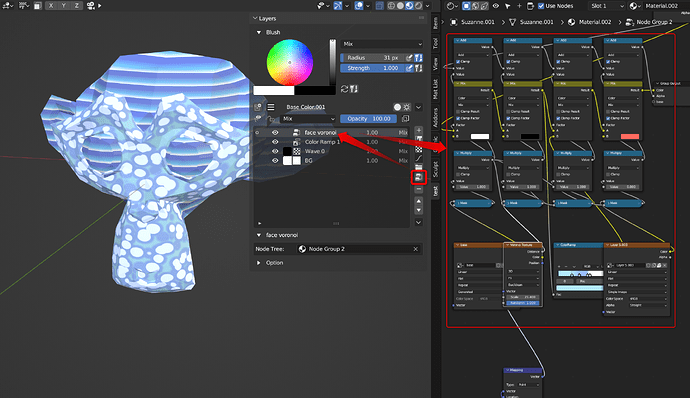
You can now nest another node group as a layer within a layer’s node group.

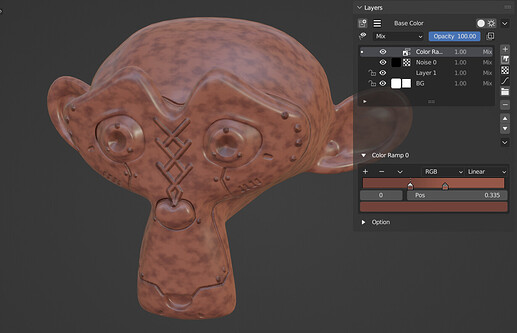
If you want an adjustment layer to affect only a specific layer, grouping them into a separate node group is convenient because you can limit the effect.
(In the image above, only the Voronoi texture is adjusted by applying a color ramp.) You
can make better use of procedural textures and adjustment layers.

  • Clicking a node group layer icon will switch the active node group to it.

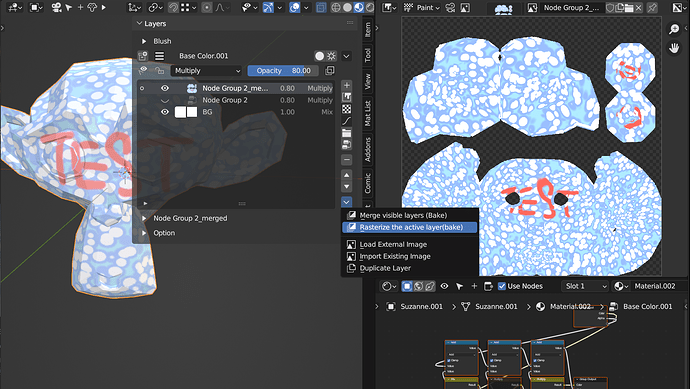
Added function to rasterize (bake) the active layer

Bake only the active layer into a raster image.

Toggle solo mode before baking so only the active layer is visible.
After baking, copy the opacity and blend mode settings of the original layer and hide the original layer.

It is convenient when you want to make a created node group layer into a single image.

Changed

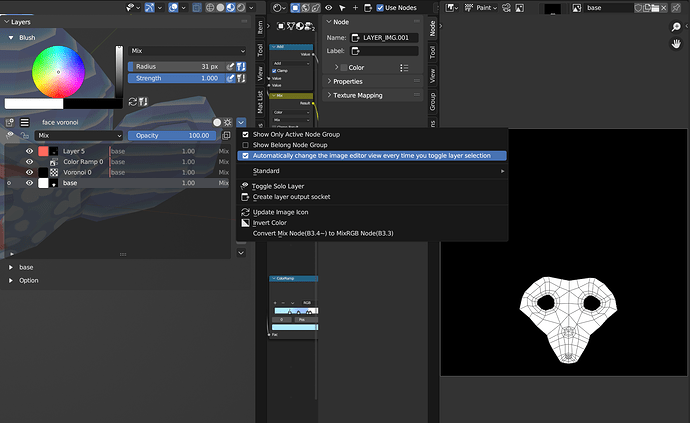
Automatically change the display of the image editor every time you select a layer

Changed the image editor to display the image of that layer when a layer is selected.
You can paint while always checking the active layer.

You can optionally disable it.
You can also display the layer image by clicking the layer icon.

Others

Shading display switching is now done only when creating a layer for the first time.
Previously, it was switched every time a layer was created, and it was not possible to operate the layer with the user’s favorite view.

Bug fix

  • Fixed an issue where deleting a layer failed when using a folder layer.
  • Fixed an issue where, when moving layers, if there was an adjustment layer above the two layers to be moved, the socket connection for that adjustment layer would become incorrect.
  • Fixed an issue where an error occurred when creating a new node group [no link].
  • Fixed the problem that the name of the clipping destination layer displayed in the list may display the name of another node group when there are multiple node groups in the clipping mask.

Others

Enable Add-on Settings > Debug Mode to list settings for the active layer list item.
There is generally no need to use this option.

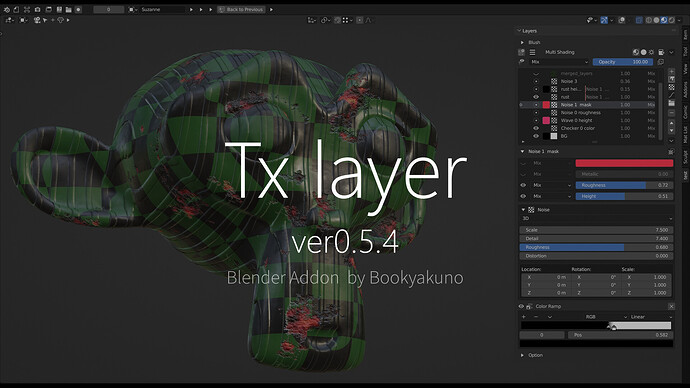
[Tx Layer ver0.5.4 update] Improved to be able to manage multiple channels at once ・Improved adjustment layer [Blender add-on]

sample file

Here is a sample blend file created in the video.
All the data created by the add-on is made of textures and nodes, so you can check it without the add-on.

tx_layer_ver0-5-4_sample_file.zip

Make it possible to collectively manage base color, metallic, roughness, and height in one layer

Layers now have their own base color, metallic, roughness and height channels.
By being able to manage multiple channels collectively, it is now possible to create realistic textures .

Future material creation can basically be completed with only one node group layer.

  • If you select [Multiple Channels] (default) when creating a node group, all these textures will be connected to the principle BSDF.
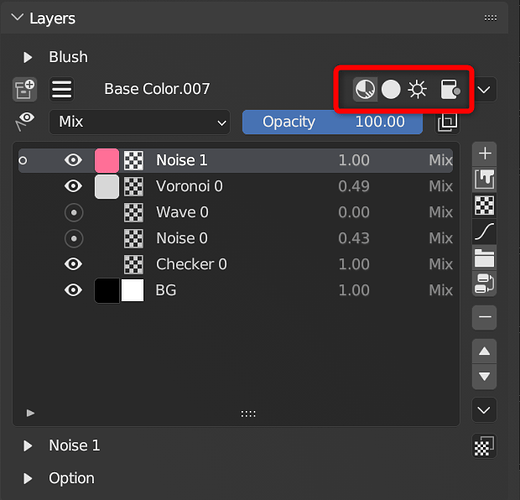
  • The eye icon in the layer list is displayed only when the base color is hidden.
    • Even if the base color is hidden, if other textures in the layer are displayed, they will be displayed with the ◎ icon.

Direct adjustment layers that affect only the active layer

Added an adjustment layer that affects only the active layer .
Makes it easier to process only specific procedural layers with adjustment layers.

  • Duplicate layer does not support direct adjustment layers.

New procedural layer Procedural layer for fill mask

The new procedural layer affects the color of the procedural itself.
Useful when you want to create colors by using procedural and color ramp together.

The fill color affects the fill mask procedural layer .
(Same behavior as the old version)
Useful when you want to use procedurals as masks.

Shader type switching function

In the viewer function that changes the shader to be displayed, the active state can be selected from three types: principle, diffuse, and radiation.

  • Principle: Shader with multiple texture settings available (default).
  • Diffuse: A simple shader without gloss.
  • Emissive: shader without shadows. It is convenient to check the texture itself.
  • Toggle Channel Socket: Change to shader without shading and toggle channel socket. It is useful for checking individual textures.

Alpha related improvements

Improved the inconvenient point in the operation related to alpha.
It is now easier to create textures using alpha even with only [Base Color] without using the [Alpha] node group.

  • Added the [Perform transparent material settings] function.
    • Alpha-blend, alpha-clip shadows, and disable backface display.
    • Accessible from the Other menu.
  • Add nodes that inherit alpha are now shown/hidden when showing/hiding layers.
    • Alpha was not affected by showing/hiding layers.
  • When creating a node group, the background below the layer structure (the default value of the node group’s input socket) has been changed from white to black.
    • When drawing a layer that uses alpha, the outline of the picture will be white if the background is white.
  • In the shader type switching function, the alpha of the node group is now displayed even in diffuse
    • Alpha node groups are not reflected.
  • Changed the shadow mode in the material settings to alpha clip when creating the [Alpha] node group.

addition

  • Added [Delete node group] function.
    • Delete the layer list and node group used in the node group.
    • (Not completely deleted from within the Blend file)
  • Added [Clean unused data (images, node groups)] function.
    • Delete data (images and node groups) with 0 users from the Blend file.

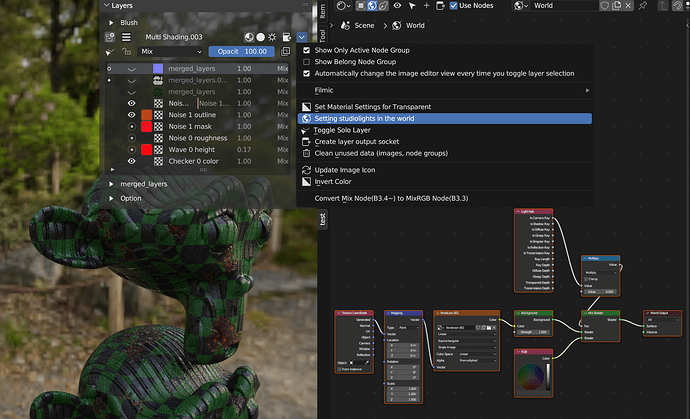
Ability to set studio lights in the world

Set lighting with a panorama image.

Since panorama images are built into Blender by default, the following folder is opened by default.
(C:\Program Files\blender\3.5\datafiles\studiolights\world)

option

  • Remove old world nodes
    • Delete all old nodes beforehand.
  • Shown in the background with studio lights
    • Turn it on if you want the studio light image to appear in the background.
    • By default the background is set to a solid color.

others

The addon version notation has been incremented by one digit (to make it easier to notate minor updates in the future).

  • The add-on panel menu is now always visible.
    • Because it can now be used for purposes other than texture painting.
    • It will appear in the “Addons” tab.
    • You can disable it in the addon settings.
  • In [Combine visible layers (bake)], the [Use temporary planar mesh] option is turned off by default.
    • Baking often wants to bake a procedural texture whose coordinates are [Generate].
  • [Add Node Group Layer] has been moved to the Other Add Layer menu.

bug fix

  • Fixed the problem that the target layer becomes invisible when the target layer uses a clipping mask in the solo display switching function.
    • In that case, I also made the layer used for the clipping mask visible.
  • Fixed an issue where [Duplicate Layer] for procedural layers could not be performed.
1 Like

Thanks for the update!
It seems you forgot to add the ver0.5.4 to the Gumroad library. Thanks

sorry I missed it.
I fixed it now.

1 Like

Thanks, found it! :pray:

Tx Layer ver0.5.5 update

Enhanced brush-related functions / Added eyedropper tool for picking correct colors / Bug fixes

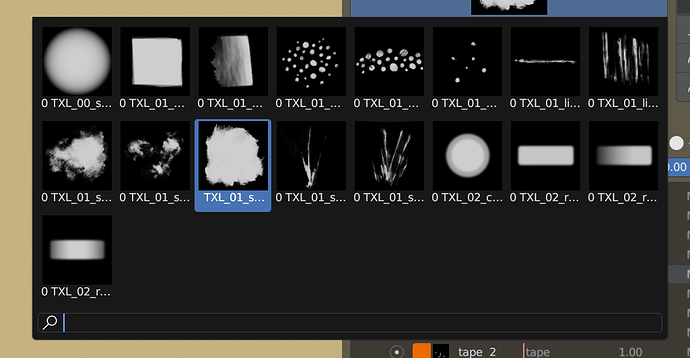
Batch loading of brushes and a compact brush detail setting menu have been added. A brush texture has also been added so you can start painting right away.

We’ve also enhanced other related features needed for painting, such as the eyedropper tool to get the correct color.

Tx Layer improves the workflow for texture painting as a whole, not just layers.

Brush-related enhancements

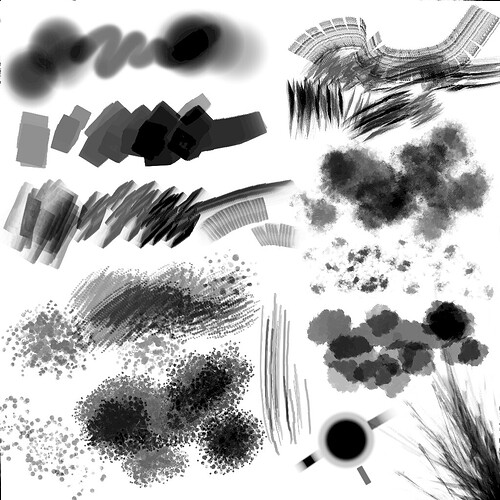
Added brush textures for instant texture painting.
It’s in the brush in the addon folder.

The brush texture is made by myself.
Redistributable and commercial use is allowed.

The brush itself is also available at the link below.

[FREE] Brush texture set [for Tx Layer Blender Addon]

Brush advanced settings menu

Added brush detail settings menu.
Only items that are frequently used are grouped together for easy access.

How to use brush settings

When using brush textures, use the brush settings as follows.

  • [Stroke method]
    • Basically [view plane]
    • When using a bump map, use [ Anchor ].
  • [rake ]
    • Basically enabled.
    • The texture rotates along the brush.
  • [random]
    • For scattered textures like dots, enable Random.
    • By not using [Random], you can create a different stroke brush.
  • [space]
    • Basically 10%.
    • If it is 1%, the brush drawing will be heavy, so keep it at around 2 or 3% at the lowest.
    • If the brushes are too far apart, lower them.
    • For dark brush textures, I sometimes intentionally set it to 20% so that the details don’t get crushed.
  • Attenuation (right curve)
    • If you want to create a texture, basically set it to [Constant ( 冂 icon)].
    • If you want to soften it, set it to [Smooth].
    • If you want a soft brush, weaken the left point of [Linear] to 10% or less.
  • Compensation (Stroke Stabilization)
    • It is necessary when you want to draw a clean line.
    • Otherwise, drawing will be delayed, so it’s basically unnecessary.

Bulk load brush textures

Added a function to batch load brush textures.
Saves the trouble of loading each image as a texture.

Loads the images in the specified folder as brushes.

By default, the addon’s built-in texture folder is loaded.

  • Option to pre-remove brushes without user
  • fake user option

Added eyedropper feature to [get correct diffuse color]

Samples the color of the final result minus lighting.

Blender’s built-in eyedropper tool only allows you to get the final result, including the colors or lighting of the one image being edited.
This add-on eyedropper tool allows you to get the final result of layer compositing without lighting shadows.

Get accurate colors by temporarily switching to diffuse display.

  • Image Texture Paint Mode > Alt + C

Bug fix for [New Layer] when creating a new layer structure

2023-06-23_01h26_51

  • From ver0.5.4, when creating the first layer with [New Layer], an error was output and it could not be used.
  • This corresponds to shading display switching.
  • This corresponds to channel display switching.

Changed the name to [Create layer in immediate node tree (legacy)].

This is a feature from older versions and is now deprecated.
It is recommended to use [Create node group and layer].

Improved baking

  • Temporarily reverted to Principle BSDF when shader display is Emission/Diffuse.
    • (Because the radial display is only a temporary display state)
  • Added option to switch to Diffuse BSDF when baking Diffuse type.
    • (because the colors change if you are using SSS in your principal BSDF)
  • Separate resolution setting in bake from resolution setting in layer settings.

others

  • In [Create node group and layer], the pop-up menu is not displayed when creating for the first time.
    • Basically, the [Multiple channels] setting is sufficient.
  • At the bottom right of the brush color circle, a [○] button has been added to change the current color to white.
    • Useful when drawing black and white masks for fill layers.
3 Likes

Wow, another fantastic update! Yesterday, when using the previous version, it was a bit inconvenient to set up a texture brush outside of the add-on - now you implemented texture brush features inside the add-on - thanks!
Eyedropper - nice!

Eraser brush:
After registering, the toggle via a shortcut key works fine and speeds up the workflow!
Could you add an alternative option to keep the current brush texture instead of switching to the circular one? Having the two options would be great, thanks!

1 Like