Wonderful tool. Thank you for sharing it with us.
hi!, i have a problem always that i use HairNet, happen this:

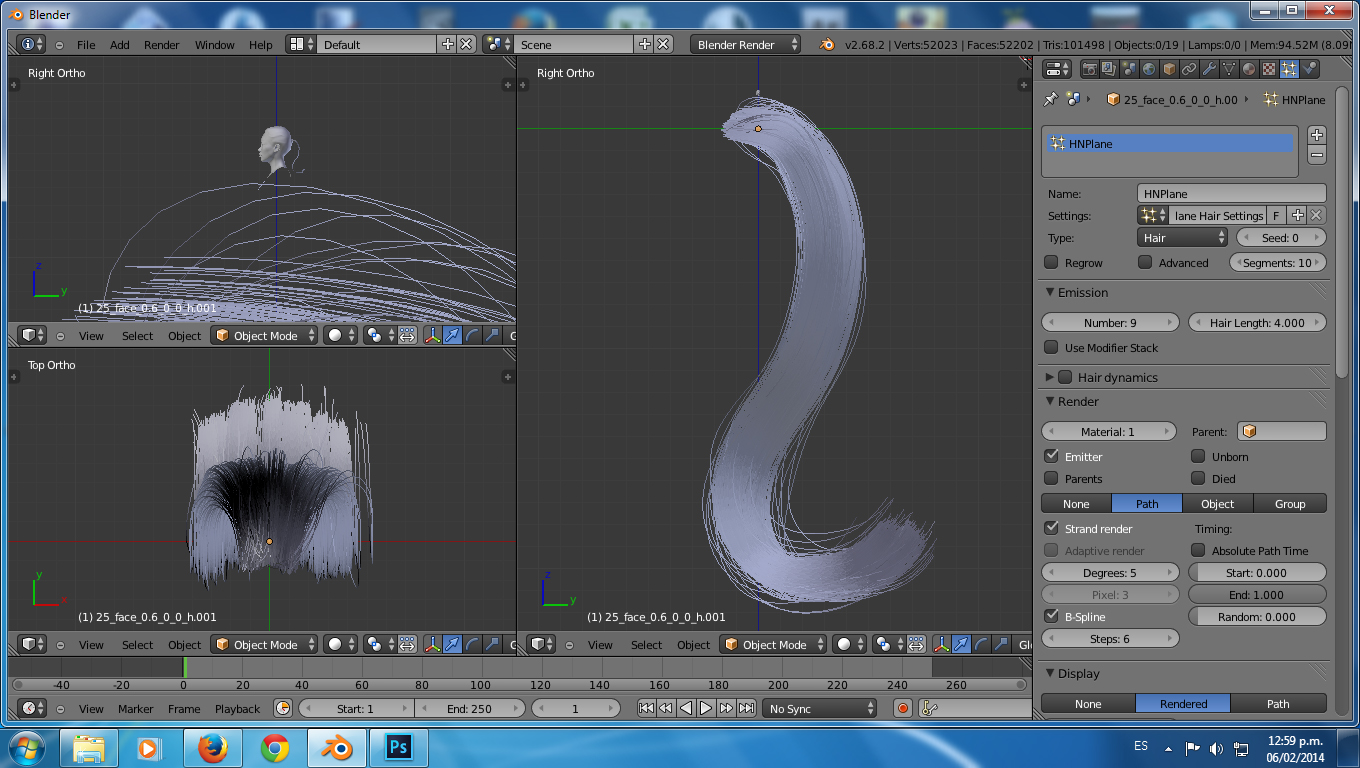
Please help me, i don´t know why i´m doing wrong 
@lishaoran00 my guess is that the scale of the hair object is different from the scale of the head object. If you select the hair mesh in object mode, press control-A, and apply scale, it should work better. Applying the location will probably help, too.
This same problem has held up several people so I will make some time to update the script so it can accommodate object scales. Or at least notifies users of the issue.
Thanks You!!! now works perfect 
Amazing tool!
your script is really usefull but the problem is to create the polygon hair the easiest as possible make polygon hair take a lot of time
I totally agree I wish we could go from hair guides to flat poly double sided normal hair easily. This would save me tons of time from extruding faces and pulling edges and rotating faces to get thing right.
I’m glad to see something like this isn’t just limited to maya users. I had a hard time finding this.
Same for me !
Maybe with gooseberry.
@jdcooke2010
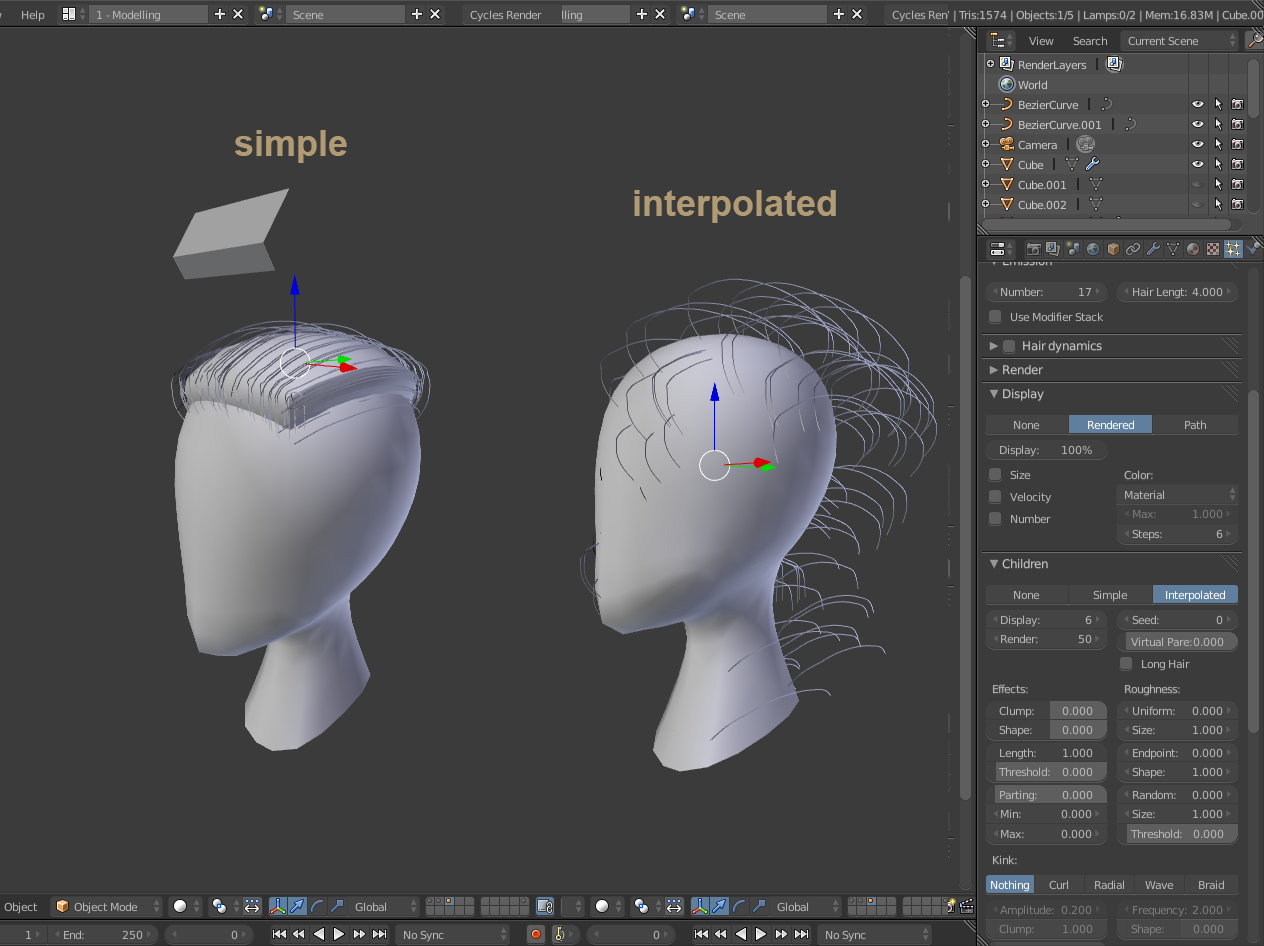
I followed your advice to use interpolated hair but does not work for me, I don’t know what I’m doing wrong can you create a video of how to do it properly please if you can of course and thanks
Wow, Jandals, This is one badass script! Wizardry!
Thanks so much on sharing this, you rock!
Here’s a quickie I’m doing on the fly testing the script. I can’t even begin to think how long this would take me to create without your script. I hope the guys at BF are taking note at this script when they get to upgrading the hair system.

Hey @kakachiex2, can you tell me how far you’re getting? Are you able to generate hair?
Keep in mind that even if you remember to apply ‘rotation’ , ‘scale’ and ‘location’ to ALL your objects the results can be confusing - you may have to turn off children, and set the display>“steps” to something higher than 2.
Also, there appears to be a slight bug in the “Add Hair From Curves” function in that you’ll get an error if you create a curve object before creating your skull object.
i use geometry mesh and i generate the hair without any problem the problem is wen i select interpolate child option the hair get out of the root
Excellent. OK here are the steps I take once a hair system is created…
-
Set children to “none” and then set display > “steps” to 4 or 5 - so I can see what I’m doing.
-
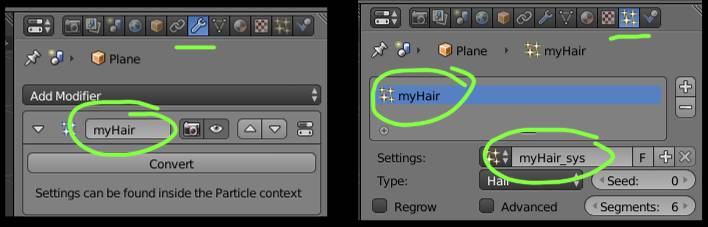
Next, I give the system a unique name in all relevant fields - ie: in the Modifier window, and the Particle window
- Now, before I can do ANYTHING else, I switch from “Object Mode” to “Particle Mode” and apply the smooth brush (set to 0.001) to the hair particles themselves - A single touch of the hair often is enough.
(The above step is VERY important!!! - without it, your hair will go CRAZY when you try to change any other settings.)
-
exit “Particle Mode” and SAVE my work !!!
-
I go back to “Particle Mode” and inspect the hair particles - I’ll often move hairs around, adjust where the root is or delete some hairs completely.
-
Time to “anchor” the hairs… using a simple plane object with one of the edges marked, I select it, then select the “skull object” ( or target surface) and then press “Add Hair From Sheets” - a new hair system is created - I immediately delete this new system and forget about it.
Anytime a new hair system is create it has the effect of “anchoring” all previously created systems - as a consequence EVERY time you add a new hair system to a target surface, ALL other hair systems on that surface need to be visible or else they may get deleted. IMPORTANT!!!
That’s about it - from here on out, your hair is at the mercy of Blender’s charm.
Final note: I’ve found that the “anchoring” step isn’t just for when I use Hairnet, but anytime I use “Particle Mode” the hair may need to be “re-anchored” before it behaves exactly as expected. Something to keep in mind.
take care

@jdcooke2013
i have follow all your advice step by step and i don’t get it to work with interpolate option i see the first particle anchored but wen i select interpolate it get crazy i’m using blende 2.71 and buildbot for testing and thamks for you’r help
here is my blend file if you have the time to test you will find in layer other test.
http://www.pasteall.org/blend/30744
Hey kakachiex2,
I took your file to try it out.
Pretty much followed jdcooke2010 instructions + adding your vertex group to Density.
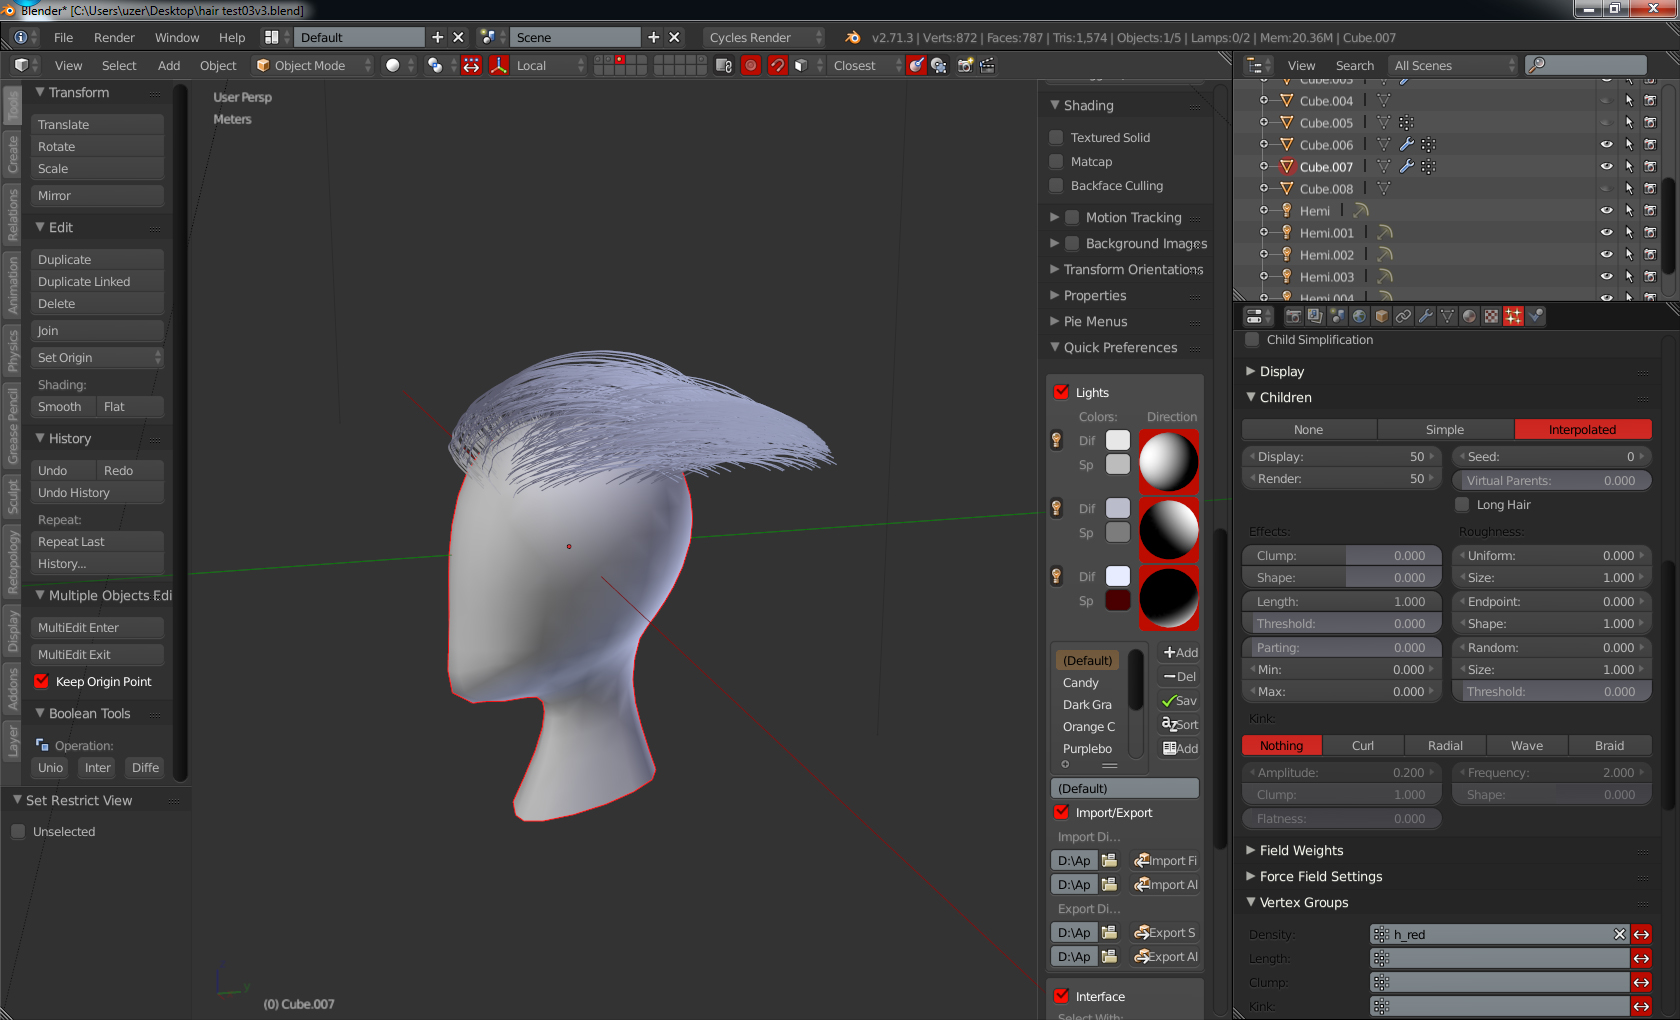
The file:
http://edge-loop.com/images/blender/hair%20test03v3_02.blend
BTW jdcooke2010, that’s a nice find how to hack around the Interpolate bug in blender. The Interpolate function was useless to me before this.
hey kakachiex2,
It looks like you missed step 3. you’ll know you’ve completed it when the “Free Edit” button pops in.

good luck
@orAmgE
i open you’r test and all the child particle are away from the parent root it looks better than mine because you use a vertex group as a density but its not correct here is you’r test enter particle edit mode and you will see the problems

@jdcooke
the file i upload have only the particle hairnet only for you to test the step but i did all the step correctly and don’t work for me anyway thanks for you’re help i will continue testing
Hey, how goes development for this? Any news or progress?
It looks like I have missed a few conversations here. JDcookie, thanks for all the posts you’ve made. I’m grateful to see the help you’re giving to other users. Seeing how you use the script is also very helpful to me as I work through where its shortcomings are and where I can make improvements.
Auuman Anubis, I just started making some more changes to how the script handles multiple hair objects. I would really like to add an ability to subdivide the hair proxy objects but I can’t guess at how quickly (or slowly) that will progress. I’m also a little wary about the next major Blender release because hair systems are getting some big changes. It doesn’t sound like anything that will directly interfere with HairNet but I won’t know until the changes are released. So development is still going on, albeit slowly.