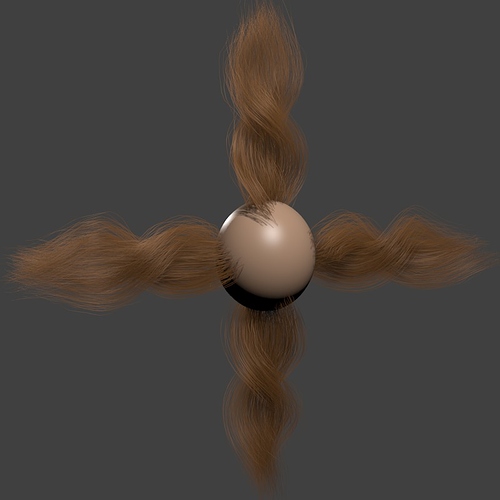
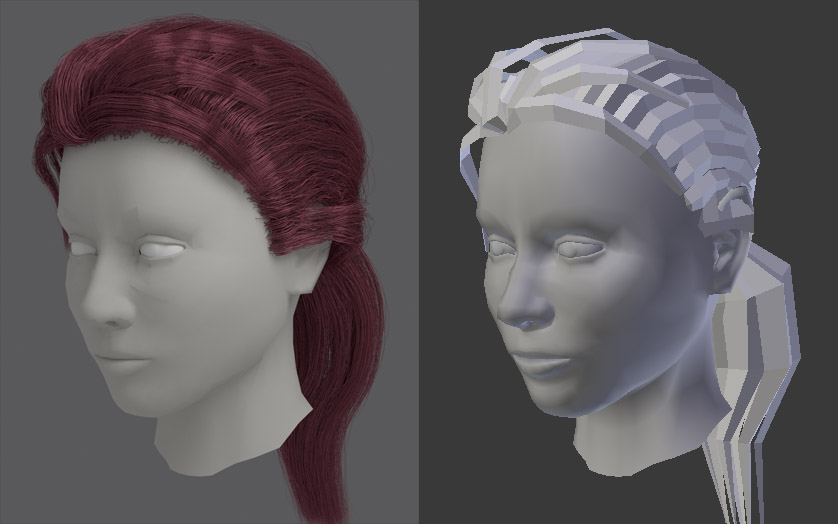
Hair guides created from mesh objects

I have written a script which can use the edge loops of a mesh object to create guide hairs of a hair system. The idea is that mesh modeling tools can be used to sculpt the general shape of a hair system more quickly than it can be done in particle mode. The hair mesh can also be a reusable starting-point or a backup of a hair system.

Its wiki page outlines some of its limitations and weaknesses so if you want to experiment with it head there. You’ll have to go to the tracker page (attachments tab) to download the plugin.

https://en.blender.org/index.php/Extensions:2.6/Py/Scripts/Objects/HairNet

http://projects.blender.org/tracker/index.php?func=detail&aid=35062&group_id=153&atid=467

The attached example blend file will, hopefully, demonstrate how to set things up for the plugin.

At this point it’s best to use the script in an experimental capacity. Part of its process requires that it delete existing particle systems, which seems tricky to manage via python. So I don’t recommend using it in a blend file where you’ve invested lots of time into particle systems.

Update Feb 8 2015 It’s been a long time since the last update. Version 0.4.9 introduces some workflow changes:

*Multiple hair proxy objects can be processed at once.
*Hair can be created on either a head-object or on the proxy mesh itself.
*There is a “Master Hair System” field which lets users copy hair settings from an existing hair system.
*Additional hairs can be generated in between mesh edges.

In some cases, the code creates extra named copies of hair settings (settings.001, settings.002 and so on). All the unused settings get cleared out upon saving and closing a blend file but the names get a bit messy.

The instructions on HairNet’s wiki page do not cover version 0.4.9 so users will have to do some experimenting until it gets updated.

Attachments

HairNetExample.blend (1.12 MB)

27 Likes

this is a great script! I was really hoping for something like this in blender, thanks a lot! Will give it a try as soon as I can!

Thanks a lot! :slight_smile:

That is some badass starting point for something bigger!, very nice job man, but can I suggest something?..well you should use some screenshots of what your script does, because with no images a lot of people overlook your awesome work…This must continue :slight_smile:

I love this! thank you so much, I intend to make good use of it… :slight_smile:

Whooo hooo ! a twisty test !


Thanks for taking a look. I took a little time to add a couple of screenshots to the original post but I’m also glad to see that the script works for someone besides myself :slight_smile:

wow, helpful! remember me the Maya system. Really cool!

it’s very cool,haha,thanks

Seeking a picture or video tutorial:yes:

It’s nice to see your render Images.
I downloaded “HairNet.py” and Installed. After I just open your file, It’s not working properly. Please help me to Learn more…

I haven’t seen something this impressive in a long time. There was once a script similar to this that was made a long time ago.

dude. DUDE! This is riduculously awesome.

1 Like

This looks like a great workflow enhancement - I’ll give it a whirl on my next “Hairy” character

The wiki page (link in the original post) now has a pictorial step-by-step and a link to a video which shows the basics. Both are rudimentary but I hope that they will be helpful until I can take time to make improvements to the plugin and to the demonstration.

mmmmm I cannot see the download in the pages you linked… where is it?

Bernardo, the plugin file is on http://projects.blender.org/. You have to click the “attachments” tab at the bottom to get to the download link. I added the direct link to the original post.

Wow! this is great, thank you very much for sharing, Jandals !

Thanks… didn’t notice that, but it was quite easy :smiley:

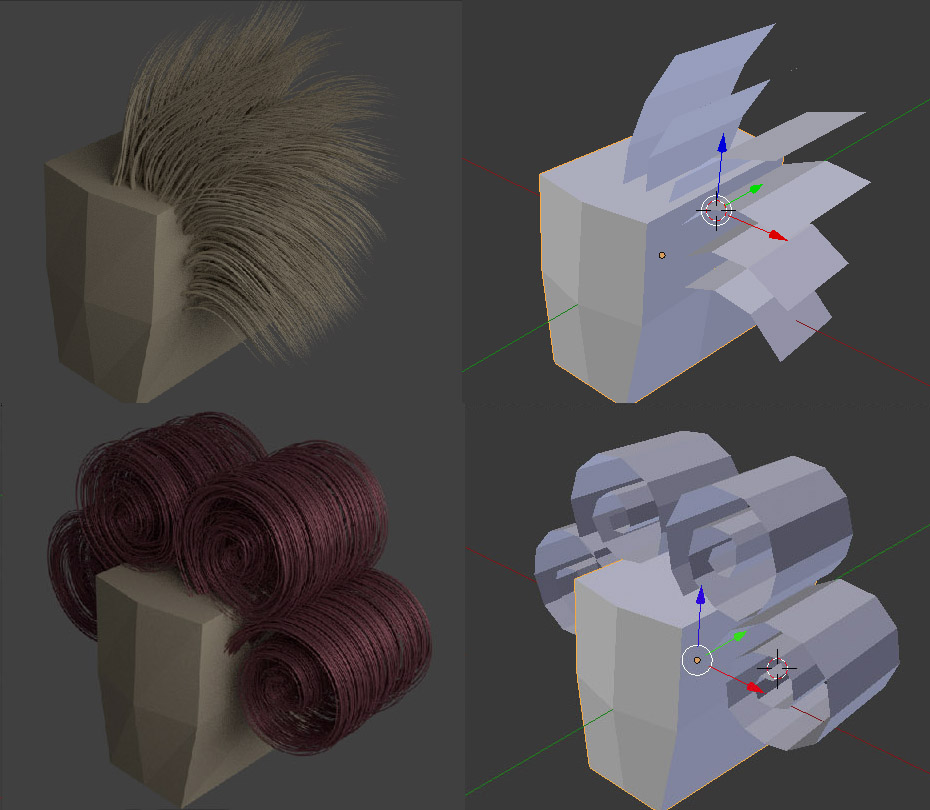
A few days ago, I changed HairNet so that it can manage more than one hair system. The set-up used in the attached image involves three separate hair objects which are turned into three hair systems. Two of those hair systems share the same particle settings so that changes to one system are applied to the other. The settings remain linked if changes are made to the mesh and the hair is regenerated.


Yes!

This gives so much more control not to mention you can bake it right down to the same planes.

It looks like a very useful addon, sadly I cannot make it working, every time it says ‘Error - Please select only two objects’.

Maybe I’m doing something wrong, I select the guide mesh, then Shift-select the hair object and press ‘Add Hair’, however it says the same whatever I do.

I’m on mac os x 10.7.5 64 bit, blender 2.67a or 2.66.5.

Any hint?

Thank you,
paolo