HI i need to parent a bone to some vertices. Here an image.
I did this: I created vertex groups. I used the bone constrant “child of”. I selected the vertex group.
I positioned in edit mode the bone where the group is, using the cursor.
After I added the constraint, the bone flipped, changed direction, moved elsewhere. I tried to understand if it was an issue of origin or whatnot. I dont understand why the bone moves I need it to stay in place and follow rotation scale and location of a couple of vertices.
Put the bone where you want it in relation to the mesh. Create the constraint and specify all details for it, like the relevant vertex group. Then, hit the “set inverse” button on the constraint.
Blender automatically sets the inverse at time of constraint creation, but when you change the parameters, it doesn’t recalculate a new inverse, it keeps using the one generated for other parameters. So then the bone jumps.
However, I don’t recommend child-of constraints targeting vertex groups. It’s not an operation that makes a lot of sense. Location is okay, but rotation and scale are not vertex properties. Blender does what it can to maybe do what you want, but it’s unreliable. Better is to copy location, damped track, locked track specific positions, marked by vertices or by other bones. (Or, parent an empty, vertex-triangle to your mesh, and then copy transforms of that empty. Basically the same thing.)
@bandages advice is always really good, he knows his stuff!
But my preferred method of doing this is slightly different than this:
I just vertex parent the bone to the mesh, no need for the empty and constraints.
Basically, position the bone at the location of the mesh. Select the bone in pose mode, then shift-select the mesh object. Enter edit mode for the mesh object and select 3 verts nearest the bone’s root. Then do a Ctrl-P → Make Vertex Parent (the only option given). See the attached file…
When you open the file, the mesh will be in edit mode and 3 verts will be selected, feel free to move the verts around and the bone will follow…
What you’re doing with that-- with the file you’ve shared-- is parenting the armature to the mesh, not any particular bone in the armature. This is probably just fine if your armature contains only a single bone. If your armature contains multiple bones, then you’ll find that all of your root-level bones move with the parent mesh. Which might not be what you want.
Indeed, I accidentally parented the armature to the mesh’s verts, which isn’t what I wanted to do. Been a bit since I used this, so I had to dig up an old file and looked at it. I did use this method:
Now when you move the face around in edit mode, the empty follows because it’s a child of the face and a copy transforms constraint on the bone makes the bone follow the empty. This will copy the location and rotation of the face, but not the scale.
I parented an empty to 3 vertices. I set the constraint “child of” on the bone, i select the empty, this time the operation works.
I received help.
I did not specify the intended usage of this trickery. Now I tell you about it.
The intended usage is to take a cloth simulation, and “bake” it to bones.
I have seen in Houdini, a node that creates bones to bake fat simulation, this allows to have the bones deform the mesh as if they were a fat simulation so they can be exported to game engines.
I have a character that is a femboy and a dragon. The wings of this character are membranes.
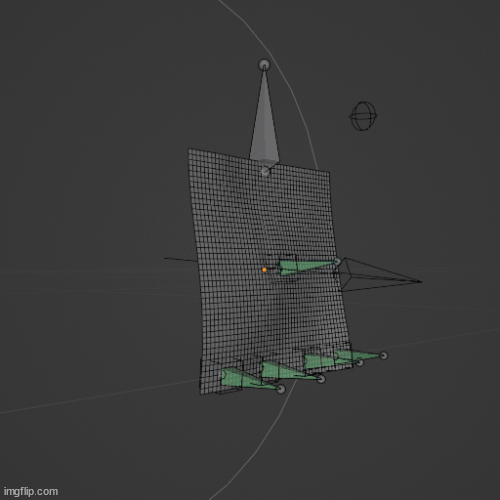
I hhope the image explains more or less my intention.
Mesh1: character mesh.
Mesh2: the wing proxy mesh that has the cloth simulation.
Wing bones: they move the vertices of the pinned area in the cloth sim wing.
Wing membrane bones: they deform mesh1 if they are parented to single vertices.
According to the test I did, this plan should work well. I did not test it yet. I do think it can work.