Hello, i’m curious to know how your workflow to create scales that filled the fish/dragon body perfectly in Blender sculpt or texture paint. I mean just look at how smooth and tidy the scales are, and it’s also has a scaling according to the body thickness. How to achieve that in Blender?

Hmm you got me curious, I don’t think is possible with just sculpting (Blender doesn’t have a feature like the noise generator in Zbrush); but maybe with the displace modifier and vertex groups, something like this could be achieved.
Edit: Is not exactly the same, but here’s an image of a test I just did with the displace modifier.

I don’t know how to do it myself but someone might find this helpful if they decide to follow up
http://www.cgarena.com/freestuff/tutorials/max/piercings/piercings.html
If you have a scale texture “brush”, you can sculpt it in as long as you have enough detail in the mesh. If you’re using multires, you might have to add a couple of levels. If you’re using dynamic topology, make the detail size really small. … but if you plan to retopo, you might want to hold off on this detail until after that.
@julperado : thanks mate, i think you nailed it  how do you make the scales pattern tidy like that? The scale also scaling down in the tail area. And how do you avoid the seams?
@DCBloodHound : this is exactly the origin of my google image search, thanks for the link
@gradyp : Yes, i understand the concept of details in Blender, the more you have polycount the more detail your model, but what i’m trying to ask is how to create the fish/dragon scales along the body curve, as clean (i said smooth in my earlier post) and as tidy as possible, without any brush artifact or seams. Now i’m experimenting with dot drag or curve brush stroke method function, but it seems i can’t get it right.
If you’re using a tablet, couldn’t you use pressure sensitivity on the radius to control the size of the brush? With it closer to the tail, you’d use lighter presser, and where the body is thicker, use heavier pressure.
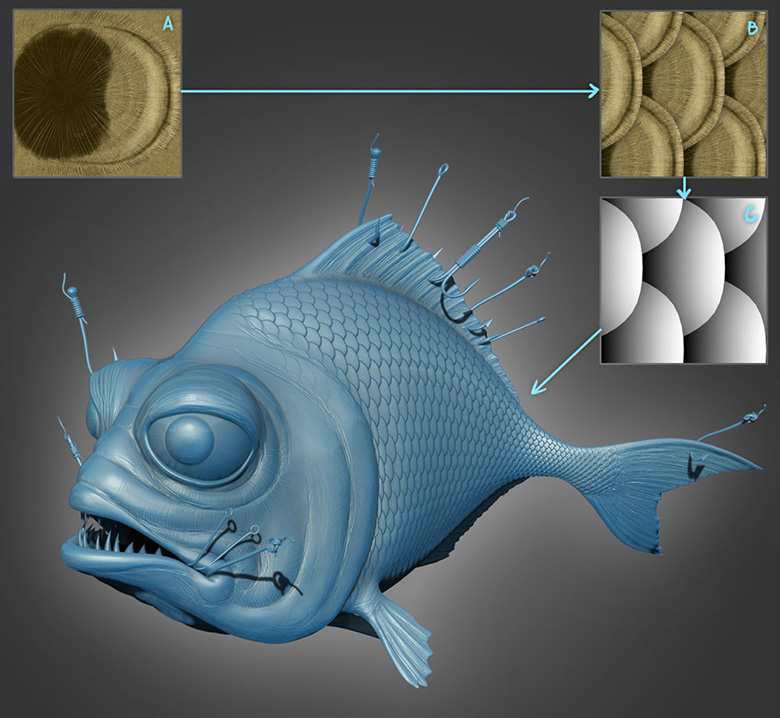
@gradyp using any sculpt brush is not exact enough to achieve such a clean look, even with high polycounts or pressure sensitivity control; that’s why I mentioned the noise feature of Zbrush. If you look the making of article, you’ll see he mentions the use of a texture to displace the mesh:
http://www.cgarena.com/freestuff/tutorials/max/piercings/piercings2.html
…I painted one scale in Photoshop (marked A) and made it tillable by cutting and copying in combination with the offset filter (B). Using a gradient ramp, it was easy to create bump version (C). Once this was done it was simple to just fill the side of the fish with scale pattern. Both the color version for later Texturing and bump version to be used to displace the mesh in ZBrush…
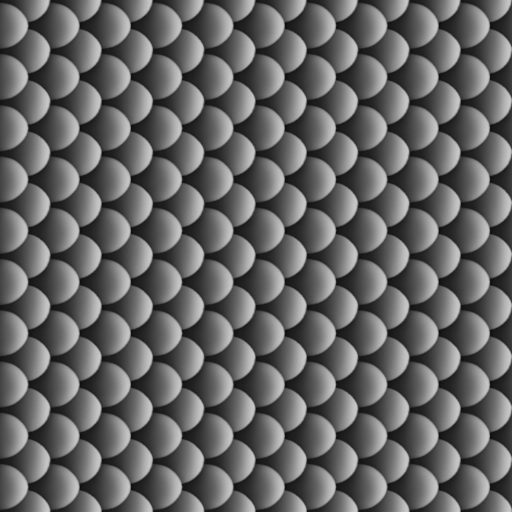
@johantri the scales come from a pattern image I found on google:
To avoid the seams and control the size of the scales, you’ll have to mess around with the UV’s of the model, note that I used a vertex group and a UV map (the model has to be unwrapped first). I didn’t save the file (dumb!) so I can’t share it with you, I’m sorry… Hope this helps anyway ![]()
2 Likes
@julperado that’s displace idea with a seamless texture is a nice workaround to the lack of Blender sculpt functionality.
Tested with a basic cylinder mesh , unwrapped with the follow active quad method :

And used some subsurf + a displace modifier using a seamless texture :
You can get nice thing

Why didn’t I thought of that!?!? 
Of course, if you want to actually model the scales (which would look nicer), the Tissue addon is perfect for the task.
I have never seen that before.
@CarloBergonzini Whoa! that’s the coolest modeling add-on i’ve ever seen, now i can make chainmail or anything with pattern easily. Thanks for the link and idea! Will experiment with it later.
Hey Guys, I’m just starting out with blender and I love the the displacement modifier. However, I seem to follow all the steps concerning the displacement and I’d love to pull this off without too much mesh manipulation. Somehow my displacement modifier can’t make up it’s mind about what to bulge up and what to bulge down. Anybody any idea what I’m doing wrong?

Thanks for the help!
Two things I notice: You need it to be a gradient showing the shape of the scale like the image above (How to create fish/dragon scales?) and you have Color Space set to “Non-Color” which I believe is only for normal maps, generally light purple.
I actually think that the problem is that I use a texture map to drive the displacement modifier on the mesh but since the poly was a plane in my case, it doesn’t affect the normals so the shading still behaves as if it’s all flat faces…I wonder if a normal map is enough to match this, as I’m not too familliar with what a normal map does compared to adjusting the normals yourself…The thing I set to non color is a grey scale image that is called displacement map driving the bump map, it’s the same texture I use for the displacement modifier, maybe I should unhook this one as well?
In the image you show, with the texture properties, these properties are generally only used for displacement. The bump map you would put in the shader editor. But as far as to what to do; I think I would try switching it SRGB as opposed to Non-Color, although I’m not sure and adding a gradient to the texture, because I think neither bump maps nor displacement maps work unless they have some sort of gradient so that it know which direction to slope. Thing is with displacement you need alot of subdivisions…
Just for an experiment look at this blend (2.82) using the image above.
rough-scales.blend (716.2 KB)

awesome, without any material properties whatsoever!! Thanks a lot!
Fantastic! FYI, I didn’t UV map it so there is a seam there.
Hi, a tried using your file to add scales to a character I am building but it does not seem to work, when I try to replicate. This is what my model looks like when added:
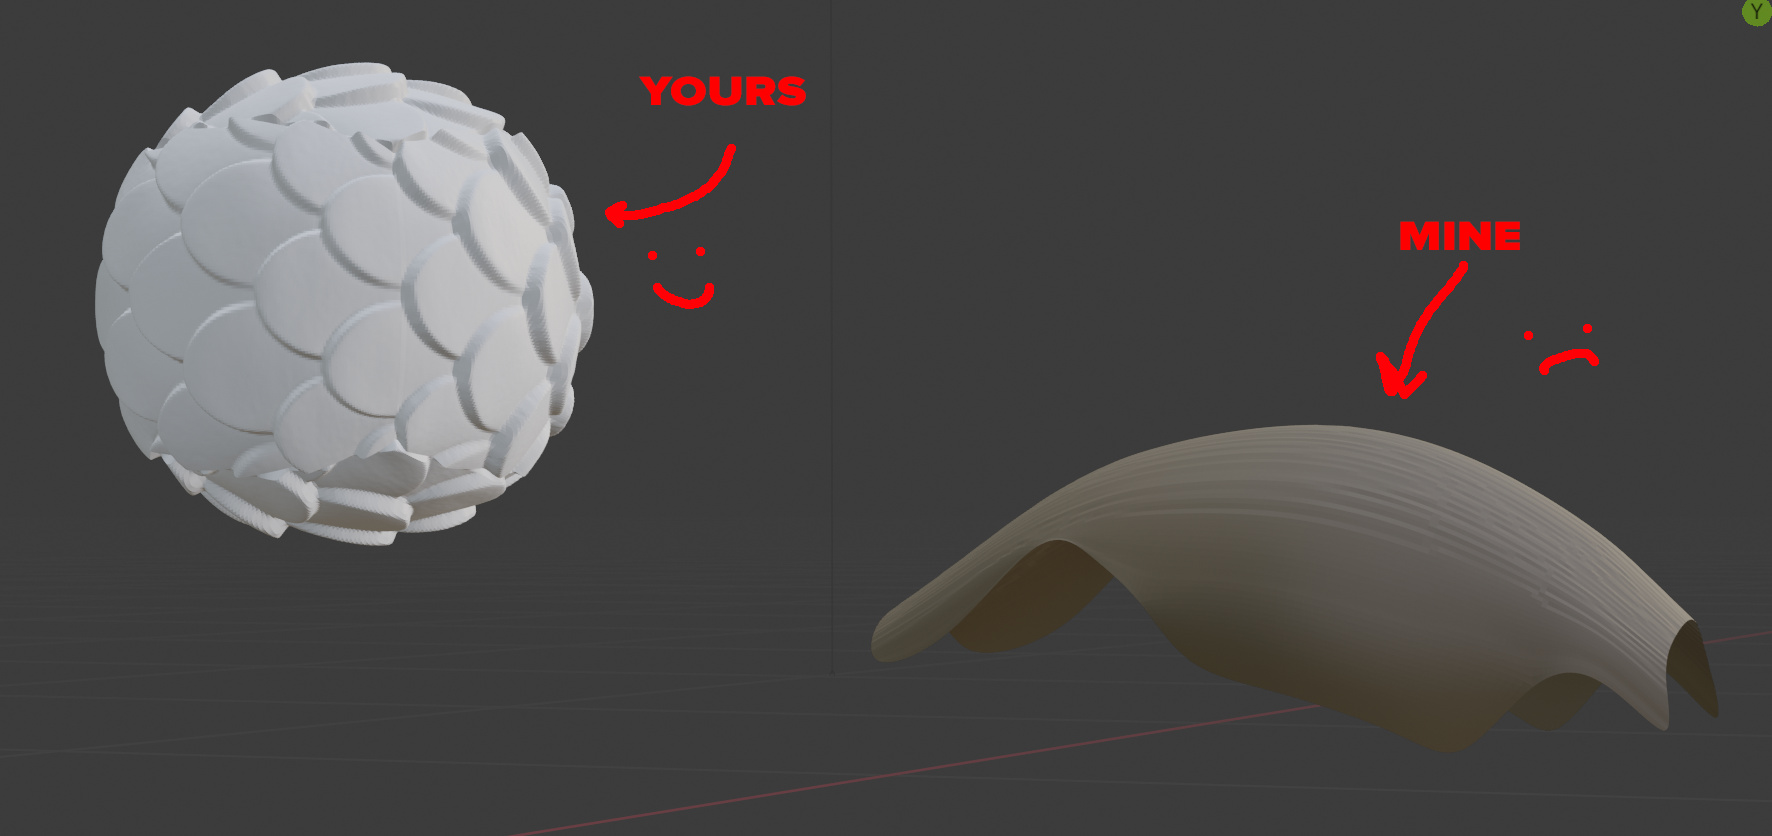
Any ideas what I am doing wrong?