Hi guys, may i ask, how do i export a zbrush subtool with polypaint material as OBJ so that it can be imported to Blender?
Hi @peterblender,
Welcome to Blender Artists.
ZBrush uses a custom OBJ export format that includes Polypaint as vertex colors. 3D-Coat can import that, but Blender can’t. Blender will import the OBJ, but without vertex colors.
The solution is to export the subtool as FBX from the zPlugins menu. The FBX file will also contain the polypaint as vertex colors, and can be imported in Blender.
Another possibility is to install the free GoZ for Blender add-on, and establish a bridge between Blender and ZBrush:
thanks bro, may i ask, when polypainting a mesh in zbrush, do i need to uv unwrap it first?
or can i polypaint first and then uv unwrap? because when i polypainted it and then unwrapped later, the polypaint was distorted and produced some rectangular patterns on the mesh. is there a way to fix it if i did it in this order?
I don’t think the order of UV/polypaint matters in zbrush, but sometimes you need to flip or rotate your texture map before you link it with a node in blender. I use multimap exporter and frequently the texture maps are flipped. You can also export them properly with “flip V” or something like that.
1 Like
i’m still in zbrush.
Do the rectangular patterns match polygon locations? I wonder if you accidently have a different material designated in those places. If you click the m (material) button and then fill all within the color palette, it will unify the materials.
1 Like
I don’t have much UV experience, but I do know that you can Polypaint first, then UV unwrap. I don’t think the order really matters. I’ve converted Polypaint to a texture only a few times, but it’s always best practice to put the UV seams where they’re least visible. UV Master is the best UV unwrapping solution in ZBrush.
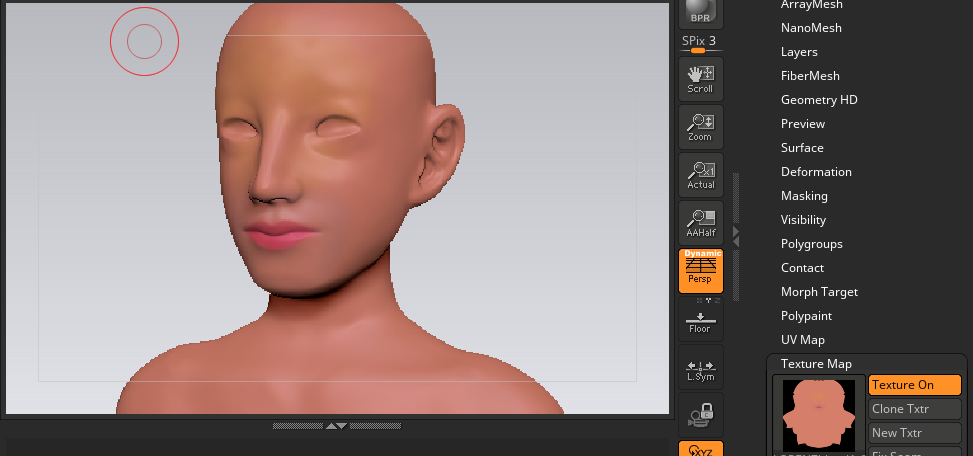
Hi bro, i somehow managed to exprt the subtool & it’s texture out of Zbrush. but the problem is when i open it in Blender & windows 3d viewer, the Texture is flipped and it doesn’t look right even if it’s at the correct angle. Like it has extra black spaces below and the lips painted is on the nose.
Here’s the original Zbrush
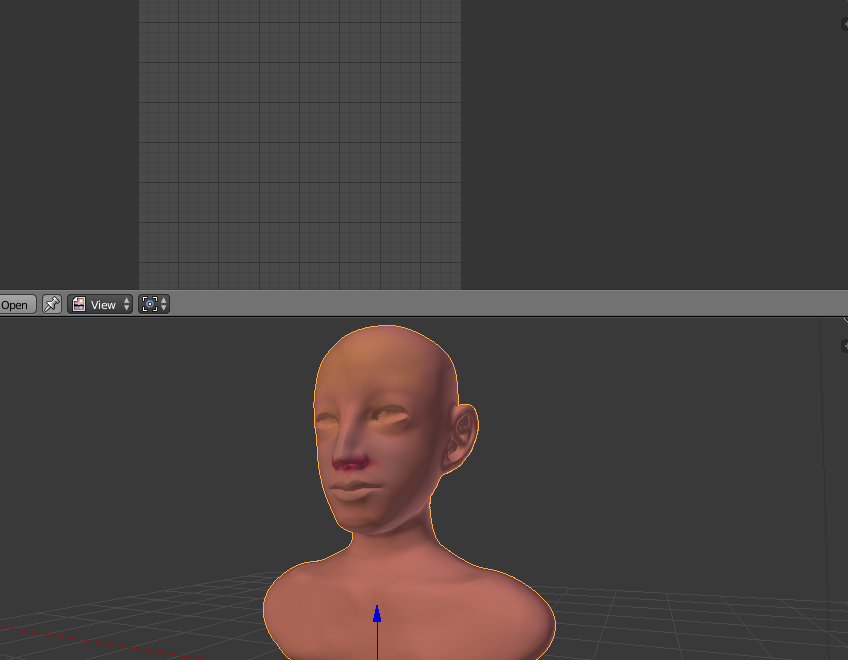
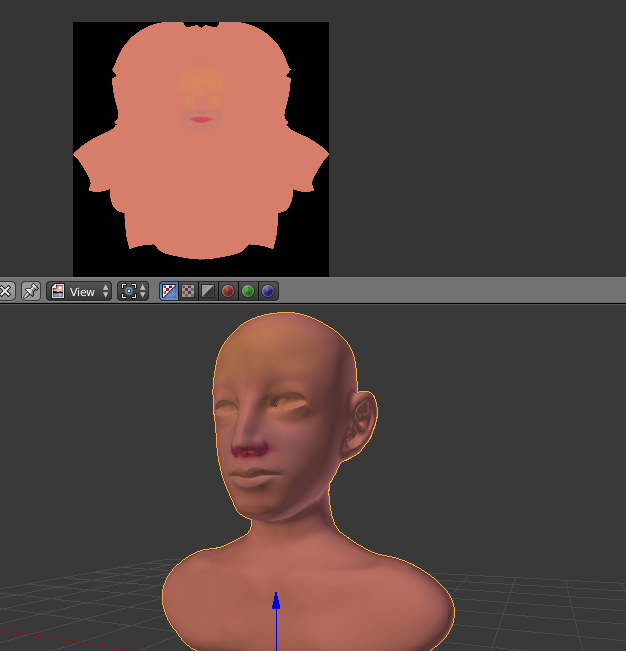
Here’s what it looked like in Blender
Hi @peterblender,
I haven’t got much UV mapping experience, but I guess the black part is due to a lack of overlap / safety margin in the UVs. Maybe someone else can shed a better light on this for you.
The texture can be flipped in ZBrush UV options, and I believe also in the export options. Or you can do the flipping in Blender.
can i create a new thread on this?
For quick Blender help you can go to https://blender.stackexchange.com/ . For ZBrush help I guess this is a better place: http://www.zbrushcentral.com/forumdisplay.php?101-ZBrush-Questions-and-Troubleshooting-Forum
Good luck!
I think hyping these sculpting improvements and thinking that Blender is anywhere even close to ZB is wishful thinking at best.
Zbrush’s real power lies in its multi-level resolution workflow which has been a core paradigm since its beginning, based on trad sculpting(build up primary forms at a very low resolution) Long before dynamesh was a feature. As far as I’m aware Blender’s multi-level sculpting features are far from optimal.
Also, in ZB I can work on up to 1 billion(geo HD) with sculpt layers and export 8k udim displacement maps.
Blender sculpting is more comparable to Sculptris, not Zbrush.
Cartoon/stylistic sculpting in Blender certainly seems great, but for high-end insane detailing comparable to what ZB is capable of there is still a LONG way to go.
1 Like
Agreed. I guess your post would be more appropriate in the thread about the Sculpt Mode Features branch. 
Weird!! When I posted this the thread was called ‘Zbrush Vs Blender’ 
1 Like
 Mysterious forces are at work here!
1 Like