I can’t stop watching this, it looks so good! How the hell did you do the fingers…?
@rombout Thanks for the suggestions, the creasing appears on bump maps as well though, so it couldn’t be the mesh or modifier order I don’t think.
@julperado Ok this is testing my memory, but the fingers are basically IK chains with the (going to have to use some anatomical terms here) distal phalanx copying the rotation of the target (the ring at the tip of the finger), and the intermediate phalanx parented to a duplicate (ring at the proximal interphalangeal) to give some FK control over the end two bones.
The small ring at the wrist controls the hand while leaving the finger tips in place, while the larger ring, to which the smaller ring and targets are parented, controls the whole hand.
For the fingers to “detect” the ground plane (which you’re probably wondering about), I simply put a limit location constraint on the targets that has the Minimum Z set to 0 (the same height as the ground plane).
Also the 4th and 5th metacarpal rotations are controlled by a ring on the side.
Hope that makes sense, there might be more to it than that but I’d have to do some digging to figure out what I’ve done. 
Thank you! While reading it I realize that I know a lot less about rigging than what I thought, but it is very useful anyway, I’ll have to give it a try on my own and see what I can come up with before asking for help desperately 
Hello, I am new to rigging and i am wondering how you did the IK back, after looking a bit i found a way to sort of make it work but it in no way works as good as yours, is there any chance you could explain a little bit how you’ve done it ?
Well, I started trying to explain, but that was too hard… so I thought I’ll show you, but that will take too long… so why don’t I just share it and be done with it:
Human 17j Spine.blend (680.1 KB)
Good luck figuring out how it works, I can barely understand it myself! 
Thank you for that ill do my best to understand everything !
Let me know if you get stuck and I’ll attempt to make sense of it.
Do you plan to give a breakdown of the painting skin process? The blender community is in need of realistic tutorials… or ask at blender cloud to do a course?
hahaha “I basically made it, but dont know what i did”…
Man that spine feels like some weird snake or so. Bizar actually how a spine looks with a more “human” look to the righ
I think its because the base mesh is low res, thought it has subsurf. The vertex groups dont seem to have nice smooth transitions. I think its those harh cuts or stops in color which causes it than
The trouble with tutorials is they take so much time that I have to choose between either teaching or creating, and for now I’d rather be doing the latter… I try to give hints where I can though.
Pretty much! All the trial and error combined with unfamiliarity with new software makes it hard to retain the knowledge for very long.
If that’s the case then the mesh density would need to be so high that deforming it would be impractical. Also the LW equivalent has no such problem…
@rombout Sorry I haven’t responded to your posts in that other thread by the way, my brain has jettisoned much of what I knew about the addon (probably to make room for rigging!), so I’m waiting until I get around to revisiting it properly.
Nice work. Always been a fan. I see more and more lw and modo users moving to blender.
I will probably move 100% this year after those two switched owners recently its just not stable.
No worries! I also get this when i explore new things in blender. It has so many things to explore. Yet some parts are still quit lacking proper information. Luckily there are dozens of tuts and info vids which do cover these. Problem stacking all this in my brain and keeping it in there ![]()
Thanks @poly2poly2
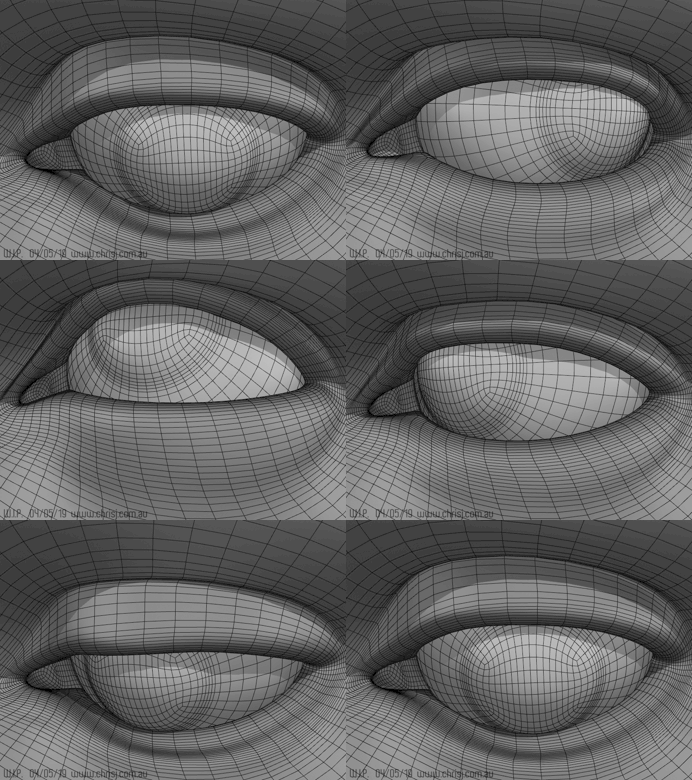
Another couple of key challenges solved (in the space of a day no less!), and now I have the eyes rigged. Must be time for some more show and tell!

The eye rotation is a fairly straight forward tracking affair, with the addition of eyelid bones that have Copy Rotation constraints with a low influence, so that they appear to drag. The blinks required a more… convoluted approach.
I wanted to reproduce the technique I used in my Lightwave rig, which involves a chain of non-linear morphs (shape keys) driven by a single control. The equivalent method in Blender is to make an action and then use a control to “scrub” through the action via an Action Constraint, but since the Action Editor doesn’t seem to recognise shape keys I had to drive the shapes with bones and make an action for the bones instead.
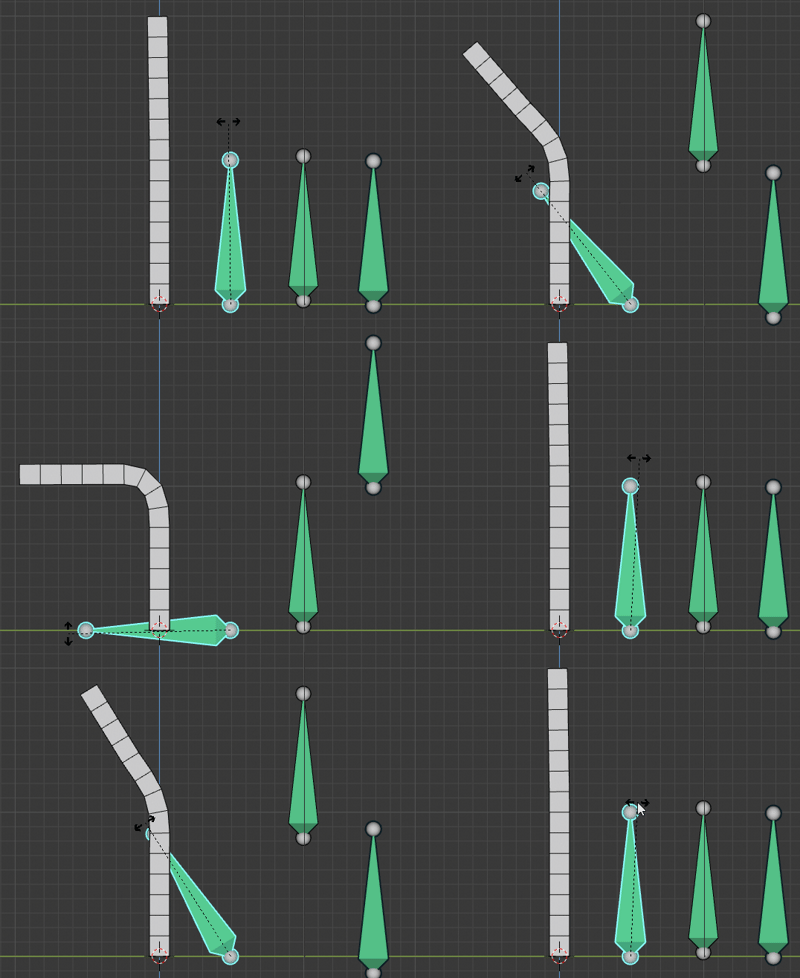
Here’s a simplified version of this concept with one of the up/down bones driving a 45° bent stick shape, and the other up/down bone driving the 90° bent stick shape. The bone I’m rotating is scrubbing back and forth through the pre-made animation of the other two bones.

Non-Linear Shape Keys 1a.blend (572.6 KB)
Curiously, in order to achieve a non-linear transition between the shape keys I had to add an extra keyframe at either end of each shape’s F-curve and set the handle types to Automatic so that the start and end of the curves overshoot their 0 state (for this to work the minimum range of the shape keys needs to be at -1). I have no idea why this works, but it corresponds with my results in LW.
Here’s the full diabolical contraption in action:
So in all there are two controls for the eyes: one for the blinks, and one for the eye rotations.
Here ends today’s lesson. 
This is nuts! Amazing!
That’s fantastic. I love how the eye feels so alive!
This is hypnotizing…
Simply amazing. It’s a tribute to how great Chris is with figuring out how to get things to work in different software environments.
waow, amazing
As realistic as I’ve seen
