Awesome! 
Hi spiderbrigade,
Sorry taking so long getting back to you. You should not have a “KIT OPS Duplicate” after you drop your INSERT. It is automatically deleted. It is created (and needed) to facilitate the drag/drop interface. See this GIF and you’ll see it’s deleted as soon as the INSERT is dropped:
As to your other question:
As you probably already know, you’ll need to have a second slot in the target object’s material and then it can be transferred. Here’s what that workflow looks like in KIT OPS.

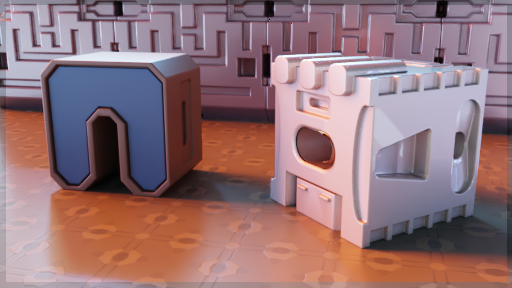
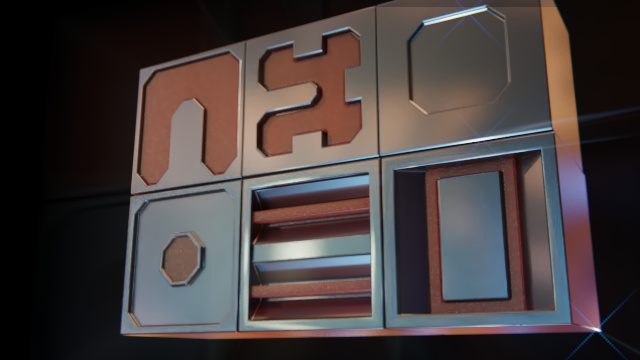
All under control here it seems. The is one more thing I need and that is thinking out of the box. ![]()
The box on the left: self made insert with a cutter and union boolean mesh.
On the right: some inserts from the package. (Mind also the beatiful thinfim shader)
The floor shows microroughness.
I like to use the following workflow:
- C-sharp the base mesh (Cube, euhj: try to think out of the box).
- use an insert on the base mesh
- in the modifier-stack of the base mesh, put the bevel on Angle (30?)
- Then move the boolean modifier before the bevel modifier.
- Select the bolean mesh (the insert) and give is a S-Sharp
This doesn’t work well for inserts that have details or small parts. Therefore, with this workflow simple boolean meshes are needed. What do you think of this workflow?
4 Likes
Looking good!
(BTW, we released KOPS a week late b/c you asked for snapping and we ended up putting in align/snap features!)
As far as HOPS workflow goes, I’ll @masterxeon1001 respond. Though I do find sometimes with KOPS you need to lower the angle to maintain proper smoothness in the target object. I’ve even gone as low as 16 degrees on models.
Also, I think you probably can add your inserts in steps, the large ones first, then apply and add bevels, then medium and apply and add bevels, then the smallest ones.
1 Like
Just want to let everyone know KIT OPS is also now on Blender Market as well as Gumroad.
Ohh. ![]()
![]() Yes I use snapping al the time. In case the geometry is complex (E.g. not a cube) I go in edit mode of the base mesh, select a face, then cursor to selected, go into object mode, select insert, selection to cursor, then scale/transform the insert. Maybe for future releases, I don’t know if that is possible, is to snap an insert to a face (or edge) when dragging. With PIE menu editor I made some macro’s / commands that does the workflow above for me:
Yes I use snapping al the time. In case the geometry is complex (E.g. not a cube) I go in edit mode of the base mesh, select a face, then cursor to selected, go into object mode, select insert, selection to cursor, then scale/transform the insert. Maybe for future releases, I don’t know if that is possible, is to snap an insert to a face (or edge) when dragging. With PIE menu editor I made some macro’s / commands that does the workflow above for me:
But snapping to a face sometimes be convenient when dragging an insert to base mesh, no?
(In gif I pressed on capslock all the time instead of TAB, so you see NONE a few times (I think I will remove that capslock key from the keyboard). And the shortcut to commands is Shift-U in the gif. )
1 Like
No problem, definitely happy to wait for a more in-depth response. In this case I guess that transforms my question into a bug report, because I definitely have the KIT OPS Duplicate objects created (and not deleted) after each insert. Overall there are some minor bugs to work out; sometimes the red Kit Ops frame doesn’t cover the whole 3d view, sometimes the “Apply” option isn’t available for an insert, etc. Are there any addon incompatibilities I should be aware of that could cause these?
That absolutely works. Thank you! I guess that has to be done after each insert, and the insert does have to be applied. No way to do it while maintaining non-destructive?
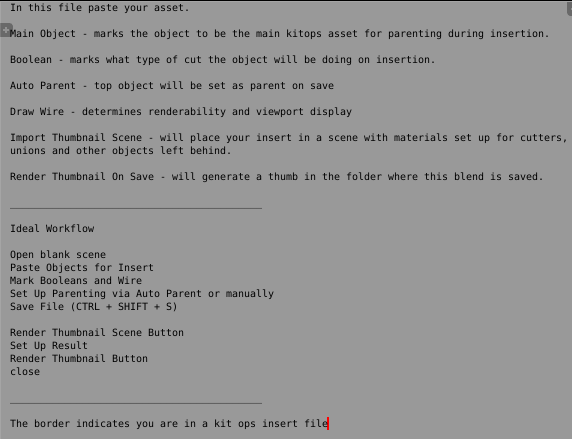
How can we prepare our own INSERTS?
I’m not sure if it was meant for us but I saw a text file in one of the blend files (adv_cube2_2). And i couldn’t follow the steps:
1 Like
In the read-me file where KITOPS is installed you can see it;
Instructions for using KIT OPS PRO in FACTORY (authoring) mode can be found at:
and you can also get there by pressing the ? key in the KIT OPS FACTORY tool shelf panel.
You can also find a PDF version at:
Is quite simple if you follow the steps once. Here some self-made inserts:
1 Like
@filibis if you go to the kitops support page - follow the link to join the discord group. In there I found a few videos from the beta testing where they show the process for making some inserts.
I found those pretty helpful.
2 Likes
I’m experiencing the same thing sirmaxim with the tabs interface addon. I started clicking around in the tabs interface settings and managed to get Kit Ops to appear. Works fine for now.
Yeah, we’re looking into that. Hope to have a fix shortly
Sweet! Thanks Chipp.
Great job on the creation and release of Kit Ops (Free & Pro) as well as the Smart Inserts!
I bought it the morning of release and it’s a real time-saver. Kit Ops really helps in pushing me to be more creative and experiment with objects that I didn’t look at as “usable”. I’m starting to familiarize myself with creating my own inserts which is an awesome feature.
This is sort of off-topic, and it’s not a major concern I just like tweaking every little bit of the UI as well as the actual add-ons themselves. I like the “theme” of the inserts grid, red inserts thumbnails, black background, blue-ish border as seen on the “KitOps.com” page. I know you can customize a few of the prompts like, the color of the border that indicates Kit Ops is active, the logo color, etc. Is there any way to customize or theme the inserts UI grid through Blender or would that be more of a coding process? Just wondering because I’m learning to create and code add-ons for Blender with Python and this would give me something to focus on for myself in order to develop my coding/problem-solving skills.
Again it’s not a problem, just something I wanted to ask about.
Thanks again to all involved with Kit Ops!
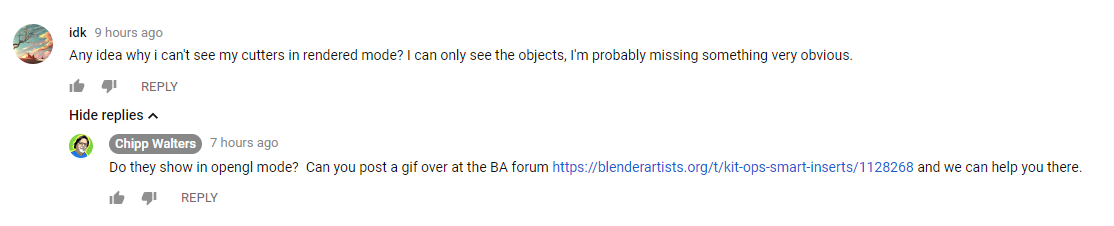
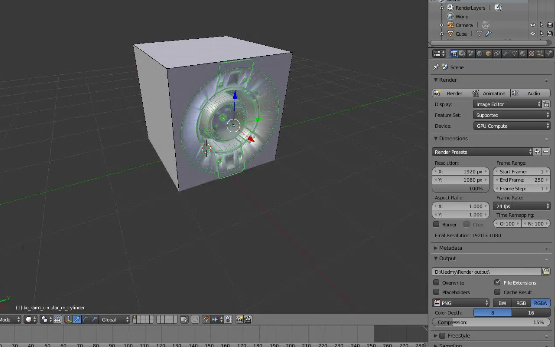
check the modifier stack. I wonder if the renderability of the boolean modifier is toggled
yes. The insert compositing is handled via a render scene that is packaged in the addon. When it was first being created we had a different scene with a black background but it wasnt liked. The nodes are in place for tweaking and making a format you would want your render thumbs to be but non of those options are automated and connected to any prefs. But if you do automate parts of it into the theme settings do let us know it could be considerable.
1 Like
Yeah that’s one of first things I checked, it’s toggled on.
what does the stack look like at this moment?