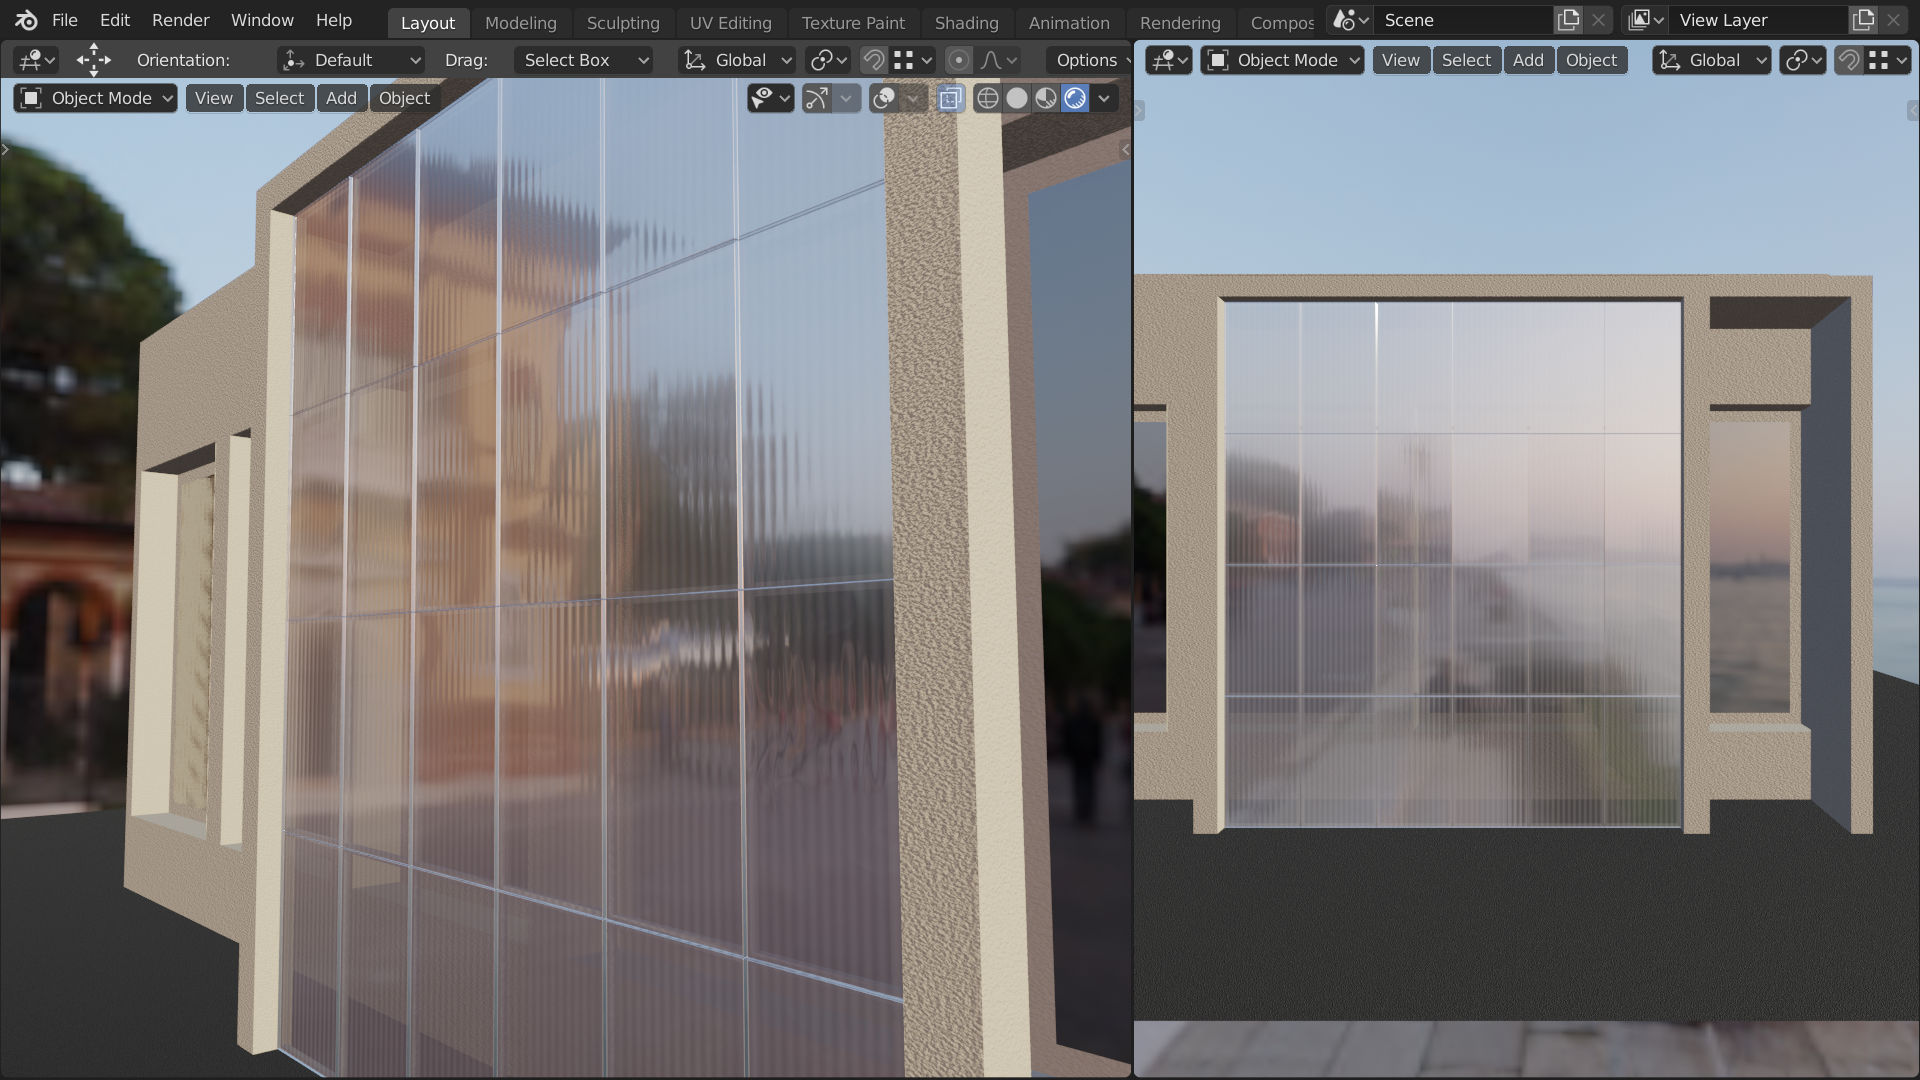
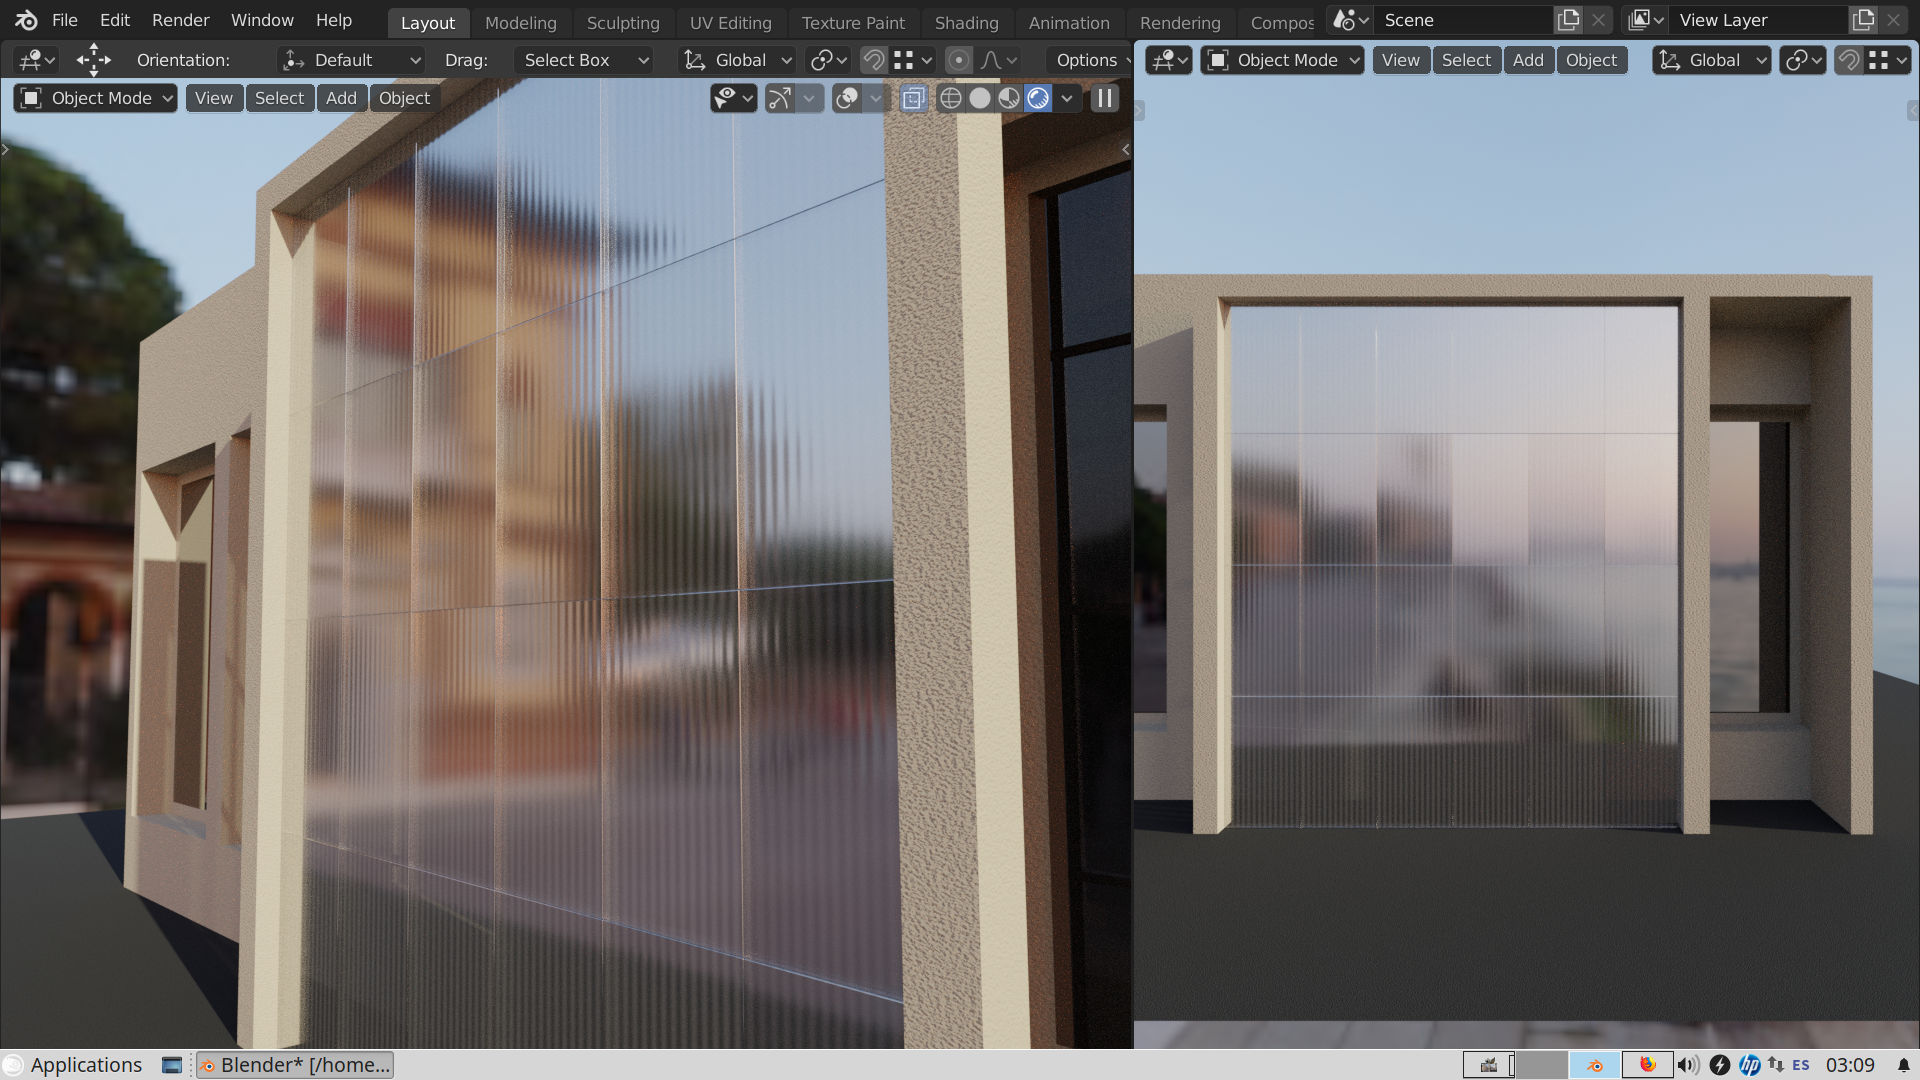
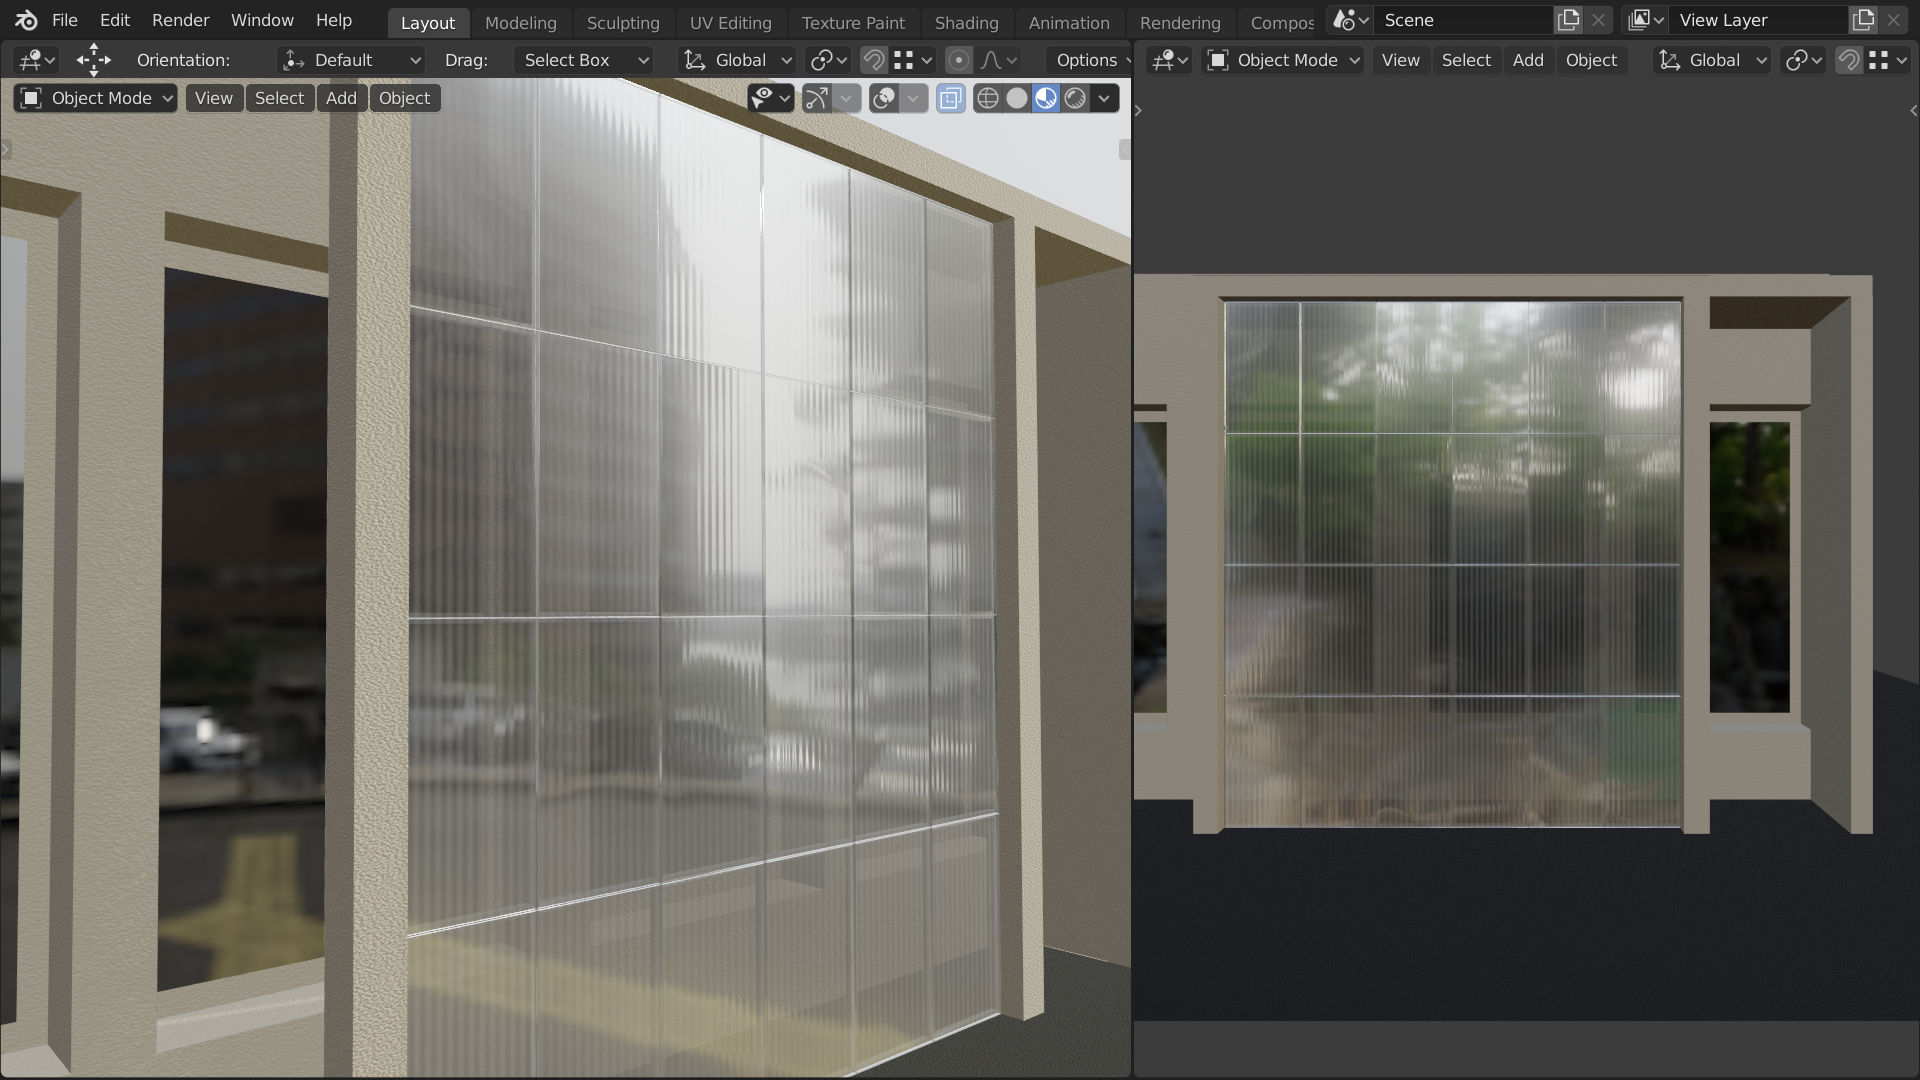
If you look at picture #2 in OP, you’ll see the effect in the “mirrors” that the panes are not perfectly aligned. So aside from any low frequency “bumps” you have from varying glass thickness, settling etc, you may want to account for that. Here is what I use for pretty much anything that has uneven lay (tiles, bricks, window or railing glass panes etc):
Random color can be obtained from Object Info/Random → 1D White Noise color output in your case.
While it tries to reduce the effect at glancing angles, for high modifications always verify on a sharp glossy node - reduce the effect if anything goes black. In your case though, it should be very subtle.
Hey that’s a great idea thanks for the example. I especially like the use of the white noise for random. I have found that if I put the random output from obj info as vector input I can adapt to my material (without using the brick texture). Also if I put the white noise to 4d the w slider acts as a seed and it will out put loads of different values this will be very usefully for getting more values from the object info node! I will use this in many more materials.
It looks like I will have to model some modern buildings!
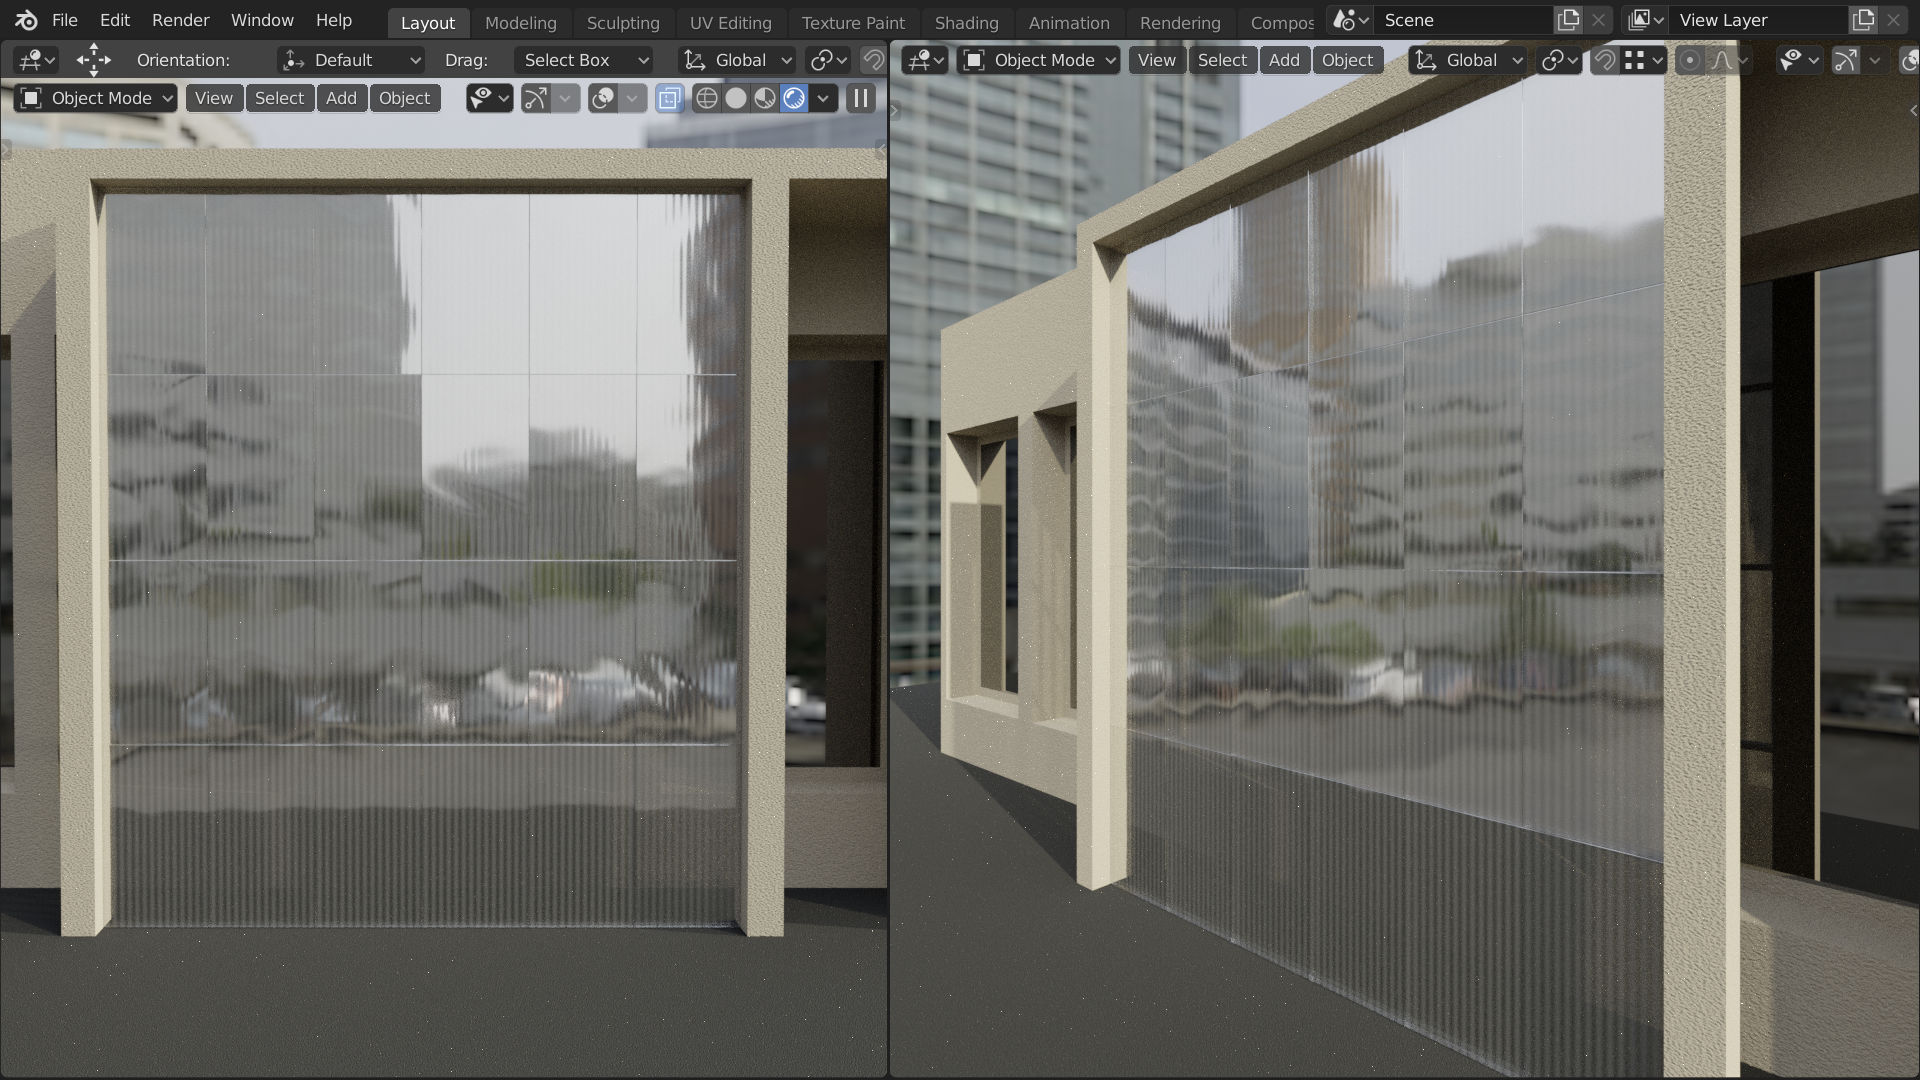
Yesterday I did not notice the distortions disappeared again in Cycles, today I have finally resolved the mystery. It was because I used the reflection output as vector for the distortions, I have changed it to object and now they are much more similar to Eeveey, I had to re-tweak everything though. I can now use the colour mix nodes again.
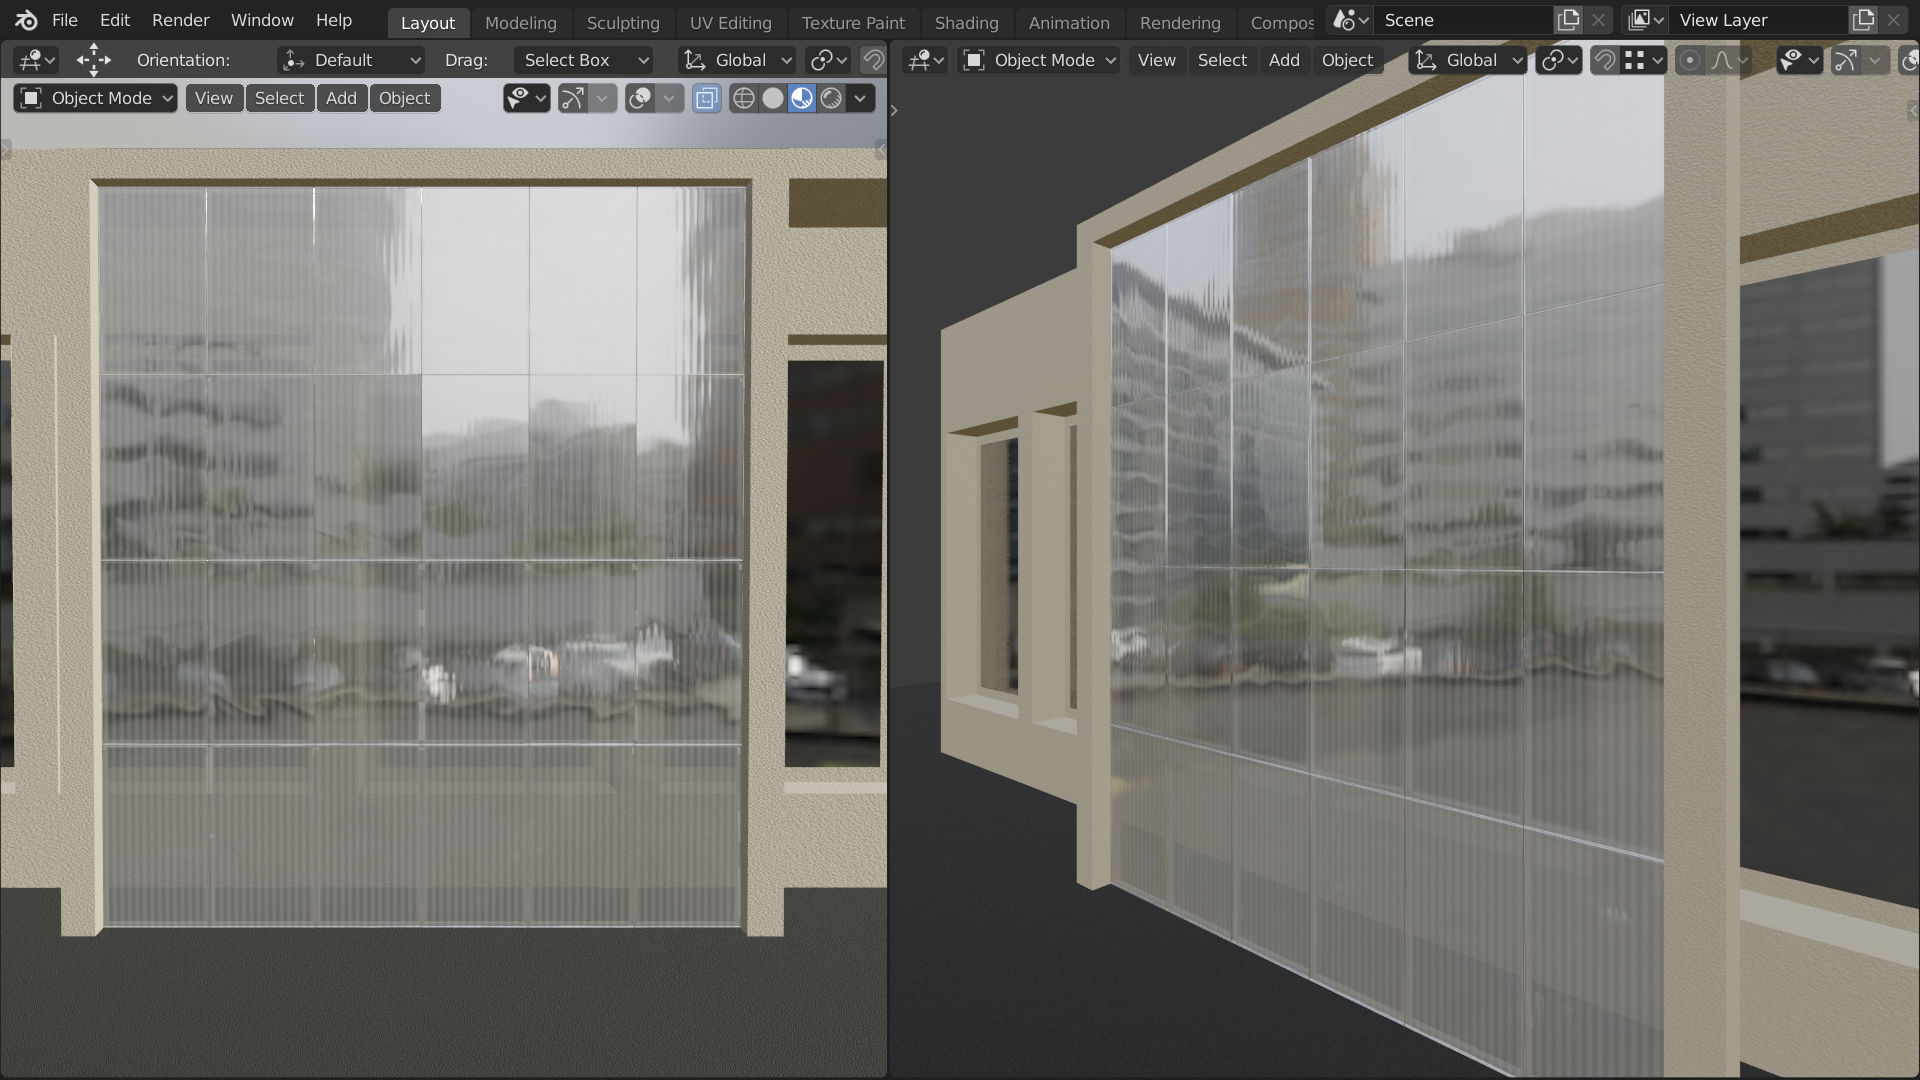
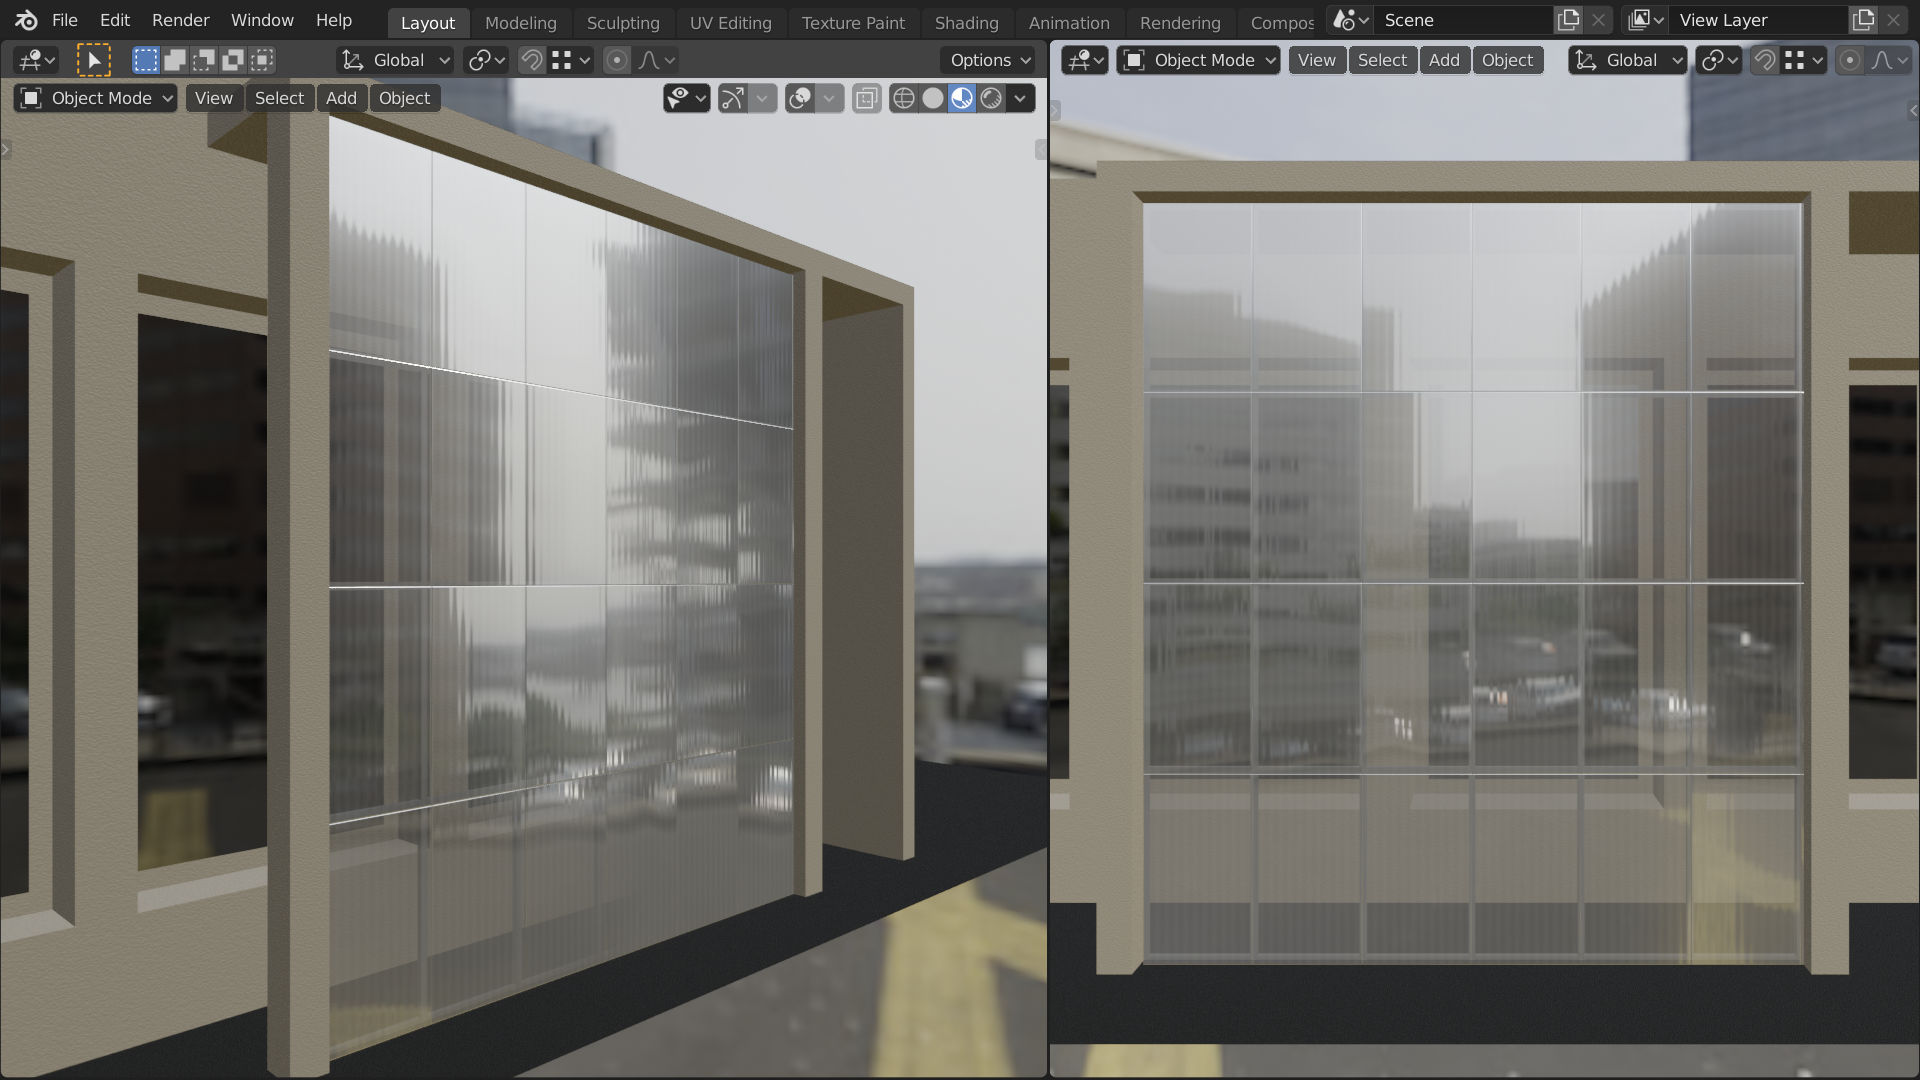
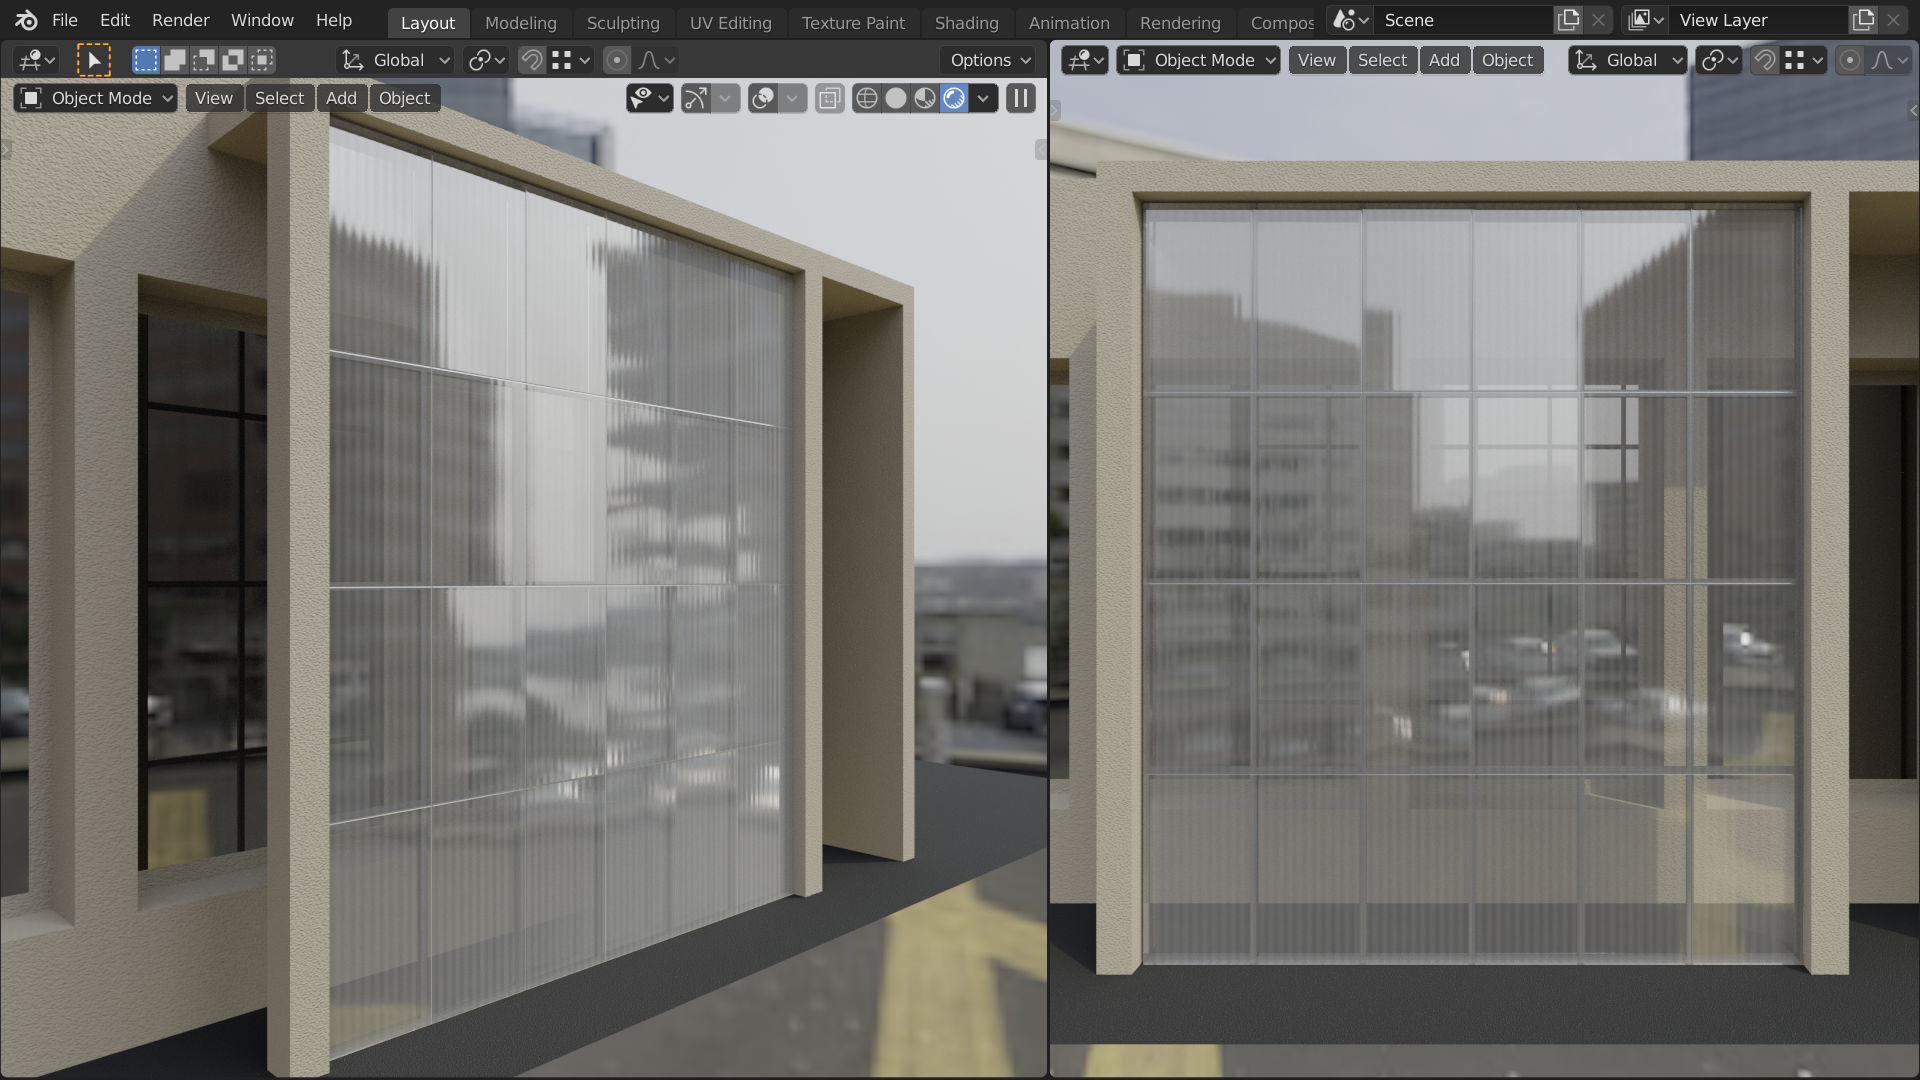
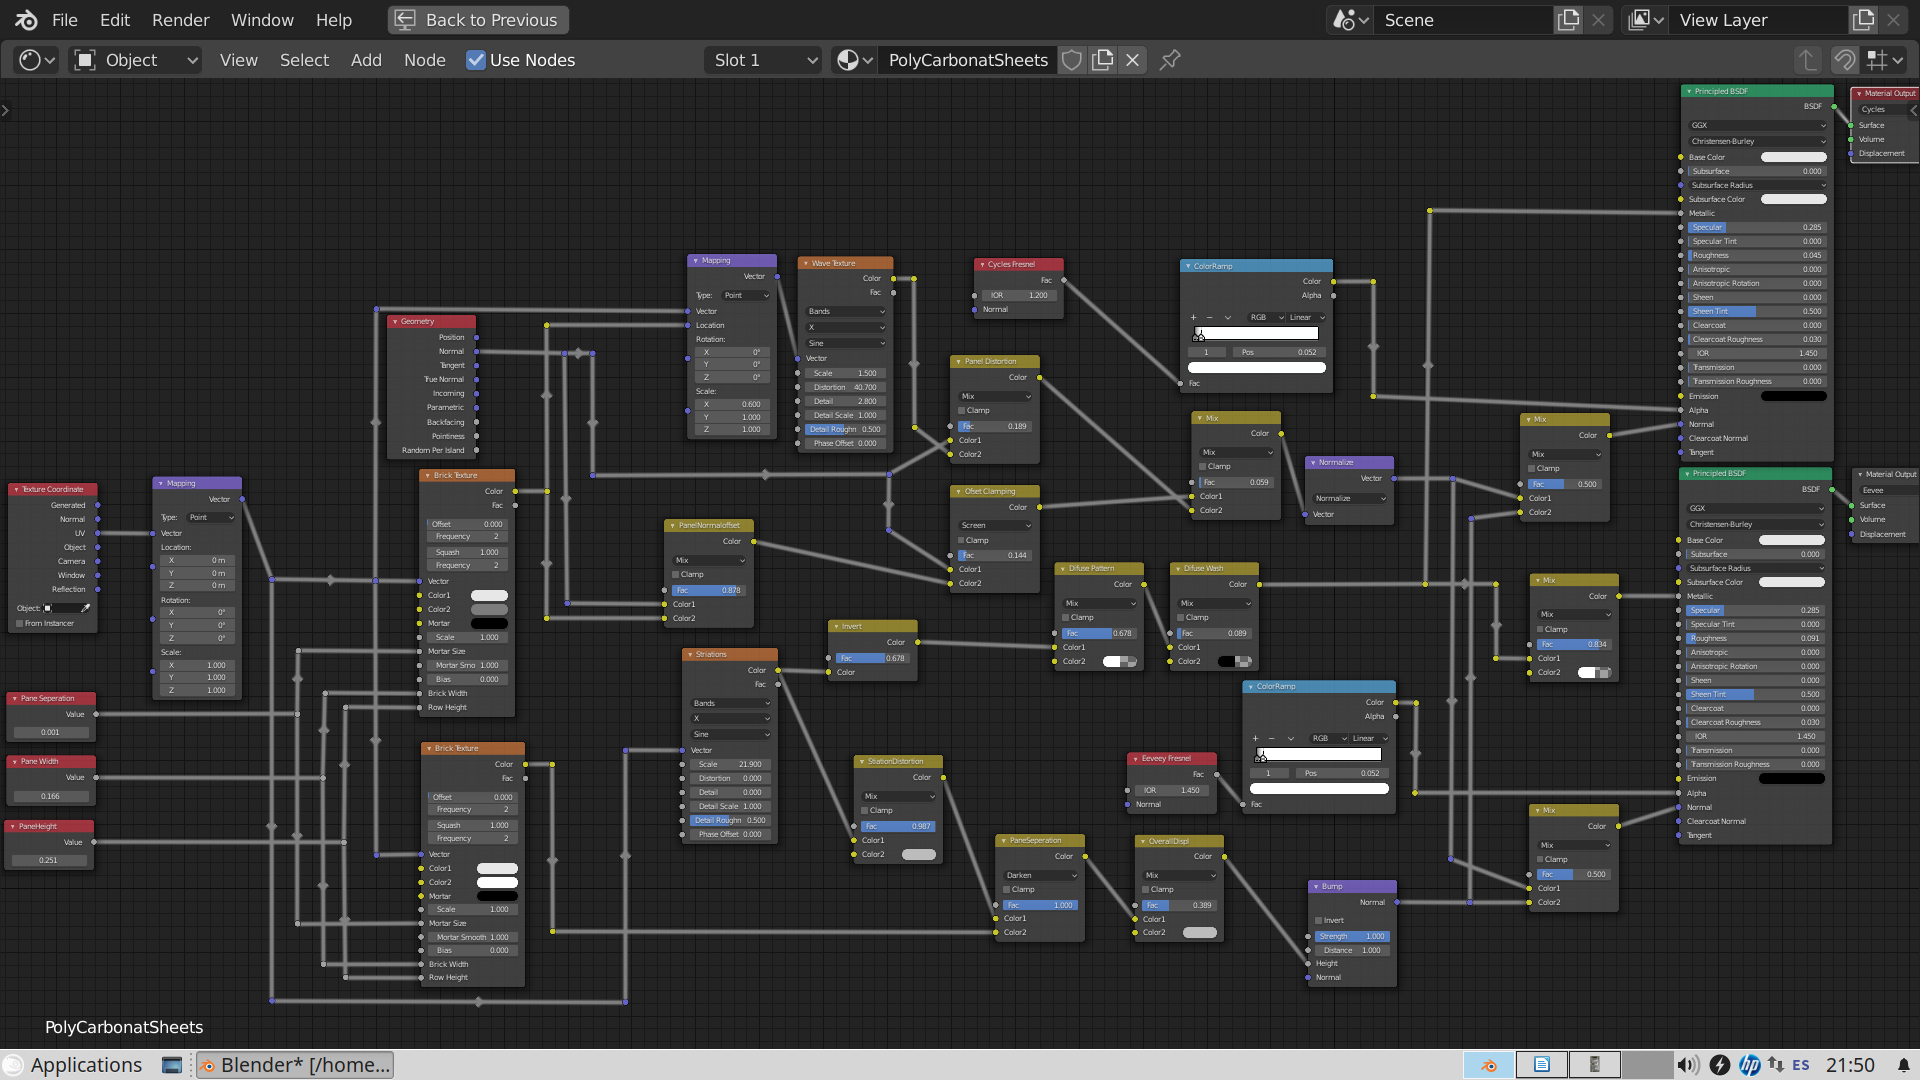
So here is the final result!
Eeveey
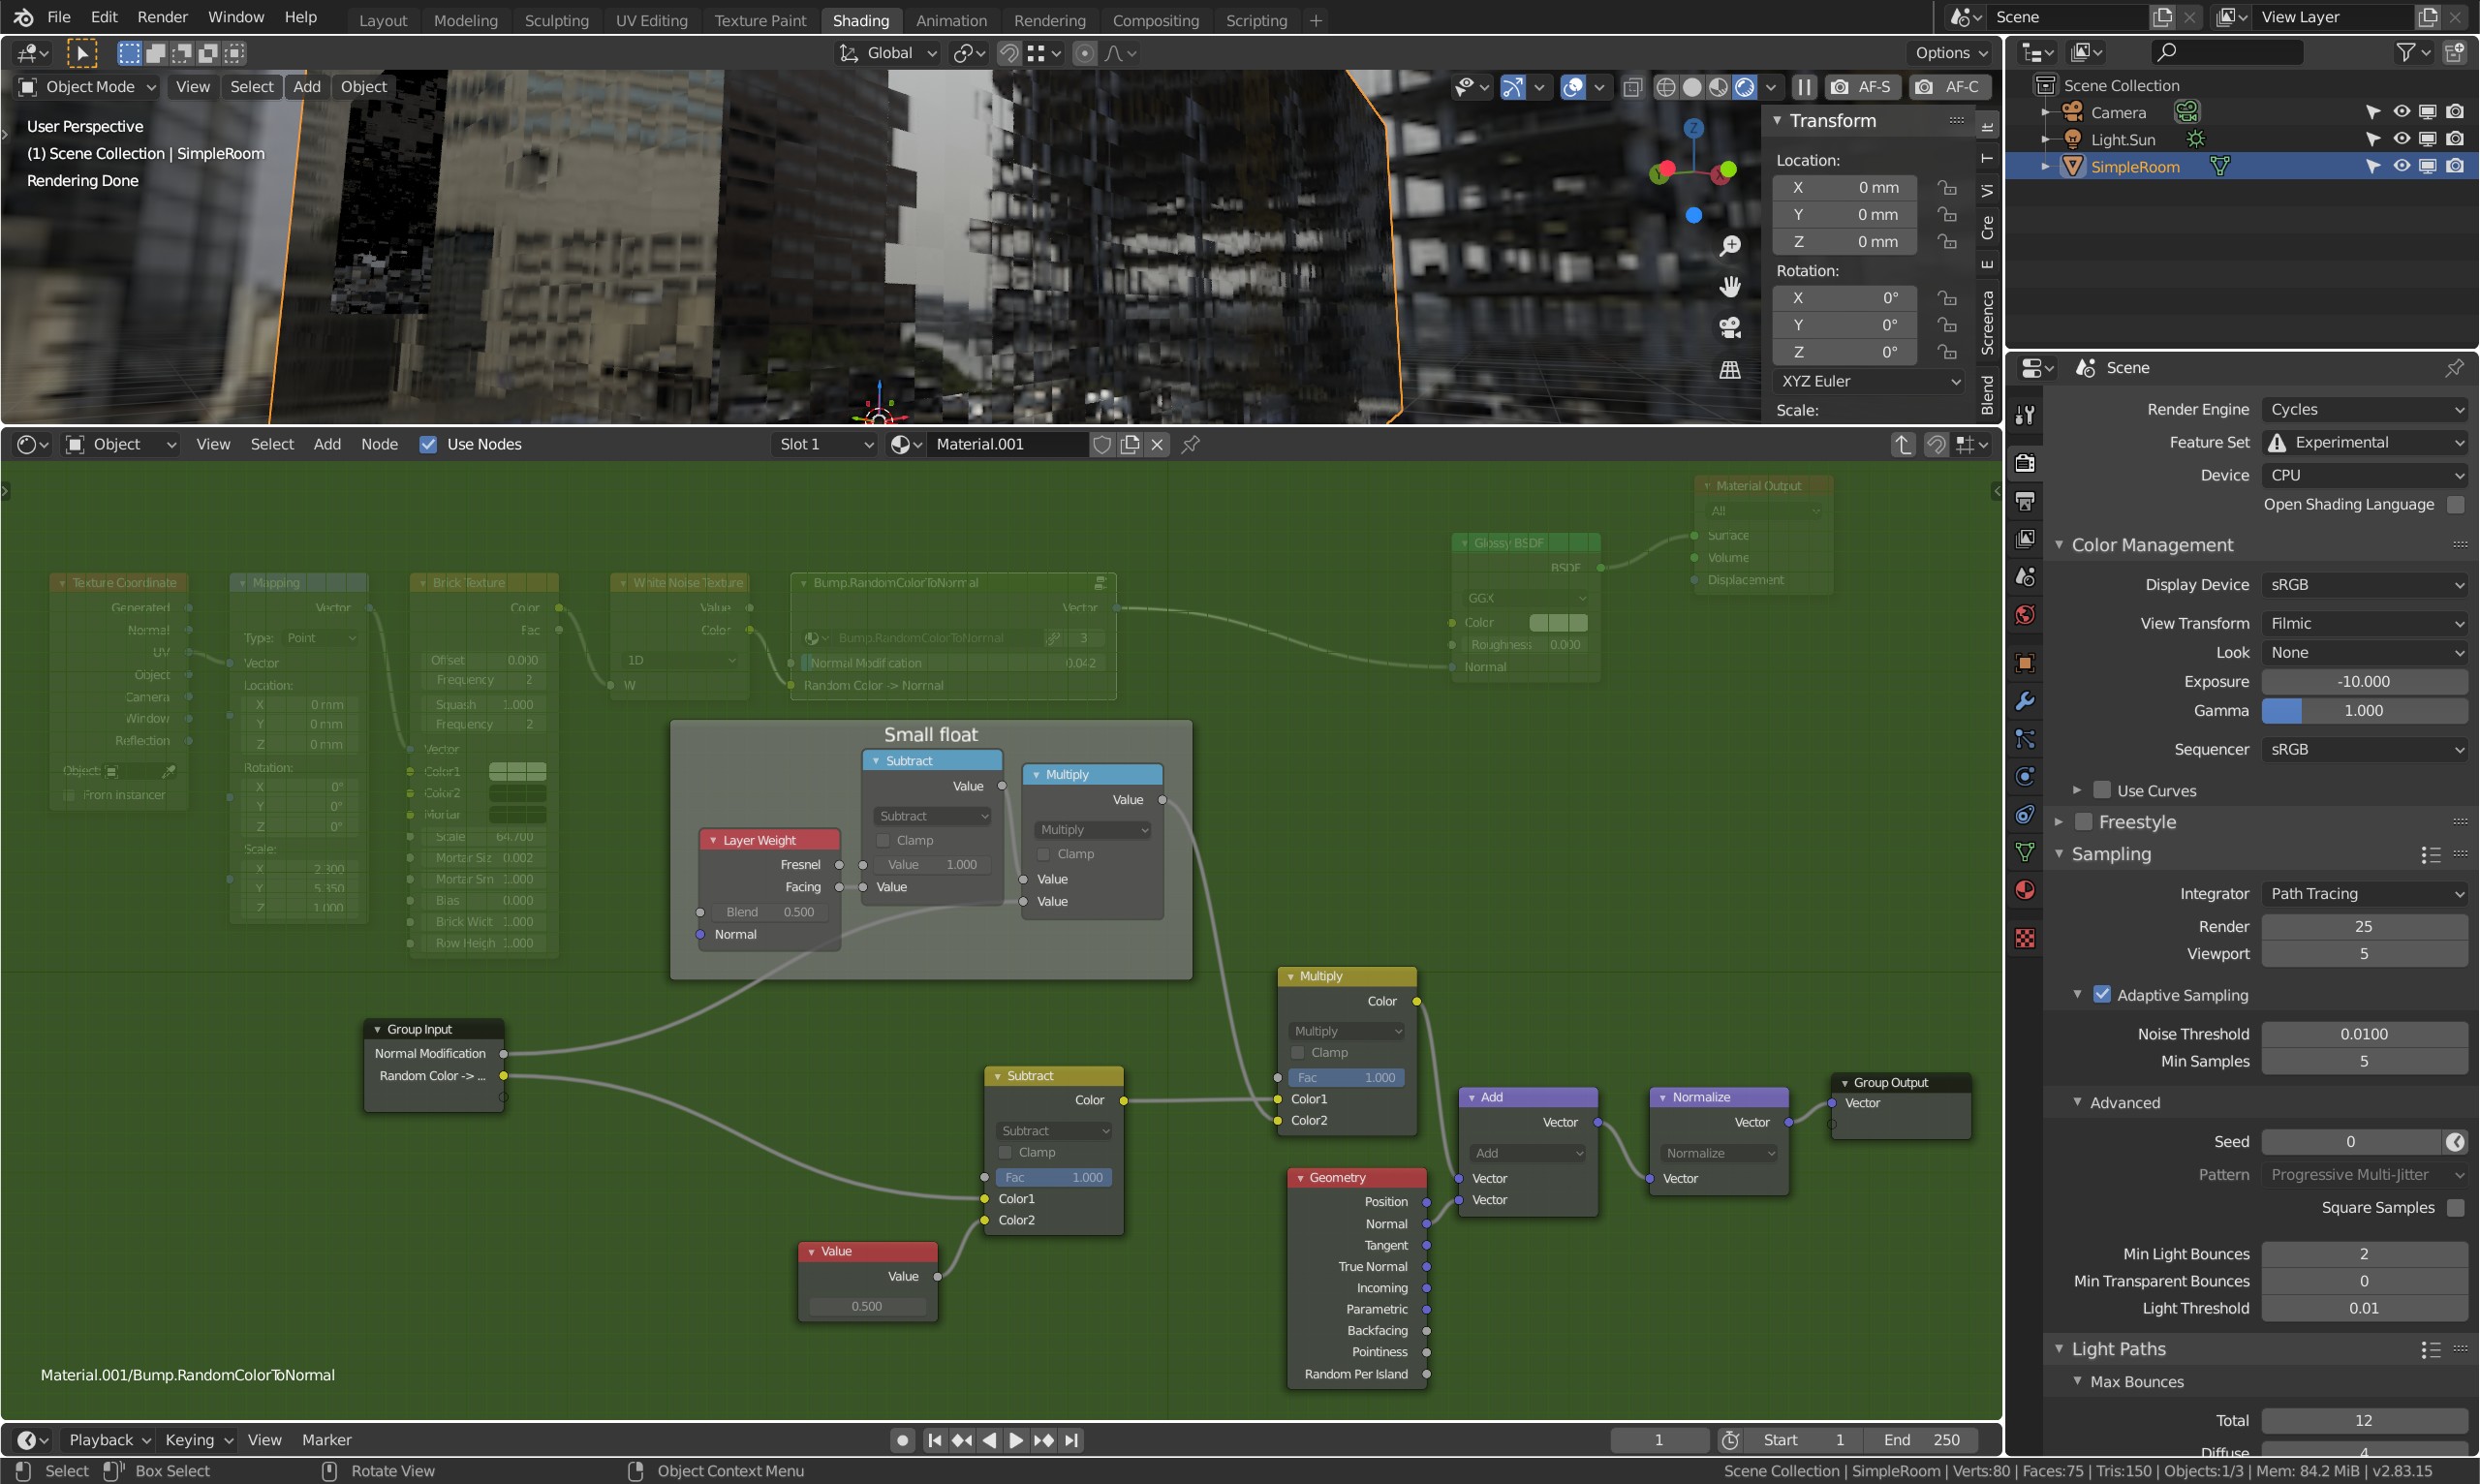
Use two brick generators if you want grout. One black&white fed into WhiteNoise with no grout, and one for only grout. Use the gradual grout mask to mix the normal modification with obtained normal to prevent a sharp edge in the center of the grout. Voronoi with no random can also be useful for tiling stuff like this, not sure which is the most efficient.
While W parameter in 4D generators can serve as an easy seed, it’s generally better to use just a random vector added. Although I haven’t tested it, I would recommend to not use more dimensions than needed. Same with octaves/details - most tutorials crank it up to full without consideration.
Its all in there (normal offset for panels, pane separations, striation distortion, general distortion and Fresnel for more reflections at acute angles).
I ended up using very subtle general distortion and plenty o plane offset, it is all tweakable.
Both distortions and offset get much more noticeable the further away you take the texture.
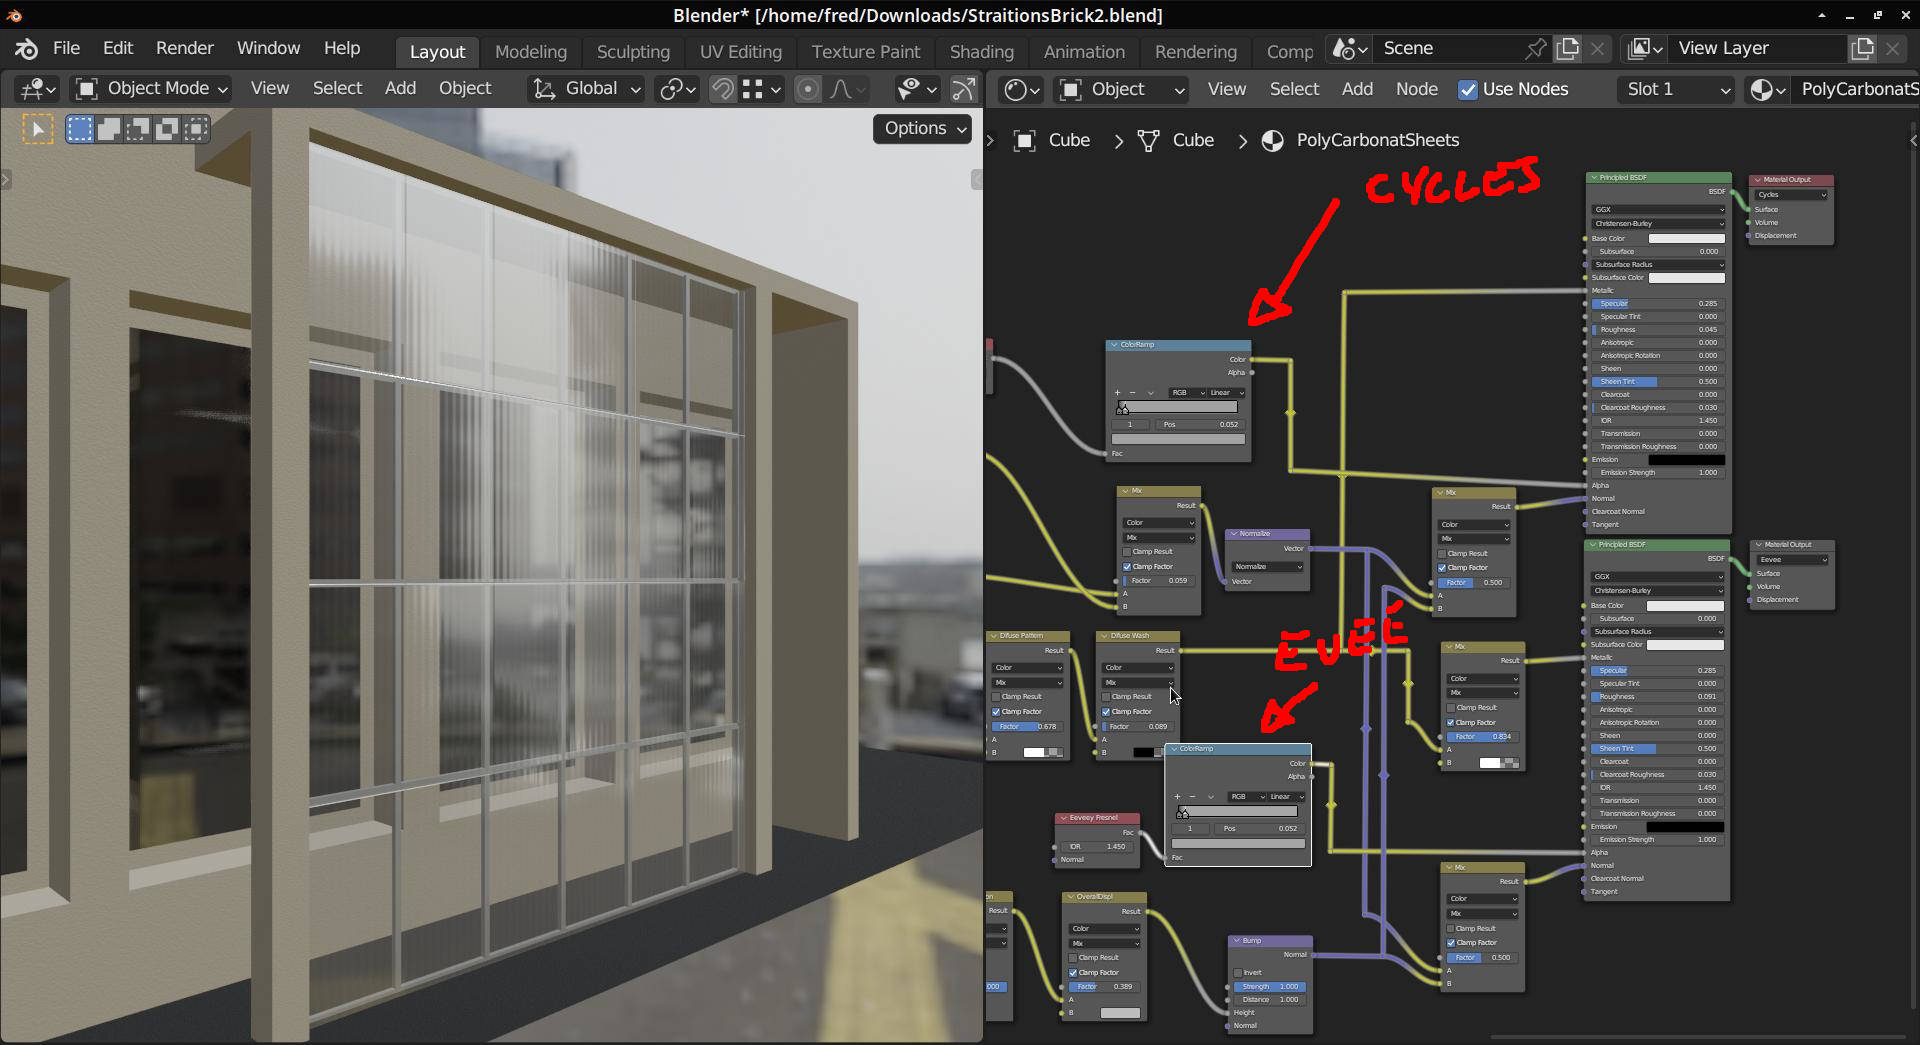
I changed the final mix values for transparency/diffuse and roughness between cycles and eeveey. In the end I made 2 outputs for cosistancy.
I was so pleased with the result that I tidied up the nodes
Thanks Colacuve for inspiring me during lock-down and thanks Carl for your help.
Now I’m going to model some buildings to use all this!
Eeveey
And the Blend so you don’t have to copy them all!
You will find the main parameters named if you want to exaggerate things. StraitionsBrick2.blend (1.1 MB)
Happy Blending.
Sorry to insist on an old topic (and edit - yet again), but I was trying to use the material and found that when I did the node cleanup I had forgotten to mix in the striation distortion for the cycles output. I have now mixed it and it will now work like the render example.
I have edited the images and uploaded a new blend file. I have deleted the old ones and replaced them in this same post.
Hmmm, still has the same problem because I’m using the bump node to convert to normal map. I can not see an easy way round it, so for the moment I will just tweak the overall displacement value depending on object size.
Hi! I am trying to do the same, thank you very much for the hints. The only thing is that in my wave texture it looks like the “X” option is missing (I am in Blender
You are rotating the wrong mapping node, the mapping node you are rotating uses the brick texture to change the location of the distortion values to randomize the panel distortion between the separate sheets, So you get different distortions for each separate pane. The wave texture you have marked is used for the panel imperfections. You are rotating the panel distortions.
It looks like you have changed the value of the striation orientation in the wave texture I labeled striations from “X” to “diagonal”, at the bottom left of the setup. I do not think there is a problem with the blender version.
It could be that, I’m using 2.9 now (I started the material with 2.83).
But in Gemma’s example image she is trying to adjust the mapping of the wrong wave texture. I used one wave texture for the wavy distortions and another for the straight lines of the striations pattern.
EDIT:
At close inspection you are right Carl the old wave node did not have that flip x.y,diagonal option and I did not include a mapping node especially for the striation orientation.
Hi!! Sorry, but can I ask you to upload th material you crated? i’m having really lot of troubles trying to do the same material, expecially with opacity. Let me know if you can, thanks
I hope I can revive this thread. First of all thank for this shader! I am on a tight deadline and it is a life saver
I will go through its making off with great interest but for for now I need a quick fix to add transparency to it!
How would one do this?
The transparency is controlled by the colour ramps that go into the alpha inputs. if you change the white colour stop to a darker grey it will be more transparent.
Hard numeric values. Not driven by layer weight/facing or fresnel. I.e. diffuse and translucency is always a hard numeric factor (and always < 0.5 at that), although you can drive the factor with a texture to simulate thickness, you shouldn’t use viewing angles for something like this.