I would legit pay money for this, but that aside, this is amazing. Great work!
2 Likes
I’m sorry to bother you with more questions. I’m finding the grid instancing approach super useful, but I’m having troubles removing left over parts where the grids intersect.
I saw that you mentioned storing IDs of the original faces, but where and how do I use those IDs later?
hey cool !
here is a screenshot of my node tree :
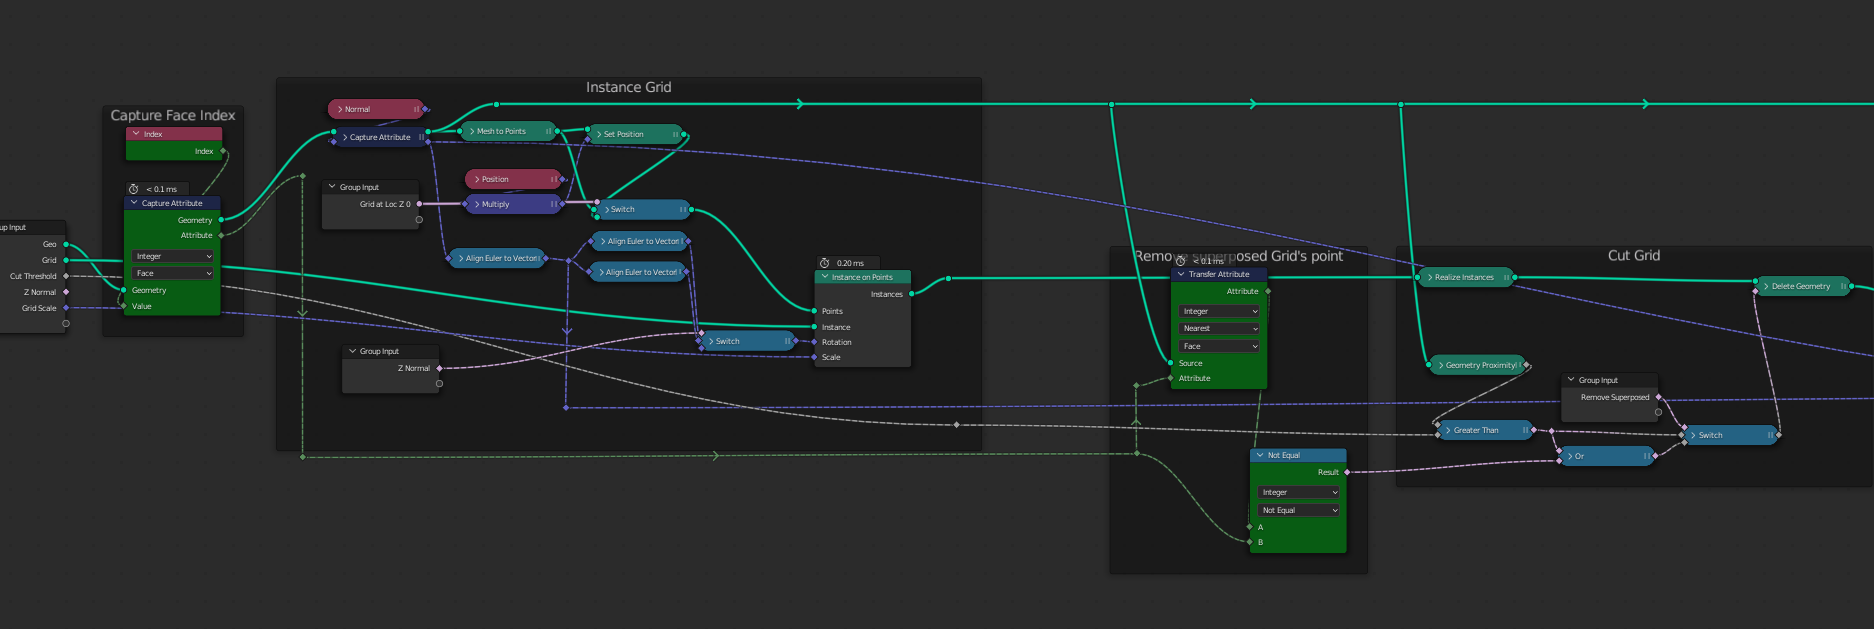
The nodes that you are looking for are in green, hopes that helps and feel free to ask me if it’s not clear and I’ll provide more informations !
It opens a lot of possibilities I use this custom node group quite often !
1 Like
This makes so much sense. Thanks a bunch 
1 Like
Awesome ! Feel free to post your experiments with the technique, it could be quite interesting to see how you use this tool !
1 Like
I saw this before, it´s so incredible both in concept and execution! so many things have to come together in a persons mind to be able to create something like this, I love it! congratulations @sozap amazing work!
Thanks a lot, that’s really appreciated !
I’ve started a new scene here :
There is more information on the general process, if you’d like to have a sneak peak on how all this is put together. As with many things it’s spending a lot of time to figure out one issue after the other ![]() .
.
2 Likes
Hello Sozap,
Thx a lot for all your advices and tips! Your new building is really insane ! ![]()
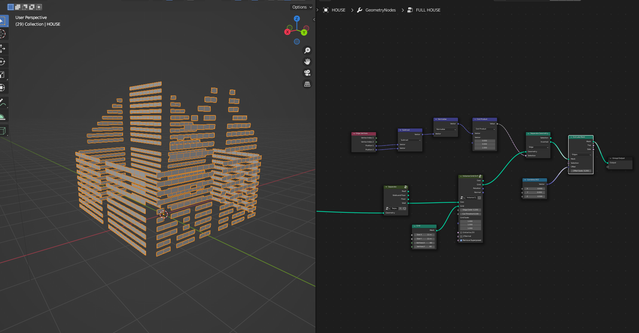
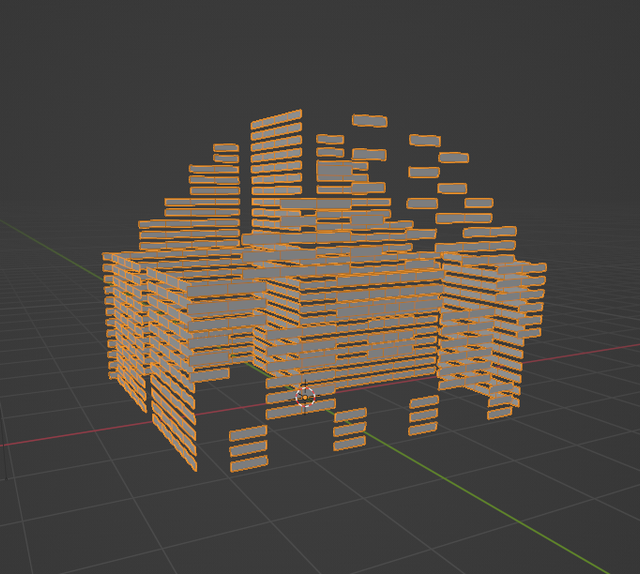
I’m working step by step with the house. Here where i am : generate the planks.
I’ve read many times all your precious replies, and i’m trying to figure out how to reduce vertical subdivision of the grid without having wird deformation. For exemple, if i reduce Y vertices of the grid, i have holes in the mesh… ![]()
Amazing, congrats!
hey thanks ! and that’s very cool to see your progress !
Here is a few hints :
Instead of extruding the mesh, you can convert the edges to curves, and form the planks using a curve to mesh.
That way, you can set very high subdivisions on the grid, so the grid fit the mesh nicely, and once converted to curves, you can resample them so they have for example only two points. You’ll probably need a little more if you plan to destroy it, but that can be done latter once you get the basis right !
Especially when it comes to destroying the house, but also from time to time I find myself converting back and forth from curve to mesh to do some operations. In the end I was amazed by the power of geometry nodes because it doesn’t cost that much in processing the geometry .
You can also try to use a decimate modifier on the basemesh set to planar before starting to add detail.
On my setup the house has 3 modifiers :
The basemesh generator set the global shape,
The decimate set to planar convert every faces to Ngons, so I have the minimal amount of faces and edges.
Then come the last geometry node tree that take care of turning the base mesh into the final house.
It works without the decimate, but I found that it gives better result in general.
I’m very glad that people find their way in all the the things I’ve written and comes with their own solutions, I’m looking forward to see your progress !
1 Like

I’d recommend you check out this tutorial, it’s for brick walls but it’s the same sorta idea
1 Like
Hey Sopaz,
Love your work mate and got me heaps inspired.
Just wondering, how did you get the voronoi offset on each floor level?
I cannot for the life of me work this out!
Thanks so much for sharing tips and what not too!
2 Likes
Super cool ! Well done !
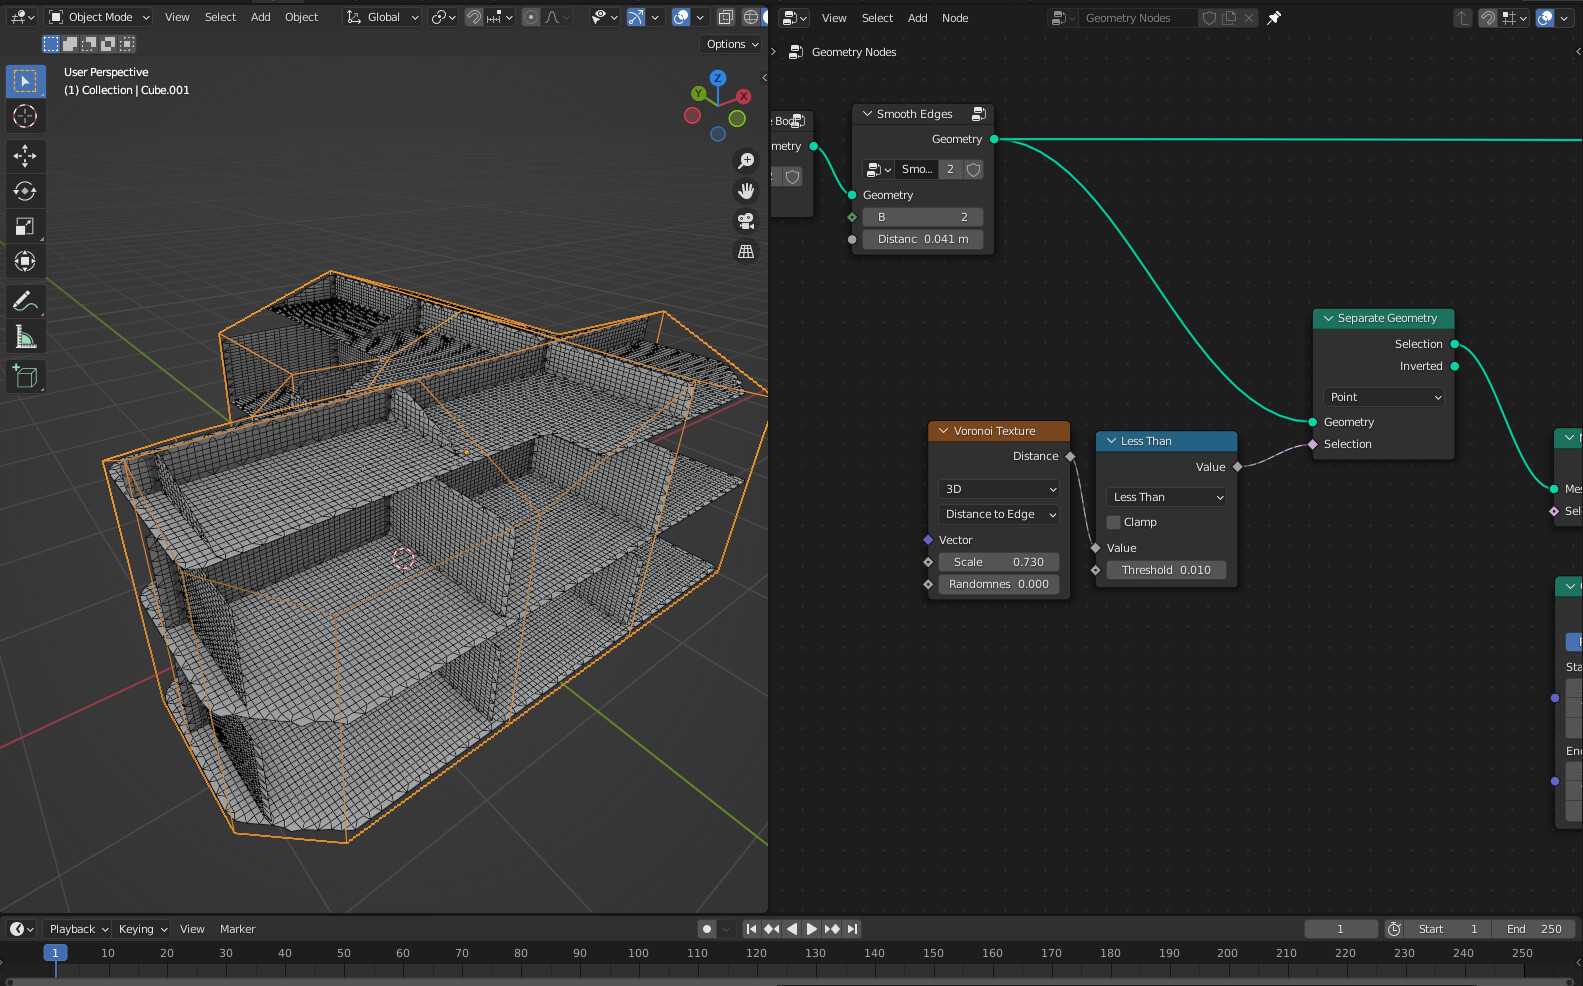
This one is quite simple, set the voronoi texture to 4D and plug the island index into the W socket, you can multiply it if needed …
2 Likes
Man you are a beast. Thanks. Learned so much from this thread already!
If you did an online course I would straight up pay for it. Just sayin…
1 Like
Awesome ! that’s really cool to see people making good uses of these techniques !
I’ll see if I have time to work on a course, but for now I’m just having too much fun playing with the nodes to do something else 
3 Likes
Hi,
A short uptade, but with pictures… I think that the procedural construction from a plan is the most complex. The positional maths is quite challenging… Or maybe it’s just my own skill ![]()
I put some random color to separate each part.

The planks are out, I finally used a trapezoidal curve to generate them, to have a base wider than the top. Following the posted tutorial, I tried to introduce a modulo to have horizontal shifts. On some faces it works, on others, not.

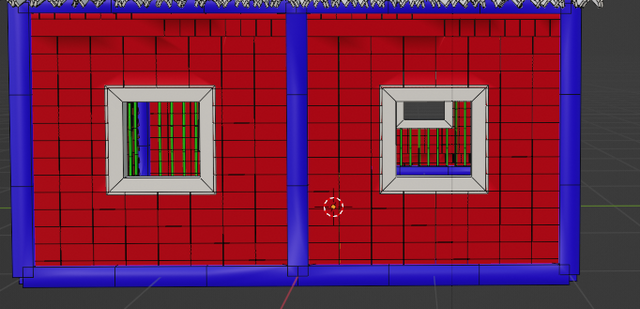
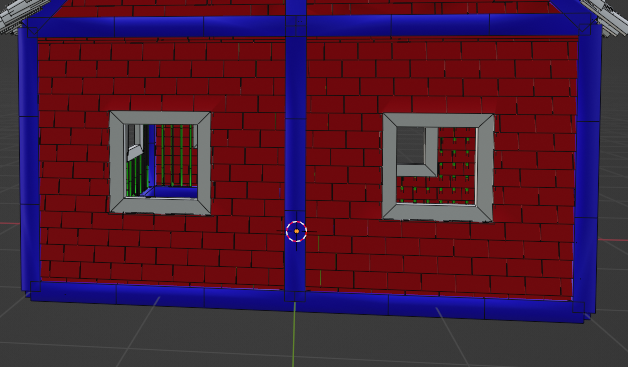
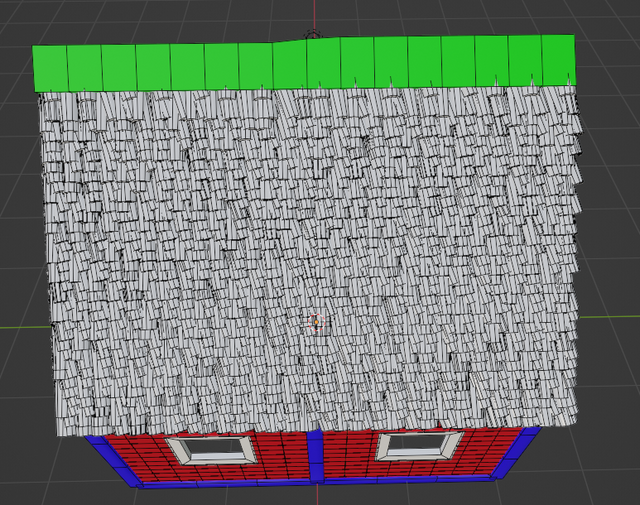
The tiles are also fixed, but the result is a real mess of stacking. At the moment they are generated on one instance on grid, with a little random effect. For the top section I isolated a piece of the mesh directly from the subdivided roof.
For the inner structure, I decided to deal with the subdivision of the grid ( inevitably high to have a well cut mesh). I would like to try without decimate…hope a geo node will come in the future !
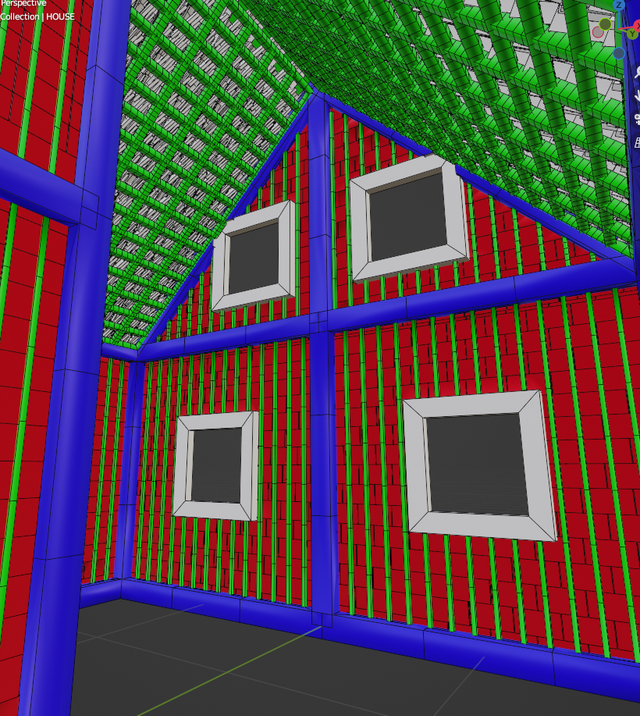
I tried to place them a bit further inside the mesh, but it is not good enough. The house is based on a single subdivided plane, so the distances are not the same if you are at the edge of the original mesh (n°2) or if you are in the “hole”. (n°1). Maths is …well… i tried ! ![]()
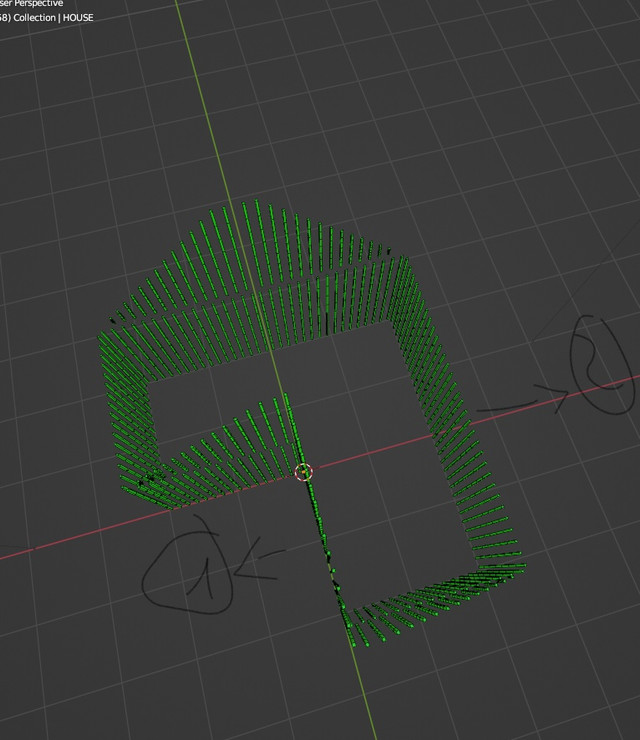
Finally, I placed some windows, i don’t know yet how to distribute them properly on face i choose . All this is still very sketchy, sorry… ![]()
1 Like
Cool ! You’re making really good progress here !
Of course at some point you’ll get a giant pile of issue that need to be solved, by taking each one step by step eventually things will start to get better !
For the offset of the planks, you can do it on the grid before instancing it on the faces, that way it should work everywhere.
But of course you’ll need different grids depending on offset and subdivisions you’ll need for different parts (roof structure, tiles, planks etc …)
For that you can try to transfer the normal attribute of the roof basemesh, and do a set position on the curves based on that. That should give you a constant offset .
Anyway, it really starts to look like a house , probably you’ll have to clean things up a bit before going further , but things will start to get interesting from this point, because you’ll start to add extra detail rather than bringing the essential elements !
Well done !
