Revised mesh tension add-on

the existing tension map add-on apparently was having issues with armatures, shapekeys and rendering in blender 2.8+, so i decided to give a shot at making a version myself. it should work with armatures, shape keys and other deformation modifiers, and shouldn’t have issues rendering.

its still kinda frustrating how the new depsgraph seems to work, especially for rendering animations. it feels like you have to hack your way into making updates on each frame without breaking some other element of the animation.

anyway, download here:
Version 1.0:
mesh_tension.py (5.1 KB)

Version 1.1:
mesh_tension.py (10.5 KB)

Big Updates!

  • Now generates vertex groups that can be used with modifiers!
  • If a modifier uses one of the generated tension vertex groups, it’ll automagically know to not use that modifier for calculating deformation tension
  • Added an ‘Always Update’ option per mesh that allow instantaneous feedback while editing the scene rather than only when playing back animations.

Version 1.2:

mesh_tension.py (10.7 KB)

  • Adds a ‘Bias’ option that lets you artificially favour stretching or compression

Version 1.3:

mesh_tension_1_3.py (10.9 KB)

  • Feature: If you tag a modifier name with the suffix ‘SKIPTENSION’ it won’t consider that modifier’s deformations as contributing to tension:

  • Fix: An objects’s tension updates are now paused when in edit mode; hopefully reducing errors where tension calculation ceases to function.

Version 1.4:
new vertex mask option that avoids tension calculations on an entire mesh - ie if you only need to calculate the effects on a character’s head rather than an entire body. note that in the current implementation it doesn’t factor in the individual vertex weights of the masking group, just whether the vertices are assigned to that group. it definitely provides a decent speed-up, but not as much as i’d have liked.

i also tried to do some trickery around handling mesh data in update loops. it provided some additional performance benefits in some test cases, but do test cautiously in case i’ve made any sort blunder! also in case it doesn’t appear to be working after updating the addon, try toggling the mesh tension on and off on the object, it should force a refresh of some new data structures the add-on relies on.

mesh_tension_1_4.py (12.8 KB)

Version 1.5:

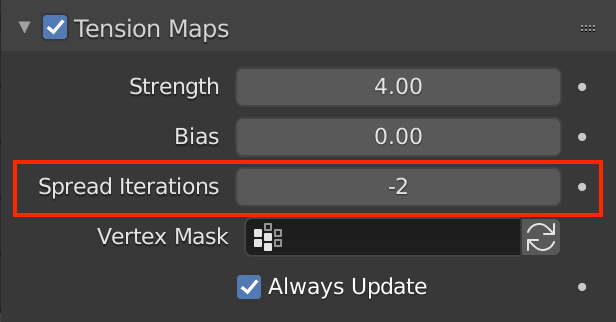
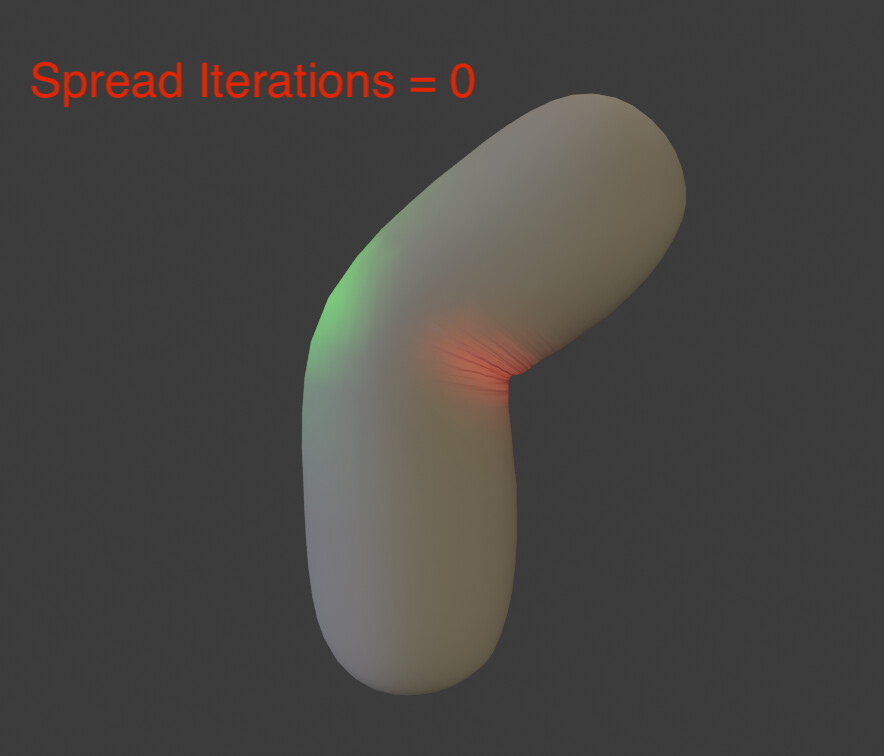
Feature: Tension spread.

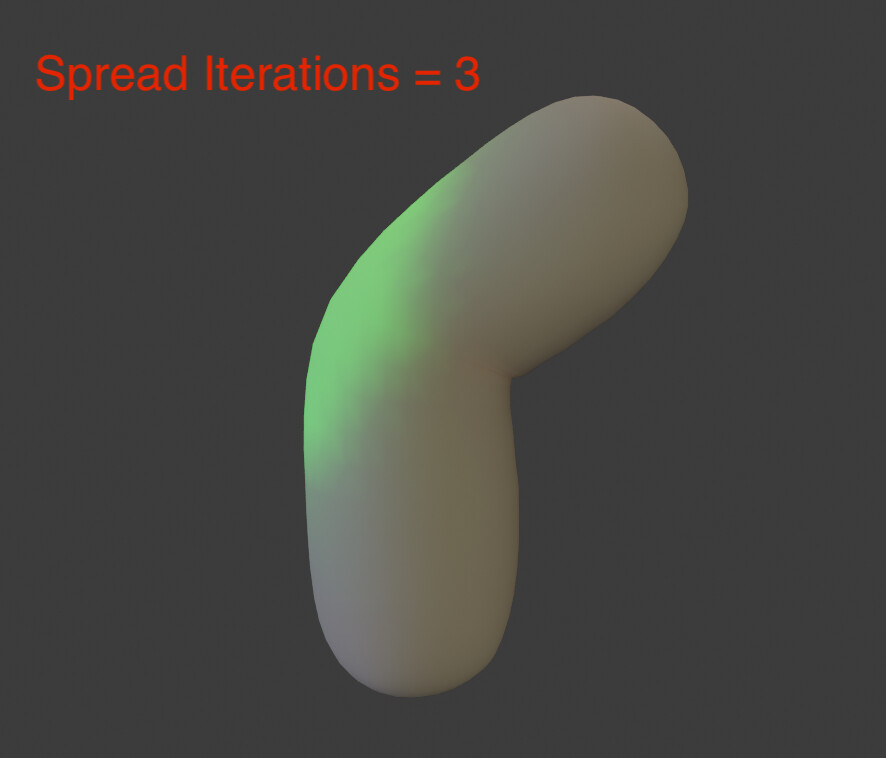
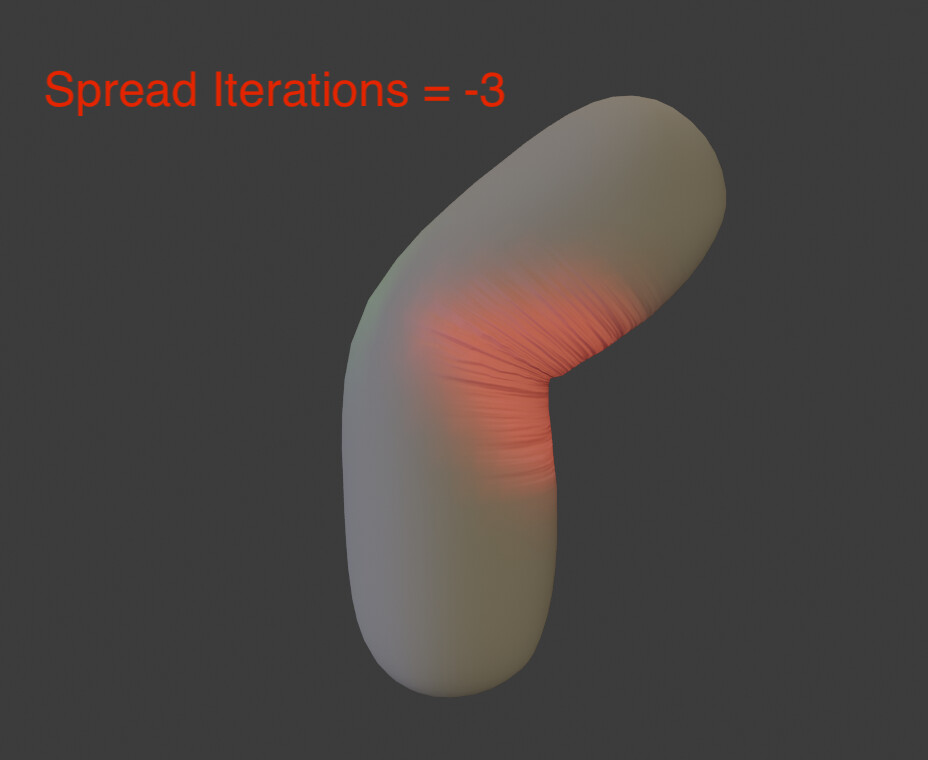
  • If the previous vertex mask helped speed things up, here’s a way to slow them down again! ‘Spread Iterations’ allow tension to propogate across the mesh. Positive iterations spread the stretching effects, negative iterations spread compression.

  • Higher iteration counts in either the positive or negative direction slow things down quickly, so I soft clamped the value between -4 and 4 to prevent accidentally locking things up dragging it like a slider, but you can manually type in higher values if required.

  • Wondering if I should allow individual controls for compression and stretching spread. might give more flexibility by allowing overlap of the two effects.

Screen Shot 2021-02-28 at 11.08.15 PM

mesh_tension_1_5.py (14.3 KB)

Usage (version 1.1):

  1. Install it in the preferences like any other add-on

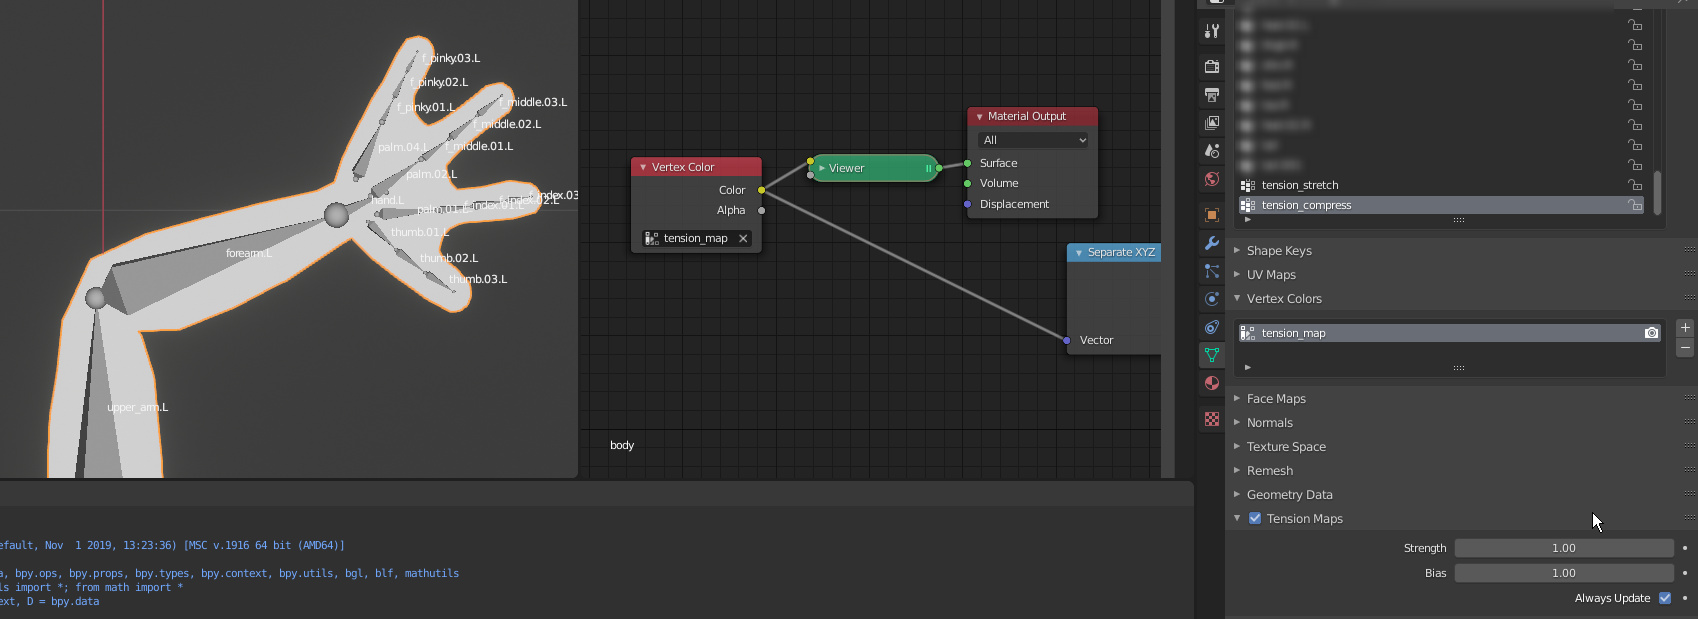
  2. Enable it per mesh in the mesh data tab:

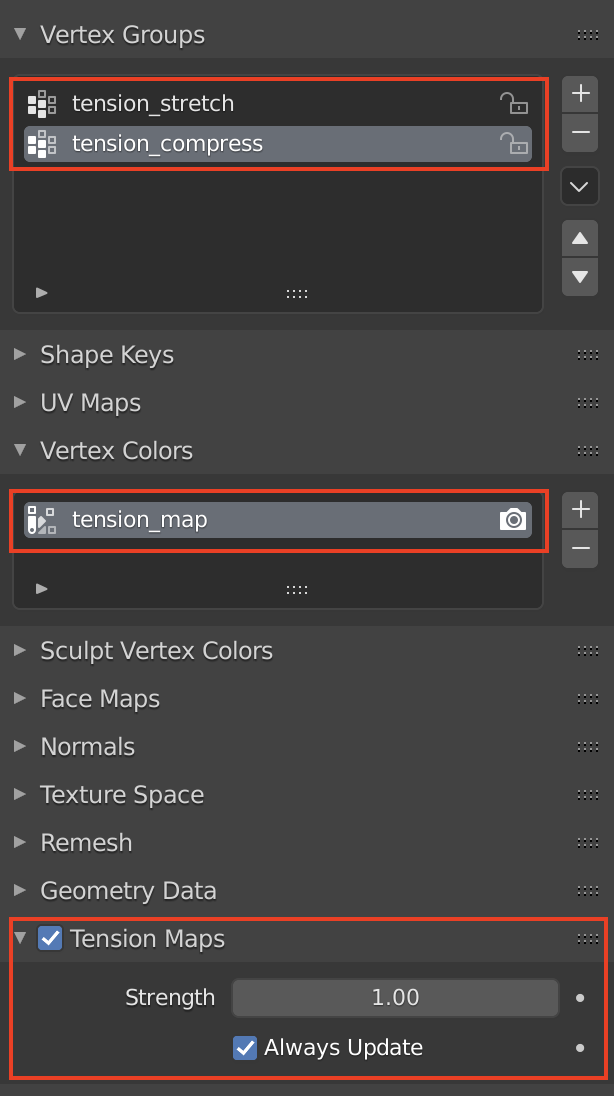
  • ‘Strength’ multiplies the intensity of the tension values.
  • ‘Always Update’ allows for interactive tension updates even when not using the animation system
  • In the scene properties, there is also an option to globally disable tension calculations
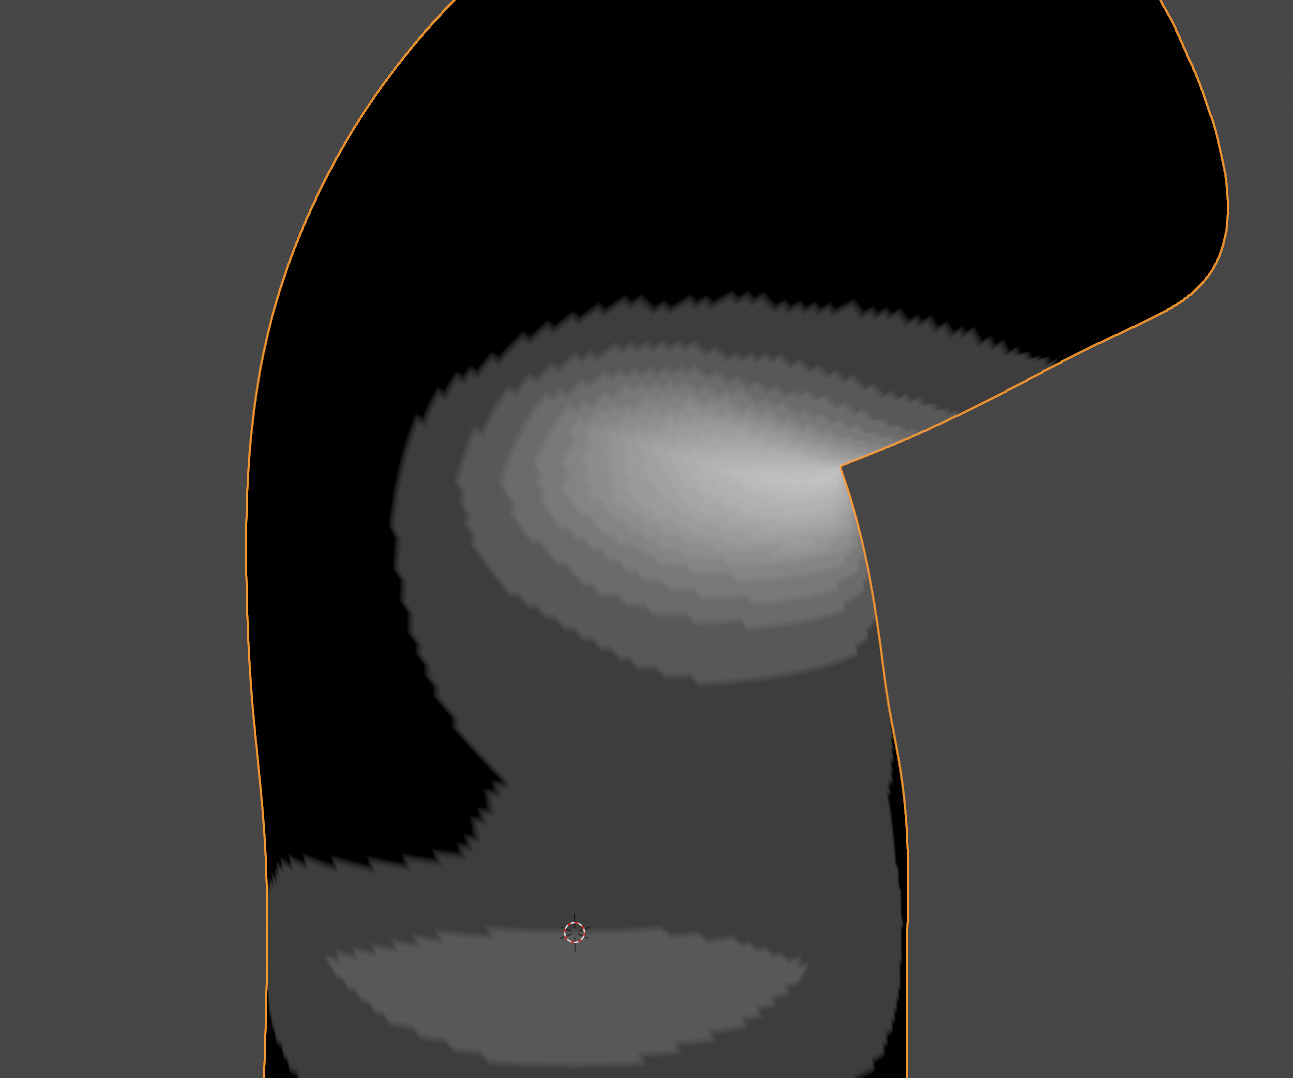
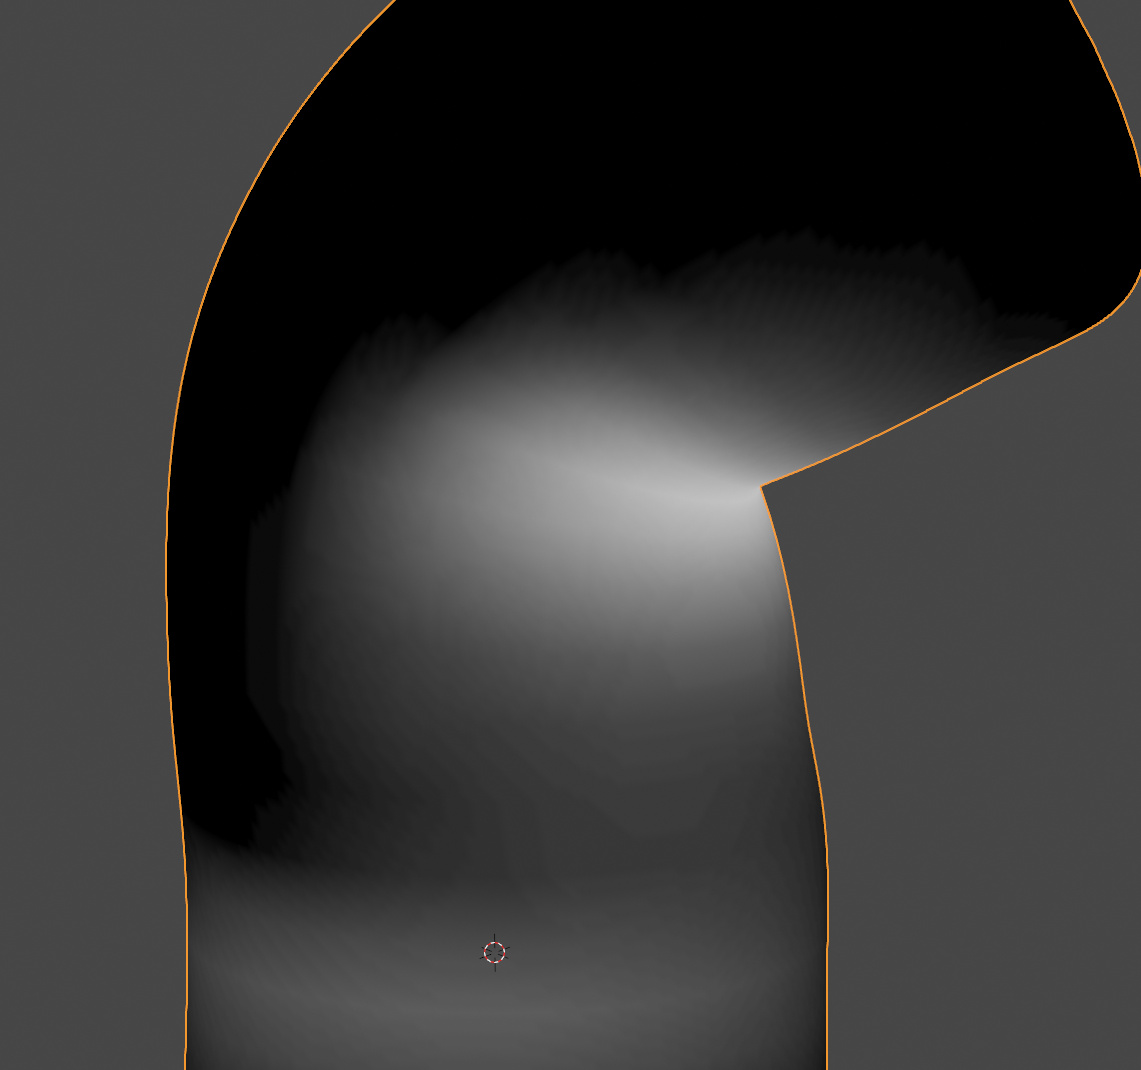
  1. When enabled, it adds a vertex color called ‘tension_map’ that stores stretch in the green channel and compression in the red channel, and vertex groups ‘tension_stretch’ and ‘tension_compress’.

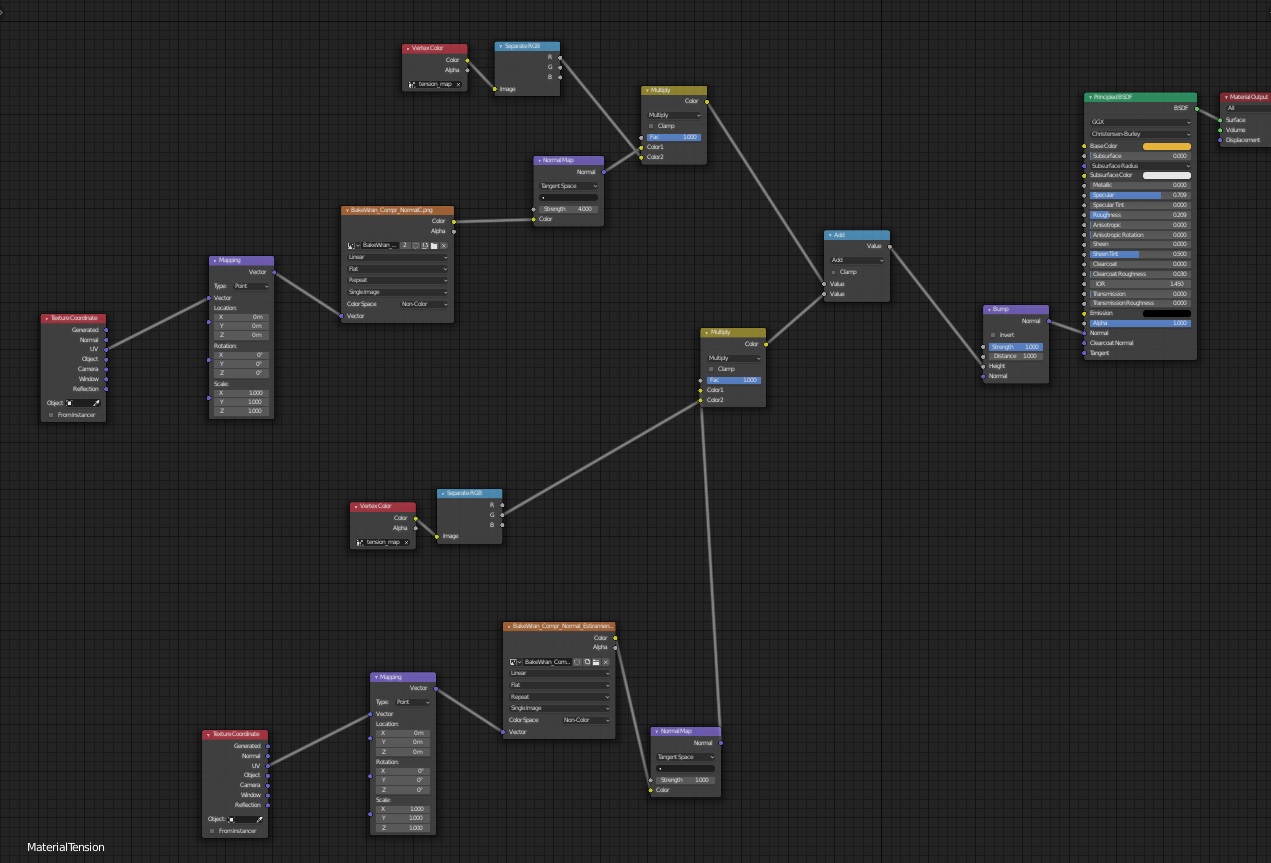
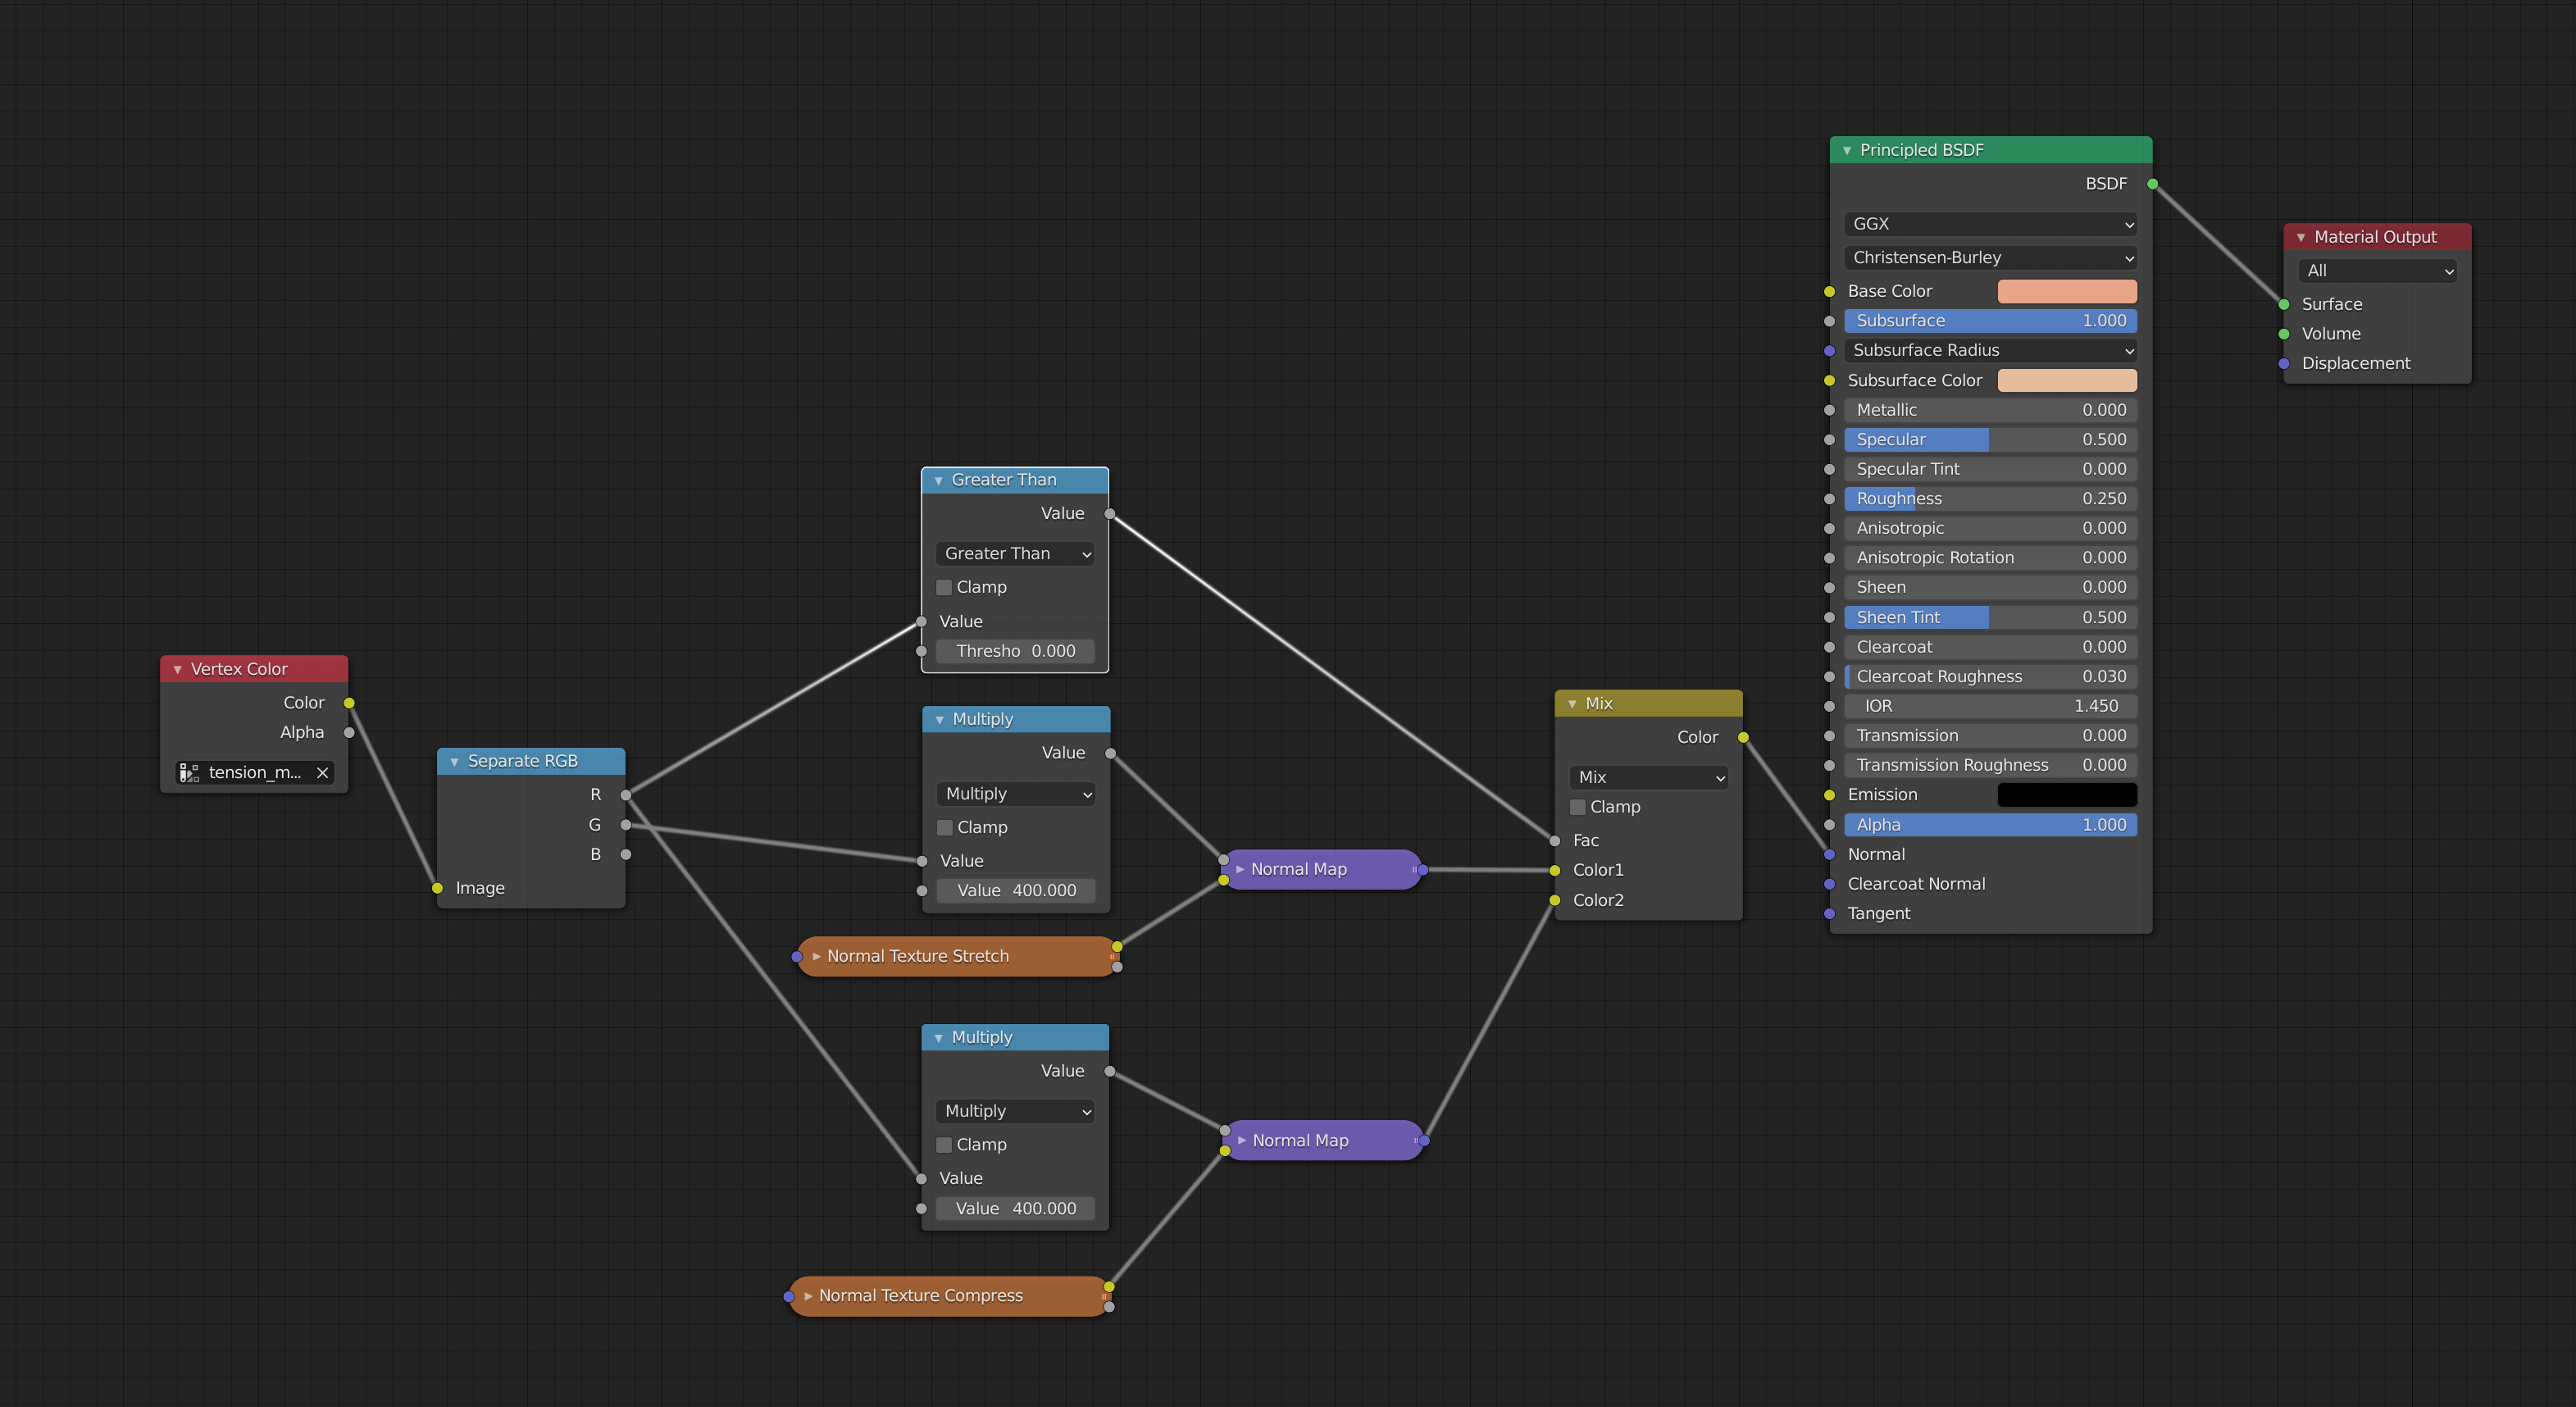
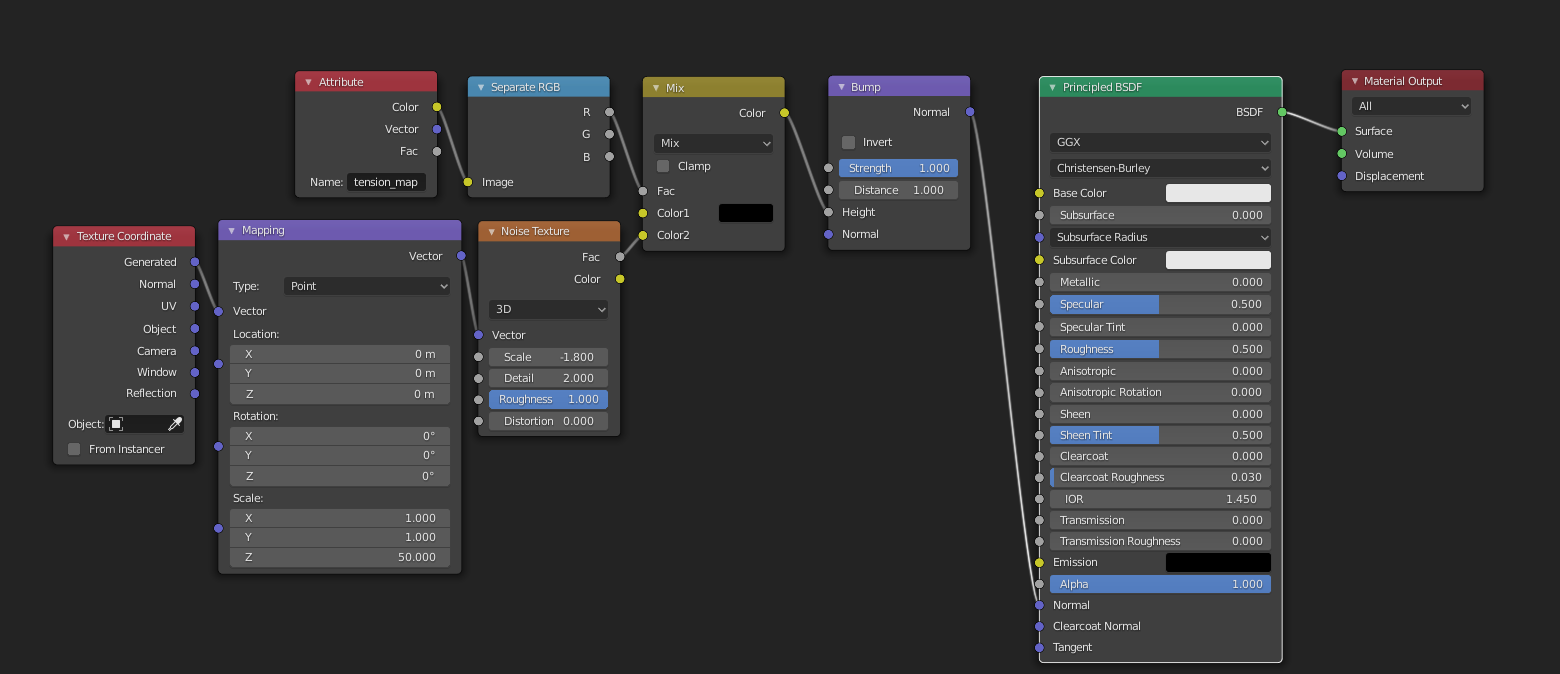
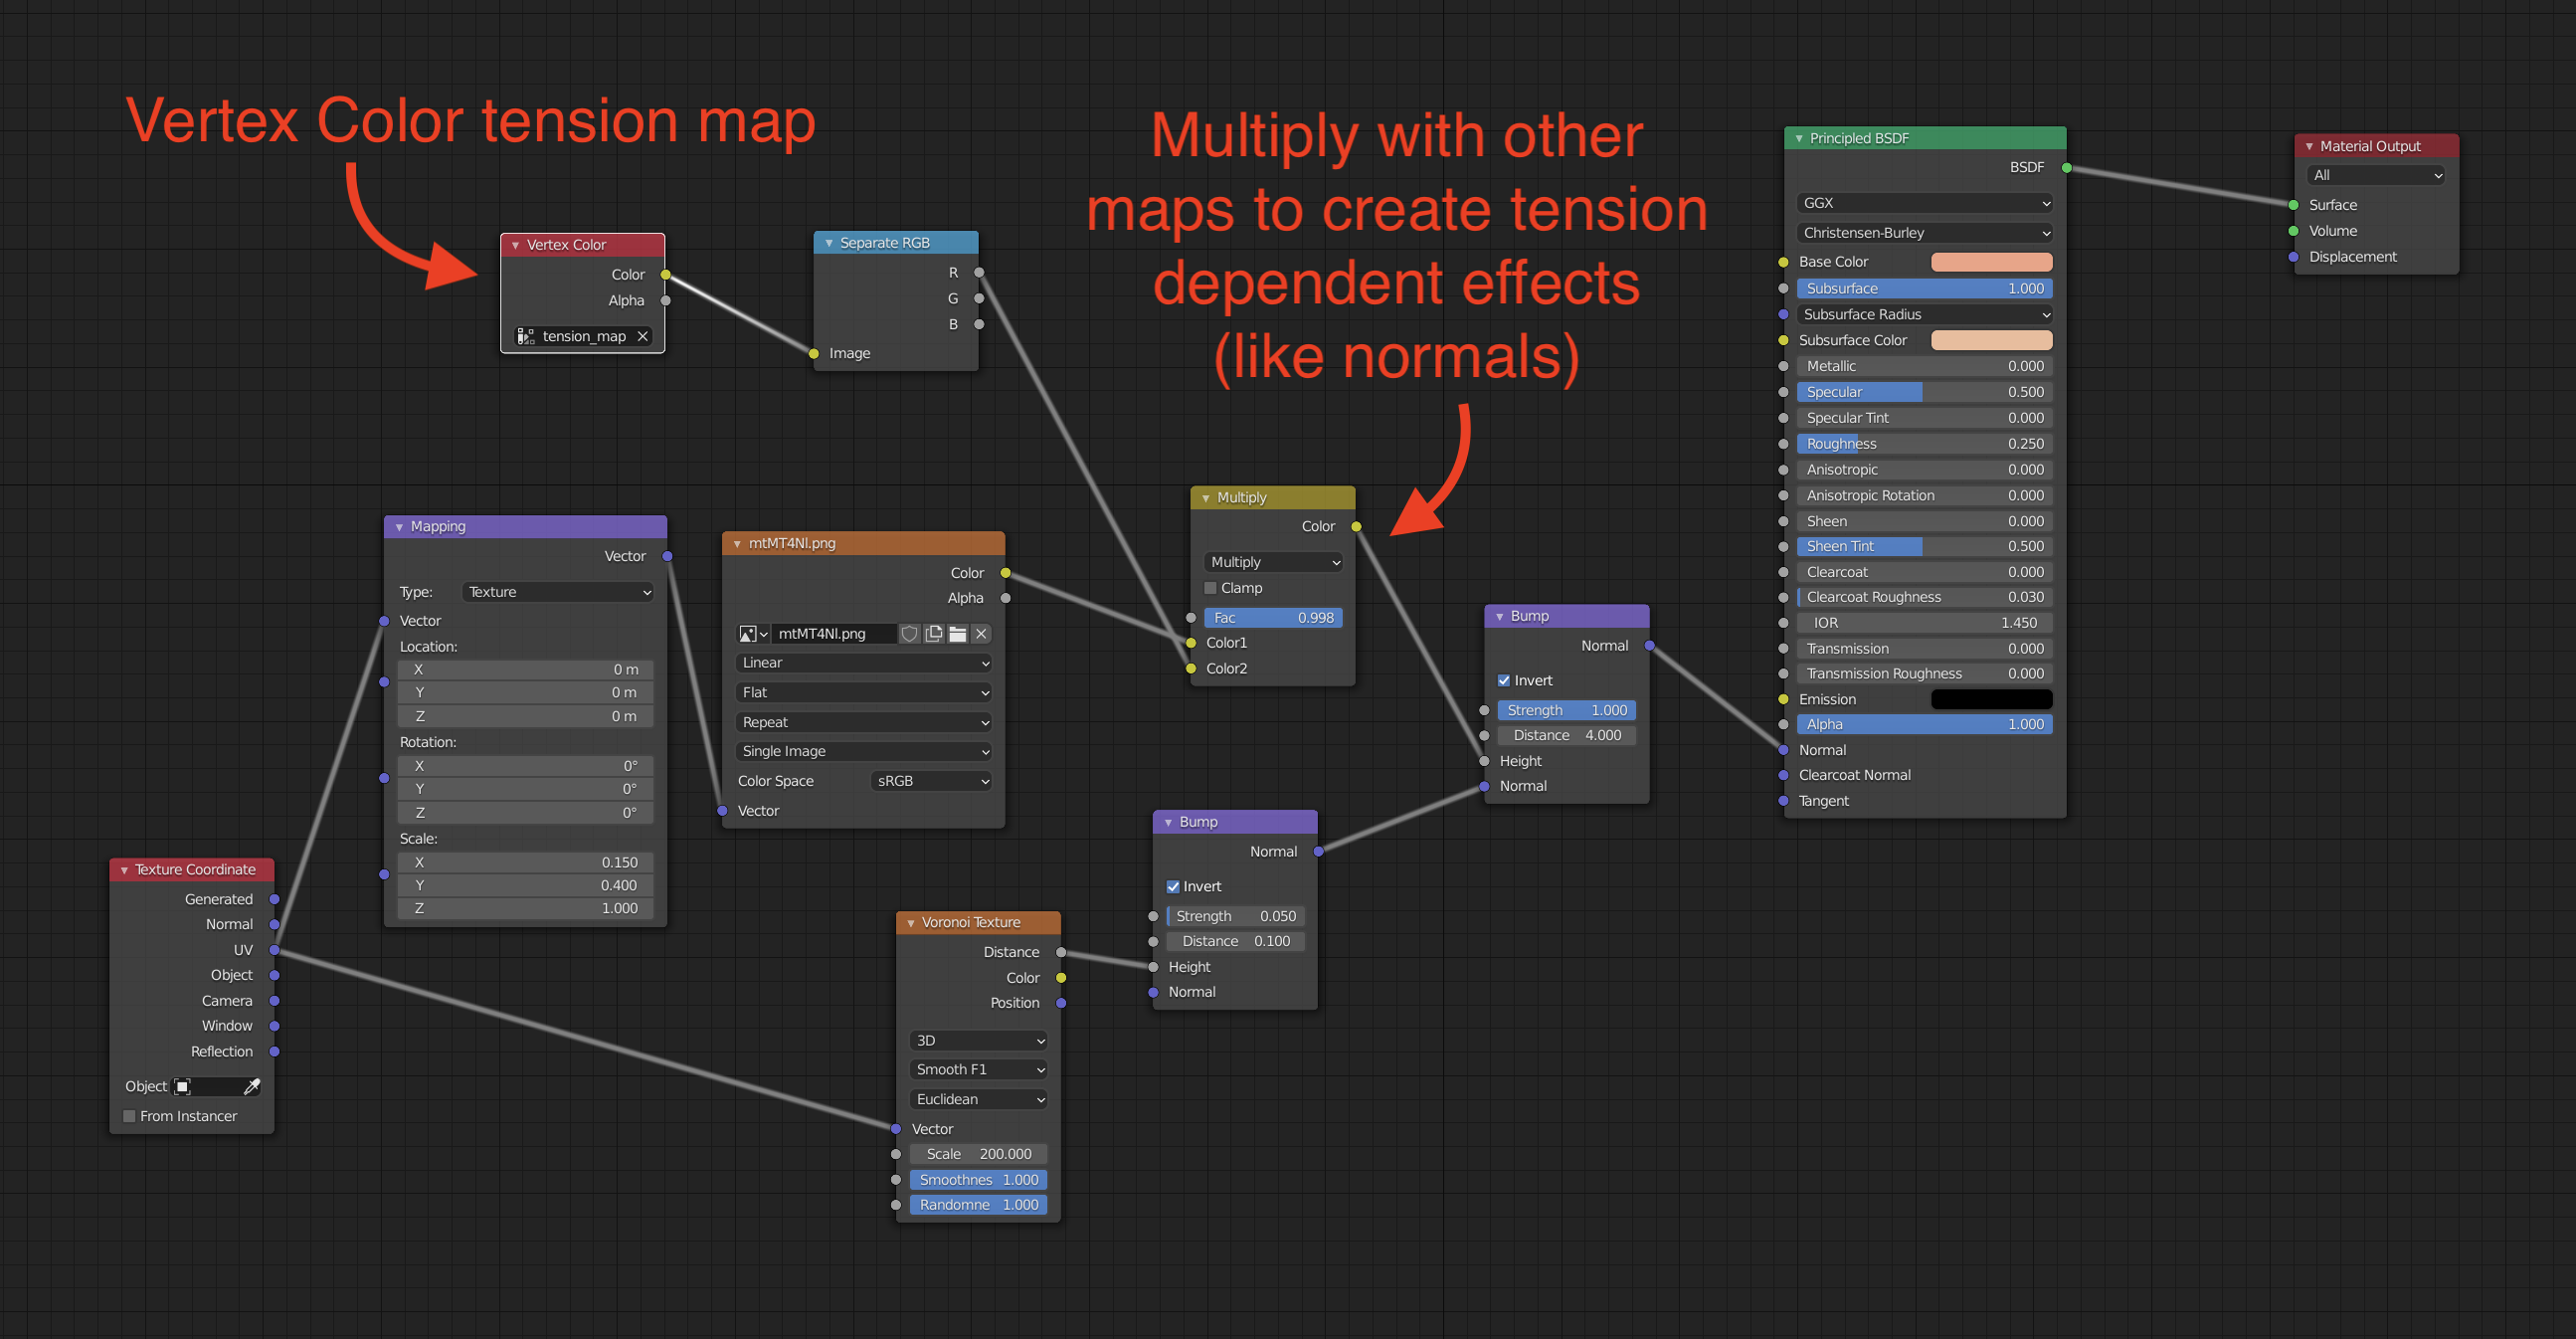
  2. To use in a shader, add a vertex color attribute. You can separate out the green or red channels to multiply against corresponding maps that show compression or stretching.

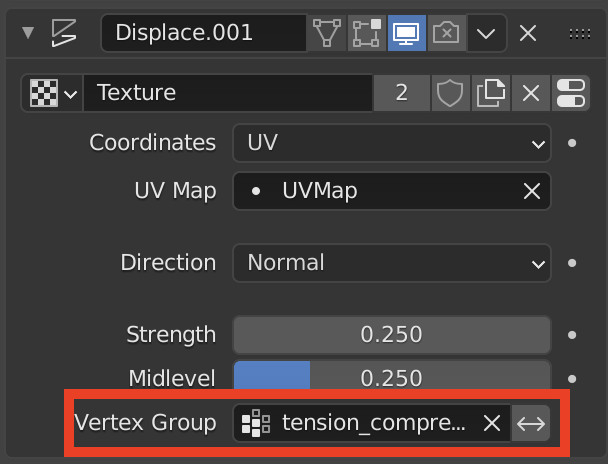
  3. To drive a modifier, select one of the tension vertex groups in the modifier’s settings.
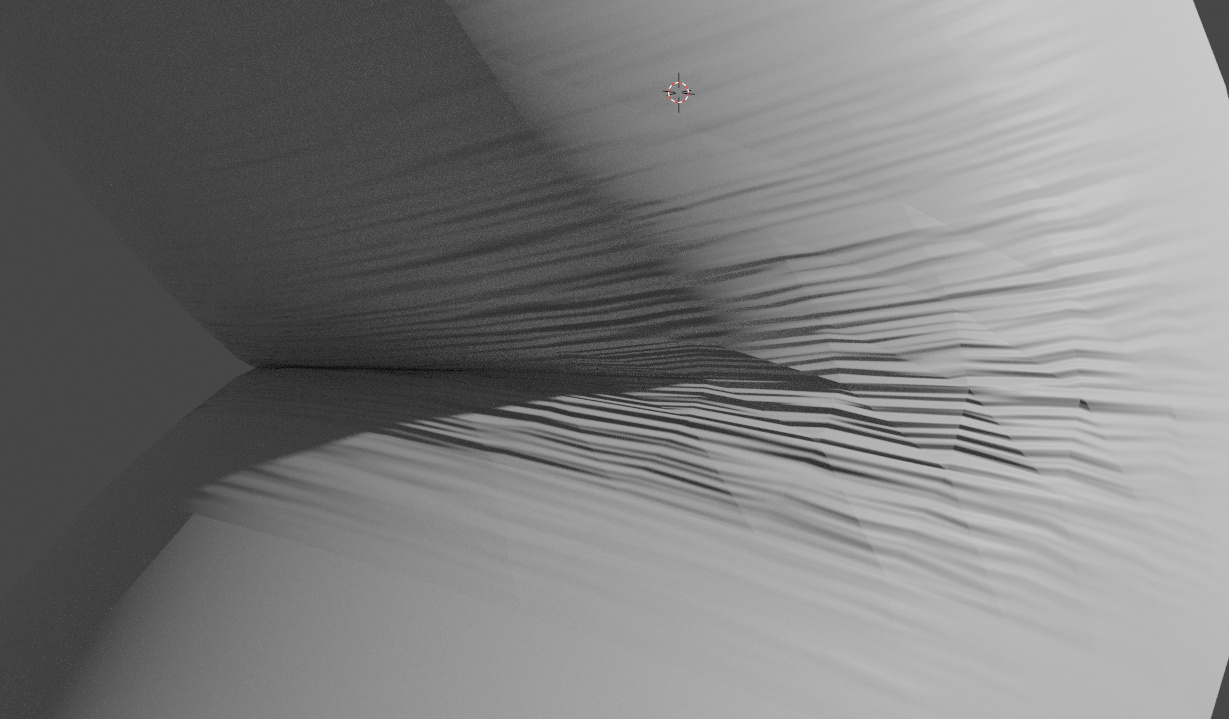
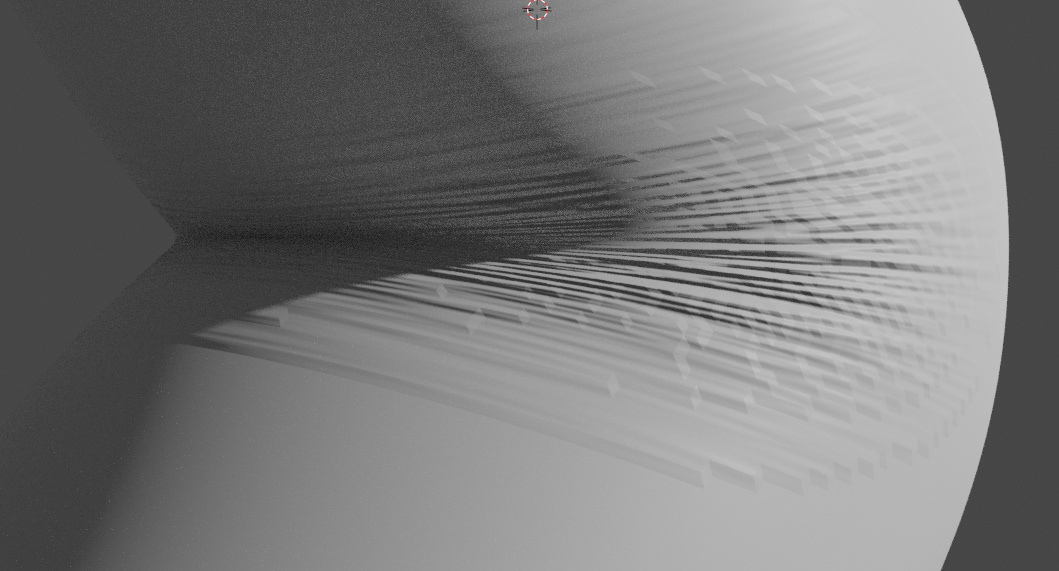
    Screen Shot 2020-07-05 at 8.32.05 PM

Example:

Notes:
-I discovered that to get around crashes, there is apparently a magical ‘Lock Interface’ toggle in the Render menu. So for safety the add-on interface greys itself out and presents a prompt until this is enabled.

73 Likes

This is just great thanks ! Will try once at home

Very good work! Could you too add a link of a blend file with one example to understand, please?

3 Likes

i’ve got an incoming update that should address most of the remaining notes, it’ll add support for vertex groups to allow for tension influenced modifiers and more reliable viewport updates.

the only remaining gotcha is you’ll need to enable Render > Lock Interface, which i discovered is blender’s official recommendation for handling render crashes on these sorts of add-ons. as a safety, the add-on will only run if you have this enabled, otherwise it’ll notify you you need to take that step :slight_smile:

6 Likes

Thank you for taking the time to update this addon, I’ll try it out and let you know if I find any issues :nerd_face:

Could you maybe make a github or something so we can keep track on the progress and make sure what version we’re using ? Else it’s okay, you’re already doing gods work

1 Like

Hi. Thank you very much for this addon.

I made a quick test with an sphere with a subd modifier and a couple of shapekeys for squash and stretch and i got it working but the surface end up very faceted.


Here is the node network.

Any info about this?

Thanks
Cheers.

P.S. I made the test with version 1.0 of the addon

1 Like

i’m not sure if it causes the artifacts you are experiencing, but there are some things that would raise some red flags about that shader setup:

  • running a normal map through an rgb multiply node can produce odd results. if you want to control the intensity of the normal map node, plug the tension into the strength input of the normal map.
  • you go from data types texture > normal map > color > float value > normal. unless you are going for a very specific effect, those data conversions are likely destroying/distorting a lot of data.

my guess is you are trying to blend two normal maps that correspond to being stretched or compressed. here is an example layout i would do:


note:

  • i am multiplying the tension values to taste before plugging them into the normal map strengths, this will vary based on your maps
  • to blend the normal maps i use a mix node. the ‘greater than 0’ node basically says “if there’s any compression, use the compress normals, otherwise use the stretch normals.”
5 Likes

It works great, thanks Steve, now the surface is smooth. How the setup would be for displacement maps?.., would it be the same as with normal maps but instead of the normal maps node using displacement nodes and connect the whole thing to the displacement slot of the material output?

I ask because i really want to use displacement maps for the squash and stretch and use the normal maps just for visualize the map effects in the viewport while i animating.

Well godamn, it just works!

The only crash I got was the first time I opened blender after installing the addon but after that it worked swimmingly. Pretty happy with the results of this simple test

Thank you soo much

5 Likes

glad its working! do let me know if the crash recurs at all.

2 Likes

Hello !

I’ve been doing some tests with your addon for the past 2h and it’s cool but a lot of problems seem to arise with time. I don’t know if it’s me doing some bad stuff but auto update doesn’t seem to be working at all on my side, altho it was at the beginning. I tried restarting blender and making a new project and it doesn’t work, I have to press spacebar after posing the bone.

Also, there’s some pretty significant creasing without subdividing as seen here:

And subdividing actually increases banding on the tension maps themselves as seen in this node wrangler preview of the attribute node with 3 levels of subdiv


Creating some pretty weird artifacts

Here’s the shader

I’ve been trying to keep everything as non destructive as possible, i’m using a generated noise texture as the wrinkle map and the bump/normal has a normal strengh. It’s very weird, looks like the tension map is loosing bitdepth when you subdivide.

Here’s the file
tension glitches.blend (981.4 KB)

What am i doing wrong ?

i looked into this a bit. some findings:

-in eevee, using the attribute node to access the tension map produces noticably different results than the dedicated vertex color node. i don’t know exactly whats going on, but it looks similar to color space issues with normal map textures. either way, the vertex color node produces less artifacting (the remaining stair stepping is resolved by subdividing)

-in cycles, the issue seems to persist in regardless of vertex color or attribute node, and when subdivided, ends up causing the the stair stepping you described. i confirmed this isn’t specific to how the add-on generates vertex colours, as you can try painting your own vertex colour map and it will have the same issue. the work around i’ve found for this is rather than multiply a height map by the tension map, plug the tension map into the strength socket of the bump map, and the results will appears more as expected.


as a final note, while testing this, i ran into the issue of the ‘always update’ ceasing to function, so i’ll look into the cause.

thanks for the report!

5 Likes

Thanks a lot for the answer,

You’re right it’s a blender issue, just node wrangling the R channel x 10 on a subdivided model is disgusting

Crazy how Evee is comparatively clean

I wonder if there’s a place where we can speak about this to the devs, it’d be worth looking into it, it’s pretty much the reason why all of those tension maps add ons are kinda hacky and even then, you need to work around blender’s limitations. This has to affect other people using vector maps.

UPDATE : Just so you know, I’ve created a bug report on dev.blender

It seems to be related to cycles only, someone might know where is the fault in the code (hopefully)

4 Likes

Wasn’t that the same problem that the other addon had?.. anyways, the bug report has not being assigned to a developer yet, so hopefully one will be assigned soon.

But, Blender is very open and there are very good programmers out there so maybe one of them could dig into it or in any case make a new addon so we have a good solution once and for all for this.

3 Likes

Using V1.2 in stable 2.82 build, gives me a module error for some reason here. Not sure if this is known yet. V1.1 is working just fine so far.

Traceback (most recent call last):
File “C:\Program Files\Blender Foundation\Blender 2.82\2.82\scripts\modules\addon_utils.py”, line 351, in enable
mod = import(module_name)
ModuleNotFoundError: No module named ‘mesh_tension_1’

hmm can’t replicate on my end here. it’s odd that its trying to register a module named mesh_tension_1. is it possible that something is accidentally getting renamed? perhaps to be safe have you tried fully removing the previous version before installing the latest version? (there is a “remove” button in add-on preferences)

Can someone test it on characters?

1 Like

I’m actually attempting it on a character.
Though i seem to run into bugs?

I got it working once. And set it to update always. Then in the node view. I previewed the
tension_map vertex color. And whilst i was working on creating a normal map to use with it.
It seemingly stopped working. I’ve flicked the tension on and off multiple times. But the tension map remains just pure white, no matter how i bend or stretch it.

The arm here is bend. And as far as i understand that should be enough to at least show some change

1 Like

i believe i may have run into this in the past, but i haven’t been able to reliably reproduce it. if you manage to create a share-able file that demonstrates the issue i can see if i can track down whats happening!