Are you saying CTRL+MMB SCROLL UP could be used to create a bridge between 2 faces in an older version of Smart Fill? I just tried the method you described with Smart Fill 1.2.3 in Blender 2.79 and am getting the same error message that 1.3.1 throws in Blender 2.80:
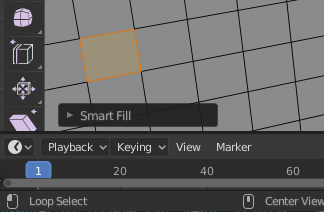
RuntimeError: Error: Select at least two edge loops
Yes, according to an old video Jimmy made, the feature was added so that you could repeat a smart fill action with previous values with CTRL+ SCROLL UP. See video, from about 1:10 he starts explaining it: https://vimeo.com/156164213
I found a semi-working fix for the CTRL+MMB SCROLL UP issue that brings this functionality back. It is semi-working as it does not make so the latest version of Smart Fill works identically to older versions of Smart Fill (it has an “off-by-one” issue I have not yet found a fix for), but (IMO) semi-working is better than non-working.
There should be an updated version of Smart Fill out with this fix on gumroad in the coming days, but for anyone that wants to try it now, comment out line 941 near the bottom of the smart_fill.py file (6 lines above class KMH). For python, you comment out a line by adding a # character in front of it. Basically you make this change (- = old, + = new):
It is installed (in the preferences>add-ons tab it is checked and everything appears ok) but I am not finding where from to activate it in the edit mode’s workspace. As far as I know the dialogue box appears after the activation of add-ons. There must be an activation (somewhere in F3 key tools list, in the right bar of the scene or at least a keyboard shortcut) first for its appearing. So, what is the way of activating it?
Ok. found it! It was one of the versions inside the zipped file that had to be chosen.
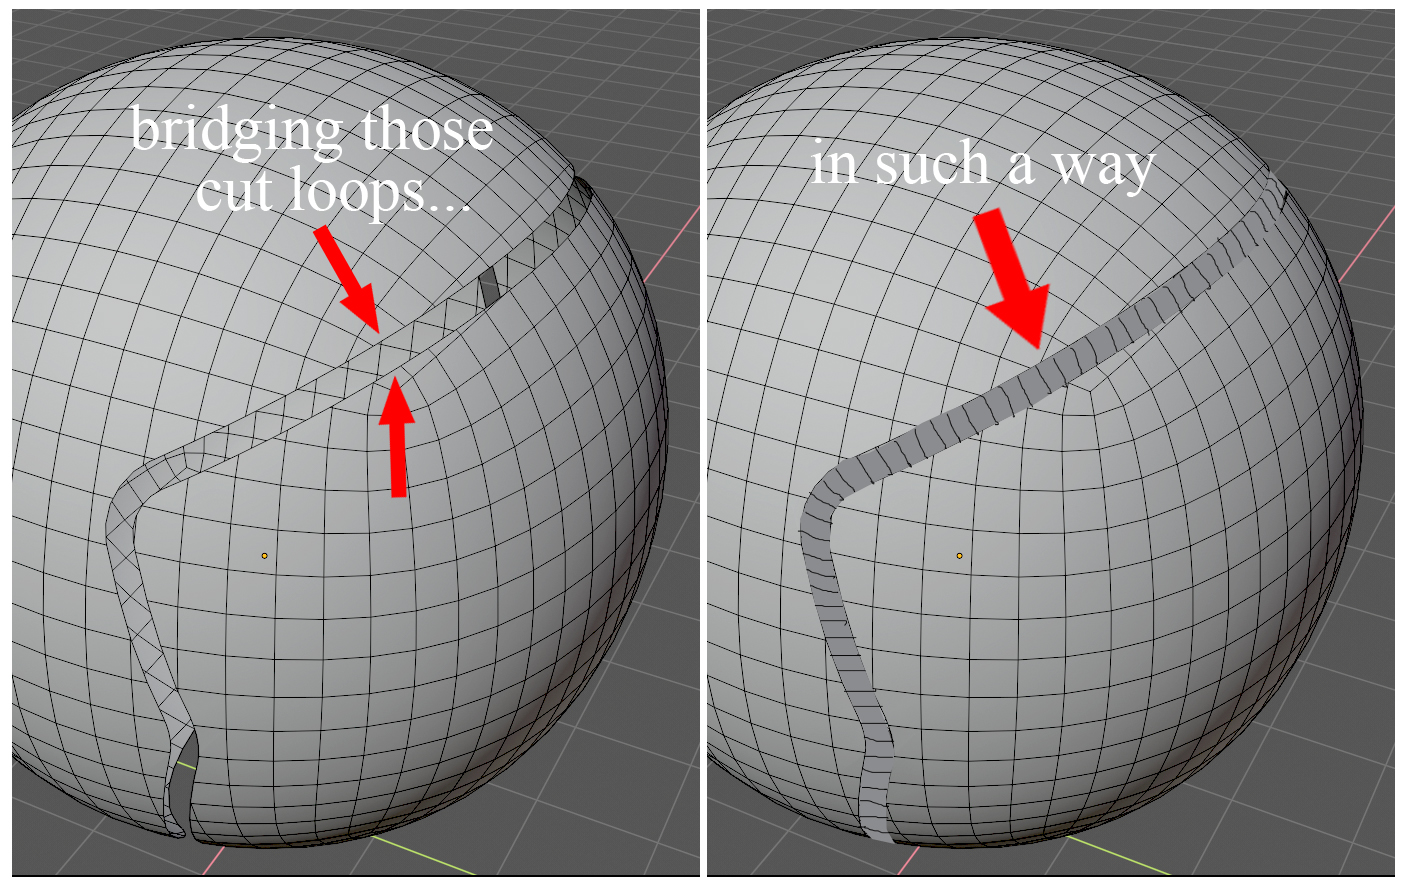
Btw, I do have an idea-request: is it not possible to program a way of bridging two cut loops as those shown in the pictures below (with a chosen count of vertices in both sides)? It would be a great aid for producing easily clean bevel-able areas (strips for example) on any surface. Such a bridging kind could make accessible a whole range of modeling tasks which are very difficult to access through the use of other tools.
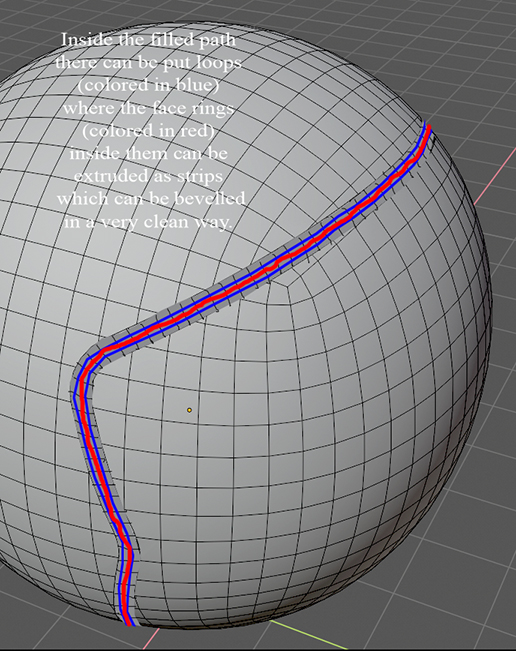
Simply put, it is a way of bridging in an orderly way cut loops on any surface: You just select the two cut loops and you bridge them with a clean cut ‘ribbon’ (by creating the same number of vertices, facing each other, in the two sides). So that you can put in them edge loops and than extrude and bevel the edge rings created between the edge loops.
Manually copying/moving the extracted py file to your add-ons folder will also work. You should be able to install it without extracting the py file from the zip from the add-ons tab in preferences using the “Install…” button though. Blender has a zip extractor built in allowing it to do the “extract-to-addons-folder” operation automagically.
I do not think generating a bevel-able fill like the one in your example image would be possible with Smart Fill. This would require rebuilding the geometry surrounding the loops. A task like that sounds like it might be better suited for a re-meshing tool instead of the fill operations that Smart Fill uses.
Also… what did you do to make those clean loops in the “bridging those cut loops…” example image?
I have this on my todo list, I am not sure on a time-table though.
nBurn… the loops in the first image are made by cutting the object two times with another object using the ‘intersect-knife’ command (in ‘edit’ mode) and then deleting the faces between the two cut-loops.
Now as to the tool request: I do not think it is a matter of remeshing. It is a matter of creating parallel vertices of the same number on the two cut-loops (and being able to keep them selected). Then they can be bridged even with the native ‘bridge edges’ tool of Blender.
Also, you misunderstood me… I did not mean extruding and beveling the new fill space. I did mean extruding and beveling the space that can be produced by placing two new loops inside the newly created bridge space. It is a very easy thing two understand but it is a little bit difficult to explain it verbally.
To make it simple: the whole need is to create parallel vertices of the same amount on the facing each other two loops. That’s all. Everything else can be done with the native tools of Blender.
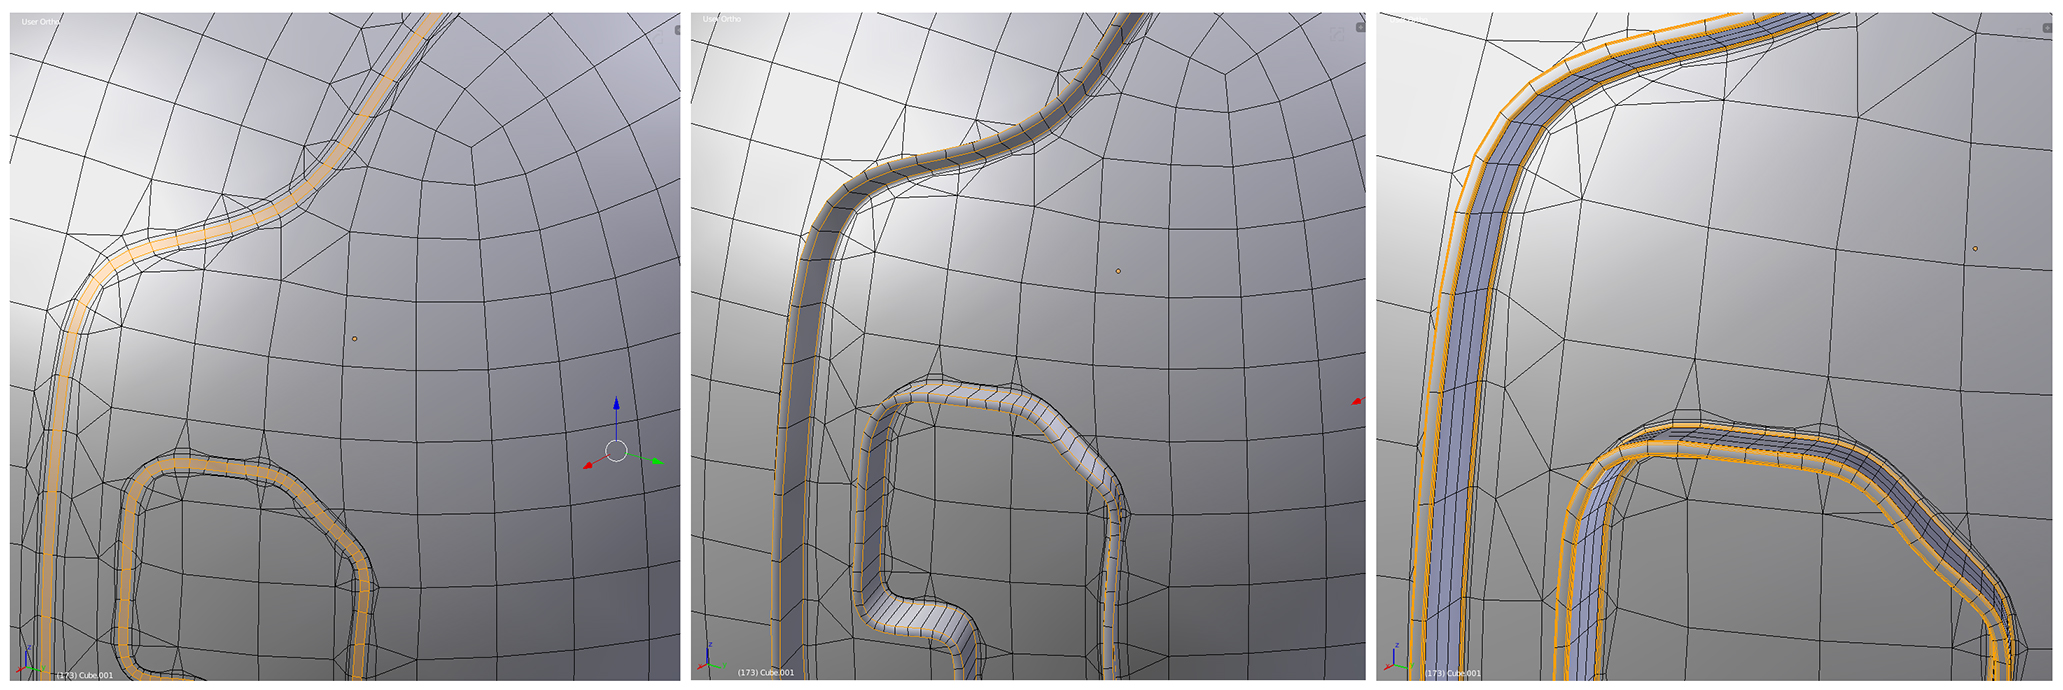
In fact this is something easily achievable with the strips that can be produced with the use of ‘Bevel after Boolean’ add-on (as it is shown in the images below) but there the strips do have a mesh geometry around them that makes it difficult to intersect many strips with each other. This is the reason I put the question here. If we had a way of producing clean cut ribbon like strips on the surface of an object then we could intersect them with each other and produce very complex extruded strip structures on any surface.
This would require adding additional vertices to edges or moving geometry which falls into the category of remeshing / retopology. These types of tools are very difficult to program. Like, SIGGRAPH-papers level difficult. I experimented with a similar idea to this before and gave up early on.
I installed Bevel after Boolean, but could not find a way to easily create geometry like you have in those images.
Restructuring the surface of the mesh to get nice bevel-able quads gets back into remeshing / retopology territory I mentioned above. Very difficult.
For this kind of curved surface modeling I would favor modifiers like Mesh Deform, Shrink Wrap, or Surface Deform over Smart Fill. These modifiers are what Bevel after Boolean is using behind the scenes. Another option to look into is the impressive Surface Follow add-on.
I also remember there being a way to “paint” things like the ridge structure in your screenshots onto a mesh, but the I can’t remember the workflow or tools involved
If you already own Smart Fill, you should have an email address associated with Gumroad that you would have used when buying the add-on. That email address should let you “log-in” to Gumroad to see previous purchases. Once you are logged in, go to the Smart Fill product page and click on the “View product” link to get to the downloads page (see the screenshot below):
As to the various kinds of geometry I do create through the use of the Bevel after Boolean add-on, I have a video tutorial below where there is a step by step explanation of the procedure (although there are many other ways of taking advantage from the way the add-on works):
Took me forever to figure out why I couldn’t get this add-on to work and I realized that even though the Preferences show a hotkey option for “Make Edge/Face” that didn’t do anything (at least for me - I have a customized keymap). I thought that is what was controlling the add-on but it looks like it was actually still using “F” to call “mesh.smart_fill_popup”, which there was a key binding for that doesn’t show up in the add-on’s preferences. I changed that and it works fine.
Hey, I use Customaized Kemap too and had same problem. It looks like if you use Customaized Keymap addon intefears with F2 addon and dont work if F2 addon is activated …
and like Dheim mentioned , if you look in Smart Fill addon preferences you see that it is set to mesh.f2.
I copy pasted mesh.smart_fill_popup in place of mesh.f2 and it looks like it works now … but I wanna be sure that this is intended functionality and that command mesh.smart_fill_popup is correct one to use .
There is something odd going on with the hotkey registration in the add-on. It looks like this functionality had problems in the 2.79 version as well.
May I ask what hotkey setups are being used, or at least what key you are using for “fill” operation? I would like to make sure these custom key-mappings work with Smart Fill once I find a solution to the hotkey registration weirdness.
I do not think the current functionality with key registration was intended, but the mesh.smart_fill_popup command is the correct one to use. This is what Smart Fill uses to register its “fill” operation with internally.
There is a problem, indeed, with the workings of the options of this add-on. Once it activated there is no way to fill an area with a single void face (as is with the native ‘f’ command of Blender), you become obliged to have a filled area. It would be good to be connected to another key in the keyboard or to have an option to fill an area with a single void face.